What to Do With Leftover Whipping Cream: How to freeze whipping cream and whipping cream recipe ideas to use up the leftovers.

Whipping cream is one of my favorite ingredients to cook with. It’s delicious, versatile, and makes everything taste better.
But it’s also not something everyone keeps in their fridge, and a little goes a long way in recipes (and calorie-wise), so I always hesitate to create recipes for the site that use it.
I don’t want to make you buy an ingredient you’ll use for one meal and then have the rest of it go bad in your fridge.
So I told myself that before I created another recipe using cream, I’d put together a Waste Not post for whipping cream so you’d have a resource on what to do with the extra.
Wednesday I have a savory recipe hitting the site calling for whipping cream, so today, Waste Not: Whipping Cream Edition.
And before we go on, when I say whipping cream, I’m using this term interchangeably to refer whipping cream and heavy whipping cream/heavy cream. The only difference between the two is a small amount of milk fat.
Whipping Cream = 30–36% fat Heavy (Whipping) Cream = 36%+ fat
They can be used pretty much interchangeably.
Side note: As a rule, Half and Half (10.5–18%) and Light Cream (20%) cannot (always) be substituted. If you’re outside the US, here’s a good breakdown of comparable cream labels because they vary from country to country.
Okay, now that we know what is and isn’t whipping cream, here we go.
What to do With Leftover Whipping Cream
Freeze It
Like buttermilk, heavy cream freezes well. You can freeze it in the container in which it was bought (leave plenty of head space if that’s a glass bottle, and double wrap it if it’s plastic or cardboard to prevent it from picking up that freezer taste). Or you can transfer it to mason jars, again, leave space for expansion, or measure out usable amounts and double bag it in freezer bags.
When it comes time to use the frozen cream, leave it in the refrigerator to defrost for a day or two before you’ll need it and then shake vigorously to mix any fat that has separated.
Use It to Make Half and Half
If you have favorite recipes using half and half or you prefer half and half for your morning coffee, you can also use leftover heavy cream to make your own half and half at home. Simply mix approximately 1 part cream with 2 parts milk.
For example, if you have a recipe that calls for 1 cup half and half, fill your 1 cup measuring cup about 1/3 full with cream, 2/3 full with milk. Depending on whether you’re using non-fat or whole milk, go a little heavier or lighter on the cream. It doesn’t need to be exact and when in doubt, go heavier on the cream because fat is delicious.
Make Good Things With It
Finally, use it in other things. My go-to quick recipes for using up a bit of cream are…
- Using it instead of milk in my scrambled eggs
- As coffee creamer (soooooo much better than half and half)
- And making a small batch of caramel
Or try one of these other recipes:
Drinks Made With Whipping Cream
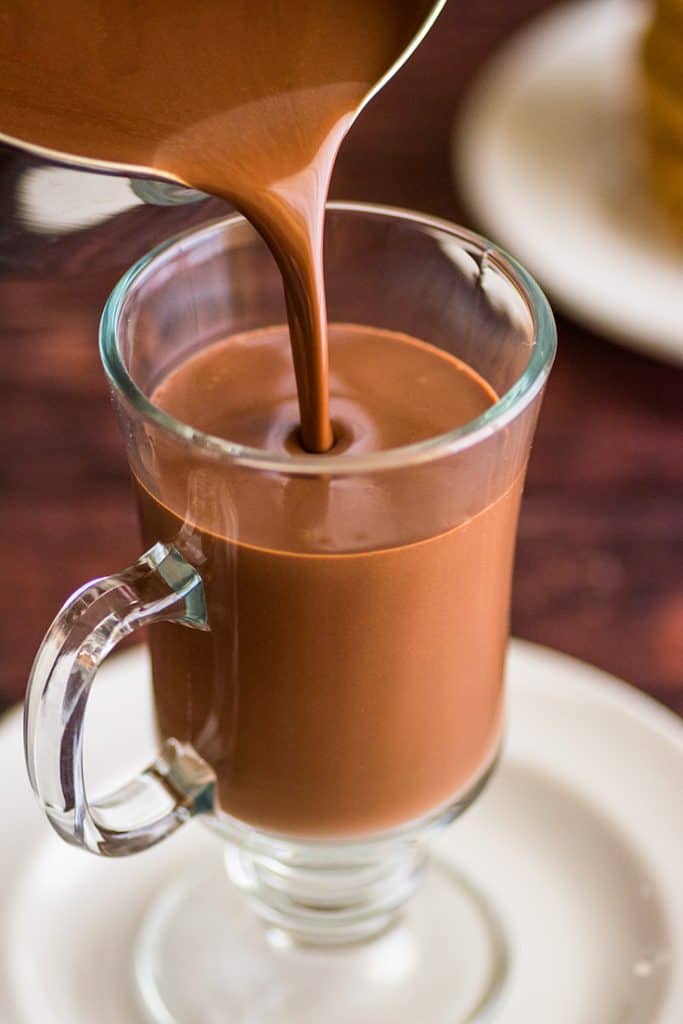
Rich and Thick Hot Chocolate
(1 tablespoon) White Chocolate Mocha (1 tablespoon) Easy Homemade Mocha (2 tablespoons) Milk Tea with Coffee Jelly (2 tablespoons) Pumpkin Spice Latte Recipe Two Ways (Light and Decadent) (1/3 cup) Rich and Thick Hot Chocolate for One (1/2 cup) Candy-Sweet Jello Shots with Triple Sec Whipped Cream
Desserts Using Whipping Cream
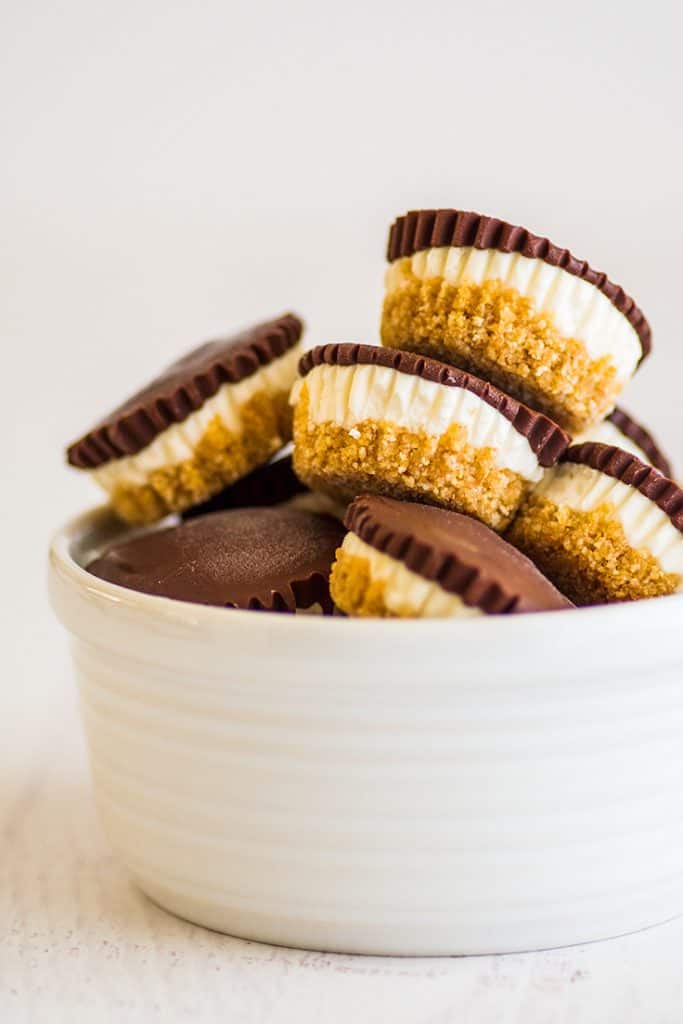
No-bake Cheesecake Bites With Graham Cracker Crust
(1 tablespoon) 30-Second Easy Chocolate Sauce (3 tablespoons) No-bake Cheesecake Bites With Graham Cracker Crust (3 tablespoons) Chocolate Souffles for Two With Creme Anglaise (1/4 cup) Small-batch No-bake Unicorn Cheesecakes (1/4 cup) Small-batch No-bake Oreo Cheesecake Bites (1/4 cup) Skinny Mini Pumpkin Pie With Graham Cracker Crust (1/4 cup) Better Than Starbucks Caramel Macchiato (1/4 cup) Butterscotch Shortbread Thumbprint Cookies (1/2 cup) Pink Cream Puffs (1/2 cup) Samoa Cupcakes (3/4 cup) Small-batch Cream Scones (3/4 cup) Small-batch Maple Scones (Maple Butter Scones) (1 cup) Whipped Cream 3 Ways (2 cups) No-churn Peanut Butter Oreo Ice Cream (2 cups) Pound Cake Cupcakes
Savory Recipes Using Whipping Cream
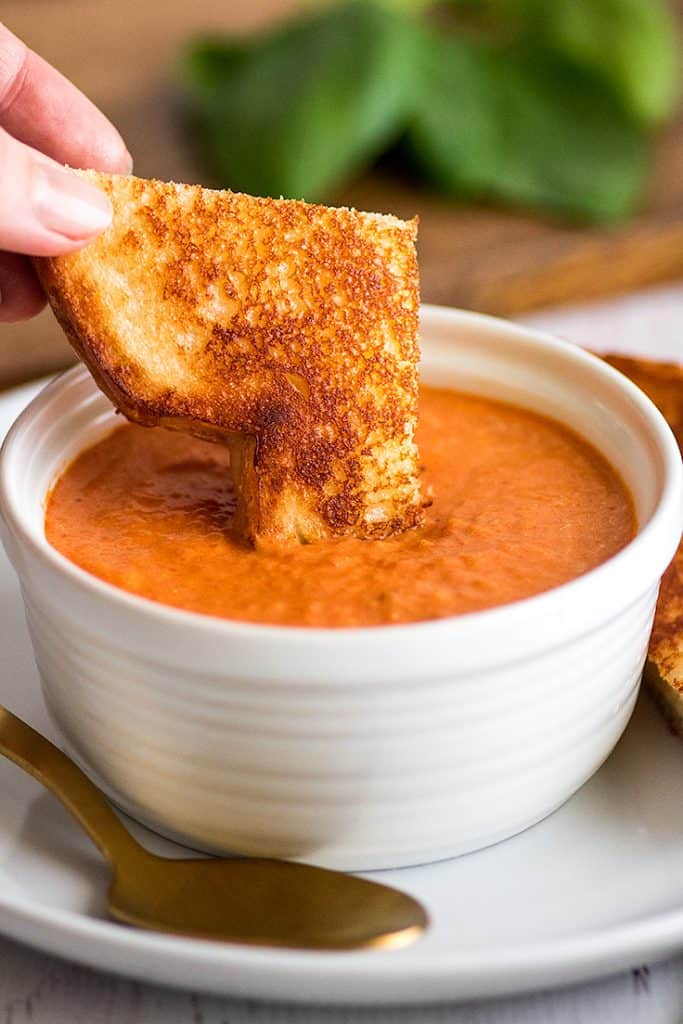
Easy Tomato Soup Recipe for Two
(2 tablespoons) My Favorite Easy Parmesan Orzo Side Dish (2 tablespoons) Shortcut Scalloped Potatoes for One (3 tablespoons) Easy Chicken in Cream Sauce for Two (3 tablespoons) Easy Tomato Soup Recipe for Two (3 tablespoons) Easy Baked Ziti Recipe (Dinner for Two) (1/4 cup) Keto Chicken Soup for Two (1/3 cup) Creamy Chicken and Asparagus Pasta Dinner for Two (1/3 cup) Cheesy Potato Gratin for Two (1/3 cup) Quick and Easy Fettuccine Alfredo for One (1/2 cup) Copycat Carmela’s Chicken (1/2 cup) Easy Creamy Chicken Noodle Soup (2/3 cup) Easy Fettuccine Alfredo With Broccoli (2/3 cup) Easy Creamy Chicken Pasta With Bell Peppers (1 cup) 15-minute Vodka Sauce (1 cup) Penne alla Vodka With Chicken
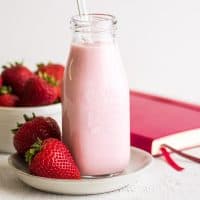
This Easy Homemade Strawberry Milk for One or Two, made with just four ingredients, is fruity, creamy, subtly sweet, and pretty much all your strawberries and cream dreams come to life.

Hey, it’s strawberry season! My very favorite fruit season (except for maybe sweet cherry season), and the time when strawberries are so good and SO cheap (at least here in California) that I always end up buying way too many.
Then I just have a pounds and pounds of strawberries sitting in my fridge or on my counter smelling amazing while I try to eat my way through them before they rot.
And since I figure that I’m probably not the only one with an overabundance of strawberries right about now, I thought that I’d share something to make with some of those extras:
Easy Homemade Strawberry Milk (for One or Two)!
Who doesn’t love strawberry milk?
And if you think you don’t love strawberry milk, maybe you just don’t like the stuff that comes powdered in a can or lukewarm on lunch trays.
Because this strawberry milk? This strawberry milk is a GD delight.
Fruity, creamy, subtly sweet, it’s pretty much all your strawberries and cream dreams come to life.
And it’s made entirely from scratch. No pink powder required.


The ingredients are simple: strawberries, sugar, a bit of water, and a tall, cold glass of milk. The strawberries, sugar, and water simmer together to make strawberry syrup, and then you stir that into your milk, and you’re done.
Unlike my (crazy popular) Chocolate Milk for One , which makes exactly one cup of milk, this recipe makes a little over two cups of strawberry milk, enough for one big glass or two smaller cups.
It also easily doubles or triples for times when you feel like leftovers.
And if you went extra crazy at the farmers market and have way, way too many strawberries, stay tuned, I’ll be sharing a larger version of this recipe in the next few weeks.


Homemade Strawberry Milk for One or Two Recipe Notes
- This recipe calls for a fine mesh strainer to strain out seeds and strawberry pieces from the strawberry syrup. If you don’t own one, they are cheap on Amazon and can be found in the baking aisle at most grocery stores, or you can simply use a slotted spoon to remove strawberries. You’ll just have some seeds and pulp at the bottom of your glass, which doesn’t hurt anything.
- This strawberry milk ends up a lovely pale pink, but if making for kids (or childlike adults), feel free to add a couple drops of red food coloring for a more vibrant pink color. I used two drops for the milk you see in the photos.
- You can make your strawberry milk with whatever milk you have in the fridge, but whole milk makes the richest, tastiest drink. If you have heavy cream or half and half on hand, you can also add a splash of that to the mix for a richer end product (highly recommended).
- Looking for more strawberry recipes? Try my Strawberry Shortcake Sundaes , Easy Strawberry Sauce for Pancakes and Ice Cream , and Strawberry Syrup .
Ingredients
Special Equipment
- ▢ Fine mesh strainer
Strawberry Milk
- ▢ 2 cups milk preferably whole milk
- ▢ 1/2 cup hulled and chopped strawberries frozen is fine
- ▢ 1/4 cup ( 50g ) granulated sugar
- ▢ 1/4 cup water
- ▢ A couple drops of red food coloring optional
Instructions
- Pour 2 cups of whole milk into a large glass and place in the freezer so milk becomes very cold. (Skip this step if making the syrup ahead of time.)
- In a small pot, combine strawberries, sugar, and water. Bring to a low boil and cook, stirring occasionally, for 10 minutes, until fragrant and reduced.
- Use a fine mesh strainer to strain syrup into a small bowl or cup. Discard strawberries. Mix 3 tablespoons or about 2/3 of the syrup into your very cold milk. Stir and then add more syrup to taste. Add food coloring if desired.
- Serve and enjoy!

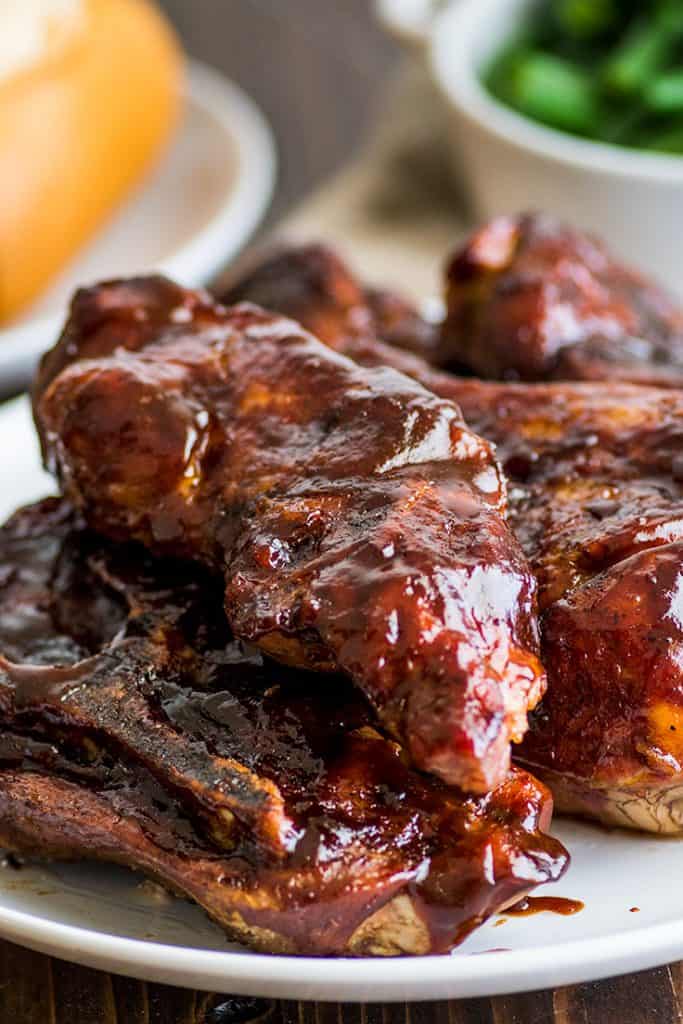
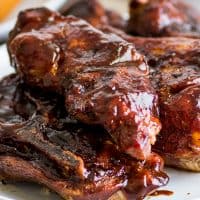
Country-style Pork Ribs ribs are a great rich and fall-apart tender alternative to traditional ribs. Cheap, easy to make, and SO good, this might just be your new favorite way to eat pork.

One of the first really popular recipes on this site was my No-Fuss Easy Oven-Baked Ribs . The recipe’s designed to use beef back ribs, but since the post went live people have been asking about using it to make country-style pork ribs.
And asking.
And asking.
And asking.
And every single time, I would have to admit that I had no idea because I’d never eaten, let alone cooked, country-style ribs.
Whelp, I finally got sick of saying “I don’t know,” and feeling like I was missing out on something (because clearly, people love these things), so I tried them for myself, and now I am so angry.


Guys, I am so angry I haven’t been making these for years because country-style ribs ARE AMAZING. And this is coming from someone who is usually firmly Team Beef Ribs over pork.
These ribs are so tender and rich and easy to make. Two ingredients, ten minutes of hands-on prep time, and you end up with these absolutely beautiful ribs with meat you can shred with a fork.
And if you’re sitting there going sure, that sounds great, but WTF are country-style pork ribs? Read on, friend.
What Are Country-style Pork Ribs?
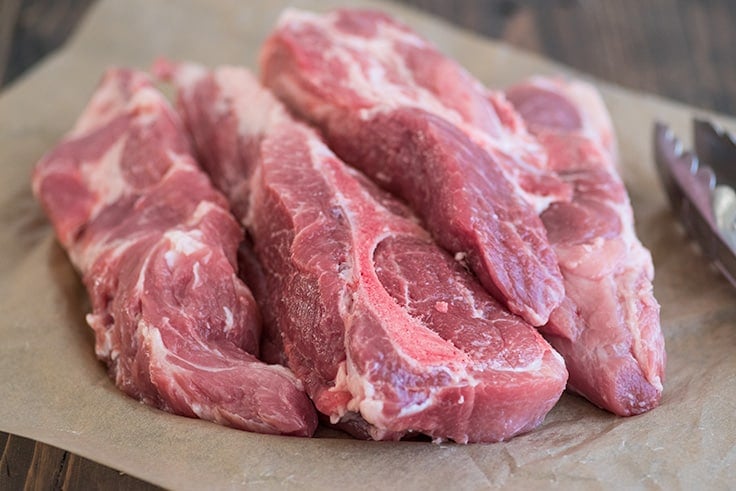

Country-style pork ribs aren’t ribs at all. They’re cuts of pork shoulder, which is the same meat you use to make pulled pork and carnitas . If you get bone-in “ribs,” you’ll recognize the distinctive y-shaped bone you get when you buy a bone-in pork shoulder roast.
This means that one, just like pork shoulder roasts, country-style ribs are super cheap, usually about $2/pound.
Two, they’re way meatier than regular pork or beef ribs (and don’t have all that gross cartilage), so you’re getting more meat for your buck.
And three, they have that wonderful marbling of fat which helps keep them moist during the long, slow cooking process on the way to tender, fall-apart ribs.
And speaking of long, slow cooking…
How to Cook Country Style Pork Ribs in the Oven
For fall-apart meat, country-style ribs really need to cook long and slow. Otherwise you’re going to get chewy pork.
The good news is that the cooking time is almost entirely hands-off. After a minimal amount of prep to get the ribs ready to cook, your oven’s doing most of the work here.
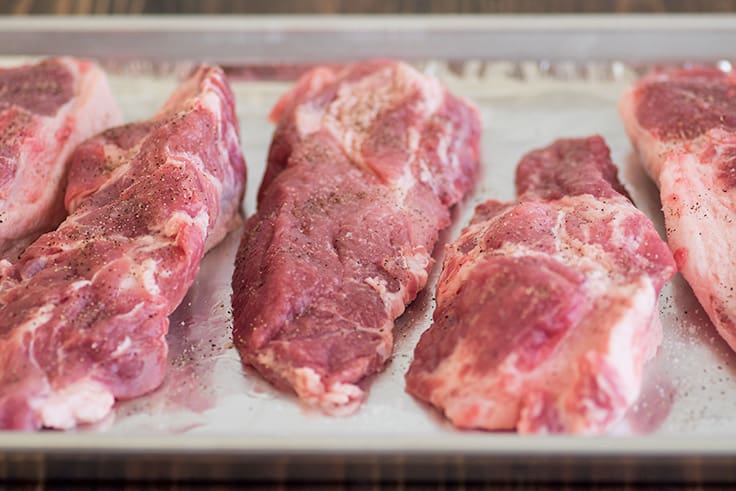

You start by salting and peppering your ribs and placing in a single layer in a roasting pan or baking dish. If you use a baking tray, make sure it has a fairly high rim, as the meat will release a lot of liquid as it cooks.
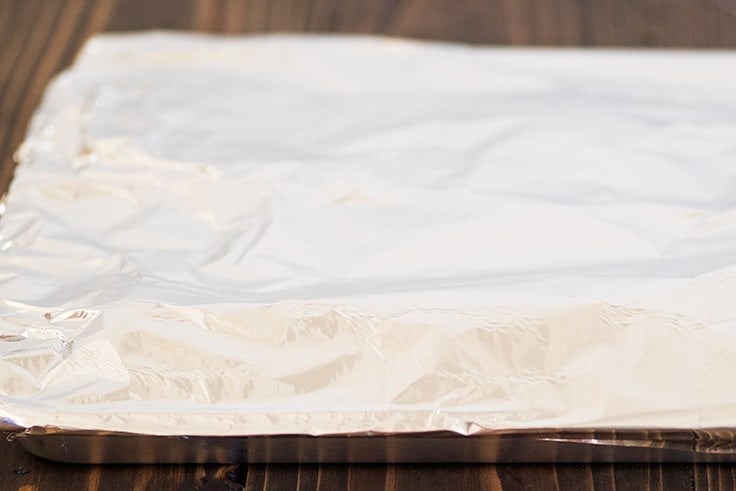

Cover with foil and bake at 300°F for 2 hours. Go read a book and sip some lemonade in front of a fan.
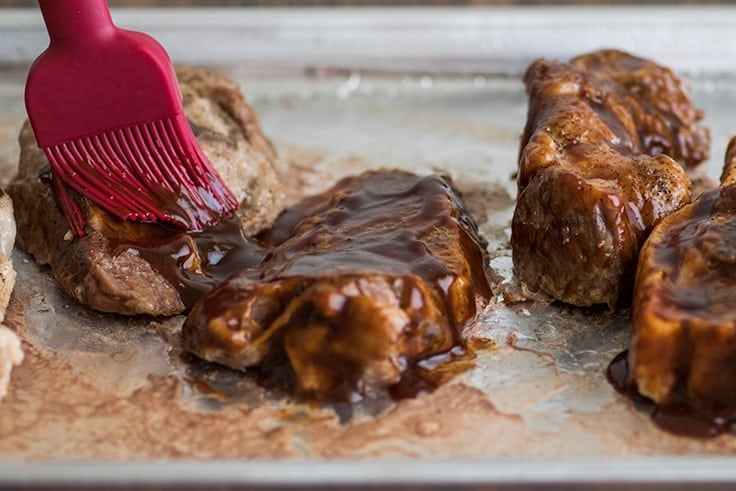

When your timer goes off, carefully uncover the meat–the steam will be hot–and drain the liquid from the tray. The meat looks super gross and sad at this point, but don’t worry. The next time it comes out of the oven, it will be beautiful.
Brush a generous coat of your favorite BBQ sauce over the meat.
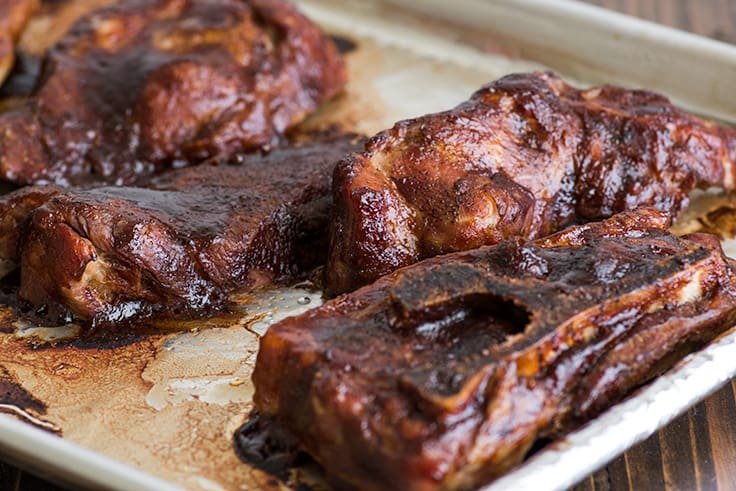

Lower the temperature to 275°F and then bake uncovered for another hour. Your ribs are done when the meat has a beautifully baked-on coat of BBQ sauce and when you can pull it apart with a fork.
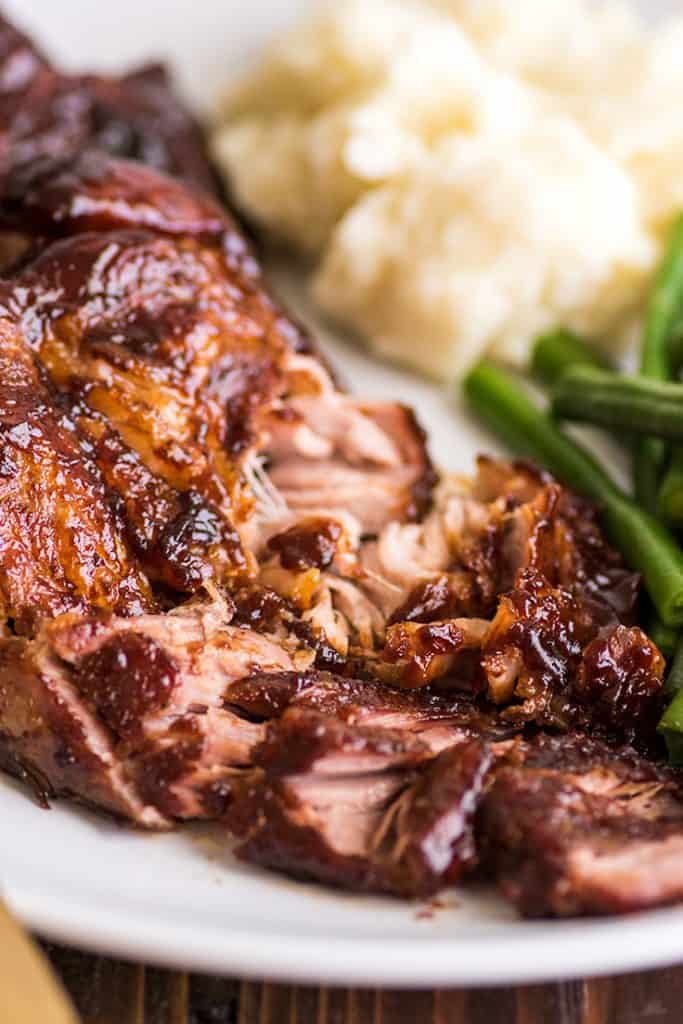
Brush with a little more sauce, give the ribs a couple minutes to rest, and then serve with some mashed potatoes or macaroni salad , and a simple veggie side like Garlic and Butter Green Beans or Oven-roasted Broccoli , and enjoy!

Country-Style Ribs Recipe Notes
- If making for guests, I recommend making two ribs per person. That’s going to be a really generous serving, but you won’t have to worry about anyone going hungry. If making a lot of ribs, you can make two trays at a time. Just add 15 minutes to the initial cooking time and swap them halfway through both cooking periods so that they cook evenly.
- You can use bone-in or boneless country-style ribs for this recipe. Since they are covered for most of the cooking time, both come out equally moist and tender. My local stores sell them in mixed packs, so I usually cook with both at the same time.
- Be very careful removing the ribs from the oven the first time. Hot liquid can slosh out of the pan, and the steam will be very hot when you remove the foil.
- For brushing on BBQ sauce, I love these silicone basting brushes that can go through the dishwasher.
- Looking for more simple meaty mains? Try my Tri-tip in the Oven , Broiled Steak with Mustard Sauce , Carne Asada , and Quick Rosemary Pork Chops .
Ingredients
Special Equipment
- ▢ Foil
- ▢ Roasting pan or rimmed baking sheet
- ▢ Silicone basting brush optional
Country-style Ribs
- ▢ Country-style pork ribs*
- ▢ Salt and pepper
- ▢ Your favorite BBQ sauce
Instructions
- Preheat your oven to 300°F. Salt and pepper both sides of your ribs and place in a single layer in your pan, fattier side up.
- Cover the pan tightly with foil and bake for 2 hours. Carefully (steam and liquid in the tray will be hot!) remove ribs from the oven and check the meat. They should be starting to become tender. If they still feel tough, re-cover them and place them back in the oven for 15 to 30 minutes.
- Transfer ribs to a plate and drain liquid from the pan. Return ribs to tray and brush with a generous coating of BBQ sauce.
- Turn oven down to 275°F and bake ribs, uncovered, for 1 hour more, or until you can pull the meat apart with a fork (if your ribs were small and already pretty tender when you put them back in the oven, start checking after 20 minutes). Brush with another coat of BBQ sauce, rest for 5 minutes, serve and enjoy!
Notes
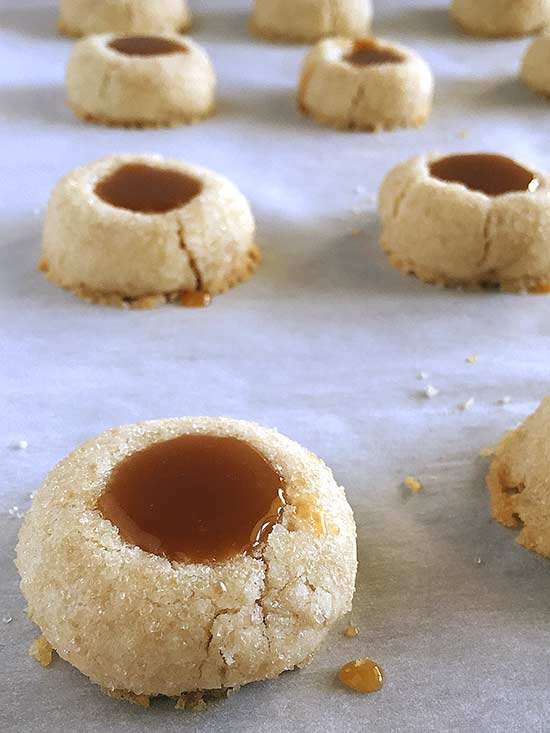
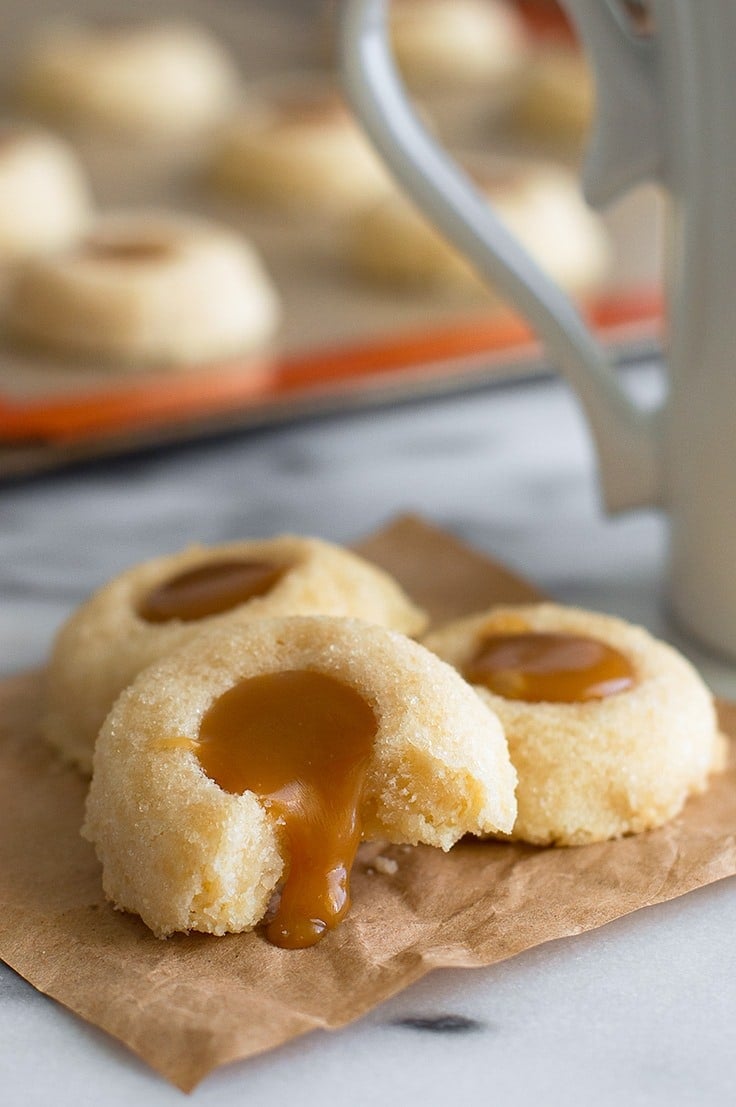
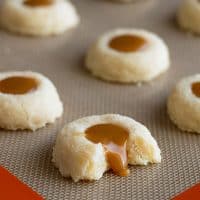
Classic shortbread thumbprint cookies with delicious homemade butterscotch filling.

Photos have been updated. Don’t worry, you’re in the right place. :)
I’m so excited to hit publish on my very first blog post today!
I wanted the inaugural post to be something that reflected the spirit of the blog to come, one that was representative of my passion for healthy recipes, eating your veggies, and branching out of your culinary comfort zone. But honestly, it’s December. It’s pretty much all cookies all the time coming out of my kitchen right now (stay tuned for salad in January).
So instead, I’m starting today with a classic cookie, my current obsession, shortbread thumbprint cookies with homemade butterscotch filling.

This is going to sound crazy, but I wasn’t a shortbread fan for most of my life. Beyond a few tried-and-true family recipes, we weren’t really bakers in my house growing up, nor were we cookie people.
I know I ate shortbread. I vaguely remember turning my nose up at those shiny blue tins of the stuff every year at Christmas, and I’d used it as a base in bars, but I didn’t understand the sweet and buttery goodness that was the homemade shortbread cookie until my sister baked up a batch for me.
My immediate reaction was, This is amazing. I never want to not be eating these. And then, Hey, World, what other wonders have you been holding out on me?!!!
Since that day, I’ve made this recipe waaaaay too many times in way too many variations (rolled in sugar, rolled in sprinkles, icing, no icing, chocolate drizzles, etc.) and have finally settled on my perfect variation: rolled in sanding sugar * or turbinado sugar *, turned into a thumbprint cookie and filled with butterscotch.
The butterscotch is the perfect, creamy complement to the buttery cookie and the sugar gives it a crunch to keep things interesting. These cookies are so good you’ll never want to let your shortbread go naked again!

Ingredients
Cookies
- ▢ 1 cup ( 8 oz) unsalted butter room temperature
- ▢ 1/2 cup ( 60 g) powdered sugar sifted
- ▢ 2 cups ( 280 g) all-purpose flour
- ▢ 1/8 teaspoon salt
- ▢ 1/4 cup sanding sugar optional
Butterscotch
- ▢ 2 tablespoons ( 1 oz) unsalted butter
- ▢ 1/4 cup ( 50 g) packed brown sugar
- ▢ 1/4 cup heavy cream
- ▢ 1/4 teaspoon salt
- ▢ 3/4 teaspoons vanilla
Instructions
Cookies
- In a large bowl, cream together the butter and sugar. Stir in flour and salt, mixing until just combined, making sure to scrape the sides and bottom of your bowl.
- Cover and chill the dough in the refrigerator until it is firm enough to handle, about 15-30 minutes. You should be able to shape scoops of it into a ball without it being too sticky or cracking. If it is over-chilled and difficult to work with, leave it out on the counter for a few minutes.
- Preheat the oven to 350°F and line a baking sheet with parchment paper.
- Using a tablespoon, scoop dough and roll into balls (slightly under 1 ounce each). If desired, roll balls in sanding sugar until completely covered. Place dough cookie sheet, 2 inches apart.
- Bake for 10 to 12 minutes. The cookies are done when their bottoms are lightly browned.
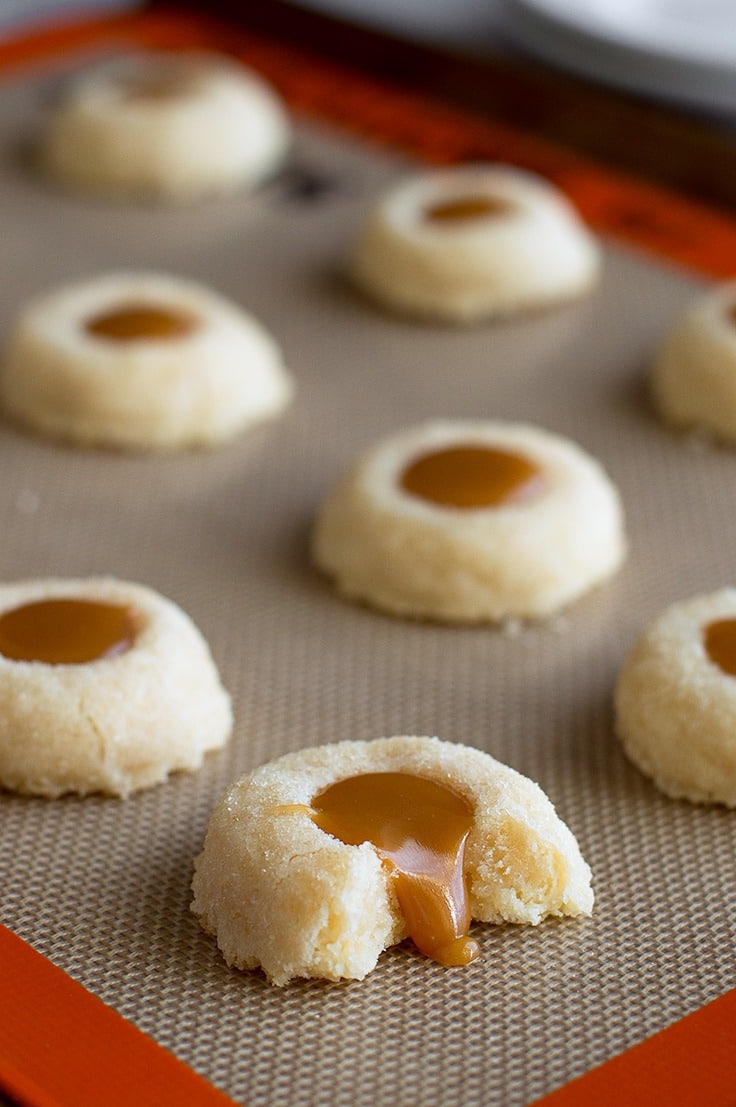
- As soon as they come out of the oven, use a round teaspoon or the back of a wooden spoon to create shallow wells in the center of each cookie. Be careful not to press too hard or you can cause the cookies to crack. Set aside.
Butterscotch
- Melt butter in a small, heavy-bottomed saucepan. Add brown sugar, salt, and cream. Stir to combine. Bring to a simmer and, stirring occasionally, cook on medium for 5 minutes.
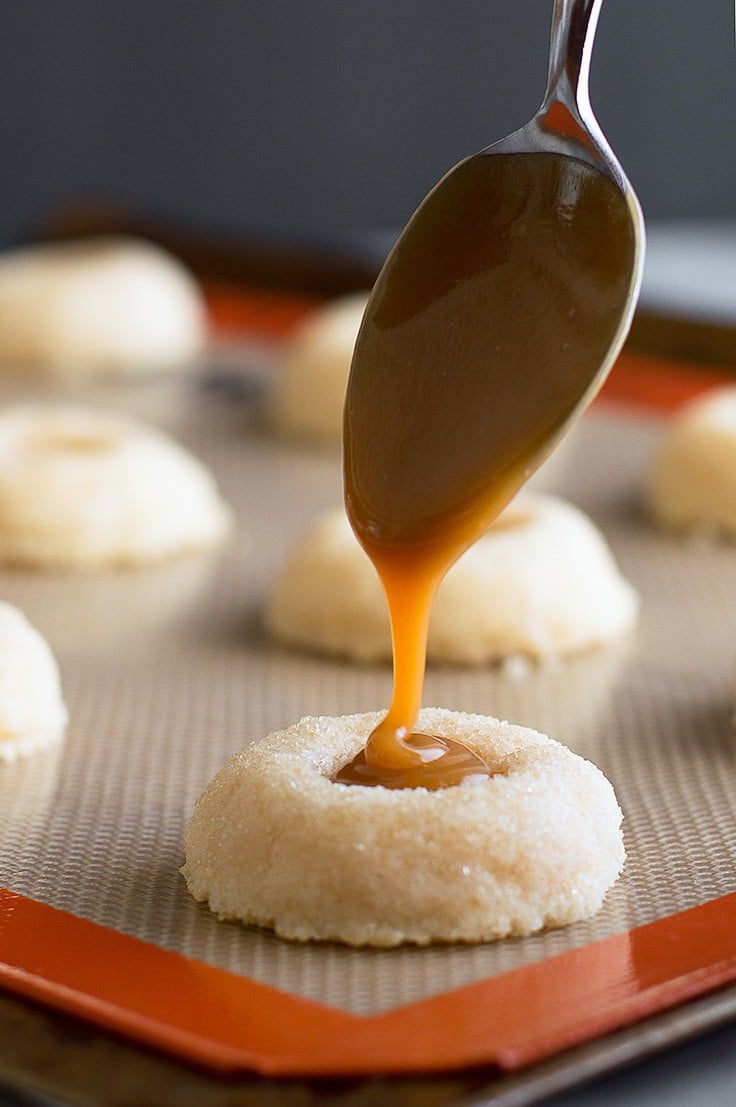
- Remove pot from heat and stir in the vanilla. Use a teaspoon to spoon butterscotch into the thumbprints. Allow the butterscotch to cool slightly before serving.
Notes
Butterscotch Shortbread Thumbprint Cookies Nutritional Information Adapted From: In the Kitchen with Stefano Faita Butterscotch Filling Adapted From: Smitten Kitchen
Small-batch Instructions: This cookie recipe halves cleanly, just use a pinch of salt instead of 1/8 teaspoon. For the butterscotch, simmer for 4 minutes instead of 5 in a 1-quart pot, and use 1/2 teaspoon vanilla.
Original iPhone Photography, Circa 2015