What to Do With Leftover Tomato Paste: how to store it, freeze it, and 10+ recipe ideas to use up the leftovers.

Heya, friends. It feels like a good time for another entry in my “Waste Not” series, a series dedicated to reducing food waste in the kitchen.
So far on this topic, I’ve written posts for:
- What to Do With Leftover Egg Yolks & Egg Whites
- What to Do With Leftover Pesto
- What to Do With Leftover Whipping Cream
- What to Do With Leftover Buttermilk
- What to Do With Leftover Pumpkin Puree
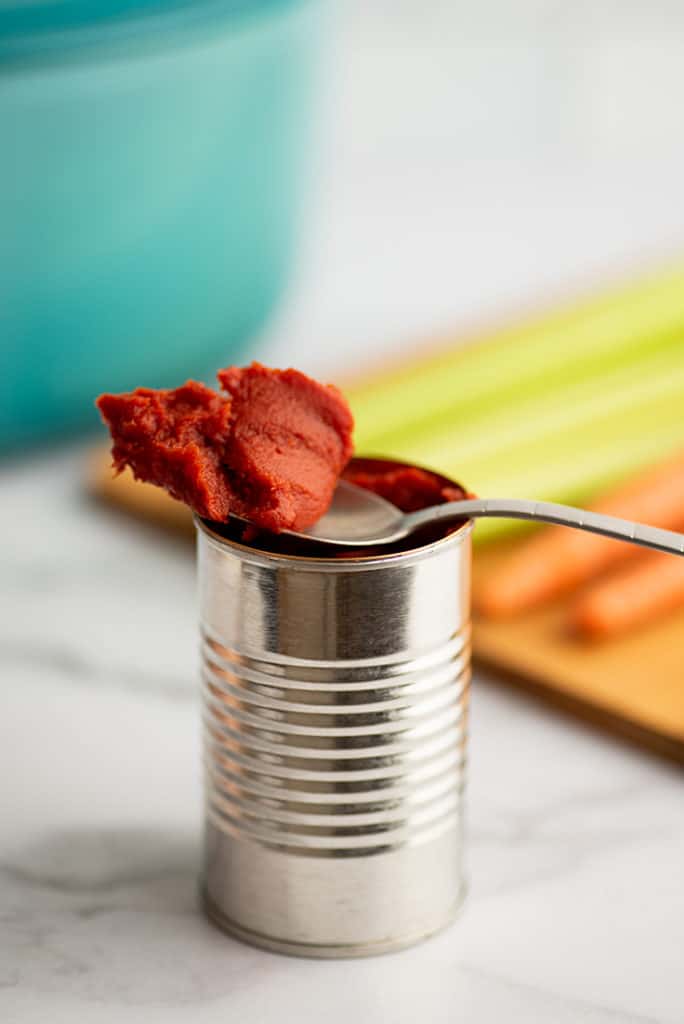
Today, we’re tackling tomato paste, an ingredient that adds tons of flavor to whatever dish you use it in, but one that often goes to waste since a little goes a long way.
So here we go: What to Do With Leftover Tomato Paste.
How to Store Leftover Tomato Paste
Canned tomato paste will keep in the fridge for 5 to 7 days in an airtight container like a mason jar or pyrex storage container. You’ll know it’s gone bad if it starts to smell “off” or if it begins to mold.
Tomato paste that comes in a tube will keep much longer in the fridge, around 45 days.
Tomato paste will keep in the freezer for 2 to 3 months in an airtight container or freezer bag.
How to Freeze Tomato Paste
The best way to freeze tomato paste is in 1 or 2 tablespoon portions since that’s what most recipes call for.
I like to drop spoonfuls of it onto parchment paper squares and measure by weight (1 tablespoon of tomato paste weighs 16 grams) because it’s quicker and less messy than using measuring spoons.
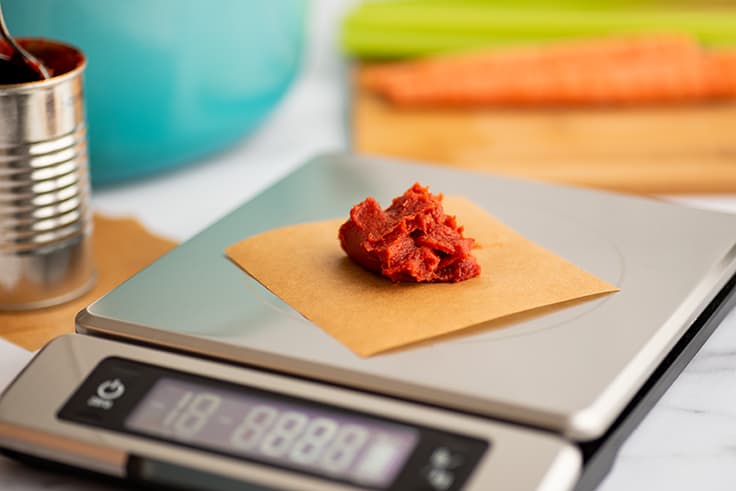

You don’t need to be precious about your measuring. Just get it somewhere in the ballpark and then place all your squares on a plate and freeze solid.
Once the paste is frozen, you can transfer them (parchment paper and all) to a freezer bag for long-term storage.
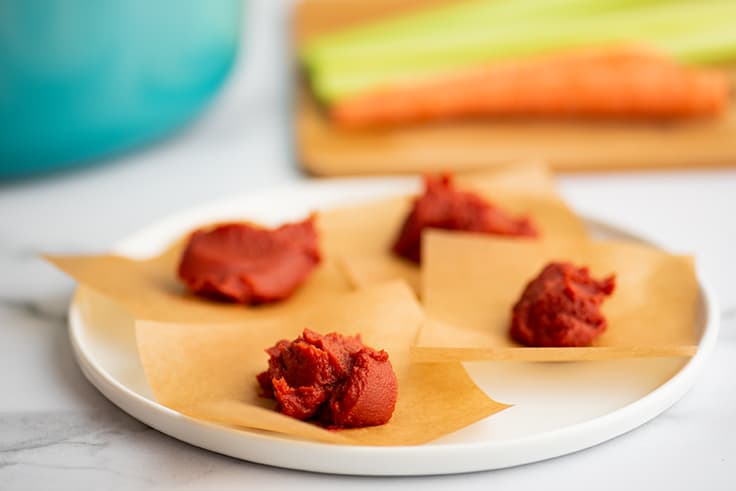

When you need tomato paste, grab one of the frozen spoonfuls and you’re good to go.
Does frozen tomato paste need to be defrosted before using? Usually no. If you’re using the paste in a soup or a sauce, you can just toss it in, and it will melt and meld in with the rest of the ingredients quickly.
The only time you really need to defrost the paste first is if you’re adding it to a mostly empty pot with things like garlic that burn quickly, because the other ingredients will burn before the paste has time to defrost.
In that case, set the frozen paste near the stove 10 to 20 minutes before you start cooking, and it should be pretty close to defrosted by the time you’re ready to use it.
Leftover Tomato Paste Recipes
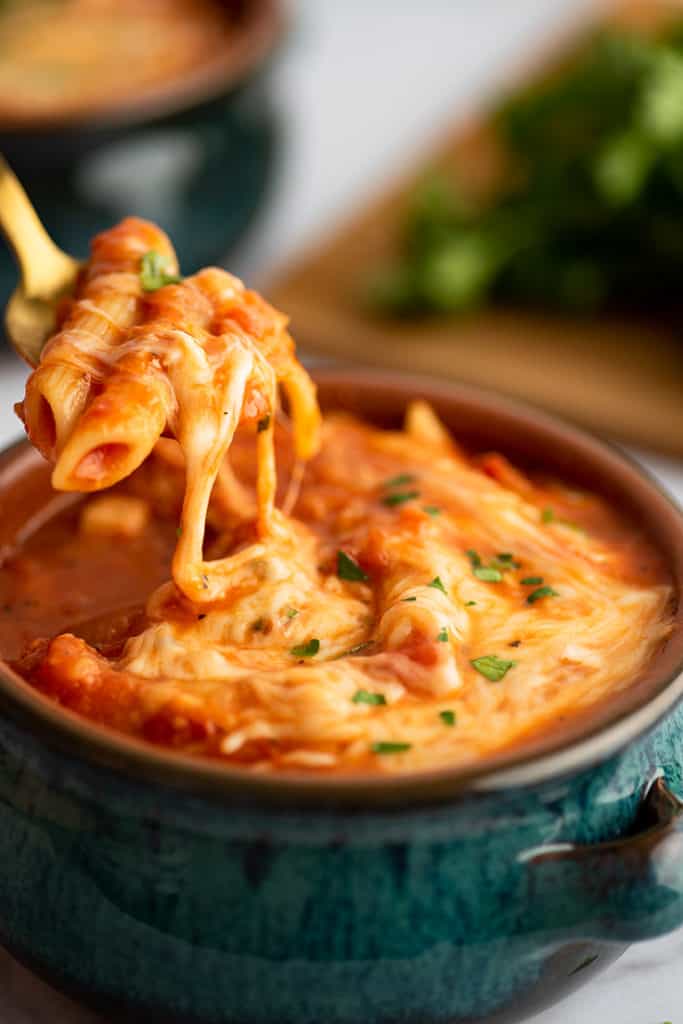
Easy Chicken Parm Soup
When you’re ready to use that leftover tomato paste, here are 10 recipes that use tomato paste to get you started:
- (1 1/2 teaspoons) Dinner for Two One-pot Homemade Spaghettios
- (2 teaspoons) Easy Shepherd’s Pie With Ground Beef (Dinner for Two)
- (1 tablespoon) Tomato Parmesan Scallop Bisque (From The Cozy Cook)
- (1 1/2 tablespoons) Mexican Vegan Vegetable Stew
- (2 tablespoons) Easy Chicken Parm Soup
- (2 tablespoons) Easy Pork Ragu
- (2 tablespoons) Gnocchi with Tomato Sauce (From Salt & Lavender)
- (2 tablespoons) Creamy Tomato and Spinach Pasta (From Budget Bytes)
- (3 tablespoons) Easy Short Ribs Recipe
- (3 tablespoons) Carnitas Enchiladas

This Small Lemon Pound Cake is incredibly moist, lemon tangy, and everything you want a slice of pound cake to be.

I have a bright little dessert for you today, one that will serve you all through the dreary days of winter and into the spring: Lemon Pound Cake!
Small-batch Pound Cake
This is a small-batch recipe that will make two mini-loaves ( these are the mini loaf pans I own ) or one very short and squat loaf in a regular-size loaf pan.
The cakes come out incredibly moist and lemon tangy and exactly everything you want a slice of pound cake to be.
Fair warning though, if you don’t want to eat two cakes today, you might want to pre-promise one of them to a friend or hide it away in your freezer. These are almost impossible not to nibble at when they are sitting on your counter (ask me how I know).


Your Choice of Pound Cake Glaze
You can leave the cakes plain if that’s how you prefer your pound cake, but you really won’t regret adding a finishing glaze. And I’m giving you two options, a sweet-tart lemon glaze or decadent cream cheese glaze.
I love both (which is why I’m including both–I couldn’t choose between them!).
The sweet-tart lemon glaze is made with two ingredients, powdered sugar and fresh lemon juice. It’s incredibly tangy and good and sets much firmer than cream cheese glaze does.
The cream cheese glaze is the same glaze I use on my Cream Cheese Glazed Pumpkin Donuts . It makes a thick and silky glaze that’s really a cross between a glaze and a frosting.
It will set, but not hard, so if you plan on wrapping the cakes for gifting, you’ll need to be careful. Cakes using this glaze should also be stored in the refrigerator because of the cream cheese.


More Small-batch Cakes
- Small Chocolate Cake
- Small Red Velvet Cake
- Six-inch Banana Cake
- Small-batch Vanilla Cupcakes
- Small-batch Chocolate Cupcakes
Small Lemon Pound Cake Recipe Notes
- This recipe calls for shortening, but you can replace it with 1/4 cup of butter (for 1/2 cup of butter total) if you don’t keep shortening on hand. I slightly prefer the texture of the cake made with some shortening, but the all-butter pound cake is still completely delicious.

Ingredients
Cake
- ▢ 1 cup ( 120g ) all-purpose flour
- ▢ 1 teaspoon baking powder
- ▢ 1/8 teaspoon salt
- ▢ 1/4 cup ( 56g ) salted butter softened
- ▢ 1/4 cup ( 48g ) shortening room temperature*
- ▢ 1 cup ( 200g ) granulated sugar
- ▢ 2 large eggs preferably room temperature
- ▢ 2 tablespoons fresh lemon juice
- ▢ 1 teaspoon lemon zest this is the zest from about 1/3 of a lemon
- ▢ 1/4 cup milk preferably whole
Lemon Glaze
- ▢ 1/2 cup ( 60g ) powdered sugar sifted
- ▢ 2 teaspoons fresh lemon juice plus more as needed
Cream Cheese Glaze
- ▢ 2 ounces cream cheese softened
- ▢ 2 tablespoons ( 28g) salted butter softened
- ▢ 1 cup ( 120g ) powdered sugar sifted
- ▢ 1 to 2 teaspoons milk any percentage
Instructions
Pound Cake
- Preheat your oven to 350°F and grease two mini loaf pans and line with parchment paper.
- In a small bowl, whisk together flour, baking powder, and salt. Set aside.
- In a medium bowl, combine softened butter, shortening, and sugar. Beat until light and fluffy, 1 to 2 minutes.
- Beat in eggs one at a time, followed by lemon juice and zest.
- Add half of the flour mixture, mixing until just combined, repeating with all of the milk and then the rest of the flour mixture.
- Divide batter between baking pans and bake for 28 to 35 minutes, until a toothpick inserted into the center of the cakes comes out clean.
- Cool before adding the glaze.
Lemon Glaze
- In a small bowl, whisk together powdered sugar and lemon juice until smooth. If necessary, add more lemon juice by the 1/4 teaspoon until you get a glaze that is just thin enough to drizzle over the cake (if you make it too thin, it won’t set).
- Drizzle glaze over the cakes and allow 10 to 15 minutes for it to set.
Cream Cheese Glaze
- In a medium bowl, combine softened cream cheese and butter. Beat until smooth.
- Add powdered sugar and 1 teaspoon of milk. Beat until smooth.
- Whisk in milk by the 1/4 teaspoon until mixture resembles a thin frosting, thin enough to easily spread over the top of the cakes but not completely pourable. (I usually use exactly 1 1/2 teaspoons milk TOTAL.) Do not add too much or your glaze will not set.
- Spread glaze over the cakes. Allow about 20 to 30 minutes for glaze to set.
- Slice cakes, serve, and enjoy!
Notes
This easy Chicken Fajita Salad with quick homemade dressing is packed with a ton of flavor and textures and is incredibly satisfying and filling.

Hey, friend, if your salad game is feeling a little stale, I have just the recipe to make you get excited about salads again: Chicken Fajita Salad.
Chicken Fajitas…As Salad
This recipe is my classic Chicken Fajitas (already a total delight on their own) served up over a bed of crisp romaine with diced avocado and tomatoes and topped with a creamy homemade Southwestern dressing.
It makes for a salad that is packed with a ton of flavor and textures and one that is incredibly satisfying and filling.
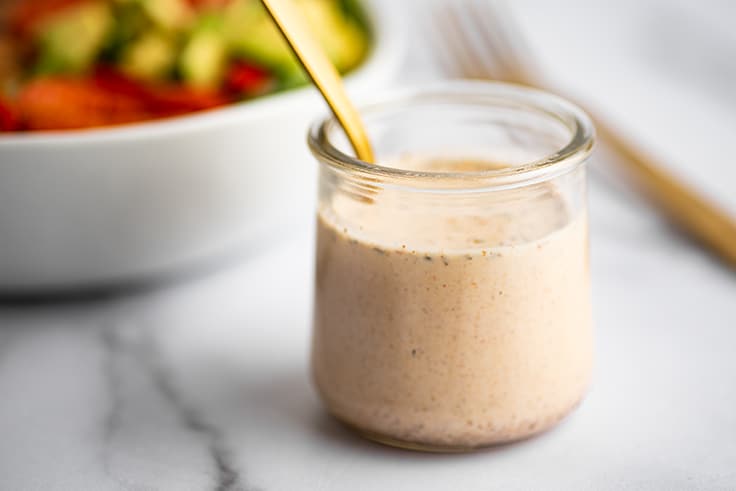

Quick Homemade Dressing
If you have a Southwestern-style dressing in your fridge, feel free to use it, but if not, I think you’re really going to like this one. It’s creamy, tangy, and best of all, SO quick and easy.
The ingredient list is just four items long, and all you have to do is throw those ingredients in a bowl, mix them together, and then drizzle away.
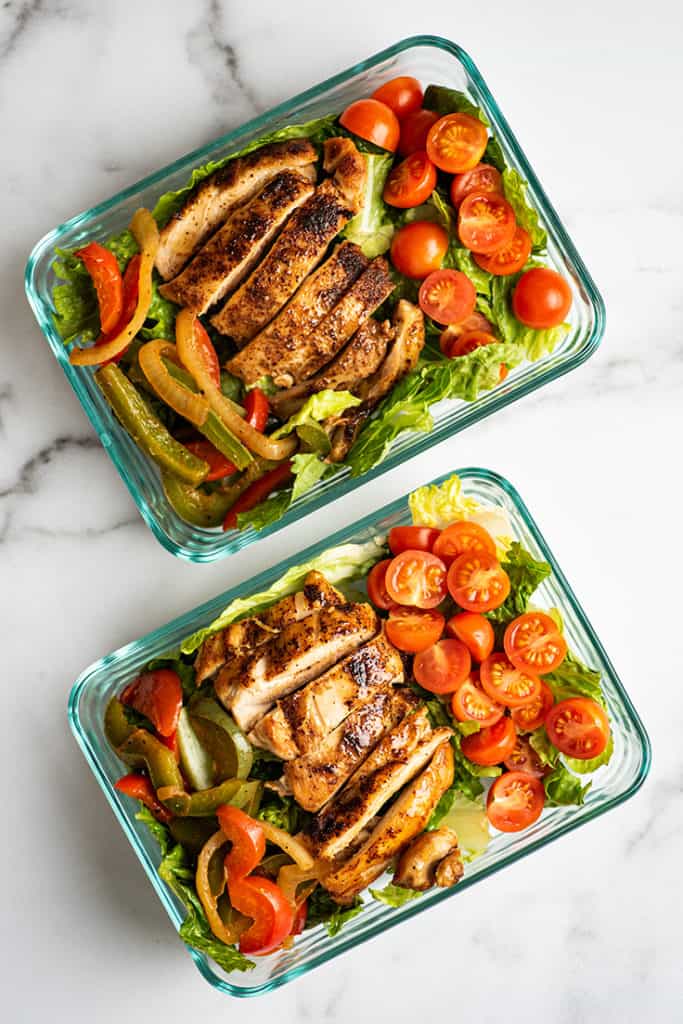
Meal Prep Salads
And for those of you who like to meal prep your lunches for the week, I highly recommend giving this salad a try. If you don’t have access to a microwave at work, the salad is really good cold. You can just pack everything (except the dressing) together in one container and go.
If you like to heat up your meat and fajita veggies before eating, pack the lettuce and tomatoes in one container and meat and peppers in a second microwave-safe container so you can pop them in the microwave before eating.

More Easy Salad Recipes
- Chicken Shawarma Salad
- BLT Salad
- Asian Chicken Salad
- Carne Asada Salad
Recipe Notes
- This recipe calls for chicken thighs, but if you want to use boneless, skinless chicken breasts, go for it. Season them as described in the recipe, but use the cooking method from my How to Cook Chicken Breasts for Salads and Sandwiches post, because cooking chicken breasts on the stove requires a slightly different cooking method to get the best results.

Ingredients
Fajitas
- ▢ 4 large or 8 small boneless skinless chicken thighs
- ▢ Taco or fajita seasoning
- ▢ 2 tablespoons vegetable oil divided
- ▢ 2 bell peppers any color, sliced
- ▢ 1/2 large onion sliced
Dressing
- ▢ 1/4 cup plain yogurt or sour cream
- ▢ 3 tablespoons milk plus more as needed
- ▢ 2 tablespoons ( 26g ) mayonnaise
- ▢ 1 teaspoon taco or fajita seasoning
- ▢ Salt and pepper
Salad
- ▢ 1 large head romaine lettuce chopped
- ▢ 1 avocado chopped
- ▢ 1 cup halved grape or cherry tomatoes or tomatoes of your choosing
Instructions
Fajitas
- Sprinkle chicken thighs with taco/fajita seasoning until lightly coated on all sides.
- On the stove, heat 1 tablespoon of oil in a large skillet over medium-high heat. Once hot, add chicken thighs and cook for 3 to 5 minutes per side, until the internal temperature reaches 165°F. If at any time the outside of the chicken begins to cook too quickly and starts to burn, turn the heat down. Once chicken is finished cooking, transfer to a plate and tent with foil to keep warm.
- While your meat cooks, in a second large skillet, heat remaining 1 tablespoon of oil over medium-high heat. Once oil is hot, add bell pepper and onion slices. Sprinkle 1/2 teaspoon of taco seasoning over the top. Cook, stirring occasionally, for 4 to 8 minutes, until edges are lightly browned and vegetables are tender-crisp. Salt and pepper to taste.
- For softer vegetables, turn heat down to medium once the vegetables begin to brown so they don’t burn, and continue to cook until vegetables reach your desired level of doneness. For very soft vegetables, add 1/4 cup of water to the pan at this point, and cook until veggies are soft and water has evaporated, adding more water as necessary.
- Slice cooked chicken thighs into strips or cubes.
Dressing
- In a small bowl, whisk together first four dressing ingredients and add salt and pepper to taste. If dressing is too thick, add more milk by the 1/2 teaspoon until it reaches your desired consistency.
Assemble Salad
- Divide lettuce between bowls and top with salad toppings. Pour dressing over the top and enjoy!
