What to Do With Leftover Half and Half: storage and freezing tips plus recipe ideas to use up the leftovers.

My “Waste Not” series is a series of posts dedicated to reducing food waste in the kitchen. They’ll give you storage tips and recipe ideas to use up the leftovers so you can toss out less and use up more.
For the latest post in this series, we’re going to chat about Half and Half.
Previous Waste Not Posts
- What to Do With Leftover Egg Yolks & Egg Whites
- What to Do With Leftover Pesto
- What to Do With Leftover Whipping Cream
- What to Do With Leftover Buttermilk
- What to Do With Leftover Pumpkin Puree
- What to Do With Leftover Tomato Paste
What is Half & Half?
Half and half is cream with a milk fat content of 10.5–18%. Not to be confused with whipping cream (30–36% fat) or heavy cream (36%+ fat).
It’s the lightest of the available cream options in the US and is a good option for adding creaminess to coffee and sauces without the heaviness (and calories) of heavy cream.
You’ll typically find half and half sold in pints, but many recipes call for only 1/2 to 1 cup of it, so it’s good to know your options when faced with the inevitable leftovers.
Storing Leftover Half and Half
Refrigeration
How long will half and half keep in the fridge?
Half and half will stay fresh in the fridge for about 5 to 7 days.
How to tell when half and half has gone bad?
Like with milk, you’ll know it’s gone bad if it develops an “off” smell or begins to curdle or separate.
Freezing
Can you freeze half and half?
Yes! Half and half can be frozen to be used in baking and cooking recipes just fine. It may separate slightly when frozen, but just give it a good shake or whisk once defrosted and it should come back together enough to be used in recipes.
However, because of this tendency to separate, I don’t recommend freezing half and half to use later as coffee creamer since the slight change in texture might be noticeable.
How to Freeze Half and Half
To freeze half and half, pour into freezer-safe containers, leaving at least 1 1/2 inch headspace (it will expand as it freezes) or pour into freezer-safe plastic bags and freeze on a flat surface like a baking tray or cutting board.
Once frozen, bags can be stored upright or wherever they will fit in your freezer.
How long will half and half keep in the freezer?
Frozen half and half will stay fresh for 2 to 3 months in your freezer.
Uses for Leftover Half and Half
Before we get to the recipes, here are some general things you can do with half and half without a recipe:
- Use it as coffee creamer
- Use it in mixed coffee drinks and hot chocolate—replacing some of the milk in these recipes with half and half will give you a much richer and creamier drink (try it with a Homemade Mocha and Easy Hot Chocolate ).
- Make scrambled eggs—replace the milk you would normally use in scrambled eggs with half and half for an extra rich and delicious scramble.
Recipes to Make With Leftover Half and Half
Below are some of my favorite recipes to make with half and half. Some use as little as 1/4 cup all the way up to a full pint, so matter how much half and half you have, there should be something that works for you.

Easy Chicken in Cream Sauce for Two
- (1/4 cup) Chicken and Broccoli Orzo
- (1/3 cup) Quick and Easy Fettuccine Alfredo for One
- (1/2 cup) Easy Pesto Chicken Pasta for Two With Oven Roasted Tomatoes
- (1/2 cup) Easy Chicken in Cream Sauce for Two
- (1 cup) Creamy Chicken and Asparagus Pasta Dinner for Two
- (1 1/2 cups) Lightened Up Copycat Carmela’s Chicken
- (2 cups) Easy Creamy Chicken Pasta With Bell Peppers
- (2 cups) Easy Fettuccine Alfredo With Broccoli
This easy Dulce de Leche Ice Cream recipe is a fantastic way to use up leftover heavy cream and the perfect place to start if you’ve always wanted to make ice cream at home, no ice cream maker required.

Hey, friends, remember last year when I got a little too obsessed with homemade dulce de leche and started adding it to everything? Well guess who’s back on her dulce de leche beat. Let’s make some Dulce de Leche Ice Cream!
Three-ingredient Dulce de Leche Ice Cream Recipe
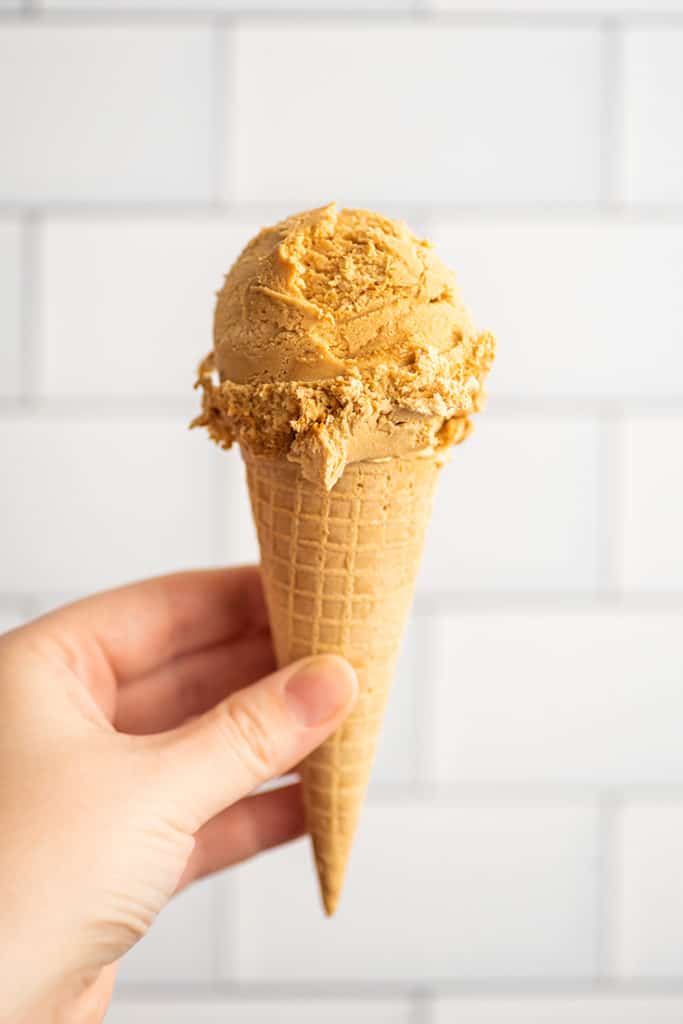
This dulce de leche ice cream is an incredibly easy and fun way to make ice cream at home. You just need three ingredients and less than ten minutes of active hands-on time to mix everything together.
After an overnight freeze, you end up with an ice cream that is smooth, super creamy, and so, so good.
Dulce de Leche Ice Cream Ingredients
- Heavy/Whipping Cream: The base for this ice cream is a pint of cream that you’re going to whip into fluffy, billowy peaks. Note: while either whipping cream or heavy/heavy whipping cream is fine, half-and-half and milk CANNOT be substituted here, as they won’t whip up.
- Dulce de Leche: All the sweetness in the ice cream comes from a single can of dulce de leche folded into the whipped cream, no additional sugar needed. You can use store-bought or homemade dulce de leche .
- Vanilla Extract: Just a little extract in the ice cream adds a hint of vanilla, which pairs fantastically with the dulce de leche flavor.
Recipe Ingredient Tip: If you’re having trouble finding dulce de leche at the store, it should be in the baking aisle or near the coffee and teas. It’s typically sold in cans alongside sweetened condensed milk and evaporated milk (double check your can and make sure you’re coming home with the correct thing!).

How To Make Dulce de Leche Ice Cream
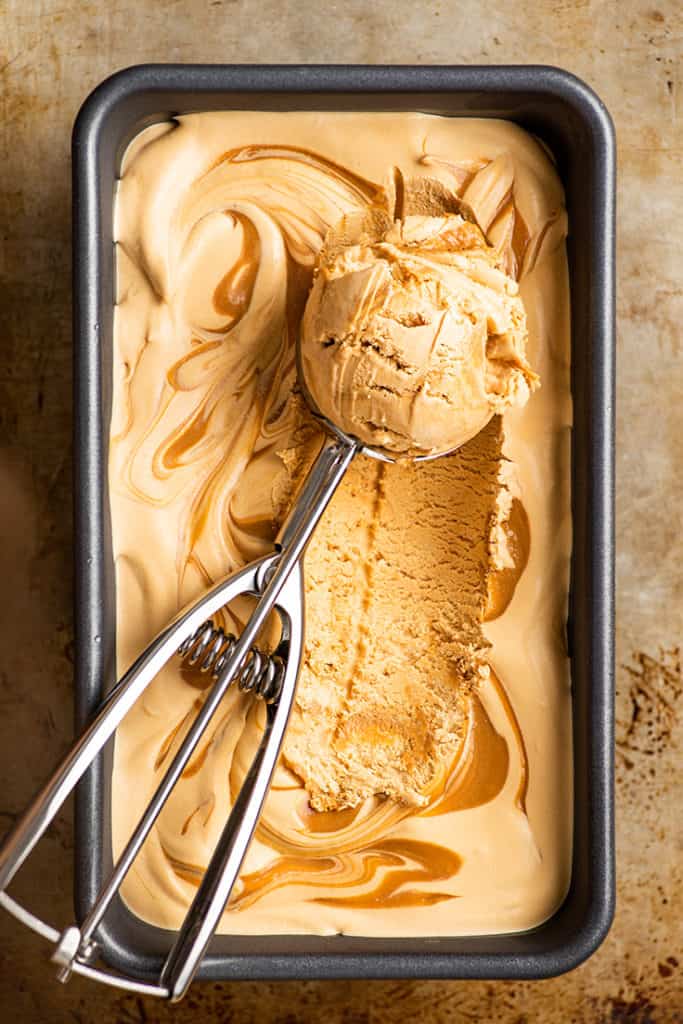
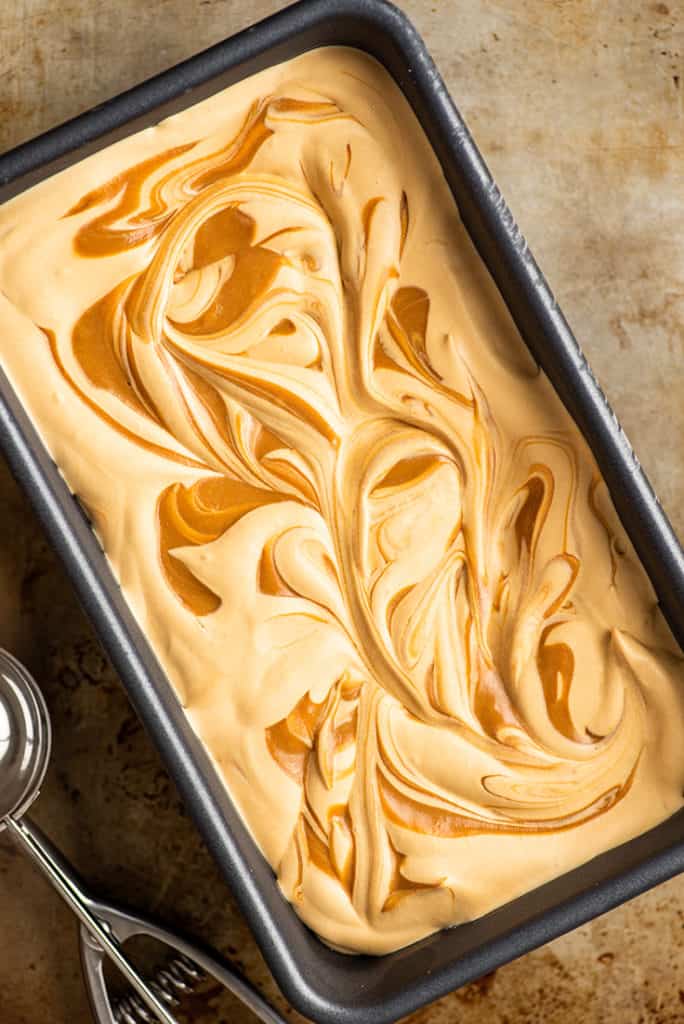
To make dulce de leche ice cream, you’ll beat a little cream into your dulce de leche to lighten it up and make it easier to incorporate into the cream. Then just whip your heavy cream and vanilla extract into stiff peaks and fold in 3/4 of the dulce de leche until uniform in color. Finally, you’ll swirl in the remaining dulce de leche so you get those pretty ribbons of it throughout and freeze until firm, preferably overnight. It’s that easy!
A Note on Texture
No-churn ice creams made with a heavy cream base have a higher fat content than traditional store-bought ice creams. This means they have a slightly richer and smoother texture and mouthfeel than custard-based ice creams.
This isn’t a bad thing, (it’s actually really yummy) but it can be a little surprising when you take your first bite, so I want you to go in prepared. 😉

More Dulce de Leche Recipes
- Dulce de Leche Milkshake
- Kahlua Tres Leches Cupcakes (with Dulce de Leche Drizzle)
- Dulce de Leche Latte
Recipe Notes
- If you want to make this ice cream with leftover cream , and don’t have 2 full cups, the recipe is really easy to scale down. Just use a ratio of 2 parts cream : 1 part dulce de leche. (So if you have 1 cup of cream, use 1/2 cup dulce de leche.) Stir just enough of the cream into the dulce de leche to thin it out a to a pudding-like consistency, and follow the rest of the recipe as written.
- If you don’t have dulce de leche on hand but do have a can of sweetened condensed milk, go check out my recipe on The Quicker Way to Make Dulce de Leche . It’s super easy and all you need is that can of condensed milk and a couple of hours.
Equipment
- Handheld electric mixer
- Rubber spatula
- Loaf pan or airtight freezer container with at least a 6-cup capacity
Ingredients
- ▢ 1 13.4-ounce can (about 1 heaping cup ) dulce de leche chilled or room temperature*
- ▢ 2 cups cold heavy whipping cream divided*
- ▢ 1 teaspoon vanilla extract
Instructions
- In a medium bowl, combine dulce de leche and 1/4 cup of the heavy cream and beat until smooth.
- In a large bowl, combine remaining heavy cream and vanilla extract. Using a handheld electric mixer, beat cream, starting on low, working up to high, until stiff peaks form (when you lift the beaters out, the peaks of cream should stand straight up without flopping over).
- Use a rubber spatula to fold in about 3/4 of the dulce de leche (reserve 1/4 to swirl in at the end), being careful not to deflate the whipped cream too much.
- Scoop half of the whipped cream mixture into a loaf pan or freezer container. Spoon half of the reserved dulce de leche over the top and use a knife to swirl the mixture into the cream.
- Add remaining whipped cream and repeat with remaining dulce de leche. Cover pan with cling wrap or lid and freeze until solid, at least 6 hours, preferably overnight.
- Serve and enjoy!
Notes
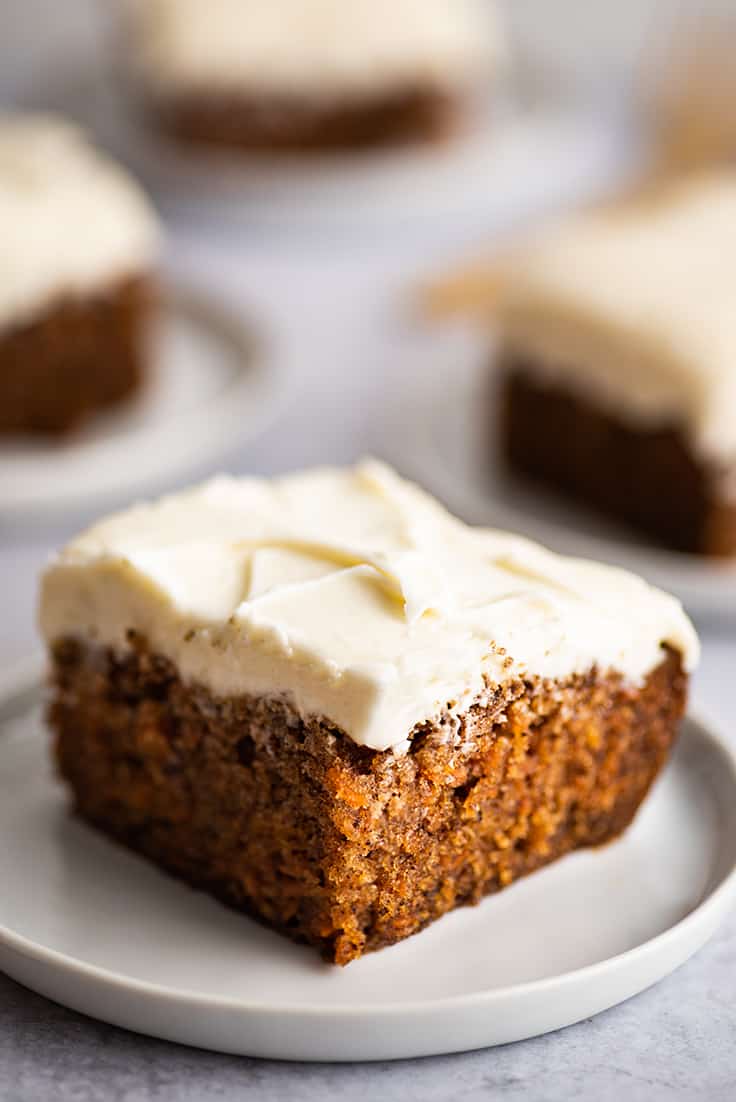
My mom’s famous carrot cake recipe that makes the BEST carrot cake with creamy, decadent cream cheese frosting.
This easy carrot cake is a family favorite. It’s simple to make, pretty much fool proof, and perfect for parties or potlucks. I can’t wait for you to try it!

A couple of years ago, I shared this Small Carrot Cake recipe , which is a miniaturized version of my Mom’s (amazing, wonderful, perfect) carrot cake.
Since that post went live, I’ve had SO many people email me asking for her full-size recipe. And since we’re coming up on carrot cake season, today I’m sharing her version on the blog.
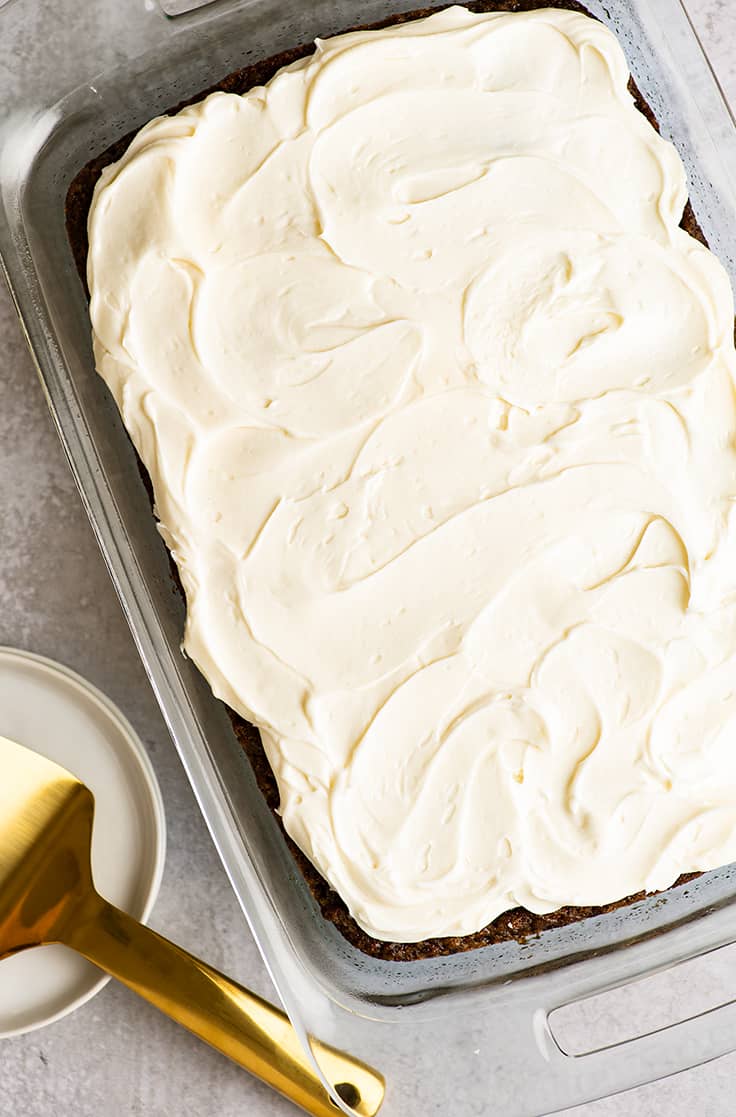
This recipe will make a 9×13-inch carrot cake, and it’s my absolute favorite carrot cake in the entire world.
The Best Carrot Cake Recipe (Perfect for Potlucks)
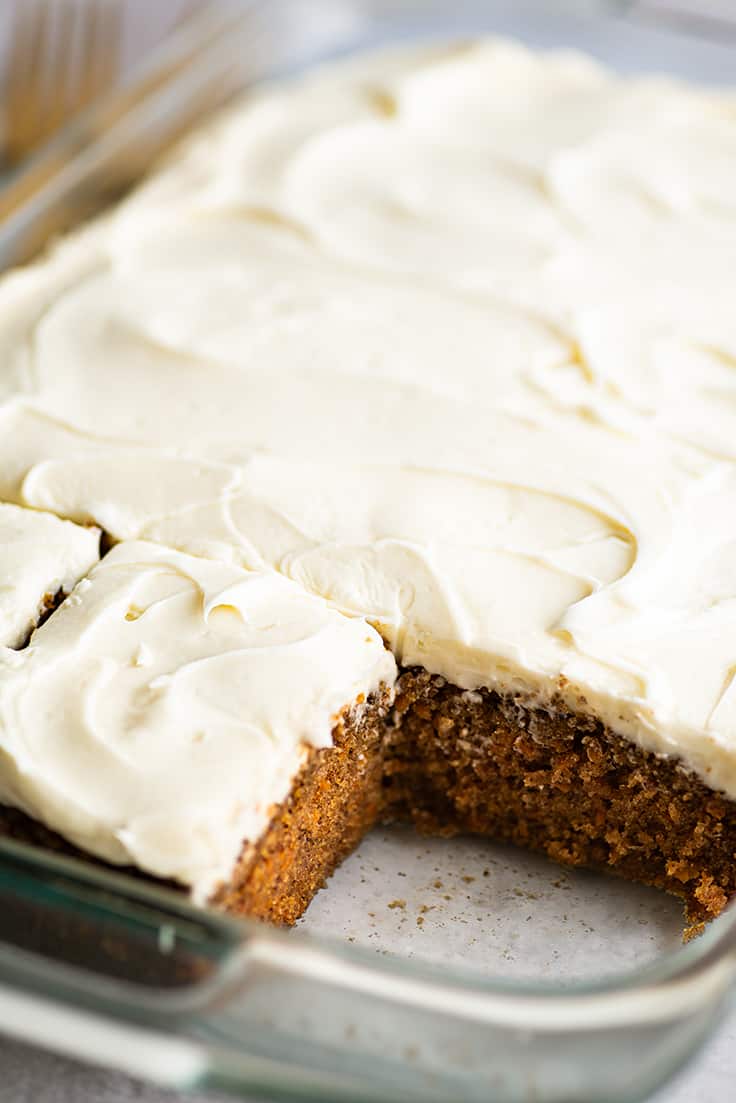
This carrot cake recipe makes a wonderfully moist and soft carrot cake with just the perfect level of spice and sweetness.
Growing up, it was my Mom’s go-to potluck dessert, and to this day, I maintain that it really is the perfect dessert for parties and potlucks because aside from being irresistible:
- You can make it a day or two in advance, and if you bake it in a 9×13 casserole dish with a lid , it’s already packaged for travel. Just pop on the lid and go.
- It’s pretty fool-proof and easy. You don’t need a stand mixer, just a whisk, a couple of bowls, and a box grater for the carrots.
- Zero decorating skills needed. Just spread on a (slightly excessive) layer of cream cheese frosting and you’re good to go.
Some Carrot Questions
And before we get to the recipe, let’s have a quick chat about carrots, because this is the one place I see people get hung up when making carrot cake.
Do I need to peel my carrots for carrot cake?
Yes! Peel your carrots before shredding them because the skin can have a bitter taste and unpleasant texture after baking.
How to grate carrots for carrot cake?
Use the large-size holes of a box grater to grate the peeled carrots. You can also use the shredding/grating disc attachment of your food processor if you have one.
Bonus tip: When shopping for carrots, try to get medium-to-large carrots as they are much easier and quicker to grate than small skinny ones!
How to measure carrots for carrot cake?
Measure your grated carrots by piling them loosely in your measuring cup. Do not pack them in for measuring.

Cream Cheese Carrot Cake Frosting
Cream cheese frosting for carrot cake is a must, and this carrot cake has some really good cream cheese frosting to top it off. It’s rich, tangy, and everything you could possibly want from a cream cheese frosting.
There are two secrets to getting a perfectly smooth and silky cream cheese frosting:
- Start with truly room temperature butter and cream cheese and beat them until smooth before adding the powdered sugar. If your butter and cream cheese aren’t mixing nicely, stop beating and let them sit for another 10-15 minutes before trying again.
If you add powdered sugar before the butter and cream cheese are smooth, you might end up with lumps of cream cheese in your frosting that you won’t be able to get rid of.
- Sift your powdered sugar. Lumpy powdered sugar can also lead to lumpy frosting. Though if you don’t mind some powdered sugar lumps, by all means, skip sifting.
Bonus tip: This is quite a lot of powdered sugar to sift, so I like to use a fine-mesh strainer to sift the sugar over a flexible cutting board so I have more space to work with and can sift the sugar more quickly.
Storing Carrot Cake
Before frosting, this cake can be stored covered at room temperature. As soon as it is frosted, if it’s not going to be eaten for a couple of hours, it should be stored covered in the refrigerator because of the cream cheese.
You can allow the cake to sit for about an hour to come to room temperature before serving or serve chilled.

Recipe Notes
- This cake contains allspice, which not all carrot cake recipes include. You can omit it if you don’t have any or don’t care for it. If you’re not sure if you’ll like the flavor in carrot cake, smell the spice before adding and skip it or cut the amount in half if it doesn’t appeal to you.
Ingredients
Carrot Cake
- ▢ 2 cups ( 240g ) all-purpose flour
- ▢ 2 teaspoons baking powder
- ▢ 2 teaspoons cinnamon
- ▢ 2 teaspoons allspice *
- ▢ 1/2 teaspoon salt
- ▢ 4 large eggs
- ▢ 2 cups ( 400g ) granulated sugar
- ▢ 1 1/4 cup vegetable oil
- ▢ 3 cups loosely packed peeled and grated carrots *
Cream Cheese Frosting
- ▢ 8 ounces cream cheese softened
- ▢ 1/2 cup ( 4oz ) salted butter softened
- ▢ 1 teaspoon vanilla extract
- ▢ 3 3/4 cups ( 1 16-ounce box) powdered sugar sifted
Instructions
Carrot Cake
- Preheat your oven to 325°F and lightly grease a 9x13-inch baking dish.
- In a medium bowl, whisk together flour, baking powder, cinnamon, allspice, and salt.
- To a large bowl, add eggs and whisk until lightly beaten. Add sugar and vegetable oil and beat until well-mixed. Add flour mixture and use a wooden spoon to stir until just mixed.
- Add carrots and stir until evenly distributed, scraping the sides and bottom of the bowl with a rubber spatula to make sure all of the batter is mixed.
- Pour batter into prepared baking dish and smooth the top. Bake for about 50 minutes to 1 hour, until the center of the cake looks set and a toothpick or cake tester inserted into the center of the cake comes out clean.
- Cool cake in the pan until completely cool.
Cream Cheese Frosting
- In a large bowl, beat cream cheese, butter, and vanilla until well-combined and smooth. Slowly add sifted powdered sugar and beat until all the sugar is incorporated and frosting is smooth and creamy.
- Spread frosting over the top of the cake. Chill before serving if desired, and enjoy!
