Making Tri-tip in the oven is SO easy and delicious and a total crowd-pleaser.

Sometimes when I’m developing recipes, I have to do quite a bit of testing so I end up eating A LOT of that recipe (remember all those test batches of Freezer Meatballs ? I’m still happily eating my way through them).
This was another recipe I tested a bunch before making it for the site, and despite the fact that I’ve eaten more tri-tip in the last two months than I have in the last two years, it’s so good that I’m already thinking about making it again this weekend.
Tri-tip is one of those cuts of meat that is usually prepared on the BBQ, but as I’ve said before, I’m not much of a grill master. Most of my life I’ve made tri-tip in the slow cooker , and it’s pretty killer that way, especially for BBQ sandwiches, but recently, I’ve been enjoying making tri-tip in the oven, because It. Is. Amazing.
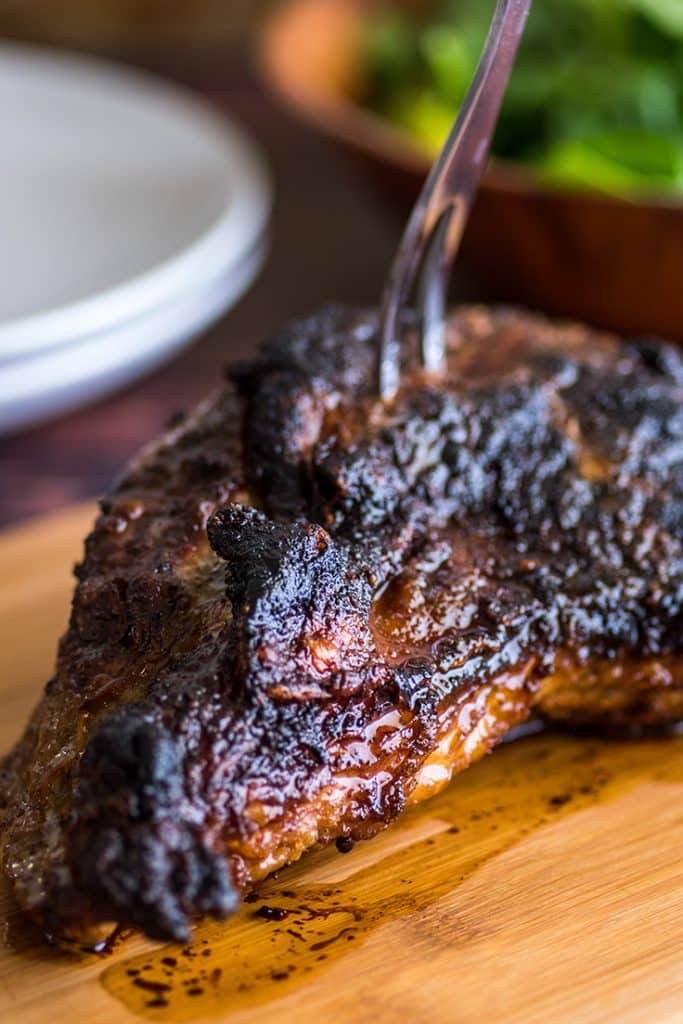

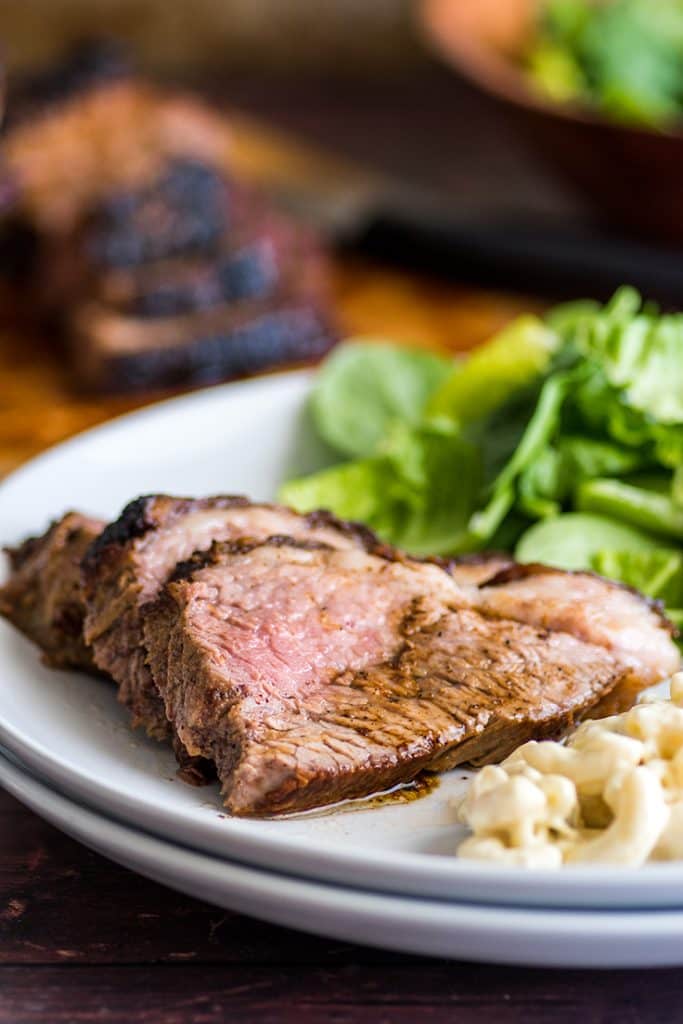
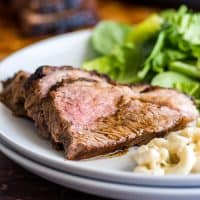
Starting tri-tip on the stove and finishing it in the oven, you get super moist and flavorful meat and that gorgeous, crispy charred exterior, all without having to step foot outside or get near a BBQ.
Seriously, as soon as you cut into the roast, you will want to start grabbing pieces to eat. I don’t usually eat while I’m shooting photos, but I’m not going to lie, I totally stopped for a snack halfway through this shoot. 😉
I grew up eating tri-tip, but when I was writing my last tri-tip recipe post, I learned that it’s actually not such a popular cut of meat around the world. So if you’re reading this going what the heck is tri-tip?, read on.
What is Tri-tip?
Tri-tip is a 1.5 to 2.5-pound, triangular-shaped cut of meat that comes from the bottom of the sirloin. It’s most popular in California and on the West Coast, but it is growing in popularity around the country.
You might find it under alternate names like “The California Cut” or “Bottom Sirloin Tip” or “Triangle Roast” (why so many names for tri-tip??).
One tri-tip will serve 4 to 6 people depending on its size and the appetite of your guests, and because of its shape, is great if you are feeding people who like different levels of doneness in their meat because the thinner end will cook quicker than the center.

Untrimmed vs Trimmed Tri-tip
Tri-tip is sold as either untrimmed or trimmed. Untrimmed tri-tip has a nice layer of fat on one side (sometimes both sides). Trimmed tri-tip will have this removed.
I like trimmed tri-tip roasts when I am cooking them in the slow cooker, but for roasting, I prefer untrimmed as the fat helps keep the meat nice and moist.
On rare occasions, I will get a tri-tip that is untrimmed on both sides. If that happens to you, you’ll want to trim one side. One side of the tri-tip will have a thick, pretty even fat cap. That’s the side you want to keep. The other side will be irregular with some muscle showing through. That’s the side you’ll want to trim.
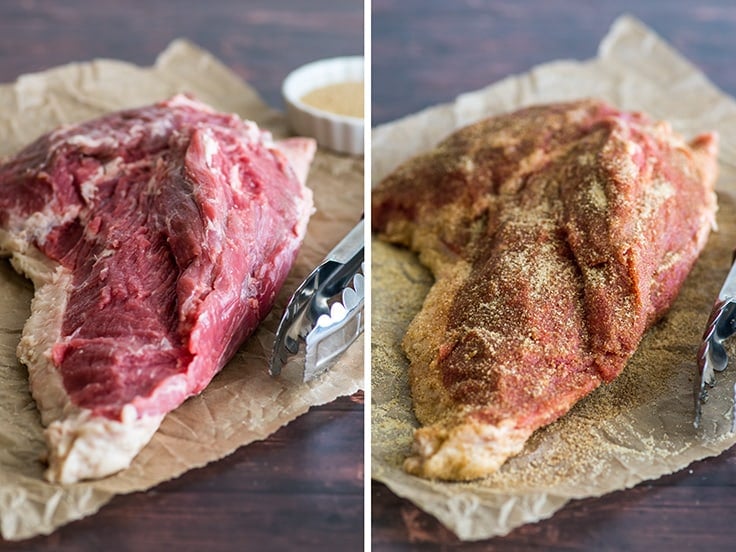
Just use a very sharp knife to slice off the fat and any silver skin (the thin bluish, silvery membrane that sticks tightly to the meat). It doesn’t have to be pretty! You can see the hack job I did on my tri-tip below.) 🙂

Okay, with that little tri-tip lesson out of the way, are you ready to see how easy it is to cook in the oven? (Scroll all the way down for the full recipe.)
How to cook tri-tip in the oven:
- Rub tri-tip with your favorite seasoning salt.
- Heat oil in an oven-safe pan and sear the tri-tip, fat-side down.
- Flip tri-tip and pop it in the oven.
- Bake for 10 to 15 minutes per pound.
- Allow roast to rest for 10 minutes, and done!

How easy is that? This has seriously become one of my go-to dinners for nights I know I’m going to be tired and not want to cook, because even though there are 20 to 40 minutes of oven time, the effort is minimal and the results are sooooooo good.
The meat is fabulous if you want to build a tri-tip sandwich, but usually, I eat it exactly as is, maybe with a little macaroni salad , broccoli , or green beans as a side.

Tri-tip Recipe Notes
- If cooking more than one tri-tip roast at a time, just make sure they’re not touching in the oven pan so there’s plenty of room for air to circulate. Cook for the recommended time based off the smallest roast. You may have to pull one roast out sooner than the other, and cooking time will probably be slightly longer, particularly if roasts are crowded together or you have to open the oven multiple times to check temperatures.
- Looking for more meaty main dishes? Try (my favorite) Crispy Carnitas and Country-style Ribs .
Ingredients
Special Equipment
- ▢ Large oven-safe skillet
- ▢ Instant-read thermometer
Tri-tip
- ▢ 1 untrimmed tri-tip*
- ▢ 2 tablespoons olive oil
- ▢ Seasoning salt*
Instructions
- Preheat your oven to 425°F.
- Trim any silver skin from the bottom of the tri-tip and sprinkle the entire thing with seasoning salt, gently rubbing it into the surface.
- On the stove, heat olive oil over medium-high heat in a large oven-safe skillet. Once oil is hot place tri-tip, fat-side down, in the pan. Cook for 4 minutes, or until well-seared. Flip meat and place pan in the oven.
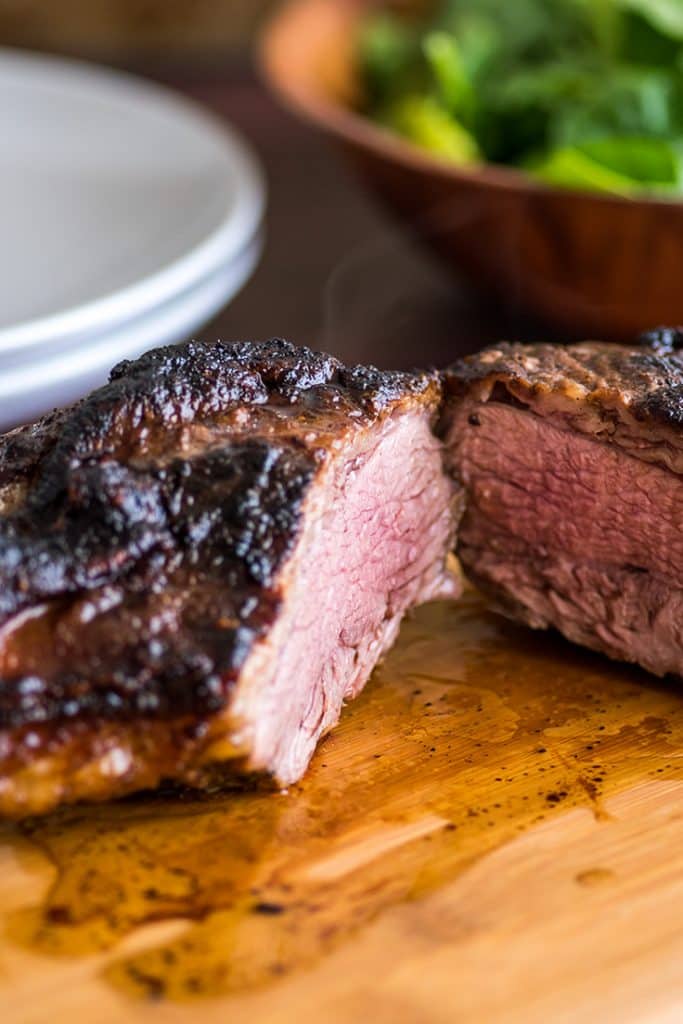
- Roast for 10 to 15 minutes per pound (start checking the internal temp at about 20 minutes for a medium-sized roast). Cook until internal temperature in the thickest part of the meat reads 135°F for medium-rare to 145° for medium (the roast in the photos was pulled at 145°F). Tent with foil to keep warm and allow meat to rest for 10 minutes before slicing.
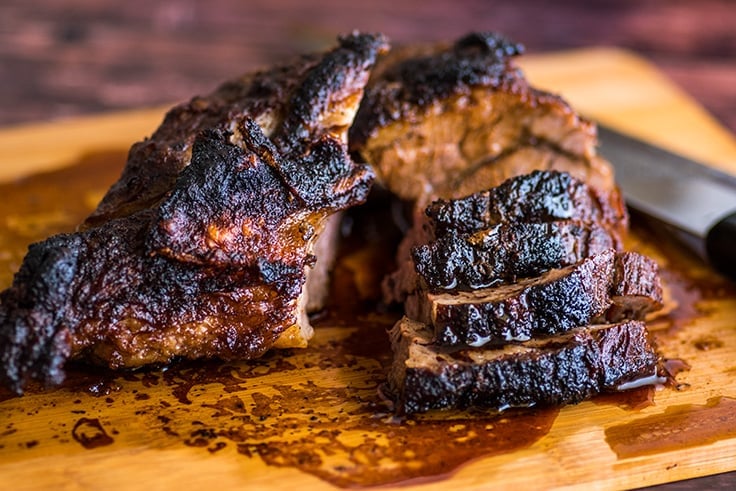
- Slice roast against the grain by cutting it in half at the center point and then across the grain on each end and enjoy!
Notes
Recipe Adapted from The New York Times

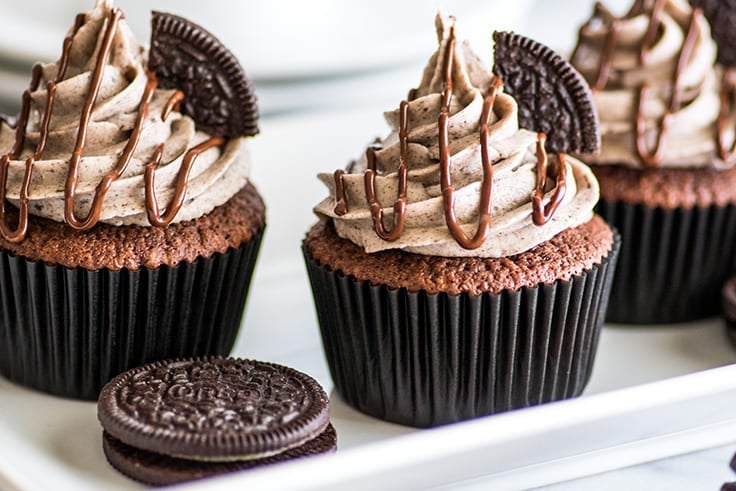
Small-batch Oreo Cupcakes, moist chocolate cupcakes with an Oreo baked right into them and the best Oreo frosting on top!

Looking for more Small-batch Cupcakes? Try these Small-batch Vanilla Cupcakes , Small-batch Hostess Cupcakes , and Small-batch Pumpkin Cupcakes !
Hey, friends. How was your week? Did you ever recover from having Monday off? Like I said in Wednesday’s post ( Cinnamon Sugar Baked Pumpkin Donuts go make them now!!), I worked through the long weekend trying to get ahead on the blog. I shot an entire month’s worth of recipes last week and then burned out hard by the middle of this one. I ended up taking Wednesday afternoon for a little me time and to go to the movies by myself ( Wind River –if you like quiet thrillers, would recommend). And I have to say after the break, I feel much more enthusiastic about food again and ready to tackle another month of recipes. 😉
Plus it doesn’t hurt that today I get to talk about one of my favorite ingredients, Oreos!
I’m not much of a snacker, so I almost never eat Oreos on their own, but I always have a container of them in my cupboard because they are one of my absolute favorite baking ingredients. They’re perfect. You can use them in a crust , in ice cream , put them in cookies . There’s not much you can’t do with them, and that includes baking them into cupcakes!
Who feels like an Oreo cupcake?
These Small-batch Oreo Cupcakes start with an Oreo pressed into the bottom of the cupcake pan, which gets topped with my favorite Small-batch Chocolate Cupcake batter. And it is so good When you bake Oreos, their texture changes so they almost melt in your mouth when you bite into them, and it’s absolutely one of the major selling points of these cupcakes.
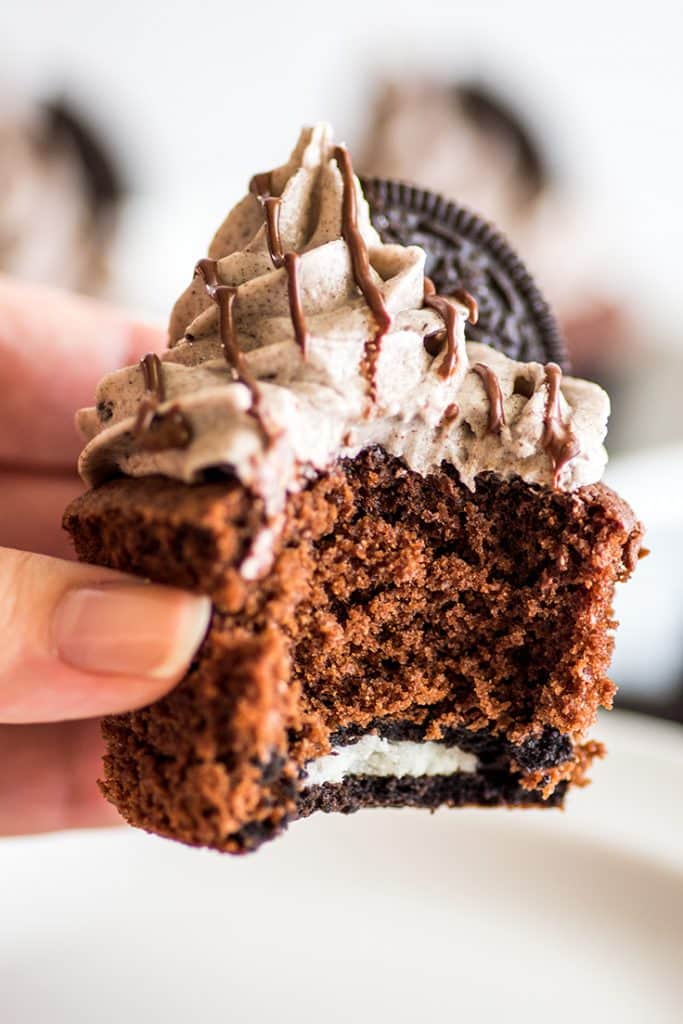

Well that, and the Oreo Frosting on top. I posted a standalone recipe for this frosting a couple of weeks ago. It’s an American buttercream with just a little cream cheese mixed in and Oreo crumbs, and it’s to die for. It tastes like a more decadent version of the creamy center of an Oreo, and I dare you not to lick the bowl when you make it. Then, just to make these Oreo Cupcakes extra cute, I drizzled chocolate over the top and garnished them with another Oreo piece.

This small-batch cupcake recipe makes four cupcakes, and best of all, it uses exactly six Oreos (okay, technically five and a half), so if you don’t usually buy/eat Oreos, you don’t have to buy a big container of them. Just grab one of those little six packs from the checkout aisle.
Or, pro tip, if you’re like me and bake often with Oreos, buy a box of snack packs. That way you always have Oreos on hand, but you don’t have to worry about them getting stale in your cupboard!


Tell me, are you an Oreo fan? What’s your favorite way to eat them?
This recipe uses just one egg yolk. Check out these Egg White Recipes for ideas on what to do with the leftover egg white.

Ingredients
Cupcakes
- ▢ 6 Oreos divided
- ▢ 2 tablespoons ( 1oz ) unsalted butter
- ▢ 2 tablespoons ( 21g ) chopped semi-sweet chocolate good quality chips are fine
- ▢ 1 1/2 teaspoons vegetable oil
- ▢ 1/4 cup ( 30g ) all-purpose flour
- ▢ 2 tablespoons ( 11g ) cocoa powder sifted if lumpy
- ▢ 1/2 teaspoon baking powder
- ▢ 1/8 teaspoon salt
- ▢ 1/4 cup ( 50g ) granulated sugar
- ▢ 1 large egg yolk
- ▢ 1/4 teaspoon vanilla extract
- ▢ 2 tablespoons milk any percentage
- ▢ 2 tablespoons hot coffee or water
Oreo Frosting
- ▢ 2 tablespoons ( 1oz ) unsalted butter softened
- ▢ 1 ounce cream cheese softened
- ▢ 1 cup ( 120g ) powdered sugar sifted
- ▢ 1 teaspoon to 1 tablespoon milk or cream
Topping
- ▢ 3 tablespoons chopped chocolate good quality chips are fine
Instructions
Cupcakes
- Preheat your oven to 350°F and line your cupcake pan with 4 liners. Place 1 full Oreo in each of the cupcake cups.
- In a small, microwave-safe bowl, combine butter, chocolate, and vegetable oil. Microwave for 15 seconds and stir. Repeat until mixture is completely melted and smooth. Set aside to cool slightly.
- In a small bowl, whisk together flour, cocoa powder, baking powder, and salt. Set aside.
- In a medium bowl, whisk together sugar, egg yolk, and vanilla until well-combined. Whisk in cooled chocolate mixture until smooth. Whisk in flour mixture until just mixed. Add milk and coffee and whisk until smooth. (Batter will be quite thin.)
- Spoon or pour batter into your prepared cupcake cups, filling 2/3 of the way full. Discard any excess batter.
- Bake for 16 to 19 minutes, until a toothpick inserted into the center of the cupcakes comes out clean or with just a few crumbs. Once the cupcakes are cool enough to handle, transfer to a cooling rack to cool completely before frosting, 15 to 20 minutes.
Frosting
- Separate 1 Oreo and scrape filling into small bowl. Place both sides of the cookie into a small plastic bag and crush into a fine crumb.
- To the bowl with the Oreo center, add softened butter and cream cheese. Beat until smooth. Add powdered sugar and cookie crumbs and 1 teaspoon of milk or cream. Beat until sugar is completely incorporated and frosting is fluffy. Add up to 2 teaspoons more of milk or cream if necessary until frosting reaches your desired consistency.
- Transfer frosting to a piping bag and pipe onto cupcakes.
Chocolate Topping
- Place chocolate in a small, microwave-safe bowl and microwave in 15-second increments, stirring in between, until smooth. Use a spoon to drizzle over cupcakes or transfer to a small plastic bag and snip off one corner to “pipe” chocolate on.
- Divide final remaining Oreo in two and quarter one half of the cookie. Garnish each cupcake with one of the quarters and eat the remaining Oreo half.
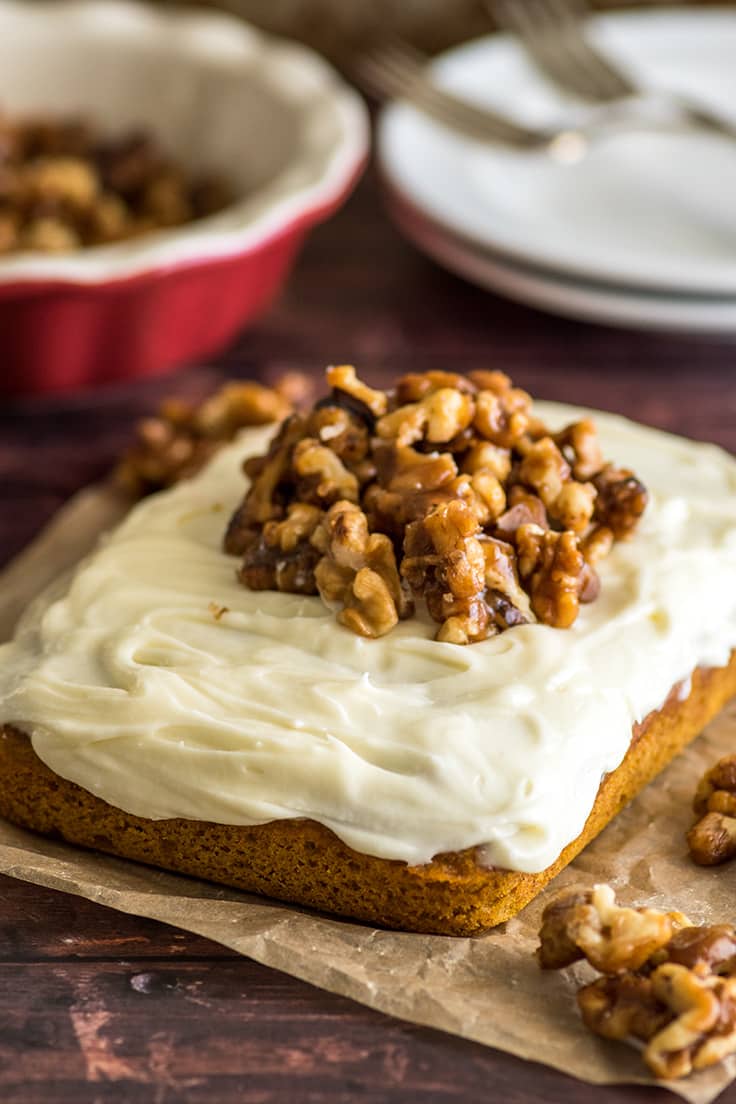
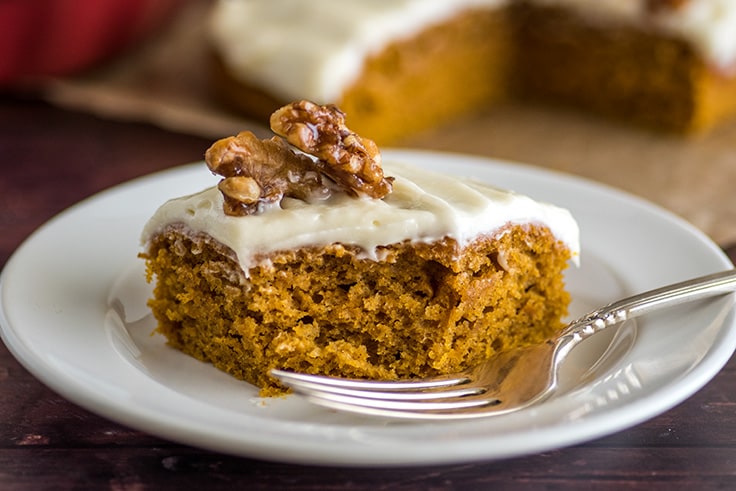
This super simple Mini Pumpkin Cake with cream cheese frosting and homemade candied walnuts is the perfect easy fall dessert to share with a couple friends.

It’s technically still summer, but I don’t care. I’m in full-on pumpkin mode now. Can’t stop this pumpkin train. I shared a small batch of Pumpkin Cupcakes a couple weeks ago, Cinnamon Sugar Baked Pumpkin Donuts last week, and today, I have a Mini Pumpkin Cake for you because you can never ever ever have enough pumpkin.


Folks, you have to make this cake this fall. It’s so soft and fluffy and pumpkiny and moist, and topped with my favorite cream cheese frosting, AKA THE BEST Cream Cheese Frosting. And since a cake this good deserves something pretty to garnish it, I added candied walnuts.
I don’t even like nuts usually, but these are soooooooo good. They’re crunchy, sugary, and so easy to make. You just need five minutes, a nonstick pan, and a little butter and sugar. The sugar melts and gets all gooey and caramelly and coats the walnuts in a crunchy candy shell when it cools. Served over the cake (or stolen by the handful), they are just fabulous.
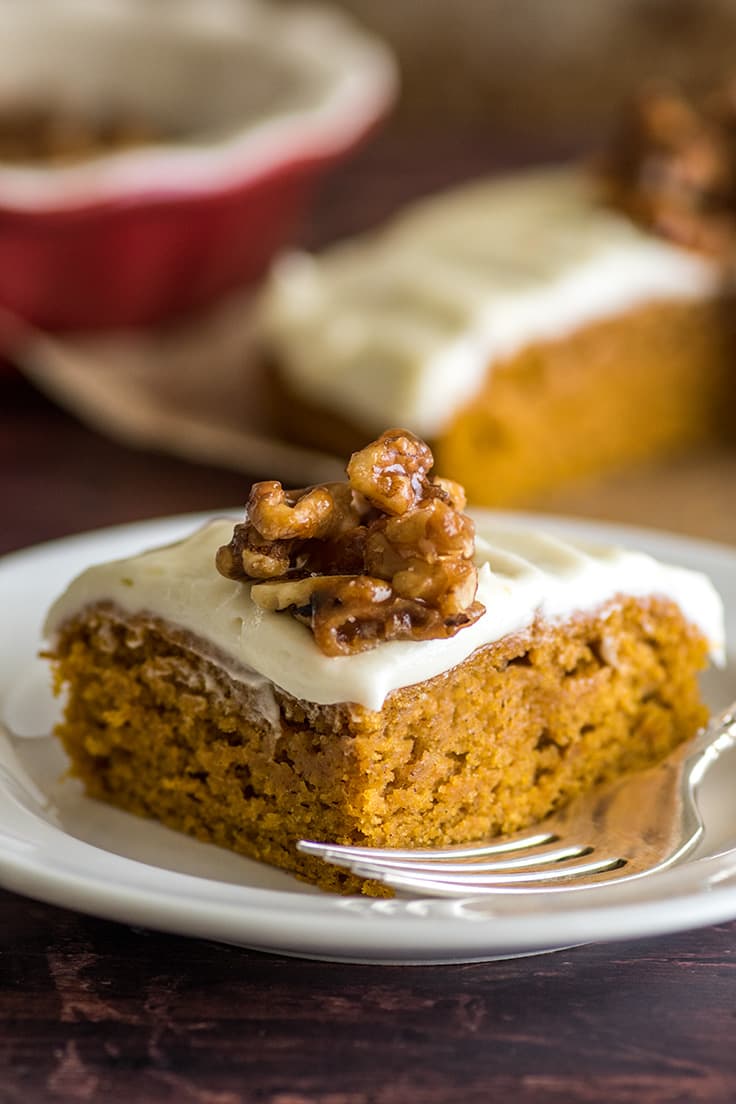

This Mini Pumpkin Cake is baked in a 7×5-inch dish ( rectangular 3-cup Pyrex containers are perfect for this) and will make four very generous servings or six smaller ones. If you’re looking for a great-tasting low-stress fall dessert, I can’t recommend this cake enough.
It’s a cinch to throw together and can be on the table in about an hour, including the hands-off baking and cooling time. Plus, the candied walnuts on top fancy it up just enough that it looks like something that took 10 times the effort. And no one needs to know just how easy it actually was. 😉

More Fall Recipes
- Pumpkin Pancakes
- Dutch Apple Pie
- Pumpkin Spice Latte
- Homemade Pumpkin Pie Spice
- Pumpkin Snickerdoodles

Ingredients
Special Equipment
- ▢ 7x5-inch baking dish
Pumpkin Cake
- ▢ 1/2 cup ( 60g ) all-purpose flour
- ▢ 1/2 teaspoon baking powder
- ▢ 1/4 teaspoon baking soda
- ▢ 1/2 teaspoon ground cinnamon
- ▢ 1/4 teaspoon salt
- ▢ 1 large egg
- ▢ 1/3 cup ( 66g ) granulated sugar
- ▢ 1/4 cup vegetable oil
- ▢ 1/3 cup + 2 tablespoons ( 111g ) canned pumpkin puree
Candied Walnuts
- ▢ 1 cup walnut halves or pieces
- ▢ 1 tablespoon ( 1/2oz ) butter if using unsalted, add a pinch of salt
- ▢ 1/4 cup ( 50g ) granulated sugar
Cream Cheese Frosting
- ▢ 2 ounces cream cheese softened
- ▢ 4 tablespoons ( 2oz ) unsalted butter softened
- ▢ 1/4 teaspoon vanilla extract
- ▢ 2/3 cup ( 80g ) powdered sugar sifted
- ▢ Pinch of salt
Instructions
Pumpkin Cake
- Preheat your oven to 350°F. Lightly grease a 7x5-inch baking dish and line with parchment paper*.
- In a small bowl, whisk together flour, baking powder, baking soda, cinnamon, and salt.
- In a medium bowl, whisk together egg, sugar, vegetable oil, and pumpkin puree until very smooth. Whisk in flour mixture. Pour batter into prepared baking dish and bake for 20 to 25 minutes, until a toothpick inserted into the center of the cake comes out with just a few wet crumbs and when gently pressed, the top of the cake springs back.
- Cool completely before frosting.
Candied Walnuts
- While your cake is cooling, make the candied walnuts. Place a sheet of parchment paper on the counter along with an extra spatula or fork (you’ll need it to separate the nuts later).
- Heat a medium non-stick skillet over medium heat. Add walnuts, butter, and sugar. Cook for 3 to 5 minutes, stirring often (don’t leave unattended), until sugar is completely melted and a light amber and nuts are coated. Turn out walnuts on to prepared parchment paper, scraping all the sugar out onto the nuts. Use the two spatulas to separate the nuts into a single layer, scraping the cooling sugar on to them as you go. Be VERY careful with the hot sugar so you don’t burn yourself!
- Allow to cool for 5 to 10 minutes and then break the nuts apart.
Cream Cheese Frosting
- In a medium bowl, combine softened cream cheese, butter, and vanilla, and beat until light and fluffy. Add powdered sugar and salt and beat until well-combined.
- Spread over cooled cake and pile cooled candied walnuts on top.
- Enjoy!
Notes
Cake adapted from AllRecipes Candied Walnuts adapted from Natasha’s Kitchen
Making Tri-tip in the oven is SO easy and delicious and a total crowd-pleaser.
Sometimes when I’m developing recipes, I have to do quite a bit of testing so I end up eating A LOT of that recipe (remember all those test batches of Freezer Meatballs ? I’m still happily eating my way through them).
This was another recipe I tested a bunch before making it for the site, and despite the fact that I’ve eaten more tri-tip in the last two months than I have in the last two years, it’s so good that I’m already thinking about making it again this weekend.
Tri-tip is one of those cuts of meat that is usually prepared on the BBQ, but as I’ve said before, I’m not much of a grill master. Most of my life I’ve made tri-tip in the slow cooker , and it’s pretty killer that way, especially for BBQ sandwiches, but recently, I’ve been enjoying making tri-tip in the oven, because It. Is. Amazing.
Starting tri-tip on the stove and finishing it in the oven, you get super moist and flavorful meat and that gorgeous, crispy charred exterior, all without having to step foot outside or get near a BBQ.
Seriously, as soon as you cut into the roast, you will want to start grabbing pieces to eat. I don’t usually eat while I’m shooting photos, but I’m not going to lie, I totally stopped for a snack halfway through this shoot. 😉
I grew up eating tri-tip, but when I was writing my last tri-tip recipe post, I learned that it’s actually not such a popular cut of meat around the world. So if you’re reading this going what the heck is tri-tip?, read on.
What is Tri-tip?
Tri-tip is a 1.5 to 2.5-pound, triangular-shaped cut of meat that comes from the bottom of the sirloin. It’s most popular in California and on the West Coast, but it is growing in popularity around the country.
You might find it under alternate names like “The California Cut” or “Bottom Sirloin Tip” or “Triangle Roast” (why so many names for tri-tip??).
One tri-tip will serve 4 to 6 people depending on its size and the appetite of your guests, and because of its shape, is great if you are feeding people who like different levels of doneness in their meat because the thinner end will cook quicker than the center.
Untrimmed vs Trimmed Tri-tip
Tri-tip is sold as either untrimmed or trimmed. Untrimmed tri-tip has a nice layer of fat on one side (sometimes both sides). Trimmed tri-tip will have this removed.
I like trimmed tri-tip roasts when I am cooking them in the slow cooker, but for roasting, I prefer untrimmed as the fat helps keep the meat nice and moist.
On rare occasions, I will get a tri-tip that is untrimmed on both sides. If that happens to you, you’ll want to trim one side. One side of the tri-tip will have a thick, pretty even fat cap. That’s the side you want to keep. The other side will be irregular with some muscle showing through. That’s the side you’ll want to trim.
Just use a very sharp knife to slice off the fat and any silver skin (the thin bluish, silvery membrane that sticks tightly to the meat). It doesn’t have to be pretty! You can see the hack job I did on my tri-tip below.) 🙂
Okay, with that little tri-tip lesson out of the way, are you ready to see how easy it is to cook in the oven? (Scroll all the way down for the full recipe.)
How to cook tri-tip in the oven:
- Rub tri-tip with your favorite seasoning salt.
- Heat oil in an oven-safe pan and sear the tri-tip, fat-side down.
- Flip tri-tip and pop it in the oven.
- Bake for 10 to 15 minutes per pound.
- Allow roast to rest for 10 minutes, and done!
How easy is that? This has seriously become one of my go-to dinners for nights I know I’m going to be tired and not want to cook, because even though there are 20 to 40 minutes of oven time, the effort is minimal and the results are sooooooo good.
The meat is fabulous if you want to build a tri-tip sandwich, but usually, I eat it exactly as is, maybe with a little macaroni salad , broccoli , or green beans as a side.
Tri-tip Recipe Notes
- If cooking more than one tri-tip roast at a time, just make sure they’re not touching in the oven pan so there’s plenty of room for air to circulate. Cook for the recommended time based off the smallest roast. You may have to pull one roast out sooner than the other, and cooking time will probably be slightly longer, particularly if roasts are crowded together or you have to open the oven multiple times to check temperatures.
- Looking for more meaty main dishes? Try (my favorite) Crispy Carnitas and Country-style Ribs .

Ingredients
Special Equipment
- ▢ Large oven-safe skillet
- ▢ Instant-read thermometer
Tri-tip
- ▢ 1 untrimmed tri-tip*
- ▢ 2 tablespoons olive oil
- ▢ Seasoning salt*
Instructions
- Preheat your oven to 425°F.
- Trim any silver skin from the bottom of the tri-tip and sprinkle the entire thing with seasoning salt, gently rubbing it into the surface.
- On the stove, heat olive oil over medium-high heat in a large oven-safe skillet. Once oil is hot place tri-tip, fat-side down, in the pan. Cook for 4 minutes, or until well-seared. Flip meat and place pan in the oven.
- Roast for 10 to 15 minutes per pound (start checking the internal temp at about 20 minutes for a medium-sized roast). Cook until internal temperature in the thickest part of the meat reads 135°F for medium-rare to 145° for medium (the roast in the photos was pulled at 145°F). Tent with foil to keep warm and allow meat to rest for 10 minutes before slicing.
- Slice roast against the grain by cutting it in half at the center point and then across the grain on each end and enjoy!
Notes
Recipe Adapted from The New York Times

Tri-tip in the Oven
Ingredients
Special Equipment
- Large oven-safe skillet
- Instant-read thermometer
Tri-tip
- 1 untrimmed tri-tip*
- 2 tablespoons olive oil
- Seasoning salt*
Instructions
- Preheat your oven to 425°F.
- Trim any silver skin from the bottom of the tri-tip and sprinkle the entire thing with seasoning salt, gently rubbing it into the surface.
- On the stove, heat olive oil over medium-high heat in a large oven-safe skillet. Once oil is hot place tri-tip, fat-side down, in the pan. Cook for 4 minutes, or until well-seared. Flip meat and place pan in the oven.
- Roast for 10 to 15 minutes per pound (start checking the internal temp at about 20 minutes for a medium-sized roast). Cook until internal temperature in the thickest part of the meat reads 135°F for medium-rare to 145° for medium (the roast in the photos was pulled at 145°F). Tent with foil to keep warm and allow meat to rest for 10 minutes before slicing.
- Slice roast against the grain by cutting it in half at the center point and then across the grain on each end and enjoy!
