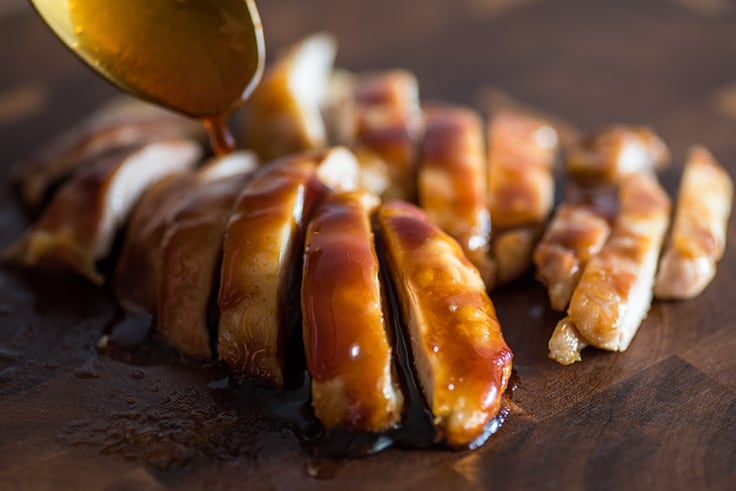
This thick and sweet homemade teriyaki sauce recipe is quick, foolproof, and so, so good.
Today I’m sharing a stand-alone recipe for my absolute favorite teriyaki sauce. If you’ve ever wanted to make your own teriyaki sauce at home or haven’t quite found your perfect recipe, give this one a try.
You can make it in about 15 minutes, and it’s perfect as a thick and sweet glaze or as a marinade.

What is teriyaki sauce?
Traditional teriyaki sauce is a mix of soy sauce, sugar, and sake and/or mirin. In Japanese, teriyaki actually refers not to the sauce, but to a cooking method where meat is broiled or grilled and brushed with or marinated in this mixture.
Thick and Sweet Teriyaki Sauce
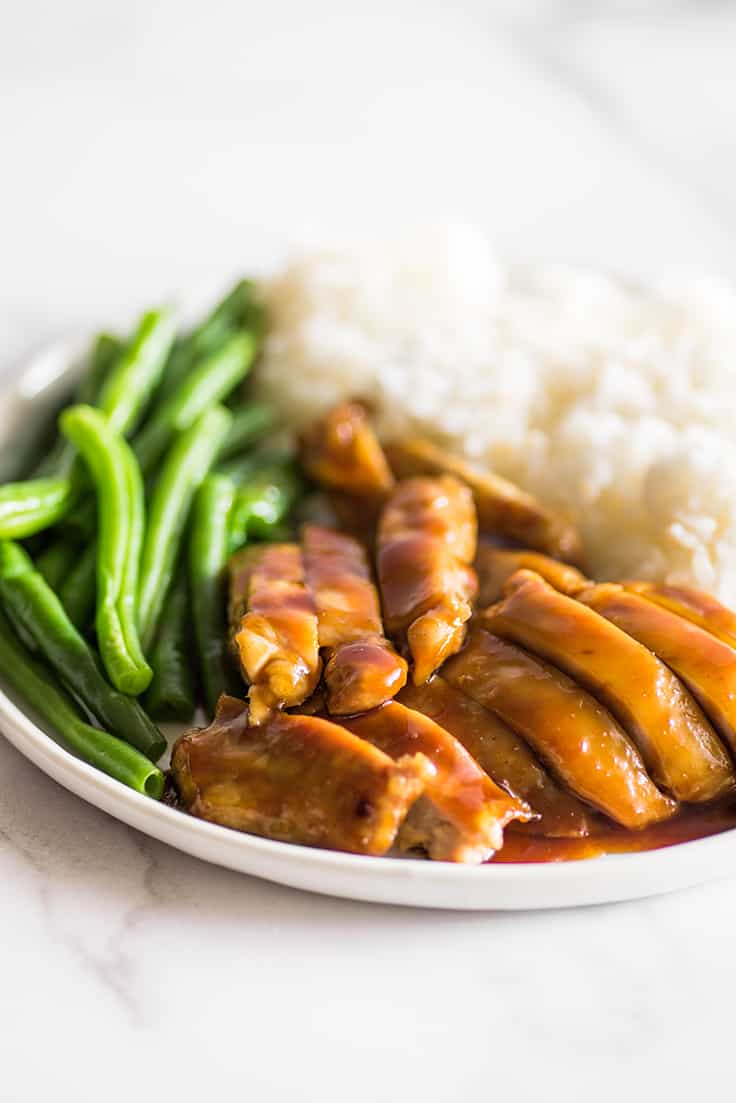
This teriyaki sauce is much thicker and syrupy than traditional teriyaki sauces (think the consistency of Panda Express teriyaki sauce). So while it’s not exactly authentic, it does create an absolutely amazing glaze over chicken and other meats and is thick enough to make an excellent dipping sauce.

Homemade Teriyaki Sauce Ingredients
This recipe calls for eight ingredients: soy sauce, mirin, rice wine vinegar, granulated and brown sugar, garlic powder, ground ginger, and cornstarch.
You probably already have most of these ingredients on hand, but unless you do a lot of Japanese cooking, you might not be familiar with mirin and rice wine vinegar.
- Mirin: Mirin is a slightly sweet Japanese wine and helps to give the sauce its tangy umami flavor. It’s readily available online , and (at least here in California) you can find it in the Asian section of your grocery store for less than $3 (it might be labeled Aji-mirin). In a pinch, you can use sherry or Marsala in its place or omit it completely, but if you can get your hands on some, use it. You won’t be sorry.
- Rice Wine Vinegar: Rice wine vinegar, AKA rice vinegar gives the sauce a little acidic bite. You should be able to find it with the other vinegars at your local grocery store ( or online ), but apple cider vinegar works well as a substitute. If you’d like to use white distilled vinegar, which has a harsher taste, cut the amount used in half.
How to Make Homemade Teriyaki Sauce
Once you’ve assembled your ingredients, you’ve done the most difficult part of this recipe. When it comes to actually making the sauce, you’re basically just stirring the ingredients together.
- First, you’ll whisk together a little water and cornstarch. Whisking your cornstarch with water before adding it to the rest of the ingredients will prevent cornstarch lumps from forming, and the mixture will help thicken the sauce.
- Then you’ll combine the cornstarch mixture and all the other ingredients in a medium pot and bring to a simmer. Heads up, keep a close eye on your sauce when it starts to steam. This sauce can boil over very quickly once it starts to simmer, so be ready to turn down the heat.
- Simmer, stirring occasionally, until sauce is thickened and syrupy. Depending on the size of the pot you’re using, this will take 5 to 10 minutes.
- Then let it cool slightly (it will thicken further as it cools) and use or store in an airtight container in the refrigerator.
Uses for Teriyaki Sauce
Some of my favorite uses for this Teriyaki Sauce are:
- Teriyaki Chicken (of course)
- Teriyaki Beef
- Dipping sauce for chicken strips
- Teriyaki Sliders
- Teriyaki Burgers
Is teriyaki sauce same as soy sauce?
No. Soy sauce is an ingredient in teriyaki sauce, but they have very different flavors and cannot be used interchangeably. Soy sauce is very salty and quite thin where this teriyaki sauce is sweet and syrupy.
Can I double this recipe?
Yes. This recipe will make 2/3 to 3/4 cup of sauce, which is usually perfect for a meal or two depending on how you’re using it. If you’d like to double or triple the recipe, simply extend the simmering time slightly as needed for the sauce to thicken.
To change the recipe yield, in the recipe card below, hover over the serving size or click if you’re on mobile, and slide the slider. No other cooking changes are needed.
How to Thicken Teriyaki Sauce
The easiest way to make teriyaki sauce thicker is with a cornstarch slurry (which this recipe uses). Whisk together 1 1/2 teaspoons cornstarch with 1 tablespoon water, and add the mixture to your sauce while it simmers.
Is there a difference between teriyaki marinade and teriyaki sauce?
Teriyaki marinades are often thinner than teriyaki sauce simply because there’s no need to take the time to thicken them. However, any teriyaki sauce can be used as a marinade. If your sauce seems a little too thick to easily coat the meat, simply whisk in a little water to thin it out.
Can I make this sauce ahead of time?
Yes. This sauce can be stored in an airtight container in the refrigerator for a couple of weeks.

Ingredients
- ▢ 1/3 cup soy sauce
- ▢ 1/4 cup water
- ▢ 2 tablespoons mirin or sherry or Marsala
- ▢ 1 tablespoon rice wine vinegar or apple cider vinegar
- ▢ 1/4 cup ( 50g ) granulated sugar
- ▢ 3 tablespoons ( 37g ) brown sugar
- ▢ 1/2 teaspoon garlic powder
- ▢ 1/2 teaspoon ground ginger
- ▢ 1 1/2 teaspoon cornstarch whisked with 1 tablespoon water
Instructions
- In a medium saucepan, over medium-high heat, combine all ingredients. Bring to a simmer, watching closely to make sure sauce does not begin to boil over.
- Once at a simmer, turn heat down to medium to keep it there. Simmer for 5 to 10 minutes, stirring occasionally, until thickened. (Sauce will thicken further as it cools.)
- Cool sauce slightly before using and enjoy.
Notes
Teriyaki Sauce Adapted From Food Network
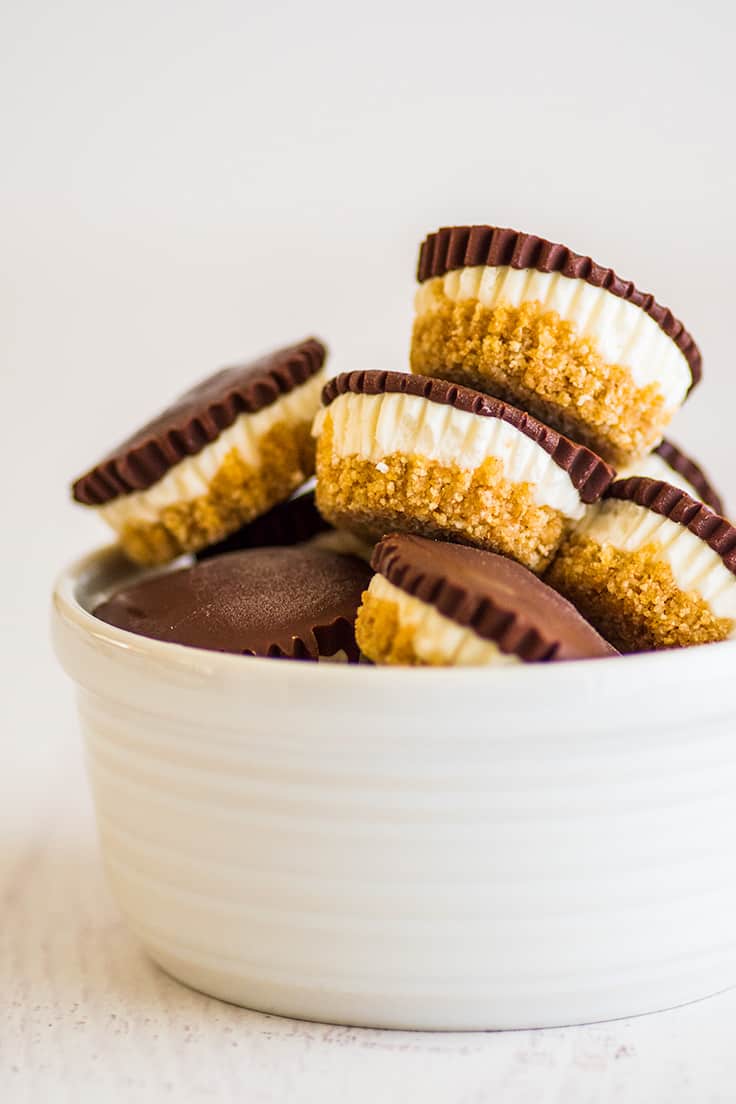
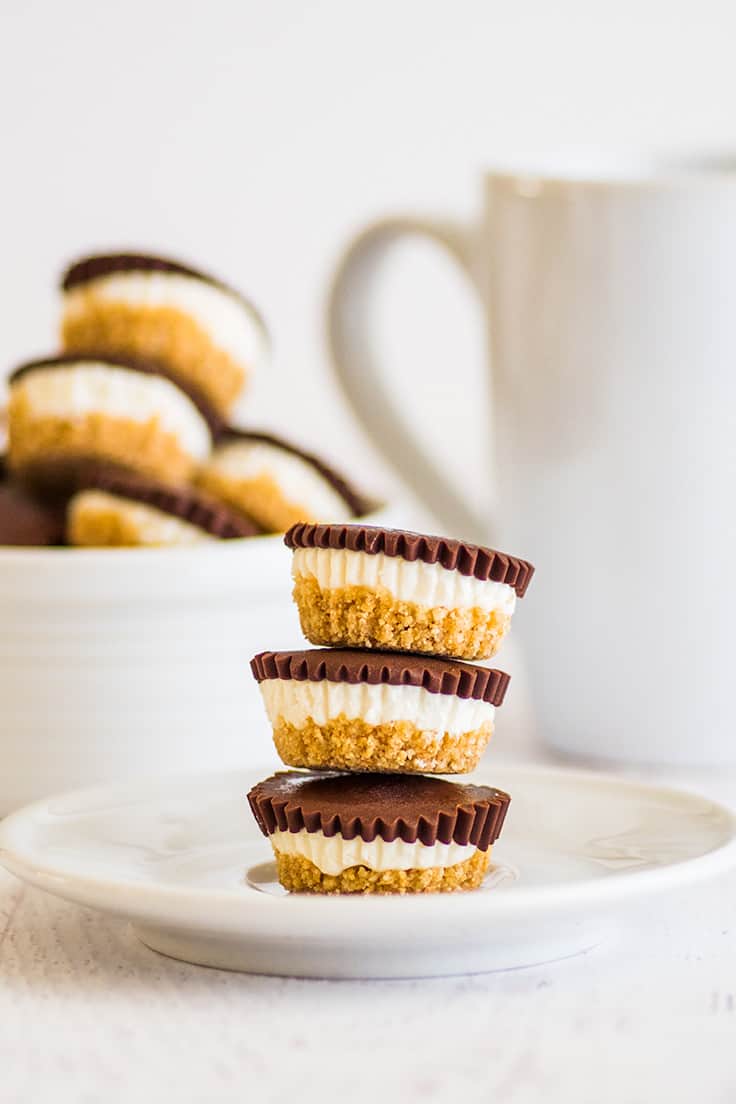
These No-bake Cheesecake Bites With Graham Cracker Crust are the perfect easy no-bake dessert.
Longtime Baking Mischief readers might remember a few summers ago when I got really excited about learning to make no-bake cheesecakes. All the deliciousness of baked cheesecake, a fraction of the time and effort, and no need to turn on your oven during the summer. What’s not to love?
I posted these amazing Oreo Cheesecakes Bites and these cute little No-bake Unicorn Cheesecakes , and you guys seemed to like them as much as I do because they’ve been pretty popular.
So I thought it was time to revisit no-bake cheesecakes with these supremely adorable and waaaaay too irresistible Cheesecake Bites With Graham Cracker Crusts.

Why You Should Make These Cheesecake Bites Today
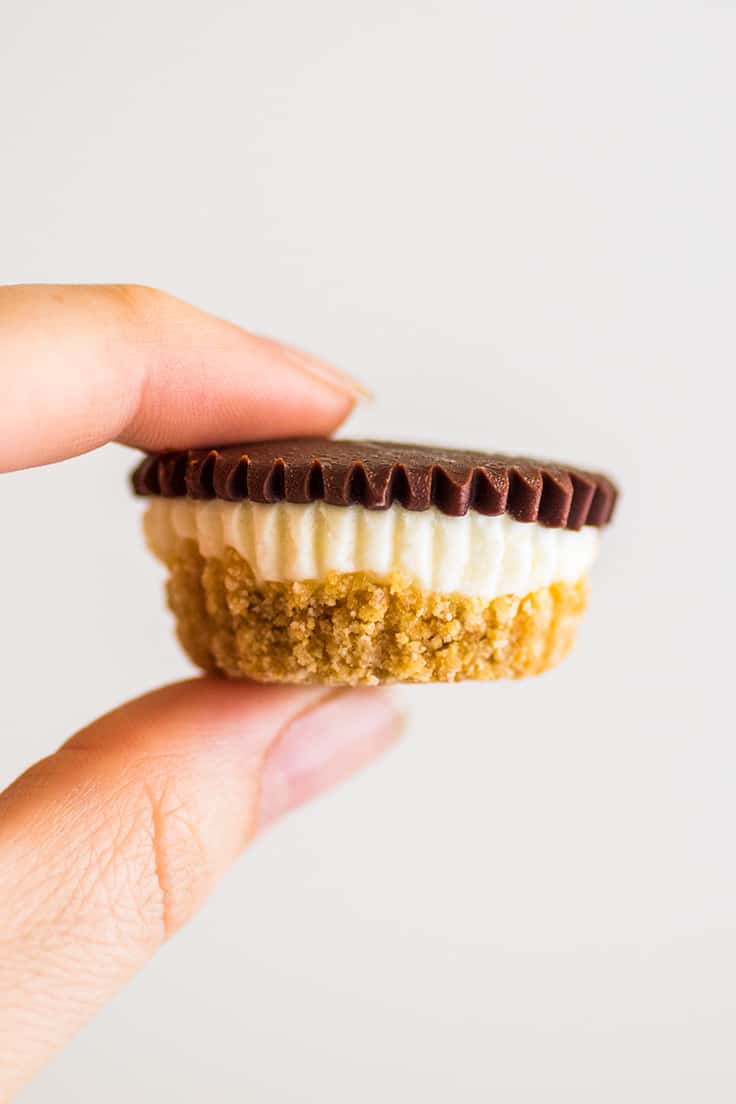
- They’re completely adorable. Seriously, how cute are these!!??
- Since these are no-bake, they’re basically fool-proof. No worrying about cracked cheesecakes or water baths with these bites. They’re simple and easy to throw together.
- They’re incredibly good. The chocolate has the most satisfying snap when you bite into it. The cheesecake layer is creamy and lightly sweet. And the graham cracker crust is crumbly, buttery, and totally the best part.
- They are the perfect freezer treat. Store them in your freezer and grab one whenever you need a little sweet pick me up.

Ingredient Notes
- Heavy cream: This recipe won’t use a full carton of heavy cream. For storage tips and recipes to use up the leftovers, check out my post What to do With Leftover Whipping Cream .
- Cream cheese: My go-to cream cheese brand for desserts is Philadelphia cream cheese . Make sure to allow enough time for your cream cheese to soften at room temperature. Cream cheese that’s too cold can leave cream cheese lumps in your cheesecake layer.
- Refined coconut oil: The chocolate layer calls for refined coconut oil. This makes the chocolate easier to work with and creates a nicer texture to bite into. You can use unrefined coconut oil if that’s what you have on hand, but your cheesecakes will also taste slightly of coconut. You can also substitute the same amount of vegetable oil.


How to Make Cheesecake Bites
To make these cheesecake bites, you’ll need four(ish) things, a mini muffin pan (see recipe notes if you want to make these in a standard muffin tin), mini muffin liners , a handheld electric mixer , and optional pastry bag for quicker cheesecake piping.
- Make the graham cracker crust: Stir together butter, graham cracker crumbs, and brown sugar. Press it firmly into lined mini muffin tins.
- Make the cheesecake layer: Whip heavy cream into stiff peaks. In a separate bowl, beat together cream cheese, sugar, and vanilla extract, and then fold the whipped cream into the cream cheese mixture. Use a piping bag to pipe the cheesecake mixture over the graham cracker crust.
- Make the chocolate topping: In a small bowl, stir together oil and chocolate and microwave until melted. Spoon chocolate over the cheesecakes.
- Freeze bites until frozen solid and enjoy!
What’s the best way to make graham cracker crumbs?
The quickest way to make graham cracker crumbs is to pulse the crackers in your food processor, but for this amount of crumbs, I prefer to just put the graham crackers in a plastic bag and use a rolling pin or meat mallet to crush the crackers into a fine crumb.
I don’t have a mini muffin pan. Can I make these in a regular muffin/cupcake tin?
Yes! This recipe will make about 4 mini cheesecakes in a cupcake pan.
Do I have to use cupcake liners in my mini muffin tin?
YES!! Unless you’re using a flexible silicone pan, absolutely do not try to make these without cupcake liners. You will have an impossible time trying to get them out of the pan.
If really want to make these right now and you don’t have liners, you can cut thin strips of parchment paper and cross them in an X under the crust layer so you can grab the strips and pop the cheesecakes out once they’re frozen.
But it’s kind of fiddly and a pain, so I recommend just ordering some liners or grabbing some from the store first.
Can I double this recipe?
Yes you can. This recipe can be scaled up with no preparation changes needed. To change the recipe yield, hover over the serving size in the recipe card below or click if you’re on mobile, and slide the slider.
No-bake Cheesecake Bites Recipe Notes
- If you don’t have heavy cream in your fridge, but you do have Cool Whip, you can cut the sugar in the cheesecake layer by half and replace the whipping cream with 2x the amount of Cool Whip.

More Frozen Treats
- Banana Milkshake
- Chocolate Pudding Pops ,
- Two-ingredient Cookies and Cream Popsicles
- Red Wine Popsicles
More Cream Cheese Recipes
- Easy Cheesecake
- No-bake Pumpkin Marshmallow Cheesecake

Ingredients
Special Equipment
- ▢ Mini muffin tin
- ▢ Mini muffin liners
- ▢ Handheld electric mixer
- ▢ Piping bag or disposable plastic bag optional*
Graham Cracker Crust
- ▢ 2 tablespoons ( 28g ) salted butter
- ▢ 1/2 cup graham cracker crumbs* 3 to 4 full graham cracker sheets
- ▢ 1 heaping tablespoon ( 16g ) brown sugar
Cheesecake Layer
- ▢ 3 tablespoons heavy cream
- ▢ 3 ounces cream cheese softened
- ▢ 2 heaping tablespoons ( 32g ) granulated sugar
- ▢ 1/2 teaspoon vanilla extract
Chocolate Topping
- ▢ 1/2 cup ( 3oz ) chopped semi-sweet chocolate (good quality chips are fine)
- ▢ 2 teaspoons refined coconut oil or vegetable oil
Instructions
- Line your mini muffin pan with 16 liners and clear enough space in your freezer to fit the pan.
- In a medium, microwave-safe bowl, melt butter. Stir in graham cracker crumbs and brown sugar until mixture begins to clump. Drop a heaping teaspoon of the crust into each of the prepared muffin cups. If there are leftover crumbs, distribute them between the cups (or eat them 😉 ). Use the top of a wooden spoon or bottom of a shot glass to firmly pack the crumbs into the cups.
- Pour heavy cream into a small bowl and use a handheld electric mixer, starting on low, working up to high to beat cream until stiff peaks form.
- In a medium bowl, combine softened cream cheese, sugar, and vanilla. Beat until well-mixed and fluffy.
- Fold whipped cream into cream cheese mixture until no streaks remain, being careful not to deflate the whipped cream as best you can. Transfer mixture to a piping bag or disposable plastic bag and snip off a corner of the bag. Use the bag to pipe the cheesecake mixture into the muffin cups, filling them about 3/4 of the way full and smoothing the top of each cheesecake as you go.
- Place cheesecakes in the freezer and freeze for 10 to 15 minutes, until just set.
- In a small, microwave-safe bowl, combine chocolate and coconut oil. Microwave for 30 seconds and stir until smooth. If necessary, microwave in 15-second increments until melted. Use a teaspoon to drop spoonfuls of chocolate over the cheesecakes until all the tops are covered and chocolate is gone.
- Freeze for 3 to 4 hours until completely solid. Remove cheesecakes from tray (leave wrappers on) and store in an airtight container or freezer bag in the freezer for up to a month.
- Enjoy!
Notes
One bowl, 5 minutes prep, and 8 ingredients are all you need to make these super quick, easy, and delicious small-batch brownies.
That’s right, I said brownies. (We’ll try fugu some other time, you crazy adrenaline junkies.)
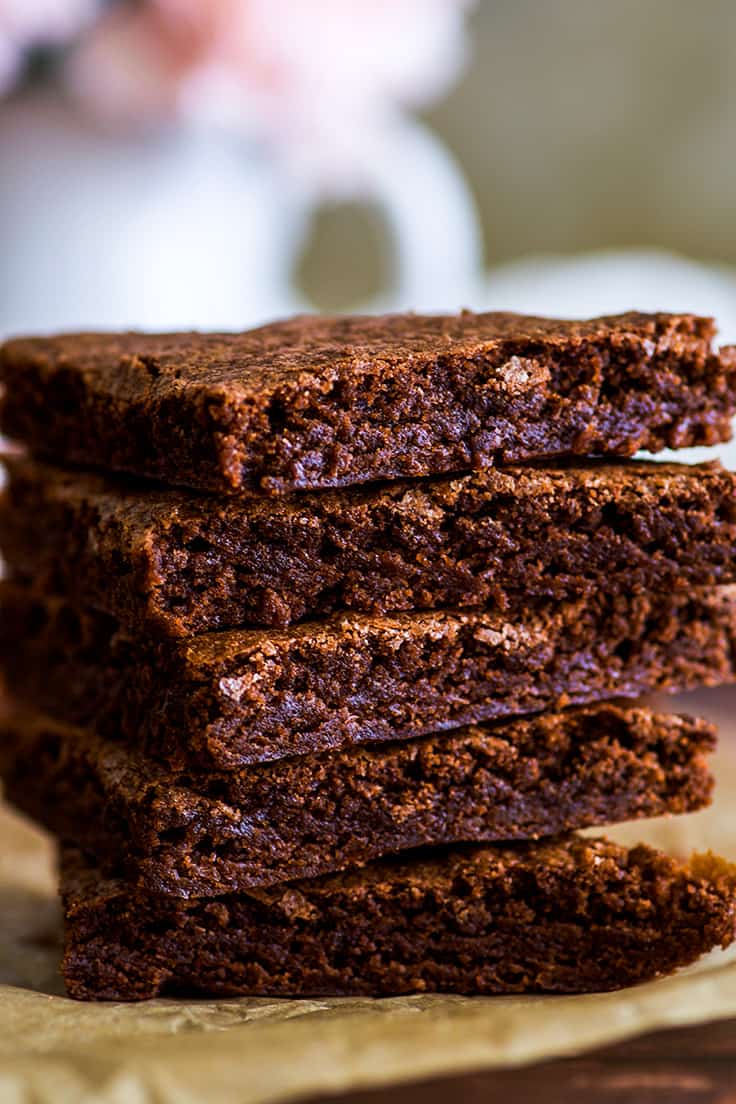
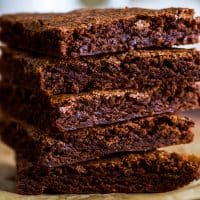
Why are these cute little triangles of chocolate goodness so dangerous? Because they are completely irresistible and way, way, WAY too easy to make.

Quick and Easy Small-batch Brownies
These are my current favorite brownies in all the world, dense and incredibly chocolatey, with lightly crispy edges and fudgy centers. (Depending on the level of fudginess you prefer, you can under-bake them for max brownie gooeyness, which is always an excellent option in my book.)
This small-batch brownie recipe makes just four to eight brownies depending on how you want to cut them, so you can go wild experimenting (or not!) knowing that you’re making just enough to indulge without over indulging.
Ingredient Notes
- Melted and slightly cooled salted butter: I call for salted butter here, but if you typically use unsalted butter, not a problem, just add 1/8 teaspoon table salt. After melting your butter, be sure to let it cool slightly so it’s no longer hot to the touch. Butter that’s too warm can scramble your eggs and leave little eggy bits in your brownies.
- Not a lot of all-purpose flour: Yes, this recipe really does call for just 1/4 cup of flour. It’s not a typo. I know it doesn’t seem like much, but for this recipe, it’s plenty. Your brownies will come out beautiful and perfect, I promise.
How to Make a Small-batch of Brownies
Start by greasing and lining a 9×5-inch loaf pan with parchment paper. I like to use a loaf pan and get thinner brownies because it makes me feel like I’m getting more brownie for my caloric buck, but if you don’t own a loaf pan, you can also bake them in a 7×5-inch baking dish and just extend the baking time a little.
In a medium bowl, mix butter, sugar, egg, and vanilla until well mixed.
Add flour, cocoa powder, baking powder, and salt, and stir until just combined.
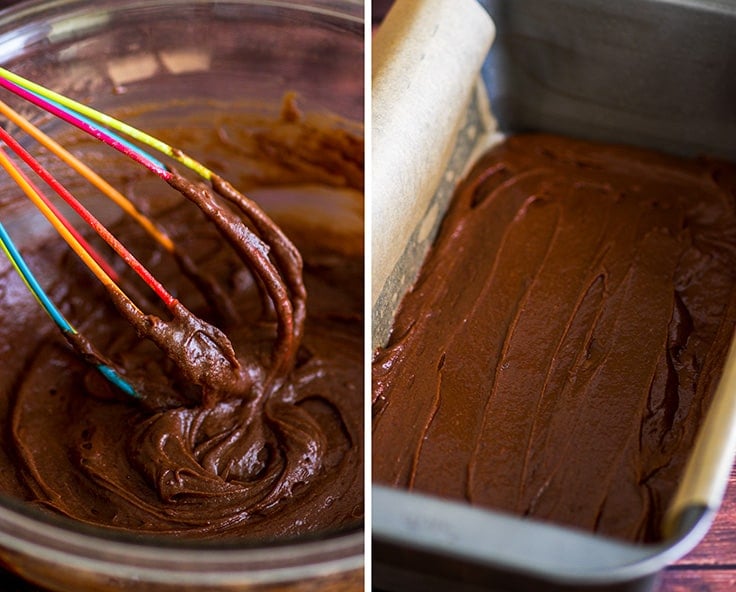

Transfer the mixture to your baking dish and bake until done.
Slice into squares or triangles and enjoy!!
Brownie Variations
And good as they are on their own, these brownies are also a perfect blank chocolate canvas to throw other things at.
- Frost (cooled) brownies with Chocolate Frosting, Vanilla Frosting , Cream Cheese Frosting , or maybe Oreo Frosting , and top with sprinkles.
- Add some peanut butter and make Peanut Butter Swirl Brownies .
- Top still-warm brownies with a scoop of ice cream and Chocolate Sauce , Caramel Sauce , Fudge Sauce or Peanut Butter Sauce and Whipped Cream to make a brownie ice cream sundae.
How to store brownies?
Store brownies in an airtight container at room temperature. They will stay fresh for 3 to 4 days.
Can I freeze these brownies?
Yes! Brownies freeze very well. Store them in the freezer in an airtight container or freezer bag for up two months. They can be eaten frozen right out of the freezer or set them on a plate at room temperature for 15 to 20 minutes before eating.
Can I double this recipe?
Yes. You can double this recipe and bake it in an 8×8-inch pan. Simply extend the baking time as needed (start checking on them at around 23 minutes). To change the recipe yield, hover over the serving size in the recipe card below or click if you’re on mobile, and slide the slider.
For a really large batch of brownies, check out my Frosted Brownies . It’s this same recipe but quadrupled and topped with a fabulous chocolate frosting.

More Small-batch Favorites
- Small Chocolate Cake
- Small-batch Vanilla Cupcakes
- Small-batch Chocolate Cupcakes
- Small-batch Peanut Butter Cookies
- Small-batch Sugar Cookies
Equipment
- 9x5-inch loaf pan
- Parchment paper, optional
Ingredients
- ▢ 1/4 cup ( 2oz ) salted butter melted and slightly cooled
- ▢ 1/2 cup ( 100g ) granulated sugar
- ▢ 1 large egg
- ▢ 1/2 teaspoon vanilla extract
- ▢ 1/4 cup ( 30g ) all-purpose flour
- ▢ 3 tablespoons ( 15g ) unsweetened cocoa powder sifted
- ▢ 1/8 teaspoon baking powder
- ▢ 1/8 teaspoon salt
Instructions
- Preheat your oven to 350°F. Lightly grease and line your loaf pan with parchment paper (if you don’t care about lifting the brownies out of the pan, you can skip the paper).
- In a medium bowl, combine slightly cooled melted butter and granulated sugar and whisk until well combined. Add egg and vanilla and mix well.
- Add flour, sifted cocoa powder, baking powder, and salt. Stir until just combined.
- Pour batter into prepared pan and smooth it out so it covers most of the bottom. Bake for 18 to 24 minutes, until a toothpick inserted into the center comes out with just a few moist crumbs. For fudgier brownies, bake for 16-20 minutes and pull them.
- Cool in the pan for at least 10 minutes before cutting. Enjoy!
Notes

Thick and Sweet Teriyaki Sauce
Ingredients
- 1/3 cup soy sauce
- 1/4 cup water
- 2 tablespoons mirin or sherry or Marsala
- 1 tablespoon rice wine vinegar or apple cider vinegar
- 1/4 cup ( 50g ) granulated sugar
- 3 tablespoons ( 37g ) brown sugar
- 1/2 teaspoon garlic powder
- 1/2 teaspoon ground ginger
- 1 1/2 teaspoon cornstarch whisked with 1 tablespoon water
Instructions
- In a medium saucepan, over medium-high heat, combine all ingredients. Bring to a simmer, watching closely to make sure sauce does not begin to boil over.
- Once at a simmer, turn heat down to medium to keep it there. Simmer for 5 to 10 minutes, stirring occasionally, until thickened. (Sauce will thicken further as it cools.)
- Cool sauce slightly before using and enjoy.
