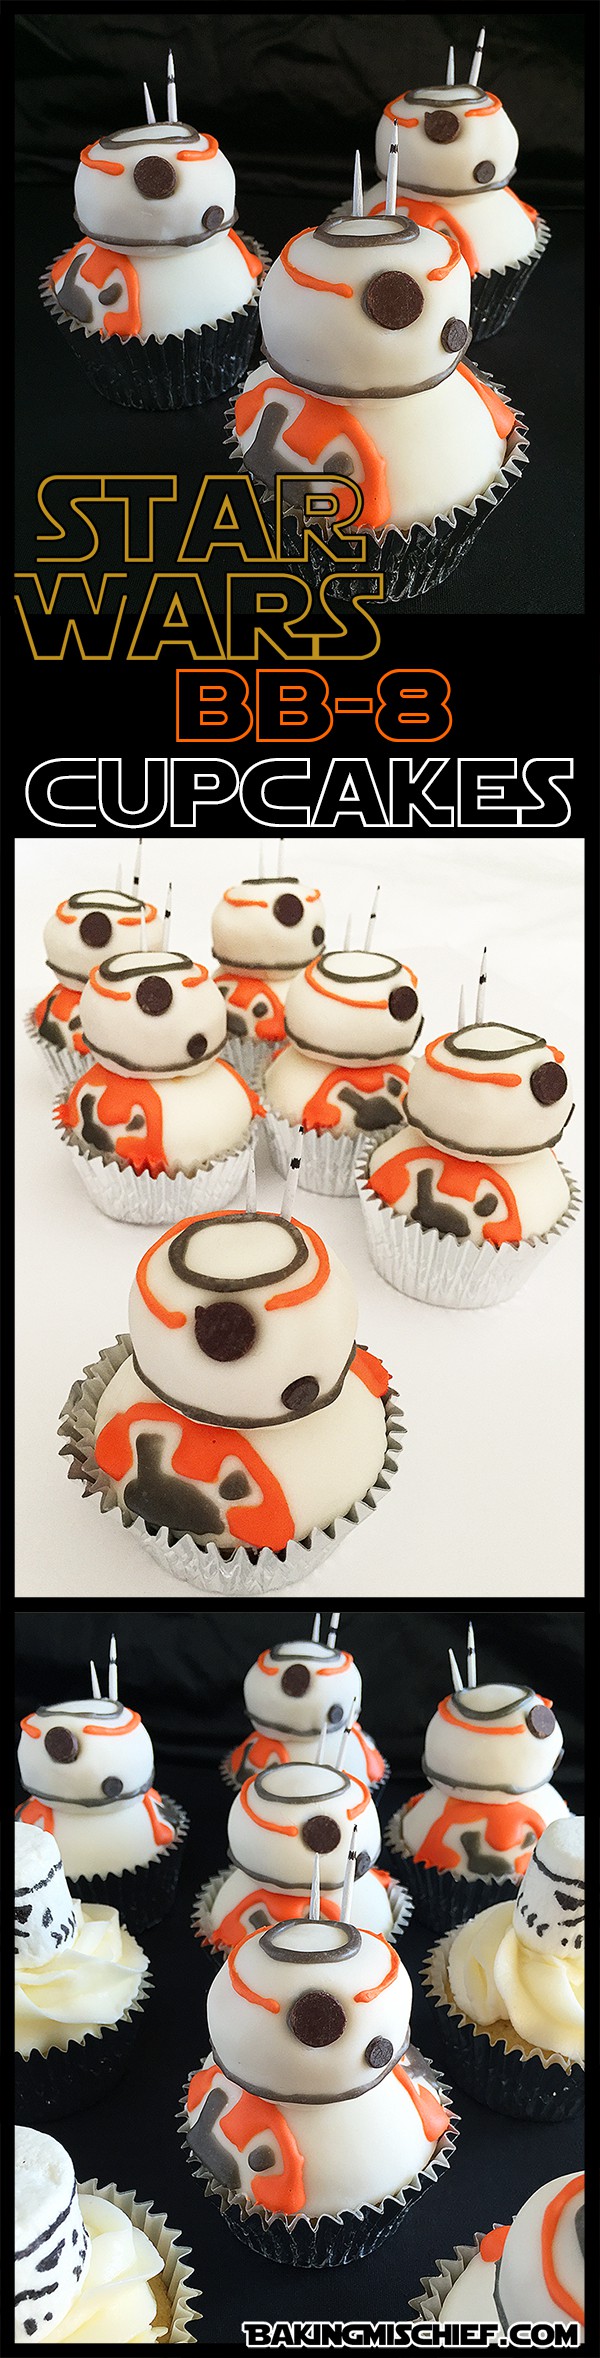
These are the droids you’re looking for! Adorable and easy(ish) Star Wars BB-8 cupcakes that anyone can make.

So, you probably haven’t heard, but there’s a new Star Wars movie coming out this month. I know, crazy. You’d think we’d have seen at least a little advertising. She says, trying to keep a straight face.
Are you excited? I’m excited.
I went through a massive Star Wars phase growing up. My first crush was Han Solo, I had a Star Wars -themed tenth-birthday party. I thought the third movie was the most romantic thing ever. I was a weird kid.
As an adult, I was sure my love for space operas had waned in the years in between, and then that full-length Star Wars: The Force Awakens trailer dropped and ten-year-old fangirl Tracy came roaring back to life.
There was space friendship, grown up Leia and Han, and the cutest droid you ever did see, and I lost my mind a little. Let’s just say, my tickets are bought, and my butt will be in a theater seat come opening weekend.
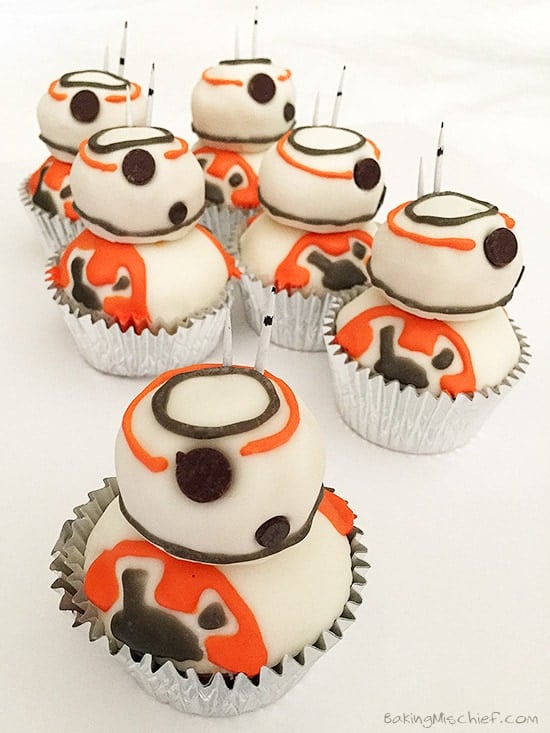

So, in honor of my very first fandom, I wanted to do something Star Wars -themed for the blog. BB-8 seemed the perfect candidate, given that she is the break-out star of the trailers (and that she is mercifully free of all the angles and fur of the other characters). She was basically just begging to be turned into a cupcake!
This was such a fun project. I’ve only worked with fondant once before and that was to sculpt Smauglock for a gingerbread house a couple of years ago (more on that another time). I wasn’t sure how covering the cupcakes and decorating them would go, but it ended up being super easy. If I can do it, anyone can make these cupcakes!

These BB-8 cupcakes can be as homemade as you want. I made my fondant, royal icing, and cupcakes, but you can also buy everything to save time. I’ve actually seen fondant at my local Vons lately, so you might be able to get everything in one trip to your grocery store.

Ingredients
- ▢ 12 cupcakes in white or silver liners - I used a double batch of Martha Stewart’s Vanilla Cupcakes
- ▢ 12 mini cupcakes - See above
- ▢ 24 ounces white frosting - I used Savory Sweet Life’s Buttercream Frosting
- ▢ 16 ounces fondant - I used The Bearfoot Baker’s Easy Fondant
- ▢ Corn starch for dusting powdered sugar will also work in a pinch
- ▢ inch 3-inch biscuit cutter or glass
- ▢ 12 chocolate chips
- ▢ 12 mini chocolate chips
- ▢ Royal icing in orange and silver/grey - I used Cake Wiz’s Royal Icing
- ▢ A piping bag w/ small tip
- ▢ 12 white toothpicks cut in half and black tips colored on in sharpie
Instructions
Prep
- If your mini cupcakes baked up so tall that they look too large for your bases, cut a bit off their bottoms, until they look appropriately head-sized. Set aside and make sure your work surface is crumb-free before you roll out your fondant.
- Sprinkle your work surface with a bit of corn starch and knead the fondant until it is pliable and easy to work with. If you are using marshmallow fondant, a quick 5-10 seconds in the microwave can help speed things along. Just be careful. If left in too long, it will be HOT.
Covering the Cupcakes
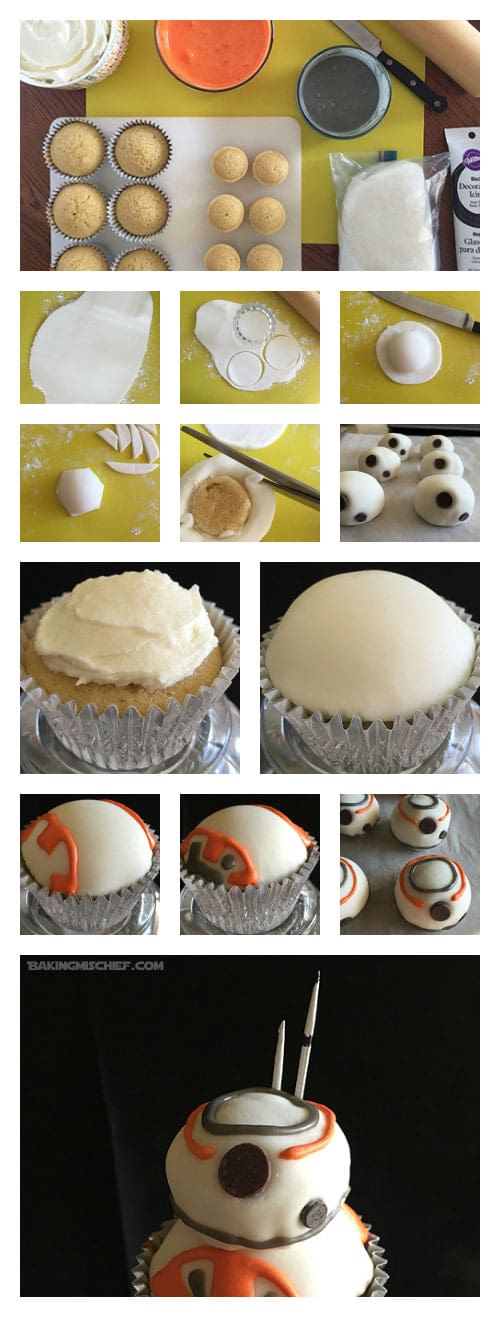
- Start with the heads. Because my fondant was a little dry, I rolled, cut and attached the fondant to the mini cupcakes a couple at a time. If your fondant is holding up well, go ahead and cut out all twelve at once. When your fondant is not in use, make sure to keep it in an air-tight container.
- Roll out fondant slightly thinner than 1/8 inch thick and cut out your three-inch disks. Take the mini cupcakes one at a time, frost the entire thing (sides includelightly and lay a fondant disk over it. Carefully, smooth it down so there are no folds or bubbles. Cut the excess, leaving a little space around the edges and then pick up the covered mini cupcake and, using scissors, trim the rest of the excess.
- Press a chocolate chip into the top half of the head for the eye and a mini chocolate chip to the lower right. Use a little bit of royal icing in the socket to secure them. Complete the rest of the heads and set aside.
- Roll the remaining fondant to 1/8-inch thickness and cut into 12 three-inch rounds.
- Spread frosting on top of each large cupcake. Your layer can be as thick or as thin as you’d like it, but make sure not to put a heavy coat around the edges or the frosting may squeeze out. Cover frosting with the fondant and smooth. If your cupcakes don’t have a huge dome on them and your fondant is too large, just cut it down with clean scissors (alternatively, you could just pile more frosting underneath to fill up the extra space). Finish all of the cupcakes and set aside.
Decorating
- Using a piping bag and a small tip, pipe the orange designs on the base and head. I found it helpful to use a toothpick in the head and spin it as I piped the lines. You can get as complex as you’d like.
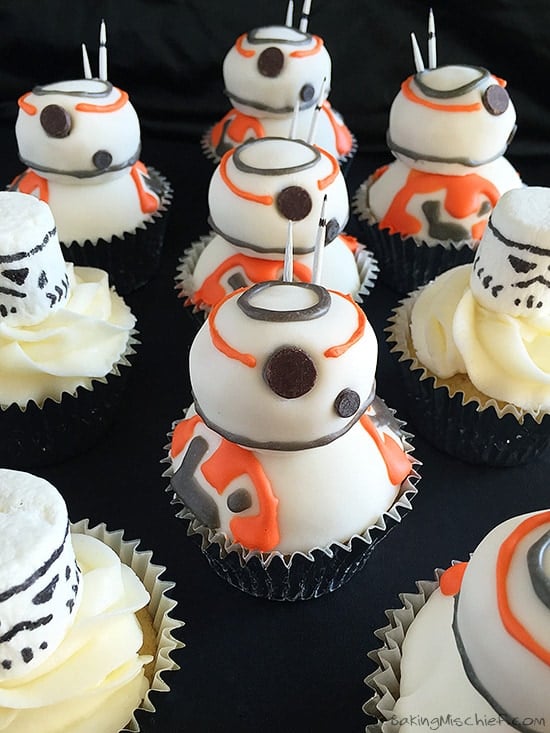
- Switch to silver and pipe the insides of the gears and finish the head. Insert the toothpicks/antennae into the heads and let sit until the icing is dry (it won’t take long). Dab a little frosting or royal icing where you want to attach the head. Place the head on the body and you are done!
Notes


Looking for moreStar WarsTreats?


Check out my Poe’s Jacket Star Wars Cookies with Printable Stickers!
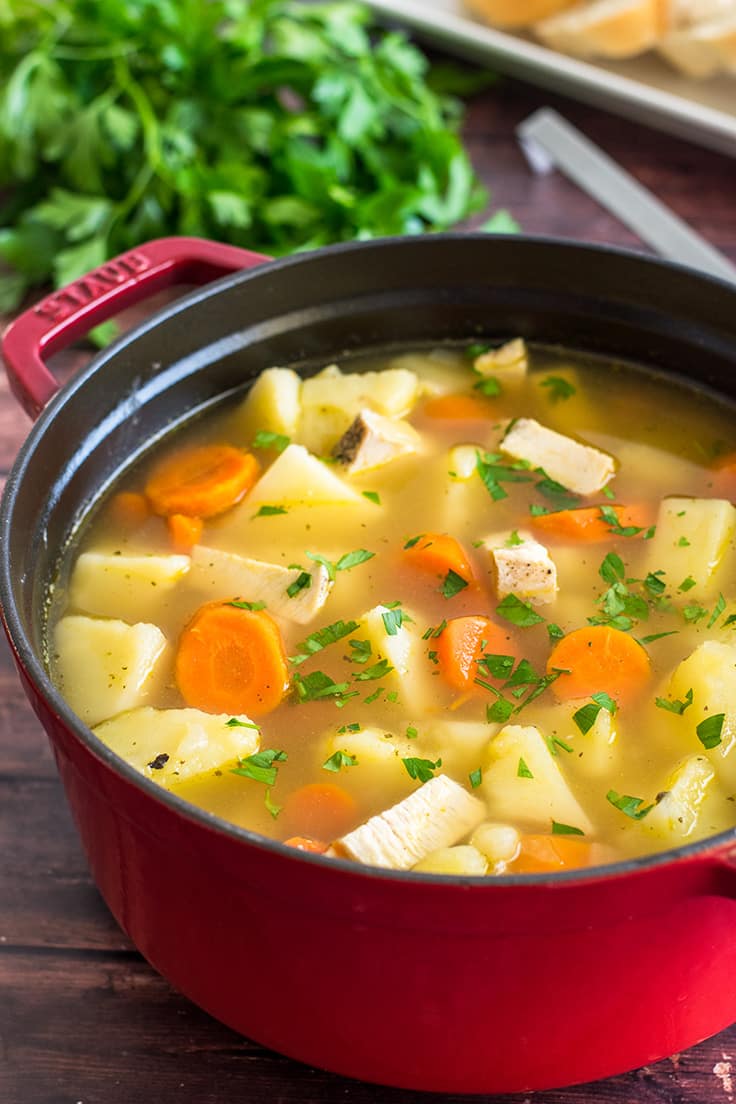
This homemade Chicken Peasant Soup is easy, fast, and delicious!

This post has been updated. Don’t worry. You’re in the right place. 😉
When I was a poor, frazzled college student living on fast food and Lean Cuisines, I had a standing Thursday-TV-and-dinner night with a couple of friends. We’d get together once a week, watch the NBC comedy block over takeout, and decompress from all the stresses of college life.
One of those cold, Pacific Northwest evenings, that week’s host suggested we try our hand at cooking our dinner instead of ordering it and showed us a chicken peasant soup recipe she had printed out from the internet.
At the time, I thought that good from-scratch soup required long hours on the stove and complicated ingredient lists. This recipe only cooked for 20 minutes! It had one spice! It had to be too simple to be any good. I wasn’t very enthusiastic, but we eventually agreed to try to make the soup, and if it wasn’t delicious, we’d order a pizza.

We made the soup. We did not order pizza.
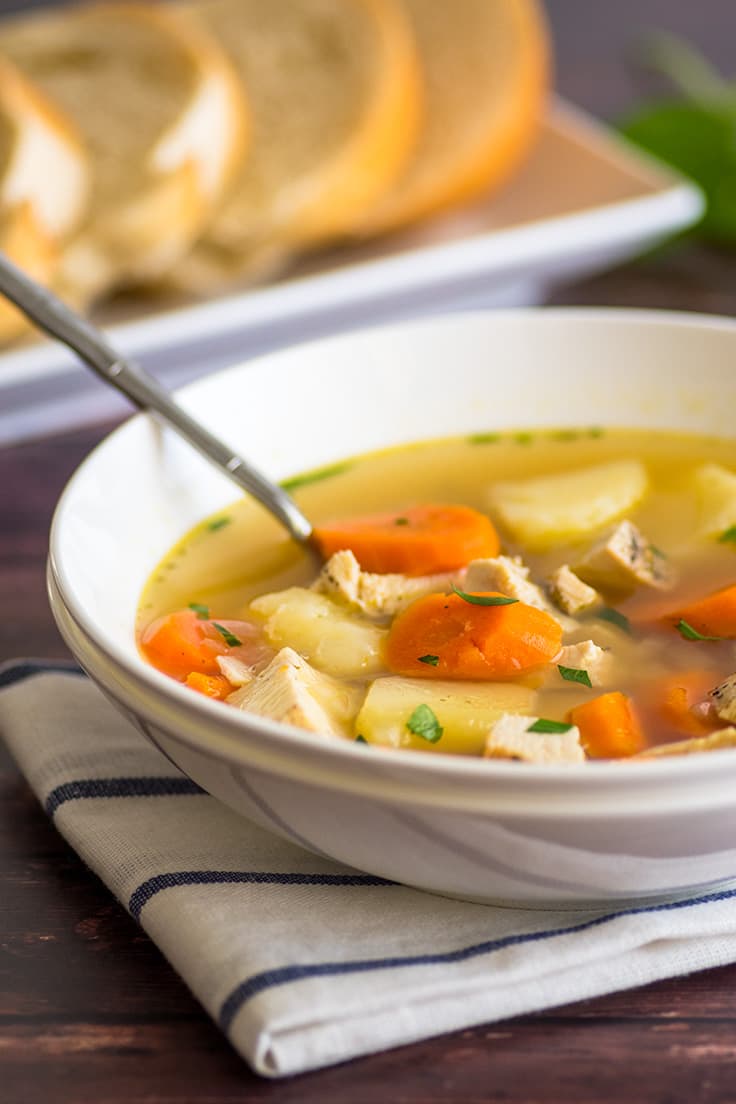
The soup turned out to be light, but full of flavor, the simplicity of the ingredients letting the taste of the garlic and chicken really come through. I happily admitted my mistake whilst scarfing down a bowl of the stuff.
Years later, I’ve lost touch with these friends. None of those NBC shows are still on the air. But I still make our soup. Like me, the recipe has changed a bit, but not too much. I make it often during this time of year and every time I do, it reminds me of rainy evenings, a time when NBC’s lineup was must-see TV, and cooking with friends.
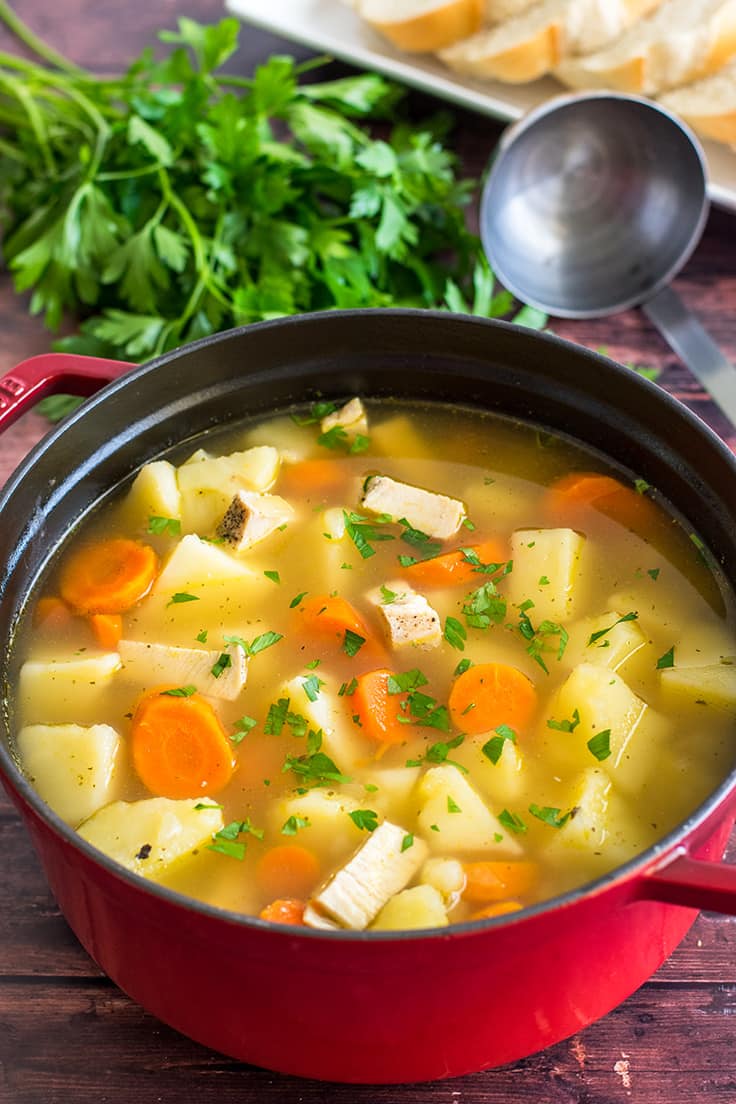

This recipe is quick, easy, and delicious. It’s simple enough to whip up for lunch, but the potatoes give it bulk so it’s a great, healthy option for a busy weeknight. I usually serve it with a some Cream Biscuits or my favorite Cheddar Cheese Scones .
More Easy Soup Recipes
- Ham and Potato Soup
- Broccoli Chowder
- Creamy Chicken Noodle Soup
- Chicken Carcass Soup
- Chicken Parm Soup

Ingredients
- ▢ 1 pound (about 2 small) boneless skinless chicken breasts cubed
- ▢ 1 small onion diced
- ▢ 4 medium red potatoes cubed
- ▢ 4 medium carrots peeled and sliced
- ▢ 2 cloves garlic minced
- ▢ 4 cups chicken broth
- ▢ 1/2 teaspoon oregano
- ▢ 1/4 teaspoon thyme
- ▢ 1 bay leaf optional
- ▢ Salt and pepper
Instructions
- Coat a large saucepan with cooking spray or a little bit of oil and heat over medium-high heat. Salt and pepper chicken and cook until well-browned.
- Add the rest of your ingredients to the pot and bring to a boil.
- Lower to medium heat and simmer for 20 to 25 minutes, until the vegetables are fork tender. Salt and pepper to taste. Remove the bay leaf, serve, and enjoy!
Notes
Nutritional Information Adapted From Taste of Home
Original Chicken Peasant Soup Photography Circa 2015


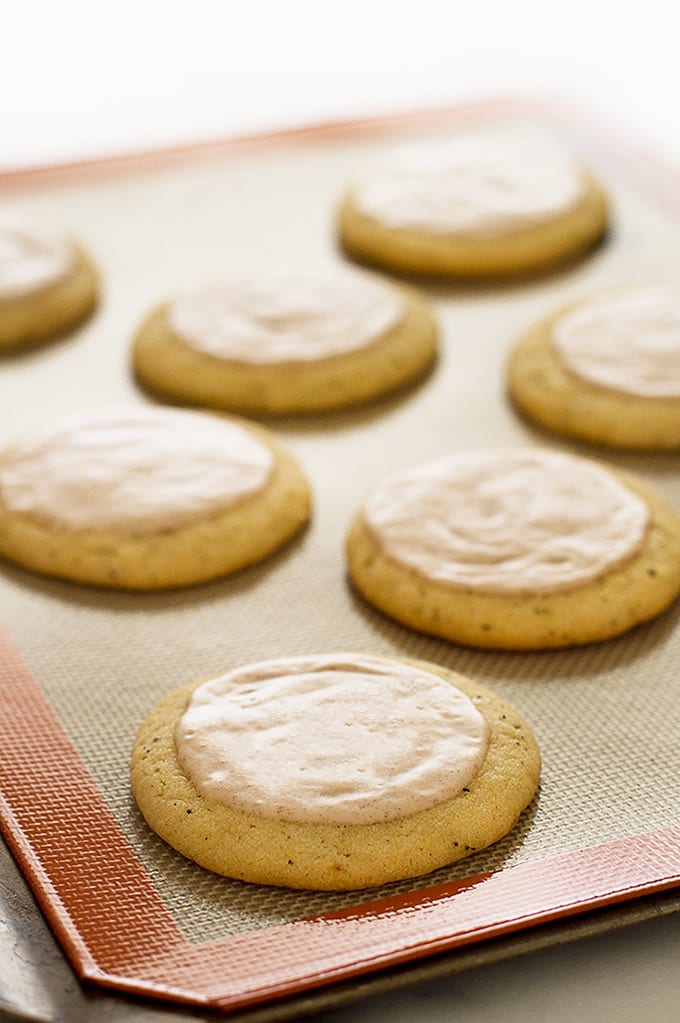
Chai sugar cookies with eggnog glaze might just be the perfect Christmas cookie.
(11/5/16 Update) Hey all, this post is one of the very earliest posts on Baking Mischief, so I gave it a little face lift. I updated the photos, cleaned up the text, and edited the recipe for clarity. I also upped the amount of eggnog glaze on the chai sugar cookies by 50 percent, because I always felt it got a little thin by the time you finished decorating. This means the calories have also been adjusted.
I did leave one older photo for posterity, so if you’d like a little blast from iPhone Christmas past, scroll all the way to the bottom of the post. 🙂

Do you have a favorite Christmas cookie, like Hot Chocolate Cookies maybe or Butterscotch Shortbread Thumbprints perhaps? To be honest, growing up, I never did. Then last year I was made aware of these chai sugar cookies by a certain someone, maybe you’ve heard of her, just my imaginary BFF, Taylor Swift.
T-Swifty (in my imagination, we have affectionate nicknames for each other) has given me many things over the years: some great music, a few really entertaining memes, the disturbingly strong desire to wear adorable, retro, belly-button-covering bikinis–some of those gifts were better than others.
But last year, with a single Tumblr post , Taylor gave me the greatest gift one could ever hope to receive from a pop star: the recipe for the perfect Christmas cookie.
Guys, snickerdoodles are a classic (even better if you make them snickerdoodle sandwich cookies and throw in some eggnog buttercream), the store-bought sugar cookies we all decorated as kids are evergreen, but chai sugar cookies with eggnog icing? These things are a Christmas party in your mouth.
The cookies themselves are just a little bit crunchy and the chai is the perfect complement to the eggnog glaze that’s just waiting there to remind you, hey, it’s Christmas .
So thank you, Taylor. I may hate the way the lob you helped inspire me to cut my hair into this summer is growing out, but we will always have our perfect Christmas cookie.

Chai Sugar Cookie Recipe Notes
- This recipe calls for a chai tea packet to be added directly to your cookie batter. Make sure you are using one with fairly finely chopped fragments (you don’t want giant crunchy bits in your cookies!). I’ve used both Tazo * and Twinings (their decaff is my chai of choice) brands with great success.
- These cookies SPREAD when baked. You can fit them on two cookie sheets, but the edges will end up touching. If you want perfectly round cookies for gifting or serving to guests, bake them in 3 batches.

Ingredients
Cookies
- ▢ 1/2 cup ( 4 oz) unsalted butter room temperature
- ▢ 1/2 cup vegetable oil
- ▢ 1/2 cup ( 100 g) granulated sugar
- ▢ 1/2 cup ( 60 g) powdered sugar
- ▢ 1 large egg
- ▢ 2 teaspoons vanilla extract
- ▢ 1 chai tea packet cut open*
- ▢ 2 cups ( 280 g) all-purpose flour
- ▢ 1/2 teaspoon baking soda
- ▢ 1/4 teaspoon salt
Glaze
- ▢ 1 1/2 cup ( 180 g) powdered sugar sifted
- ▢ 1/4 heaping teaspoon nutmeg
- ▢ 1/4 heaping teaspoon cinnamon
- ▢ 3 tablespoons eggnog or milk
Instructions
Cookies
- Using a stand mixer, beat butter until creamed. Add the oil and mix on medium for about thirty seconds. Scrape sides and bottom of the bowl and add the granulated sugar, powdered sugar, egg, vanilla, and the contents of the chai tea packet. Mix on medium until everything is incorporated.
- On low, mix in flour, baking soda, and salt until just combined.
- Refrigerate dough for about 1 hour until firm enough to handle.
- Preheat your oven to 350 degrees F. Line 3 baking sheets with parchment paper or grease well.
- Scoop heaping tablespoons of dough (just over 1 ounce) onto your cookie sheet, 8 to a sheet (these cookies spread!). With the palm of your hand, flatten dough until it is 1/4-inch thick. For more uniform-looking cookies, roll your dough into balls before you flatten them.
- Bake for 8-10 minutes until the edges are just lightly golden. Cool completely before adding the glaze.
Glaze
- In a small bowl, combine powdered sugar, nutmeg, cinnamon and eggnog, whisk together until well-combined. If glaze is too thick, continue to add liquid 1/4 teaspoon at a time until it reaches your desired consistency.
- Spread 1 heaping teaspoon of glaze on each cooled cookie.
Chai Sugar Cookies Nutritional Information Adapted from Taylor Swift , and The Pastry Queen * via Joy the Baker
Original Post Photo, circa 2015 (iPhone 5)


Star Wars BB-8 Cupcakes
Ingredients
- 12 cupcakes in white or silver liners - I used a double batch of Martha Stewart’s Vanilla Cupcakes
- 12 mini cupcakes - See above
- 24 ounces white frosting - I used Savory Sweet Life’s Buttercream Frosting
- 16 ounces fondant - I used The Bearfoot Baker’s Easy Fondant
- Corn starch for dusting powdered sugar will also work in a pinch
- inch 3-inch biscuit cutter or glass
- 12 chocolate chips
- 12 mini chocolate chips
- Royal icing in orange and silver/grey - I used Cake Wiz’s Royal Icing
- A piping bag w/ small tip
- 12 white toothpicks cut in half and black tips colored on in sharpie
Instructions
Prep
- If your mini cupcakes baked up so tall that they look too large for your bases, cut a bit off their bottoms, until they look appropriately head-sized. Set aside and make sure your work surface is crumb-free before you roll out your fondant.
- Sprinkle your work surface with a bit of corn starch and knead the fondant until it is pliable and easy to work with. If you are using marshmallow fondant, a quick 5-10 seconds in the microwave can help speed things along. Just be careful. If left in too long, it will be HOT.
Covering the Cupcakes
- Start with the heads. Because my fondant was a little dry, I rolled, cut and attached the fondant to the mini cupcakes a couple at a time. If your fondant is holding up well, go ahead and cut out all twelve at once. When your fondant is not in use, make sure to keep it in an air-tight container.
- Roll out fondant slightly thinner than 1/8 inch thick and cut out your three-inch disks. Take the mini cupcakes one at a time, frost the entire thing (sides includelightly and lay a fondant disk over it. Carefully, smooth it down so there are no folds or bubbles. Cut the excess, leaving a little space around the edges and then pick up the covered mini cupcake and, using scissors, trim the rest of the excess.
- Press a chocolate chip into the top half of the head for the eye and a mini chocolate chip to the lower right. Use a little bit of royal icing in the socket to secure them. Complete the rest of the heads and set aside.
- Roll the remaining fondant to 1/8-inch thickness and cut into 12 three-inch rounds.
- Spread frosting on top of each large cupcake. Your layer can be as thick or as thin as you’d like it, but make sure not to put a heavy coat around the edges or the frosting may squeeze out. Cover frosting with the fondant and smooth. If your cupcakes don’t have a huge dome on them and your fondant is too large, just cut it down with clean scissors (alternatively, you could just pile more frosting underneath to fill up the extra space). Finish all of the cupcakes and set aside.
Decorating
- Using a piping bag and a small tip, pipe the orange designs on the base and head. I found it helpful to use a toothpick in the head and spin it as I piped the lines. You can get as complex as you’d like.
- Switch to silver and pipe the insides of the gears and finish the head. Insert the toothpicks/antennae into the heads and let sit until the icing is dry (it won’t take long). Dab a little frosting or royal icing where you want to attach the head. Place the head on the body and you are done!
Notes
Cookiefied versions of “Star Wars: The Force Awakens’” best character: Poe’s Jacket.
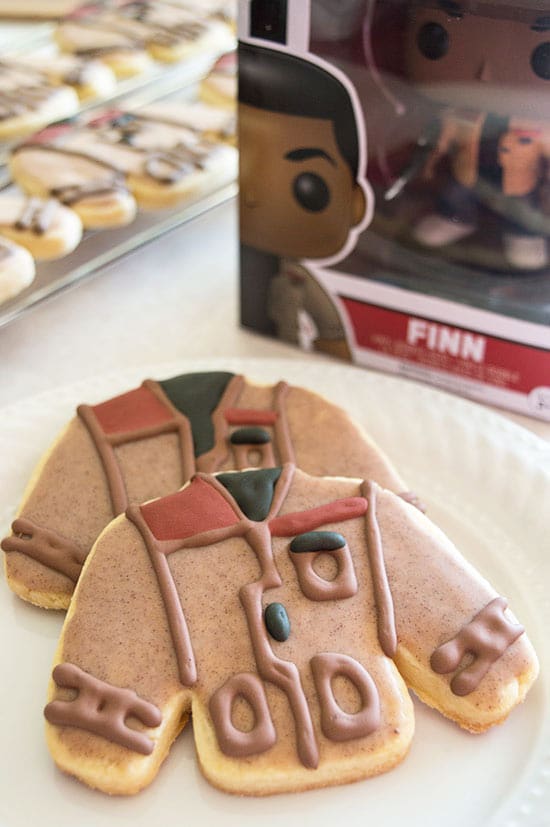

Okay guys, I was not going to do another Star Wars recipe after my BB-8 Cupcakes . When I started this blog, I said I’d limit myself to one nerdy recipe per franchise, lest the blog just become all Hannibal recipes all the time (people-free obviously, and I’m saving that one for a special occasion). BUT, I wanted to do a nerdy/pop-culture Valentine’s Day treat and once this idea popped into my head, it refused to leave. So here you go: Poe’s Jacket Cookies.
Why are these my Valentine’s Day treats? Because, was there a purer expression of love and friendship in all of pop-culture this year than the sharing of Poe’s jacket? I think not. The movie might as well be called Star Wars: Siblinghood of the Travelling Jacket for all that thing gets passed around by our three heroes. AND IT’S BEAUTIFUL!!


Disney via Dork Side of the Force
The jacket starts off the film with the best pilot in the Resistance, who passes it off to the universe’s most adorable stormtrooper, who then loans it out to our favorite young Jedi, who then gives it back to our newly minted Resistance member, where it, SPOILER probably helps save his life. And each time it’s handed off, it’s given in the spirit of friendship and affection. I love it so much, I might just cry. And if that jacket doesn’t get repaired and make it into the sequel, I really will.
I made these cookies with the recipe from my Copycat Heart Cookies with Cinnamon Icing , minus the food coloring. If you want to see me rave over how delicious they are, click over to that post. Just trust me when I say they’re really, really good, but you can use whatever cutout cookie dough you like best (or store-bought to make things simple). I do recommend using the cinnamon icing I link to though, because the cinnamon is what gives the coat the great, slightly distressed leather look, no coloring needed!


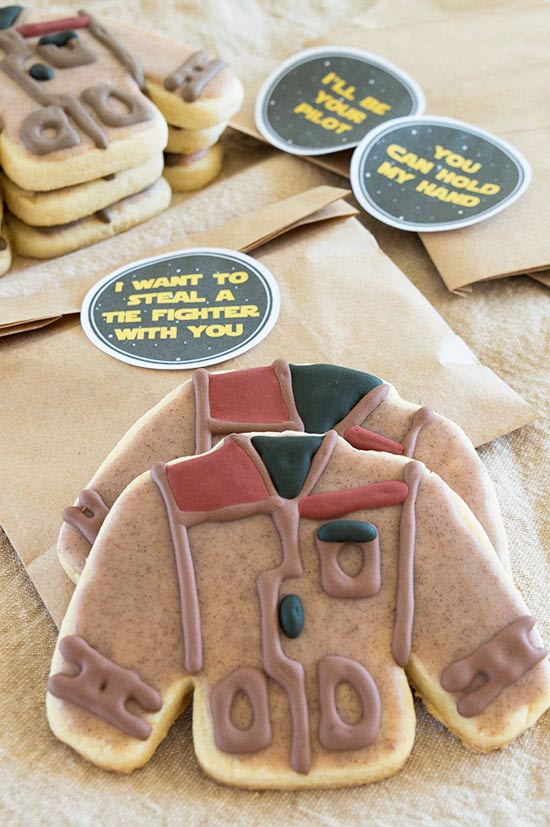
In case you want to use these as valentines or party favors, I created some printables to go with the cookies. You can print them out on sticker paper or just use double-stick tape like I did. (Click on each one for a large version.)


And before we move on to the instructions, I’ll tell you now, these cookies are a bit of a labor of love. They are easy to make, BUT they require a few resting periods, so they are not quick cookies. Don’t start these at 8pm on Valentine’s Day eve or the morning of a party. There will be tears. With that dire warning out of the way, on to the instructions!

Ingredients
Cookies
- ▢ 18 sweater-shaped sugar cookies cooled - I used my Copycat Heart Cookies dough
- ▢ 1 batch of my Cinnamon Icing without food coloring
- ▢ 2-3 cups royal icing made thick* - I used a double batch of Cake Wiz’s Royal Icing
- ▢ Red, yellow, green, and black food coloring
You Will Also Need
- ▢ Piping bags
- ▢ A coupler and #2 tip
Instructions
Icing
- Cover cookies by dipping them in the cinnamon icing. Use a knife to scrape off the excess and clean up the edges. Set aside to harden.
- Separate royal icing into three bowls. 1/4 in two of them and 1/2 in the third. In one of the small bowls, make black icing. In the other small, make the maroon. I used mostly red with a couple drops of yellow and green. In the largest, make your brown icing. I used about 57 drops of red, 45 green, and 11 yellow.
- Stir and check the consistency of your icing. You want 15-second icing, which means, if you run a knife through it, it takes about 15 seconds to fill back in. If it is too thick, add a little water to it in 1/4-teaspoon increments. If it becomes too thin, stir in a little sifted powdered sugar.
- If your cookies are firm enough to handle without smudging the base icing, you can begin piping. Otherwise, cover the royal icing and wait.
Piping
- Fill your piping bag with the brown icing and pipe on the jacket details.
- Switch to maroon and do the breast line and shoulder patch. I used a toothpick to spread the icing around and get into the corners.
- Finally, switch to black and do the accents and fill in the shirt. Again, using a toothpick for the corners if needed.
Rest
- Allow to dry for at least four hours before stacking or packing. The royal icing will dry quickly, but the base icing needs a few hours, or it will dent and smear.
Notes
Used to make this recipe:
