This small-batch of Garlic Aioli, made with just three ingredients, is your new best friend if you want to upgrade your sandwich, french fry, and veggie dipping game.
Today’s recipe is a total game-changer of a recipe: Small-batch Garlic Aioli.
It’s made with just three ingredients, mayonnaise, garlic, and lemon juice (plus a little salt and pepper), that when mixed together basically become magic.
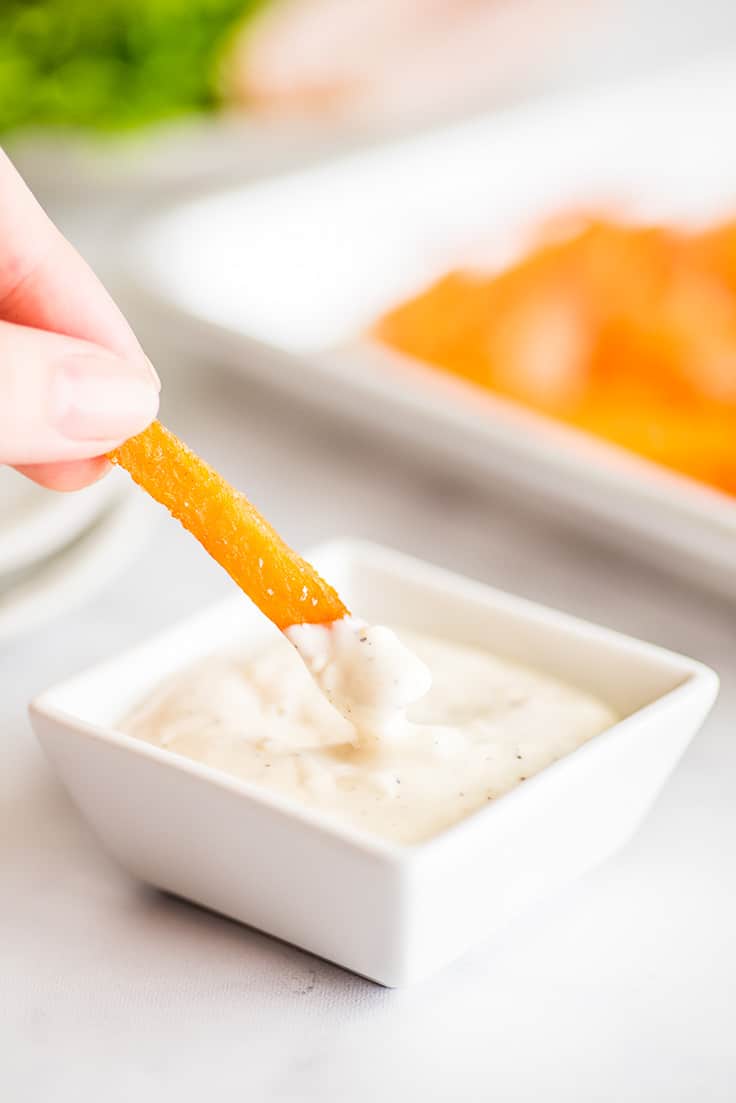

You get a creamy spread perfect for dipping fries and veggies or slathering over sandwiches. The kick of garlic and acidic tang of the lemon really bring out the best of whatever you’re eating it on/over/with.
Trust me, if you’ve never made aioli at home, you need this recipe in your life.
Ingredient Notes
- Mayonnaise: Any mayo will work here including vegan and low-fat. If you want to lighten up your aioli, you can substitute up to two tablespoons of unsweetened yogurt for part of the mayonnaise. Especially when using it as dip, you don’t miss the fat, and it dramatically cuts the calories.
- Fresh garlic: It’s best to steer clear of sprouted garlic in your aioli. While you can usually get away with using sprouted garlic to some degree in cooking, when using it raw, it can give your aioli an “off” flavor even if you cut away the sprouted portion.
- Lemon juice: Fresh or bottled lemon juice works just fine in this recipe.
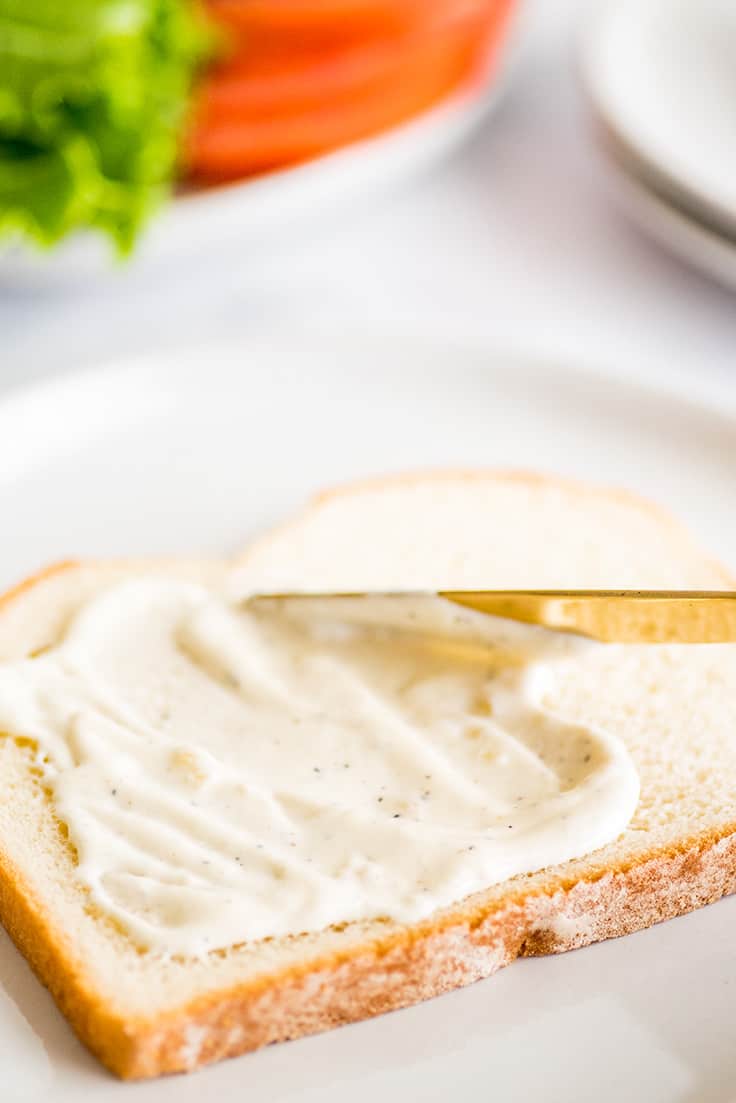
How to Make Small-batch Homemade Aioli
- In a small bowl, combine mayonnaise, pressed garlic, lemon juice, and salt and pepper.
- Stir, and add more salt and pepper to taste if needed.
That’s it. I included measurements in the full recipe below to get you started, but after you’ve made it once or twice, you won’t need them. Just a couple dollops of mayo in a bowl, a crushed garlic clove and lemon to taste. You’ll be able to make aioli in your sleep in about 30 seconds.
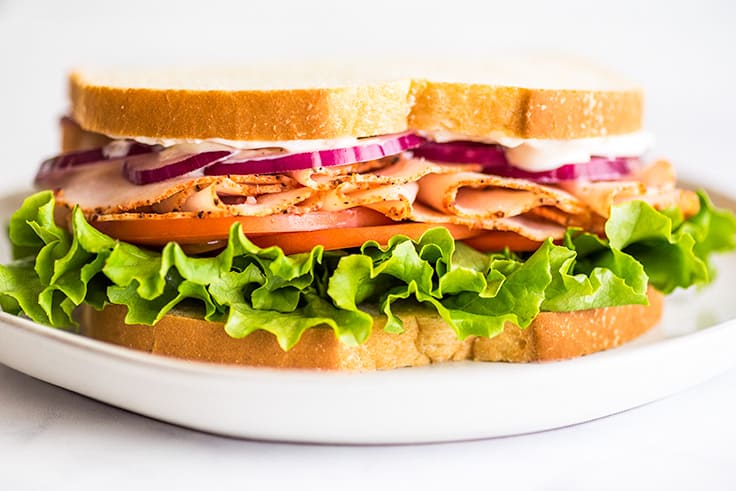
It’s a perfect back-pocket recipe to pull out any time a turkey and cheese sandwich at lunch feels a little boring or homemade batch of sweet potato fries needs a little spicing up.

Variations
- Chipotle aioli: You can make chipotle yogurt aioli by stirring 1/8 teaspoon chipotle powder OR 1/2 to 1 teaspoon of adobo sauce from a can of chipotle peppers for a smokey, spicy flavor.
- Greek yogurt aioli: Replace the mayonnaise with plain, unsweetened yogurt for a light and delicious aioli.
I don’t have a garlic press. What can I use instead?
If you own a microplane , you can also use it to grate your garlic. Or in a pinch, you can crush garlic with a knife (read on for instructions).
How to Crush Garlic Without a Garlic Press
To crush your garlic without a garlic press, peel and finely dice a clove of garlic. Sprinkle with a little salt and then use the flat of your knife blade to smash/scrape the garlic into a paste. ( Here’s a good video of this being done .)
Then just scrape that paste into the bowl with the rest of your aioli ingredients (salt to taste since you’ve already added some salt), and you’re good to go.

Can I make garlic aioli ahead of time?
Yes. You can make aioli up to 48 hours in advance. Store it in an airtight container in the refrigerator. Aioli not used within 2 days of being made should be discarded because of the raw garlic.
Can I make a big batch of garlic aioli?
Yes! The recipe can be scaled up with no recipe changes needed. To change the recipe yield, in the recipe card below, hover over the serving size or click if you’re on mobile, and slide the slider.
You Might Also Enjoy
- Small-batch Cheese Sauce
- Pesto Chicken Sandwiches
- Chipotle Turkey Sandwiches
- Carne Asada Sandwich
- Homemade Panini

Ingredients
Special Equipment
- ▢ Garlic press
Small-batch Aioli
- ▢ 1/4 cup ( 56g ) mayonnaise
- ▢ 1 garlic clove pressed
- ▢ 1 teaspoon lemon juice
- ▢ 1/8 teaspoon salt
- ▢ 1/8 teaspoon pepper
Instructions
- In a small bowl, combine all ingredients and stir until well-combined.
- Taste and add more salt and pepper if needed.
- Serve and enjoy!
Notes
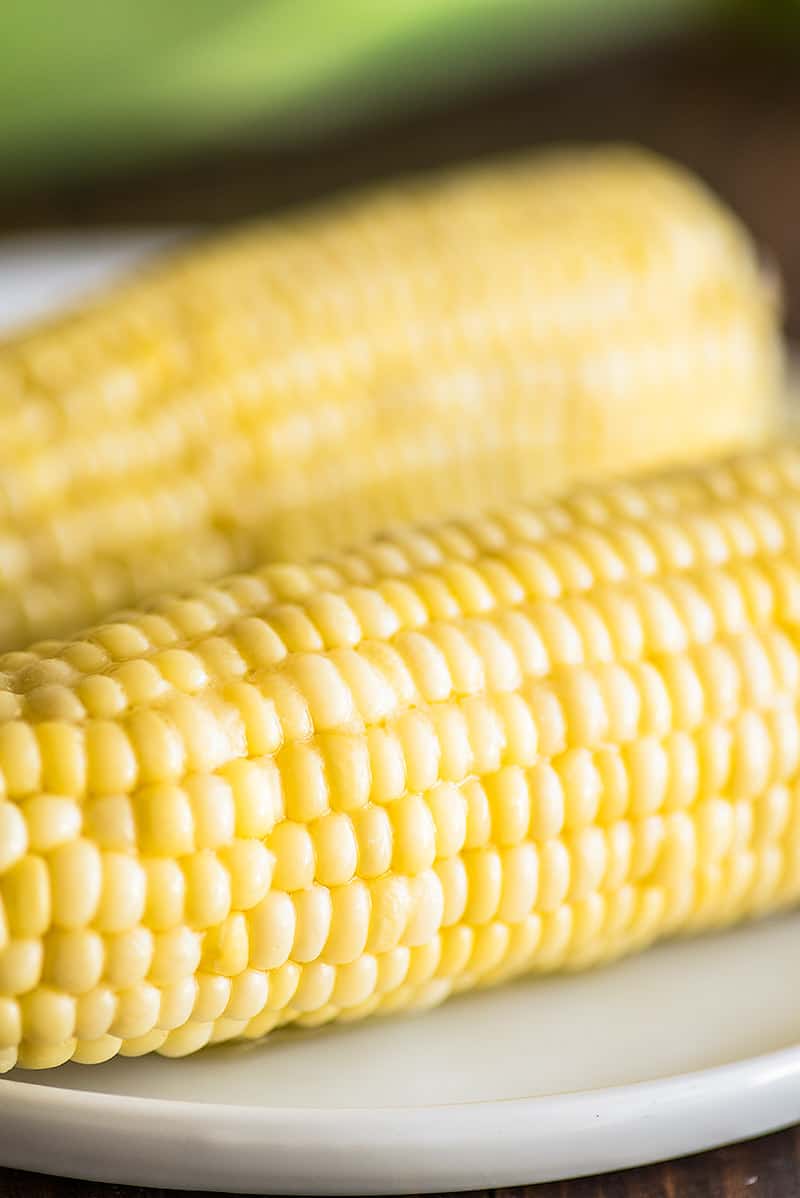
Microwave corn on the cob is the easiest way to cook a whole ear of corn. It’s quick, mess-free, and comes out perfect every time.
I have another microwave vegetable recipe for you today, and honestly, this one’s kind of a game-changer: Microwave Corn on the Cob.
This is the BEST way to cook corn on the cob, because it is SO quick, SO easy, and mess-free.

The Easiest Way to Make Corn on the Cob
Cooking corn in the microwave means no need to shuck the corn or peel off those annoying little stringy bits.
You literally just cut the end off an ear of corn, shove it in the microwave, and once it’s cooked, it slides right out of the husk, silk-free and ready to eat.
It. Is. Magic.
To Make Corn on the Cob in the Microwave, You Will Need
- A very sharp knife
- A microwave
- Corn on the cob
- 3 minutes
How to Cook Corn on the Cob in the Microwave
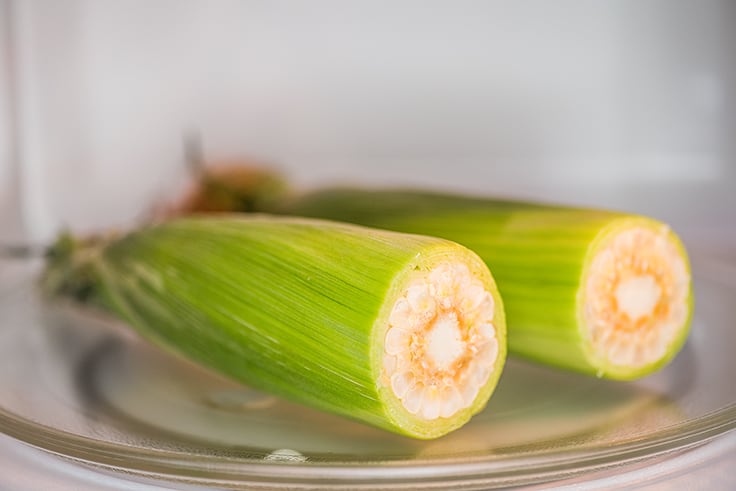
- To microwave corn on the cob in the husk, you’ll first cut off one end so you can slide the corn out once it’s cooked. To do this, find the point at the stalk end (the closed end without all the corn silk) where the cob begins to taper into a point.
You’re going to slice off the end just before that (don’t cut the end off after the cob starts to narrow or you won’t be able to slide the corn out of the husk easily).
Use a sharp knife to make a shallow cut all the way around the cob to help guide the knife, and then apply a little force and slice all the way through.


A Note on Cutting Corn: Cutting through the cob takes a bit of muscle and a sharp knife, as cobs are quite tough. If you’re really struggling to cut the corn or the pressure needed is making you nervous, stop, skip this step and finish cutting off the end after microwaving.
The corn will be softer and easier to cut after microwaving. You’ll just need to let it cool long enough for you to safely handle it.
- Place the corn in the microwave and microwave for 3 minutes. Let it sit for one minute to cool slightly, but don’t leave cooked corn sitting in the microwave for more than a couple minutes or it might not slide out of the husk as easily as it should.

- Carefully, using an oven mitt or towel if necessary, squeeze the corn out of the husk. Make sure to keep squeezing all the way to the end. This helps keep the silk trapped inside.


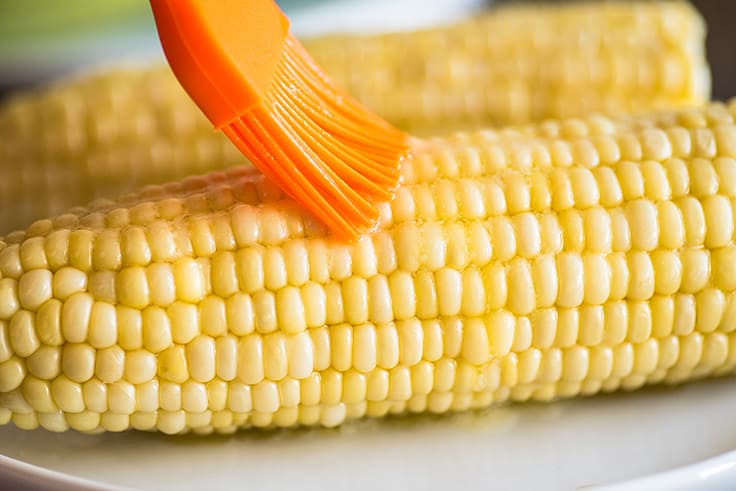
- Rinse to remove any stray strands of silk, brush with melted butter if that’s your thing, and enjoy!

How to Microwave Husked Corn on the Cob
If your corn is already husked, not a problem. You can microwave corn in a paper towel and get the same effect.
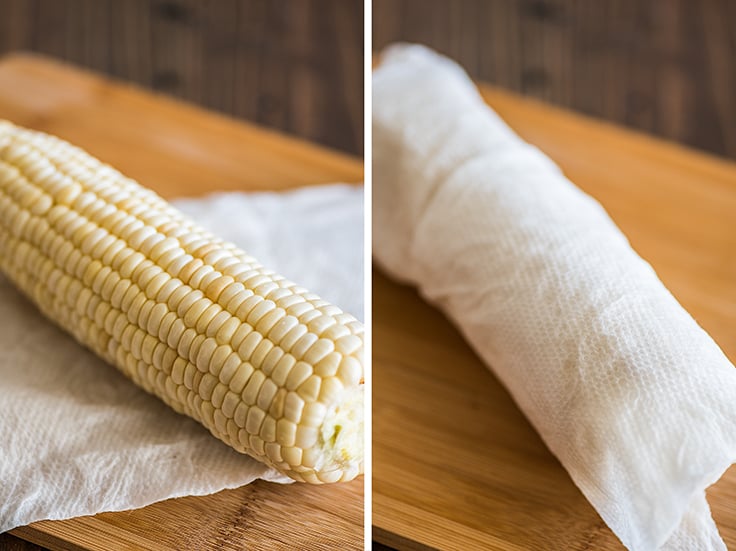

- Fold a paper towel in half, run it under water, and then squeeze out most of the liquid so that it is not dripping. Wrap the damp towel around your corn and it’s ready to go.
- If you have a pack of corn that’s half-shucked, with the ends trimmed but some husks still on, just leave the husks on and wrap the paper towel over them. They and the corn silk will be easier to remove after microwaving.
What to Put on Corn on the Cob
If you want to add a flavor boost to your corn, try one of these combos:
- Elote-style: Drizzle corn with melted butter and then spread mayonnaise over the entire thing. Sprinkle with cotija or Parmesan cheese, a bit of chili powder and a squeeze of lime juice.
- Honey Butter Corn: Combine melted butter and honey (about 3 parts butter to 1 part honey) and stir until mixed. Brush mixture over the cooked corn.
- Herbed Butter Corn: Whip your favorite herbs into softened butter (try one of these flavor combos if you’re not sure where to start ) and spread the flavored butter over the corn.
Can I Microwave More than One Ear of Corn in the Microwave?
Yes. You can microwave more than one ear of corn in the microwave. The rule of thumb is you’ll want to add 1 to 2 minutes per ear of corn and not cook more than what will fit in a single layer with a little space between, so 3 to 4 ears is usually the limit.
- Microwave 2 ears of corn: 4-5 minutes
- Microwave 3 ears of corn: 5-6 minutes
- Microwave 4 ears of corn: 6-7 minutes
How do you store cooked corn on the cob?
Store cooked corn in an airtight container or plastic bag in your refrigerator for 2 to 3 days.
How do you reheat cooked corn on the cob?
Corn on the cob can be reheated in the microwave. Wrap the corn in a slightly damp paper towel and microwave in 20-second increments until it is heated through.
What Goes With Corn on the Cob?
If you’ve craving corn on the cob and need some ideas on what to serve it with, these are some of my favorites:
- Marinated Rib-eye Steaks
- Turkey Burgers
- Tri-tip Sandwiches
- Slow Cooker Beef Ribs
More Microwave Veggie Recipes
- Broccoli in the Microwave
- Cauliflower in the Microwave
- Green Beans in the Microwave
- Carrots in the Microwave
Tips and Tricks
- Microwave power varies wildly, so if your first ear of corn seems under/overcooked, don’t give up! Next time, try reducing or extending the cooking time next time a little as needed for your microwave and preference.

Ingredients
- ▢ Un-husked corn on the cob *
- ▢ Butter optional for brushing
- ▢ Salt optional
Instructions
- Place corn on a cutting board, and cut off the stalk end by making a shallow cut all the way around the corn and then slicing through.
- Place the corn in the microwave and microwave for 3 minutes. Let it sit for 1 minute.
- Carefully, using an oven mitt or towel if necessary, squeeze the top of the corn so that the cob slides out.
- Rinse, pat dry, brush with melted butter and sprinkle with salt if desired, and enjoy!
Notes
- Microwave 2 ears of corn: 4-5 minutes
- Microwave 3 ears of corn: 5-6 minutes
- Microwave 4 ears of corn: 6-7 minutes
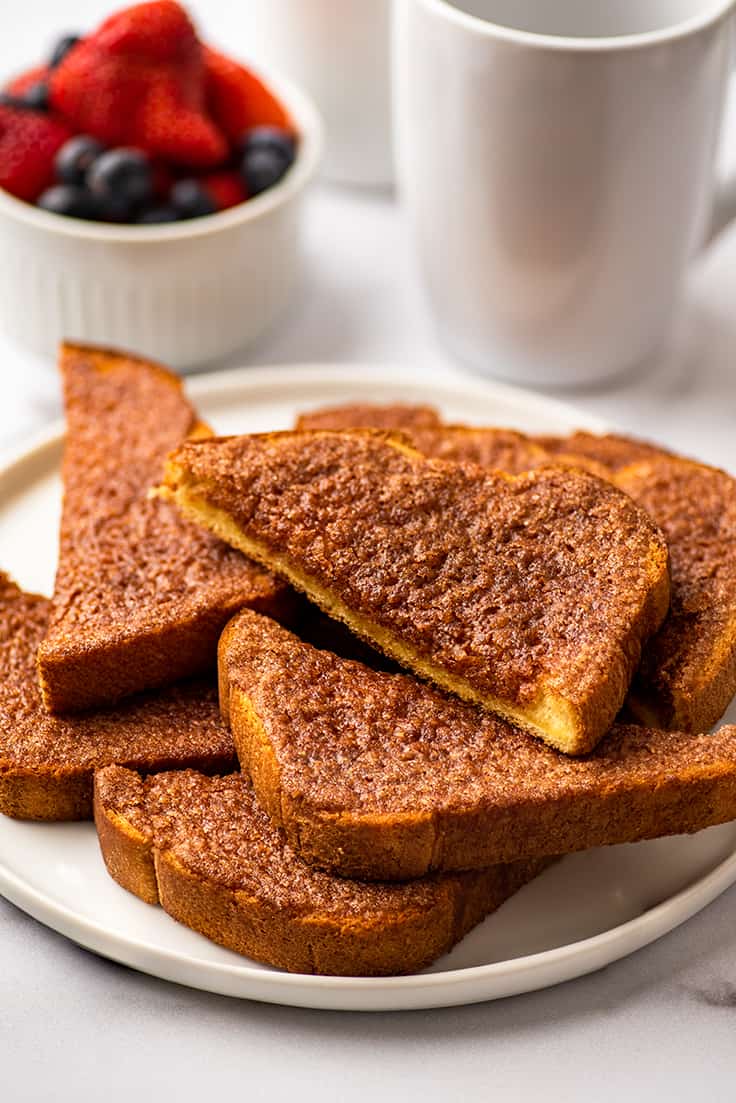
Here’s how to make the best cinnamon toast ever.
A few months ago, I saw a restaurant photo on Instagram of a slice of cinnamon toast with the most gorgeous caramelized layer of cinnamon sugar over the top, and I immediately set about trying and recreate it at home.
After a bit of trial and error, friend, I’d like to introduce you to the best cinnamon toast I’ve ever eaten.
It’s so good, and I’m so excited for you to give it a try.

Why is this toast so good?
The classic cinnamon sugar toast a lot of us grew up with is toasted bread, topped with butter, sprinkled with cinnamon sugar , and done. And it’s completely delicious.
But this cinnamon toast, this toast takes the whole cinnamon toast experience up about seven notches.
Instead of adding cinnamon sugar to the bread after cooking, this method uses a paste of butter and cinnamon sugar over uncooked bread which is then baked in the oven and broiled.
Cooking the cinnamon sugar mixture onto the toast creates a fantastic caramelized crust over the bread while the butter seeps down into it so you get this absolutely irresistible crispy, sweet, and buttery combo when you take a bite.
I found variations of this recipe around the internet, but I believe the cooking method was popularized by the Pioneer Woman. Her recipe uses two sticks of butter and an entire loaf of bread though, so today I’m sharing a scaled-down cinnamon sugar toast recipe with you.
Ingredient Notes
- Salted room temperature butter: You’ll need to use well-softened butter in this recipe, otherwise mixing it with the cinnamon and sugar will be a challenge and it won’t spread nicely on the bread without tearing it. I call for salted butter here, but if you typically use unsalted butter, not a problem, just add 1/8 teaspoon table salt along with the sugar.
- Granulated sugar: This recipe calls for granulated sugar, but if you want to mix things up, you can use a 50/50 mix of white granulated sugar and brown sugar for a bit of added molasses flavor.
- Bread: Most sliced sandwich breads will work just fine here. I used a thick-sliced brioche loaf for the toast in the photos, but plain old white bread will do. Hearty wheat bread is also quite good as a base for cinnamon sugar toast and is what I always used as a kid.
How to Make Cinnamon Toast
This is a quick overview of how to make cinnamon toast in the oven with extra tips and tricks. For the full printable recipe, scroll down to the recipe card below.
- Combine together softened butter, sugar, cinnamon, and vanilla. Use a fork to stir until the mixture forms a paste that is uniform in color.


- Divide the cinnamon butter mixture evenly between the pieces of bread and spread it over the slices from edge to edge. Place the slices on an ungreased, unlined baking sheet. (Don’t use parchment paper or a silicone baking mat because they can’t be used under the broiler.)
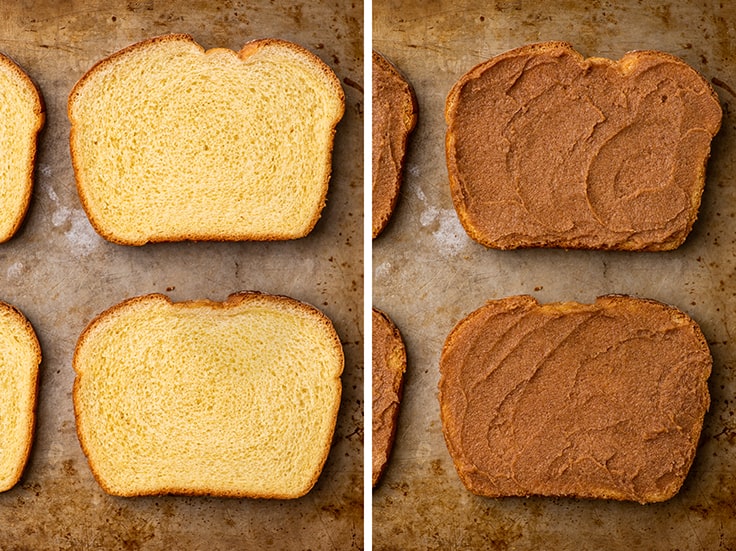

Place the baking sheet on the top or center rack of your oven (you want it in the top half of your oven, but at least 5 inches from the broiler so your bread doesn’t burn).
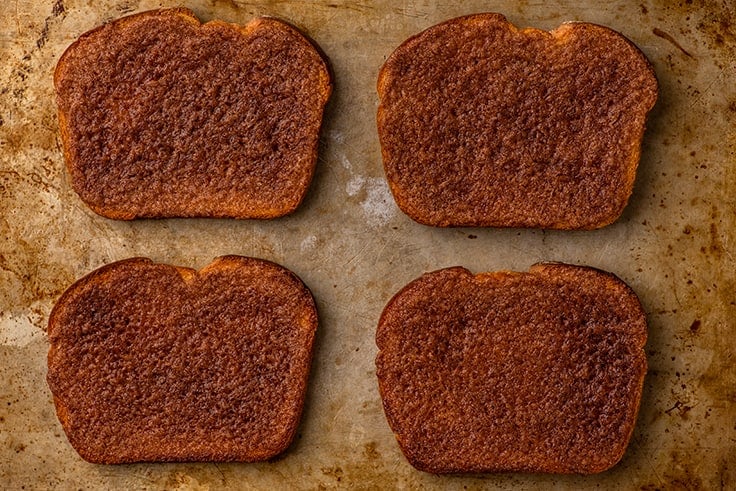
Bake for 10 minutes and then switch your broiler on high and toast for 1 to 2 minutes, until top is bubbly and toast is fully crispy. DO NOT walk away from your toast under the broiler, as it can start to burn in seconds.

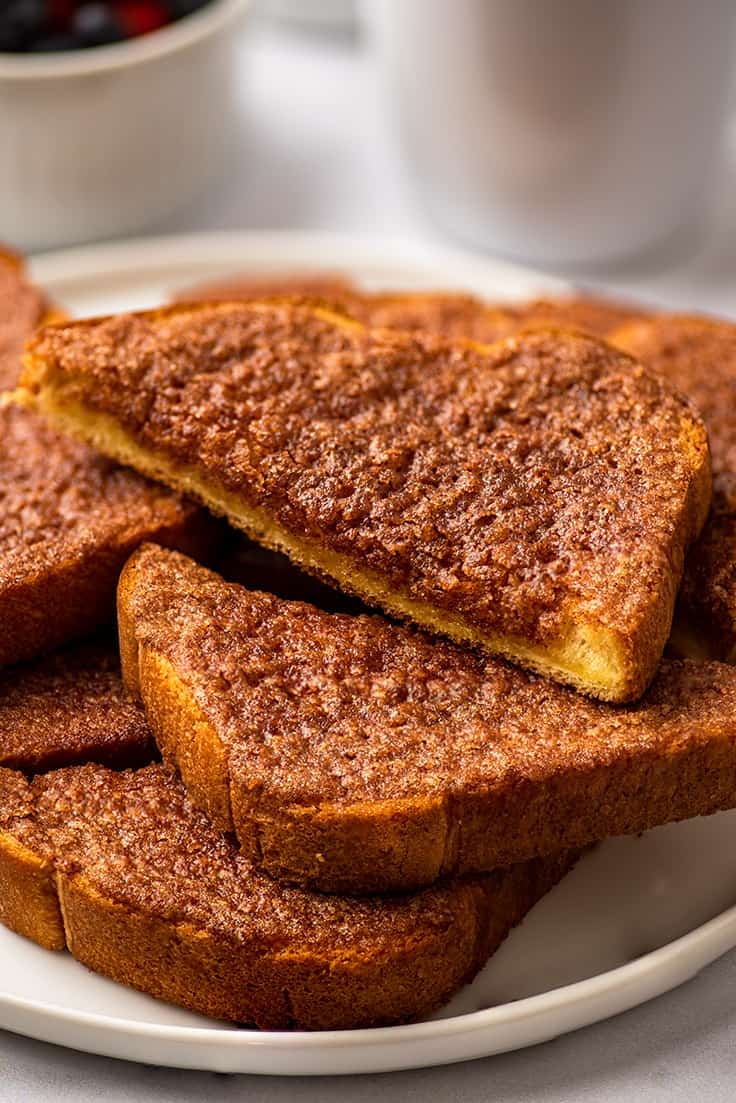
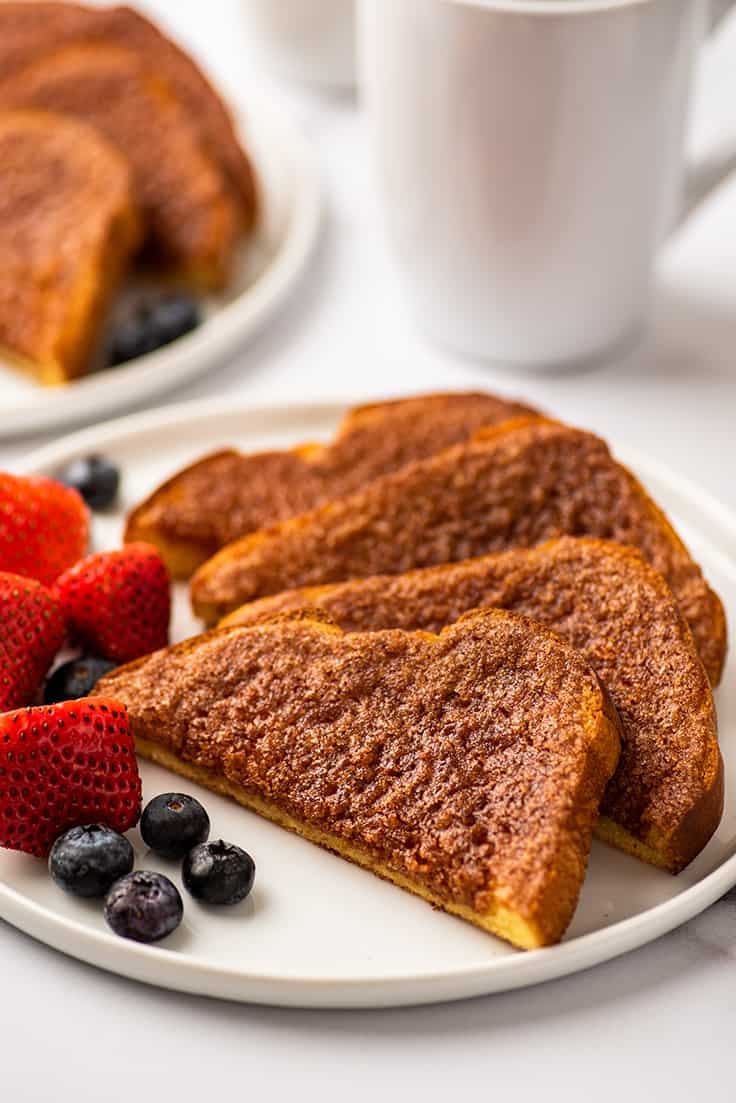
- Allow the toast to cool slightly, slice, and enjoy!
Variations
- Spice Things Up: For a more complex flavor experience, try mixing a generous pinch of nutmeg or a little orange zest (about 1 very loosely packed teaspoon) into the cinnamon and butter mixture.
- Crispier Toast: If you like your toast quite crispy all the way through, crank up the heat and bake it at 400°F for 8 to 10 minutes (depending on how thick your bread is).

How can I soften my butter more quickly?
If you’re in a hurry, you can quickly soften your butter by cutting it into quarters and microwaving it in 4 to 5-second intervals until it softens slightly but does not become melty. Once it’s soft enough to smash with a fork, it’s good to go.
Can I make this without using my broiler?
If you can’t/don’t want to use your broiler, you can skip the final broiling step, the sugar just won’t be quite as caramelized.
Simply make the recipe according to the instructions and bake the bread an additional minute or two until it reaches your desired level of crispiness (since you can’t judge by color, squeeze the slices to check to see how toasted they are getting).
Can I make cinnamon toast without using the oven?
Yes and no. If you don’t have access to an oven, you can make fantastic classic cinnamon toast without one, but you can’t make this cinnamon toast.
To make classic cinnamon toast, use the same ingredient amounts but toast your bread in a toaster and generously butter each piece of bread. Mix sugar and cinnamon together to make cinnamon sugar and sprinkle it over the top of your buttered toast.

Can I freeze cinnamon toast?
I don’t recommend baking the toast ahead of time and freezing it, but you can freeze the toast before baking so it’s ready to go right into the oven on busy mornings.
To prep the toast for freezing , make the recipe as instructed and once the bread is spread with the cinnamon butter mixture, place it on a plate or baking sheet that will fit in your freezer and freeze about 20 minutes, until the top is mostly frozen (if the top is frozen, it won’t stick to other things when stacked for freezing).
Place slices of parchment paper between the slices and freeze in a freezer bag for up to 2 months. When you’re ready to cook your toast, preheat the oven to 350°F and bake frozen toast on a baking sheet for 10 to 12 minutes or until toasted. Broil for an additional 1 to 2 minutes and enjoy!
More Sweet Breakfast Ideas
- Small-batch Cinnamon Rolls
- Small-batch Cream Scones
- Homemade Mocha
- Banana Pancakes for Two

Ingredients
- ▢ 4 slices sandwich bread
- ▢ 1/4 cup ( 56g ) salted butter softened*
- ▢ 1/4 cup ( 50g ) granulated sugar
- ▢ 1 teaspoon ground cinnamon
- ▢ 1/2 teaspoon vanilla extract
Instructions
- Preheat your oven to 350°F. Place your bread on a broiler-safe ungreased, unlined baking sheet.
- In a medium bowl, combine softened butter, sugar, cinnamon, and vanilla. Use a fork to stir until the mixture forms a paste that is uniform in color.
- Divide the cinnamon butter mixture evenly between the pieces of bread and spread it over the slices from edge to edge, completely covering each piece.
- Place baking sheet on the top or center rack of your oven (you want it in the top half of your oven, but at least 5 inches from the broiler so your bread doesn’t burn). Bake for 10 minutes or until bread is lightly crispy.
- Turn the broiler on high and broil toast until cinnamon sugar is bubbling, 1 to 2 minutes. If at any time the edges of your toast begin to burn, pull them out of the oven. DO NOT walk away from your toast under the broiler and watch it closely.
- Allow the toast to cool slightly, slice, and enjoy!
Notes
Recipe Adapted From The Pioneer Woman

Small-batch Garlic Aioli
Ingredients
Special Equipment
- Garlic press
Small-batch Aioli
- 1/4 cup ( 56g ) mayonnaise
- 1 garlic clove pressed
- 1 teaspoon lemon juice
- 1/8 teaspoon salt
- 1/8 teaspoon pepper
Instructions
- In a small bowl, combine all ingredients and stir until well-combined.
- Taste and add more salt and pepper if needed.
- Serve and enjoy!
