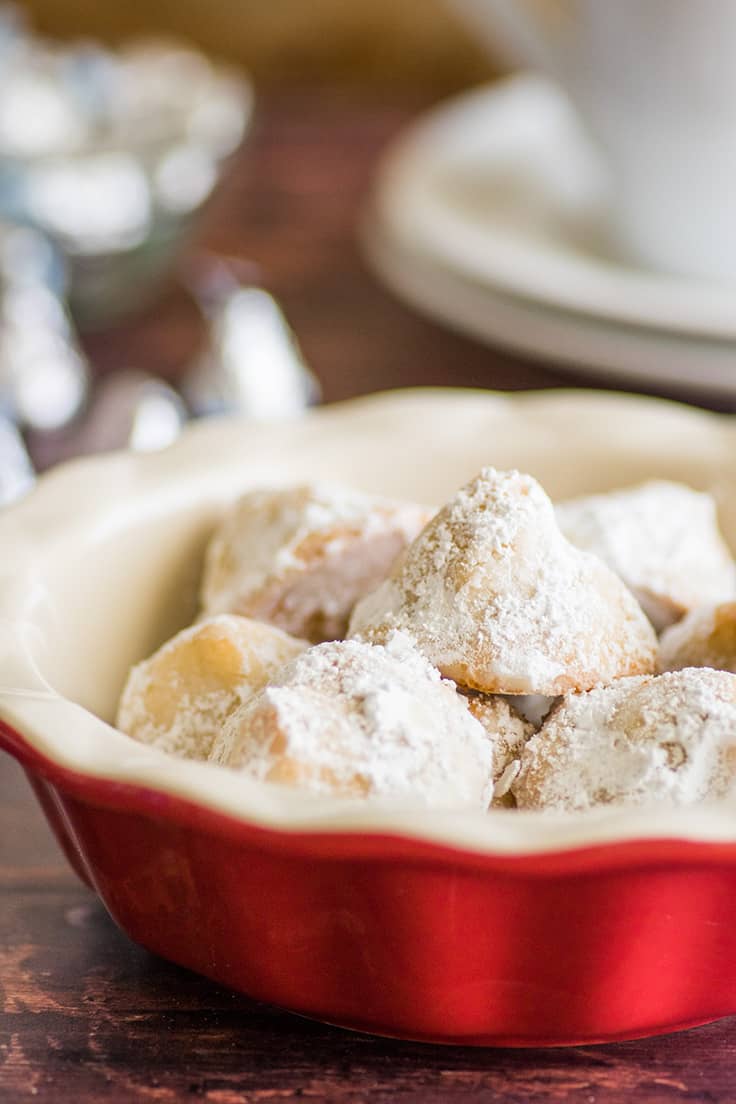
Snowball Cookies are perfect Christmas cookies. They have a cute festive name, they’re super easy to make, and they’re a total crowd-pleaser, so everyone’s happy when they show up on a cookie plate.
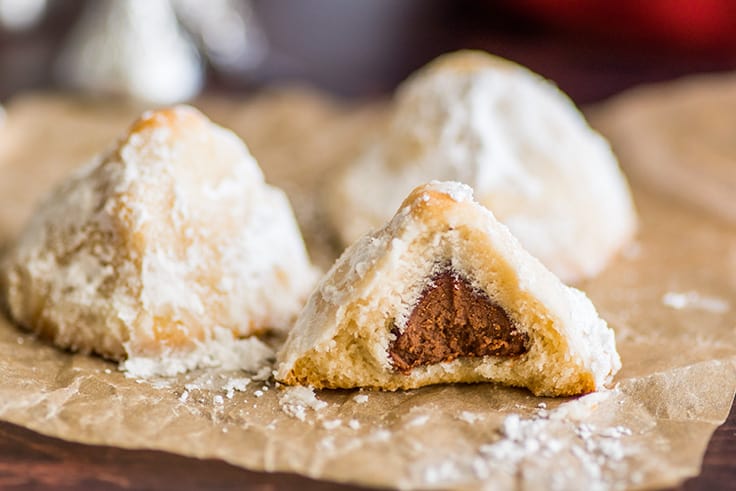
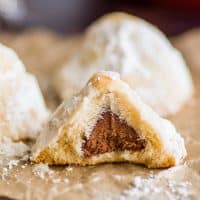
There are a lot of versions of Christmas snowball cookies out there. Most of them involve nuts, some of them pie crust, but this is what a snowball cookie was in my house growing up: crunchy, crumbly, buttery shortbread wrapped around a Hershey’s Kiss and dredged in powdered sugar.
I make them every year when my whole family is together for the holidays, and I always stash a couple at the back of the cupboard just for myself because even set out among total winners like my Snickerdoodle Sandwich Cookies , Chai Sugar Cookies , and Gingerbread Men , they are always one of the first cookies to disappear.

A Small-batch Snowball Cookie Recipe
Generally, I make a big batch of these for the holidays because the family loves them, and I like to include them in cookie trays for friends and neighbors, but I’m sharing a small batch today that makes about 10 cookies for those quiet December evenings when you’re not feeding a house or a neighborhood full of people.
Ingredient Notes
- Hershey’s Kisses: You can use almost any variety of Hershey’s Kisses to stuff these cookies, but their classic milk chocolate is still my favorite. If you don’t want an entire big bag of Kisses around your house, you can usually find mini bags of them in the candy aisle at the grocery store and most convenience stores.
- Salted butter: I call for salted butter in this recipe, but if all you have is unsalted butter, not a problem. Just add a heaping 1/8 teaspoon of salt to the dough along with the flour.

How to Make Snowball Cookies
- In a medium bowl, beat together butter, powdered sugar, and vanilla until light and fluffy.
- Add flour and beat until no streaks of flour remain.
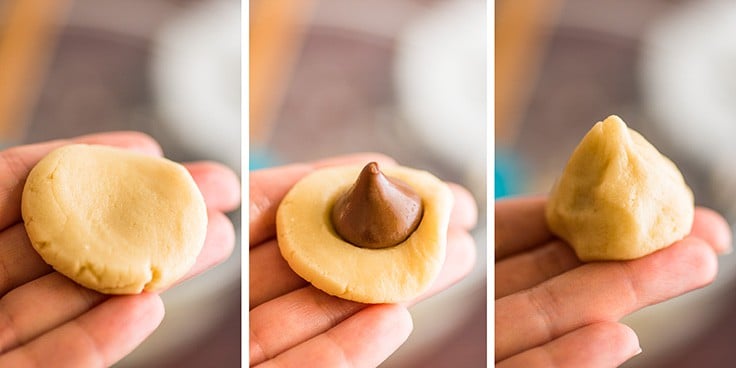
- Scoop spoonfuls of dough and wrap them around unwrapped Kisses.
- Bake until the edges and tips of the cookies are just lightly browned.
- Roll in powdered sugar and enjoy!

Can snowball cookies be frozen?
Yes! Snowball cookies freeze well. Store in an airtight container or freezer bag in the freezer for up to 2 months.
Allow them to sit at room temperature for a few minutes before eating so the frozen chocolate kiss has time to defrost slightly, otherwise, they’re hard to bite into while frozen.
How long do snowball cookies stay fresh?
Snowball cookies will stay fresh for up to 5 days when stored in an airtight container at room temperature.

Can I double this recipe?
Yes! This recipe scales up with no preparation changes needed.
To double the recipe ingredients, hover over the serving size in the recipe card below or click if you’re on mobile, and slide the slider. If you’d like to make a full-size recipe for gifting or family, multiply the recipe by 4.
More Christmas Recipes
- The Best Crockpot Hot Chocolate
- Classic Hot Chocolate
- Peppermint Mocha
- Snickerdoodle Cookies
More Small-batch Cookie Recipes
- Small-batch Chocolate Chip Cookies
- Small-batch Shortbread
- Small-batch M&M Cookies
- Small-batch Peanut Butter Cookies
Equipment
- Handheld electric mixer
Ingredients
- ▢ 10 Hershey’s Kisses
- ▢ 1/4 cup ( 56g ) salted butter* softened
- ▢ 2 tablespoons ( 15g ) powdered sugar
- ▢ 1 teaspoon vanilla extract
- ▢ 1/2 cup + 1 tablespoon ( 67g ) all-purpose flour
Topping
- ▢ 1/2 cup ( 60g ) powdered sugar
Instructions
- Preheat your oven to 400°F and line a baking sheet with parchment paper or silicone baking mat. Unwrap 10 Kisses and set aside.
- In a medium bowl, combine softened butter, powdered sugar, and vanilla. Beat until well combined and fluffy, about 1 minute. Add flour and beat, starting on low, working up to high until mixture clumps and forms a dough. Scrape bottom and sides so no streaks of flour remain.
- Scoop a half-ounce spoonful of dough and roll into a ball. Flatten the dough between your palms and set a Kiss in the center. Wrap the edges of the dough around so all the chocolate is covered. Place on prepared baking sheet and repeat with the rest of the dough and candies.
- Bake for 9 to 11 minutes, until the edges of the dough are lightly browned. Cool on the baking tray until cool enough to handle.
- Pour powdered sugar into a bowl and roll cookies in the sugar until coated. Enjoy!
Notes
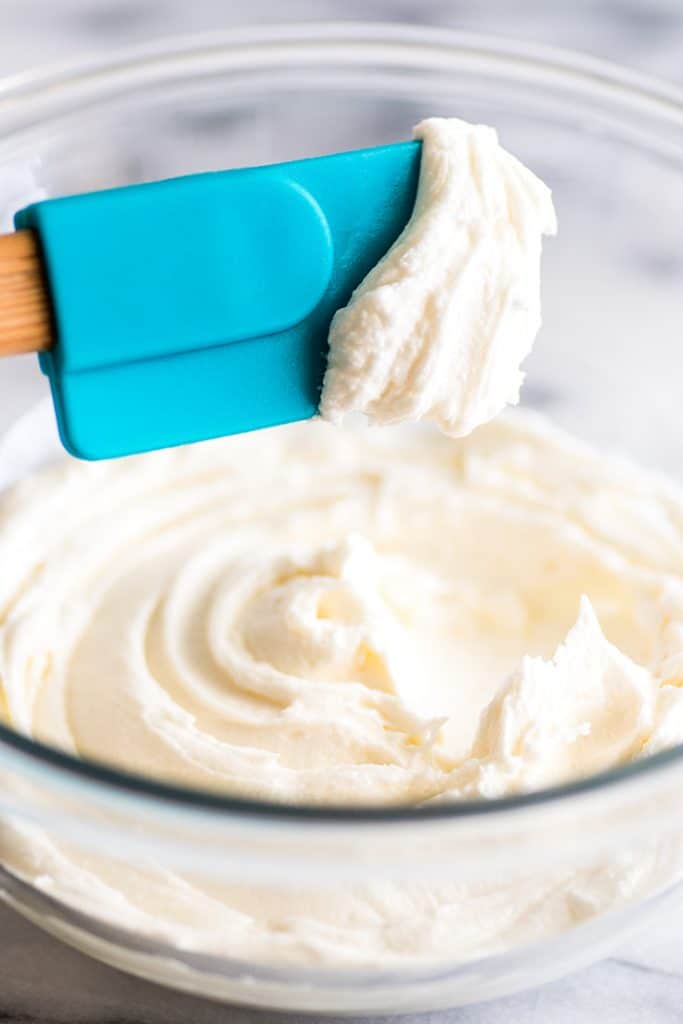
This is the perfect small-batch vanilla frosting recipe. It’s rich, delicious, and so easy to make.
Another Wednesday, another small-batch frosting recipe. I love sharing these small-batch frosting recipes with you because having an archive of different frosting flavors means that you can mix and match them with my small-batch cupcakes or cookies and make the small-batch dessert of your dreams.
Here on the blog so far, I’ve shared Small-batch Chocolate Frosting , Small-batch Oreo Frosting , and Small-batch Cream Cheese Frosting . This time, it’s classic, perfect Small-batch Vanilla American Buttercream Frosting.

What is American Buttercream Frosting?
American buttercream is a fabulous and convenient frosting that can be made with just a few ingredients, butter, powdered sugar, a little salt, some vanilla, and usually a bit of cream or milk.
Unlike Swiss, French, and Italian meringue buttercreams , American buttercream does not contain eggs, so there is no cooking involved. You just soften some butter, beat it until it is nice and fluffy and then beat in the rest of the ingredients.
From start to finish, it takes less than 5 minutes. I love it for small-batch baking because it’s so simple to make and easy to scale.
It’s also very tasty. This vanilla frosting is rich and buttery and quite sweet, with a smooth texture that crusts just a little.
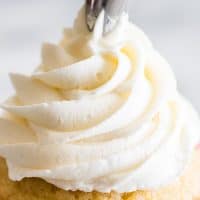
If you’re looking for a sweet and easy vanilla frosting for sugar cookies , cupcakes (I love it on my Small-batch Vanilla Cupcakes ), or maybe a little gingerbread house, this is the frosting you’re looking for.
Ingredient Notes
- Softened butter: Be sure to start with butter that is softened but not melted. Melty butter can give your frosting an unpleasant, greasy texture. When butter is properly softened, you should be able to press an indentation into the stick with your finger, but the butter should still hold its shape around it. I call for unsalted butter in the recipe, but you can use salted butter if that’s what you keep on hand. Simply omit the added salt in the recipe.
- Powdered sugar: You must use powdered sugar for this frosting recipe. You cannot substitute granulated or brown sugar.
- Vanilla extract: For a more luxurious vanilla flavor, you can use vanilla beans or vanilla paste instead of vanilla extract. See the notes in the recipe card for substitution amounts.

Variations
- Chocolate frosting: Add 2 tablespoons of unsweetened cocoa powder.
- Chocolate cream cheese frosting: Add 2 ounces of softened cream cheese and 2 tablespoons of unsweetened cocoa powder.
- Cream cheese frosting: Add 2 ounces of softened cream cheese along with the butter.
How much frosting will this make?
The recipe makes ¾ to 1 cup of frosting depending on how much air you beat into it. This is enough vanilla frosting to frost:
- 4 to 6 cupcakes with a piping bag (big swirls)
- Up to 8 cupcakes or cookies with a knife
- The top only of a 7×5-inch or single-layer 6-inch cake
My frosting is too sweet/buttery. What did I do wrong?
You probably didn’t do anything wrong. American buttercream is very sweet and very buttery by design. If that’s not working for you, but you still want to try this style of frosting, make one of my flavored small-batch American buttercreams . The butter flavor and heavy sweetness aren’t quite as in your face when there are other flavors there to off-set them.
Can I reduce the amount of sugar in this recipe?
You can cut it by a little, but not much. Sugar helps provide structure to the frosting, and if you keep cutting sugar, at some point you’re just eating lightly sweetened butter.
Where can I use this frosting?
So glad you asked! My favorite things to use this frosting on are:
- Small-batch Cut-out Sugar Cookies
- Small-batch Frosted Sugar Cookies
- Small-batch Vanilla Cupcakes
- Small-batch Chocolate Cupcakes
More Small-batch Frosting Recipes
- Chocolate Frosting
- Cream Cheese Frosting
- Cookie Dough Frosting
- Strawberry Frosting
- Oreo Frosting
Recipe Notes
- Storage: Store leftover frosting in an airtight container in the refrigerator for up to 5 days. Frosting will harden significantly once chilled, so let it come to room temperature on the counter before using. If piping the frosting, re-whip as needed to return the frosting to its fluffy consistency.
- Freezing: American buttercreams freeze extremely well. Store frosting in a freezer bag in the freezer for up to 2 months. Defrost overnight in the refrigerator and allow to come to room temperature before using.


Ingredients
- ▢ 4 tablespoons ( 56g ) unsalted butter* softened
- ▢ 1 cup ( 120g ) powdered sugar sifted
- ▢ 1 teaspoon to 1 tablespoon milk or cream
- ▢ ¼ teaspoon vanilla extract*
- ▢ Pinch of salt
Instructions
- In a medium bowl, beat softened butter until light and fluffy, 30 seconds to 1 minute. Add powdered sugar, 1 teaspoon of milk or cream, vanilla extract, and salt.
- Beat until smooth. Add up to 2 additional teaspoons of milk until frosting reaches your desired consistency.
Notes
Let’s celebrate! Baking Mischief turns two years old today!

Happy Friday! Did you have a good work week? Today is an exciting day around here, because today, Baking Mischief turns two years old! December 1, 2015, I hit publish on my first recipe, Butterscotch Shortbread Thumbprint Cookies , and now two years, hundreds of recipes, and millions (millions!!) of visitors later, here we are.
Thank you to those of you who have been following along from the beginning and to those who joined up along the way. There is no way Baking Mischief would be here today without your support.
I know that I don’t write as much personal and behind-the-scenes stuff on the blog as many bloggers (guys, I’m shy), so I thought that to celebrate two years of Baking Mischief, I would share a little more than usual and tell you some fun facts you might not know about the site.
Interested? Here we go.
20 Things You Might Not Know About Baking Mischief
There are currently 265 posts on the site. 27 Weekend Posts (which I think are going to come back–stay tuned), 19 round-ups, 12 miscellaneous, and 207 recipes. Of those recipes, 96 are full-size, 94 are small-batch or recipes for two, and 17 are recipes for one.
Baking Mischief was almost a fandom food blog. My first vision for the site was one where I focused solely on film, television, and book-related recipes. I decided against it pretty quickly, but in some alternate timeline, it’s Nerd Month all day every day around here and the blog is called Fannish Kitchen (actual then-available name I considered).
Other names that might have been: Fangirl in the Kitchen, Windy Side of Care, As it Please Me (I was going through a Much Ado About Nothing phase with those last two), and My Best Vices (what?? why??).
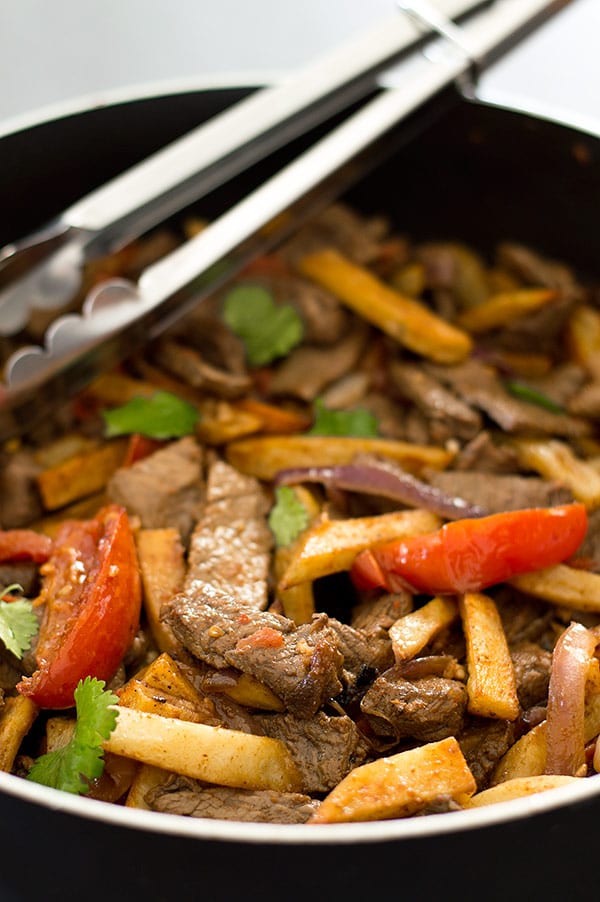

Between Hannibal’s Lomo Saltado and Sanguinaccio Dolce , and my Game of Thrones Frey Pie , I believe Baking Mischief has the most cannibal recipes of any of the mainstream food blogs. If that’s not something to be proud of, I don’t know what is. 😉
And I’ve mentioned before that despite being absolutely delicious, Lomo Saltado is one of the least popular recipes on the site for some reason (though the Frey Pie is really popular). Other recipes I love that haven’t yet caught on include:
- Homemade Pudding Pops (SO good)
- Basil Chicken Pasta for Two (One of my tastiest, quickest, easiest weeknight dinner recipes)
- BLT Salad (It has croutons cooked in BACON GREASE!!)
I chose to die on Panini/Panino hill. This was a mistake.
I learned my lesson, and the official Baking Mischief Style Guide allows both donut and doughnut .
There is an official Baking Mischief Style guide.
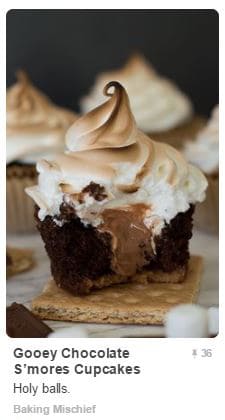
This is my favorite Pinterest caption I’ve ever come across for one of my recipes.

And this the funniest recipe feature I’ve received.
99% of the technical skills required to build and run this website were acquired playing Neopets in the aughts. The other 1% was a 1-unit CSS class I took in college.
There aren’t and probably never will be any seafood recipes for people on the site (there is a tuna High-value Dog Treats recipe for dogs). I’m not a huge seafood fan, and the only thing I know how to cook is dishwasher salmon .
The first (and one of the only) free products I’ve accepted since starting the blog were a couple of bully sticks for Ella just because I thought it was funny to tell people that free bull penises were one of the perks of having a food blog.
It took a couple minutes (and a few hilariously awkward photos) for Ella to figure out how to eat these #bestbullysticks but now she’s gnawing on them like a pro. She definitely gives them an A++ review! A post shared by Tracy (@bakingmischief) on Apr 27, 2016 at 3:44pm PDT

Small-batch Snowball Cookies with Kisses
Equipment
- Handheld electric mixer
Ingredients
- 10 Hershey’s Kisses
- 1/4 cup ( 56g ) salted butter* softened
- 2 tablespoons ( 15g ) powdered sugar
- 1 teaspoon vanilla extract
- 1/2 cup + 1 tablespoon ( 67g ) all-purpose flour
Topping
- 1/2 cup ( 60g ) powdered sugar
Instructions
- Preheat your oven to 400°F and line a baking sheet with parchment paper or silicone baking mat. Unwrap 10 Kisses and set aside.
- In a medium bowl, combine softened butter, powdered sugar, and vanilla. Beat until well combined and fluffy, about 1 minute. Add flour and beat, starting on low, working up to high until mixture clumps and forms a dough. Scrape bottom and sides so no streaks of flour remain.
- Scoop a half-ounce spoonful of dough and roll into a ball. Flatten the dough between your palms and set a Kiss in the center. Wrap the edges of the dough around so all the chocolate is covered. Place on prepared baking sheet and repeat with the rest of the dough and candies.
- Bake for 9 to 11 minutes, until the edges of the dough are lightly browned. Cool on the baking tray until cool enough to handle.
- Pour powdered sugar into a bowl and roll cookies in the sugar until coated. Enjoy!
