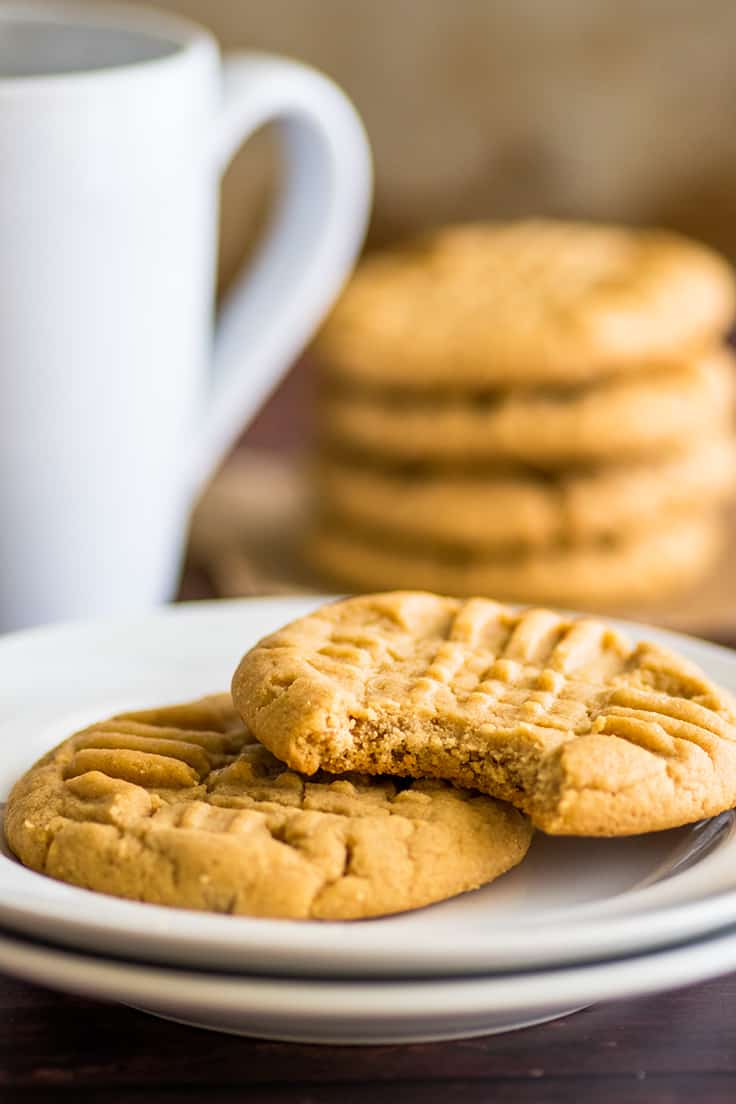
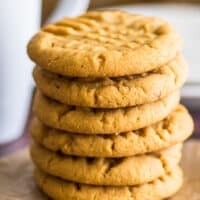
These small-batch peanut butter cookies are easy to make, super peanut buttery, and SO good.
Hey, workweek got you down? You should make yourself a cute little batch of peanut butter cookies. Your day will get 97% better immediately. I promise.
I love a good peanut butter cookie and these cookies definitely earn that label. Other words used to describe them by taste testers have been, “amazing,” “really really good,” and “my favorite peanut butter cookies ever.”

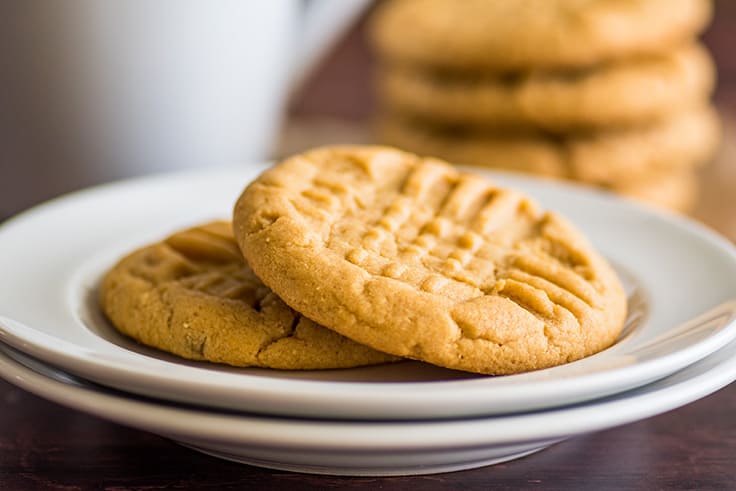
The Perfect Small-batch Peanut Butter Cookies
These cookies are super peanut buttery and the perfect (or at least my perfect) peanut butter cookie texture where they’re a little soft and crumbly, a little chewy, and with a little extra oven time, a little crunchy.
This recipe makes six cookies so there are just enough to share, but not so many that you’re in any real trouble should you choose not to. 😉
Notes Ingredients
- Baking staples: The bulk of the ingredients for these cookies is made up of baking staples, flour, baking soda, salt, butter, brown and granulated sugar, and vanilla extract.
- Peanut butter: Smooth or chunky peanut butter will work, but stick with a processed brand like Jiff or Skippy, as these give you the most consistent results for baking.
- Egg yolk: This recipe uses only an egg yolk. For ideas on what to do with that leftover egg white, check out my post What to Do With Leftover Egg Whites (I recommend a small batch of banana muffins ).

How to Make a Small Batch of Peanut Butter Cookies
- Mix dry ingredients together in a small bowl.
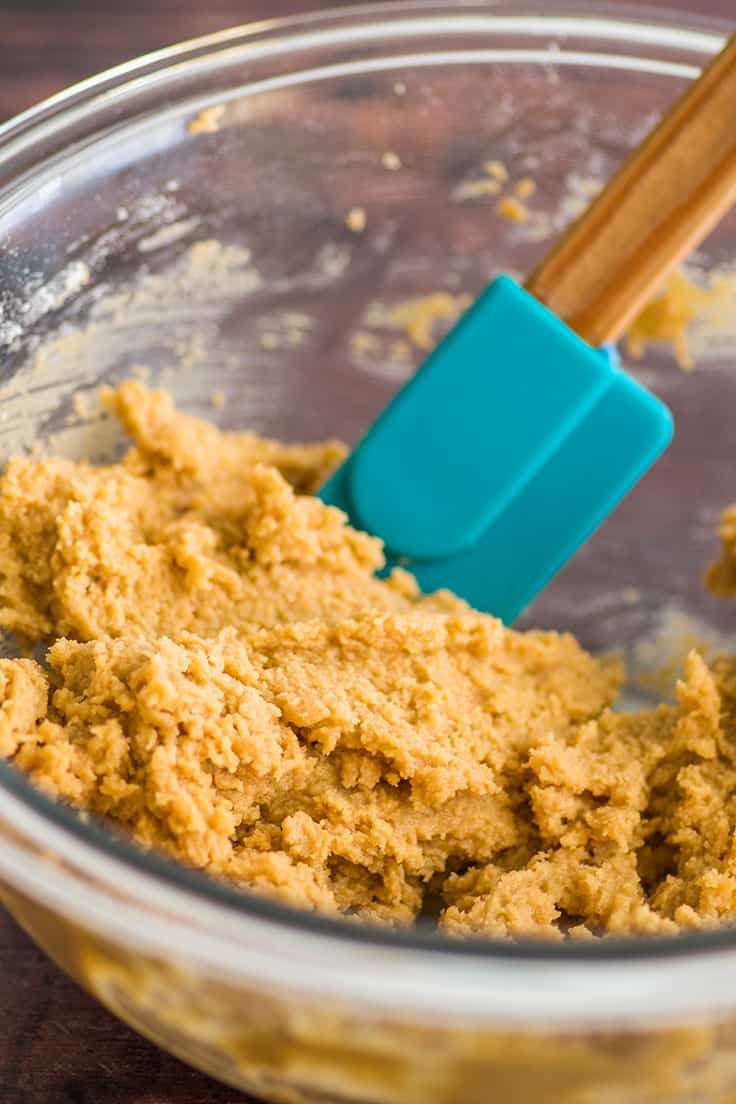
- Whisk together wet ingredients in a medium bowl. You can use a handheld mixer for this part if you’d like, but all you really need is a whisk and a little elbow grease.
- Stir dry ingredients into the wet and mix.
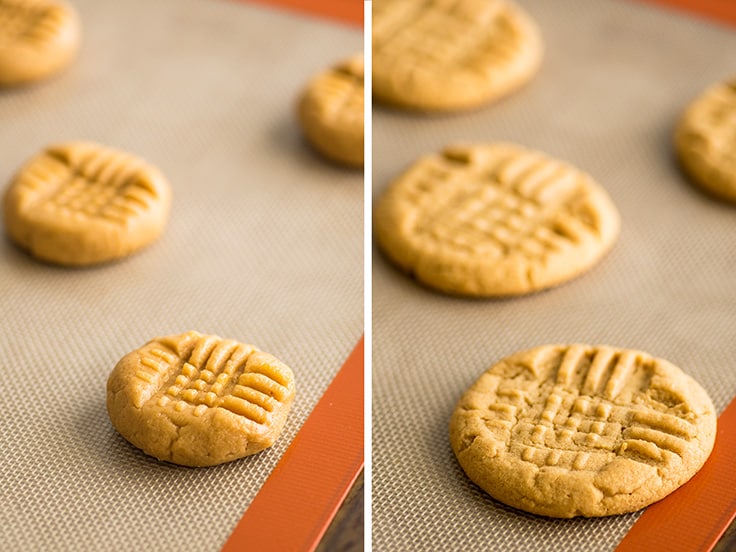
- Scoop rounded spoonfuls of the dough and roll into balls before placing on the cookie sheet and using a fork to press a crosshatch pattern into the top of each cookie.
- Bake and let the cookies cool and set for at least 10 minutes before eating.

Peanut Butter Cookie Variations
- Chocolate chip/Peanut butter cup cookies: Add 1/3 cup of chocolate chips or chopped peanut butter cups to the dough before baking.
- Nutella-stuffed cookies: On a plate lined with parchment paper, freeze six 1-tablespoon-sized dollops of Nutella until solid, about 20 minutes. Make the cookie dough, and when forming the cookie dough balls, split them in half and place a frozen dollop of Nutella inside. Squish the top and bottom halves back together, press with a fork, and bake according to recipe instructions.
- Peanut butter cookie sundae: Top warm cookies with a scoop of ice cream, peanut butter sauce or fudge sauce (or both!!), whipped cream , and sprinkles.
Small-batch Peanut Butter Cookies Troubleshooting
These cookies are pretty simple to make, but occasionally people run into trouble. These are the two issues I’ve seen:
Warm cookies are falling apart: This is normal! The cookies need to set before you can eat them. If you try to move them right after they come out of the oven, they will crumble in your hand. Give them 10 to 15 minutes on the baking sheet and they will firm right up.
If you prefer a softer, slightly underdone cookie and don’t want them to continue to cook from the heat of the baking sheet, slide the entire sheet of parchment paper (with the cookies still on it) off the tray onto the cool counter. This might be a little challenging if you’re using a rimmed baking sheet, but I believe in you.
Dough too crumbly: This happens when there is too much flour in your dough or if you have an extra small egg yolk. Next time be sure to measure the flour by weight or using the spoon and sweep method (stir the flour in your container to fluff it up and then spoon it into your measuring cup, sweep excess off with the flat of a knife).
You can fix the dough by adding just a bit of milk or water, 1/2 teaspoon at a time, until the dough comes together and there is no dry flour at the bottom of your bowl.

How to store peanut butter cookies?
Store your cookies at room temperature in an airtight container for up to five days.
Can I freeze peanut butter cookies?
Yes! These cookies freeze really well. If you have leftovers, put them in a freezer bag and they will keep in the freezer for up to 2 months.
Can I use natural peanut butter in these cookies?
You could probably get away with using natural peanut butter if you really want to, but these cookies have not been tested with it, so I can’t guarantee the results.
More Peanut Butter Desserts
- Peanut Butter Cookie for Two
- Peanut Butter Oatmeal Cookies
- Small-batch Monster Cookie Bars
- Peanut Butter Hot Chocolate

More Small-batch Cookies
- Small-batch Chocolate Chip Cookies
- Small-batch Oatmeal Cookies
- Perfect Small-batch Sugar Cookies
- Small-batch Gingerbread Cookies
- Small-batch Shortbread Cookies
Or check out my entire Small-batch Cookie Recipe Archive .
Ingredients
- ▢ 1/2 cup ( 60g ) all-purpose flour measured by weight or using the spoon and sweep method*
- ▢ 1/4 teaspoon baking soda
- ▢ 1/4 teaspoon salt
- ▢ 1/3 cup ( 85g ) peanut butter (not natural peanut butter)
- ▢ 3 tablespoons ( 1.5oz ) unsalted butter softened
- ▢ 3 tablespoons ( 37g ) brown sugar
- ▢ 2 tablespoons ( 25g ) granulated sugar
- ▢ 1 large egg yolk
- ▢ 1/2 teaspoon vanilla extract
Instructions
- Pre-heat your oven to 350°F and line a baking sheet with parchment paper or silicone baking mat.
- In a small bowl, whisk together flour, baking soda, and salt.
- In a medium bowl, combine peanut butter, softened butter, brown sugar, granulated sugar, egg yolk, and vanilla. Whisk together until smooth.
- Stir in flour mixture until just combined. Scoop rounded spoonfuls of the dough and roll into 6 balls. Place dough onto prepared cookie sheet and use a fork to firmly press a crosshatch pattern onto the tops of the cookies.
- Bake for 8 to 11 minutes, until the edges of the cookies look set, but the cookies are still pale (for a crispier cookie, bake for 10 to 12 minutes until the cookies begin to darken). Cool on the baking sheet for at least 10 minutes before moving (cookies will be quite soft until they cool).
- Enjoy!
Notes
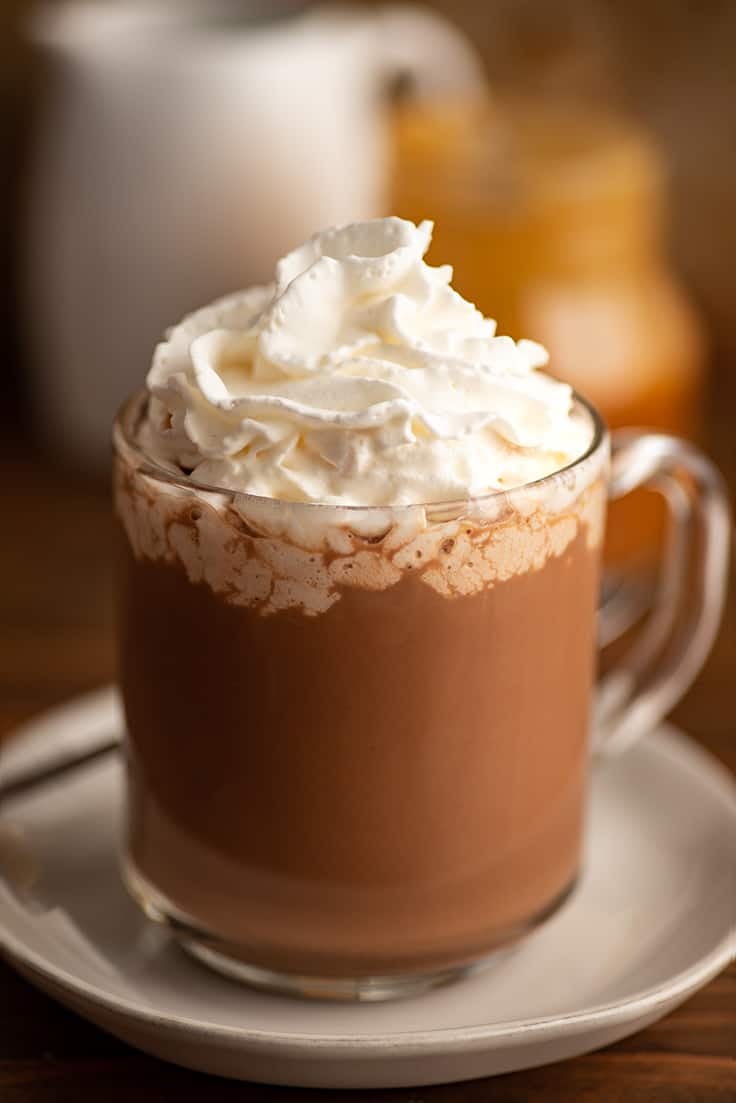
You can make a salted caramel mocha at home that’s even better than the coffee house version with just a few simple ingredients.
If you’re sitting around in your pajamas today craving a salted caramel mocha and really don’t want to get dressed and leave the house to buy one, no worries. Stay in your pajamas, head to the kitchen, and make your mocha at home this morning.
It’s super simple, quick, and easy.

What does a salted caramel mocha taste like?
If you’ve never had Starbucks’ salted caramel mocha, the drink is just what it sounds like. A creamy chocolatey mocha with notes of salted caramel and the slightly bitter edge of coffee.
It’s such a good combo, and when you make it at home you can add as much caramel as you like so you get a drink that is the perfect balance of flavors for you.
Ingredients
- Coffee: No espresso needed for this drink. Use whatever coffee you have on hand, brewed a little strong if you want an extra kick of coffee flavor.
- Milk: Starbucks uses 2% milk in their coffee drinks, but you can use any milk you’d like including non-dairy milks. The higher fat your milk, the creamier your drink will be.
- Cream: Cream is optional, but a tablespoon (or more) in your mocha gives it a delicious richness. Feel free to substitute a splash of half and half if that’s what you keep on hand. And you’ll definitely have some leftover heavy cream, so check out my post What to Do With Leftover Whipping Cream for storage tips and recipe ideas for the leftovers.
- Cocoa powder, sugar, and water: Instead of using a store-bought chocolate syrup, you’ll make a quick cocoa powder syrup to flavor the mocha base.
- Salted caramel: Use your favorite salted caramel sauce or regular caramel sauce here (add a generous pinch of salt for unsalted sauce). If caramel sauce isn’t something you keep at home, pick some up the next time you’re at the store, make my quick shortcut caramel sauce , or whip out a heavy-bottom pot, melt some sugar, and make some traditional caramel sauce yourself.
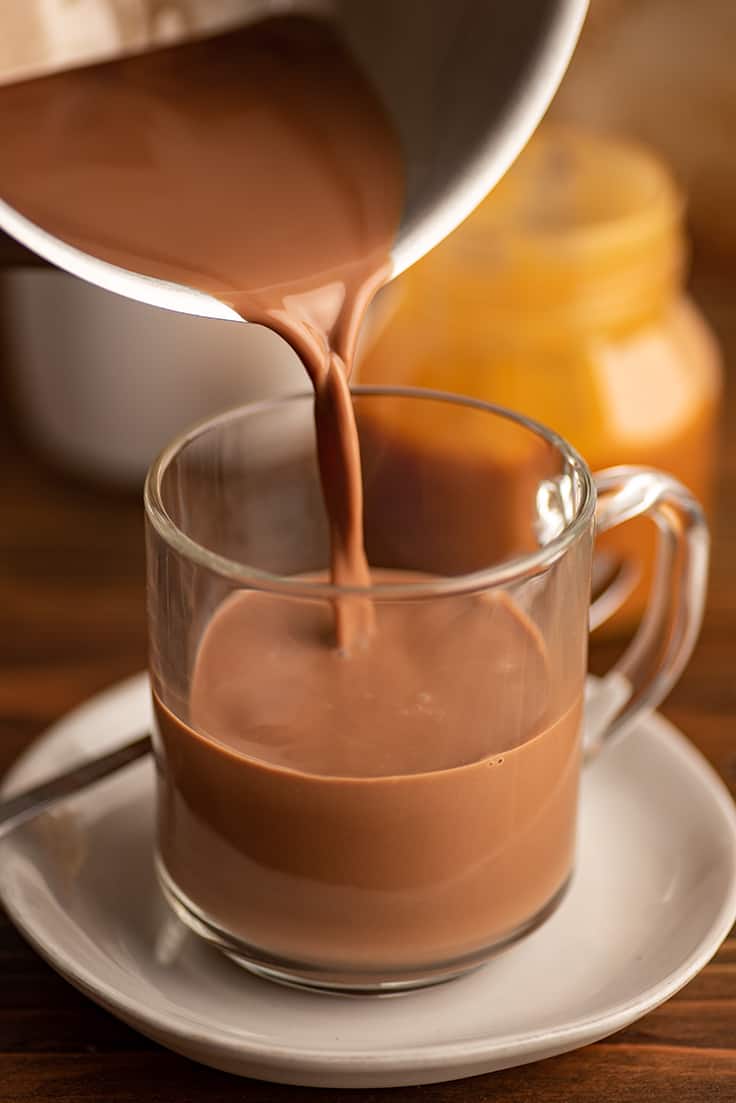

How to Make a Salted Caramel Mocha
- Make a chocolate syrup by heating the cocoa powder, sugar, and water together in a small pot.
- Stir in caramel sauce and coffee until smooth.
- Add milk and cream and heat until steaming.
- Enjoy your drink in your pajamas.
Can I make this an iced salted caramel mocha/frappuccino?
Yes! To make an iced/frappuccino version, follow the recipe making the chocolate syrup and stir in the the caramel sauce. Then add just 1/4 cup of the milk. Heat just until the mixture is completely smooth and uniform in color. Then remove from heat and combine with the remaining milk and cold coffee. Pour over ice for an iced version or blend with 1 1/2 cups of ice for a salted caramel frappuccino.
I recommend using the full 2 teaspoons of sugar for the iced version and doubling the sugar for a frappe because the blended ice will dilute the sweetness quite a bit.
How much caffeine is in a salted caramel mocha?
The Starbucks version ranges from 80 mg to 185 mg of caffeine depending on the size of the drink. In this homemade version, there is 1/2 cup of coffee which averages about 48 grams of caffeine.


Is a salted caramel mocha a holiday drink?
The Starbucks salted caramel mocha is a seasonal drink they bring back every fall alongside their pumpkin spice latte . But there’s nothing that says you can only make the homemade version in the fall.
If a salted caramel mocha sounds good to you in May or June, then absolutely make yourself one in May or June.
Can I make this without coffee?
Yes. If you’d like to make this without coffee, you can replace the coffee with the same amount of milk for a salted caramel hot chocolate .
More Starbucks Copycat Recipes
- White Chocolate Mocha
- Chai Latte
- Snickerdoodle Hot Chocolate
- Peppermint Mocha
- Iced Mocha
- Caramel Macchiato
A Note on Serving Size
This recipe makes about one cup of coffee, enough to fill an 8-ounce mug. If you’d like to fill an oversized mug, 1 1/2 or double the recipe. To double the recipe ingredients, hover over the serving size in the recipe card below or click if you’re on mobile, and slide the slider.

Ingredients
- ▢ 1 ½ teaspoon ( 3g ) unsweetened cocoa powder
- ▢ 1 to 2 teaspoons ( 4-8g ) granulated sugar *
- ▢ 1 tablespoon water
- ▢ 1 heaping tablespoon salted caramel sauce* plus optional more for topping
- ▢ ½ cup hot coffee
- ▢ ½ cup milk any percentage
- ▢ 1 tablespoon heavy cream optional
- ▢ Whipped cream for topping optional
Instructions
- In a small saucepan, stir together cocoa powder and sugar. Add water and heat over medium heat until mixture is well combined and no lumps of cocoa powder remain.
- Add caramel sauce and hot coffee and stir until caramel is melted.
- Add milk and optional heavy cream and heat, stirring often until milk is steaming hot. Do not let milk come to a boil. If desired, whisk vigorously until mocha is foamy.
- Pour into an 8-ounce mug. Taste and add more sugar/caramel if needed. Top with optional whipped cream if desired, and enjoy!
Notes
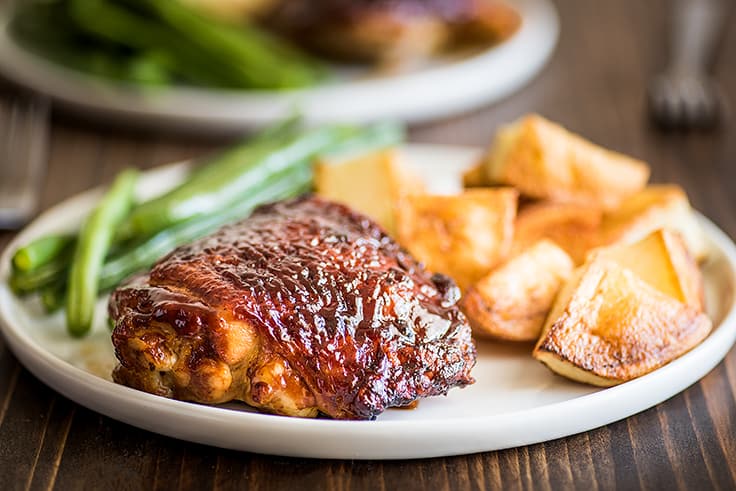
These Baked BBQ Chicken Thighs are an incredibly easy chicken dinner that you can throw together with three ingredients in about 35 minutes.
Hey, friend. If you’re craving some barbecue but don’t want to go outside and man a grill, this is the recipe for you.
This is a super simple chicken recipe that comes together fast and easy. The thighs are started on the stove so you get extra crispy skin and then finished in the oven where the BBQ sauce caramelizes and gets sticky and beautiful.


Ingredients
- Bone-in, skin-on chicken thighs: Thigh size varies wildly so plan on serving 2 small thighs or 1 very large thigh per person. If making for guests or big eaters, just automatically plan on 2 thighs per person.
- Barbecue sauce: Use a thick-style BBQ sauce as thinner sauces won’t be able to form a nice caramelized layer over the chicken. This is my go-to BBQ sauce for this recipe.
- Seasoning salt: I like to use seasoning salt here, but if you don’t have any, not a problem. You can mix up your own, or just substitute salt and pepper and a little sprinkle of garlic powder. Your chicken is still going to be delicious.
The Best Cut of Meat for Oven BBQ Chicken
Bone-in, skin-on thighs are my prefered cut of meat for oven-barbecued chicken because the skin bakes up crispy and beautiful and they always come out moist and juicy and perfect. However, if you’d like to use bone-in skin-on chicken breasts or drumsticks, you absolutely can.
Brown and bake them according to the recipe instructions but the chicken breasts will need a longer cooking time and the drumsticks a slightly shorter one.
How to Bake BBQ Chicken Thighs
- Pat chicken thighs dry (this allows the skin to become its crispiest self), sprinkle with seasoning salt, and sear them on the stove until the skin is beautiful, golden, and crispy.
A Note on Grease: Heads up if you’ve never cooked chicken thighs on the stove before. They will sizzle and pop while they cook. You can turn down the heat a little if it’s really stressing you out or use a splatter screen (I love these things) to contain any splatters.
- Then transfer thighs to a baking sheet and use a basting brush (I like the silicone ones that can go through the dishwasher) to add a very generous coating of your favorite BBQ sauce. You want a nice thick layer so you get a really good coat once it caramelizes.


- Finally, bake the thighs until an instant-read thermometer inserted into the center reads 165°F. And that’s it. Time to serve.
What to serve with BBQ chicken thighs?
My favorite things to serve this chicken with are:
- Steamed Green Beans or Butter and Garlic Green Beans
- Microwave Corn on the Cob
- Mashed Potatoes
- Macaroni Salad
- Microwave Baked Potato
At what temperature is chicken done in an oven?
Chicken is fully cooked when it reaches 165°F. Use an instant-read thermometer and check the temperature in the thickest part of the meat, making sure that the thermometer is not touching bone as you take the reading.

Can I use boneless skinless chicken breasts/chicken thighs in this recipe?
You can. I don’t love using boneless skinless chicken for oven BBQ because you don’t get that nice crispy skin, but it’s great if you want to make chicken for BBQ salads or BBQ Chicken Pizza .
Simply follow the recipe as written but brown both sides of the meat on the stove before baking. Boneless thighs will have a significantly shorter baking time, so start checking on them after 6 to 8 minutes. Depending on their size, boneless chicken breasts should take about the same amount of time as bone-in thighs, but keep an eye on them and start checking the temperature of the meat fairly early.
You Might Also Enjoy
- Slow Cooker Tri-tip Sandwiches
- Slow Cooker Beef Ribs
- Country-style Pork Ribs
- Carne Asada
- Crispy Lemon Chicken Thighs
- Chicken Shawarma

Ingredients
Special Equipment
- ▢ Foil optional but nice to have*
- ▢ Splatter screen optional but nice to have
- ▢ Silicone basting brush optional but nice to have
- ▢ Instant-read thermometer
BBQ Chicken
- ▢ 4 to 8 bone-in, skin-on chicken thighs *
- ▢ Seasoning salt or salt and pepper
- ▢ 1 tablespoon olive oil
- ▢ 1/2 cup BBQ sauce plus more as needed*
Instructions
- Preheat oven to 425°F and line a baking sheet with foil.*
- Pat thighs dry and examine the underside for any cartilage or bone fragments. Sprinkle both sides with seasoning salt.
- Heat oil in a large skillet over medium-high heat. Once the oil is hot, swirl it around the pan so the entire surface is covered. Place chicken thighs in the pan, skin-side down. If chicken is sizzling and popping to aggressively, turn heat down slightly or cover with a splatter screen.
- Cook thighs until skin is deeply golden, and skin has released from the pan, 4 to 6 minutes. Remove pan from heat.
- Transfer thighs, skin-side up, to a baking sheet and brush each thigh very generously with 1 to 2 tablespoons of BBQ sauce so there is a thick coating over all parts of the thigh showing.
- Bake for 15 to 22 minutes, until an instant-read thermometer inserted into the center of the thigh reads 165°F
- Serve and enjoy!
Notes
These small-batch peanut butter cookies are easy to make, super peanut buttery, and SO good.
Hey, workweek got you down? You should make yourself a cute little batch of peanut butter cookies. Your day will get 97% better immediately. I promise.
I love a good peanut butter cookie and these cookies definitely earn that label. Other words used to describe them by taste testers have been, “amazing,” “really really good,” and “my favorite peanut butter cookies ever.”
The Perfect Small-batch Peanut Butter Cookies
These cookies are super peanut buttery and the perfect (or at least my perfect) peanut butter cookie texture where they’re a little soft and crumbly, a little chewy, and with a little extra oven time, a little crunchy.
This recipe makes six cookies so there are just enough to share, but not so many that you’re in any real trouble should you choose not to. 😉
Notes Ingredients
- Baking staples: The bulk of the ingredients for these cookies is made up of baking staples, flour, baking soda, salt, butter, brown and granulated sugar, and vanilla extract.
- Peanut butter: Smooth or chunky peanut butter will work, but stick with a processed brand like Jiff or Skippy, as these give you the most consistent results for baking.
- Egg yolk: This recipe uses only an egg yolk. For ideas on what to do with that leftover egg white, check out my post What to Do With Leftover Egg Whites (I recommend a small batch of banana muffins ).
How to Make a Small Batch of Peanut Butter Cookies
- Mix dry ingredients together in a small bowl.
- Whisk together wet ingredients in a medium bowl. You can use a handheld mixer for this part if you’d like, but all you really need is a whisk and a little elbow grease.
- Stir dry ingredients into the wet and mix.
- Scoop rounded spoonfuls of the dough and roll into balls before placing on the cookie sheet and using a fork to press a crosshatch pattern into the top of each cookie.
- Bake and let the cookies cool and set for at least 10 minutes before eating.
Peanut Butter Cookie Variations
- Chocolate chip/Peanut butter cup cookies: Add 1/3 cup of chocolate chips or chopped peanut butter cups to the dough before baking.
- Nutella-stuffed cookies: On a plate lined with parchment paper, freeze six 1-tablespoon-sized dollops of Nutella until solid, about 20 minutes. Make the cookie dough, and when forming the cookie dough balls, split them in half and place a frozen dollop of Nutella inside. Squish the top and bottom halves back together, press with a fork, and bake according to recipe instructions.
- Peanut butter cookie sundae: Top warm cookies with a scoop of ice cream, peanut butter sauce or fudge sauce (or both!!), whipped cream , and sprinkles.
Small-batch Peanut Butter Cookies Troubleshooting
These cookies are pretty simple to make, but occasionally people run into trouble. These are the two issues I’ve seen:
Warm cookies are falling apart: This is normal! The cookies need to set before you can eat them. If you try to move them right after they come out of the oven, they will crumble in your hand. Give them 10 to 15 minutes on the baking sheet and they will firm right up.
If you prefer a softer, slightly underdone cookie and don’t want them to continue to cook from the heat of the baking sheet, slide the entire sheet of parchment paper (with the cookies still on it) off the tray onto the cool counter. This might be a little challenging if you’re using a rimmed baking sheet, but I believe in you.
Dough too crumbly: This happens when there is too much flour in your dough or if you have an extra small egg yolk. Next time be sure to measure the flour by weight or using the spoon and sweep method (stir the flour in your container to fluff it up and then spoon it into your measuring cup, sweep excess off with the flat of a knife).
You can fix the dough by adding just a bit of milk or water, 1/2 teaspoon at a time, until the dough comes together and there is no dry flour at the bottom of your bowl.
How to store peanut butter cookies?
Store your cookies at room temperature in an airtight container for up to five days.
Can I freeze peanut butter cookies?
Yes! These cookies freeze really well. If you have leftovers, put them in a freezer bag and they will keep in the freezer for up to 2 months.
Can I use natural peanut butter in these cookies?
You could probably get away with using natural peanut butter if you really want to, but these cookies have not been tested with it, so I can’t guarantee the results.
More Peanut Butter Desserts
- Peanut Butter Cookie for Two
- Peanut Butter Oatmeal Cookies
- Small-batch Monster Cookie Bars
- Peanut Butter Hot Chocolate
More Small-batch Cookies
- Small-batch Chocolate Chip Cookies
- Small-batch Oatmeal Cookies
- Perfect Small-batch Sugar Cookies
- Small-batch Gingerbread Cookies
- Small-batch Shortbread Cookies
Or check out my entire Small-batch Cookie Recipe Archive .

Ingredients
- ▢ 1/2 cup ( 60g ) all-purpose flour measured by weight or using the spoon and sweep method*
- ▢ 1/4 teaspoon baking soda
- ▢ 1/4 teaspoon salt
- ▢ 1/3 cup ( 85g ) peanut butter (not natural peanut butter)
- ▢ 3 tablespoons ( 1.5oz ) unsalted butter softened
- ▢ 3 tablespoons ( 37g ) brown sugar
- ▢ 2 tablespoons ( 25g ) granulated sugar
- ▢ 1 large egg yolk
- ▢ 1/2 teaspoon vanilla extract
Instructions
- Pre-heat your oven to 350°F and line a baking sheet with parchment paper or silicone baking mat.
- In a small bowl, whisk together flour, baking soda, and salt.
- In a medium bowl, combine peanut butter, softened butter, brown sugar, granulated sugar, egg yolk, and vanilla. Whisk together until smooth.
- Stir in flour mixture until just combined. Scoop rounded spoonfuls of the dough and roll into 6 balls. Place dough onto prepared cookie sheet and use a fork to firmly press a crosshatch pattern onto the tops of the cookies.
- Bake for 8 to 11 minutes, until the edges of the cookies look set, but the cookies are still pale (for a crispier cookie, bake for 10 to 12 minutes until the cookies begin to darken). Cool on the baking sheet for at least 10 minutes before moving (cookies will be quite soft until they cool).
- Enjoy!
Notes

Small-batch Peanut Butter Cookies
Ingredients
- 1/2 cup ( 60g ) all-purpose flour measured by weight or using the spoon and sweep method*
- 1/4 teaspoon baking soda
- 1/4 teaspoon salt
- 1/3 cup ( 85g ) peanut butter (not natural peanut butter)
- 3 tablespoons ( 1.5oz ) unsalted butter softened
- 3 tablespoons ( 37g ) brown sugar
- 2 tablespoons ( 25g ) granulated sugar
- 1 large egg yolk
- 1/2 teaspoon vanilla extract
Instructions
- Pre-heat your oven to 350°F and line a baking sheet with parchment paper or silicone baking mat.
- In a small bowl, whisk together flour, baking soda, and salt.
- In a medium bowl, combine peanut butter, softened butter, brown sugar, granulated sugar, egg yolk, and vanilla. Whisk together until smooth.
- Stir in flour mixture until just combined. Scoop rounded spoonfuls of the dough and roll into 6 balls. Place dough onto prepared cookie sheet and use a fork to firmly press a crosshatch pattern onto the tops of the cookies.
- Bake for 8 to 11 minutes, until the edges of the cookies look set, but the cookies are still pale (for a crispier cookie, bake for 10 to 12 minutes until the cookies begin to darken). Cool on the baking sheet for at least 10 minutes before moving (cookies will be quite soft until they cool).
- Enjoy!
