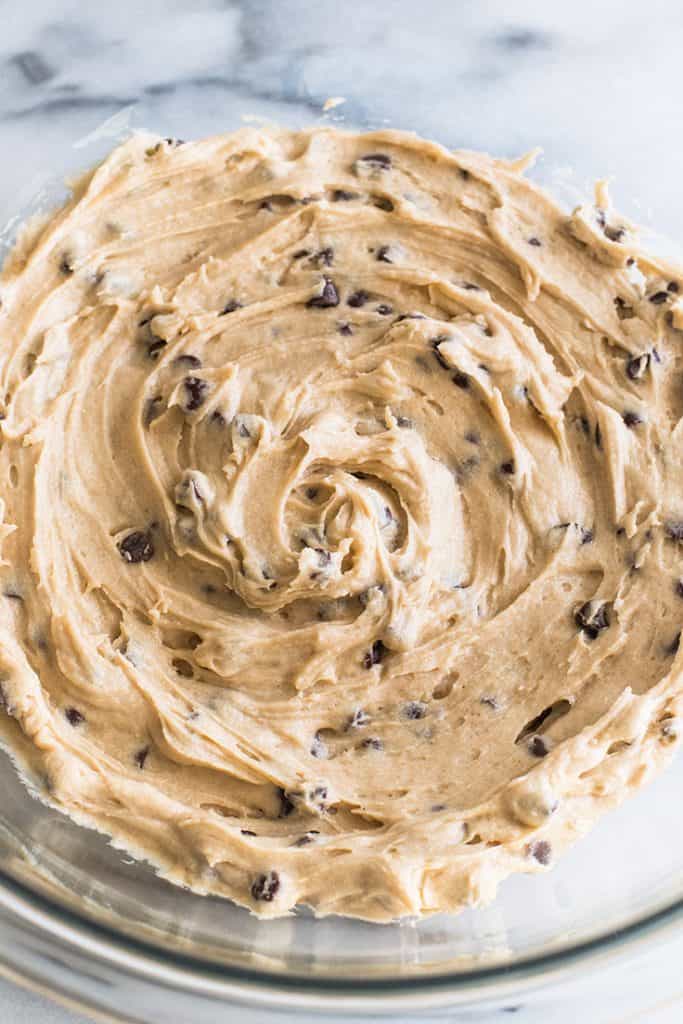
This Small-batch Cookie Dough Frosting tastes just like an extra creamy batch of cookie dough that you happen to get to spread over a cupcake. If you’ve ever made chocolate chip cookies and been tempted to just eat the dough by the spoonful instead of baking it, this is the frosting for you.

Hey, friends, I have another small-batch frosting recipe for you today. I started sharing these frosting recipes alongside my small-batch cupcakes back in August because I wanted you guys to be able to mix and match small-batch cupcakes and frostings to make whatever kinds of cupcake creations you were craving.
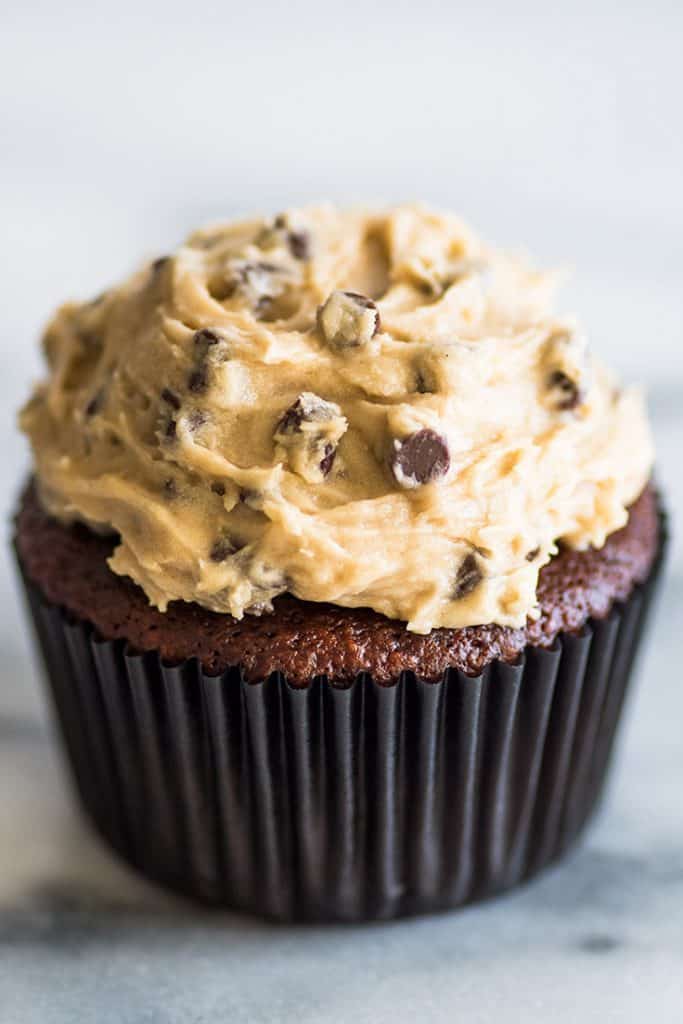
And today, we have Small-batch Cookie Dough Frosting! I used this a couple months ago on these Chocolate Cookie Dough Cupcakes , but today I’m sharing just the frosting as a stand-alone recipe.
And if you haven’t tried it yet, this frosting is crazy good. If you’ve ever made chocolate chip cookies (these Small-batch Chocolate Chip Cookies perhaps?) and been tempted to just eat the dough by the spoonful instead of baking it, this is the frosting for you. It tastes just like an extra creamy batch of cookie dough that you happen to get to spread over a cupcake.
And I mean, that’s the dream, right?
Like my other small-batch frosting recipes, this Cookie Dough Frosting makes about one cup of frosting and is enough to generously top four to six cupcakes with a piping bag or about eight cookies or cupcakes when spread on with a knife. It’s fabulous over cupcakes, but I’m currently dreaming of spreading it over brownies , or maybe even sugar cookies …

How to Make Cookie Dough Frosting
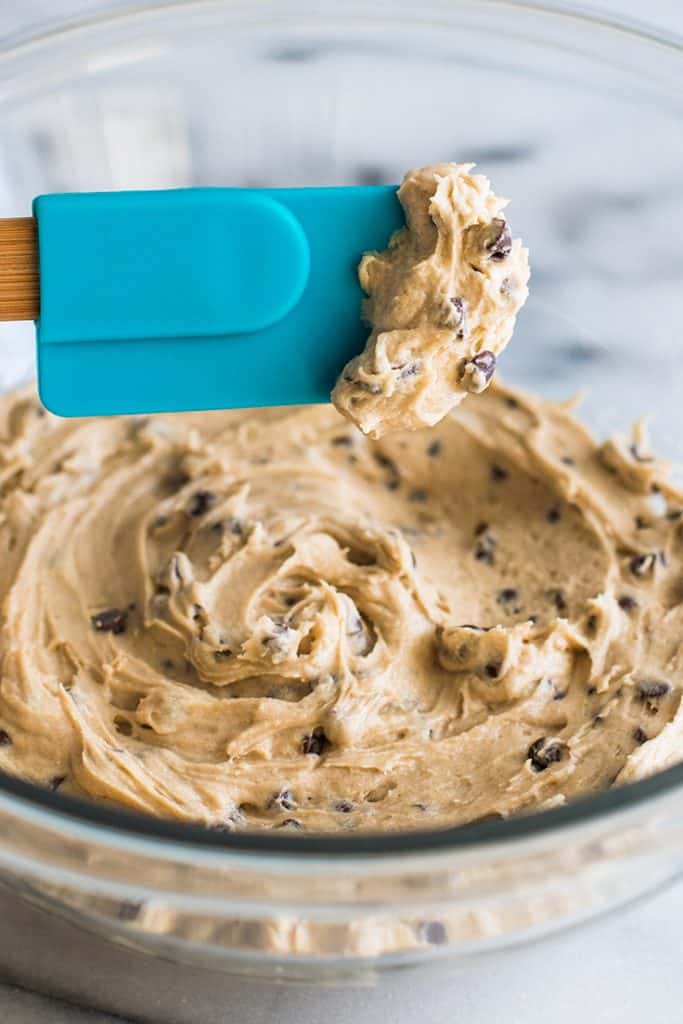
The reason this Cookie Dough Frosting tastes like cookie dough because it is essentially cookie dough, minus the eggs and leaveners and with slightly different ingredient ratios. It’s even made the same way. Just like with cookie dough, you start by creaming softened butter and brown sugar, adding vanilla, and then beating in the flour and salt. But then instead of putting that mixture into the oven, you drizzle in some milk or cream and beat the frosting until it is light and fluffy before folding in lots of chocolate chips.
It’s sooooo good.
If you’re reading this thinking that flour seems like an odd ingredient for frosting, 1) it’s actually really important to the flavor. Part of the cookie dough taste is the flour taste. You might not think of flour as tasting like anything, but it absolutely does. And 2) flour is used in frosting all the time. There’s actually an entire category of frosting called Flour Buttercream or Ermine Frosting made with flour, so it’s way less strange than you might think.
How to Cook Flour for Cookie Dough Frosting
As with under-cooked eggs, consuming raw flour does run the very slight risk of food poisoning , so if you’re concerned about that, you can absolutely cook your flour before adding it to your frosting. I do find that cooking the flour removes the raw flour taste which is part of the cookie dough flavor (I know, who knew there were so many facets to the taste of flour), but your frosting will still be excellent.
To cook your flour, simply line a baking sheet with parchment paper and spread your flour out over the top. Bake at 350°F for 10 minutes and then allow the flour to cool completely. Baked flour has a tendency to clump together, so you’ll need to sift it to get rid of any lumps, but after that, you’re just a few minutes and a few ingredients from the Cookie Dough Frosting of your dreams.

Small-batch Cookie Dough Frosting Recipe Tips
- Properly softened butter is a MUST for the frosting recipe. If your butter is not soft enough, the ingredients will not mix completely and you will end up with little flour lumps in your frosting. You want butter that is not melted but soft enough to easily squish with a finger. This shouldn’t be a problem during the summer, but in cold kitchens during the winter, you might need to cut the butter into cubes and place somewhere warm for a couple minutes.
- Finally, I recommend using a handheld electric mixer for the frosting. Small-batch frostings can usually be made by hand in a pinch, but I suspect you’ll have a hard time getting the flour to mix completely in this recipe if doing it by hand.
Looking for more small-batch frostings, try my Vanilla Frosting , Chocolate Frosting , Chocolate Cream Cheese Frosting and Cream Cheese Frosting .
Ingredients
Special Equipment
- ▢ Handheld electric mixer
- ▢ Fine-mesh strainer or sifter for sifting cooked flour
Cookie Dough Frosting
- ▢ 1/2 cup ( 60g ) all-purpose flour measured by weight or using the spoon and sweep method*
- ▢ 1/4 cup ( 2oz ) unsalted butter softened (very soft but not melted)
- ▢ 1/4 cup + 2 tablespoons ( 75g ) brown sugar
- ▢ 1/2 teaspoon vanilla extract
- ▢ 1/4 teaspoon salt
- ▢ 2 tablespoons milk plus more to taste
- ▢ 1/4 cup ( 42g ) semi-sweet miniature chocolate chips
Instructions
- Preheat your oven to 350°F and line a baking sheet with parchment paper. Sprinkle flour over the parchment paper and bake for 10 minutes. Cool completely.
- In a medium bowl, use a handheld electric mixer to cream well-softened butter and brown sugar until light and fluffy, 1 to 2 minutes.
- Add vanilla and beat until well-combined.
- Sift flour and salt over the top, and with your mixer on medium, mix until flour is completely mixed in, 1 to 2 minutes. The frosting will look like course crumbs.
- Add 2 tablespoons of the milk and beat, starting on low working up to high until frosting is smooth and fluffy.
- If frosting is too stiff, add milk by the 1/2 teaspoon until the frosting reaches your desired consistency.
- Fold in your chocolate chips.
- Use frosting to frost cupcakes, brownies, or cookies, and enjoy!
Notes

Frosting Adapted From I Am Baker
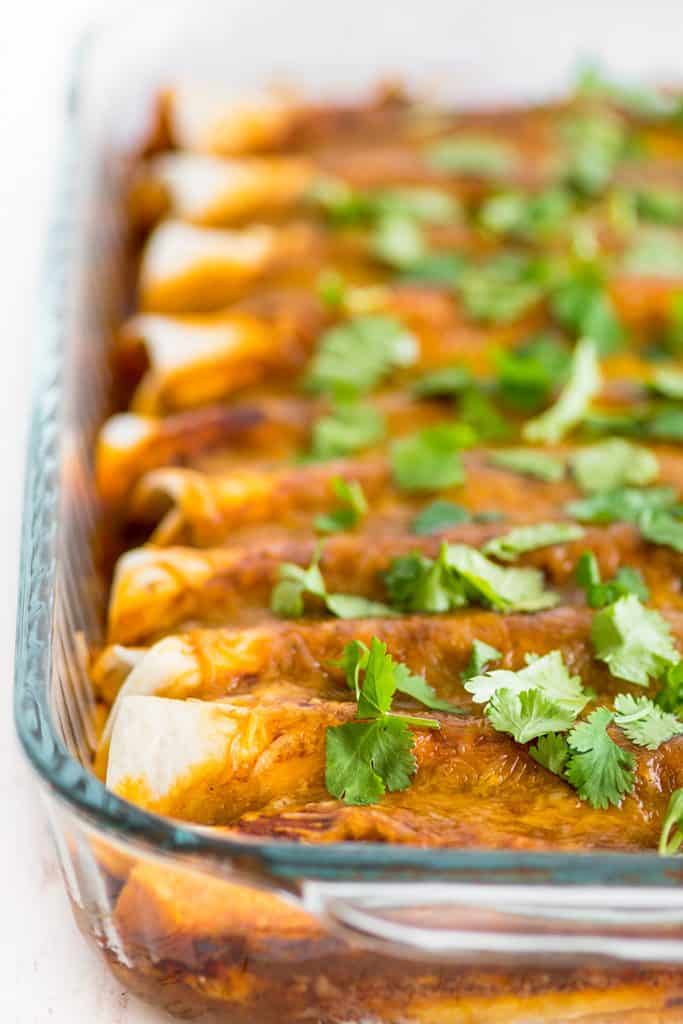
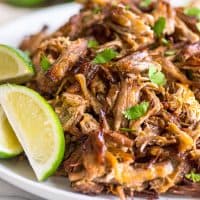
Carnitas Enchiladas (AKA Pulled Pork Enchiladas) are a delicious alternative way to eat enchiladas. Rich, crispy carnitas are wrapped in tortillas and covered with a tangy homemade enchilada sauce and plenty of cheese. This recipe makes ten enchiladas which can be baked all at once or frozen in batches for smaller households.

Two weeks ago, I shared the best, most crispy and amazing Homemade Carnitas Recipe along with Carnitas Tacos, made three different ways . And I hope you’re not all carnitas’d out because I have one more carnitas recipe for you today: Carnitas Enchiladas.
During my carnitas recipe testing extravaganza, because of the truly astounding amount of carnitas I had around the house for a solid two months, I made these enchiladas SO often, and never ever got tired of them.

Carnitas are a fabulous filling for enchiladas because they are super rich and flavorful all on their own so they don’t get overwhelmed by the other ingredients. Add all the cheese and sauce you want, and you’re still going to get plenty of that great carnitas flavor when you bite into these enchiladas.
And the sauce, I LOVE this sauce. It’s smooth, a little tangy, and not too bitter. It’s perfect over meat and tortillas, but I always kind of want to eat it with a spoon too.
It’s that good.
That being said, it’s definitely not authentic enchilada sauce, so if you have a favorite sauce of your own, feel free to use that instead.
I always make these enchiladas with my homemade carnitas recipe as a way to use up leftovers, but if you don’t have carnitas made already, I’ve embedded my carnitas recipe below the enchilada recipe. You can also click through to that post to see more step by step carnitas instructions.
OR, if you have regular pulled pork on hand, you can use that. Pulled pork and carnitas are made from the same cut of meat, and there’s enough seasoning in the sauce that it doesn’t matter too much how the pork was originally seasoned.
How to Make Carnitas Enchiladas (Pulled Pork Enchiladas)
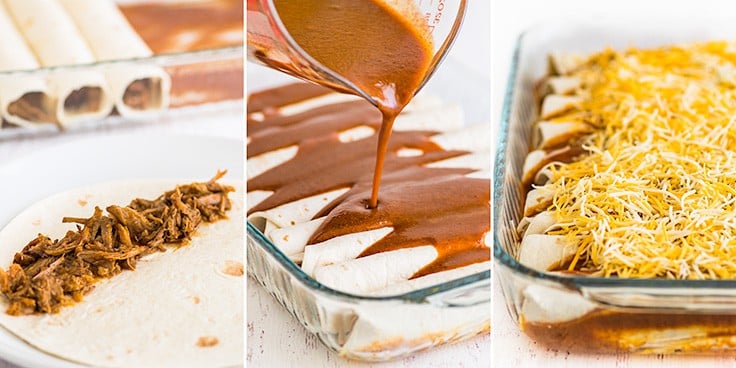

These are some of the easiest enchiladas to whip up. The sauce is made from pantry staples that simply get whisked together on the stove and simmered until thickened. And then you’re ready to assemble your enchiladas.
The carnitas are mixed with a bit of sauce, wrapped in tortillas, and lined up in a casserole dish. Then you pour on the sauce, add cheese, and bake.
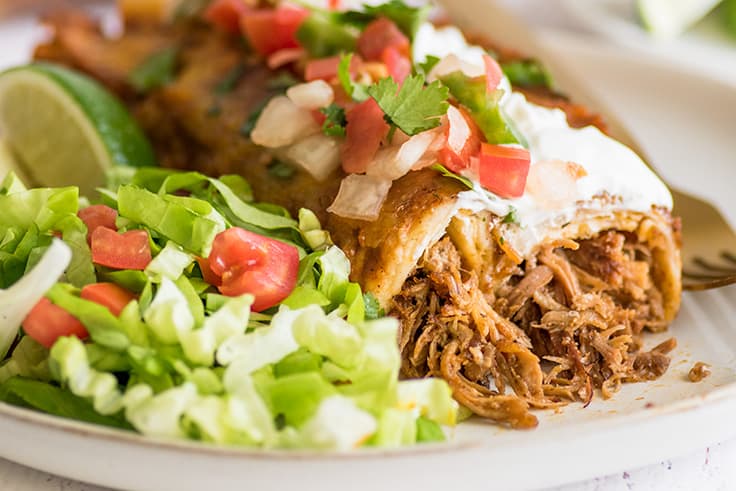
Thirty minutes later, you end up with enchiladas that are cheesy, rich, and perfect for piling high with sour cream and pico de gallo and serving to friends and family.

Freezing Carnitas Enchiladas
The recipe I’m sharing today makes a full-size casserole dish and will serve five people two enchiladas each. I’m sharing a full-size version for two reasons: 1, I really like to make this for other people. It’s a real crowd pleaser and a low-stress dinner to make for guests. 2, it freezes very well, so if you’re a small household, freeze this (unbaked) in batches and you can get two or three meals out of it.
I’ve included detailed freezing and reheating instructions in the recipe card, but this will make two 8×8 pans of five enchiladas or three 5×7 pans of three or four.
You Might Also Enjoy
- Chicken Enchiladas
- Homemade Barbacoa
- Easy Carne Asada
- Chicken Fajitas
- Barbacoa Tacos
Carnitas Enchilada Recipe Notes
- If you have a favorite enchilada sauce of your own, use 3 cups of your favorite sauce.
- If you like really saucy, wet enchiladas, 1 1/2 this sauce recipe.
- Feel free to add more cheese, corn, black beans, etc., to the carnitas filling. Make the carnitas enchiladas of your heart.
- Serve alongside quick and simple sides like Cilantro Lime Rice , Green Beans , or Steamed Broccoli .
Ingredients
Special Equipment
- ▢ 9x13-inch rectangular casserole dish or smaller dishes for freezing and half batches*
Enchilada Sauce
- ▢ 3 tablespoons olive oil
- ▢ 3 tablespoons all-purpose flour
- ▢ 2 tablespoons chili powder
- ▢ 1 1/2 teaspoons ground cumin
- ▢ 3/4 teaspoon garlic powder
- ▢ 1/4 heaping teaspoon dried oregano
- ▢ 1/4 heaping teaspoon salt
- ▢ 3 tablespoons tomato paste
- ▢ 3 cups chicken or vegetable broth
- ▢ 1 1/2 teaspoons apple cider vinegar or distilled white vinegar
- ▢ Black pepper
Enchiladas
- ▢ 10 8-inch tortillas flour or corn
- ▢ 4 cups pulled pork carnitas warm
- ▢ 1 1/2 cup shredded Mexican cheese blend or colby-jack cheese
Toppings
- ▢ Cilantro
- ▢ Pico de Gallo
- ▢ Sour Cream
Instructions
Enchilada Sauce
- Pre-measure all of your sauce ingredients (flour, spices, and salt will be added together so they can all go in the same small bowl) and place them next to the stove.
- In a medium pot, heat oil over medium heat. Add flour, spices, and salt and whisk until a thick paste forms and begins to bubble, 30 seconds to 1 minute.
- Whisk in tomato paste and stir until mostly combined. Slowly pour in broth, whisking out any lumps as they form and whisk until completely smooth. Bring to a simmer and cook, whisking often, until sauce has thickened, 6 to 9 minutes.
- Remove from heat, stir in vinegar, and add salt and pepper to taste. Set aside to cool slightly.
Assemble Enchiladas
- Preheat oven to 350°F.
- Lightly grease your baking dish and add 1/4 cup of the enchilada sauce to the bottom of your dish, spreading it so that it mostly coats the bottom in a thin layer.
- Place warm carnitas in a bowl and add 3/4 cup of sauce. Stir until well-combined. Fill each tortilla with about 1/3 cup of meat and roll tightly. Place in the baking dish, seam-side down.
- Pour remaining sauce over the enchiladas and sprinkle the cheese over the top.
Bake
- Bake for 25 to 30 minutes, until cheese is melted and the edges of the tortillas are just slightly crispy and browned.
- Cool for 10 minutes before serving. Top with sour cream and pico de gallo if desired. Enjoy!
Notes
Sauce Adapted From Cookie and Kate
Ingredients
Special Equipment
- ▢ Large Dutch oven
Carnitas
- ▢ 1/4 cup vegetable oil
- ▢ 4-6 pound pork shoulder roast boneless or bone-in, trimmed of fat cap and cut into fist-sized chunks
- ▢ Salt and pepper
- ▢ 1 large onion diced
- ▢ 1 clove garlic crushed
- ▢ 3 tablespoons lime juice
- ▢ 1 tablespoon chili powder
- ▢ 1/2 teaspoon dried oregano
- ▢ 1/2 teaspoon ground cumin
- ▢ 6-8 cups ( 3-4 14.5 ounce cans) chicken broth
Instructions
- Pre-measure all your ingredients, dice your onion, and prep your garlic. Once you get started cooking, things move fast.
- Generously salt and pepper pork chunks on all sides.
- In a large Dutch oven, heat oil over medium-high heat. Once hot, brown meat on all sides, in batches if necessary. This will take 10 to 15 minutes.
- Add onion, garlic, lime juice, chili powder, oregano, cumin, and enough chicken broth so the meat is mostly covered. Bring to a boil and then reduce heat to a low simmer. Cover and cook for 2 to 2 1/2 hours, until meat is tender and can be easily pulled apart with a fork.
- Preheat oven to 400°F and line a baking sheet with foil for easier cleanup. Use a large slotted spoon to transfer meat to a cutting board (reserve the broth) and use two forks to shred the meat. Transfer shredded meat to the baking sheet and spread it in an even layer over the surface. Drizzle 1/4 cup of the cooking liquid over the meat, sprinkle with salt, and bake for 10 minutes.
- Drizzle a little more broth over the meat, cook 10 minutes more, and repeat for a total of 30 minutes, until edges are crispy and browned.
- Serve and enjoy.
Notes
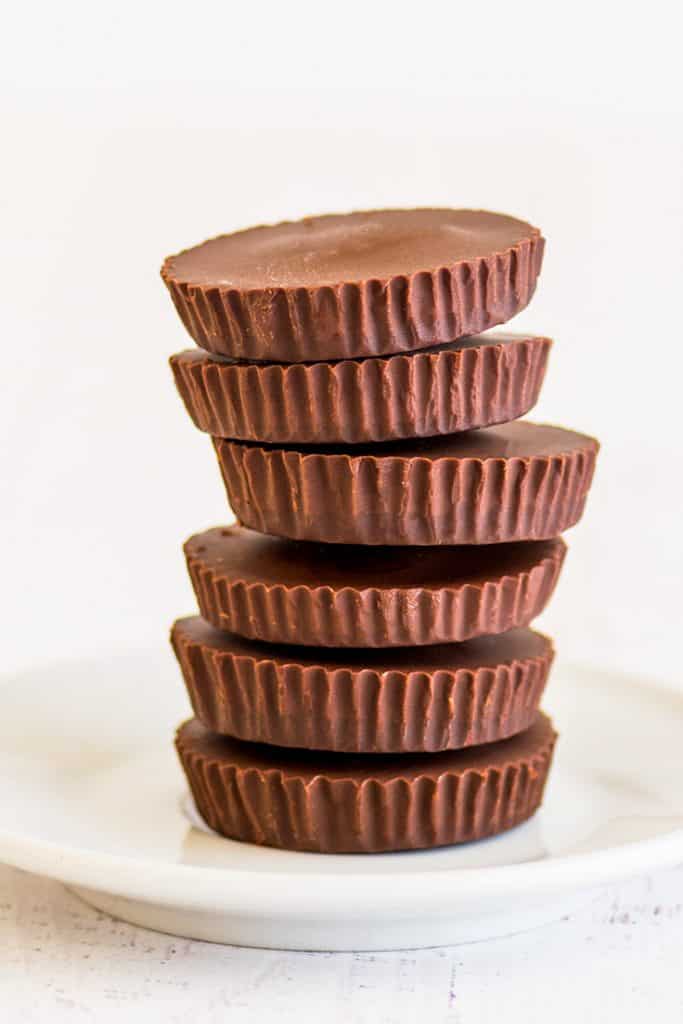
Homemade peanut butter cups are super easy to throw together and perfect for days when you’re craving something sweet but have an empty baking cupboard. These can be made with just three ingredients and 15 minutes.

Hey, you ever have one of those lazy afternoons where you’re CRAVING sugar but there’s nothing sweet in your entire house/apartment/illegally zoned yurt except a half-full bag of chocolate chips, and you’re not quite that desperate—yet?
The next time that happens, I have a solution for you. Make a batch of these four-ingredient peanut butter cups. They use ingredients you probably have in your cupboard, don’t require you to turn on the oven or stove, and are way, way more fun/more delicious/less sad to eat than a handful of chocolate chips.
What You Need For Homemade Peanut Butter Cups
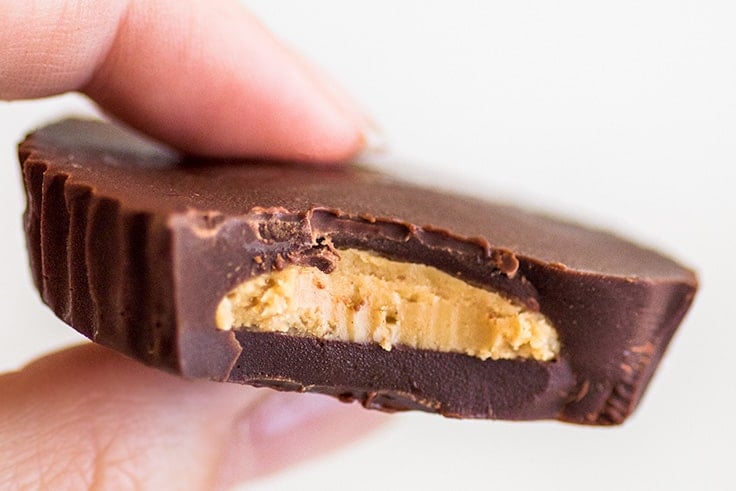
These homemade peanut butter cups need just four ingredients: chocolate, coconut oil, peanut butter, and powdered sugar, and two of those ingredients are negotiable.
The coconut oil can be omitted, but it makes for smoother melted chocolate which is easier to work with (so if you have it, use it). And if you don’t have powdered sugar in your cupboard, brown or regular granulated can be substituted. Your peanut butter layer will just be a little grainy.
You will also need some freezer space (for chilling between layers), a muffin tin (I like using my 6-cup muffin tin because it requires less freezer space, but full-size works just fine), and paper liners. (Don’t try to make these without liners. They would be a pain to get out of the pan.)
How to Make Homemade Peanut Butter Cups


To make the peanut butter cups, you just layer melted chocolate and coconut oil, melted peanut butter plus powdered sugar, and more melted chocolate, chilling in between each layer for a couple of minutes. The whole process will take about 15 minutes to assemble the candies and another 10 minutes or so for them to chill enough to eat.
I like to use the downtime between layers to scrub counters, put away dishes, or rearrange my junk drawer, so at the end of the chilling time, I have delicious candy AND a super clean kitchen.
This recipe will make six regular-size peanut butter cups or twelve minis. Once they have solidified, I transfer them (with wrappers still on) to an airtight freezer bag or container and store in the refrigerator or freezer.


Homemade Peanut Butter Cup Substitutions
You can customize these in a ton of ways, but here are a couple of recommendations to get you started:
- White chocolate peanut butter cups – You can use good-quality white chocolate to make peanut butter cups, but heads up: white chocolate is a little more finicky to melt in the microwave, so watch it closely and make sure not to overheat it.
- Nutella – Nutella can be substituted for peanut butter and does not need any additional sugar. Just melt for 15 seconds in the microwave until easily spreadable.
- Sprinkles – Nonpareils sprinkled over the top chocolate layer before it sets make cuter cups and add a nice crunch.
Recipe Notes
- This recipe calls for refined coconut oil. You can use unrefined, but it will make your chocolate taste slightly of coconut.
- If it’s cool in your kitchen and your coconut oil is in its solid state, don’t worry too much about getting exactly one/one-and-a-quarter teaspoons of oil. A little more or less won’t negatively affect your chocolate.
- My favorite way of measuring peanut butter and other sticky substances is to measure it by weight using a kitchen scale so you’re not continuously trying to scrape it out of measuring spoons.

Looking for more easy desserts? Try my Small-batch Chocolate Chip Cookies , Peanut Butter Bars , and 30-Second Easy Chocolate Sauce .

Ingredients
Special Equipment
- ▢ Muffin tin OR
- ▢ Mini muffin tin
- ▢ Cupcake liners
Homemade Peanut Butter Cups
- ▢ 2/3 heaping cup ( 4.5oz ) chocolate chips divided
- ▢ 2 1/4 teaspoons refined coconut oil divided (optional)
- ▢ 3 tablespoons ( 48g ) peanut butter (not natural peanut butter)
- ▢ 1 tablespoon ( 8g ) powdered sugar sifted
Instructions
- Clear space in your freezer for a muffin tin. Line tin with 6 liners ( 12 if making minis).
- Place 3 small microwave-safe bowls on the counter. To the first, add 1/3 cup chocolate chips and 1 teaspoon coconut oil. To the second, add 1/3 heaping cup of chocolate chips and 1 1/4 teaspoon coconut oil. To the third, 3 tablespoons of peanut butter.
- Melt the chocolate in the first bowl by microwaving for 30 seconds. Stir and microwave for an additional 15 seconds if necessary, until you are able to stir the chocolate smooth. Add 1 heaping teaspoon of chocolate to each prepared muffin cup, smoothing the chocolate out into an even layer so it covers the entire bottom. If there is any chocolate left in the bowl, divide it evenly(ish) between the cups. Place in the freezer for 5 minutes or until chocolate is hardened.
- Place the bowl with peanut butter in the microwave and heat for 20 seconds. Stir and heat for an additional 10 seconds if the peanut butter is not smooth and pourable. Stir in powdered sugar and drop a teaspoon of peanut butter onto the center of each muffin cup. The peanut butter should spread to almost the edges but not touch. If there is any leftover peanut butter, divide it between the cups. Freeze for 5 minutes.
- Repeat step 3 with remaining bowl of chocolate. Freeze for at least 10 minutes. Enjoy!
Notes

Small-batch Cookie Dough Frosting
Ingredients
Special Equipment
- Handheld electric mixer
- Fine-mesh strainer or sifter for sifting cooked flour
Cookie Dough Frosting
- 1/2 cup ( 60g ) all-purpose flour measured by weight or using the spoon and sweep method*
- 1/4 cup ( 2oz ) unsalted butter softened (very soft but not melted)
- 1/4 cup + 2 tablespoons ( 75g ) brown sugar
- 1/2 teaspoon vanilla extract
- 1/4 teaspoon salt
- 2 tablespoons milk plus more to taste
- 1/4 cup ( 42g ) semi-sweet miniature chocolate chips
Instructions
- Preheat your oven to 350°F and line a baking sheet with parchment paper. Sprinkle flour over the parchment paper and bake for 10 minutes. Cool completely.
- In a medium bowl, use a handheld electric mixer to cream well-softened butter and brown sugar until light and fluffy, 1 to 2 minutes.
- Add vanilla and beat until well-combined.
- Sift flour and salt over the top, and with your mixer on medium, mix until flour is completely mixed in, 1 to 2 minutes. The frosting will look like course crumbs.
- Add 2 tablespoons of the milk and beat, starting on low working up to high until frosting is smooth and fluffy.
- If frosting is too stiff, add milk by the 1/2 teaspoon until the frosting reaches your desired consistency.
- Fold in your chocolate chips.
- Use frosting to frost cupcakes, brownies, or cookies, and enjoy!
