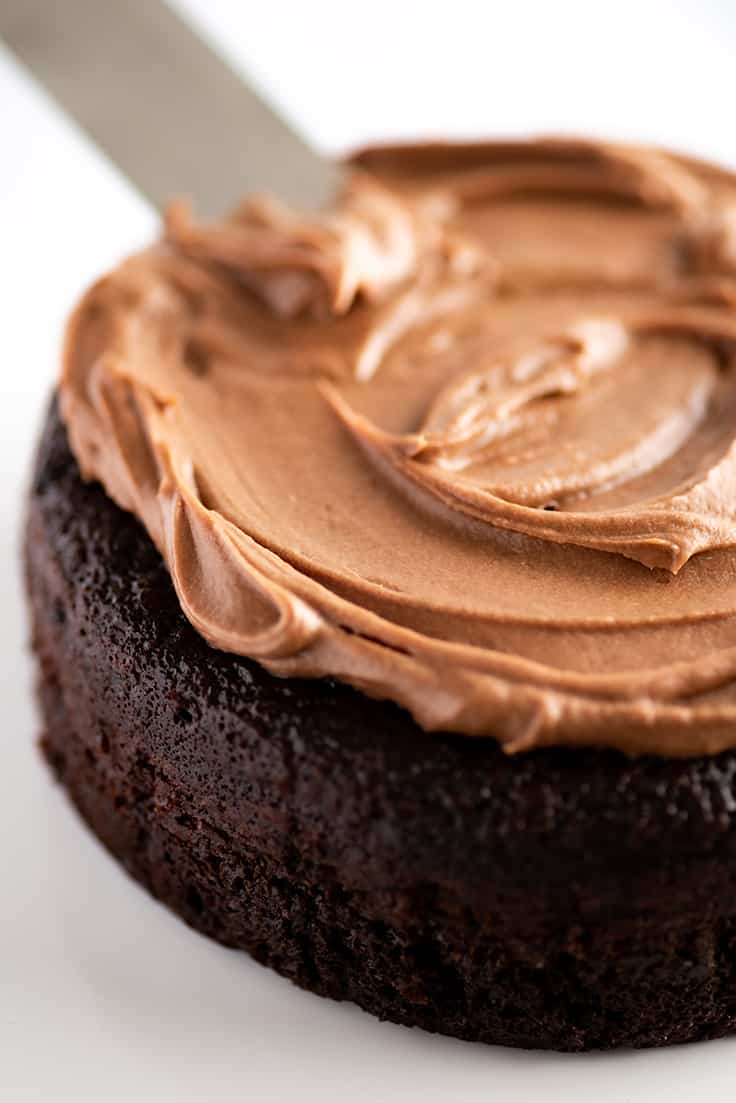
This small-batch Chocolate Cream Cheese Frosting is silky smooth, deeply chocolatey, and incredibly decadent. It’s pretty much the best thing you’ll ever spread onto a cupcake.
I have another small-batch frosting recipe for you today, and this one is one of my favorites. This Chocolate Cream Cheese Frosting is SO creamy and SO spectacularly good, good luck not just sitting there and eating it with a spoon (that’s what I like to do 😉).
And the best part is that it’s just as easy to make as a classic American chocolate buttercream but with the added smoothness and tang of cream cheese.

Recipe Yield
This recipe will make about 1 cup of frosting depending on how much air you whip into it. It will frost (about):
- 4 to 6 cupcakes with a piping bag
- 8 cookies
- 1 single-layer 6-inch or 7×5-inch cake or brownies (top and sides)
- 1 8-inch cake (thin layer over top only)
*If you want to use this frosting to frost a 6-inch 2-layer cake, double the recipe.
Chocolate Cream Cheese Frosting Ingredients
- Cream cheese: You’ll want to use full-fat cream cheese here for the best results. Philadelphia cream cheese is my go-to cream cheese for desserts.
- Butter: I call for salted butter here since it’s what most people have on hand, but if you have unsalted, you can use that and just add a generous pinch of salt.
- Vanilla extract: Even though this is a chocolate frosting, a little vanilla extract helps add depth to the chocolate flavor.
- Powdered sugar: Powdered sugar adds sweetness AND structure to this frosting. If you’re someone who likes to cut the sugar in recipes, don’t try and cut too much sugar from this frosting or it will be too runny.
- Unsweetened cocoa powder: Even though we’re using just 2 tablespoons of cocoa powder, it gives the frosting a deep and dreamy chocolate flavor.
- Milk: If you need a thinner, smoother frosting, you can add just a bit of milk after everything has been mixed.


How to Make the Best Chocolate Cream Cheese Frosting (Tips & Tricks)
- Start with softened (but not warm and greasy) cream cheese and butter. Starting with fats that are the correct temperature (about 65°-70°) is essential to this frosting recipe. Too cold and you’re going to end up with little lumps of cream cheese and butter in your frosting. Too warm and the frosting will be greasy. You want your cream cheese to be easily spreadable and you should be able to press an indentation into the butter with your finger while the butter around it holds its shape.
- Beat the cream cheese and butter together until there are no individual streaks or lumps of either remaining. If the cream cheese and butter aren’t mixing together nicely, they’re too cold. Let them sit at room temperature for 10 to 15 minutes more and then try again. If you mix the rest of the ingredients in while the fats still have lumps, you’ll have lumps in your final frosting that you won’t be able to get rid of.
- Beat in vanilla and then your sifted powdered sugar and cocoa powder. You can mix this frosting by hand, but it’s a lot of work. I recommend a handheld electric mixer. Be sure to start on low and work your way up to medium-high so you don’t end up with a cloud of sugar and cocoa powder when you start.
- Adjust for desired texture. Once your frosting is smooth and creamy and looks like frosting, you can adjust the texture depending on what you need. For a stiffer frosting, add a bit more powdered sugar. For a thinner more spreadable frosting, add just a bit of milk, 1/2 teaspoon at a time.
A note on sifting: Both powdered sugar and cocoa powder tend to be lumpy ingredients. Sifting removes all those lumps and ensures that you end up with a completely silky smooth, lump-free frosting.
If you have a large flexible plastic cutting board ( like these ), using one can speed up your sifting time and create less mess. Sift your powdered sugar and cocoa powder over the larger cutting board surface and then pick up the cutting board and funnel the sugar/cocoa powder into your bowl.
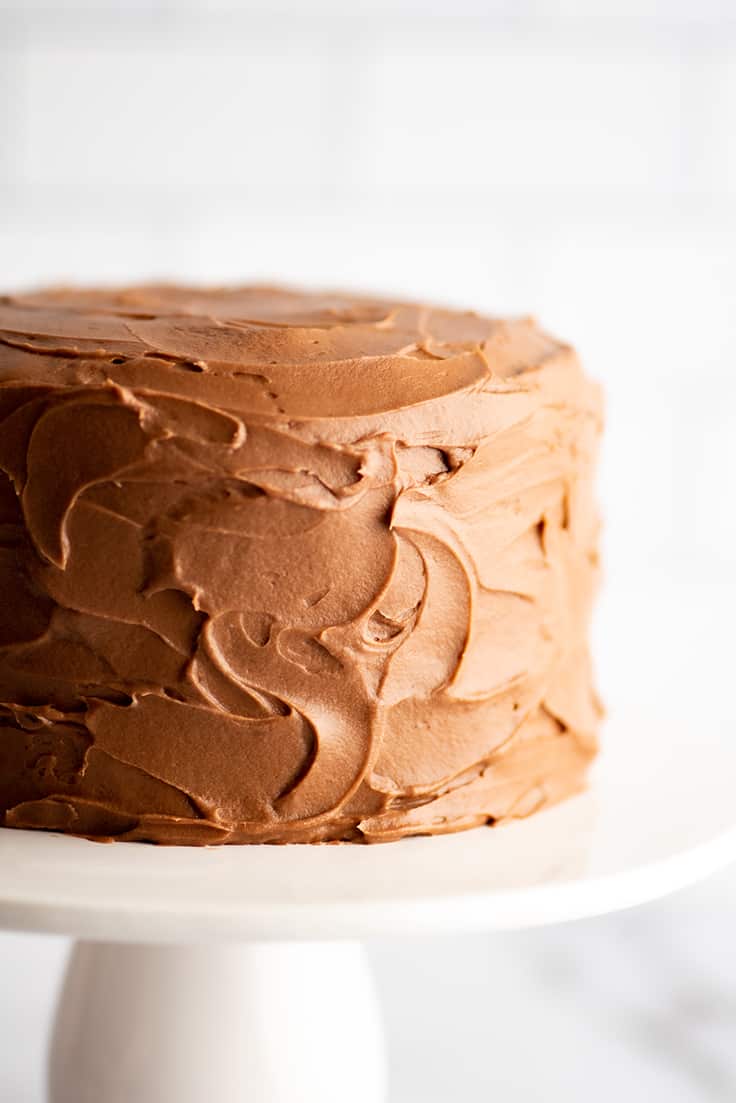
When using this frosting to frost a 2-layer 6-inch cake, double the recipe.
Where to Use This Frosting
Chocolate cream cheese frosting is delicious on almost anything, but here are a few recipes to get you started:
- Small-batch Vanilla Cupcakes
- Small-batch Chocolate Cupcakes
- Frosted Sugar Cookies
- Small-batch Brownies
- Small Banana Layer Cake (double the frosting recipe)
Does cream cheese frosting need to be refrigerated?
Yes. Cream cheese frostings and desserts topped with them should be stored in the refrigerator in an airtight container.
Can you freeze chocolate frosting?
Yes! American buttercreams like this freeze really well. Store your frosting in a freezer bag and it will keep for up to 2 months in the freezer. Allow to come to room temperature on the counter before using.
Can you make this frosting in advance and store it in the refrigerator?
Yes. You can store this frosting covered in the refrigerator for about 48 hours, but the frosting is extremely firm cold, so you’ll need to let it come to room temperature on the counter before using.
More Small-batch Frosting Recipes
- Van illa Frosting
- Chocolate Frosting
- Cream Cheese Frosting
- Cookie Dough Frosting
- Strawberry Frosting
- Oreo Frosting
To double or triple the frosting recipe, hover over the serving size or click if you’re on mobile, and slide the slider.
Equipment
- Handheld electric mixer
Ingredients
- ▢ 2 ounces cream cheese softened
- ▢ 4 tablespoons (57g) salted butter softened
- ▢ 1/2 teaspoon vanilla extract
- ▢ 1 1/4 cups ( 150g ) powdered sugar sifted
- ▢ 2 tablespoons ( 10g ) unsweetened cocoa powder sifted
- ▢ 2 teaspoons milk as needed
Instructions
- In a medium bowl, combine cream cheese and butter. Using a handheld electric mixer, beat until well-combined and there are no individual streaks of cream cheese or butter remaining.
- Add vanilla and mix well.
- Add sifted powdered sugar and cocoa powder and beat, starting on low, working up to medium-high, until frosting is smooth and creamy.
- If necessary, add a little milk by the half teaspoon until frosting reaches your desired consistency.
Notes
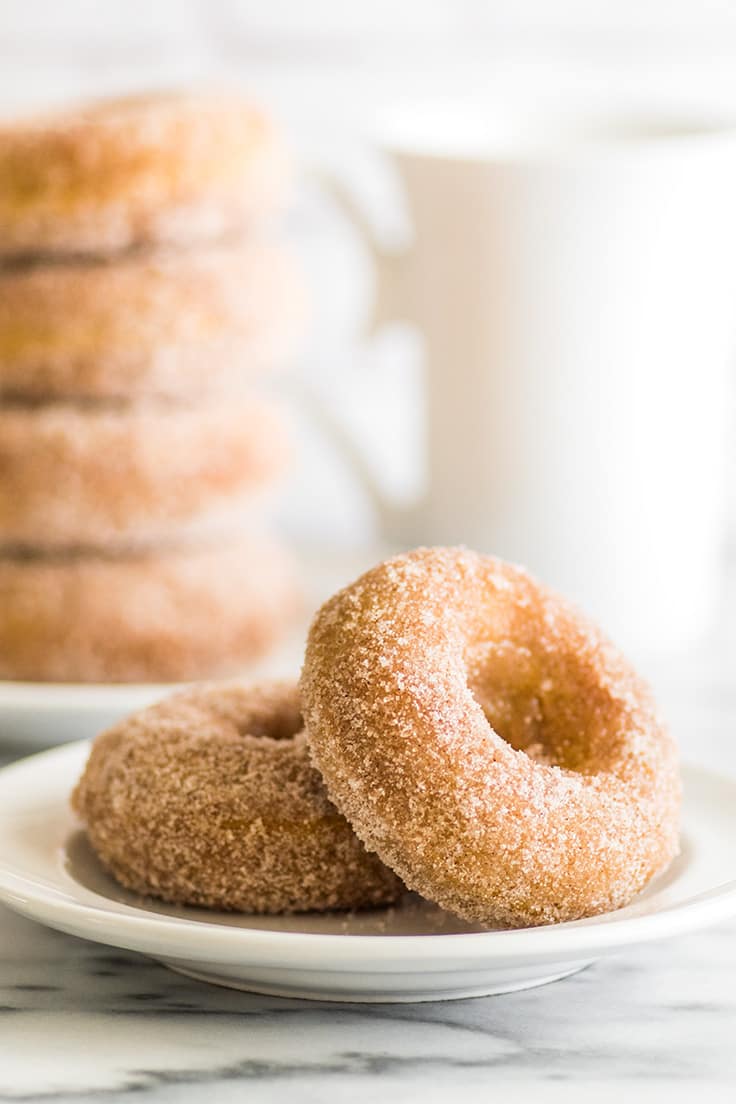
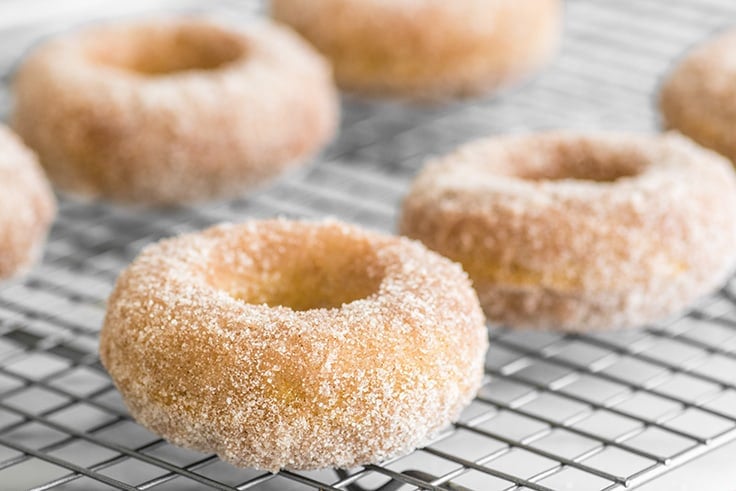
Soft and fluffy baked pumpkin donuts tossed in crunchy cinnamon sugar are the perfect sweet way to start fall mornings.
In 2015, I shared these Pumpkin Donuts With Maple Glaze . They were one of my favorite recipes I posted that season, and I loved them so much that I wanted to revisit that pumpkin donut recipe and try something a little different.
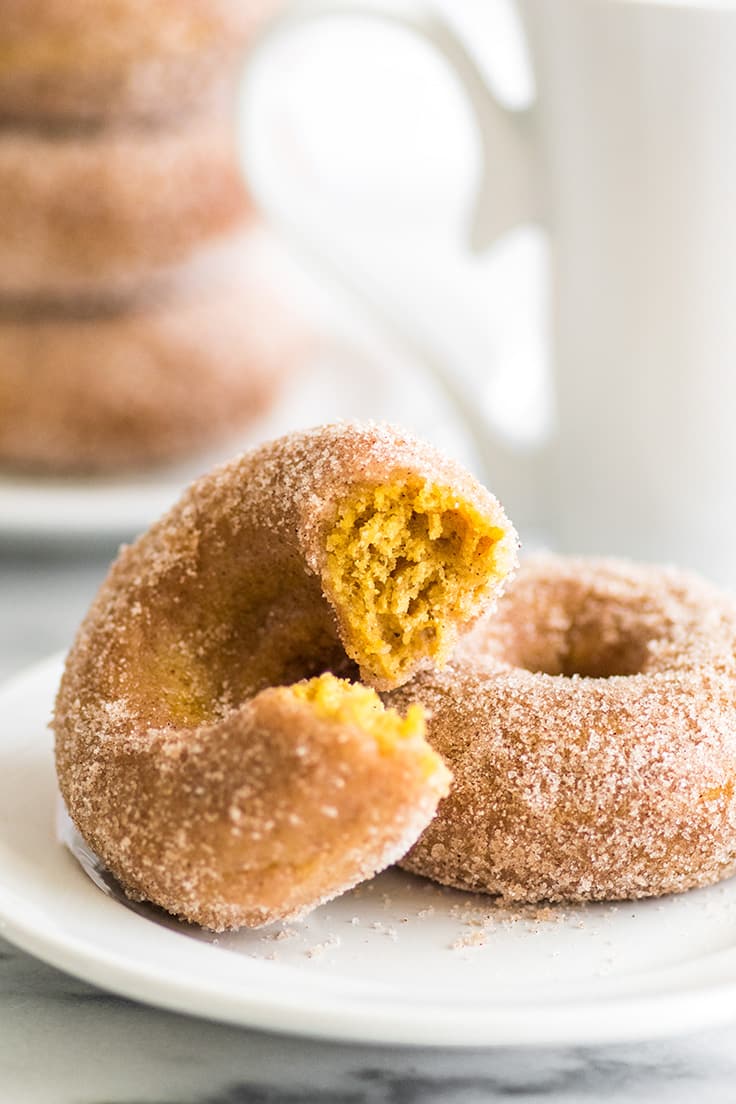
So this time around, the donut base is still the same fabulous moist and soft pumpkiny dream of a baked donut, but instead of topping them with maple frosting, they get coated in crunchy cinnamon sugar
And friend, they’re real good.

My mom was my donut taste tester for the original maple version, and she loved those. She took one bite of these cinnamon sugar donuts and was immediately like, “ These are my favorite donuts you have ever made.”
So don’t just take my word for it, my mom thinks you should make them too. 😉
Baked Pumpkin Donut Ingredients
Baking staples: This recipe uses a handful of pantry baking staples: all-purpose flour, baking powder, salt, brown sugar, an egg, and milk. Butter: You’re going to use butter both in the donut base and to coat the donuts after baking so the cinnamon sugar sticks. I call for unsalted butter in the recipe, but if all you have is salted, it will work fine. Just cut the added salt in the recipe by half. Pumpkin puree: Not to be confused with pumpkin pie filling, pumpkin puree is just pure, pureed pumpkin. You can usually find it in the baking aisle near the premade pie fillings. This recipe won’t use a whole can, so check out my post on Leftover Pumpkin Puree for storage tips and recipe ideas for the leftovers. Pumpkin pie spices: These donuts are made with cinnamon, ginger, nutmeg and ground cloves to really boost that fall pumpkin flavor. If you have premixed pumpkin pie spice , you can replace the spices with 3/4 teaspoon of pumpkin pie spice. Cinnamon sugar: While I normally think the perfect cinnamon sugar ratio is 1 part cinnamon to 4 parts sugar, this recipe uses much less cinnamon. This is because you’re already getting a ton of cinnamon flavor from the donuts themselves and too much cinnamon in the cinnamon sugar mixture will make the coating dark and splotchy.

How to Make Pumpkin Donuts
- Whisk together dry ingredients in one bowl and wet ingredients in a second bowl. Add the flour mixture to the wet ingredients and stir until just combined. Overmixing can create tough donuts, so mix just until there are no longer any streaks of flour at the bottom of your bowl and them move on.
- Fill the donut pan using a piping bag or gallon plastic storage bag with a hole snipped off of one corner. You can fill your donut pan with a spoon, but trust me, piping the donut batter is so much faster, cleaner, and easier than trying to spoon it.
- Bake the donuts until they’re springy. Instead of whipping out a cake tester, the super easy way to tell if these donuts are done is to press a finger gently into the top of one of the donuts, and if it springs back or almost completely springs back, it’s done.
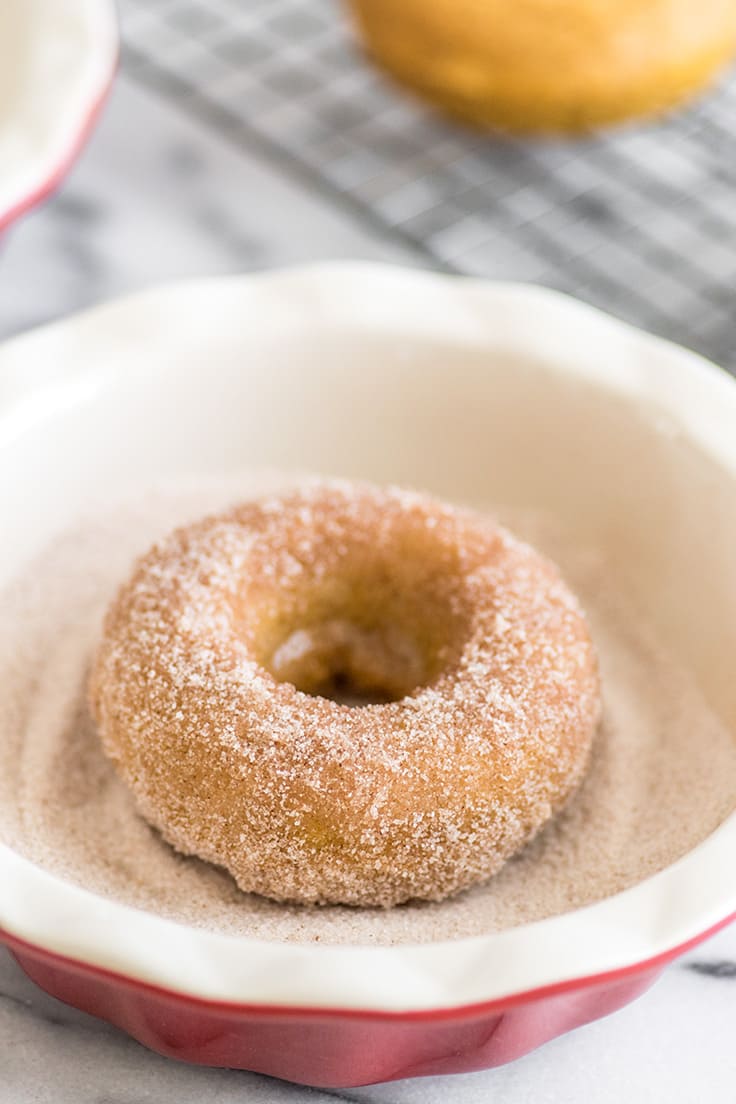
- Let donuts sit until cool enough to handle. You don’t need to completely cool the donuts before coating. As soon as they’re cool enough to handle you can start rolling them in butter and cinnamon sugar.

More Pumpkin Donut Toppings
If you’d like some other topping options for your pumpkin donuts, try:
- Maple Glaze
- Cream Cheese Glaze
- Streusel Coffee Cake Topping
Do I need a donut pan to make these donuts?
Yes, you’ll definitely need one if you want that classic donut shape. I’m a fan of this Wilton model . I’ve owned it for years and use it for all of my donut recipes.
But can I make these without a donut pan?
If you don’t own a donut pan, you can also make donut muffins in a regular muffin pan. This will make about 6 muffins. Bake at the temperature called for in the recipe for about 14 minutes.
Can I make these into pumpkin donut holes?
Yes! This will make about 20-ish donut holes using a mini muffin pan. Bake at the temperature called for in the recipe for 7 to 10 minutes.
How to store pumpkin donuts?
Baked donuts are best on the first day, but if you’d like to store them, keep them at room temperature laid out in a single layer in an airtight container (stacked donuts will stick and pull cinnamon sugar off each other).

More Pumpkin Recipes
- Mini Pumpkin Cake
- Small-batch Pumpkin Cookies With Cream Cheese Frosting
- Mini Pumpkin Pie
- The Best Pumpkin Pancakes
- Small-batch Pumpkin Cupcakes
Ingredients
Special Equipment
- ▢ Donut Pan or mini muffin tin
Pumpkin Donuts
- ▢ 1 cup ( 120g ) all-purpose flour
- ▢ 1 teaspoon baking powder
- ▢ 1/2 teaspoon cinnamon *
- ▢ 1/8 teaspoon ground ginger
- ▢ 1/8 teaspoon ground nutmeg
- ▢ Pinch ground cloves
- ▢ 1/4 teaspoon salt
- ▢ 1/3 cup ( 81g ) pumpkin puree
- ▢ 1/3 cup ( 66g ) brown sugar
- ▢ 1 large egg
- ▢ 1/4 cup milk any percentage
- ▢ 2 tablespoons ( 1oz ) unsalted butter melted and cooled
Cinnamon Sugar Topping
- ▢ 1/4 cup ( 2oz ) unsalted butter
- ▢ 1/2 cup ( 100g ) granulated sugar
- ▢ 1/2 teaspoon cinnamon
Instructions
- Preheat your oven to 350°F and lightly grease your donut pan (or muffin tin).
- In a small bowl, whisk together flour, baking powder, cinnamon, ginger, nutmeg, cloves, and salt.
- In a medium bowl, combine pumpkin puree, brown sugar, egg, milk, and melted butter. Whisk together until smooth. Add flour mixture and stir until just combined.
- Place a large disposable plastic bag over a cup and transfer batter to the bag. Snip off one of the corners and “pipe” the batter into your prepared donut pan, filling about 3/4 of the way full. This will make exactly 6 donuts.
- Bake for 9 to 11 minutes, until the donut tops spring back when lightly pressed with your finger. When pan is cool enough to handle, turn donuts out on a cooling rack.
To Coat
- Add melted butter to a small bowl large enough for dipping. In a second bowl of the same size, stir together sugar and cinnamon. Dip a donut first in the butter, letting any excess drip off and then dip in the cinnamon sugar, tossing to coat.
- Repeat with remaining donuts and enjoy!
Notes
Donuts Adapted From Live Well Bake Often
How to make a quick and easy half and half substitute with what you have in your fridge.
Half and half is a common enough ingredient in recipes but not something everyone keeps stocked all the time. If you come across a recipe that calls for it, but don’t have any in your fridge, not a problem.
There are a few half and half substitutions you can use in a pinch.

What is Half and Half?
Half and half is a light cream sold in the US with a milk fat content of 10.5–18%. For comparison, whole milk has 3.5% milk fat while whipping cream has a 30–36% milk fat content and heavy (whipping) cream has 36%+ milk fat.
It’s typically used in recipes where you want to add some creaminess without the heaviness and calories of heavy cream.
How to Make Half and Half Substitutes
There are a few different ways to make half and half at home, but here are three of the most practical and common solutions.
The Easy Substitute
1/2 cup heavy cream* + 1/2 cup milk (any percent)
The easiest way to substitute for half and half is just to mix equal parts milk and cream. It will have a slightly higher fat content than true half and half (15-19.75%) so will yield somewhat richer results, but sometimes that’s just extra delicious.
Best for: Coffee and baking and cooking recipes where you don’t mind extra richness and you’re not worried about exactly accurate fat content and nutritional information.
*I’m using whipping cream and heavy whipping cream interchangeably here. While there is a small difference in milk fat (between about 1% to 6%), either will work just fine to make a half and half replacement.
The Accurate Substitute
3/4 cup whole milk + 1/4 cup heavy cream OR 2/3 cup nonfat milk + 1/3 cup heavy cream
This gives you a half and half substitute in the 10-11.5% range, making it a near-perfect replacement for actual half and half.
Best for: Coffee and recipes where you want that true creamy-but-not-to-rich half and half experience.
The No-cream Substitute
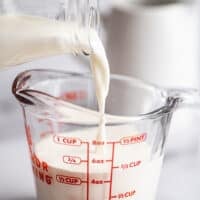
2 tablespoons melted butter + 1 scant cup of milk (preferably whole)
To make a half and half substitute without heavy cream, combine butter (salted or unsalted is fine) and scant 1 cup of milk. Add melted butter to a 1-cup measuring cup and fill it the rest of the way with milk. If using whole milk, this will put you at about 13% milk fat. It won’t taste quite like half and half but will yield richer and creamier results than just milk.
Best for: Pastas and cooking dishes where half and half is not the main ingredient. Should work fine in most baking recipes.
Recipes Using Half and Half
- Chicken and Broccoli Orzo
- Quick and Easy Fettuccine Alfredo for One
- Easy Chicken in Cream Sauce for Two
- Easy Creamy Chicken Pasta With Bell Peppers
Ingredients
Easy Half & Half Substitute
- ▢ 1/2 cup heavy cream
- ▢ 1/2 cup milk any percentage
Most Accurate Half & Half Substitute (With Whole Milk)
- ▢ 3/4 cup whole milk
- ▢ 1/4 cup heavy cream
Most Accurate Half & Half Substitute (With Non-fat Milk)
- ▢ 2/3 cup non-fat milk
- ▢ 1/3 cup heavy cream
Half & Half Substitute Without Heavy Cream
- ▢ 2 tablespoons melted butter
- ▢ 1 scant cup milk any percentage
Instructions
- Combine ingredients and use as you would half and half from a carton.
Notes

Small-batch Chocolate Cream Cheese Frosting
Equipment
- Handheld electric mixer
Ingredients
- 2 ounces cream cheese softened
- 4 tablespoons (57g) salted butter softened
- 1/2 teaspoon vanilla extract
- 1 1/4 cups ( 150g ) powdered sugar sifted
- 2 tablespoons ( 10g ) unsweetened cocoa powder sifted
- 2 teaspoons milk as needed
Instructions
- In a medium bowl, combine cream cheese and butter. Using a handheld electric mixer, beat until well-combined and there are no individual streaks of cream cheese or butter remaining.
- Add vanilla and mix well.
- Add sifted powdered sugar and cocoa powder and beat, starting on low, working up to medium-high, until frosting is smooth and creamy.
- If necessary, add a little milk by the half teaspoon until frosting reaches your desired consistency.
