This recipe for small-batch Angel Food Cupcakes will make six dreamy marshmallowy cupcakes perfect for a light dessert.
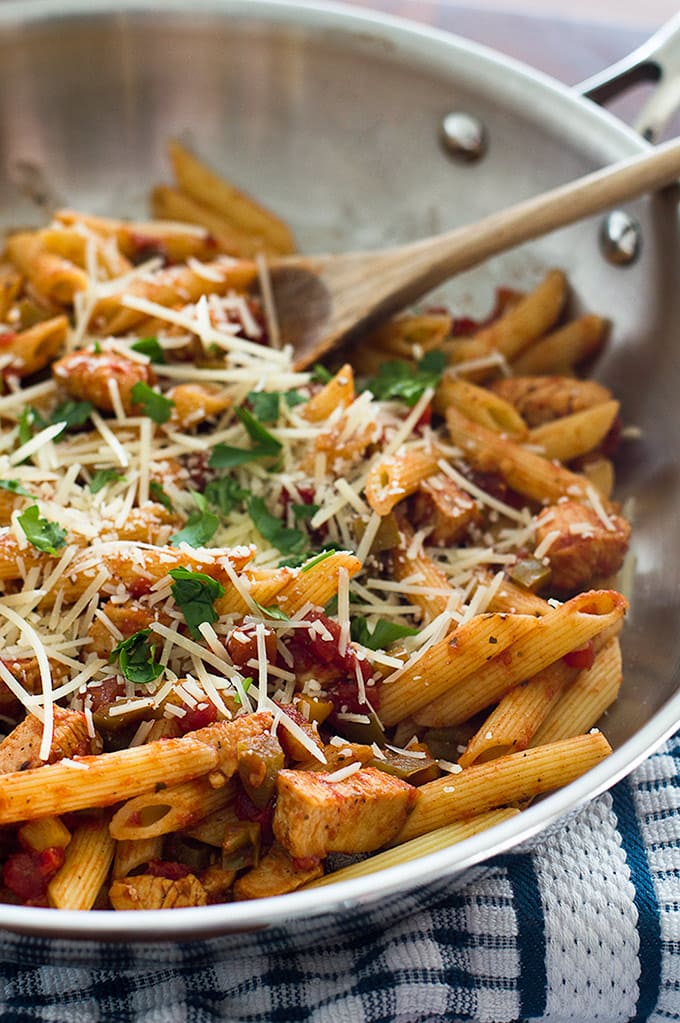
Light and easy Pasta Primavera with sweet crunchy bell peppers, tomatoes, and lean chicken breast served over penne pasta and topped with Parmesan cheese.


It’s Monday! How was your weekend? Did you watch the Golden Globes last night? Did any of your favorites win? I’m an awards show junkie, so I made naan pizza for the occasion (OMG, so good, recipe coming soon) and happily settled in for three hours of beautiful people giving each other awards. I was super excited to see my fav, Olivia Colman get recognized, and oh man, those Viola Davis and Meryl Streep speeches were so great.
Also, Kristen Bell has maybe inspired me to cut my hair into a lob again. Tell me not to do it, people. Talk me down from this ledge!
I realized as I started writing this post that today, in the dead of winter, I’m posting a pasta with a name that basically translates into “spring pasta.” I could say that was intentional and that I’m dreaming of spring, but to be perfectly honest, I love winter (at least my mild SoCal version of it). I’m in no hurry to see spring take its place. I just really love eating this pasta all year round and wanted to share it with you now. 🙂
Up there with other favorites like my Ham and Potato Soup (that recipe just got new photos, have you seen them?), BLT Salad , and Peasant Soup , it’s one the recipes I make most often in my own kitchen, because it’s just a dinner you feel good about eating and making.
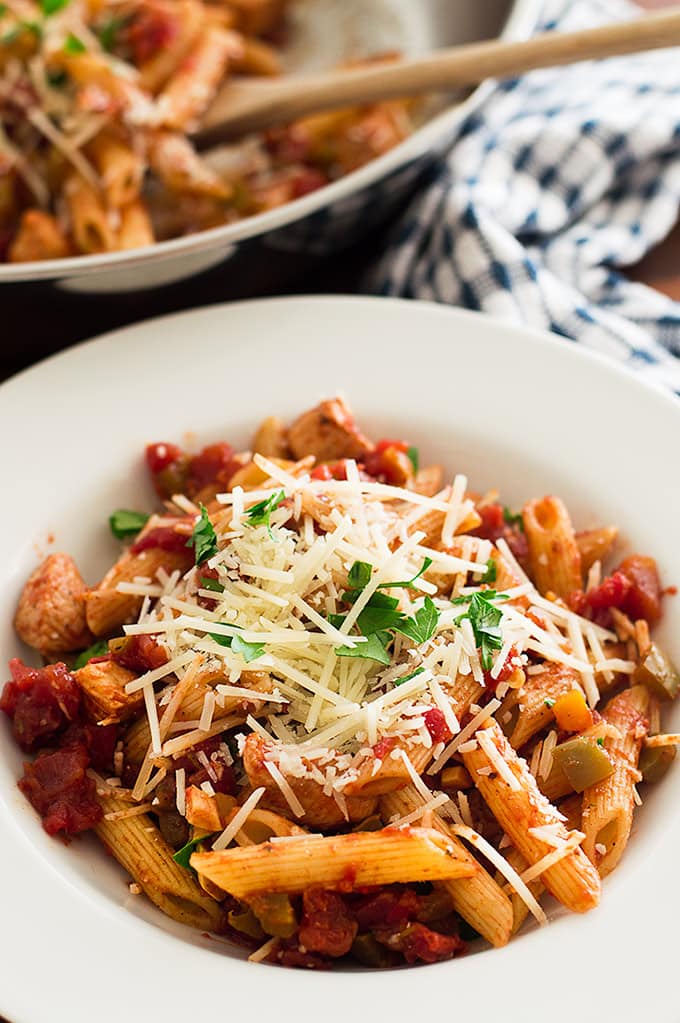

This easy Pasta Primavera is all about lots of veggies (okay, tomatoes are a fruit), some lean chicken breast, and a little bit of cheese coming together to make a damn good pasta. I love that it’s easy to make. I love that it’s a bit spicy and just a tiny bit sweet. And I love that it’s a nice and light pasta for those times when I desperately need some carbs in my life.

More Easy Pasta Dishes
- Fettuccine Alfredo for One
- Chicken Francaise
- Creamy Sausage Pasta
- Buttered Noodles
Ingredients
- ▢ 4 ounces penne pasta
- ▢ 1 tablespoon butter
- ▢ 1 small (about 8 ounces) boneless chicken breast cubed
- ▢ Salt
- ▢ 1 large bell pepper (any color) diced small
- ▢ 1 clove garlic minced
- ▢ 1 14-ounce can diced tomatoes with green green chilies
- ▢ 1/4 teaspoon dried basil
- ▢ 1/4 teaspoon dried crushed rosemary
- ▢ 1/4 teaspoon dried thyme
- ▢ 1/4 teaspoon garlic powder
- ▢ 1/4 cup ( 1 oz) shredded Parmesan cheese
Instructions
- Put a medium pot of salted water on to boil for the pasta and cook pasta according to package instructions.
- While your pasta is cooking, in a large skillet, over medium to medium-high heat, melt butter. Add chicken breast, sprinkle with salt, and cook until cooked through. Transfer cooked chicken to a plate and tent with foil to keep warm.
- Return pan to heat and add bell pepper and garlic. Cook over medium heat for 4 to 6 minutes, until vegetables just begin to soften.
- Add tomatoes and spices, bring to a simmer, and cook, stirring occasionally, until mixture becomes thick and saucy, about 6 to 10 minutes (different brands of tomatoes will vary). Stir in cooked chicken and simmer for 1 minute more or until chicken is hot.
- Stir in cooked pasta, dish up, and top with Parmesan cheese. Enjoy!
Adapted from AllRecipes

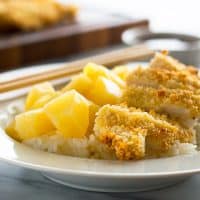
Easy Baked Chicken Katsu is a delicious, lighter take on the fried original. Pair with a simple sweet and tangy homemade Pineapple Katsu Sauce and it might just be your new favorite dinner.


Today I’m sharing one of my favorite Japanese dishes lightened up a little for January, Baked Chicken Katsu (or Torikatsu)! Folks, you are in for a treat. I LOVE this recipe.
Traditional Chicken Katsu is chicken cutlets coated in panko and then shallow or deep fried in oil. It’s amazing, it’s delicious, but it’s also kind of a pain to make.
My Baked Chicken Katsu is chicken cutlets, coated in panko and then baked. It’s amazing, it’s delicious, and it’s the easiest thing in the world to make.
No worrying about splattering oil or making a mess, you just coat your chicken cutlets in panko and plonk them in the oven.


You still end up with a fabulously crunchy chicken exterior, but without all the mess and heaviness of deep frying.
(Though if you do feel like making a bit of a mess in the kitchen, I’ve included shallow frying instructions in the recipe as well. Because sometimes that’s fun too.)


And my favorite part about this recipe, the part that makes everything worthwhile is the sweet and tangy pineapple katsu sauce that goes with it. It’s made with ingredients you probably already have in your pantry (maybe you’ll need to make a store run for the pineapple), and is perfection.
You just simmer everything together while your chicken bakes, and by the time your chicken is done, you have a thick, fabulous sauce for dipping.


As written, this Baked Chicken Katsu recipe generously serves 2. To change the recipe yield, hover over the number of servings (or click if you are on mobile) and slide the slider–no preparation changes are necessary for doubling.
Ingredients
Chicken Katsu
- ▢ 1 boneless skinless chicken breast
- ▢ Salt
- ▢ 1/4 cup all-purpose flour
- ▢ 1 large egg beaten
- ▢ 3/4 cup panko
- ▢ Cooking spray
Katsu Sauce
- ▢ 1 tablespoon soy sauce
- ▢ 2 teaspoons cornstarch
- ▢ 1/4 cup granulated sugar
- ▢ 2 teaspoons brown sugar
- ▢ 1 tablespoon white vinegar
- ▢ 3 tablespoons pineapple juice (can be from a can of pineapple chunks)
- ▢ 1 teaspoon ketchup
Serve With
- ▢ White steamed rice optional
- ▢ Pineapple chunks optional
Instructions
- Preheat oven to 450°. Line a baking sheet with foil and grease well.
- Cut your chicken breast in half horizontally (butterfly the breast and cut all the way through) by placing one hand on top of the breast and running the knife through the center of the meat so you have two thin, even pieces. Lightly salt both sides of your chicken pieces.
- Line up 3 containers on the counter large enough to fit your chicken. Place flour in the first, beaten egg in the second, and panko in the third. Put your prepared baking sheet at the end of the assembly line.
- Coat your first chicken piece well in flour, followed by the egg, and then panko. Place on prepared baking sheet and repeat with the second chicken piece. Spray a very light spray of cooking oil over the tops of the breasts–this helps them brown. Bake for 15 to 20 minutes, until an instant-read thermometer inserted into the center of the breasts reads 160°F. Remove chicken from oven and allow to rest for 5 minutes.
- While your chicken bakes, in a very small bowl, whisk together soy sauce and cornstarch until all lumps are gone. Add mixture and the rest of the sauce ingredients to a small saucepan. Bring to a simmer over medium-high heat (turn down if mixture begins to boil) and simmer for 3 to 6 minutes until thickened. Remove from heat.
- Slice chicken breast and serve over rice with a side of pineapple (if desired) and sauce on the side for dipping. Enjoy!
Notes
Adapted from AllRecipes
This recipe for small-batch Angel Food Cupcakes will make six dreamy marshmallowy cupcakes perfect for a light dessert.

Small-batch Angel Food Cupcakes
Ingredients
Special Equipment
- Hand-held Electric Mixer
Angel Food Cupcakes
- 5 tablespoons granulated sugar divided
- 3 tablespoons ( 21 g) cake flour
- Pinch of salt
- 2 large egg whites at room temperature
- 1 1/2 teaspoon warm water
- 1/8 teaspoon vanilla extract or a couple drops of almond extract
- 1/4 teaspoon cream of tartar
Serve With
- Whipped cream
- Strawberries, blueberries, or blackberries
Instructions
- Preheat your oven to 350°F and line cupcake pan with 6 liners.
- Into a medium bowl, sift together 2 tablespoons of the sugar, the flour, and salt.
- In a medium bowl, combine remaining 3 tablespoons of the sugar, egg whites, water, vanilla, and cream of tartar and whisk until foamy. With a handheld electric mixer, beat on high until medium peaks form, 2 to 3 minutes–eggs should be white and glossy, and when the beaters are lifted straight up, peaks should stand on their own and curl over at the tip.
- Sift 1/3 of the flour mixture over the top of the egg whites and use a silicone spatula to fold flour into the egg mixture until just incorporated. Repeat twice more, being careful not to overmix and deflate the eggs.
- Fill your prepared cupcake cups about 80% of the way full and smooth tops (discard any extra). Bake for 17 to 20 minutes, until cupcakes have pulled away from the edges of the cupcake pan, are very lightly golden, and a toothpick inserted into the center of the cupcakes comes out clean.
- Cupcakes can cool in the pan. If desired, once cooled, pipe a circle of whipped cream around the top of the cooled cupcake and fill with chopped fruit. Enjoy!
