This Small Batch of Cut-out Sugar Cookies recipe makes one-dozen sugar cookies and is quick and easy, with no dough chilling time required!
Today’s recipe is this sweet little batch of cut-out sugar cookies. It’s the perfect recipe if you love decorating cookies at Christmas but don’t have a lot of people around to feed them to.
You still get to decorate some cookies (maybe with some spiked hot chocolate and a fire going in the background to keep you cozy while you work), but you don’t have to find homes for (or accidentally eat) a mountain of cookies when you’re done.

A (Quick) Small Batch of Sugar Cookies
This recipe will make about a tray-and-a-half of sugar cookies, that’s 8 to 12-ish normal-sized cookies depending on how you cut them out.
The finished cookies come out just the right level of not-too-sweet (perfect since they’re meant to be smothered with frosting), with crunchy edges and slightly chewy centers.
The cookies are easy to make (though please read the recipe notes on flour measurement before starting), with a dough that is great to work with. Best of all, the dough doesn’t need to be chilled, so between making, baking, and cooling time, you can be decorating them in about an hour.
Ingredient Notes
- Spooned and leveled all-purpose flour: Properly measured flour is SO important in this recipe. In order to make a no-chill dough, it has a slightly higher flour content than normal cookie recipes. This means that if you over-measure your flour, you are going to have way too much and the dough is going to be crumbly and difficult to work with. For best results, measure your flour with a scale (recommended) or the spoon and sweep method (stir the flour in your container to fluff it up and then spoon it into your measuring cup, sweep excess off with the flat of a knife).
- Softened butter: You must use softened butter in this recipe (not cold or melted). Set your butter out on the counter 30 minutes to an hour before making the cookies. You’ll know your butter is the correct temperature if you can easily press an indentation into it with your finger but the butter around it still keeps its shape.
- Egg yolk: Because this is a small-batch recipe, you don’t need a whole egg, just the yolk. For ideas on what to do with that leftover egg white, check out my post What to Do With Leftover Egg Whites (I recommend my Mini Chocolate Sheet Cake ).

How to Make Small-batch Sugar Cookies
- Whisk together flour, baking powder, and salt.
- Cream softened butter and sugar together before adding the egg yolk and vanilla.
- Add the flour mixture to the butter mixture in thirds, beating until mostly combined after each addition.
- Gather dough into a ball and roll out on a lightly floured work surface.
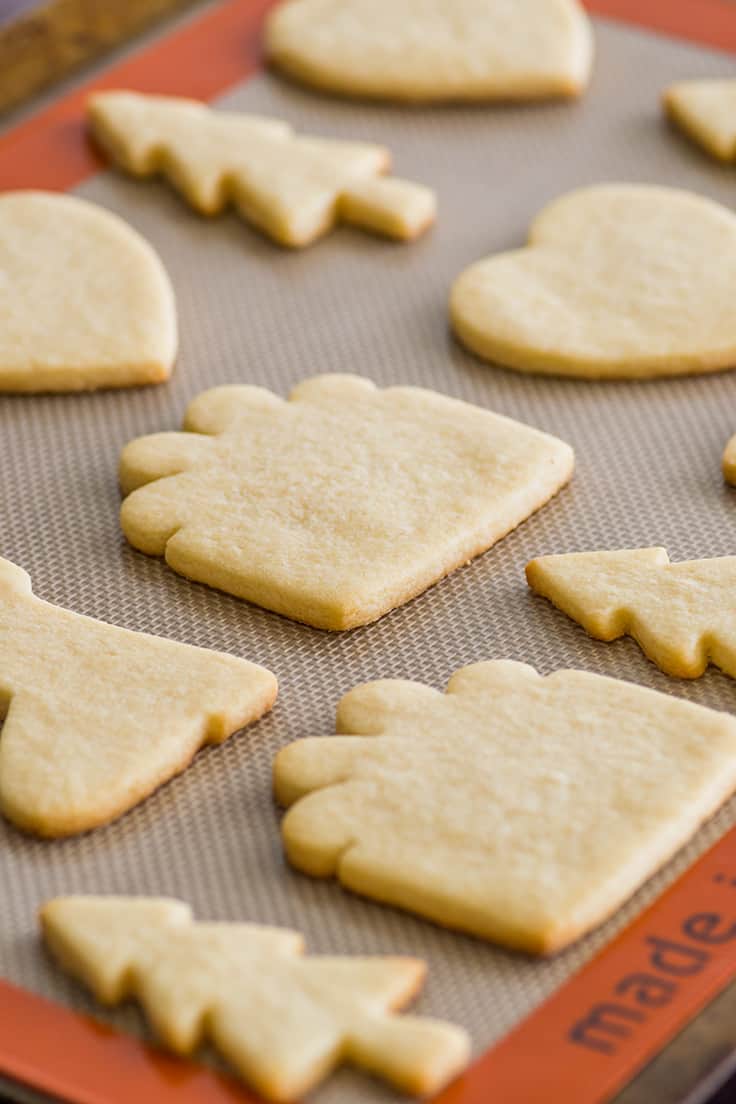
- Cut into shapes, bake, cool and decorate!
Recommended Tools
- A handheld electric mixer : A full-size stand mixer will be too large for this amount of dough, but a handheld mixer is extremely helpful for creaming butter and making sure the dough comes together.
- Thin metal spatula or offset spatula: This dough is easy to work with, but because it’s not chilled, the cut-out cookies can be difficult to pick up if your work surface doesn’t have enough flour. I like to use a metal spatula to lift the cookies to easily transfer them from work surface to baking pan.

Can you freeze sugar cookies?
Yes! Sugar cookies freeze very well. They can be frozen frosted or unfrosted, but if freezing frosted cookies, freeze them solid on a plate or tray first so the frosting doesn’t get smooshed in the freezer.
Store cookies in the freezer in an airtight container or freezer bag for up two months.
They can be eaten frozen right out of the freezer or set them on a plate at room temperature for 15 to 20 minutes before eating.
How thick should cut-out sugar cookies be?
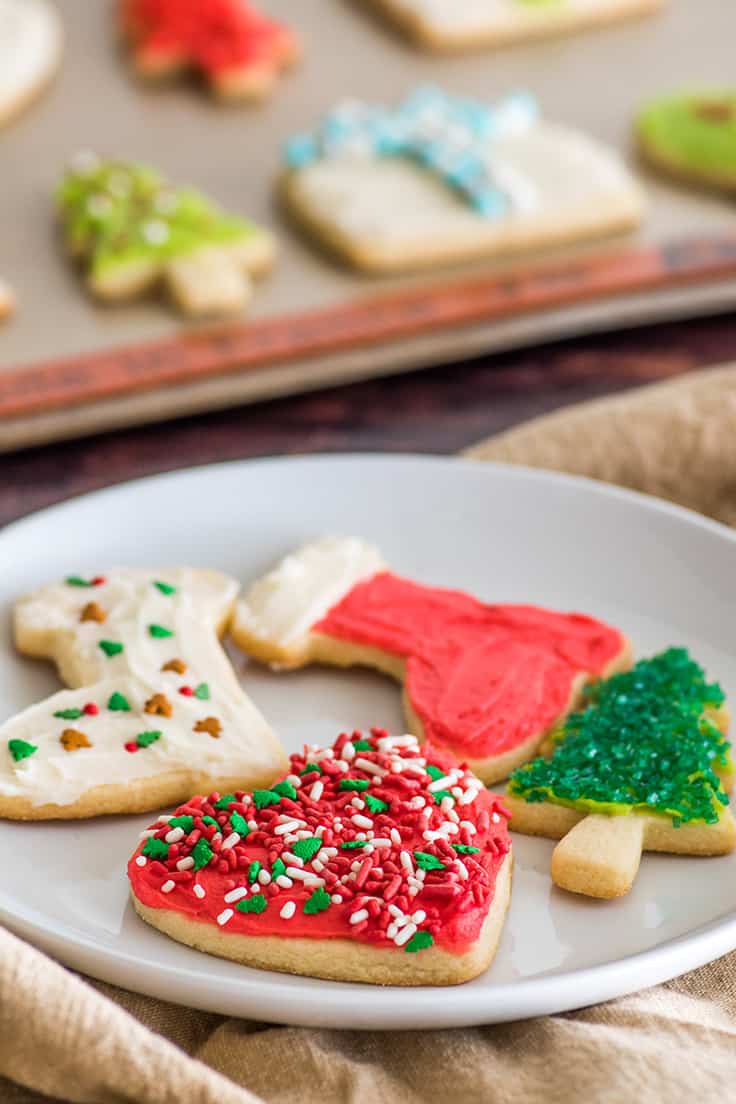
For these cookies, 1/4-inch thick is the perfect thickness.
How long do cut-out sugar cookies last?
Cut-out sugar cookies will stay fresh at room temperature, in an airtight container for up to 5 days. If you want to keep them fresh longer, freeze them.
A Note on Frosting
These cookies are great with royal icing or a simple buttercream. I’ve included my small-batch vanilla frosting recipe below the recipe card (scroll past the cookie recipe to get to it), but if you want to change things up, try one of my other small-batch frosting recipes like:
- Chocolate Frosting
- Cream Cheese Frosting
- Chocolate Cream Cheese Frosting
- Strawberry Frosting
- Oreo Frosting


Troubleshooting
My dough is too dry and crumbly, what do I do?
As mentioned above, this recipe uses a slightly higher ratio of flour to wet ingredients so we don’t have to chill the cookies. But this means accurate flour measurement is extremely important. If your dough is crumbly, you probably have a bit too much flour in there (or got a small egg yolk). Not a problem, this is an easy fix.
To fix crumbly dough where you have dry flour at the bottom of the bowl, add milk or water by the 1/4 teaspoon until your dough just comes together. Don’t add so much that your dough becomes sticky and wet!
If there’s no flour at the bottom of the bowl but the dough isn’t quite coming together like it should, try this old baker’s trick. Wet your hands and then use damp hands to gather the dough and smoosh it all together. Once it’s a cohesive ball, it’s ready to roll out.
Baking Tips
When baking, for evenly cooked cookies, bake similar sizes and shapes together. Things with lots of edges like stars, trees, and reindeer will cook much faster than things like stockings and presents, etc..
More Small-batch Cookie Recipes
- (Soft) Small-batch Frosted Sugar Cookies
- Small-batch Shortbread Cookies
- Small-batch Snowballs
- Small-batch Buckeye Brownie Cookies
- Small-batch Oreo and Andes Chocolate Cookies
Or check out my Small-batch Cookie Archive!

Equipment
- Handheld electric mixer
- Rolling pin
- Cookie cutters
- Metal spatula
Ingredients
Small Batch of Cut-out Sugar Cookies
- ▢ 1 cup ( 120g ) all-purpose flour measured by weight or using the spoon and sweep method* plus more for rolling
- ▢ ¼ teaspoon baking powder
- ▢ ¼ teaspoon salt
- ▢ ⅓ cup ( 76g ) unsalted butter softened*
- ▢ ⅓ cup ( 66g ) granulated sugar
- ▢ 1 large egg yolk
- ▢ ½ teaspoon vanilla extract
Instructions
- Preheat the oven to 375°F and line two baking sheets with parchment paper or silicone baking mats.
- In a small bowl, whisk together flour, baking powder, and salt. Set aside.
- In a medium bowl, use a handheld electric mixer to cream together butter and sugar until light and fluffy, about 1 minute. Add egg yolk and vanilla and mix until well-combined.
- Add ⅓ of the flour mixture, and mix on medium until mostly combined. Add half of the remaining flour and repeat. Pour in the rest of the flour and continue to mix until the dough begins to clump (this may take a little while) and you can form it into a ball with your hands.*
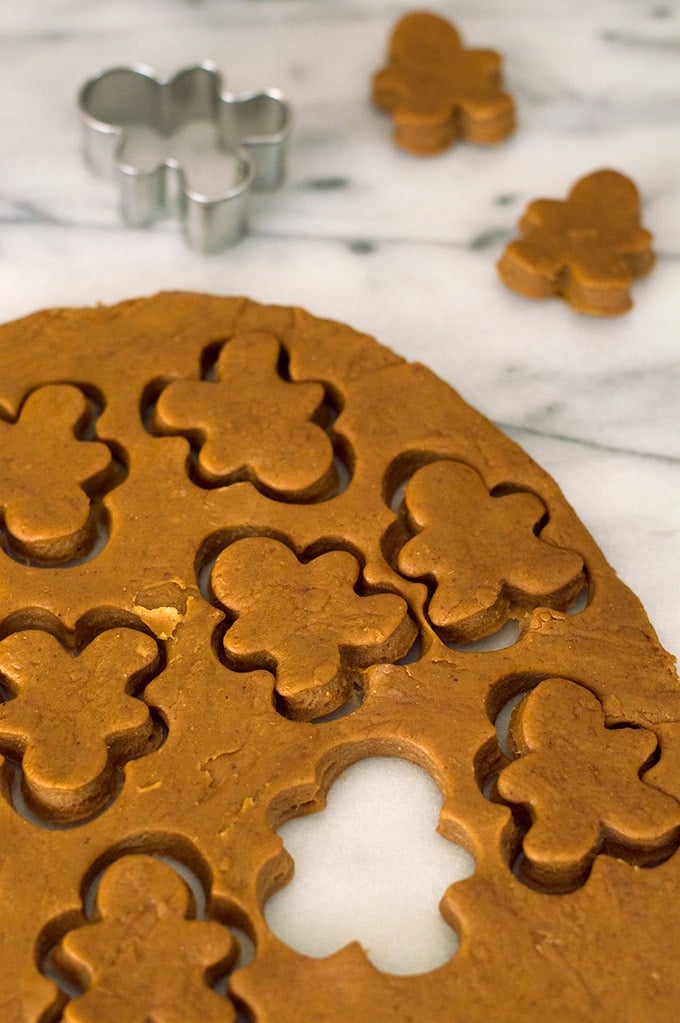
- Lightly flour your workspace and rolling pin and roll dough out to ¼-inch thick. Dip cookie cutters in flour and cut out your cookies, placing them at least an inch apart on the trays. Use a metal spatula to pick up the cookies if they stick to your work surface at all. Continue to cut out cookies, gathering dough and re-rolling as necessary until all the dough is shaped.
- Bake cookie sheets, one tray at a time, for 6 to 9 minutes, until the edges of the cookies just start to turn golden. Cool completely before frosting. And enjoy!
Notes
Adapted from Food.com

Ingredients
- ▢ 4 tablespoons ( 56g ) unsalted butter* softened
- ▢ 1 cup ( 120g ) powdered sugar sifted
- ▢ 1 teaspoon to 1 tablespoon milk or cream
- ▢ ¼ teaspoon vanilla extract*
- ▢ Pinch of salt
Instructions
- In a medium bowl, beat softened butter until light and fluffy, 30 seconds to 1 minute. Add powdered sugar, 1 teaspoon of milk or cream, vanilla extract, and salt.
- Beat until smooth. Add up to 2 additional teaspoons of milk until frosting reaches your desired consistency.
Notes
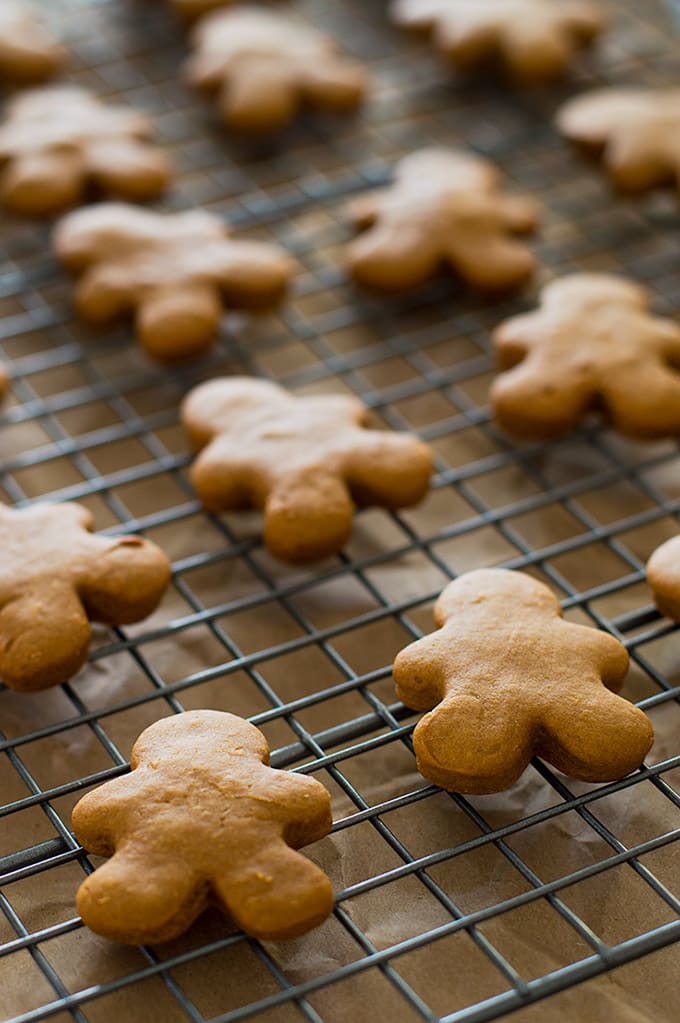
Horse and Dog Gingerbread Treats are a simple and easy way to show your pets you care this Christmas!
But I know that’s not the greatest thing for them, so for the last few years, I’ve been making them some of their own gingerbread cookies. And they LOVE THEM.

Horse and Dog-Friendly Gingerbread
There’s no granulated sugar here, just molasses, and then flour, some ginger and other spices, and a little bit of oil. Ginger’s even a great digestive aid for dogs, so these are some cookies you can feel good about sharing.
The recipe is super simple to throw together and the dough is easy to work with. Plus, the treats are indistinguishable (to the eye) from regular gingerbread cookies , so if you make human and dog gingerbread cookies at the same time, have fun with hungry friends and family refusing to tell them which is which. 😉
Ingredient Notes
- All-purpose flour: This recipe uses all-purpose flour, but if you’d like to use whole wheat flour, you can. Be sure to measure your flour using a scale (recommended) or the spoon and sweep method (stir the flour in your container to fluff it up and then spoon it into your measuring cup, sweep excess off with the flat of a knife). Too much flour can make your dough crumbly and hard to mix.
- Molasses: If you don’t usually cook with molasses, it’s a handy ingredient to have around, especially during the holidays, and once opened, it will keep for about a year. In the grocery store, you can usually find it near the syrups in the pancake or baking aisle.

How to Make Gingerbread for Dogs and Horses
- Whisk together dry ingredients in a medium bowl.
- In a small bowl, whisk together molasses, water, and oil. Using a wooden spoon, slowly mix liquid ingredients into the flour mixture, stirring until well-combined and uniform in color
- Roll or pat dough to 1/4-inch thick and cut into shapes.
- Bake for 20 minutes and allow cookies to cool on the baking sheet.
Can dogs eat gingerbread?
Regular gingerbread? Probably not. THIS gingerbread? Yes. Gingerbread is often on the list of foods not to feed to pets. This is because many gingerbread recipes contain nutmeg, which is toxic to dogs in large quantities.
This recipe contains no nutmeg and only dog and horse-safe ingredients, but as always, please consult your vet if you have any questions or concerns about what you are feeding your pet!
Can I freeze gingerbread treats?
Yes! Freeze treats in an airtight container or freezer bag for up to 3 months.
How to store gingerbread treats?
Store these treats in an airtight container at room temperature.


Can people eat these cookies?
You can eat them if you want, but you probably won’t want to. They’re very dense, pretty crunchy, and not very sweet.
More Dog Treat Recipes
- High-value Dog Treats
- Watermelon and Yogurt Frozen Dog Treats (Pupsicles)
- 2-ingredient Pupsicles (3 ways)
More Christmas Recipes (for People!)
- White Chocolate Peppermint Mocha
- Chai Sugar Cookies with Eggnog Glaze
- The Best Crockpot Hot Chocolate
- Small-batch Snowball Cookies with Kisses
- Small-batch Cut-out Sugar Cookies

Easy Horse and Dog Gingerbread Treats
Ingredients
- 1 ½ cups ( 180 g) all-purpose flour measured by weight or using the spoon and sweep method*
- 1 tablespoon ground ginger
- ½ teaspoon ground cinnamon
- ¼ teaspoon ground cloves
- ¼ cup molasses
- ¼ cup water
- 2 tablespoons vegetable oil
Instructions
- Preheat your oven to 325°F and line a baking sheet with parchment paper or silicone baking mat.
- In a medium bowl, whisk together dry ingredients.
- In a small bowl, whisk together molasses, water, and oil. Using a wooden spoon, slowly mix liquid ingredients into the flour mixture, stirring until well-combined and uniform in color (some times I work the dough a little by hand to make sure all streaks of flour are mixed in–see recipe notes on dough texture).
- On an a clean, smooth surface, roll or pat dough to ¼-inch thick and cut out shapes, gathering dough and re-rolling as necessary. Bake for 20 minutes and allow cookies to cool on the baking sheet.
Notes
Nutrition
Recipe Slightly Adapted From Dog Treat Kitchen
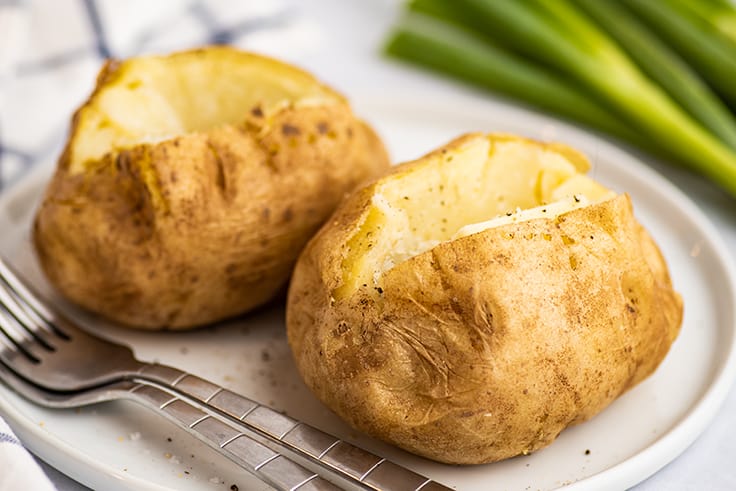
How to make a quick and easy Microwave Baked Potato. Skip the long baking time and make your “baked” potatoes in the microwave in just minutes.
When it’s a baked potato night but you’re short on time, a microwave baked potato is such a time saver.
Potatoes cooked in the microwave are ready in a fraction of the time and still come out soft and fluffy and perfect for loading with toppings.

How Long to Microwave a Baked Potato
If you popped in from search looking for this info, here you go:
- Microwave 1 potato* for 3 to 4 minutes per side
- 2 potatoes for 4 to 5 minutes per side
- 3 potatoes for 5 to 6 minutes per side
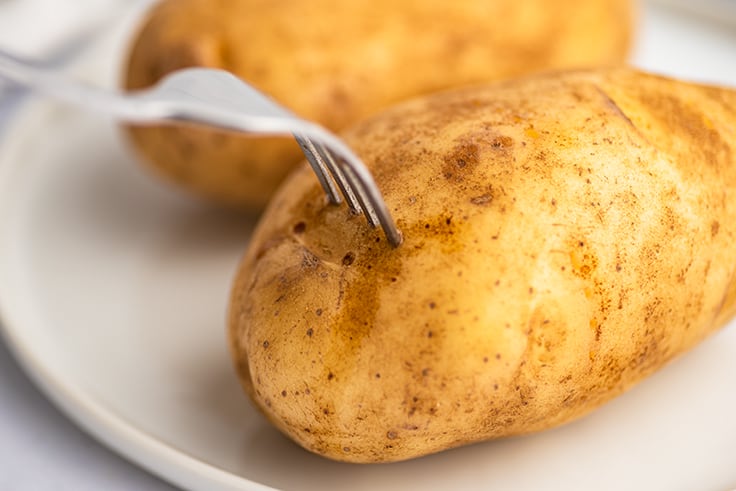
*Be sure to pierce potatoes with a fork before microwaving.
These times are for average-to-large-size baking potatoes of around 10 ounces. For smaller potatoes, start with one minute less, and for larger, one minute more.
Now that’s covered, if you want a little more information, keep reading.
How to Prep Microwave Baked Potatoes
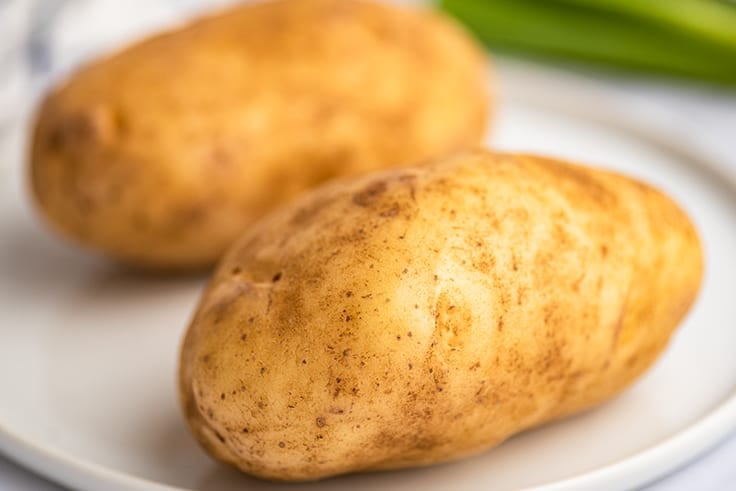

- Always start by giving your potato a good scrub to remove any debris from its skin.
- Dry the potato and then pierce it all over with a fork. This allows steam to escape as the potato cooks and will prevent it from exploding in your microwave.
How to Bake a Potato in the Microwave

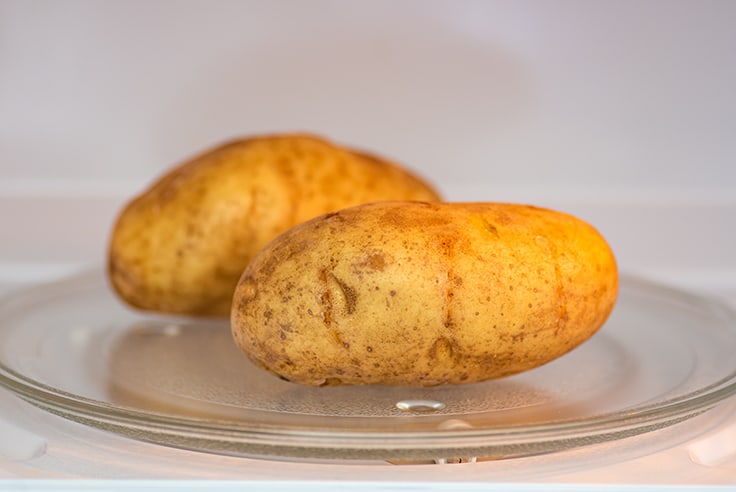
Once your potato is scrubbed, dried, and pierced, place it directly into the microwave. If cooking more than one potato at a time, make sure that the potatoes are not touching.
Cook the potato for 3 to 4 minutes and then carefully flip and cook for an additional 3 to 4 minutes. For every extra potato you’re cooking, add 1 minute for each side.

Use a knife to pierce the potato and check for doneness. The potato should feel tender (but not mushy) all the way through.
If the potato is finished, allow it to sit for 1 minute to cool slightly before removing it from the microwave. If still hard, continue to cook in 1-minute increments until the potato is tender.
Getting Crispy Skin on a Microwave Baked Potato
If you really love a baked potato with crispy skin, you can still get that even if you do most of the cooking in the microwave.
To crisp the skin of a microwave baked potato: Preheat your oven to 425°F and cook the potato(es) in the microwave according to the recipe instructions. Once cooked, rub your potato with olive oil—it will be hot, so handle with care! Sprinkle generously with salt (preferably coarse salt) and place the potato on a baking sheet.
Bake until the skin is crispy, usually 10 to 15 minutes. Serve and enjoy!
Baked Potato Toppings
Once your potatoes are finished, time to load them up. You can use classic baked potato toppings like:
- Butter
- Cheese
- Sour cream
- Bacon
Or go with some non-traditional toppings like:
- Chili
- Broccoli and cheese sauce
- Taco filling and nacho sauce
How to cut a baked potato like a restaurant?
To cut a baked potato like a restaurant, slice the potato lengthwise across the top, cutting about halfway down. Then, using a thick towel to protect your hands from the hot potato, use the thumb and index finger of each hand to squeeze the sides of the potato inward until the slice splits open.
Use a fork to fluff up the insides of the potato before adding your toppings.

Why do potatoes get hard in the microwave?
Potatoes get hard in the microwave when they’re overcooked and the overcooked sections lose too much moisture and become dry and hard.
If you’re using an older microwave without a revolving plate and find that your potato is developing hard spots before it’s cooked all the way through, try rotating it (not just flipping it) a couple times during the cooking process so it cooks evenly all over.
What to serve with baked potatoes?
A loaded baked potato (like a chili baked potato or broccoli and cheese potato ) can be a meal all on its own, but baked potatoes are also classic sides for meaty mains. I recommend:
- Tri-tip
- Marinated Steak
- Roasted Chicken
- Top Sirloin Steak
More Quick Microwave Recipes
- Microwave Sweet Potatoes
- Broccoli in the Microwave
- Cauliflower in the Microwave
- Corn on the Cob in the Microwave
- Green Beans in the Microwave
- Carrots in the Microwave

Ingredients
- ▢ Medium-to-large baking potato scrubbed and dried*
Instructions
- Pierce potato all over with a fork before placing it directly into the microwave. If cooking more than one potato at a time, make sure that the potatoes are in a single layer and not touching.
- Cook the potato for 3 to 4 minutes and then carefully flip and cook for an additional 3 to 4 minutes. For every extra potato you’re cooking, add 1 minute for each side.*
- Use a knife to pierce the potato and check for doneness. The potato should feel tender (but not mushy) all the way through.
- If the potato is finished, allow it to sit for 1 minute to cool slightly before removing it from the microwave. If still hard, continue to cook in 1-minute increments until the potato is tender.
Notes
- 2 potatoes for 4 to 5 minutes per side
- 3 potatoes for 5 to 6 minutes per side
This Small Batch of Cut-out Sugar Cookies recipe makes one-dozen sugar cookies and is quick and easy, with no dough chilling time required!
Today’s recipe is this sweet little batch of cut-out sugar cookies. It’s the perfect recipe if you love decorating cookies at Christmas but don’t have a lot of people around to feed them to.
You still get to decorate some cookies (maybe with some spiked hot chocolate and a fire going in the background to keep you cozy while you work), but you don’t have to find homes for (or accidentally eat) a mountain of cookies when you’re done.
A (Quick) Small Batch of Sugar Cookies
This recipe will make about a tray-and-a-half of sugar cookies, that’s 8 to 12-ish normal-sized cookies depending on how you cut them out.
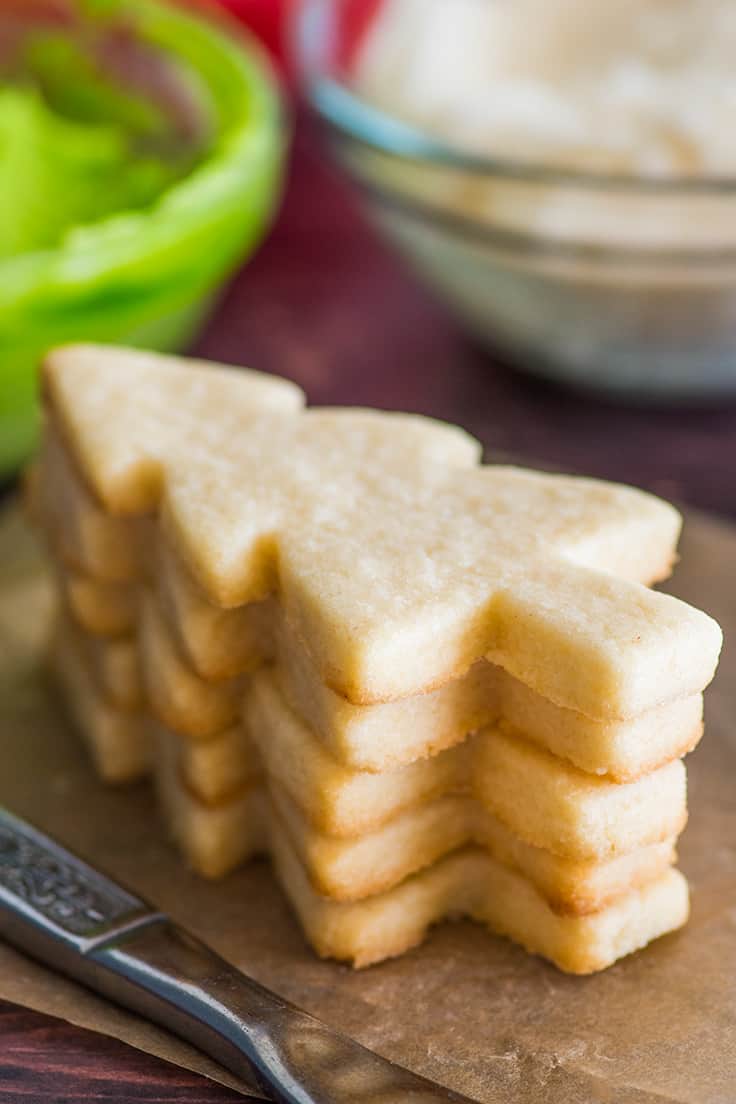
The finished cookies come out just the right level of not-too-sweet (perfect since they’re meant to be smothered with frosting), with crunchy edges and slightly chewy centers.
The cookies are easy to make (though please read the recipe notes on flour measurement before starting), with a dough that is great to work with. Best of all, the dough doesn’t need to be chilled, so between making, baking, and cooling time, you can be decorating them in about an hour.
Ingredient Notes
- Spooned and leveled all-purpose flour: Properly measured flour is SO important in this recipe. In order to make a no-chill dough, it has a slightly higher flour content than normal cookie recipes. This means that if you over-measure your flour, you are going to have way too much and the dough is going to be crumbly and difficult to work with. For best results, measure your flour with a scale (recommended) or the spoon and sweep method (stir the flour in your container to fluff it up and then spoon it into your measuring cup, sweep excess off with the flat of a knife).
- Softened butter: You must use softened butter in this recipe (not cold or melted). Set your butter out on the counter 30 minutes to an hour before making the cookies. You’ll know your butter is the correct temperature if you can easily press an indentation into it with your finger but the butter around it still keeps its shape.
- Egg yolk: Because this is a small-batch recipe, you don’t need a whole egg, just the yolk. For ideas on what to do with that leftover egg white, check out my post What to Do With Leftover Egg Whites (I recommend my Mini Chocolate Sheet Cake ).
How to Make Small-batch Sugar Cookies
- Whisk together flour, baking powder, and salt.
- Cream softened butter and sugar together before adding the egg yolk and vanilla.
- Add the flour mixture to the butter mixture in thirds, beating until mostly combined after each addition.
- Gather dough into a ball and roll out on a lightly floured work surface.
- Cut into shapes, bake, cool and decorate!
Recommended Tools
- A handheld electric mixer : A full-size stand mixer will be too large for this amount of dough, but a handheld mixer is extremely helpful for creaming butter and making sure the dough comes together.
- Thin metal spatula or offset spatula: This dough is easy to work with, but because it’s not chilled, the cut-out cookies can be difficult to pick up if your work surface doesn’t have enough flour. I like to use a metal spatula to lift the cookies to easily transfer them from work surface to baking pan.
Can you freeze sugar cookies?
Yes! Sugar cookies freeze very well. They can be frozen frosted or unfrosted, but if freezing frosted cookies, freeze them solid on a plate or tray first so the frosting doesn’t get smooshed in the freezer.
Store cookies in the freezer in an airtight container or freezer bag for up two months.
They can be eaten frozen right out of the freezer or set them on a plate at room temperature for 15 to 20 minutes before eating.
How thick should cut-out sugar cookies be?
For these cookies, 1/4-inch thick is the perfect thickness.
How long do cut-out sugar cookies last?
Cut-out sugar cookies will stay fresh at room temperature, in an airtight container for up to 5 days. If you want to keep them fresh longer, freeze them.
A Note on Frosting
These cookies are great with royal icing or a simple buttercream. I’ve included my small-batch vanilla frosting recipe below the recipe card (scroll past the cookie recipe to get to it), but if you want to change things up, try one of my other small-batch frosting recipes like:
- Chocolate Frosting
- Cream Cheese Frosting
- Chocolate Cream Cheese Frosting
- Strawberry Frosting
- Oreo Frosting
Troubleshooting
My dough is too dry and crumbly, what do I do?
As mentioned above, this recipe uses a slightly higher ratio of flour to wet ingredients so we don’t have to chill the cookies. But this means accurate flour measurement is extremely important. If your dough is crumbly, you probably have a bit too much flour in there (or got a small egg yolk). Not a problem, this is an easy fix.
To fix crumbly dough where you have dry flour at the bottom of the bowl, add milk or water by the 1/4 teaspoon until your dough just comes together. Don’t add so much that your dough becomes sticky and wet!
If there’s no flour at the bottom of the bowl but the dough isn’t quite coming together like it should, try this old baker’s trick. Wet your hands and then use damp hands to gather the dough and smoosh it all together. Once it’s a cohesive ball, it’s ready to roll out.
Baking Tips
When baking, for evenly cooked cookies, bake similar sizes and shapes together. Things with lots of edges like stars, trees, and reindeer will cook much faster than things like stockings and presents, etc..
More Small-batch Cookie Recipes
- (Soft) Small-batch Frosted Sugar Cookies
- Small-batch Shortbread Cookies
- Small-batch Snowballs
- Small-batch Buckeye Brownie Cookies
- Small-batch Oreo and Andes Chocolate Cookies
Or check out my Small-batch Cookie Archive!

Equipment
- Handheld electric mixer
- Rolling pin
- Cookie cutters
- Metal spatula
Ingredients
Small Batch of Cut-out Sugar Cookies
- ▢ 1 cup ( 120g ) all-purpose flour measured by weight or using the spoon and sweep method* plus more for rolling
- ▢ ¼ teaspoon baking powder
- ▢ ¼ teaspoon salt
- ▢ ⅓ cup ( 76g ) unsalted butter softened*
- ▢ ⅓ cup ( 66g ) granulated sugar
- ▢ 1 large egg yolk
- ▢ ½ teaspoon vanilla extract
Instructions
- Preheat the oven to 375°F and line two baking sheets with parchment paper or silicone baking mats.
- In a small bowl, whisk together flour, baking powder, and salt. Set aside.
- In a medium bowl, use a handheld electric mixer to cream together butter and sugar until light and fluffy, about 1 minute. Add egg yolk and vanilla and mix until well-combined.
- Add ⅓ of the flour mixture, and mix on medium until mostly combined. Add half of the remaining flour and repeat. Pour in the rest of the flour and continue to mix until the dough begins to clump (this may take a little while) and you can form it into a ball with your hands.*
- Lightly flour your workspace and rolling pin and roll dough out to ¼-inch thick. Dip cookie cutters in flour and cut out your cookies, placing them at least an inch apart on the trays. Use a metal spatula to pick up the cookies if they stick to your work surface at all. Continue to cut out cookies, gathering dough and re-rolling as necessary until all the dough is shaped.
- Bake cookie sheets, one tray at a time, for 6 to 9 minutes, until the edges of the cookies just start to turn golden. Cool completely before frosting. And enjoy!
Notes
Adapted from Food.com

Ingredients
- ▢ 4 tablespoons ( 56g ) unsalted butter* softened
- ▢ 1 cup ( 120g ) powdered sugar sifted
- ▢ 1 teaspoon to 1 tablespoon milk or cream
- ▢ ¼ teaspoon vanilla extract*
- ▢ Pinch of salt
Instructions
- In a medium bowl, beat softened butter until light and fluffy, 30 seconds to 1 minute. Add powdered sugar, 1 teaspoon of milk or cream, vanilla extract, and salt.
- Beat until smooth. Add up to 2 additional teaspoons of milk until frosting reaches your desired consistency.
Notes

Small Batch of Cut-out Sugar Cookies (No-chill)
Equipment
- Handheld electric mixer
- Rolling pin
- Cookie cutters
- Metal spatula
Ingredients
Small Batch of Cut-out Sugar Cookies
- 1 cup ( 120g ) all-purpose flour measured by weight or using the spoon and sweep method* plus more for rolling
- ¼ teaspoon baking powder
- ¼ teaspoon salt
- ⅓ cup ( 76g ) unsalted butter softened*
- ⅓ cup ( 66g ) granulated sugar
- 1 large egg yolk
- ½ teaspoon vanilla extract
Instructions
- Preheat the oven to 375°F and line two baking sheets with parchment paper or silicone baking mats.
- In a small bowl, whisk together flour, baking powder, and salt. Set aside.
- In a medium bowl, use a handheld electric mixer to cream together butter and sugar until light and fluffy, about 1 minute. Add egg yolk and vanilla and mix until well-combined.
- Add ⅓ of the flour mixture, and mix on medium until mostly combined. Add half of the remaining flour and repeat. Pour in the rest of the flour and continue to mix until the dough begins to clump (this may take a little while) and you can form it into a ball with your hands.*
- Lightly flour your workspace and rolling pin and roll dough out to ¼-inch thick. Dip cookie cutters in flour and cut out your cookies, placing them at least an inch apart on the trays. Use a metal spatula to pick up the cookies if they stick to your work surface at all. Continue to cut out cookies, gathering dough and re-rolling as necessary until all the dough is shaped.
- Bake cookie sheets, one tray at a time, for 6 to 9 minutes, until the edges of the cookies just start to turn golden. Cool completely before frosting. And enjoy!
Notes
Nutrition

Small-batch Vanilla Frosting
Ingredients
- 4 tablespoons ( 56g ) unsalted butter* softened
- 1 cup ( 120g ) powdered sugar sifted
- 1 teaspoon to 1 tablespoon milk or cream
- ¼ teaspoon vanilla extract*
- Pinch of salt
Instructions
- In a medium bowl, beat softened butter until light and fluffy, 30 seconds to 1 minute. Add powdered sugar, 1 teaspoon of milk or cream, vanilla extract, and salt.
- Beat until smooth. Add up to 2 additional teaspoons of milk until frosting reaches your desired consistency.
