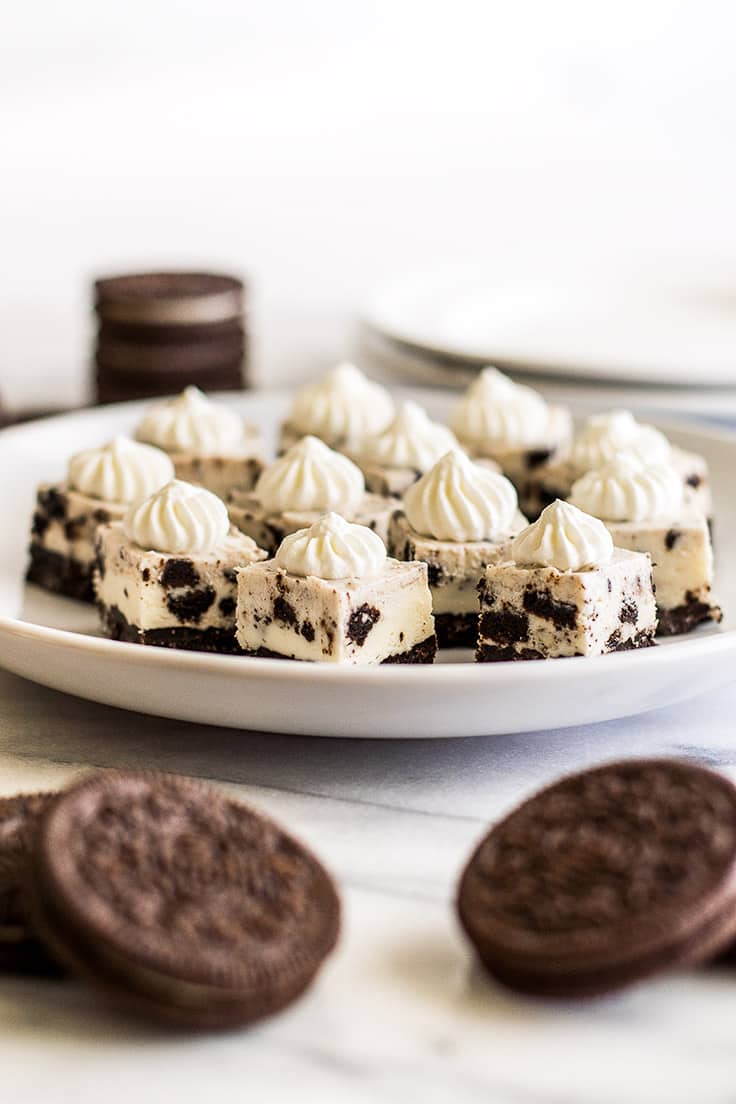
No-bake Oreo Cheesecake Bites are the perfect bite-sized treat. They’re cute, tasty, and almost too easy to make.
Love homemade cheesecake but don’t love actually turning on your oven and baking one? Friend, I have just the recipe for you.
These Oreo cheesecake bites have all the cream cheesy goodness of a baked cheesecake with about five percent of the effort so you can make them all the time.

These bites are SO GOOD.
On the bottom is a buttery Oreo crumb crust and then the cheesecake layer is a sweet and creamy combo of cream cheese, whipped cream, and vanilla with even more chopped Oreos throughout because obviously, our Oreo cheesecake must contain A LOT of Oreos. 😉
Ingredient Notes
- Oreos: Feel free to use any variety/flavor of Oreos here. These bites are really fun to make with the different seasonal Oreo varieties.
- Heavy cream: This recipe won’t use a full carton of heavy cream. For storage tips and recipes to use up the leftovers, check out my post What to do With Leftover Whipping Cream .
- Cream cheese: My favorite cream cheese brand for cheesecakes is Philadelphia cream cheese . Make sure to allow enough time for your cream cheese to soften at room temperature. Cream cheese that’s too cold can leave lumps in your cheesecake layer.

How to Make Oreo Cheesecake Bites
This is a quick overview of the recipe steps. For the full printable recipe, scroll down to the recipe card below.
- Make the Oreo crust by combining crushed Oreos and butter and pressing it into your baking dish.
- Whip heavy cream into stiff peaks. The whipped cream will help lighten up the texture of the cheesecake.
- Beat together softened cream cheese, sugar, and vanilla and then fold in the whipped cream and remaining Oreo pieces.
- Spread cheesecake layer over the Oreo crust and freeze until firm, about 3 hours.
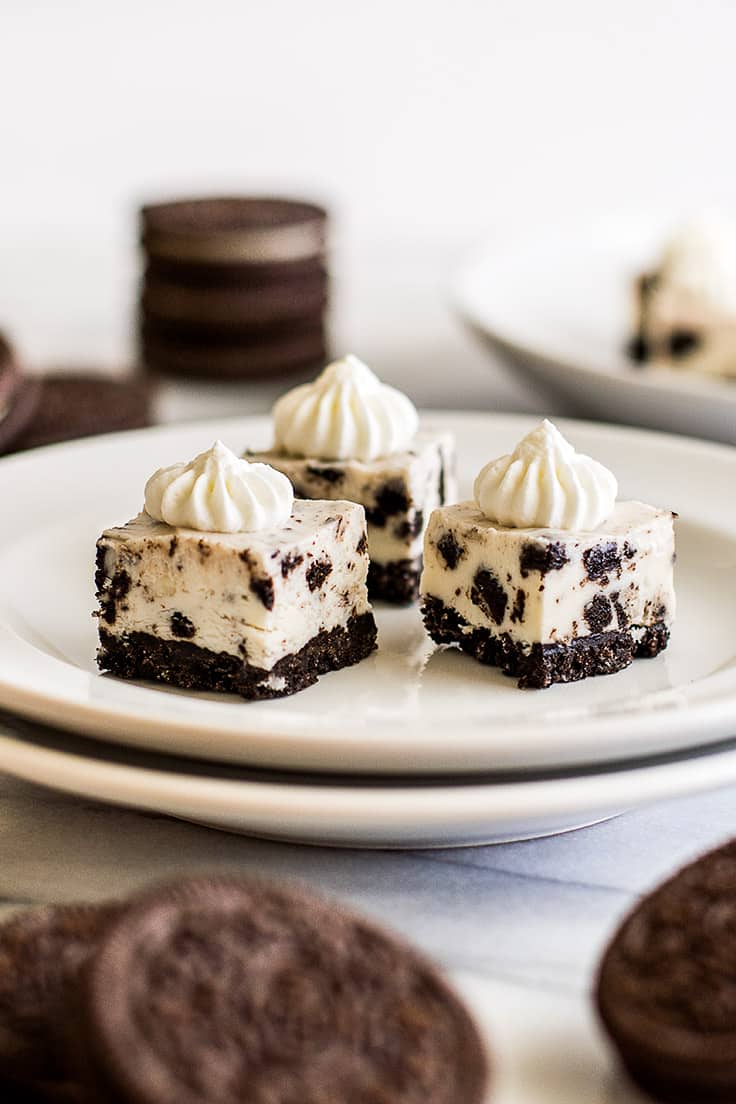
- Slice into bites and enjoy!
Do I need to scrape out the centers of the Oreos before crushing them for the crust?
Nope. You can crush the whole Oreos, filling and all. However, including the filling does make the crumbs stickier, so sometimes you have to scrape some of them out of the bag with a knife. If you don’t want to mess with that (or just really want to eat a ton of Oreo filling), omit the creamy center.
I don’t have a 7×5-inch dish. What else can I use?
You can also make these bites in a cupcake or mini cupcake pan like my No-bake Cheesecake Bites With Graham Cracker Crust. Just be sure to use cupcake liners or you won’t be able to get them out of the pan.
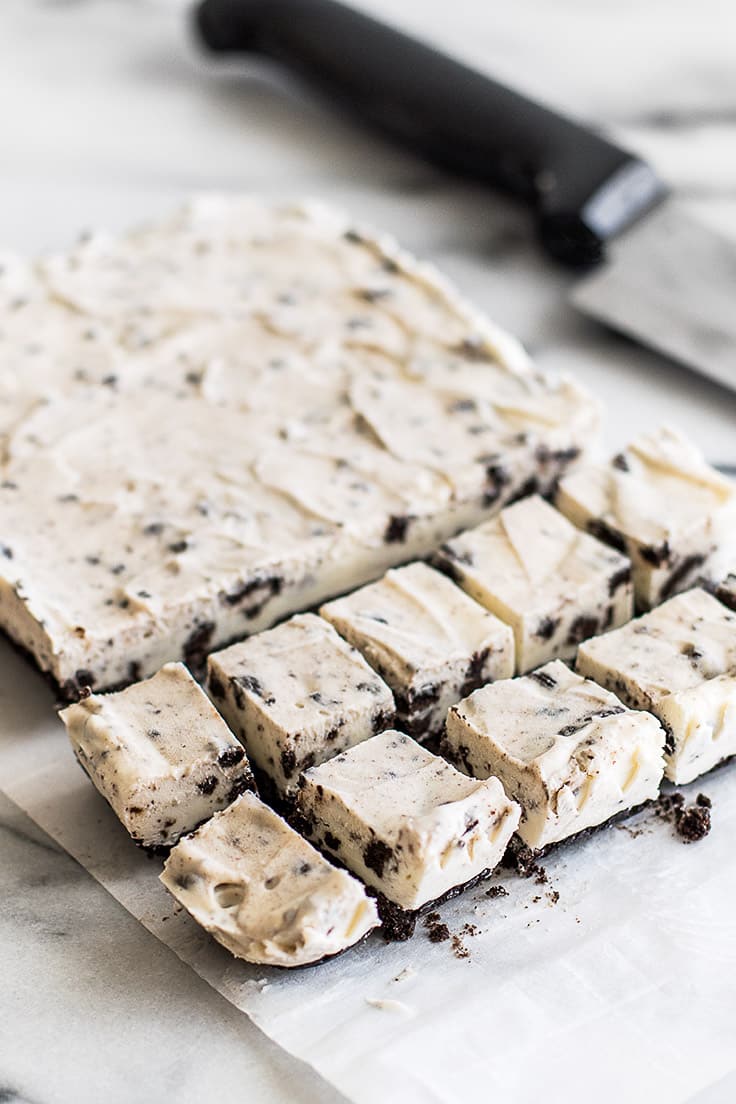
How can I get clean cuts when cutting the cheesecake into bites?
- Make sure the bites are completely frozen solid before cutting.
- Use the parchment paper sling to lift the block out of the baking dish before cutting.
- Use a long chef’s knife to cut the bites and wipe the blade with a warm, damp cloth between every cut.
This should give you nice tidy cuts. If the bites are smooshing while you’re trying to cut them, they’re not firm enough yet to cut. Put them back in the freezer.

How should I store these cheesecake bites?
Once cut, store the bites in an airtight container. You can store them in the freezer or the refrigerator depending on what type of cheesecake you feel like eating. The texture of refrigerated Oreo cheesecake bites is like a slightly softer, creamier cheesecake. From the freezer, they taste like a cross between a cheesecake and ice cream.
Both are fabulous and I still haven’t decided which I like better, so you should probably just make the recipe and test both ways out for yourself. 😉
Can I double this recipe?
Yes. This recipe can be scaled up and made in an 8×8-inch dish with no preparation changes needed. To change the recipe yield, hover over the serving size in the recipe card below or click if you’re on mobile, and slide the slider.
More Oreo Recipes
- Oreo Milkshake
- Small-batch Oreo Frosting
- Bailey’s Cookies and Cream Milkshake
- No-churn Peanut Butter Oreo Ice Cream
- Two-Ingredient Cookies and Cream Popsicles
More No-bake Favorites
- Small-batch Peanut Butter Bars
- The Best Vanilla Milkshake
- Homemade Pudding Pops
- Magic Chocolate Shell
- Small No-bake Marshmallow Pumpkin Cheesecake
Equipment
- Parchment paper
- Plastic zip top bag (for crushing Oreos)
- 7x5-inch baking dish
- Handheld electric mixer
Ingredients
- ▢ 14 Oreos divided
- ▢ 2 tablespoons ( 26g ) salted butter melted
- ▢ 1/4 cup heavy cream
- ▢ 4 ounces cream cheese softened
- ▢ 3 heaping tablespoons ( 42g ) granulated sugar
- ▢ 1/2 teaspoon vanilla extract
- ▢ Whipped cream optional for topping*
Instructions
- Line your baking dish with parchment paper. Secure with binder clips or clothes pins and set aside.
- Finely chop 5 of the Oreos and set aside. Place the remaining 9 Oreos in a plastic bag and crush into a fine crumb with a rolling pin or the bottom of a glass. Pour crumbs into a medium bowl and stir in melted butter until well mixed. Pour crumbs into prepared baking dish and press out into an even layer.
- In a medium bowl, use a handheld electric mixer to beat heavy cream until stiff peaks form (when you lift the beaters straight up, the peaks should stand straight up without flopping over). Set aside.
- In a medium bowl, beat softened cream cheese, sugar, and vanilla until well mixed. Fold in whipped cream and Oreos, being careful not to deflate the whipped cream. Transfer mixture to your prepared dish and spread over crust. Cover and freeze until firm, about 3 hours.
- Use the parchment paper to remove cheesecake from the container and cut into 24 small squares. Add a dollop of whipped cream to each if desired, and enjoy!
Notes
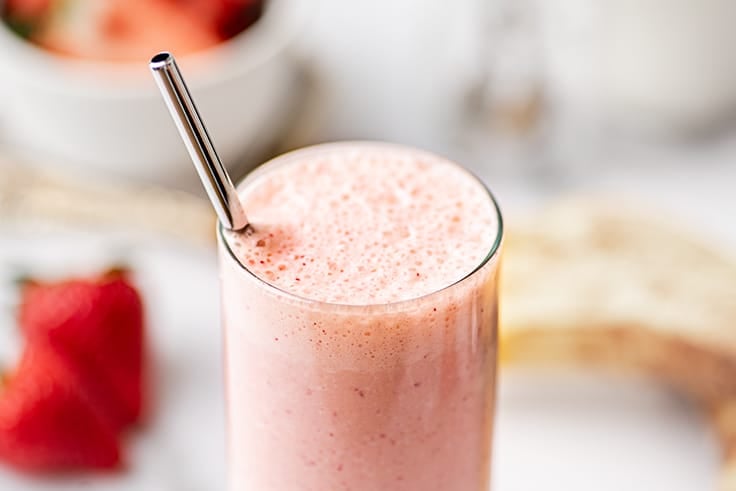
This strawberry banana milkshake is perfectly creamy with a fresh pop of banana and strawberry flavor.
Since I wrote my How to Make a Milkshake post a couple of years ago, I’ve added a bunch of milkshake recipes to the site, the best vanilla milkshake , my favorite chocolate milkshake , a fabulous strawberry milkshake , and thick banana milkshake .
And today we’re covering one of my favorite fruity combos, a strawberry banana milkshake.

This shake is rich and creamy, with a perfect balance of banana and strawberry and ideal for cooling you down on a warm day.
Ingredient Notes
- Vanilla ice cream: Good quality vanilla ice cream makes the best milkshake base to layer other flavors over.
- Strawberries: Don’t have strawberries? Feel free to substitute any berry for the strawberries.
- Banana: An overripe banana is best if you have it, but a ripe or even slightly green banana will work okay. If your banana is not yet very sweet, you might want to add a couple teaspoons of sugar to the shake just to boost the sweetness of the fruit.
- Milk: Any percentage milk works just fine here.

How to Make a Strawberry Banana Milkshake
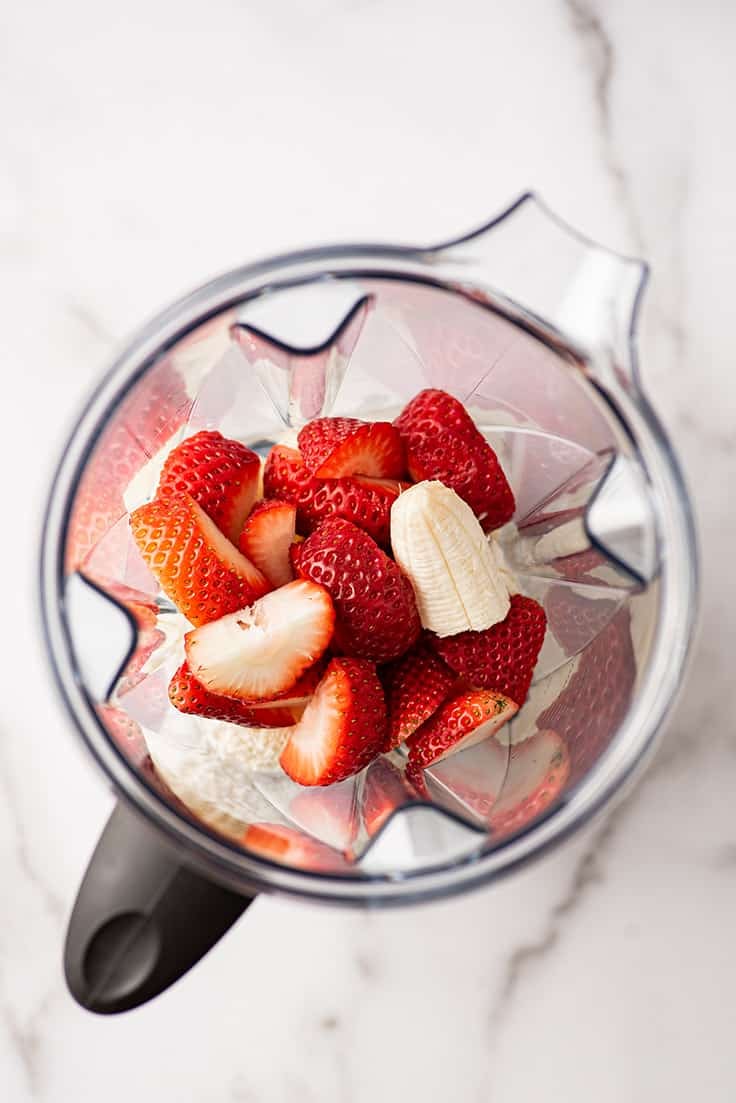
- In your blender, combine ice cream, strawberry and banana pieces, and milk (and sugar if desired). Blend until smooth and pourable.
- Pour into a glass and add optional whipped cream. Enjoy!!
More Flavor Combos
- Strawberry Banana Cheesecake Milkshake: Add 1 1/2 to 2 ounces cream cheese to the shake before blending.
- Strawberry Banana Split Milkshake: Swirl 1 tablespoon of chocolate fudge sauce around the glass before pouring the shake in, top with whipped cream and add 1 more tablespoon fudge sauce over the top. (Do not stir the sauce into your shake or it will turn brown.)
Is it better to use fresh or frozen fruit in milkshakes?
It depends on your preferences and your blender. Frozen fruit will yield a thicker, creamier shake, but can make your shake difficult to blend, especially if you are using an older or underpowered blender.
To combat this, be sure to allow your ice cream time to soften before blending.
To soften your ice cream, scoop it into your blender and leave it at room temperature for 5 to 10 minutes before you add the rest of the ingredients and blend. If your blender is still really struggling, you can also use just a bit more milk until it’s able to blend well.
For tips and tricks for freezing bananas, check out my post How to Freeze Bananas .

Can I make this milkshake ahead of time?
It’s best to make any milkshake right before you’re going to drink it. While you can store milkshake leftovers in the refrigerator, they will slowly melt and become more like thick strawberry banana milk than a shake. Still really delicious but not the same frosty milkshake experience.
Can I make this without ice cream?
You can make a strawberry banana milkshake without ice cream, but you can’t make this milkshake without ice cream. You’ll need to use completely different ingredient ratios. Go check out my Banana Milkshake Without Ice Cream post, and there are instructions in that recipe for adding strawberries.
Can I double this recipe?
If using a high-powered blender like a Vitamix or Blendtec , absolutely. To change the recipe yield, hover over the serving size in the recipe card below or click if you’re on mobile, and slide the slider.
If your blender sometimes has trouble processing frozen fruit, you might want to make your shakes in two batches.
More Milkshake Recipes
- The Best Oreo Milkshake
- Caramel Milkshake
- Bailey’s Cookies and Cream Milkshake
- Dulce de Leche Milkshake
More Strawberry and Banana Recipes
- Strawberry Milk
- Quick and Easy Strawberry Sauce for Pancakes and Waffles
- Small-batch Banana Muffins
- Small-batch CHOCOLATE Banana Muffins
- Banana Pancakes
- The BEST Banana Pudding
Recipe Notes
- This recipe makes about a 16-ounce (2-cup) milkshake, enough for one restaurant-size serving or two smaller ones.

Ingredients
- ▢ 1 1/2 cups vanilla ice cream* about 3 scoops
- ▢ 1/2 to 3/4 cup milk* any percentage
- ▢ 3/4 cup chopped hulled strawberries fresh or frozen is fine
- ▢ 1 ripe banana cut into pieces fresh or frozen is fine
- ▢ Whipped cream optional for topping
Instructions
- In a blender, combine ice cream, milk, strawberry pieces, and banana pieces, and blend until well-combined and pourable.
- Pour into a glass. Top with whipped cream if desired and enjoy.
Notes
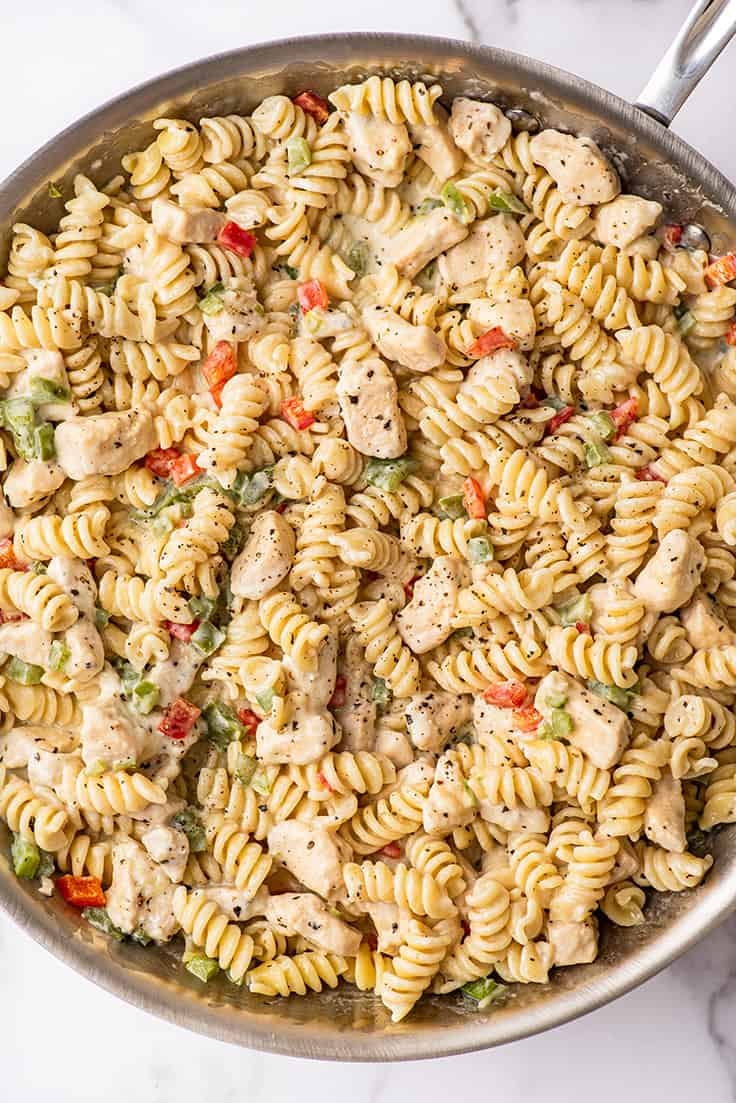
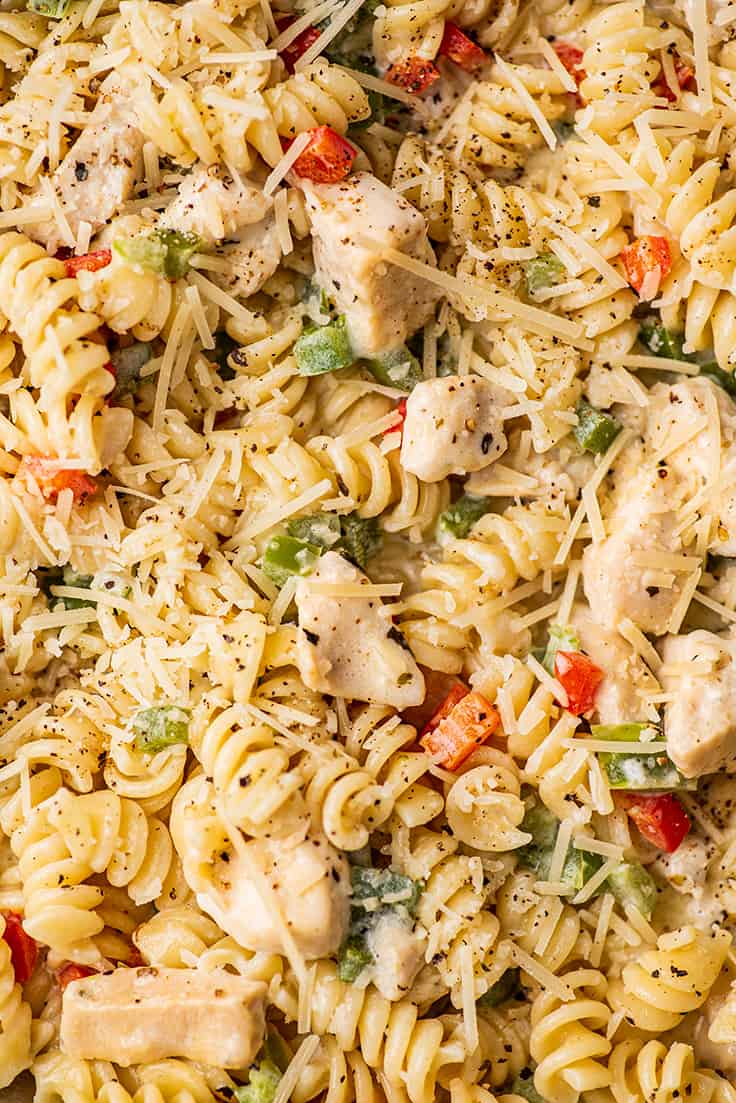
This creamy chicken pasta with bell peppers is rich, filling, and so easy to make. It’s a quick dinner that everyone will love.
If you’re craving a big cozy bowl of creamy pasta, this is the recipe you’re looking for. It’s simple and incredibly easy to make, but so rich and satisfying that you definitely feel like you’re treating yourself.
You really can’t go wrong with cream and parmesan, but throw some diced bell peppers and chicken in there and you’re taking your pasta game up to a whole new level.

And just a side note to the parents out there. If your kids are picky eaters, this is a great pasta for introducing kids to veggies they may be unwilling to try on their own.
The peppers are cut small and end up quite soft, so their texture is inoffensive, and their taste mild.
Ingredient Notes
- Rotini pasta: Rotini is my favorite pasta shape for this dish, but use whatever pasta you’d like. Penne, rigatoni, or even farfalle would also work well here.
- Half and half: If you don’t have half and half, you can make a quick half and half substitute by using about 2 parts milk to 1 part heavy cream (it doesn’t need to be exactly accurate). If you have leftover half and half, check out my post What to Do With Leftover Half and Half for storage tips and recipe ideas to use up the leftovers. (I recommend using it to make an extra creamy cup of hot chocolate .)
- Red and green bell peppers: The variety of colors is nice in this dish, but feel free to use whatever color/combination of colors of bell peppers you have on hand.
How to Make Creamy Chicken Pasta
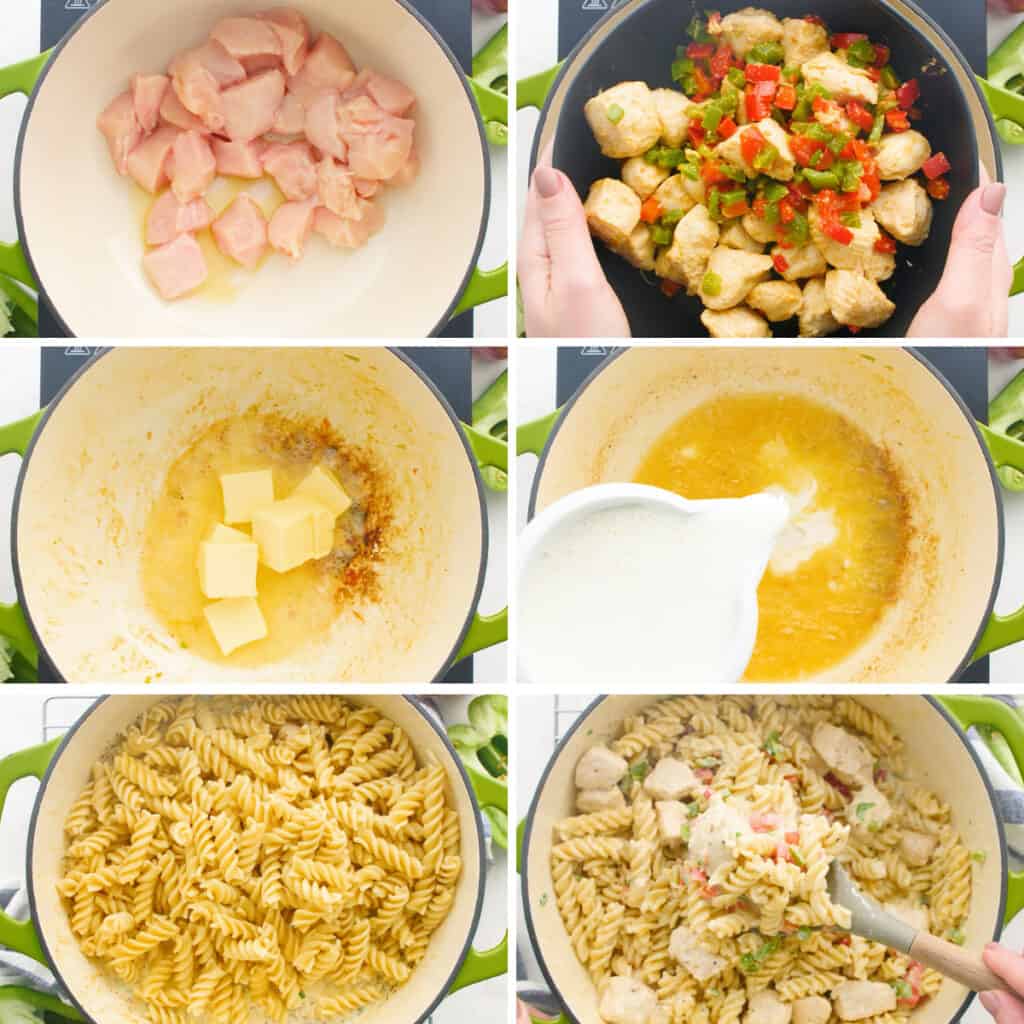

- Cook chicken and peppers in a large skillet until chicken is cooked through and bell peppers are tender-crisp. Transfer chicken and peppers to a plate and set aside.
- Melt butter in the empty pan and add half and half. Bring the mixture to a low simmer and cook for 5 to 8 minutes until just barely reduced.
- Add cheese, spices, and salt to taste before stirring the cooked chicken and bell peppers back in.
- Toss with pasta and serve!
Can I make creamy chicken pasta in advance?
Creamy pastas are always best right after being cooked, but if you want to make this in advance, go ahead. You can reheat the pasta gently on the stove or in the microwave, but before doing so, add a generous splash of half and half or heavy cream since the pasta will have absorbed some of the liquid as it sat in the fridge.
Stir the pasta occasionally as it reheats and add more half and half/cream as needed to return it to its creamy consistency.

Can I make a smaller batch of this pasta?
Absolutely. No cooking or preparation changes are needed to cut the recipe in half or quarters. To avoid waste when halving, you can use a single bell pepper in any color. To change the recipe yield, hover over the serving size in the recipe card below or click if you’re on mobile, and slide the slider.
Can you freeze creamy chicken pasta?
As I mentioned in my American Goulash recipe , I’m not the biggest fan of freezing pasta, but if you have leftovers and don’t mind the resulting slightly mushy noodles, by all means, go ahead.
Defrost in the refrigerator and reheat in the microwave with a splash of cream, half & half, or milk (about a tablespoon per serving), and a sprinkle of Parmesan. In my test batch, I found the texture of the sauce to be a little lumpy after freezing, but stirring in the extra liquid and cheese fixed that right up. This can be stored in the freezer for up to 3 months.


What to serve with chicken pasta?
Serve this pasta with a slice of garlic bread and simple sides like Roasted Broccoli , Roasted Zucchini or Roasted Green Beans .
More Comfort Food Recipes
- Pork Stroganoff
- Creamy Chicken Noodle Soup
- Chicken and Broccoli Orzo
- Creamy Chicken Enchiladas
- Beef Stew

Ingredients
- ▢ 12 ounces rotini pasta
- ▢ 1 pound (about 2 small) boneless skinless chicken breasts cut into 1-inch cubes
- ▢ 1 small green bell pepper diced small
- ▢ 1 small red bell pepper diced small
- ▢ 2 cups half and half*
- ▢ 1/2 cup ( 4 oz) butter
- ▢ 3/4 cup ( 3oz ) shredded Parmesan cheese plus more for topping
- ▢ 1 teaspoon chives or green onions minced, optional
- ▢ 1/2 teaspoon dried oregano
- ▢ 1/2 teaspoon dried basil
- ▢ 1/2 teaspoon salt
Instructions
Pasta
- In a large pot, boil water for pasta. Salt lightly and add rotini. Cook according to package instructions. Drain and set aside.
Chicken & Peppers
- While pasta cooks, grease a large pan with cooking spray or a drizzle of olive oil, and over medium heat, cook chicken and peppers together until chicken is cooked through and peppers are tender. If you prefer crunchier peppers, add them to your chicken after 2 to 3 minutes. Transfer chicken and veggies to a bowl and set aside.
Sauce
- In the same pan, melt butter over medium heat and add the half and half. Bring to a low simmer and allow to cook until it has reduced down and thickened just slightly, about 5 to 8 min. Remove from heat and add Parmesan, chives or green onions, oregano, basil, and salt.
Combine
- Add chicken back to the pan with the sauce, pour in the drained noodles, stir and serve. Top with more Parmesan if desired.
Notes
Recipe adapted from: AllRecipes

Small-batch No-bake Oreo Cheesecake Bites
Equipment
- Parchment paper
- Plastic zip top bag (for crushing Oreos)
- 7x5-inch baking dish
- Handheld electric mixer
Ingredients
- 14 Oreos divided
- 2 tablespoons ( 26g ) salted butter melted
- 1/4 cup heavy cream
- 4 ounces cream cheese softened
- 3 heaping tablespoons ( 42g ) granulated sugar
- 1/2 teaspoon vanilla extract
- Whipped cream optional for topping*
Instructions
- Line your baking dish with parchment paper. Secure with binder clips or clothes pins and set aside.
- Finely chop 5 of the Oreos and set aside. Place the remaining 9 Oreos in a plastic bag and crush into a fine crumb with a rolling pin or the bottom of a glass. Pour crumbs into a medium bowl and stir in melted butter until well mixed. Pour crumbs into prepared baking dish and press out into an even layer.
- In a medium bowl, use a handheld electric mixer to beat heavy cream until stiff peaks form (when you lift the beaters straight up, the peaks should stand straight up without flopping over). Set aside.
- In a medium bowl, beat softened cream cheese, sugar, and vanilla until well mixed. Fold in whipped cream and Oreos, being careful not to deflate the whipped cream. Transfer mixture to your prepared dish and spread over crust. Cover and freeze until firm, about 3 hours.
- Use the parchment paper to remove cheesecake from the container and cut into 24 small squares. Add a dollop of whipped cream to each if desired, and enjoy!
