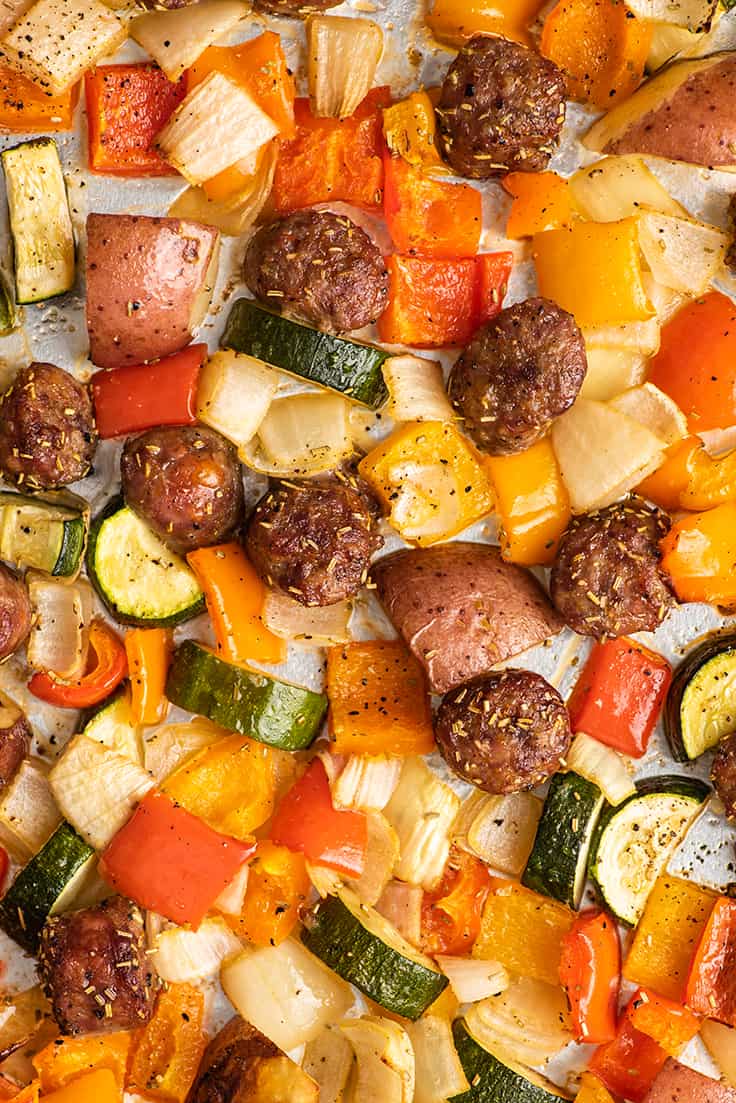
This Sheet Pan Sausage and Veggies recipe makes an incredibly simple and easy dinner that packs a ton of flavor.

Hey, friend, if you need a dinner that comes together and cooks up with no fuss and basically zero hands-on cooking time, today’s recipe’s got your back. Let’s make Sheet-pan Sausage and Veggies.
An Incredibly Easy Dinner Recipe
When it comes to easy dinners, it doesn’t get much simpler than drizzling a bunch of veggies and sausage in olive oil, tossing them on a tray, and letting them hang out in the oven to roast while you go about your evening.
It’s a fabulous way to get a ton of veggies on your plate all at once, and is SO good.

A Good Make Ahead Option…
While this dish is incredibly easy to make, it does involve quite a lot of chopping. I like to zen out to an audiobook or podcast while I cut the veggies, but if you plan on making this on a weeknight, you might want to prep some of the vegetables in advance.
The onion and bell peppers can be cut and stored together (in the refrigerator) up to 2 days ahead of time with zero loss in quality.
Prep and cut the zucchini, potatoes, and sausage right before cooking. They’re quick to cut, so you should be able to do it by the time your oven has finished pre-heating.
What to Serve With Sausage and Vegetables
You can serve your sausage and veggies over a bowl of rice or cauliflower rice. It’s also quite good with a side of Parmesan Orzo and Steamed Broccoli or Corn .
Bonus Tip: If you have leftovers, heat them up and serve them with scrambled eggs (and maybe a little cheddar cheese) in the morning.
Meal-Prep Sausage and Veggies
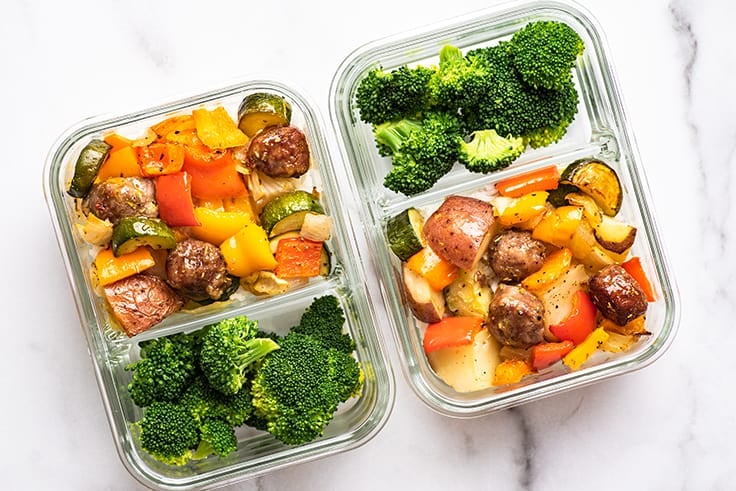

The flavors in this dish really only get better with time, so this recipe’s a great option for meal-prep lunches or dinners.
It also makes extremely generous servings, so while I’d say it serves 5 to 6 for dinner, you could probably get 8 lunch-size servings out of it when served over rice, which is perfect if both you and a partner need lunches for the week.
Recipe Notes
- If you don’t usually cook with/buy Italian sausage, you can generally find packages of it near the hamburger in the butcher department.
- Don’t remove the sausage casings when cutting. They will help hold the sausage pieces together while they cook.
- For more sausage recipes, try my Quick Creamy Sausage Pasta , Baked Ziti , and Homemade Spaghettios.

Ingredients
- ▢ 2 tablespoons fresh minced rosemary OR 2 teaspoons dried crushed rosemary
- ▢ 1/2 teaspoon garlic powder
- ▢ 1/2 teaspoon salt
- ▢ 1/4 teaspoon pepper
- ▢ 1 pound Italian sausage sliced 1/2-inch thick (do not remove casings) mild, hot, or sweet is fine
- ▢ 1 1/2 pounds red potatoes scrubbed and cut into bite-sized pieces
- ▢ 2 medium to large zucchini halved and sliced 1/2-inch thick
- ▢ 1 large yellow or white onion chopped 1/2-inch squares
- ▢ 1 orange bell pepper chopped 1-inch squares
- ▢ 1 yellow bell pepper chopped 1-inch squares
- ▢ 1 red bell pepper chopped 1-inch squares
- ▢ 2 tablespoons olive oil
Instructions
- Arrange oven racks so that both racks are somewhere near the center of the oven (you don’t want the bottom rack right above the heating element).
- Preheat your oven to 425°F. Lightly grease two baking sheets with cooking spray.
- In a small bowl, stir together rosemary, garlic powder, salt, and pepper.
- In a large bowl, combine sausage, potatoes, and zucchini. In a second large bowl combine chopped onion and bell peppers.*
- Drizzle the contents of both bowls with half of the the olive oil and half of the spice mixture each, and then use clean hands to mix each bowl so that everything is well coated.
- Pour half of the contents of each bowl onto both trays, and then mix well so you have an even mixture of sausage and veggies on each tray. Spread everything out so it covers the entire tray in a (mostly) single layer.
- Bake both trays at once for 40 to 50 minutes, swapping the trays once halfway through. Dinner is ready when veggies are fork-tender and sausage is cooked through.
- Serve and enjoy!
Notes
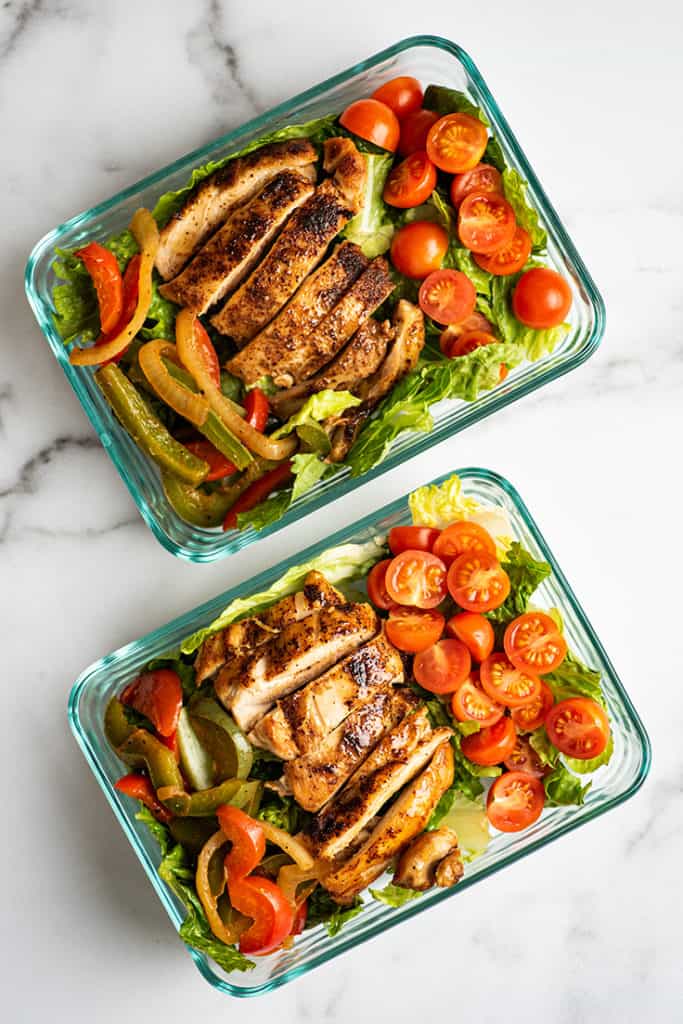
This easy Chicken Fajita Salad with quick homemade dressing is packed with a ton of flavor and textures and is incredibly satisfying and filling.

Hey, friend, if your salad game is feeling a little stale, I have just the recipe to make you get excited about salads again: Chicken Fajita Salad.
Chicken Fajitas…As Salad
This recipe is my classic Chicken Fajitas (already a total delight on their own) served up over a bed of crisp romaine with diced avocado and tomatoes and topped with a creamy homemade Southwestern dressing.
It makes for a salad that is packed with a ton of flavor and textures and one that is incredibly satisfying and filling.
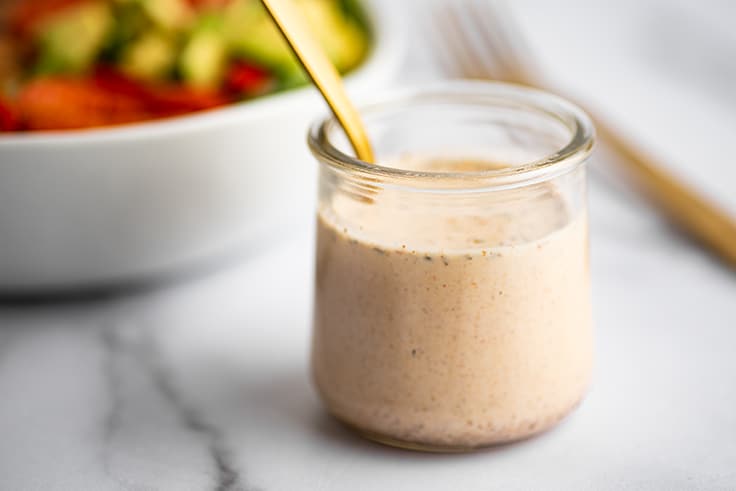

Quick Homemade Dressing
If you have a Southwestern-style dressing in your fridge, feel free to use it, but if not, I think you’re really going to like this one. It’s creamy, tangy, and best of all, SO quick and easy.
The ingredient list is just four items long, and all you have to do is throw those ingredients in a bowl, mix them together, and then drizzle away.
Meal Prep Salads
And for those of you who like to meal prep your lunches for the week, I highly recommend giving this salad a try. If you don’t have access to a microwave at work, the salad is really good cold. You can just pack everything (except the dressing) together in one container and go.
If you like to heat up your meat and fajita veggies before eating, pack the lettuce and tomatoes in one container and meat and peppers in a second microwave-safe container so you can pop them in the microwave before eating.

More Easy Salad Recipes
- Chicken Shawarma Salad
- BLT Salad
- Asian Chicken Salad
- Carne Asada Salad
Recipe Notes
- This recipe calls for chicken thighs, but if you want to use boneless, skinless chicken breasts, go for it. Season them as described in the recipe, but use the cooking method from my How to Cook Chicken Breasts for Salads and Sandwiches post, because cooking chicken breasts on the stove requires a slightly different cooking method to get the best results.

Ingredients
Fajitas
- ▢ 4 large or 8 small boneless skinless chicken thighs
- ▢ Taco or fajita seasoning
- ▢ 2 tablespoons vegetable oil divided
- ▢ 2 bell peppers any color, sliced
- ▢ 1/2 large onion sliced
Dressing
- ▢ 1/4 cup plain yogurt or sour cream
- ▢ 3 tablespoons milk plus more as needed
- ▢ 2 tablespoons ( 26g ) mayonnaise
- ▢ 1 teaspoon taco or fajita seasoning
- ▢ Salt and pepper
Salad
- ▢ 1 large head romaine lettuce chopped
- ▢ 1 avocado chopped
- ▢ 1 cup halved grape or cherry tomatoes or tomatoes of your choosing
Instructions
Fajitas
- Sprinkle chicken thighs with taco/fajita seasoning until lightly coated on all sides.
- On the stove, heat 1 tablespoon of oil in a large skillet over medium-high heat. Once hot, add chicken thighs and cook for 3 to 5 minutes per side, until the internal temperature reaches 165°F. If at any time the outside of the chicken begins to cook too quickly and starts to burn, turn the heat down. Once chicken is finished cooking, transfer to a plate and tent with foil to keep warm.
- While your meat cooks, in a second large skillet, heat remaining 1 tablespoon of oil over medium-high heat. Once oil is hot, add bell pepper and onion slices. Sprinkle 1/2 teaspoon of taco seasoning over the top. Cook, stirring occasionally, for 4 to 8 minutes, until edges are lightly browned and vegetables are tender-crisp. Salt and pepper to taste.
- For softer vegetables, turn heat down to medium once the vegetables begin to brown so they don’t burn, and continue to cook until vegetables reach your desired level of doneness. For very soft vegetables, add 1/4 cup of water to the pan at this point, and cook until veggies are soft and water has evaporated, adding more water as necessary.
- Slice cooked chicken thighs into strips or cubes.
Dressing
- In a small bowl, whisk together first four dressing ingredients and add salt and pepper to taste. If dressing is too thick, add more milk by the 1/2 teaspoon until it reaches your desired consistency.
Assemble Salad
- Divide lettuce between bowls and top with salad toppings. Pour dressing over the top and enjoy!
How to quickly ripen bananas to be used in baking recipes.

I’ve written quite a few posts on what to do with that brown banana that’s been sitting on your counter all week, but today we’re going to chat about the opposite situtation, what to do when you really need an overripe banana for baking and all you have is a bunch of perfectly unblemished yellow bananas.
The Fastest Way to Ripen Bananas (For Baking)
The quickest way to ripen bananas for baking is to just bake them. Pop as many bananas as you need in the oven, and when they come out you have perfectly soft and sweet bananas ready to go.
It’s that simple.
This was one of my favorite kitchen hacks I ever learned because it means that you can make a perfect loaf of banana bread whenever you want, not when those bananas on the counter decide they’re ready for it.
How to Ripen Bananas in the Oven
To ripen bananas in the oven, bake them at 300°F for 30 to 40 minutes, until deeply blacked and soft to the touch.
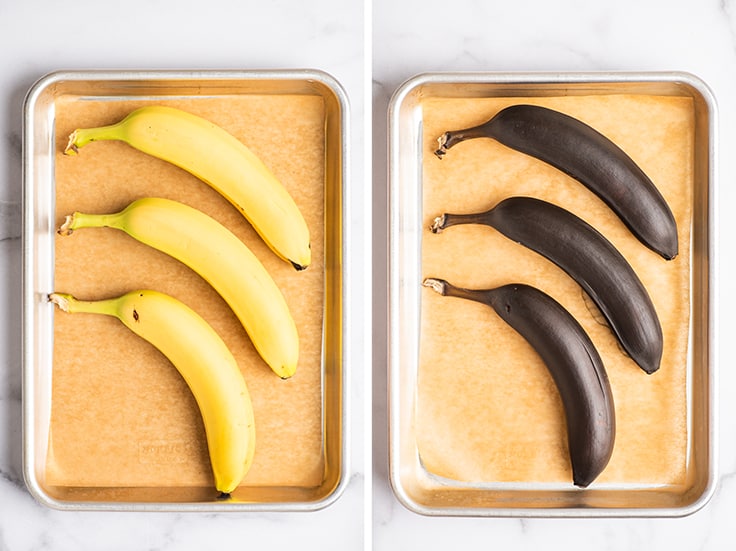

Baking Tip: I recommend baking bananas on parchment paper or foil as the bananas will often split and begin to leak, and the sugars in the juice can burn on your tray.
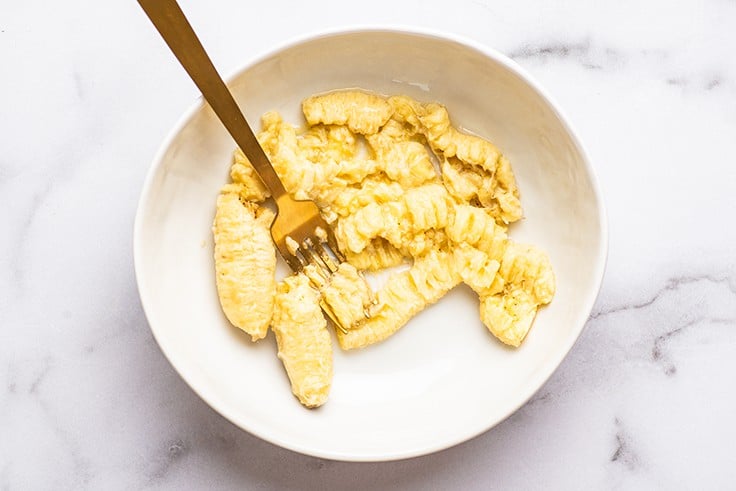
Once browned, the bananas will need to cool before you use them in any baking recipes. You can speed up that process by peeling and mashing them so heat escapes more quickly.

How to Store Ripened Bananas
If you ripen more bananas than you need, the extras can be stored (unpeeled or peeled) in an airtight container or freezer bag in the freezer. When you’re ready to use them, simply defrost completely (overnight in the fridge will do the trick), peel if needed and mash.
Recipes to Make with Ripened Bananas
- One Banana, One Bowl Banana Muffins
- Chocolate Banana Muffins
- Banana Pancakes
- Banana Milkshake
- Small Banana Cake With Cream Cheese Frosting
Recipe Notes
- This recipe in NOT for ripening bananas to eat them raw. Unless you like banana mush, you will not enjoy the texture of the bananas ripened this way.
- I don’t recommend attempting this with completely green, unripe bananas. They won’t have developed enough sugars and flavor be useful in baked goods, even after baking.

Ingredients
Equipment
- ▢ Baking sheet
- ▢ Parchment paper or foil optional
Ripened Bananas
- ▢ Bananas *
Instructions
- Preheat your oven to 300°F and line a baking sheet with parchment paper or foil for easy cleanup.
- Bake banana(s) for 30 to 40 minutes, until blackened and soft to the touch.
- Cool on the baking sheet until cool enough to handle. Peel and transfer banana to a bowl and mash so that it cools more quickly. Cool completely before using in recipes.
Notes

Sheet Pan Sausage and Veggies
Ingredients
- 2 tablespoons fresh minced rosemary OR 2 teaspoons dried crushed rosemary
- 1/2 teaspoon garlic powder
- 1/2 teaspoon salt
- 1/4 teaspoon pepper
- 1 pound Italian sausage sliced 1/2-inch thick (do not remove casings) mild, hot, or sweet is fine
- 1 1/2 pounds red potatoes scrubbed and cut into bite-sized pieces
- 2 medium to large zucchini halved and sliced 1/2-inch thick
- 1 large yellow or white onion chopped 1/2-inch squares
- 1 orange bell pepper chopped 1-inch squares
- 1 yellow bell pepper chopped 1-inch squares
- 1 red bell pepper chopped 1-inch squares
- 2 tablespoons olive oil
Instructions
- Arrange oven racks so that both racks are somewhere near the center of the oven (you don’t want the bottom rack right above the heating element).
- Preheat your oven to 425°F. Lightly grease two baking sheets with cooking spray.
- In a small bowl, stir together rosemary, garlic powder, salt, and pepper.
- In a large bowl, combine sausage, potatoes, and zucchini. In a second large bowl combine chopped onion and bell peppers.*
- Drizzle the contents of both bowls with half of the the olive oil and half of the spice mixture each, and then use clean hands to mix each bowl so that everything is well coated.
- Pour half of the contents of each bowl onto both trays, and then mix well so you have an even mixture of sausage and veggies on each tray. Spread everything out so it covers the entire tray in a (mostly) single layer.
- Bake both trays at once for 40 to 50 minutes, swapping the trays once halfway through. Dinner is ready when veggies are fork-tender and sausage is cooked through.
- Serve and enjoy!
