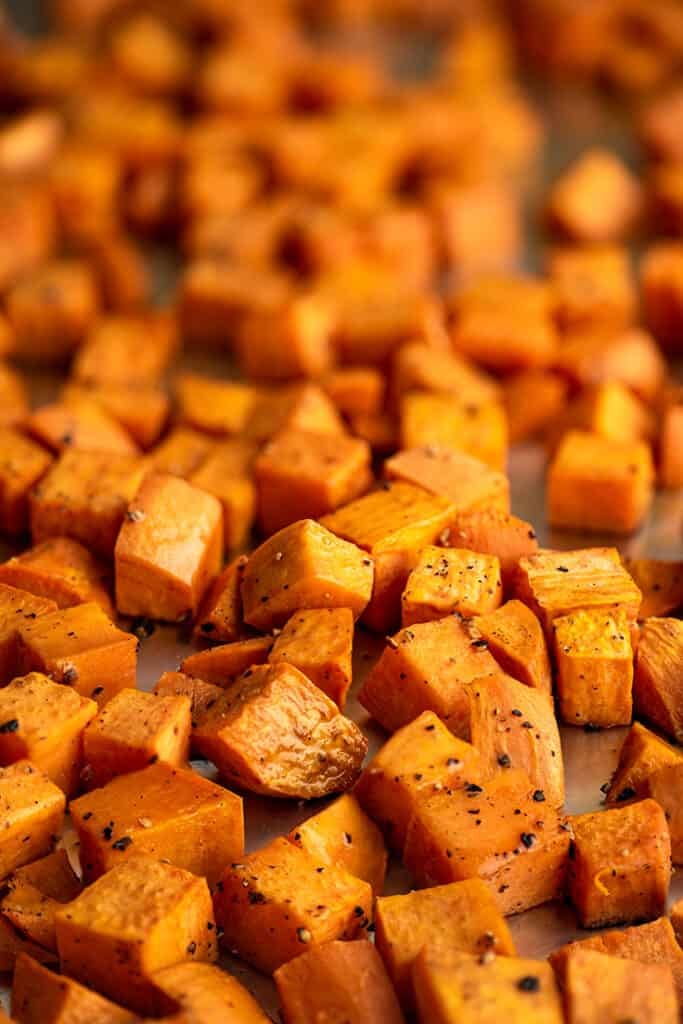
Roasted sweet potatoes are an easy and crowd-pleasing side dish that can be prepped in just minutes.
These roasted sweet potato cubes are one of my absolute favorite fall side dishes. They’re super simple to throw together and roast up beautifully with creamy insides and sweet and salty flavor that goes so well with almost any main dish.

Ingredient Notes
- Sweet potatoes: Sweet potatoes come in a variety of colors, and you can roast any of them, but I recommend going with the red/orange-skinned, orange-flesh varieties for their flavor and creamy texture. Lighter color, white-flesh varieties are also quite good if you prefer a firmer sweet potato. I don’t love purple sweet potatoes for roasting.
- Olive oil: Olive oil not only keeps the potatoes from sticking to the tray as they bake but adds flavor as well. Don’t skimp on it!
- Salt and pepper: Sweet potatoes are delicious when roasted with just salt and pepper, but you can use your favorite seasoning salt or blend if you prefer. Or experiment with flavors like chili powder, cumin, or paprika.
Yams vs Sweet Potatoes
And a quick note on yams vs sweet potatoes so you don’t get confused at the grocery store. For years in the US, we’ve been calling the “soft” variety of sweet potatoes yams as a way to differentiate them from “firm” sweet potatoes, which cook up firmer and waxier than the soft varieties. If you’re buying it in a large US supermarket, it’s probably a sweet potato, no matter what the label says. True yams are actually an entirely different type of tuber.
- True Yams: Native to Africa and Asia. They have a distinctive bark-like skin and are starchy and not very sweet. Not usually very common in US chain grocery stores.
- Sweet Potatoes: Smoother skin with tapered ends. Sweeter than true yams and come in a variety of colors from white to red to purple.
Long story short, when you go shopping for sweet potatoes, don’t worry if the thing you’re buying is labeled “yam.” As long as it looks like a sweet potato, that’s almost certainly what it is.
How to Cut Sweet Potatoes for Roasting
If you’ve never cut a sweet potato before, you might be a little surprised at how dense and difficult to cut through they can be compared to a regular potato. Using the proper cutting method will make your job a lot easier (and safer).
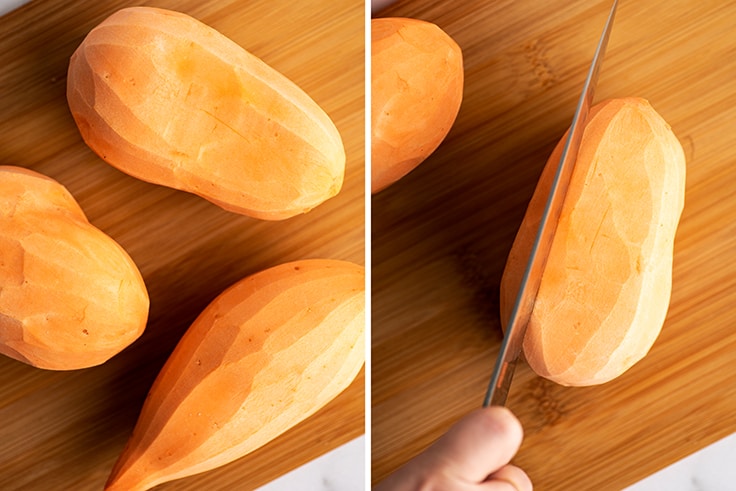

If your potatoes have very long skinny ends, with a sharp knife, cut them off before starting. Then cut a ½-inch piece off of one side of the sweet potato. Set the piece aside and turn the potato onto the cut side so you have a flat, stable surface for the potato to rest on and then cut it into ½-inch slices.
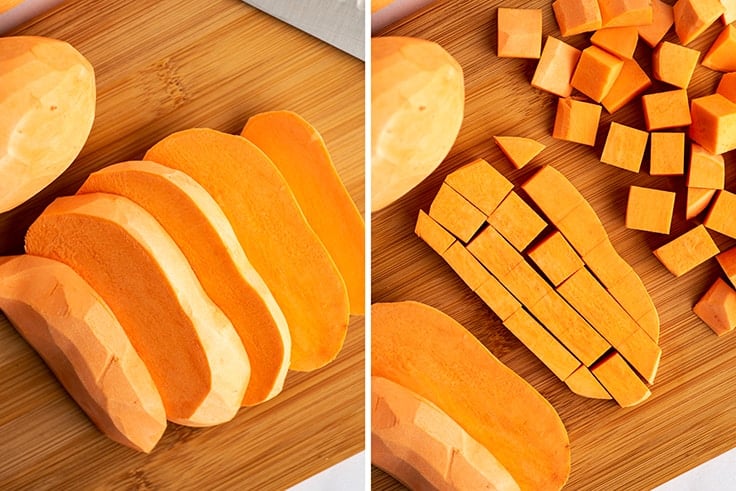

One at a time, cut each of the slices into ½-inch cubes, and you’re all set.
This also works for cutting them into fries or large chunks. Just adjust your cuts as necessary.
How to Roast Sweet Potatoes
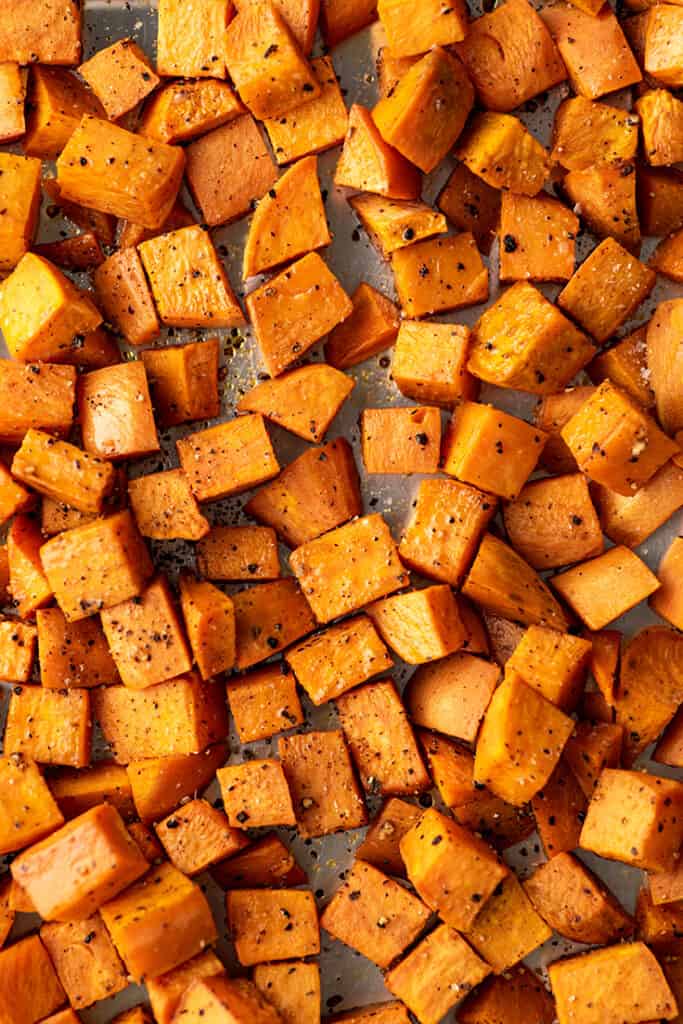
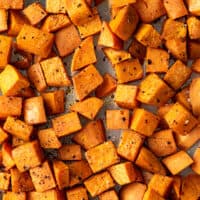
- Once you’ve cut your sweet potatoes into evenly sized chunks, transfer them to a large baking sheet and add oil. Toss them really well with the oil and then spread them out in a single layer over the baking sheet.
- Sprinkle generously with salt and pepper and bake, shaking the pan every 10 minutes, until potatoes are tender.

How long does it take to roast sweet potatoes?
Depending on the size of your sweet potato chunks, roasting sweet potatoes at 425°F should take between 20 and 30 minutes.
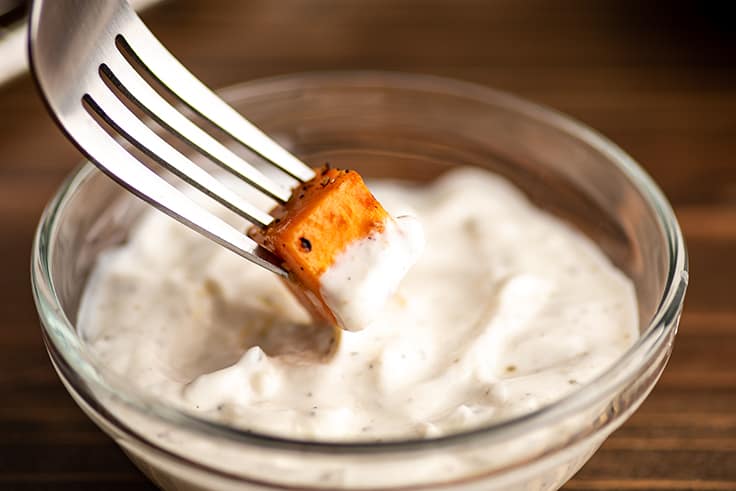
What’s a good dipping sauce for sweet potatoes?
If you want to dip your potatoes in something I recommend making a quick batch of garlic aioli or Greek yogurt aioli . The tangy aioli is so good paired with sweet potatoes and takes only minutes to make.

What to Serve With Roasted Sweet Potatoes
Serve the sweet potatoes as a side dish along with meaty mains like:
- Tri-tip
- Marinated Steak
- Roasted Chicken
Or use them instead of meat in tacos, burritos, and salads. One of my absolute favorite ways to serve roasted sweet potatoes is topped with my easy chili recipe and a little sour cream and shredded cheese.
You Might Also Enjoy
- Roasted Red Potatoes
- Smashed Potatoes
- Mashed Potatoes for Two
- Baked Parmesan Zucchini
- Microwave Sweet Potato
Ingredients
- ▢ 2 pounds sweet potatoes peeled and cut into ½-inch cubes
- ▢ 2 tablespoons olive oil
- ▢ Salt and pepper
Instructions
- Preheat your oven to 425°F.
- Place sweet potato cubes on a large rimmed baking sheet and drizzle them with olive oil.
- Mix the cubes until well-coated and spread them out in a single layer on the baking sheet.
- Sprinkle generously with salt and pepper. Bake for 20 to 30 minutes, shaking the tray every 10 minutes, until sweet potatoes reach your desired level of doneness.
- Add more salt and pepper to taste, serve and enjoy!
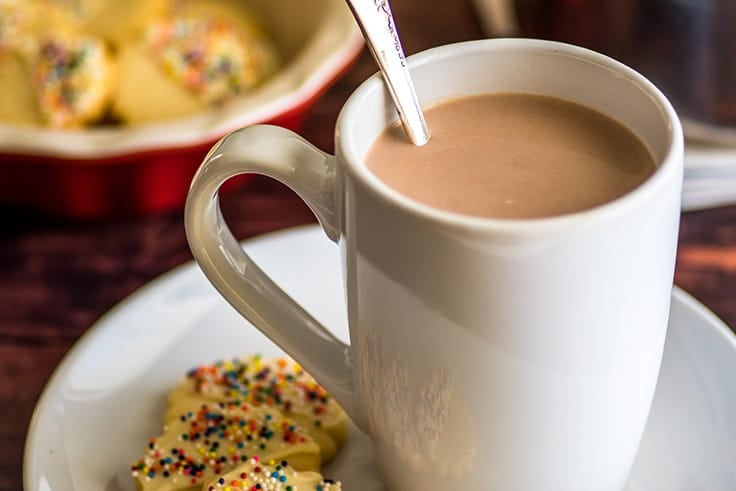
This easy hot chocolate recipe is made with just three simple ingredients. It’s quick and delicious, perfect for those times when you need some hot chocolate NOW.
Have a craving for hot chocolate but don’t have any hot cocoa mix in your cupboard? No worries, I’ve got you covered.
If you have milk in your fridge and cocoa powder and sugar in your baking cupboard, you can make and be sipping a creamy, fabulous cup of hot cocoa in about 5 minutes.

Ingredient Notes
- Milk: Any milk can be used here (plant-based works just fine). The higher fat the milk, the richer your hot chocolate will be. For an extra rich and creamy drink, try substituting half and half or heavy cream for some of the milk.
- Cocoa powder: Both natural and Dutch-process cocoa powder will work for this recipe, but Dutch-process cocoa powder is considered the gold standard for hot chocolate.
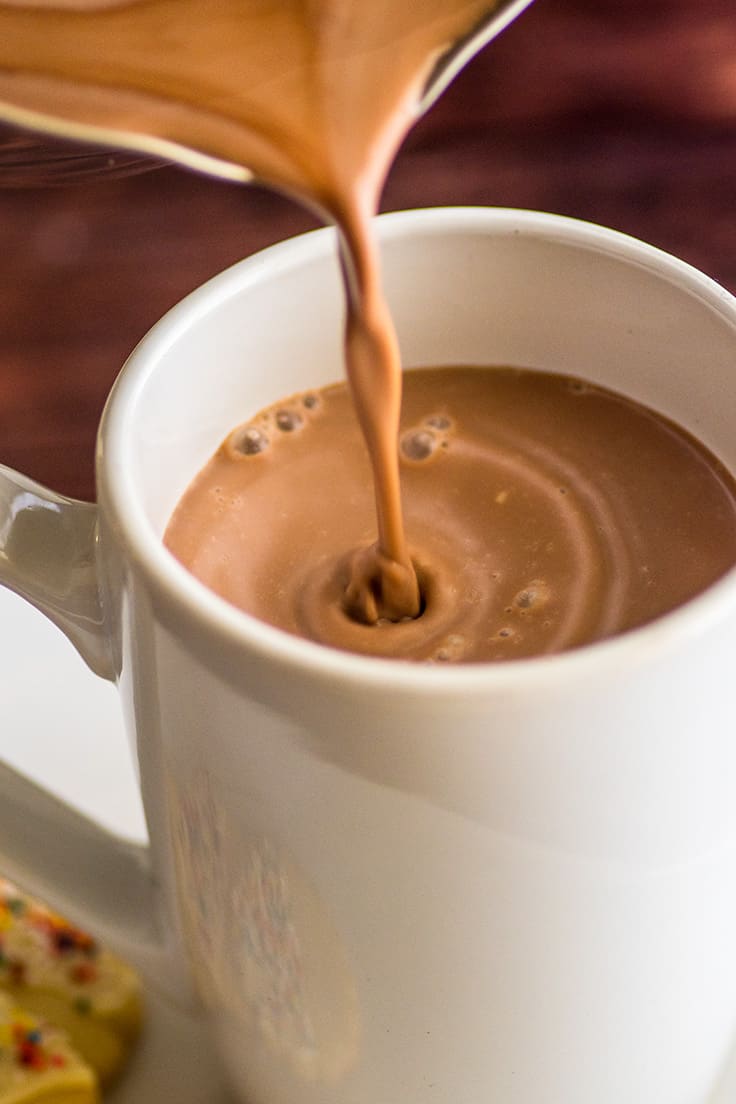

How to Make Hot Chocolate
To make hot chocolate on the stovetop, whisk together cocoa powder, sugar, and a bit of water over medium heat to make a chocolate syrup and then whisk in milk and a pinch of salt and heat until steaming.
To make hot chocolate in the microwave, combine cocoa powder, sugar, and water in a mug. Stir until well-mixed and microwave for 15 seconds. Stir until smooth and then add milk. Microwave 1 to 1 ½ minutes, until steaming. Stir once more, and enjoy!
Then curl up under a fluffy blanket with a cookie or two (I recommend shortbread or gingerbread ), and enjoy a cozy evening in.
Variations
Want a little hot chocolate upgrade? Try…
- Peanut Butter Hot Chocolate : Stir a spoonful of peanut butter into your hot chocolate and top with peanut butter sauce .
- Richer/Creamier Hot Chocolate: Use whole milk or replace ¼ cup of the milk with heavy cream.
- Baileys Hot Chocolate : Replace ¼ cup of the milk with Baileys Irish liqueur.
- Extra Chocolaty Hot Chocolate: Toss in a small handful of chocolate chips or chopped chocolate to melt just before adding the milk.
- Peppermint Hot Chocolate: Crush a candy cane and add it to your hot chocolate when you add the milk.
Can I make a big batch of this?
Yes! As written, this is a hot chocolate recipe for one, but you can scale up the recipe with no preparation changes needed. To change the yield, in the recipe card below, hover over the serving size or click if you’re on mobile, and slide the slider.
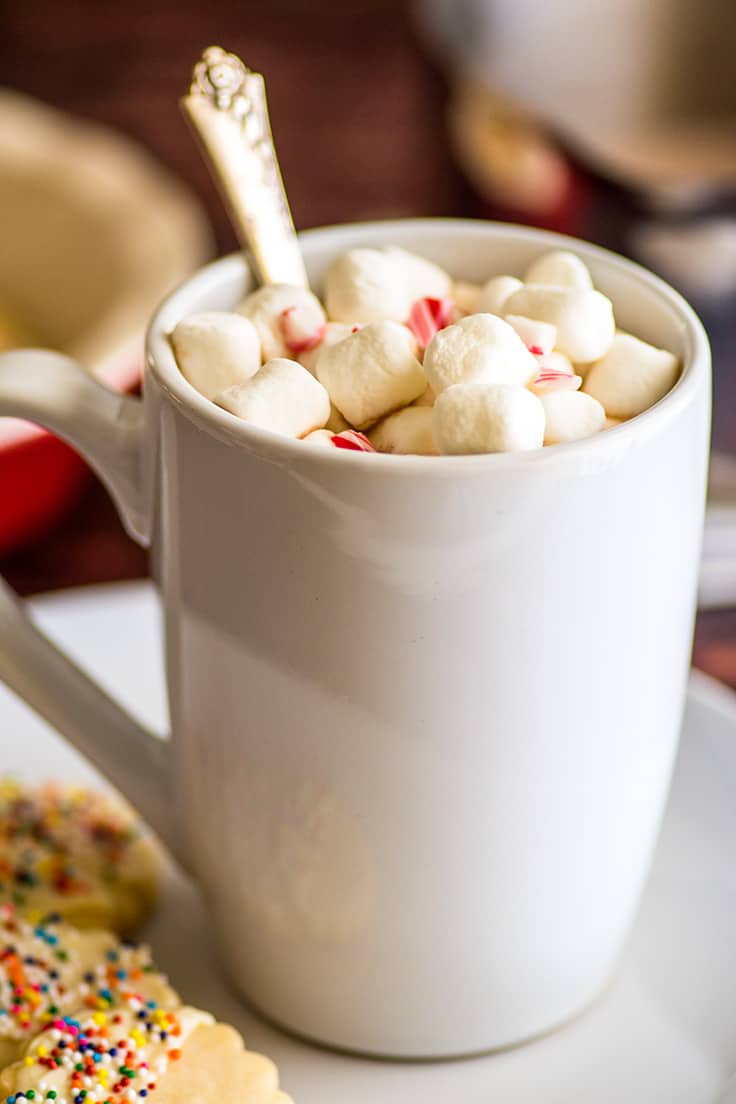
What are the best hot chocolate toppings?
Whipped cream and marshmallows are obviously the classic hot chocolate toppings, but you can also add:
- Crushed candy cane
- Chocolate shavings
- Sprinkles!!
- A scoop of vanilla ice cream (seriously, so good)
- Fudge sauce or Nutella sauce
- Chopped up candy (like M&Ms and peanut butter cups)
How can I make spiked hot chocolate?
Spiked hot chocolate is really easy to make. Just make your cup of hot chocolate and then add the alcohol of your choice to taste (usually 1 to 2 ounces/2 tablespoons to ¼ cup).
Baileys and other Irish cream liqueurs are my favorite, but other good spiking options are:
- Kahlua and other coffee liqueurs
- Flavored vodkas like marshmallow or whipped cream
- Peppermint schnapps

More Hot Chocolate Recipes to Try
- Rich and Thick Hot Chocolate
- The BEST Crockpot Hot Chocolate
- Pink Hot Chocolate
- White Hot Chocolate
- Chai White Hot Chocolate
- Frozen Hot Chocolate
Recipe Notes
This recipe makes 1 cup of hot chocolate, enough to fill an 8-ounce mug. To fill an oversized mug, 1 ½ or double the recipe.

Ingredients
- ▢ 2 tablespoons ( 25g ) granulated sugar
- ▢ 1 tablespoon ( 7g ) cocoa powder
- ▢ 1 tablespoon water
- ▢ 1 cup milk any percentage
- ▢ Pinch of salt
- ▢ Whipped cream optional for topping
- ▢ Mini marshmallows optional for topping
Instructions
- In a small saucepan, over medium heat, combine sugar, cocoa powder, and water. Stir until sugar and cocoa powder dissolve.
- Add milk and salt and stir. Heat until the mixture reaches your desired temperature, stirring occasionally.
- Pour into an 8-ounce mug and top with optional whipped cream or marshmallows if desired. Enjoy!
Notes
Nutritional Information (non-fat milk) Nutritional Information (2% milk) Nutritional Information (whole milk)
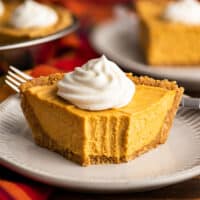
This small no-bake marshmallow pumpkin cheesecake is a fun and easy mini dessert you can make without ever turning on your oven.
If you’re craving pumpkin cheesecake but don’t feel up to a big baking project or you have a half-eaten bag of marshmallows you should really use up, you need this recipe in your life.
It’s fun and simple to make and produces an adorable 6-inch cheesecake that is rich and creamy and so, so good.

Ingredient Notes
- Pumpkin puree: Not to be confused with canned pumpkin pie filling, pumpkin puree is just pure pureed pumpkin. You can usually find it in the baking aisle near the premade pie crusts and pie filling. The recipe won’t use up an entire can of pumpkin puree, so see my post What to Do With Leftover Pumpkin Puree for storage tips and recipe ideas for the leftovers.
- Marshmallows: Marshmallows provide most of the sweetness for this pie so they cannot be omitted. You’ll need 5 ounces of marshmallows, about half a standard-size bag.
- Cream cheese: Philadelphia cream cheese is my go-to cream cheese brand. Make sure your cream cheese is truly room temperature before you try to use it. Cream cheese that’s too cold will leave cream cheese lumps in the cheesecake.
- Heavy cream: Heavy cream lightly sweetened and whipped into whipped cream helps lighten up the texture of the cheesecake. You can also replace the whipped cream and sugar with 1 cup of whipped topping. The recipe won’t use up an entire carton of heavy cream. For ideas on what to do with the leftovers, check out this post What to Do With Leftover Whipping Cream .
- Pumpkin spices: This recipe uses cinnamon, nutmeg, and ginger, but if you have premade pumpkin pie spice in your cupboard, you can replace these spices with 1 teaspoon of pumpkin pie spice.


How to Make a Marshmallow Pumpkin Cheesecake
- Melt the marshmallows: In a medium saucepan, combine marshmallows, canned pumpkin, spices, and salt. Heat over medium-low heat, stirring almost constantly with a heat-proof rubber spatula, until marshmallows are completely melted and mixture uniform in color, about 6 minutes. Watch carefully to make sure none of the mixture is sticking to the edges of the pot and burning. Burnt bits will leave chewy dark streaks in your pie. Cool to room temperature, 45 minutes to an hour.
- Make the graham cracker crust: Stir together graham cracker crumbs, melted butter, and brown sugar and then press into a 6-inch pie tin in an even layer. Place in the freezer until you’re ready to use it.
- Make whipped cream: In a separate medium bowl, combine heavy cream and sugar. Beat using a handheld electric mixer, starting on low and working up to high, until stiff peaks form. Set aside.
- Make the cheesecake base: Add softened cream cheese to the cooled marshmallow mixture and beat until the cream cheese is completely incorporated.
- Fold in the whipped cream and assemble the pie: Switch back to a rubber or silicone spatula and gently fold in the whipped cream, being careful not to deflate the cream too much as you go. Once there are no streaks remaining, spoon the filling into your prepared pie crust.
- Chill until set: The pie will need about 3 to 4 hours of chilling time before it’s ready to eat. Once it’s firmed up, you can decorate it with additional whipped cream and enjoy!
A note on extra filling: 6-inch pie pans vary somewhat in size. If you’re using a shallow pie dish, there may be quite a bit of extra filling. You can discard (or eat) the leftover filling.
You can also line a mini muffin pan with cupcake liners and fill them with the extra filling. Freeze and make little frozen cheesecake bites.
I don’t have a 6-inch pie dish. What can I use instead?
Instead of a single small pie, make it into mini pies using a cupcake pan. Just be sure to line the cups with liners or you’ll have a tough time getting the mini pies out of the pan.
Can I make this ahead of time?
Yes. Make the marshmallow pumpkin cheesecake up to 48 hours in advance and store covered in the refrigerator (don’t decorate with whipped cream until just before serving as the whipped cream may begin to weep).
Or wrap tightly and store in a freezer bag and freeze the cheesecake for up to 2 months. This cheesecake freezes extremely well. Defrost in the refrigerator before serving.


Can I double this recipe?
Yes! If you’d like to double the recipe, use a regular 9-inch pie pan. No preparation changes are needed. To double the recipe ingredients, hover over the serving size in the recipe card below or click if you’re on mobile, and slide the slider.
More Fall Recipes
- Small Apple Cake
- Dutch Apple Pie
- Small-batch Pumpkin Cupcakes
- Pumpkin Streusel Muffins (Small-batch)
- Easy Kettle Corn
- The Best Pumpkin Pancakes
More Cheesecake Recipes
- Easy Cheesecake
- Cheesecake Bites
- Oreo Cheesecake Bites
- Unicorn No-bake Cheesecakes
Equipment
- 6-inch pie pan
- Handheld electric mixer
Ingredients
- ▢ 5 ounces ( 3 cups minis or 19 regular ) marshmallows
- ▢ ½ cup ( 122g ) canned pumpkin
- ▢ ½ teaspoon ground cinnamon *
- ▢ ¼ teaspoon ground ginger
- ▢ ¼ teaspoon ground nutmeg
- ▢ ¼ teaspoon salt
- ▢ ¾ cup graham cracker crumbs 6 full graham cracker sheets
- ▢ 4 tablespoons ( 56g ) butter melted, salted or unsalted is fine
- ▢ 2 tablespoons ( 25g ) brown sugar
- ▢ ½ cup heavy cream
- ▢ 1 tablespoon ( 12g ) granulated sugar
- ▢ 3 ounces cream cheese softened
Optional Toppings
- ▢ Whipped cream
- ▢ Ground cinnamon
Instructions
Melt Marshmallows
- In a medium pot, combine marshmallows, canned pumpkin, spices, and salt.
- Heat over medium-low heat, stirring almost constantly, until marshmallows are completely melted and mixture uniform in color, about 6 to 8 minutes.
- Scrape mixture into a medium bowl and allow to cool to room temperature, 45 minutes to an hour.
Make the Crust
- While your marshmallow filling cools, in a small bowl, combine graham cracker crumbs, melted butter, and brown sugar. Stir together until well-mixed and press crumbs into a 6-inch pie tin in an even layer. Place in the freezer until you’re ready to use it.
Assemble the Cheesecake
- Once marshmallow mixture has cooled, in a separate medium bowl, combine heavy cream and sugar. Beat using a handheld electric mixer, starting on low and working up to high, until stiff peaks form (when you lift the beaters straight out, they should leave peaks of whipped cream that stand straight up and don’t flop over at the tip). Set aside.
- Add softened cream cheese to the cooled marshmallow mixture and beat until the cream cheese is completely incorporated.
- Switch to silicone spatula and gently fold the whipped cream into the pumpkin/cream cheese mixture, being careful not to deflate the cream too much as you go.
- Once there are no streaks remaining, spoon the filling into your prepared pie crust. There may be some extra filling that won’t fit. You can discard (or eat it).
- Smooth the top of the pie and refrigerate until firm, 3 to 4 hours.
- Decorate with additional whipped cream and a sprinkle of cinnamon if desired, and enjoy!
Notes

Roasted Sweet Potatoes
Ingredients
- 2 pounds sweet potatoes peeled and cut into ½-inch cubes
- 2 tablespoons olive oil
- Salt and pepper
Instructions
- Preheat your oven to 425°F.
- Place sweet potato cubes on a large rimmed baking sheet and drizzle them with olive oil.
- Mix the cubes until well-coated and spread them out in a single layer on the baking sheet.
- Sprinkle generously with salt and pepper. Bake for 20 to 30 minutes, shaking the tray every 10 minutes, until sweet potatoes reach your desired level of doneness.
- Add more salt and pepper to taste, serve and enjoy!
