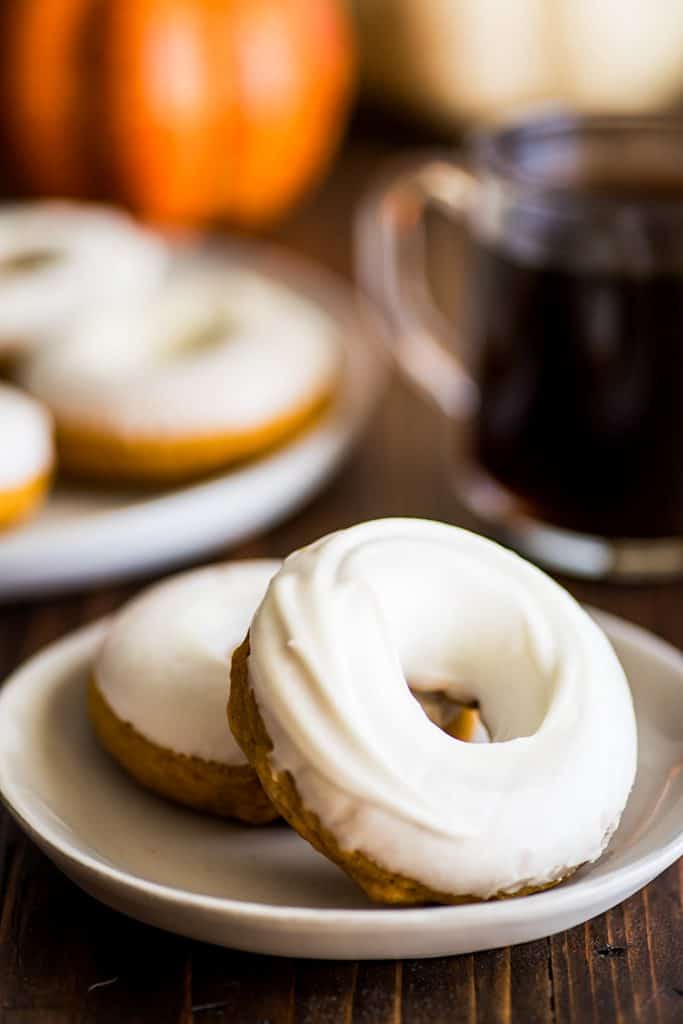
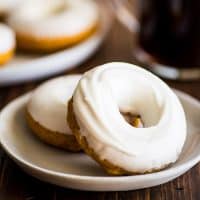
Soft, moist, spicy, and EASY baked pumpkin donuts with a decadent cream cheese glaze. These donuts are the perfect indulgent treat for fall mornings.

Hey, friends. Today is a very exciting day around here. Because today is the day I’m posting the first Baking Mischief pumpkin recipe of the summer fall!!
I know, I know, it’s a little early for pumpkin.
Originally, I had an apple recipe scheduled for you today, but that recipe is a little tricky, so I wanted to test it one more time before sharing.
So today, you’re getting pumpkin, and you’re going to like it.
No seriously, you’re really going to like it, because this pumpkin recipe is Pumpkin Donuts with CREAM CHEESE GLAZE.

Say it with me, CREAM CHEESE GLAZE.
Every fall that there has been a Baking Mischief, I’ve posted a pumpkin donut recipe.
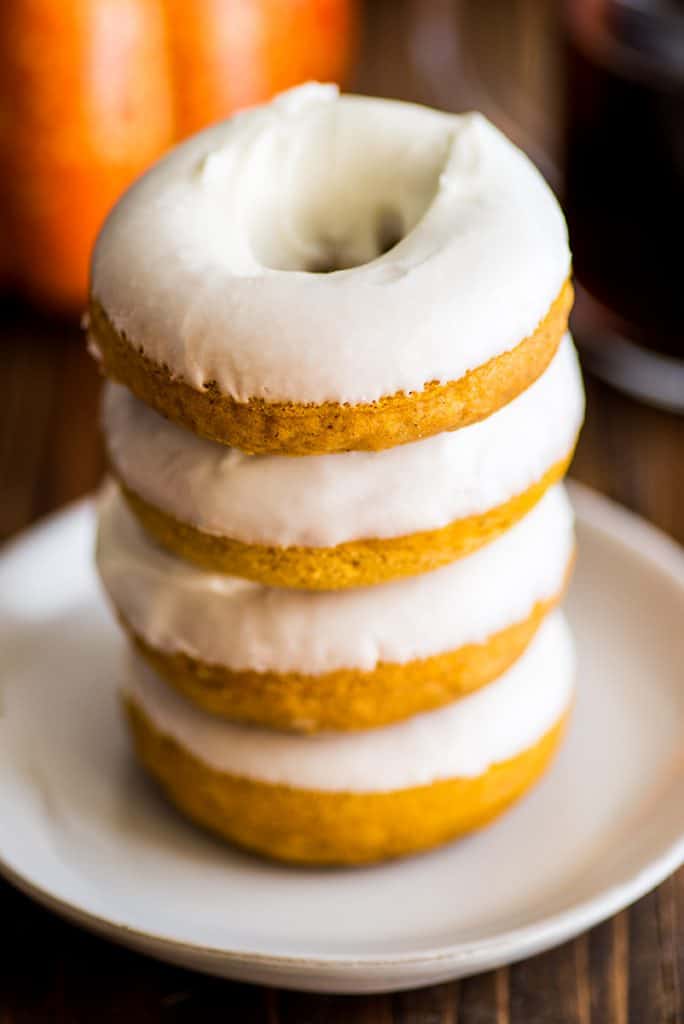
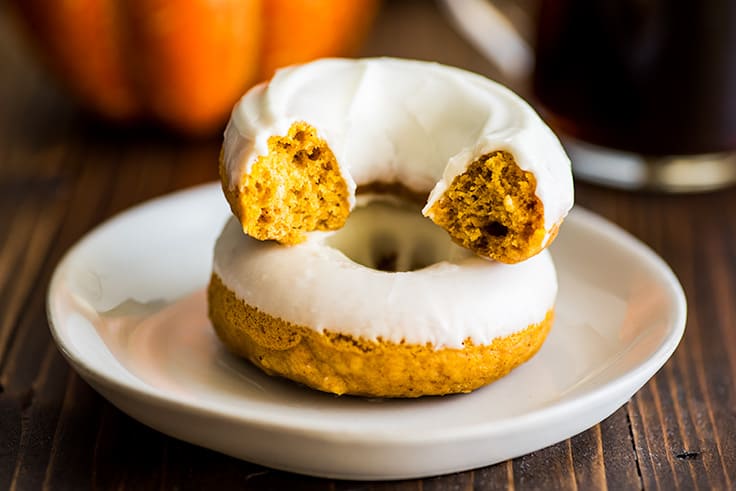
They’re all made on the same baked pumpkin donut base that’s soft, moist, springy, spicy, and PERFECT. (Also, alarmingly easy. Don’t send me angry emails if you find yourself making them way too often this fall.)
Year one was Pumpkin Donuts With Maple Glaze . Year two was Cinnamon Sugar Pumpkin Donuts .
And this year, year three, is the best one yet, at least according to my taste testers.
I’ve had the same taste testers every year (thanks, fam), and every year, they update their fav rankings.
These Pumpkin Donuts With Cream Cheese Glaze are their current number one.
And I’m really not surprised. They love cream cheese, and if you love cream cheese, you’re going to love this glaze.

The Cream Cheese Glaze
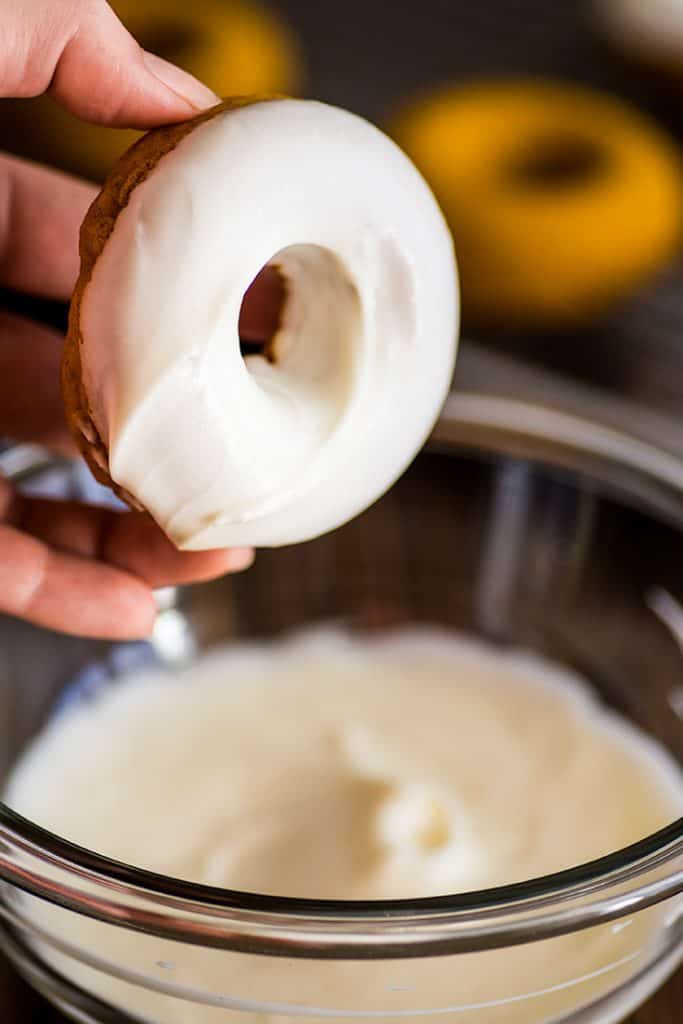
Oh, this cream cheese glaze. It’s a little buttery, very cream cheesy, sweet, tangy, and best of all, it sets. You’ll want to spoon it over everything. Cookies , cakes , strawberries–I’m making myself hungry…
Just be sure to read the recipe carefully. Because of the added moisture of the cream cheese, this glaze is a little more finicky than straight powdered sugar and milk glazes.
You can’t add too much milk, or the glaze won’t set, so it’s thicker and will give you a more textured look (which you can see in the photos) than a lot of donut glazes.
It is not hard to make (at all), but I just want you to be aware going in.
Anyway, if you are cream cheese and pumpkin lover (or you love someone who is), the next time you’re at the store, grab a block of cream cheese and a can of pumpkin, and immediately come home and make these.
They’re simple, delicious, and really, the best possible start to fall.

Pumpkin Donuts With Cream Cheese Glaze Recipe Notes
- If you don’t already own a donut pan, this is the one I own and would highly recommend.
- Donuts can also be made in a regular muffin tin or mini muffin tin , baked at the same temperature, until tops spring back when pressed with a finger or a toothpick inserted into the center comes out with just a few moist crumbs.
- Again, be sure to read the cream cheese glaze notes carefully regarding adding milk. If you add too much milk, the glaze will take forever to set or will not set at all.
- This recipe will not use up an entire can of pumpkin puree. For ideas on what to do with the leftovers, read What to Do With Leftover Pumpkin Puree .
- Looking for more pumpkin and cream cheese recipes? Try this Mini Pumpkin Cake and Small-batch Pumpkin Cupcakes .
Ingredients
Special Equipment
- ▢ Donut Pan or mini muffin tin
Baked Pumpkin Donuts
- ▢ 2 tablespoons ( 1oz ) butter *
- ▢ 1 cup ( 120g ) all-purpose flour
- ▢ 1 teaspoon baking powder
- ▢ 1/2 teaspoon cinnamon *
- ▢ 1/8 teaspoon ground ginger
- ▢ 1/8 teaspoon ground nutmeg
- ▢ Pinch ground cloves
- ▢ 1/4 teaspoon salt
- ▢ 1/3 cup ( 81g ) pumpkin puree
- ▢ 1/3 cup ( 66g ) brown sugar
- ▢ 1 large egg
- ▢ 1/4 cup milk any percentage
Cream Cheese Glaze
- ▢ 2 ounces cream cheese softened
- ▢ 2 tablespoons ( 1oz ) butter softened
- ▢ 1 cup ( 120g ) powdered sugar sifted
- ▢ 1 to 2 teaspoons milk any percentage
Instructions
- Preheat your oven to 350°F and grease donut pan.
- In a small, microwave-safe bowl, melt butter in the microwave and set aside to cool slightly.
- In small bowl, whisk together flour, baking powder, cinnamon, ginger, nutmeg, cloves, and salt.
- In a large bowl, combine pumpkin puree, brown sugar, egg, milk, and slightly cooled melted butter. Whisk until well-combined.
- Add flour mixture to the pumpkin mixture and use a spoon to stir until just mixed.
- Transfer batter to a piping bag (or disposable plastic bag and cut off one of the corners) and pipe batter into the prepared donut pan, filling rings 3/4 of the way full—this should make almost exactly 6 donuts.
- Bake for 9 to 11 minutes, until a toothpick inserted into the center of the donuts comes out with just a few moist crumbs or the tops of the donuts just spring back when pressed with a finger.
- Cool the donuts in the donut pan until cool enough to handle and then turn donuts out onto a cooking rack to cool completely before glazing.
Cream Cheese Glaze
- In a medium bowl, combine softened cream cheese and butter. Beat until smooth.
- Add powdered sugar and 1 teaspoon of milk. Beat until smooth.
- Whisk in milk by the 1/4 teaspoon until mixture resembles a thin frosting, thin enough for dipping but not pourable. (I usually use exactly 1 1/2 teaspoon milk TOTAL.) Do not add too much or your glaze will not set.
- Dip donuts in glaze and twist them a few times to make sure they are well-coated. Smooth the topping slightly with your finger. Allow to set for 15 to 20 minutes.
- Serve and enjoy!
Notes
Donuts Adapted From Live Well Bake Often
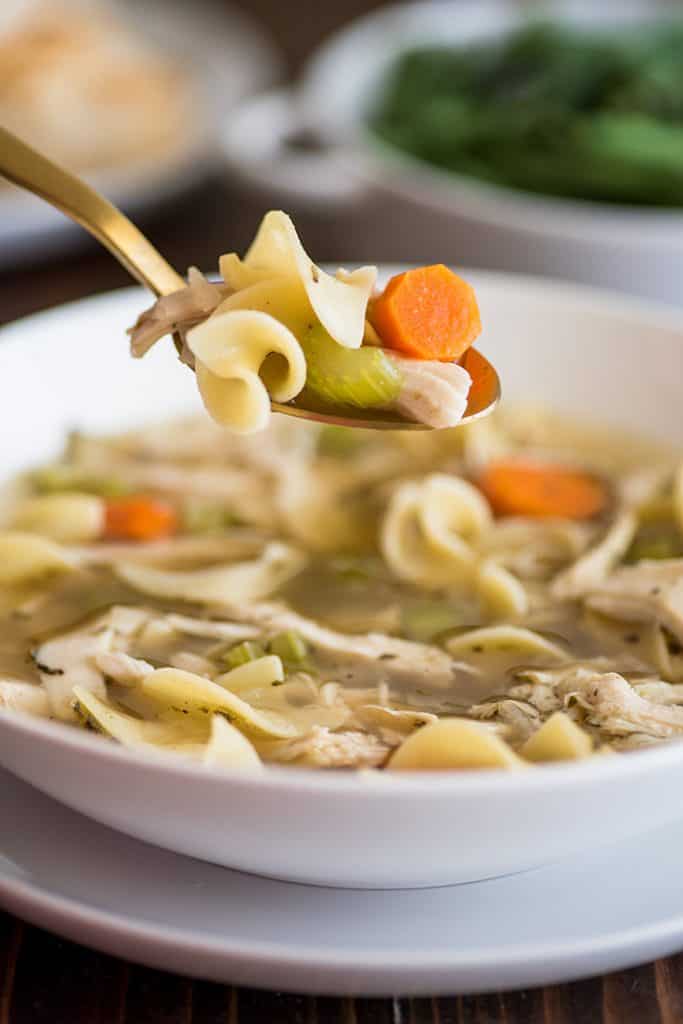
This chicken carcass soup is a great way to use up leftovers from a roasted or rotisserie chicken. It’s from-scratch chicken noodle soup that is easy, warming, and completely delicious.
Hey, friends. Yesterday, I published a complete guide to Roasted Chicken (if you haven’t read it yet, go check it out!), and today, I have a follow-up recipe for you.
This recipe is for the day after (or the day after the day after) you’ve roasted a chicken. When the carcass is picked bare and your beautiful golden bird is mostly just a pile of bones.
Time to make some chicken carcass soup.

This recipe is great for so many reasons. First, because the name is just deliciously gruesome and second, because there is something so satisfying about making a pot of soup from scratch without even a can of broth.
You’ll walk around with a smile, feeling capable and accomplished the entire rest of the day. (Okay, maybe that’s just me.)
On top of the ego boost, this is just some really good soup. Soup started from bones simmered into stock beats the canned stuff every time.
Ingredient Notes
- Chicken carcass: The larger your chicken, the more flavor your chicken stock will have. If you have a particularly small rotisserie chicken, you can save it in your freezer until you have another one and cook two at once for maximum flavor. This recipe will also work with a turkey, though if you like, you can double the rest of the recipe because of the significantly larger carcass.
- Filtered water: You don’t have to use filtered water for your stock, but if you don’t like the taste of your tap water, don’t use it in your soup. 😉
- Two sets of carrots, onions, and celery: You’ll use two sets of vegetables in this soup. The first will simmer with the stock to help flavor it and then be discarded (the veggies will be mushy and flavorless after the long simmer), and the second set will be added to the soup.

How to Make Chicken Carcass Soup
- Prep your chicken: To start, take your chicken carcass and remove and reserve any leftover chicken meat from the bones. If there are more than two cups of meat, great. You’ll use that in the soup. If not, we’ll cook some chicken later to add to it.
Use a pair of good kitchen shears, a sharp chef’s knife, or cleaver to chop up the carcass just enough so that you can lay the bones mostly flat.
Then heat a tablespoon of oil in a large pot over medium-high heat and add your bone pieces.
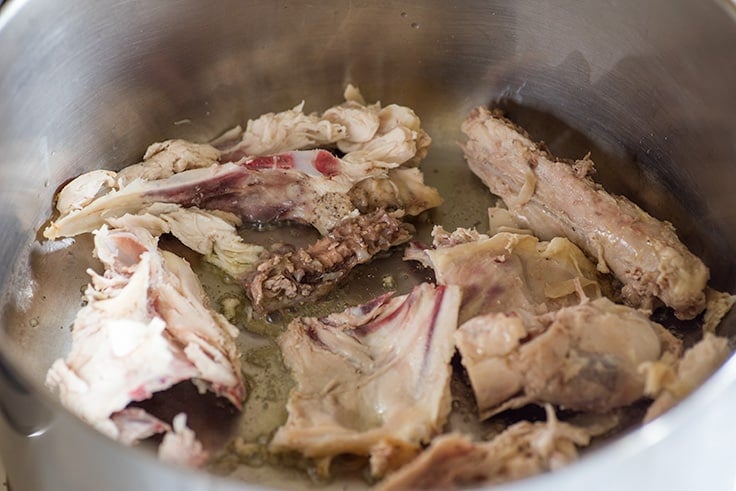

- Brown the chicken bones: Cook, using cooking tongs or chopsticks to turn the pieces occasionally, until bones and remaining skin are browned. Any meaty bits still attached won’t brown much, but the fat and the bones should turn nicely golden.
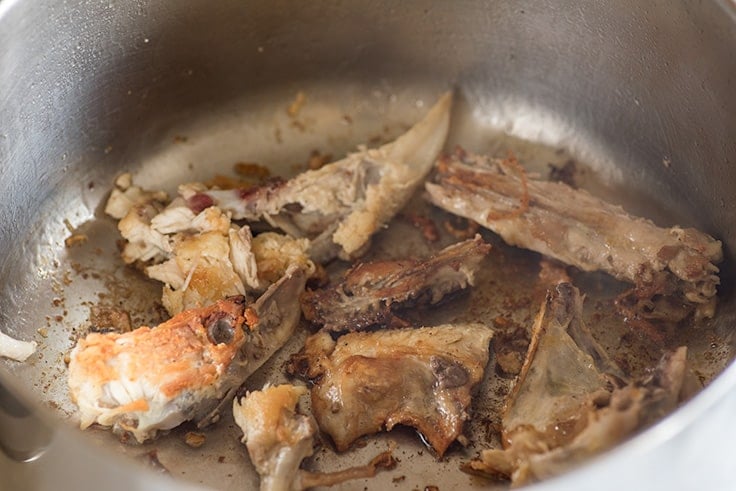

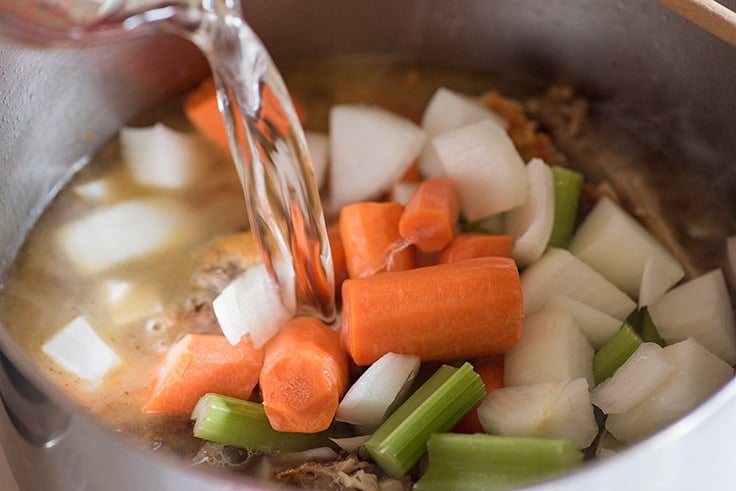
- Add the rest of the stock ingredients: Add a splash of water to deglaze the pan and scrape all the browned bits off the bottom with a wooden spoon.
Then add a couple of roughly chopped carrots, celery ribs, and half an onion, along with about 10 cups of water and a little salt.
Bring the water to barely a simmer (watch closely to make sure it never comes to a boil as that can make your soup cloudy), and then turn the heat down to keep it there.

- Simmer: Simmer for 90 minutes, scraping fat off the surface of the water occasionally, and checking to make sure your broth has not started to boil.
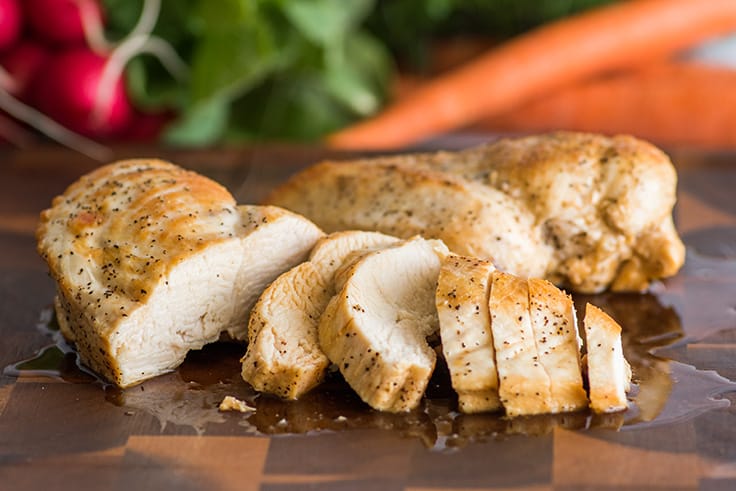
If there were less than two cups of meat remaining on your chicken, now’s a good time to cook a couple of chicken breasts.
If you don’t have a go-to chicken-cooking method, try the posts How to Cook Shredded Chicken or How to Cook Chicken Breasts if you prefer cubed meat.

- Finish stock: You’ll know your stock is done when it has a good chicken flavor. If it still tastes too watery after 90 minutes, simmer it a little longer.
Once the stock is done, use a large slotted spoon to remove and discard large pieces of bone and vegetable before straining broth through a fine-mesh strainer .


- Start your soup: Rinse pot to remove any chicken or vegetable remnants and return broth to pot. Bring to a simmer and add chopped carrots, celery, onion, and spices. Those simmer for 20 to 25 minutes, until tender.
While your vegetables cook, cook 1 to 1½ cups of noodles (depending on your preferred broth to noodle ratio) in a separate pot until just al dente.
Cooking your pasta separately keeps it from soaking up all your broth and gives you complete control of the cooking time. I like egg noodles in my chicken soup, but you can use whatever pasta you like best.
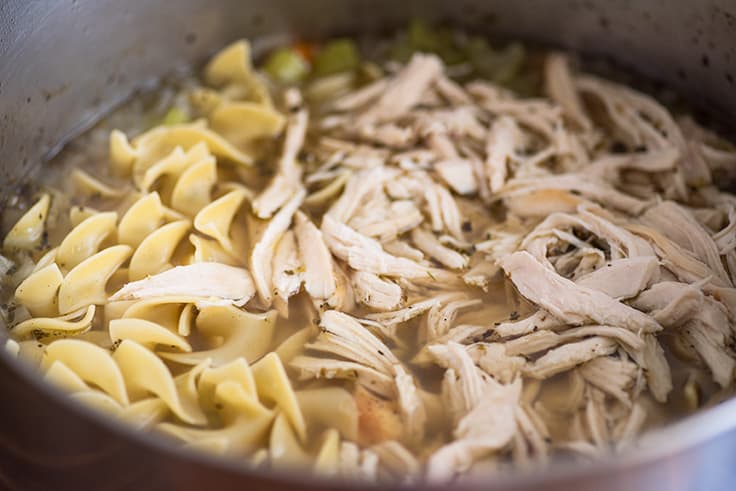

7: Add pasta and chicken: When noodles and veggies are done, add cooked (and drained) pasta and chicken to the pot of broth.
Stir everything together and add more salt and pepper to taste. Bring to a simmer and cook for 1 minute longer to make sure the chicken is heated through.
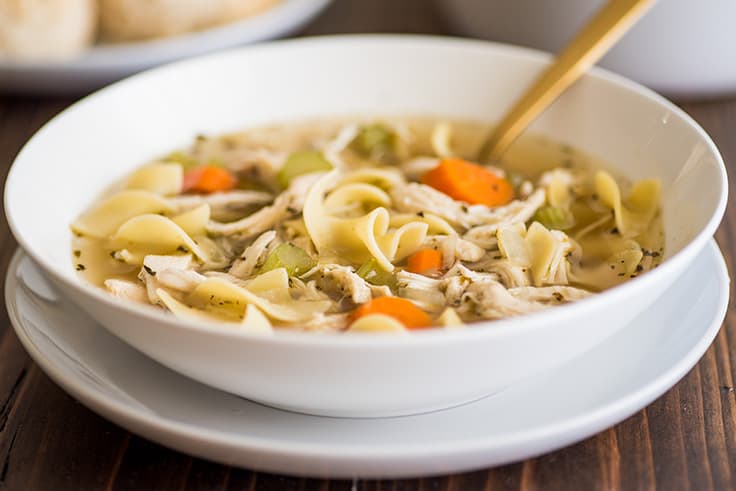
- Enjoy: And that’s it. Serve and enjoy.
What to serve with chicken carcass soup?
Serve your soup with a slice of crusty bread, some Cheddar Scones or quick Cream Biscuits, and a simple veggie side like Oven-Roasted Broccoli , Butter and Garlic Green Beans , or Roasted Zucchini .
Can I make this in advance?
Yes. You can make the soup or just the stock up to 48 hours in advance. Store covered in the refrigerator and reheat gently over medium heat. For best results, make and add the noodles just before serving, but this is optional.
Can I freeze this soup?
Yes, with some modifications. I don’t love freezing soup with noodles in it, so I recommend freezing the soup before you add the noodles. So if you know you’re going to eat only half the soup, add the chicken and then divide the soup and freeze half before you add the cooked noodles.
That being said, if you usually freeze soup with noodles and want to do it, you can.
For more tips and tricks on freezing soup, check out my post How to Freeze Soup .

More Favorite Soup Recipes
- Ham and Potato Soup
- Simple Beef Stew
- Tomato Soup
- Broccoli Potato Soup
- Creamy Chicken Tortellini Soup
Chicken Carcass Soup Recipe Notes
- Small-batch instructions: This is a full batch of soup that makes about four servings. It is great as leftovers, but if you’re part of a small household and want to make it Chicken Carcass Soup for Two, you can freeze half of the broth after straining and cut the rest of the recipe in half. Broth will keep in the freezer for about 3 months.

Equipment
- Fine mesh strainer
Ingredients
Chicken Stock
- ▢ 1 tablespoon olive oil
- ▢ 1 chicken carcass picked clean of meat and cut into pieces
- ▢ 10 cups filtered water
- ▢ 2 large carrots roughly chopped
- ▢ 2 celery ribs roughly chopped
- ▢ ½ large onion roughly chopped
- ▢ ½ teaspoon salt
Chicken Noodle Soup
- ▢ 2 large carrots chopped
- ▢ 2 celery ribs chopped
- ▢ ½ onion diced
- ▢ 1 bay leaf
- ▢ ¼ heaping teaspoon dried oregano
- ▢ ¼ heaping teaspoon dried basil
- ▢ ⅛ teaspoon ground thyme
- ▢ 1 to 1½ cups pasta
- ▢ 2 cups cooked chicken shredded or chopped
- ▢ Salt and pepper
Instructions
- In a large pot, heat oil over medium-high heat until shimmering. Add chicken carcass pieces and cook, turning occasionally, until bones and any remaining skin are browned.
- Add a splash of the water to deglaze the pan and scrape all the browned bits off the bottom. Add the vegetables, remaining water, and salt. Bring to barely a simmer (watch closely to make sure it never comes to a boil as that can make your soup cloudy).
- Simmer for 90 minutes, scraping fat off the top occasionally, and checking to make sure your broth has not started to boil.
- Discard large pieces of bone and vegetable before straining broth through a fine-mesh strainer. Rinse pot to remove any chicken or vegetable remnants and return broth to pot. Bring to a simmer and add carrots, celery, onion, and spices. Simmer for 20 to 25 minutes, until vegetables are tender.
- While your vegetables cook, bring a pot of generously salted water to boil and cook noodles according to package instructions. Drain and set aside.
- Stir cooked, drained pasta and cooked chicken into the broth and vegetables. Add more salt and pepper to taste. Bring to a simmer and cook for 1 minute to make sure the chicken is heated through.
- Serve and enjoy.
Notes
- To substitute a turkey carcass: Double the rest of the ingredients.
- Freezing: Stock or finished soup can be frozen for up to 3 months. Defrost overnight in the refrigerator before reheating.
Recipe Adapted From Chowhound
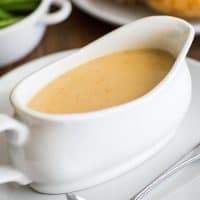
How to Make Gravy From Drippings: your guide to making the best, easy homemade gravy from pan drippings.

Over the last month, I’ve been posting a series of recipes related to one of my favorite fall things, roasted chicken. There’s been an Easy Roasted Chicken Guide , How to Make Chicken Carcass Soup , and How to Make Chicken Stock .
Today, I present you with the last of that series, How to Make Gravy From Drippings.
And I’m not going to say this is my favorite of the bunch, I love them all, but really this is kind of my favorite because it’s a perfect back-pocket recipe.
To me, a perfect back-pocket recipe is one of those recipes that gives you just a little more confidence in the kitchen because you always know you can whip it up in any situation, in any half-stocked kitchen, any time.
This gravy fits all of those bills. It’s quick, requires just four ingredients, and all you need to make it is a pot or skillet, a whisk, and (optionally) a fine-mesh strainer.
Did I mention it’s also really excellent gravy? Making gravy from a roux made with pan drippings means that not only are you getting a creamy, dreamy gravy, but it’s a gravy infused with all the flavor of whatever those drippings came from.
It’s so good, it’s dead easy to make, and I can’t wait for you to try it.


What You Need to Make Gravy From Pan Drippings
Pan drippings from roasted meat and the browned bits: If the drippings are in something that can go on the stove top, pour off everything but two tablespoons of fat and keep all the browned, stuck-on bits from the bottom of the pan in there.
If the drippings are on a baking sheet or something that can’t go on the stove top, measure out the correct amount of drippings, pour off the rest, and then use a spatula to scrape the solid bits out of the pan and add them in with the drippings.
The browned bits are optional, but they’ll add a lot of flavor, so why waste them?
Flour: To make your roux and thicken your gravy.
Water, broth, or milk: Any of the three will work here. I actually like gravy made with water best, but experiment and see what works for you. Broth will give you a really flavor-packed gravy and gravy made with milk will be richer (but a little sweet for my taste).
Butter: Adding a bit of butter after the gravy has thickened will make it silky-smooth and rich.
Freshly squeezed lemon juice: Lemon juice is totally optional, but if you taste the gravy and it tastes a little flat to you, just a tiny squeeze of lemon will brighten up the flavor without making it taste lemony.
A fine-mesh strainer: Finally, straining your gravy through a fine-mesh strainer will make sure your gravy is perfectly smooth and creamy with no lumps or solid bits.
How to Make Gravy From Drippings


Start by pouring off all but two tablespoons of fat from your pan (I like to reserve the rest of the drippings just in case something goes wrong or for later use), leaving any solid, stuck-on bits in the pan.


Heat over medium-high heat until any remaining solids are golden brown. Watch out, the fat will splatter during this step. Just turn the heat down if it’s splattering too much.
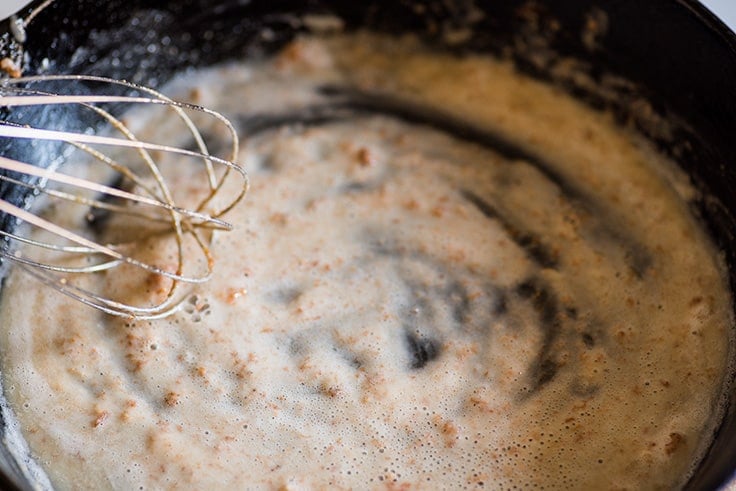

Whisk in flour and cook until lightly golden, about 30 seconds to a minute.

Very slowly at first, pour in water, broth, or milk, whisking out any lumps as they form. Once the flour seems incorporated, you can speed up your pour.
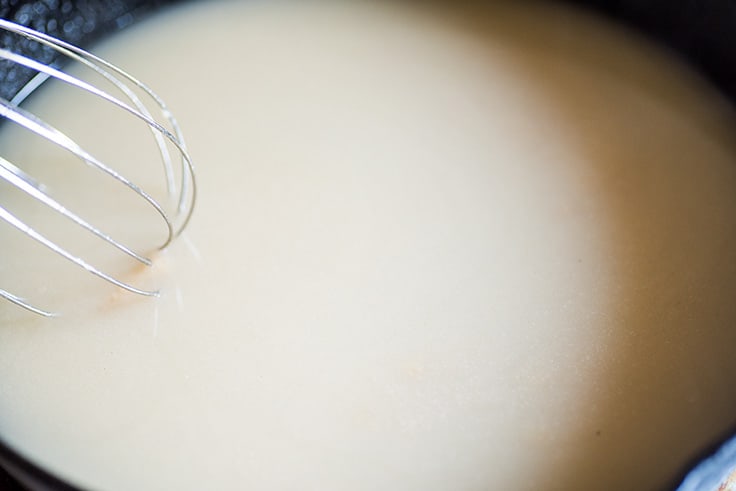
Cook, whisking continuously for 5 to 8 minutes (possibly longer if making a larger batch), until gravy is thickened and bubbly.
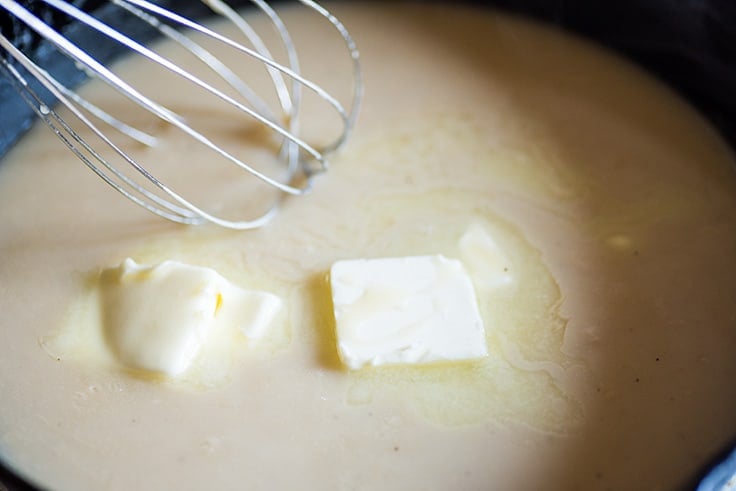

Turn stove off and whisk in butter and salt and pepper to taste. If desired, add a small squeeze of lemon to taste.
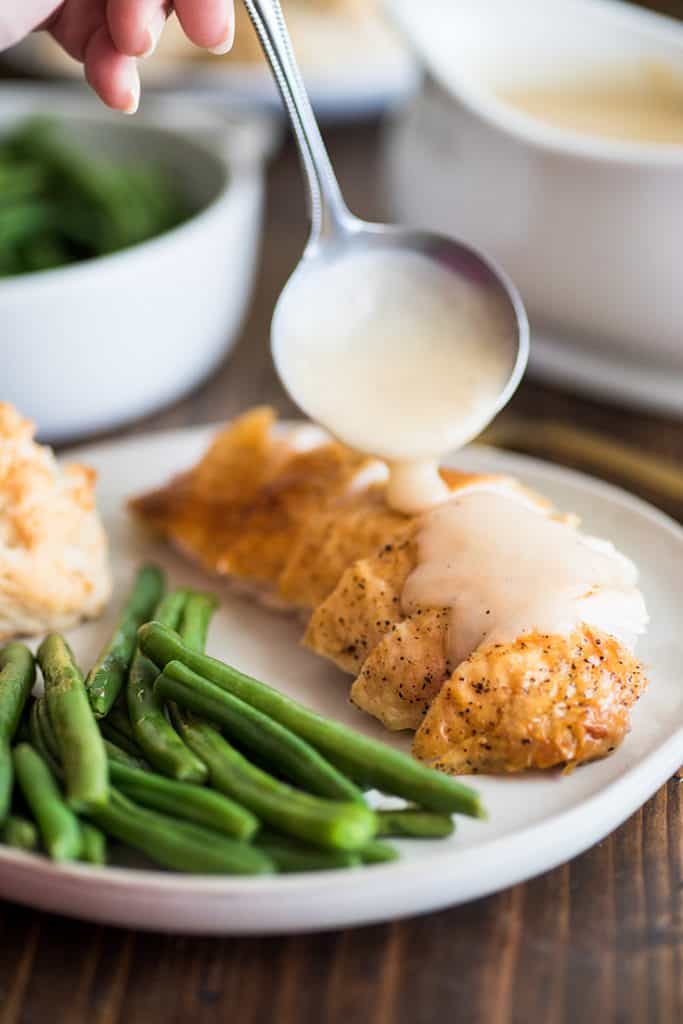
Serve over Roast Chicken , Cooked Chicken Breasts , Mashed Potatoes , biscuits or anything else that sounds good topped with gravy.

Gravy From Pan Drippings Recipe Notes
- If your roux (fat and flour mixture) comes out lumpy and does not look like the roux in the photo, don’t worry. You probably had a lot of cooking liquid in with the fat and it evaporated during the browning step. Just make sure to whisk in the water/broth/milk slowly to get rid of the lumps and your gravy will be just fine.
For more How-to Tutorials, you might also enjoy:
How to Cook Chicken Breast for Salads and Sandwiches How to Cook Shredded Chicken How to Cook Chicken for Recipes
Ingredients
Special Equipment
- ▢ Fine-mesh Strainer
Gravy From Drippings
- ▢ 2 tablespoons fat from pan drippings
- ▢ 2 tablespoons ( 15g ) all-purpose flour
- ▢ 2 cups water or chicken broth or milk
- ▢ 4 tablespoons ( 2oz ) salted butter
- ▢ Salt and pepper to taste
- ▢ Freshly squeezed lemon juice to taste optional
Instructions
If Cooking in Original Roasting Pan/Skillet
- Pour off all but 2 tablespoons of fat from skillet, retaining any browned solid bits in the pan.
If Transferring Drippings to Skillet
- In a large skillet, add 2 tablespoons of fat from pan drippings. Scrape solid, browned bits from the original cooking pan and add them to the skillet (skip this step if you don’t have a fine-mesh strainer).
Gravy From Drippings
- Heat fat over medium-high heat. Bring to a simmer and cook until any solid bits in the drippings are well-browned. Add flour and whisk until lightly golden, 30 seconds to 1 minute. Slowly pour in the water/broth/milk, whisking out any lumps as they form.
- Whisk continuously until thickened, 5 to 8 minutes. Add butter and, if desired, lemon juice to taste—just enough to brighten up the flavor a little. Add salt and pepper to taste.
- Strain gravy through fine-mesh strainer if desired. Serve and enjoy!
Notes


Pumpkin Donuts With Cream Cheese Glaze
Ingredients
Special Equipment
- Donut Pan or mini muffin tin
Baked Pumpkin Donuts
- 2 tablespoons ( 1oz ) butter *
- 1 cup ( 120g ) all-purpose flour
- 1 teaspoon baking powder
- 1/2 teaspoon cinnamon *
- 1/8 teaspoon ground ginger
- 1/8 teaspoon ground nutmeg
- Pinch ground cloves
- 1/4 teaspoon salt
- 1/3 cup ( 81g ) pumpkin puree
- 1/3 cup ( 66g ) brown sugar
- 1 large egg
- 1/4 cup milk any percentage
Cream Cheese Glaze
- 2 ounces cream cheese softened
- 2 tablespoons ( 1oz ) butter softened
- 1 cup ( 120g ) powdered sugar sifted
- 1 to 2 teaspoons milk any percentage
Instructions
- Preheat your oven to 350°F and grease donut pan.
- In a small, microwave-safe bowl, melt butter in the microwave and set aside to cool slightly.
- In small bowl, whisk together flour, baking powder, cinnamon, ginger, nutmeg, cloves, and salt.
- In a large bowl, combine pumpkin puree, brown sugar, egg, milk, and slightly cooled melted butter. Whisk until well-combined.
- Add flour mixture to the pumpkin mixture and use a spoon to stir until just mixed.
- Transfer batter to a piping bag (or disposable plastic bag and cut off one of the corners) and pipe batter into the prepared donut pan, filling rings 3/4 of the way full—this should make almost exactly 6 donuts.
- Bake for 9 to 11 minutes, until a toothpick inserted into the center of the donuts comes out with just a few moist crumbs or the tops of the donuts just spring back when pressed with a finger.
- Cool the donuts in the donut pan until cool enough to handle and then turn donuts out onto a cooking rack to cool completely before glazing.
Cream Cheese Glaze
- In a medium bowl, combine softened cream cheese and butter. Beat until smooth.
- Add powdered sugar and 1 teaspoon of milk. Beat until smooth.
- Whisk in milk by the 1/4 teaspoon until mixture resembles a thin frosting, thin enough for dipping but not pourable. (I usually use exactly 1 1/2 teaspoon milk TOTAL.) Do not add too much or your glaze will not set.
- Dip donuts in glaze and twist them a few times to make sure they are well-coated. Smooth the topping slightly with your finger. Allow to set for 15 to 20 minutes.
- Serve and enjoy!
