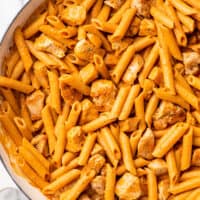
This quick and easy penne alla vodka with chicken is made with a silky smooth, incredibly rich and creamy vodka sauce and can be on the table in about 30 minutes.
A couple months ago, I shared my go-to vodka sauce on the blog. One of my favorite things about that sauce other than it being ridiculously good and absurdly quick and easy is that it’s the perfect base recipe.
You can take that vodka sauce and use it in a million delicious ways. And today we’re going to use it to make penne alla vodka with chicken.


This is a super quick, super easy dinner that packs a ton of flavor and totally satisfies.
You have chunks of chicken breast and penne tossed in silky smooth, ultra-rich vodka sauce that you’re absolutely going to want to eat with a spoon.
From start to finish, you can make this dish in about half an hour, making it the perfect cozy dinner for a busy evening.
Equipment and Ingredient Notes
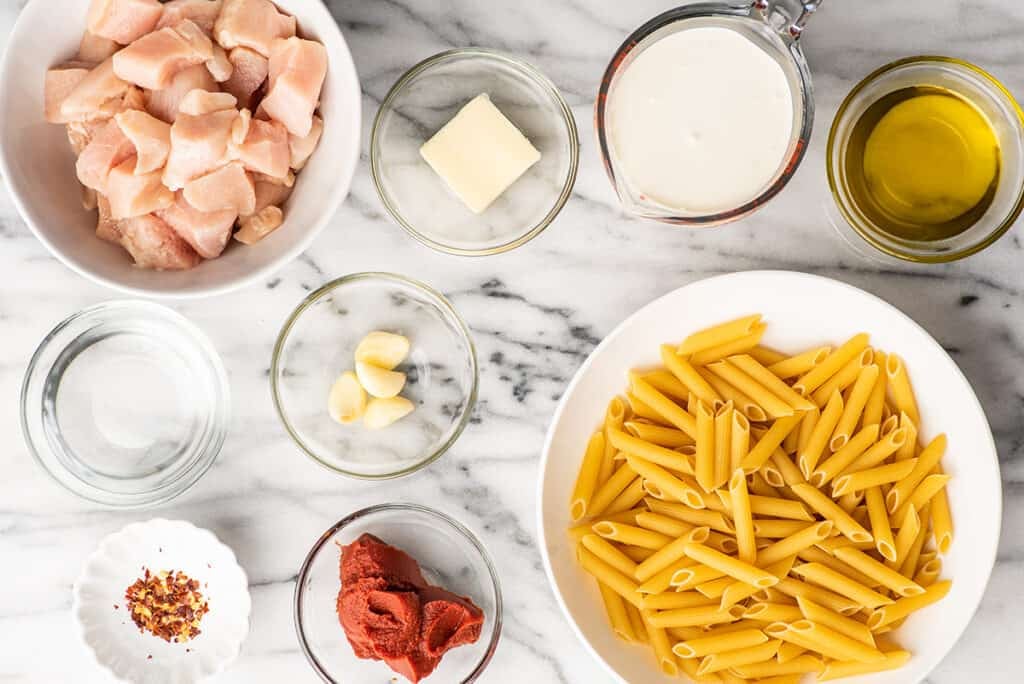

- A large pot: Even though we’re not making a ton of sauce, use a large pot instead of a skillet because it will help contain splatters while making the sauce and give you plenty of room to mix in the pasta at the end.
- A spider skimmer: If you have one, a spider skimmer/strainer is really helpful for scooping up the pasta out of the pasta water.
- Boneless skinless chicken breasts: You can also substitute boneless skinless chicken thighs here if you prefer.
- Tomato paste: Check out my post What to Do With Leftover Tomato Paste for storage tips and recipe ideas for the rest of the can.
- Heavy cream: And if you have leftover heavy cream, go check out What to Do With Leftover Whipping Cream .
Measuring tip: If you have a kitchen scale, skip the measuring cup for your tomato paste, and measure it by weight. ¼ cup of tomato paste is about 66 grams. It’s way quicker and less messy to scoop the paste onto a small plate or bowl on your scale than to pack it into a measuring cup and scrape it out again later.
How to Make Penne Alla Vodka With Chicken


- Cook chicken: In a large pot, cook the cubed chicken until cooked through and set aside. Then deglaze the pot with a little water, scraping any cooked-on bits off the bottom of the pan with a wooden spoon. Discard the liquid and wipe out the pot with a paper towel so the bottom of the pot is mostly clean.
The reason for cleaning the pan at this point is that if you leave the fond, it will get too dark and begin to burn over the next few steps and give the sauce a burnt flavor that we’re not going for.
Start your pasta: For optimal timing, once the chicken is cooked, add your pasta to boiling water just before starting the sauce.
Brown garlic: Cook garlic and red pepper flakes in a mixture of butter and oil until the garlic begins to turn lightly golden and smells wonderful.
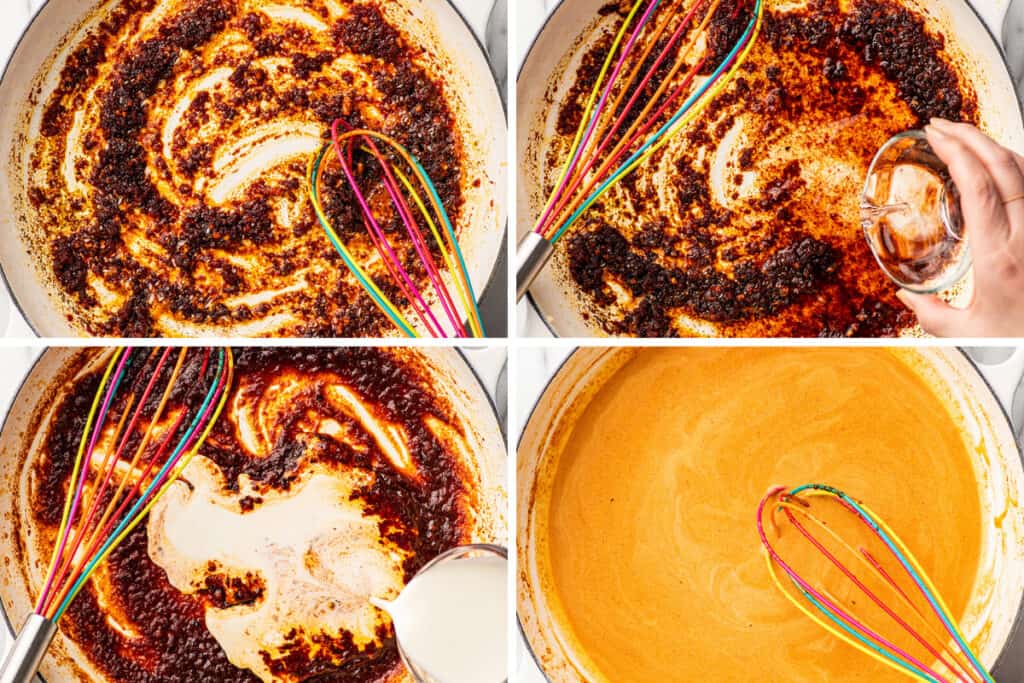

Cook tomato paste: Add tomato paste and cook, stirring often, until paste darkens in color and begins to caramelize on the bottom of the pan, 3 to 5 minutes. This cooks the raw taste out of the tomato paste and really deepens its flavor. You’ll be able smell the difference when the paste begins to caramelize.
Deglaze the pan with vodka: Turn the heat down and carefully add the vodka. The sauce is going to sizzle and pop aggressively, but don’t worry, it will calm down in a few seconds. Whisk, scraping any cooked-on bits from the bottom of the pan as you go, until the vodka is incorporated into the sauce.
Add Heavy Cream: Whisk in heavy cream, and heat over low heat, stirring constantly, until sauce is smooth, uniform in color, and heated through. Do not allow the sauce to come to a simmer. (If the cream is allowed to get too hot, it can break.)
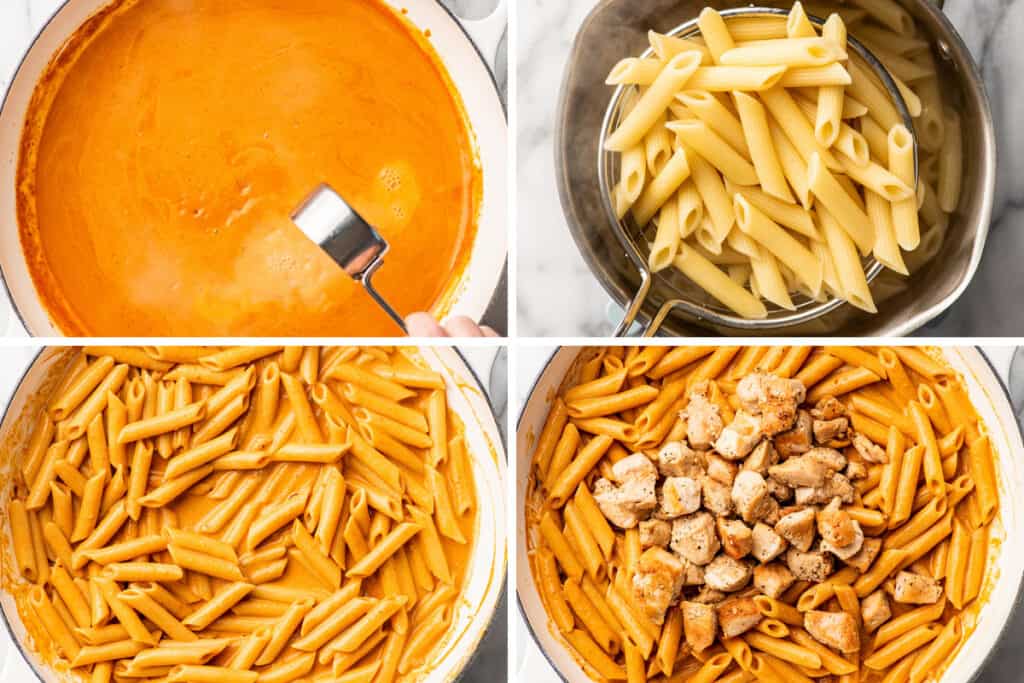

Add pasta water: When the pasta is nearly done, use a heat-proof measuring cup to scoop out ¼ cup of the cooking water and whisk it into your sauce. At this point, your sauce is definitely going to need some salt. Taste and add salt as needed.
Add pasta: Drain pasta or use a slotted spoon or spider skimmer to scoop cooked pasta out of the pasta water and add it to your sauce. Stir to combine. The sauce is going to seem a little thin at first, but it will thicken as it sits.
Add chicken: Stir in the cooked chicken. Allow the pasta to sit for 3 to 5 minutes to give the sauce a chance to thicken and the chicken time to warm up in the hot vodka sauce.
Serve and enjoy!


Can I make this dish ahead of time?
I don’t recommend making pasta with vodka sauce ahead of time because vodka sauce does not reheat super well after it’s been mixed with pasta (it separates and gets a bit oily).
If you’d like to shave off some cooking time, you can cook the chicken in advance or plan on using cooked chicken that you already have an hand (rotisserie chicken would work well).
The sauce only takes about 15 minutes to prep and make, so if your chicken is already cooked, you can have this dish on the table in about 20 minutes depending on how long it takes the water to boil for pasta.
Can I double this recipe?
Absolutely. To change the recipe yield, hover over the number of servings in the recipe card (or click if you’re on mobile) and slide the slider.
What to serve with penne alla vodka?
This sauce is pretty rich, so I like to keep the sides simple and light. A slice of garlic bread and green salad, roasted broccoli , or roasted asparagus are my go-tos.


More Easy Pasta Dinners
- Creamy Chicken Pasta
- American Goulash
- Baked Ziti
- Easy Lasagna
- 20-minute Spaghetti Bolognese
Ingredients
- ▢ 4 tablespoons olive oil divided
- ▢ 1 pound ( about 2 medium ) boneless skinless chicken breasts cut into 1-inch chunks
- ▢ ¼ teaspoon salt plus more as needed
- ▢ ¼ teaspoon black pepper plus more as needed
- ▢ 8 ounces penne or rigatoni pasta
- ▢ 1 tablespoon ( 14g ) butter
- ▢ 4 cloves garlic
- ▢ ¼ teaspoon red pepper flakes optional
- ▢ ¼ cup ( 66g ) tomato paste
- ▢ ¼ cup vodka
- ▢ 1 cup heavy cream
Instructions
- Bring a medium pot of generously salted water to boil for the pasta.
- In a large pot, heat 1 tablespoon of the olive oil over medium-high heat. Once hot, add chicken and sprinkle with salt and pepper. Cook until chicken is cooked through and use a slotted spoon to transfer the chicken to a bowl. Deglaze the pan with a little water, scraping any cooked-on bits off the bottom of the pan with a wooden spoon. Discard the liquid and wipe out the pot with a paper towel so the bottom of the pot is mostly clean.
- Add pasta to pasta water and cook according to box instructions until al dente.
- While the pasta cooks, add remaining 3 tablespoons of olive oil and the butter to the pot you used to cook the chicken and heat over medium heat.
- Once melted, add garlic and red pepper flakes. Cook for about 1 minute, until garlic is beginning to turn golden and aromatic.
- Add tomato paste and cook, stirring often, until paste darkens in color and begins to caramelize on the bottom of the pan, 3 to 5 minutes.
- Switch to a heat-resistant whisk and turn heat to low. Carefully add the vodka (the sauce will sizzle and pop aggressively for a few seconds). Whisk, scraping any cooked-on bits from the bottom of the pan as you go, until the vodka is incorporated into the sauce.
- Whisk in heavy cream, and heat over low heat, stirring constantly, until sauce is smooth, uniform in color, and heated through. Do not allow the sauce to come to a simmer.
- When the pasta is nearly done, use a heat-proof measuring cup to scoop out ¼ cup of the cooking water and whisk it into your sauce. Taste the sauce and add salt to taste.
- Once the pasta is al dente, drain or use a slotted spoon or spider skimmer to scoop out pasta, and add it your sauce. Stir to combine.
- Stir in cooked chicken. Allow the pasta to sit for 3 to 5 minutes to give the sauce a chance to thicken and the chicken time to warm up in the hot sauce.
- Serve and enjoy!
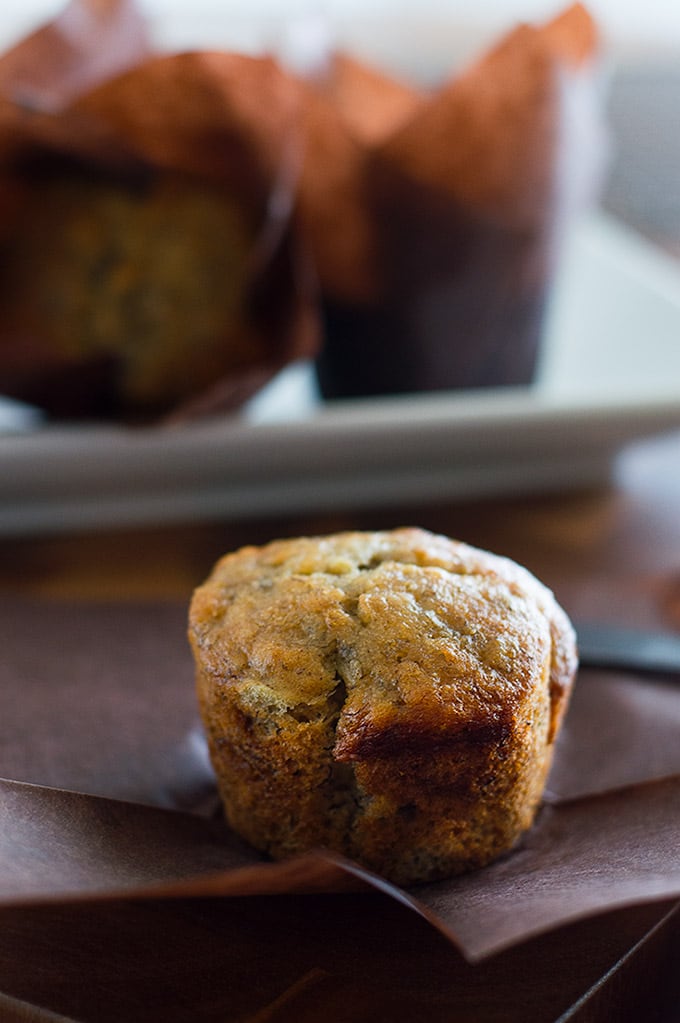
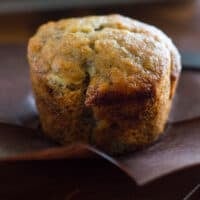
These perfectly delicious small-batch banana muffins can be made with one banana, one bowl, and half an hour.
I have two questions for you today:
Do you have one sad browning banana sitting on your counter?
Do you have a bowl and basic kitchen staples?
Yes and yes? Then you can and absolutely should make these small-batch banana muffins (or if you feel like chocolate, try these Small-batch Chocolate Banana Muffins )!

I’m all about recipes that solve problems, and this recipe solves two. It gets rid of that piece of fruit rotting on your counter and makes sure you won’t overindulge in a sweet treat because it only makes four muffins.
That’s right, just four perfect little moist and delicious banana muffins.
And they are so fast and easy to make. They literally go from banana-on-the-counter to in-the-oven in 5 minutes, because you just mash a banana, mix everything in one bowl, scoop into a muffin pan, and bake.
They come out of the oven so moist and soft and good. It’s the perfect impromptu baking project for a lazy Sunday morning or rainy afternoon.
Ingredient Notes
- One very ripe banana: Craving banana muffins but don’t have any ripe bananas on hand? Go read my post on how to quickly ripen bananas .
- An egg white: This recipe calls for just an egg white. Check out my post of Egg Yolk Recipes for ideas on what to do with the leftover yolk (I recommend a small batch of chocolate chip cookies .)
- Flour: I’ve always made these muffins with all-purpose flour, but I’ve had a number of readers tell me they turn out well with gluten-free flour, so if you’re gluten-free, measure for measure / 1 to 1 should work great.


Banana Muffin Variations
- Chocolate chip banana muffins: This is one of my favorites, fold ⅓ cup of chocolate chips to the batter before you transfer it to your muffin pan.
- Cinnamon sugar crust: Sprinkle ½ to 1 teaspoon of cinnamon sugar over the top of each muffin before baking.
- Streusel topping: If you’d like to add streusel to the muffins, go make my favorite streusel recipe . The half batch will make slightly too much for 4 muffins, so you can either freeze the leftovers for a later batch or eat it. 😉
More Small-batch Muffin Recipes
- Small-batch Blueberry Muffins
- Small-batch Chocolate Chocolate Chip Muffins
- Small-batch Chocolate Chip Muffins
- Small-batch Pumpkin Muffins
- Small-batch Apple Crumb Muffins
Can I double this recipe?
Absolutely! And if doubling the recipe, you can use 1 whole egg instead of 2 egg whites. To change the recipe yield, hover over the serving size in the recipe card below or click if you’re on mobile, and slide the slider.
Can I use a whole egg instead of just an egg white?
Yes. This is the modification readers most often tell me they’ve made with these muffins, so if you don’t want to go through the trouble of separating an egg, just use the whole thing.
More Banana Recipes
- One Banana Banana Bread
- The Best Banana Pudding
- My Favorite Banana Bread
- Banana Pancakes for Two
- 20+ Banana Recipes to Use Up Your Brown Bananas

Small-batch Banana Muffin Recipe Notes
- Freezing: Banana muffins freeze well! Individually wrap muffins in cling wrap and then store them in an airtight container or freezer bag in the freezer for up to 2 months. Allow them to come to room temperature before eating.
- Storage: Store muffins in an airtight container at room temperature for up to 3 days.
- Extra bananas: Have more than one sad brown banana? Freeze the rest! Bananas freeze super well for baking. Go check out my post How to Freeze Bananas for all the freezing tips and tricks.
Ingredients
- ▢ 1 large very ripe banana
- ▢ ¼ cup ( 50 g) granulated sugar
- ▢ 1 large egg white
- ▢ 1 tablespoon and 2 teaspoons vegetable oil
- ▢ ½ cup ( 60 g) all-purpose flour
- ▢ ½ teaspoon baking powder
- ▢ ¼ teaspoon baking soda
- ▢ ⅛ teaspoon salt
- ▢ ⅛ teaspoon cinnamon
- ▢ Pinch of nutmeg
- ▢ ⅓ cup chocolate chips (optional)
Instructions
- Preheat oven to 350°F and line a muffin pan with four liners (or grease).
- In a medium bowl, completely mash banana with a potato masher or fork. Add sugar, egg white, and oil. Stir with a spoon until just combined (mixture will still be lumpy).
- Add flour, baking powder, baking soda, salt, cinnamon, and nutmeg. Stir until just combined. If desired, stir in optional chocolate chips.
- Divide mixture between the four prepared muffin cups, filling each about 2/3 of the way full. Bake for 18 to 25 minutes, until a toothpick inserted into the center of the muffins comes out mostly clean and the tops of the muffins begin to turn golden.
- Cool in the pan until cool enough to handle before transferring to a cooling rack to cool completely.
- Enjoy!
Notes
- Doubling: If doubling, instead of using 2 egg whites, you can use a single whole egg.
- Storage: Store muffins in an airtight container at room temperature for up to 3 days.
- Freezing: Individually wrap muffins in cling wrap and then store them in an airtight container or freezer bag in the freezer for up to 2 months. Allow them to come to room temperature before eating.
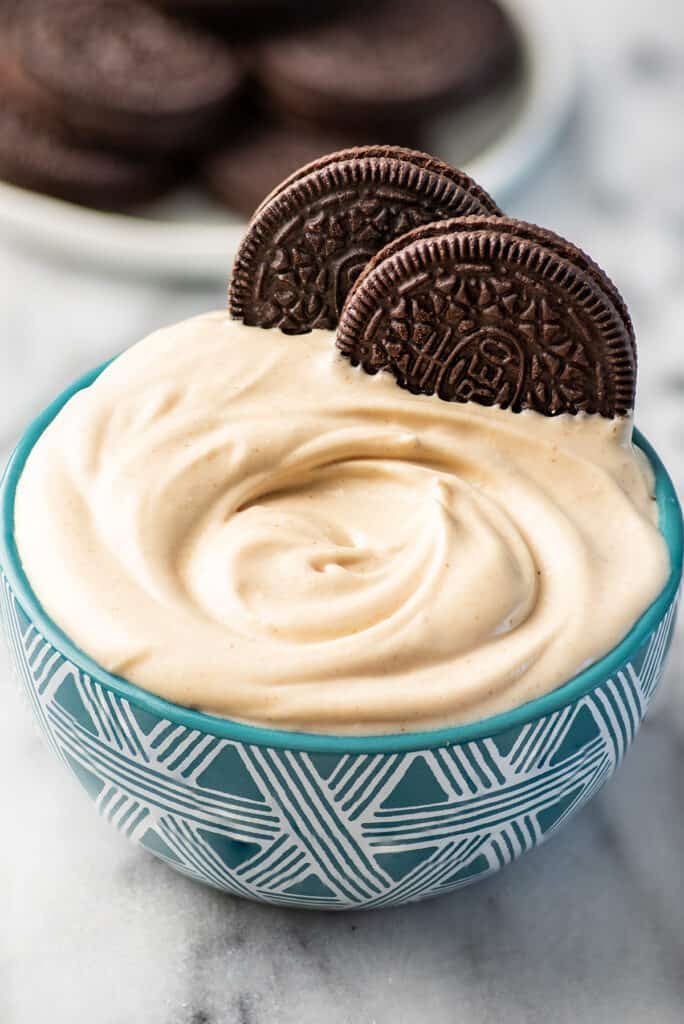
This peanut butter whipped cream is rich, creamy, and packed with peanut butter flavor.
It’s a fact of this world that a little peanut butter can improve almost any dessert. Stir a spoonful into hot chocolate , a milkshake , a batch of oatmeal cookies , and it’s going to be a good time.
Today, let me introduce you to my latest peanut butter obsession, peanut butter whipped cream.

PB + whipped cream is just such a good combo. It’s rich, creamy, super smooth, and totally packed with peanut butter flavor.
It’s a treat all on its own, eaten out of the mixing bowl with a spoon. You can use it as a dip for cookies or bananas, a light frosting, or for topping a slice of chocolate cheesecake or mug of hot cocoa .
I took the leftover whipped cream from these photos, and layered it with Oreos in a mini pie pan to make a mini peanut butter icebox cake. The ways to use this topping are practically endless, and I highly recommend you try them all. 😉
Ingredient Notes
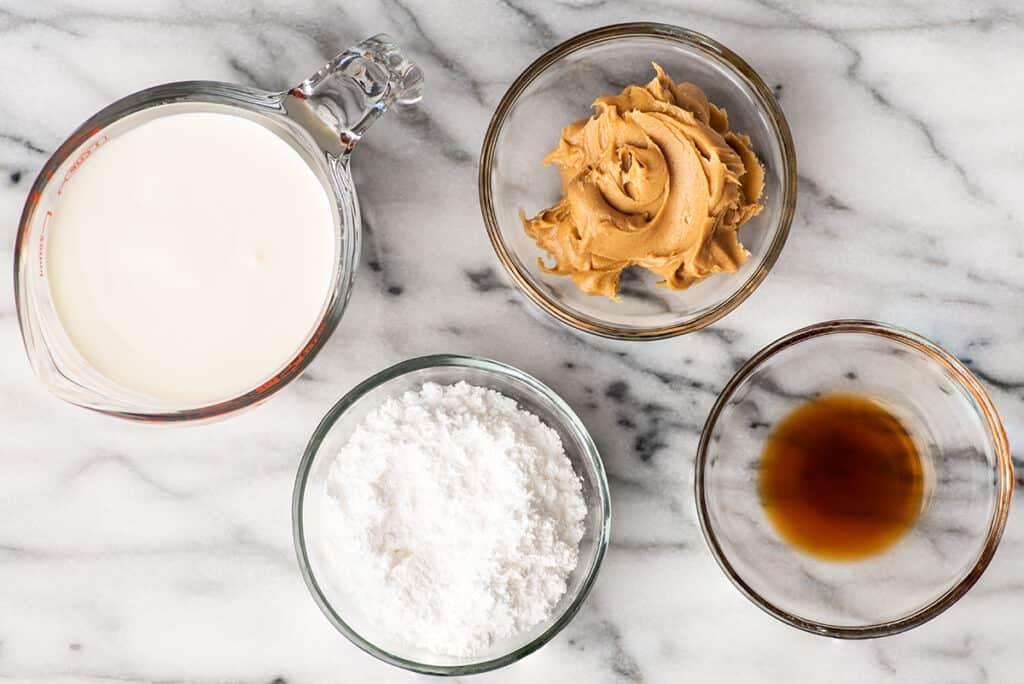

- Heavy cream: Have leftover heavy cream after making this recipe? See What to Do With Leftover Whipping Cream for storage tips and recipe ideas for using it up.
- Powdered sugar: The recipe calls for powdered sugar because powdered sugar contains cornstarch which gives you a slightly more stable whipped cream, but if all you have is granulated sugar, it will work just fine. Just be sure to read the substitution notes in the recipe card because you’ll need less granulated sugar to get the same level of sweetness.
- Creamy peanut butter: Stick with creamy peanut butter from a processed brand like Jif or Skippy. They’ll give you the smoothest, creamiest whipped cream. Natural peanut butter will be a little gritty.
How to Make Peanut Butter Whipped Cream
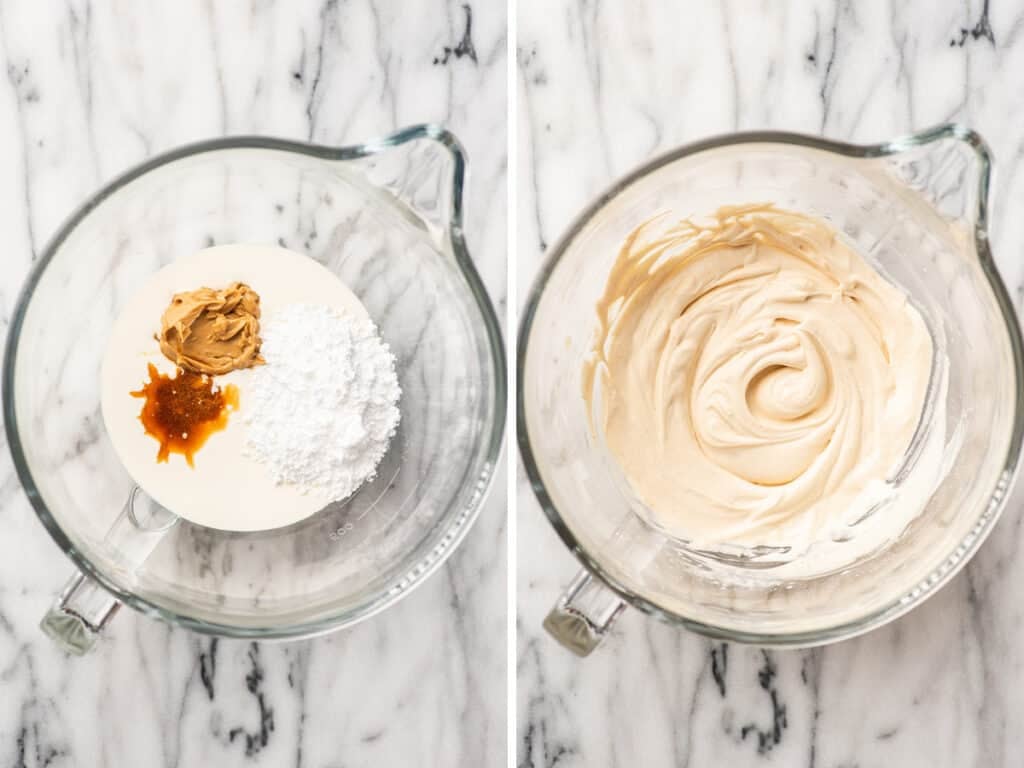

- Combine all ingredients: Add all your ingredients to a bowl or the bowl of your stand mixer.
Measuring tip: When measuring sticky ingredients like peanut butter, I highly recommend measuring by weight instead of volume. Just stick your bowl on your kitchen scale and scoop the peanut butter into it with a knife or spoon. This way you don’t have to get a measuring cup dirty!
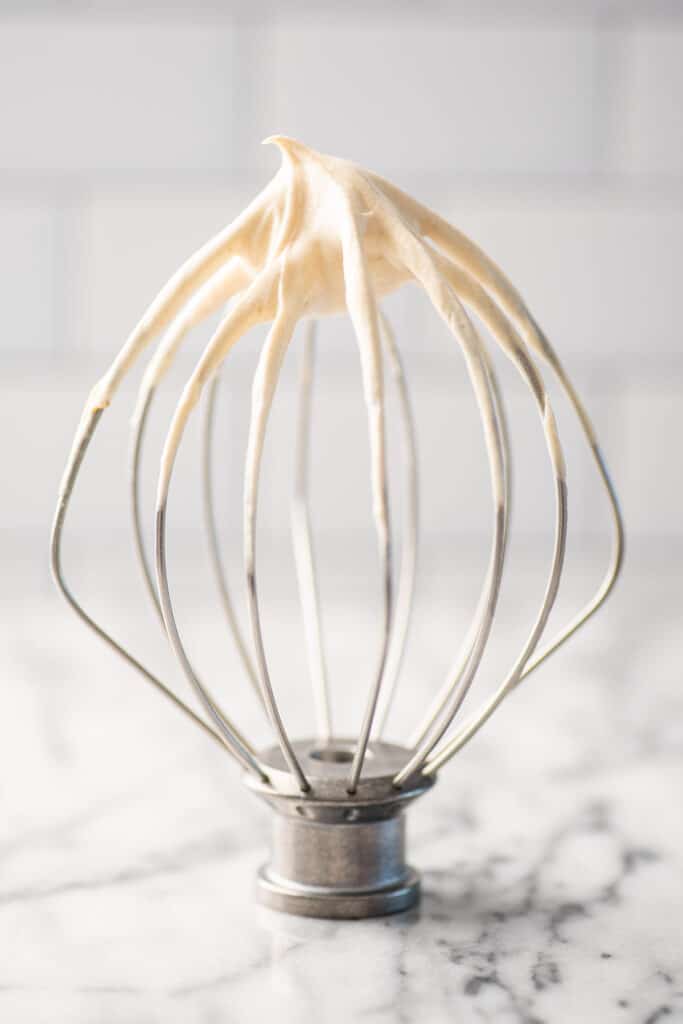
- Whip the cream: Whether you’re using a whisk, handheld electric mixer , or a stand mixer , simply whisk the cream, starting on low, working up to high, until the cream whips up either to soft peaks for spooning over hot chocolates or stiff peaks for piping.
Serve and enjoy!


Variations
- Chocolate Peanut Butter Whipped Cream: Add 3 tablespoons (1 teaspoon for a single-serving) of cocoa powder along with the rest of the ingredients.
Can I pipe/frost a cake with peanut butter whipped cream?
Yes, BUT during testing, I found peanut butter whipped cream to be even less stable than regular whipped cream.
While you can beat it to stiff peaks and pipe it, if you use something like an open-star tip, those nice defined piping lines might begin to slump a little.

More Whipped Cream Recipes
- Classic Whipped Cream
- Chocolate Whipped Cream
- Coffee Whipped Cream
- Cream Cheese Whipped Cream
- Cinnamon Whipped Cream
Recipe Notes
- Storage: Store whipped cream covered in the refrigerator for up to 48 hours. It may begin to deflate the longer it sits, but it will still taste delicious.
- Freezing: Peanut butter whipped cream pretty well. To freeze, pipe or spoon dollops of whipped cream onto a parchment paper-lined plate or baking sheet and freeze until solid. Once frozen, cut the parchment paper into squares and transfer the whipped cream (still on the parchment paper) to a freezer bag for storage. See my post Can You Freeze Whipped Cream for freezing tips and tricks.
Ingredients
Full batch
- ▢ 1 cup heavy cream
- ▢ ¼ cup ( 66g ) creamy peanut butter
- ▢ ½ teaspoon vanilla extract optional
- ▢ 2 tablespoons to ¼ cup (15-30g) powdered sugar *
- ▢ ⅛ teaspoon salt
Single serving
- ▢ 2 tablespoons heavy cream
- ▢ A couple drops vanilla extract optional
- ▢ 1 to 2 teaspoons ( 3-5g ) powdered sugar *
- ▢ 1½ teaspoon ( 8g ) creamy peanut butter
- ▢ Pinch of salt
Instructions
- Combine heavy cream, peanut butter, vanilla extract, sugar, and salt in a large bowl* or the bowl of your stand mixer.
- Using a whisk, handheld electric mixer, or the whisk attachment of your stand mixer beat until the cream whips up to your desired consistency. If needed, stop to scrape the sides of the bowl halfway through to make sure everything is being incorporated.
- Serve and enjoy!
Notes

Penne alla Vodka With Chicken
Ingredients
- 4 tablespoons olive oil divided
- 1 pound ( about 2 medium ) boneless skinless chicken breasts cut into 1-inch chunks
- ¼ teaspoon salt plus more as needed
- ¼ teaspoon black pepper plus more as needed
- 8 ounces penne or rigatoni pasta
- 1 tablespoon ( 14g ) butter
- 4 cloves garlic
- ¼ teaspoon red pepper flakes optional
- ¼ cup ( 66g ) tomato paste
- ¼ cup vodka
- 1 cup heavy cream
Instructions
- Bring a medium pot of generously salted water to boil for the pasta.
- In a large pot, heat 1 tablespoon of the olive oil over medium-high heat. Once hot, add chicken and sprinkle with salt and pepper. Cook until chicken is cooked through and use a slotted spoon to transfer the chicken to a bowl. Deglaze the pan with a little water, scraping any cooked-on bits off the bottom of the pan with a wooden spoon. Discard the liquid and wipe out the pot with a paper towel so the bottom of the pot is mostly clean.
- Add pasta to pasta water and cook according to box instructions until al dente.
- While the pasta cooks, add remaining 3 tablespoons of olive oil and the butter to the pot you used to cook the chicken and heat over medium heat.
- Once melted, add garlic and red pepper flakes. Cook for about 1 minute, until garlic is beginning to turn golden and aromatic.
- Add tomato paste and cook, stirring often, until paste darkens in color and begins to caramelize on the bottom of the pan, 3 to 5 minutes.
- Switch to a heat-resistant whisk and turn heat to low. Carefully add the vodka (the sauce will sizzle and pop aggressively for a few seconds). Whisk, scraping any cooked-on bits from the bottom of the pan as you go, until the vodka is incorporated into the sauce.
- Whisk in heavy cream, and heat over low heat, stirring constantly, until sauce is smooth, uniform in color, and heated through. Do not allow the sauce to come to a simmer.
- When the pasta is nearly done, use a heat-proof measuring cup to scoop out ¼ cup of the cooking water and whisk it into your sauce. Taste the sauce and add salt to taste.
- Once the pasta is al dente, drain or use a slotted spoon or spider skimmer to scoop out pasta, and add it your sauce. Stir to combine.
- Stir in cooked chicken. Allow the pasta to sit for 3 to 5 minutes to give the sauce a chance to thicken and the chicken time to warm up in the hot sauce.
- Serve and enjoy!
