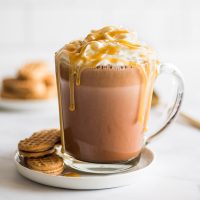
Peanut Butter Hot Chocolate is easy to make at home and so, so good.
I have a ton of hot chocolate recipes on the site, Classic Hot Chocolate , Rich and Thick Hot Chocolate , White Hot Chocolate , Pink Hot Chocolate , Baileys Hot Chocolate , so I thought I had pretty much all my hot chocolate bases covered.
But last year someone left me a comment blew my mind. They told me that they had taken my classic hot chocolate and made it into peanut butter hot chocolate.
As a lover of all things peanut butter, obviously I had to give this a try, and friends, I’m so glad I did, because it’s real good.
Adding peanut butter to hot chocolate not only makes your hot chocolate a peanut buttery delight, it also gives it a rich and creamy texture, so it feels 10xs more decadent.


Ingredients
- Sugar, cocoa powder, and water: Instead of using a store-bought chocolate sauce, we’ll use these three ingredients to make a quick chocolate syrup to flavor the hot chocolate base.
- Milk: Any percentage milk will work for hot chocolate. The higher fat the milk, the richer and creamier your hot chocolate will be.
- Peanut butter: I recommend using a processed creamy peanut butter like this so you get the smoothest hot chocolate possible.
Peanut Butter Hot Chocolate Variations
- Vegan: Replace the dairy milk with your favorite plant-based milk and you have instant vegan peanut butter hot chocolate.
- Extra chocolatey: Add 2 tablespoons of good-quality chocolate chips or chopped chocolate to the chocolate syrup and stir until melted before adding the milk. The extra boost of real chocolate flavor is so good.
- Extra creamy: Replace 2 tablespoons of the milk with heavy cream (or 1/4 cup with half and half ) for an incredibly rich and creamy peanut butter and chocolate experience.


How to Make Peanut Butter Hot Chocolate
- Stir together sugar, cocoa powder, and water over medium heat until smooth.
- Add milk and peanut butter and heat, stirring occasionally until milk is steaming hot and peanut butter is completely mixed in. Do not allow the milk to come to a boil as it can scald.
- Pour into a mug (if you are feeling a little extra, you can add whipped cream and peanut butter sauce like I did, but that’s totally optional) and enjoy!
Can I double this recipe?
Yes, you can scale up the recipe with no preparation changes needed. To change the yield, in the recipe card below, hover over the serving size or click if you’re on mobile, and slide the slider.


Can I use natural peanut butter?
I haven’t tested this hot chocolate with natural peanut butter, but I wouldn’t recommend it. I have a feeling even smooth natural peanut butter will have too much texture to stir into a drink unless you use a blender to mix it.
Can I make this in the microwave?
Yes! To make peanut butter hot chocolate in the microwave, combine cocoa powder, sugar, and water in a mug. Stir until well-mixed and microwave for 15 seconds. Add peanut butter and stir until smooth before adding the milk. Microwave 1 to 1 ½ minutes, until steaming. Stir once more, and enjoy!
More Cold-weather Drink Recipes
- Snickerdoodle Hot Chocolate
- Homemade Mocha
- White Chocolate Mocha
- Chai Tea Latte
- The BEST Crockpot Hot Chocolate
More Peanut Butter Recipes
- Buckeye Brownie Cookies
- Peanut Butter Oatmeal Cookies
- Small-batch Peanut Butter Cookies
- Small-batch Monster Cookie Bars
- Peanut Butter Swirl Brownies
- Easy Homemade Peanut Butter Cups
Recipe Notes
This recipe makes 1 cup of hot chocolate, enough to fill an 8-ounce mug. If you’d like to fill an oversized mug, 1 1/2 or double the recipe.
Ingredients
- ▢ 2 tablespoons ( 25g ) granulated sugar
- ▢ 1 tablespoon ( 7g ) cocoa powder
- ▢ 1 tablespoon water
- ▢ 1 cup milk any percentage
- ▢ 1 heaping tablespoon creamy peanut butter not natural peanut butter
Optional Toppings
- ▢ Whipped cream
- ▢ Peanut butter sauce
Instructions
- In a small saucepan, combine sugar, cocoa powder, and water. Heat over medium heat and stir until sugar and cocoa powder dissolve.
- Add milk and peanut butter and stir. Heat, stirring occasionally, until milk begins to steam and peanut butter is completely dissolved.
- Pour into an 8-ounce mug, top with optional whipped cream and peanut butter sauce if desired and enjoy.
Notes
This post was originally published on 11/30/18. It was updated on 11/1/20 with new photos and additional information and tips.
These small-batch cinnamon rolls for two make a rich and indulgent breakfast with outrageously amazing cream cheese frosting. Make the rolls the night before, throw them in the oven in the morning, and enjoy your breakfast in bed. No fuss, stress, or mixer needed!
Cinnamon rolls are my go-to special occasion breakfast. Christmas? Cinnamon roll breakfast. Easter? Cinnamon roll breakfast. Valentine’s day? Cinnamon roll breakfast. And it’s great.
There’s nothing like eating in your PJs and tucking into a warm, gooey cinnamon roll straight out of the oven.
The only problem is that most cinnamon roll recipes make a dozen or more, which is fine if you’re feeding a whole family, but if it’s just you and your partner, a dozen is a little bit much.

This post and its photos have been updated. Don’t worry, you’re in the right place.
The Best Small-batch Cinnamon Rolls
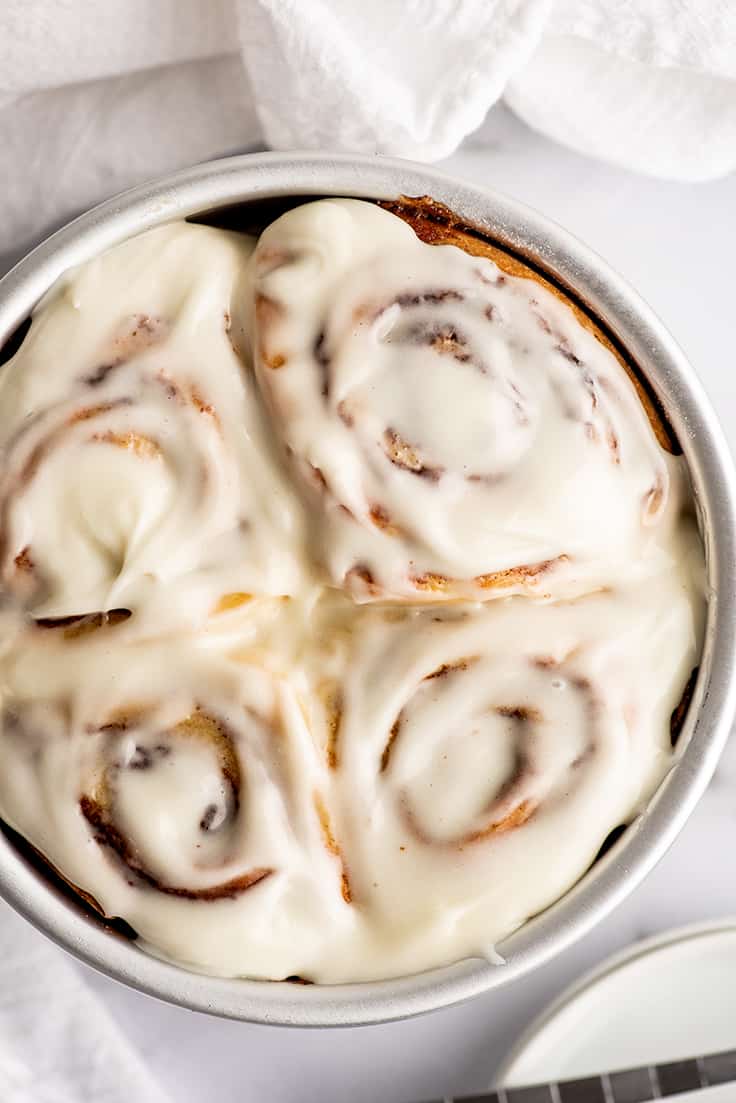
So I present to you, my small-batch cinnamon rolls. These things are so, so, so good. They are fluffy and gooey and rich and yield just four.
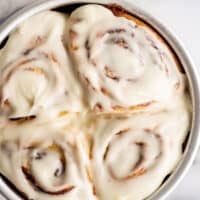
And the cream cheese frosting? This is not your thin, drizzly glaze that melts daintily over your rolls. This is thick, amazing, cream cheese frosting that’s not going to play second fiddle to anything it’s slathered on.
It will knock your socks off.
Ingredient Notes
- Active dry yeast: If you don’t usually bake with yeast, you can find it in the baking aisle of your grocery store either in a glass jar or little packets. Stick with the packets since you’ll need very little for this recipe.
- Milk: I prefer to use whole milk in this recipe, but any milk will work.
- An egg yolk: Because this is a small-batch recipe, we don’t need a whole egg, just the yolk. For ideas on what to do with the leftover egg white, check out my post What to Do With Leftover Egg Whites (I recommend a quick small batch of banana muffins ).
- Cream cheese: Philadelphia cream cheese is my favorite cream cheese brand. Make sure to allow it to come to room temperature before using it in the frosting so you don’t end up with cream cheese lumps (the same goes for your butter).
How to Make Small-batch Cinnamon Rolls


Proof the yeast in warm milk: Add the yeast and a pinch of sugar to milk that’s just slightly warm. After 10 to 15 minutes, the yeast will foam slightly letting you know it’s good to go.
Make the dough: This dough comes together fast and easy. Simply mix the dough ingredients together until you get a sticky dough. Use a plastic bench scraper or rubber spatula to help turn the dough out onto a well-floured surface and knead the dough until it becomes smooth and is no longer sticky.
First rise: Place the dough in a greased bowl and cover with a towel and allow it to sit in a warm place until doubled in size, about an hour to 90 minutes.


- Shape the rolls: Roll out the dough and add butter and cinnamon sugar before tightly rolling and slicing. These can now go into the refrigerator overnight or start their second rise.
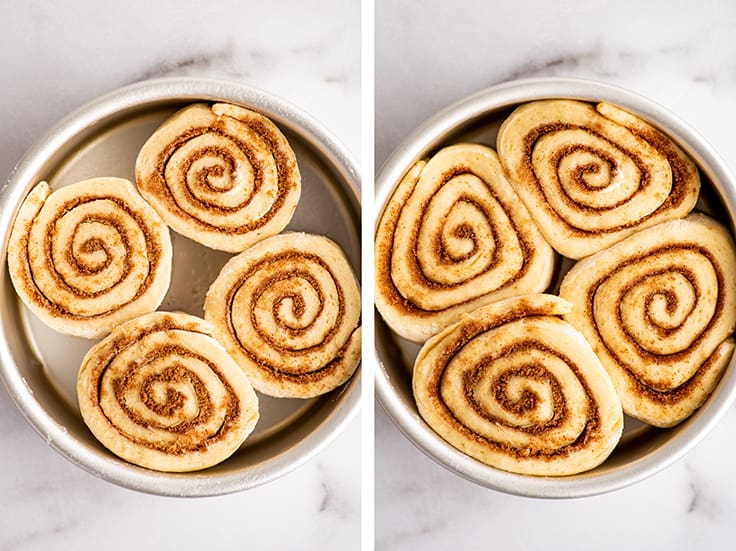

Second rise: A second rise allows the rolls to puff up before baking. Cover them and place them in a warm spot until fluffy, 45 minutes to 90 minutes.
Bake: Bake until the rolls are lightly golden. While the rolls bake, make the cream cheese frosting. Spread frosting on the warm rolls and enjoy!


Overnight Cinnamon Rolls for Two
These rolls are a fantastic make-ahead breakfast. You can make and shape them the night before and then pull them out of the refrigerator when you wake up to complete their second rise.
This second rise will usually take between 1 and 2 hours depending on the temperature of your kitchen, but if you’re in a hurry, you can also put the rolls in your cold oven on the top shelf and place a baking pan on the bottom shelf. Fill the pan with boiling water and close the oven.
The heat and steam from the boiling water will help the rolls rise more quickly, and they should be ready to bake in just a little over half an hour.
Once the rolls are fluffy, remove them from the oven, preheat the oven to 375°F and bake according to the recipe instructions.
My yeast didn’t foam. What went wrong?
If it didn’t foam there are couple things it might be:
- Your milk was too hot and killed the yeast. Try again and use an instant-read thermometer to check the temperature of your milk. It should be between 105 and 115° F. If you don’t have a thermometer, feel the water, and it should feel like lukewarm bathwater. It should not be hot, and definitely not steaming!!
- If you’re sure the milk temp is good and the yeast still doesn’t foam, your yeast is no good. You’ll need to replace it before you can start again.
I don’t have a 6-inch baking dish. What can I use instead?
You want to use a small baking dish for these rolls because being packed together helps them stay moist while baking and prevents the filling from running out and burning. Don’t try to bake them on a baking sheet or large baking dish.
A square or circular 6-inch cake pan is perfect for these, but if you don’t own either of those, you can use a 7×5-inch rectangular baking dish or any oven-safe dish that is between about 28 and 40 square inches.
Can I double this recipe?
Yes! This recipe doubles with no preparation changes needed. You can bake the doubled recipe in a 9-inch round cake pan. Just extend the baking time slightly.


Why is this called a recipe for two when there are four cinnamon rolls!!??
(I actually get this question a lot.) When I call this a recipe for two, I don’t mean sit down and eat two cinnamon rolls each for breakfast (you probably shouldn’t—they’re really rich).
I mean this is the perfect number of cinnamon rolls for two people to enjoy over a day or two. Maybe you have one for breakfast and split one for dessert. Maybe you have cinnamon rolls for breakfast two days in a row. And if four is really too many for you, freeze half of them. They freeze really, really well.
How to Freeze Cinnamon Rolls
I prefer to freeze the cinnamon rolls un-frosted, so if you plan on freezing some of the rolls, don’t frost the entire batch right out of the oven.
- Wrap each roll in plastic wrap and store in a freezer bag.
- Spread single servings of cream cheese frosting on parchment paper and freeze until solid, before wrapping and placing them in the bag with the rolls.
- When you are ready to eat, heat frozen rolls in the microwave for 30 seconds. Put a dollop of frozen frosting on the top. Microwave for additional 30 seconds. (The frosting might still be a little cold, but spread it over the top of the hot cinnamon roll and it will heat up quickly.)
More Small-batch Breakfast Ideas
- Buttermilk Pancakes for Two
- Crispy Waffles
- Pancakes for One
- Small-batch Cream Scones
- Banana Pancakes
More Small-batch Favorites
- Small-batch Chocolate Chip Cookies
- Easy Kettle Corn
- Small Carrot Cake
- Small-batch Brownies
Ingredients
Special Equipment
- ▢ 6 to 7-inch baking dish
Dough
- ▢ ⅓ cup milk any percentage
- ▢ 1 teaspoon active dry yeast
- ▢ 1 tablespoon ( 13 g) granulated sugar plus a pinch for proofing yeast
- ▢ 2 tablespoons ( 28 g) salted butter melted and slightly cooled
- ▢ 1 large egg yolk
- ▢ ¼ teaspoon salt
- ▢ 1 cup and 1 tablespoon ( 150 g) all-purpose flour
Filling
- ▢ ⅓ cup ( 66 g) packed brown sugar
- ▢ 1 teaspoon cinnamon
- ▢ 2 tablespoons ( 28 g) salted butter softened
Frosting
- ▢ 3 ounces cream cheese softened
- ▢ 3 tablespoons ( 42 g) salted butter softened
- ▢ 1 cup ( 120 g) powdered sugar
- ▢ ½ teaspoon vanilla extract
- ▢ Pinch of salt
Instructions
Make Dough
- Pour your milk into a mug and microwave it for about 20 seconds until it is lukewarm, NOT HOT (about 105-115 degrees F). Stir in yeast and a pinch of sugar and allow to sit for 10-15 minutes until the top of the mixture looks foamy.*
- In a medium bowl, whisk together milk and yeast mixture with melted butter, sugar, egg yolk, and salt.
- Add the flour and use a spoon to mix well, until a thick, sticky dough forms and all the flour is incorporated. Drop the mixture onto a well-floured work surface and knead until the dough is no longer sticky and forms a ball (about 10 to 15 folds).
First Rise
- Place dough into a greased bowl, cover with a towel, and allow to rise in a warm place for an hour to 90 minutes, until doubled in size.
Shape Rolls
- Stir together brown sugar and cinnamon.
- Once your dough has risen, turn it out on a lightly floured surface and squish and stretch it GENTLY (we don’t want to rip it) into an oblong shape and then use a rolling pin to roll the dough out to about 5 by 15 inches. Gently manipulate the corners and sides so you have a nice rectangle.
- Spread butter over the entire thing and top with the brown sugar mixture. Roll into a tight log from the short side. Use a serrated knife or dental floss to cut the roll into quarters.
Same-day Rolls
- Place the rolls in a 6 to 7-inch greased baking dish. Cover with a towel, place them in a warm spot, and allow to rise for 45 minutes to an hour, until puffed up and fluffy.
- Preheat oven to 375° F. Bake cinnamon rolls for 15-22 minutes, until the tops are golden and centers cooked through. Allow rolls to cool for 5 minutes before frosting.
Overnight Rolls
- After shaping the rolls, transfer them to a greased baking dish, cover tightly with plastic wrap, and place in the refrigerator overnight, up to 24 hours.
- In the morning, take rolls out of the fridge and set them in a warm spot (leave plastic wrap on). Allow them to rise for 1 to 2 hours, until puffed up and fluffy.
- Preheat oven to 375° F. Remove plastic wrap and bake cinnamon rolls for 15-22 minutes, until the tops are golden and centers cooked through.
Frosting
- While your rolls are baking, in a medium bowl, whisk together softened cream cheese, butter, sugar, vanilla, and salt, until well combined.
- Spread frosting over rolls, serve, and enjoy!
Notes
This post was originally published on 2/12/16. It was updated on 10/26/20 with new photos and additional information and tips. The recipe was also modified in the following ways:
- Cut the yeast. For a recipe this size, it did not need as much as it was using.
- Added a pinch of sugar to the milk when proofing the yeast. This is not actually necessary but makes the yeast foam more dramatically so it’s easier to tell that it’s alive.
- Added time for a second rise. Originally these rolls went straight from the fridge into a cold oven and did a sort of abbreviated second rise as the oven preheated. This always worked for me, but it didn’t work well with all ovens.
- Decreased the baking temperature.
If you loved the original recipe, you can still find it here .
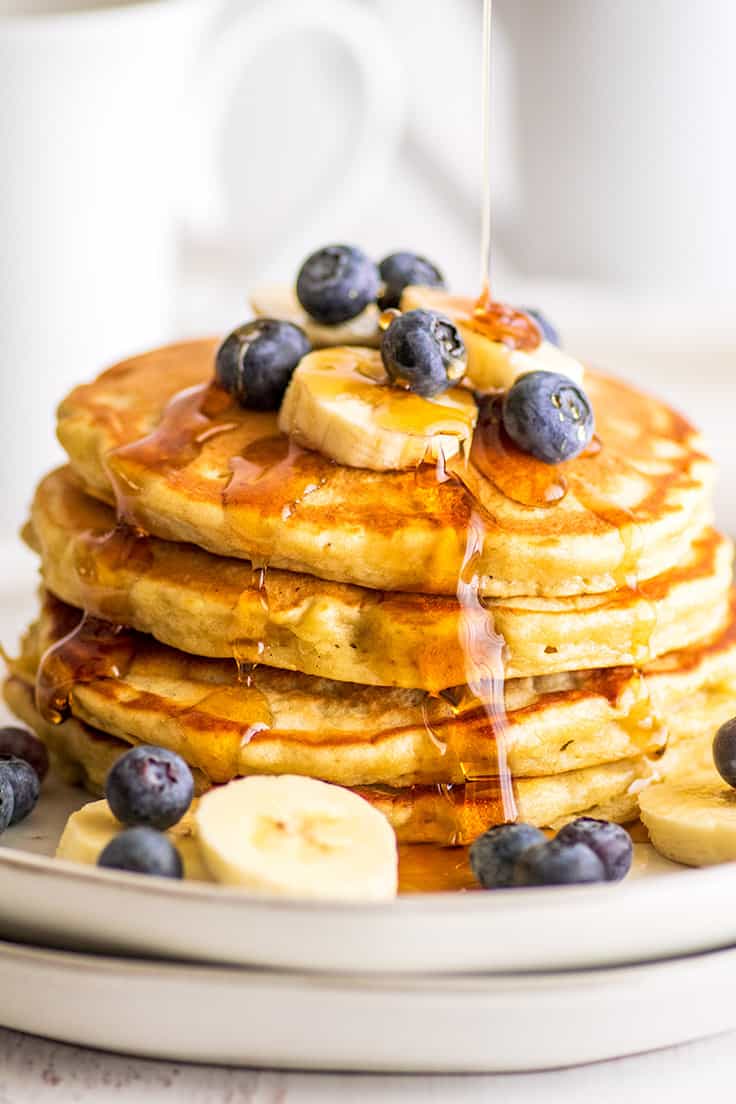
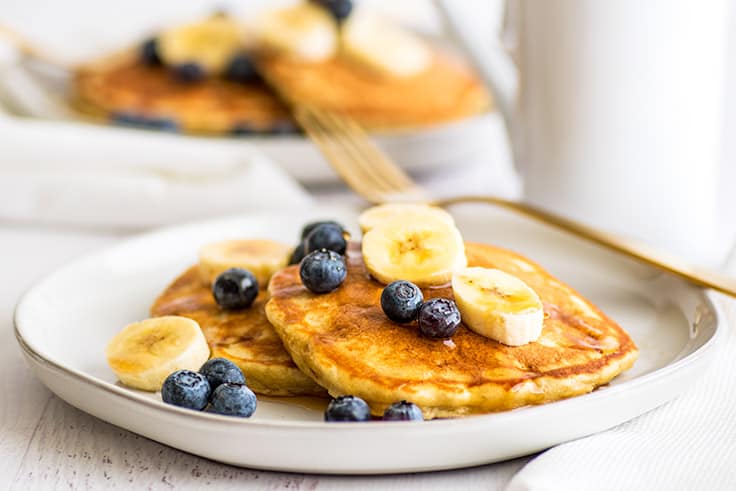
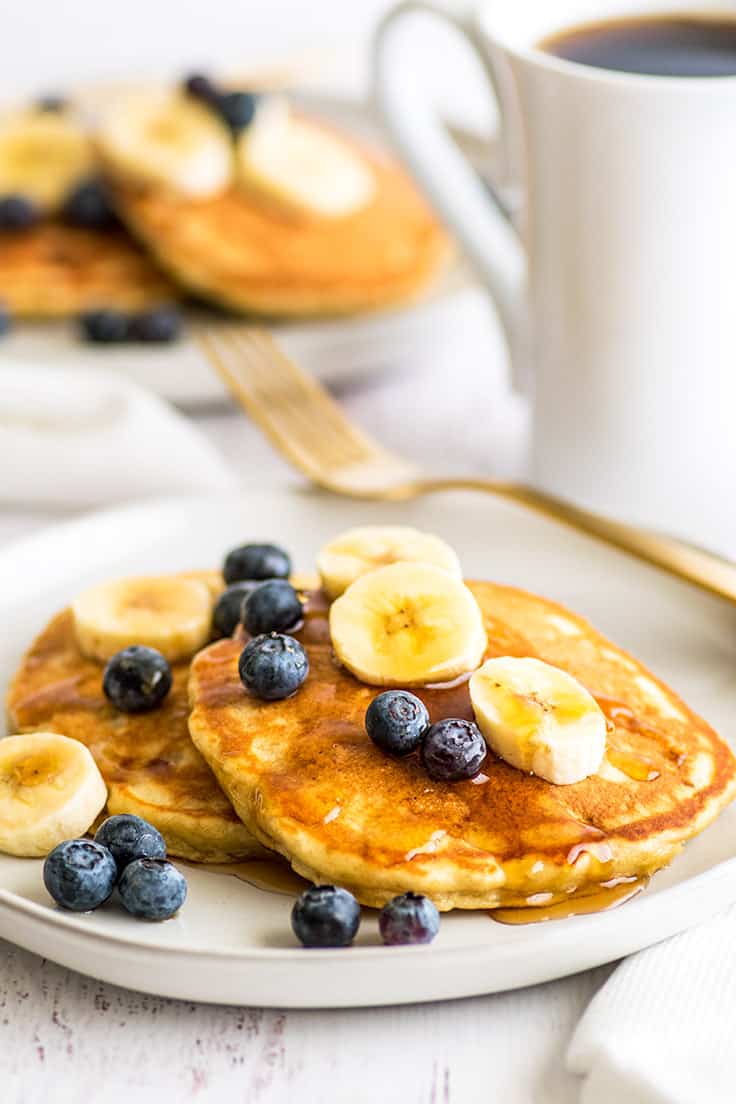
These easy banana pancakes for two are made with just one overripe banana and a handful of pantry staples. They’re quick to make, fluffy, and packed full of banana flavor.
Say hello to your new favorite small-batch pancake recipe, friend. These pancakes are perfectly fluffy, incredibly good, and designed to serve two.
Like my buttermilk pancakes for two , this banana pancake recipe will make exactly four good-sized pancakes, so you can enjoy them with someone else or make them solo and freeze the extra two for next weekend (always an excellent option).

Ingredients of Note
- One overripe banana: This recipe is perfect for using up that single sad banana sitting on your counter, but if you’re craving banana pancakes and don’t have any brown bananas, check out my post on how to quickly ripen bananas .
- Vegetable oil: A little vegetable oil in the batter helps these pancakes cook up moist and perfect. I prefer to use oil in pancakes, but if you don’t have any, the same amount of melted butter can be substituted.
How to Make the Best Banana Pancakes
- Whisk together the dry ingredients: flour, a little sugar, baking powder, and salt. Then in a separate bowl, mash your banana and add an egg, some milk, oil, and vanilla.
- Finally, mix everything together until just combined, and your batter is ready to go.
- When it comes to cooking, the key to getting a nice fluffy banana pancake that isn’t soggy in the center is to start with a preheated pan/griddle and keep the temperature just at medium. Any higher, and your pancakes are going to burn before they are cooked through, and no one wants burnt and/or undercooked pancakes.
- Once completely cooked, plate those babies up and it’s time to add toppings.

Topping Ideas
My little sister, a banana pancake connoisseur, says that the mark of a good banana pancake is that you can eat it plain, straight off the griddle. And you can absolutely do that with these pancakes (as one of my taste testers, that’s what she did and gave them her thumbs up), but my favorite way is as you see in the photos, with butter, some fresh fruit, and maple syrup.
It’s so good. Other ways you can enjoy these include:
- Spread with Nutella or Nutella sauce
- Slathered with peanut butter and honey, peanut butter sauce , or chocolate sauce
- Topped with strawberry sauce and whipped cream
Variations
Feel like changing things up? Try some of these mix-ins:
- Chocolate chip banana pancakes: Add about 1/3 cup of chocolate chips or chopped chocolate to the batter just before cooking.
- Blueberry banana pancakes: Make the pancakes according to the recipe instructions, and once you spoon the batter out onto the hot griddle, drop blueberries evenly spaced over the top of the pancakes.
Can I freeze banana pancakes?
Absolutely. Banana pancakes free pretty well. Freeze them in a freezer bag with a small sheet of parchment paper between each pancake and reheat in the microwave for 20-30 seconds. Extend the reheating time slightly for each additional pancake you’re reheating.
And if you have extra brown bananas you’re not quite ready to use, check out my post of How to Freeze Bananas .
What to serve with banana pancakes?
These pancakes are filling enough to be served on their own, but if you want to do a full breakfast spread, scrambled eggs with sausage and roasted red potatoes are an excellent way to go.

Can I double this recipe?
Yes. You can double the recipe with no changes needed. To change the yield, in the recipe card below, hover over the serving size or click if you’re on mobile, and slide the slider.
If doubling the recipe, I recommend using a griddle if you have one so you can cook all your pancakes at once. If you’re cooking the pancakes in batches on the stove, keep the finished pancakes warm in a 200°F oven while you cook the full batch.
More Banana Recipes
- Small-batch Banana Muffins
- Small-batch Chocolate Banana Muffins
- Small Banana Cake
- The Best Banana Milkshake
- Banana Pudding
More Small-batch Breakfasts
- Waffles for Two
- Small-batch Cinnamon Rolls
- Pumpkin Pancakes for Two
- Pancakes for One
- Small-batch Cream Scones

Ingredients
- ▢ ½ cup ( 60g ) all-purpose flour
- ▢ 1 ½ teaspoons ( 6g ) granulated sugar
- ▢ 1 teaspoon baking powder
- ▢ ⅛ teaspoon salt
- ▢ 1 medium-to-large very ripe banana
- ▢ 1 large egg
- ▢ 2-3 tablespoons milk any percentage, divided
- ▢ 1 tablespoon vegetable oil or melted butter
- ▢ ½ teaspoon vanilla
Instructions
- In a small bowl, whisk together flour, sugar, baking powder, and salt.
- In a medium bowl, use a fork or potato masher to mash peeled banana very well. Add egg, 2 tablespoons of the milk, oil, and vanilla, and mix until well-combined.
- Add flour mixture and use a spoon to stir until just combined. If batter seems too thick, add up to 1 tablespoon more milk.
- Heat a griddle to 350°F or a skillet over medium heat (no higher). Once cooking surface is hot, lightly grease with butter or cooking spray and add pancake batter using a 1/3 cup. Cook first side until the tops of the pancakes begin to bubble. Flip and cook until cooked through.
- Serve and enjoy!
Notes
This post was originally published on 3/14/18. It was updated on 11/1/20 with new photos and additional information and tips.

Peanut Butter Hot Chocolate
Ingredients
- 2 tablespoons ( 25g ) granulated sugar
- 1 tablespoon ( 7g ) cocoa powder
- 1 tablespoon water
- 1 cup milk any percentage
- 1 heaping tablespoon creamy peanut butter not natural peanut butter
Optional Toppings
- Whipped cream
- Peanut butter sauce
Instructions
- In a small saucepan, combine sugar, cocoa powder, and water. Heat over medium heat and stir until sugar and cocoa powder dissolve.
- Add milk and peanut butter and stir. Heat, stirring occasionally, until milk begins to steam and peanut butter is completely dissolved.
- Pour into an 8-ounce mug, top with optional whipped cream and peanut butter sauce if desired and enjoy.
