This quick and easy one-banana banana bread recipe can be made with just one banana and a few pantry staples. It bakes up moist and sweet with a decadent cinnamon sugar crust.
Last week, I shared Dominique Ansel’s banana bread (AKA my favorite banana bread recipe in the entire world) with you, and promised in the post that I’d make a mini version for all you small-batch bakers out there.
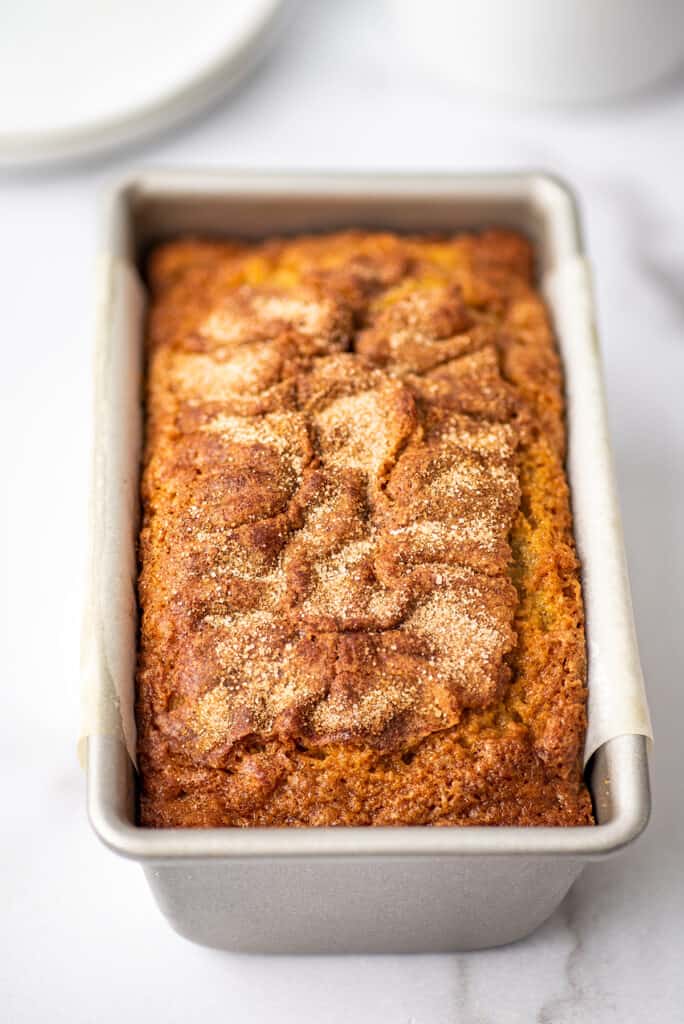
As promised, here is a cute little mini version of my favorite banana bread.

Small-batch Banana Bread
This mini version bakes in a 5.5 x 3-inch loaf pan (or can be baked as muffins in a muffin tin) and like my small-batch banana muffins , it can be made with just a single brown banana.
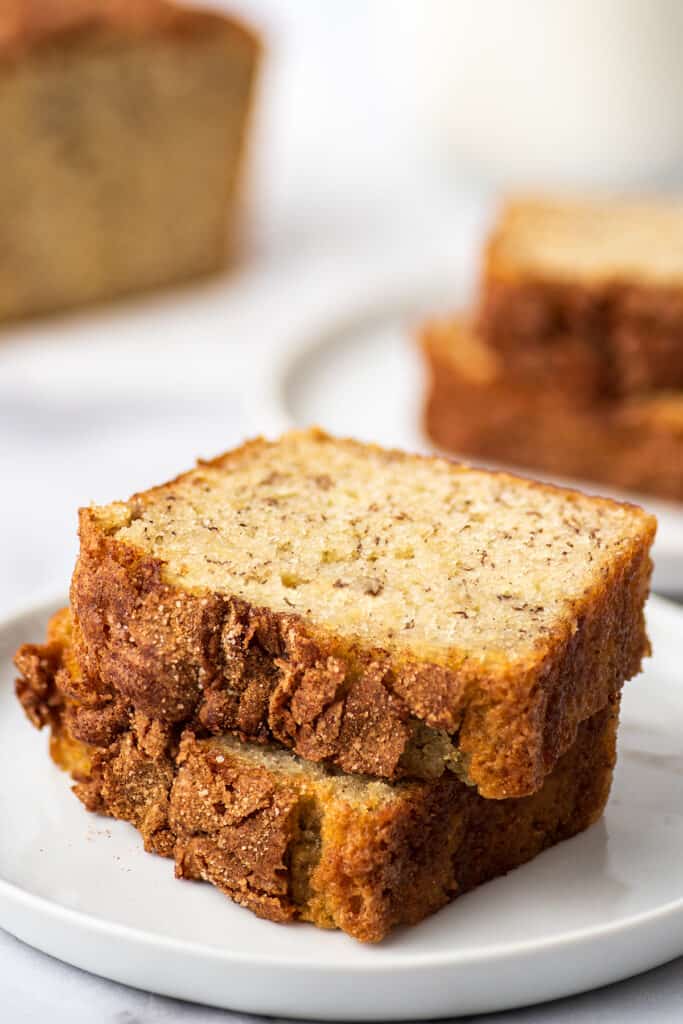
The bread is soft, moist, buttery, and just such a treat. And to make things even better, there’s a crinkly cinnamon sugar crust over the top that is just SO good.
Ingredient Notes


- One brown banana: You need just one brown banana for this recipe. If you have a banana, but it’s not quite brown enough for baking, check out my post on how to quickly ripen bananas .
- Butter: You can use salted or unsalted butter here, just make sure to read the recipe notes and add more or less salt depending on which you’re using.
- Cinnamon sugar: The cinnamon sugar crust, is optional (but highly recommended). If you’re not a huge fan of cinnamon or don’t want the extra sweetness, you can skip it.
How To Make One-banana Banana Bread


Combine Dry Ingredients: In a medium bowl, whisk together sugar, flour, baking powder, baking soda, nutmeg, and salt.
Combine most of the wet ingredients: In a separate medium bowl, mash the banana and whisk in the egg until well-combined. Pour banana mixture into the dry ingredients and mix until just-combined.
Add butter: Add melted butter, and mix until butter is incorporated into the batter. Don’t over mix, but there should not be melted butter remaining around the edges of the batter (note the way the batter looks in the last photo above).


Bake: Transfer the batter to your prepared loaf pan, leaving ¾-inch of space from the top of the pan (discard extra batter if there is too much). Sprinkle cinnamon sugar evenly over the top of the batter, and bake until a toothpick or knife inserted into the center of the loaf comes out clean.
Enjoy: Allow to cool in the pan for 15 to 20 minutes before removing and slicing.


I love this recipe, can I make a full-size version?
Absolutely! If you want to make a full-size loaf of this banana bread, go check out my post My Favorite Banana Bread .
How do I store this banana bread?
Store the bread tightly wrapped at room temperature for up to 3 days.
I don’t have a 5.5 x 3-inch loaf pan. What can I use instead?
Any mini loaf pan around that size will work, so if you have something that’s similar in size but not exact, feel free to use it. Just be sure to leave about ¾ of an inch of space from the top of the pan when you add your batter so it doesn’t overflow in your oven.
If you don’t own a mini loaf pan at all, these are the ones I own , or you can bake the batter in a muffin tin. It will make 5 to 6 banana muffins. Bake at 350°F for 17 to 22 minutes.

More Small-batch Breakfast Recipes
- Pancakes for One
- Homemade Mocha
- Cream Scones
- The Best Cinnamon Toast
More Banana Recipes
- Small-batch Chocolate Banana Muffins
- Banana Milkshake
- Banana Pancakes
- 20+ Banana Recipes to Use Up Your Brown Bananas
Ingredients
- ▢ ½ cup ( 100g ) granulated sugar
- ▢ ½ cup ( 60g ) all-purpose flour
- ▢ ¼ teaspoon ground nutmeg
- ▢ ¼ teaspoon baking powder
- ▢ ⅛ teaspoon baking soda
- ▢ ⅛ teaspoon salt *
- ▢ 1 medium overripe banana
- ▢ 1 large egg
- ▢ 3 tablespoons ( 42g ) salted butter melted*
Cinnamon Sugar Crust
- ▢ 1 teaspoon ( 4g ) granulated sugar
- ▢ ¼ teaspoon ground cinnamon
Instructions
Directions
- Preheat your oven to 350°F. Grease a mini loaf pan, line with parchment paper sling (optional), and set aside.
- In a medium bowl, whisk together sugar, flour, nutmeg, baking powder, baking soda, and salt.
- In a separate medium bowl, mash the banana and whisk in the egg until well-combined. Pour banana mixture into the dry ingredients and mix until just-combined.
- Add melted butter, and mix until butter is incorporated into the batter. Don’t over mix, but there should not be pools of butter remaining around the edges of the batter.
- Transfer the batter to your prepared loaf pan, leaving ¾ inch of space from the top of the pan (discard extra batter if there is too much).
Optional Cinnamon Sugar Crust
- In a small bowl, stir together sugar and cinnamon and sprinkle evenly over the top of the batter.
Bake
- Bake for 30 to 38 minutes, until a toothpick or knife inserted into the center of the loaf comes out clean.
- Allow to cool in the pan for 15 to 20 minutes before removing and slicing.
- Serve and enjoy.
Notes
This chicken bacon ranch pizza is a fun twist on traditional pizza night. Top your favorite pizza crust with ranch, chunks of juicy chicken, bacon, and lots of melty mozzarella for a quick and easy dinner that everyone will love.
Chicken bacon ranch pizza is one of my favorite clean-out-the fridge recipes. Have some leftover chicken? Perfect excuse to make a pizza! Bacon you need to use up? Put it on a pizza!! Half a bottle of ranch you’re tired of looking at? It’s pizza sauce now!
You can throw this pizza together with almost no effort, and because it’s pizza that involves bacon, ranch, and chicken, you know it’s going to be delicious.

What’s on a chicken bacon ranch pizza?
Chicken bacon ranch pizza toppings vary from restaurant to restaurant and household to household, but they always start with a ranch base instead of pizza sauce, chicken, and bacon. The most popular other toppings are onions, tomatoes, and peppers.
Ingredient Notes
- Cooked chicken: Leftover cooked chicken from a roasted chicken works great here or grab a rotisserie chicken from the store and chop up the breast meat for your pizza. If you have some raw chicken breasts in your fridge, I also included instructions for my favorite way to cook chicken to use in recipes in the recipe notes below.
- Ranch dressing: Use your favorite ranch as a base. Any brand will work, including homemade.
- Bacon: When making bacon for your pizza, cook it until it is just crispy, not too browned and crunchy. Since the cooked bacon will be going in the oven with the pizza, you don’t want it to become overcooked and hard.
How to Make a Chicken Bacon Ranch Pizza at Home


- Spread ranch over your prepared pizza dough. Top the dough with half of the cheese.
- Add the rest of the toppings and then remaining cheese.
- Bake according to your pizza dough instructions. If your dough didn’t come with instructions, bake at 400°F until crust is browned and cheese is bubbly and melted.
What can I use instead of pizza crust?
Don’t have pizza crust? Try it with one of these crust alternatives:


Can I freeze this pizza?
Yes. You can freeze the pizza baked or unbaked. Store slices in a freezer bag or double wrap the entire pizza in plastic wrap and then foil. Store in the freezer for up to 3 months.
To reheat, unwrap and bake in a 400°F oven until heated through.
Can I assemble the pizza ahead of time and bake it later?
Maybe. If you’re using a yeasted dough, you’re going to want to bake the pizza right away unless your dough recipe says otherwise. If using a premade store-bought crust, it shouldn’t be a problem. Assemble your pizza up to 24 hours in advance, store covered, and bake according to the recipe instructions.


More Pizza Recipes
- The Best Pizza Sauce
- BBQ Chicken Pizza
- Naan Pizza

Ingredients
- ▢ 1 medium-to-large pizza crust unbaked
- ▢ 1 tablespoon olive oil
- ▢ ⅓ cup ranch
- ▢ 1½ cups (6oz) shredded mozzarella cheese
- ▢ 1½ cups cubed or shredded cooked chicken *
- ▢ ½ red onion onion cut in half root to tip, sliced, and layers separated
- ▢ 1 to 2 roma tomatoes diced, optional
- ▢ 6 slices cooked bacon chopped*
Instructions
- Preheat oven according to crust package or pizza crust recipe instructions or 400°F.
- Brush unbaked pizza crust with a light layer of olive oil and transfer crust to a lightly greased or parchment paper-lined baking sheet.
- Spread ranch over the crust, leaving a 1-inch border around the edges.
- Top crust with half of the mozzarella cheese, followed by the cooked chicken, red onion slices, tomatoes, and bacon.
- Sprinkle remaining half of the mozzarella over the top and bake pizza according to crust package or pizza crust recipe instructions, until the cheese is melted and crust is browned.
- Slice, serve, and enjoy!
Notes
- Start with 12 ounces of raw chicken, about 1 large chicken breast. Generously salt and pepper both sides of your chicken breast.
- Heat a medium skillet with a lid over medium-high heat. Grease with cooking spray or a light drizzle of olive oil. Place chicken in the pan and cook for 2 to 3 minutes, until well-browned. Flip chicken and repeat. Once both sides are browned, add about 1/2-inch of filtered water to the bottom of the pan. Cover the skillet and turn heat down to medium.
- Cook for 8 to 12 minutes, until chicken is cooked through and an instant-read thermometer inserted into the center of the breasts reads 165°F (170°F if you’re going to shred the chicken). Check occasionally to make sure the water hasn’t all evaporated, adding more if necessary. Larger breasts will take longer to cook, so be sure to check for doneness before removing from heat.
- Transfer chicken to a cutting board and allow it to rest for 10 minutes before slicing or shredding.
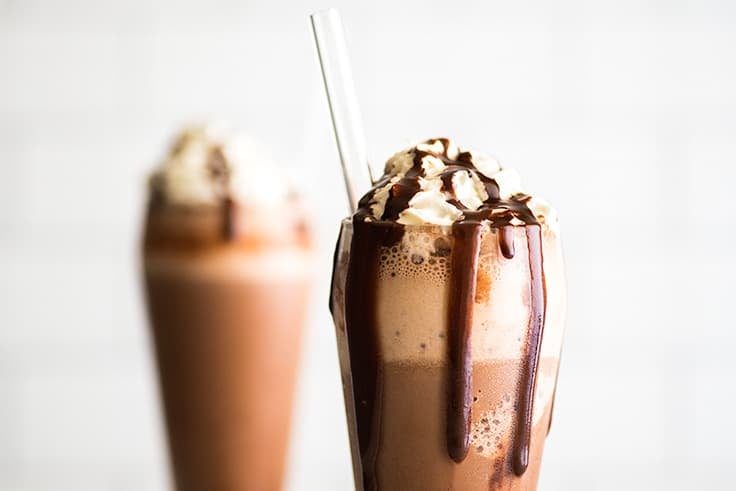
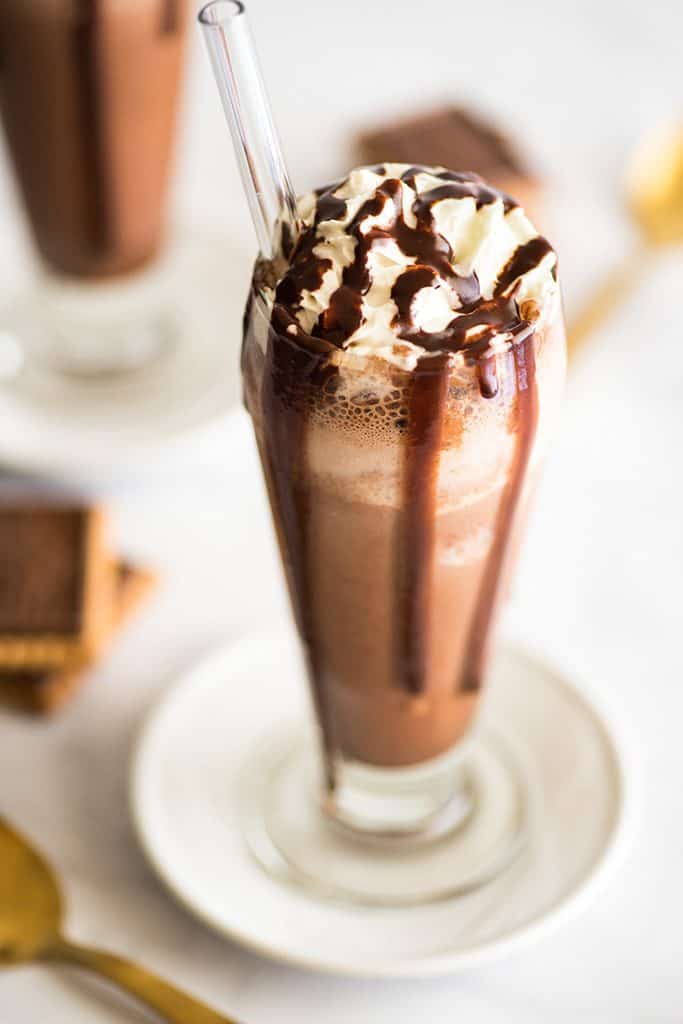
Frozen Hot Chocolate is the perfect icy and refreshing warm-weather treat and can be made with just five ingredients and five minutes.
Have you ever made frozen hot chocolate? If you haven’t, we should fix that today.
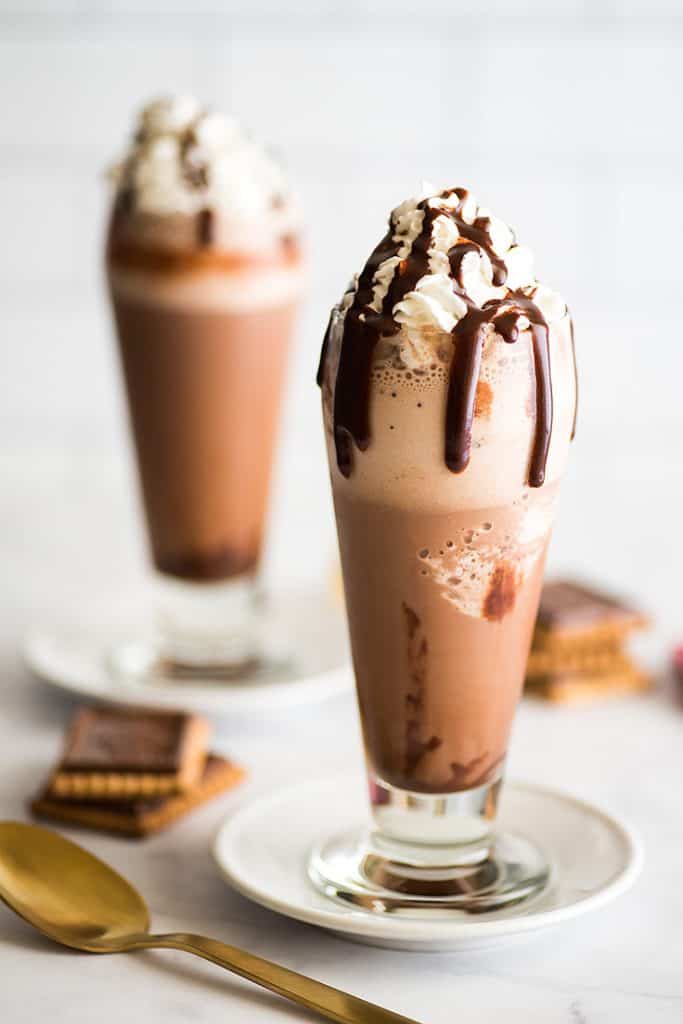
It’s everything you love about a creamy glass of hot chocolate , but iced so you can still enjoy (frozen) hot chocolate even when it’s 100 degrees outside. Best of all, frozen hot chocolate is super simple to throw together at home since it’s literally just hot chocolate ingredients blended with ice.
(You could also technically call it frozen chocolate milk since chocolate milk is just cold hot chocolate, but that name’s not nearly as catchy.)

What does frozen hot chocolate taste like?
In taste and texture, frozen hot chocolate falls somewhere between chocolate milk and a chocolate milkshake . It’s thicker and icier (obviously) than chocolate milk, but not quite as rich and nowhere near as calorie-laden as a milkshake.
In my mind, it’s the perfect warm-weather treat. Icy and refreshing, but not so heavy you want to take a nap afterward.
Tool and Ingredient Notes
- Blender: A high-powered blender is going to give you the best blended consistency (I used a Vitamix for the drinks you see in the photos), but any old blender will get the job done.
- Cocoa powder: Both natural and Dutch-process cocoa powder will work for this recipe, but Dutch-process cocoa powder is considered the gold-standard for hot chocolate.
- Milk: Any milk can be used here (plant-based works just fine). The higher fat the milk, the richer your drink will be. For an extra rich and creamy drink, try substituting half and half or heavy cream for some of the milk.

How to Make Frozen Hot Chocolate
- Make Chocolate Syrup: In your microwave, heat water until steaming and then stir in cocoa powder and sugar until completely smooth. Then stir in half of the milk to cool the syrup down.
- Blend: In your blender, combine ice, the chocolate milk mixture, and remaining cup of milk, and blend until well-combined and frosty.
- Serve and Enjoy: Pour into glasses, top with whipped cream and optional fudge sauce , and enjoy!
Variations
- Banana Frozen Hot Chocolate: Replace 1 cup of the ice with a frozen banana.
- Peanut Butter Frozen Hot Chocolate: Add a heaping spoonful (or two) of peanut butter to the blender before blending.
- Coffee Frozen Hot Chocolate: Replace 2 cups of the ice with coffee ice cubes .
- Switch Out the Toppings: Try Peanut Butter Sauce or Nutella Sauce.
Can I make this ahead of time?
Not really. While you can store leftovers in the refrigerator, the pulverized ice in the drink will start to melt and the drink will no longer be thick and frosty.
Can I make this without a blender?
Sorry, no. This drink really needs to be blended with ice. If you’re craving something cold and chocolatey, go make a cup of homemade chocolate milk . It will totally satisfy those chocolate cravings.
Or if you have some ice cream, you can make a milkshake without a blender .

More Frosty Summer Drinks
- How to Make a Milkshake
- Easy Iced Mocha
- Vanilla Milkshake
- Iced White Chocolate Mocha
- Strawberry Milk
Frozen Hot Chocolate Recipe Notes
- This recipe will make two very generous servings, slightly more than enough to fill two 16-ounce mason jars, or three to four smaller cups.
- As written, this recipe is not too sweet. If you like your frozen drinks really sweet, add a bit more sugar.

Ingredients
Fudge Sauce
- ▢ 2 tablespoons ( 25g ) granulated sugar
- ▢ 1 heaping tablespoon ( 8g ) cocoa powder
- ▢ 1 tablespoon ( 14g ) butter
- ▢ 2 tablespoons milk, half and half, or heavy cream
- ▢ 1/8 teaspoon vanilla optional
Frozen Hot Chocolate
- ▢ 1/4 cup and 1 tablespoon ( 63g ) granulated sugar *
- ▢ 3 tablespoons ( 15g ) cocoa powder
- ▢ 1/4 cup filtered water
- ▢ 2 cups milk any percentage, divided
- ▢ 3 cups ice or 2 1/2 cups crushed ice*
- ▢ Whipped cream optional
Instructions
Fudge Sauce
- In a small bowl, stir together the sugar and cocoa powder and set aside.
- In a 1-quart saucepan, melt butter over medium heat. Whisk in milk. Add cocoa and sugar mixture and whisk until smooth. Continue to whisk continuously, until mixture begins to bubble.
- Remove from heat and stir in vanilla (if desired). Allow to sit and thicken while you make your frozen hot chocolate.
Frozen Hot Chocolate
- In a small bowl, stir together sugar and cocoa powder, making sure to mix well and crush any cocoa powder lumps.
- In a 16-ounce mason jar or large, microwave-safe mug, microwave water for 30 seconds to 1 minute, until steaming. Stir in cocoa powder and sugar mixture until smooth. Stir in 1 cup of the milk.
- Combine ice, cocoa and milk mixture, and remaining 1 cup of milk in your blender and blend on high until smooth.
- Divide frozen hot chocolate between glasses, top with optional whipped cream and chocolate syrup. Serve and enjoy!
Notes
This quick and easy one-banana banana bread recipe can be made with just one banana and a few pantry staples. It bakes up moist and sweet with a decadent cinnamon sugar crust.
Last week, I shared Dominique Ansel’s banana bread (AKA my favorite banana bread recipe in the entire world) with you, and promised in the post that I’d make a mini version for all you small-batch bakers out there.
As promised, here is a cute little mini version of my favorite banana bread.
Small-batch Banana Bread
This mini version bakes in a 5.5 x 3-inch loaf pan (or can be baked as muffins in a muffin tin) and like my small-batch banana muffins , it can be made with just a single brown banana.
The bread is soft, moist, buttery, and just such a treat. And to make things even better, there’s a crinkly cinnamon sugar crust over the top that is just SO good.
Ingredient Notes
- One brown banana: You need just one brown banana for this recipe. If you have a banana, but it’s not quite brown enough for baking, check out my post on how to quickly ripen bananas .
- Butter: You can use salted or unsalted butter here, just make sure to read the recipe notes and add more or less salt depending on which you’re using.
- Cinnamon sugar: The cinnamon sugar crust, is optional (but highly recommended). If you’re not a huge fan of cinnamon or don’t want the extra sweetness, you can skip it.
How To Make One-banana Banana Bread
Combine Dry Ingredients: In a medium bowl, whisk together sugar, flour, baking powder, baking soda, nutmeg, and salt.
Combine most of the wet ingredients: In a separate medium bowl, mash the banana and whisk in the egg until well-combined. Pour banana mixture into the dry ingredients and mix until just-combined.
Add butter: Add melted butter, and mix until butter is incorporated into the batter. Don’t over mix, but there should not be melted butter remaining around the edges of the batter (note the way the batter looks in the last photo above).
Bake: Transfer the batter to your prepared loaf pan, leaving ¾-inch of space from the top of the pan (discard extra batter if there is too much). Sprinkle cinnamon sugar evenly over the top of the batter, and bake until a toothpick or knife inserted into the center of the loaf comes out clean.
Enjoy: Allow to cool in the pan for 15 to 20 minutes before removing and slicing.
I love this recipe, can I make a full-size version?
Absolutely! If you want to make a full-size loaf of this banana bread, go check out my post My Favorite Banana Bread .
How do I store this banana bread?
Store the bread tightly wrapped at room temperature for up to 3 days.
I don’t have a 5.5 x 3-inch loaf pan. What can I use instead?
Any mini loaf pan around that size will work, so if you have something that’s similar in size but not exact, feel free to use it. Just be sure to leave about ¾ of an inch of space from the top of the pan when you add your batter so it doesn’t overflow in your oven.
If you don’t own a mini loaf pan at all, these are the ones I own , or you can bake the batter in a muffin tin. It will make 5 to 6 banana muffins. Bake at 350°F for 17 to 22 minutes.
More Small-batch Breakfast Recipes
- Pancakes for One
- Homemade Mocha
- Cream Scones
- The Best Cinnamon Toast
More Banana Recipes
- Small-batch Chocolate Banana Muffins
- Banana Milkshake
- Banana Pancakes
- 20+ Banana Recipes to Use Up Your Brown Bananas

Ingredients
- ▢ ½ cup ( 100g ) granulated sugar
- ▢ ½ cup ( 60g ) all-purpose flour
- ▢ ¼ teaspoon ground nutmeg
- ▢ ¼ teaspoon baking powder
- ▢ ⅛ teaspoon baking soda
- ▢ ⅛ teaspoon salt *
- ▢ 1 medium overripe banana
- ▢ 1 large egg
- ▢ 3 tablespoons ( 42g ) salted butter melted*
Cinnamon Sugar Crust
- ▢ 1 teaspoon ( 4g ) granulated sugar
- ▢ ¼ teaspoon ground cinnamon
Instructions
Directions
- Preheat your oven to 350°F. Grease a mini loaf pan, line with parchment paper sling (optional), and set aside.
- In a medium bowl, whisk together sugar, flour, nutmeg, baking powder, baking soda, and salt.
- In a separate medium bowl, mash the banana and whisk in the egg until well-combined. Pour banana mixture into the dry ingredients and mix until just-combined.
- Add melted butter, and mix until butter is incorporated into the batter. Don’t over mix, but there should not be pools of butter remaining around the edges of the batter.
- Transfer the batter to your prepared loaf pan, leaving ¾ inch of space from the top of the pan (discard extra batter if there is too much).
Optional Cinnamon Sugar Crust
- In a small bowl, stir together sugar and cinnamon and sprinkle evenly over the top of the batter.
Bake
- Bake for 30 to 38 minutes, until a toothpick or knife inserted into the center of the loaf comes out clean.
- Allow to cool in the pan for 15 to 20 minutes before removing and slicing.
- Serve and enjoy.
Notes

One-banana Banana Bread
Ingredients
- ½ cup ( 100g ) granulated sugar
- ½ cup ( 60g ) all-purpose flour
- ¼ teaspoon ground nutmeg
- ¼ teaspoon baking powder
- ⅛ teaspoon baking soda
- ⅛ teaspoon salt *
- 1 medium overripe banana
- 1 large egg
- 3 tablespoons ( 42g ) salted butter melted*
Cinnamon Sugar Crust
- 1 teaspoon ( 4g ) granulated sugar
- ¼ teaspoon ground cinnamon
Instructions
Directions
- Preheat your oven to 350°F. Grease a mini loaf pan, line with parchment paper sling (optional), and set aside.
- In a medium bowl, whisk together sugar, flour, nutmeg, baking powder, baking soda, and salt.
- In a separate medium bowl, mash the banana and whisk in the egg until well-combined. Pour banana mixture into the dry ingredients and mix until just-combined.
- Add melted butter, and mix until butter is incorporated into the batter. Don’t over mix, but there should not be pools of butter remaining around the edges of the batter.
- Transfer the batter to your prepared loaf pan, leaving ¾ inch of space from the top of the pan (discard extra batter if there is too much).
Optional Cinnamon Sugar Crust
- In a small bowl, stir together sugar and cinnamon and sprinkle evenly over the top of the batter.
Bake
- Bake for 30 to 38 minutes, until a toothpick or knife inserted into the center of the loaf comes out clean.
- Allow to cool in the pan for 15 to 20 minutes before removing and slicing.
- Serve and enjoy.
