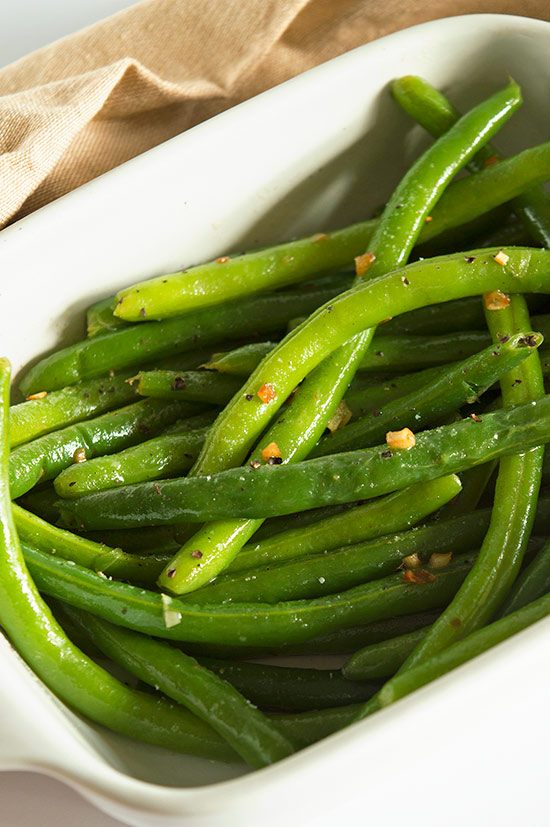
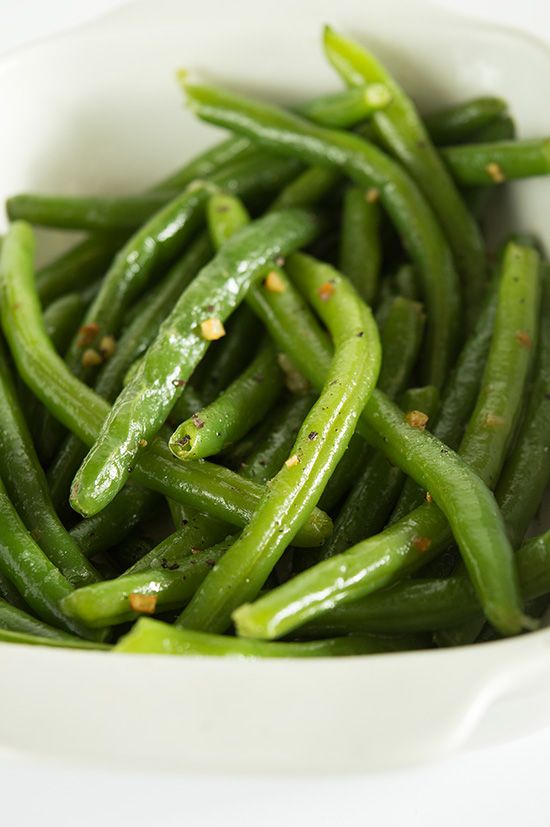
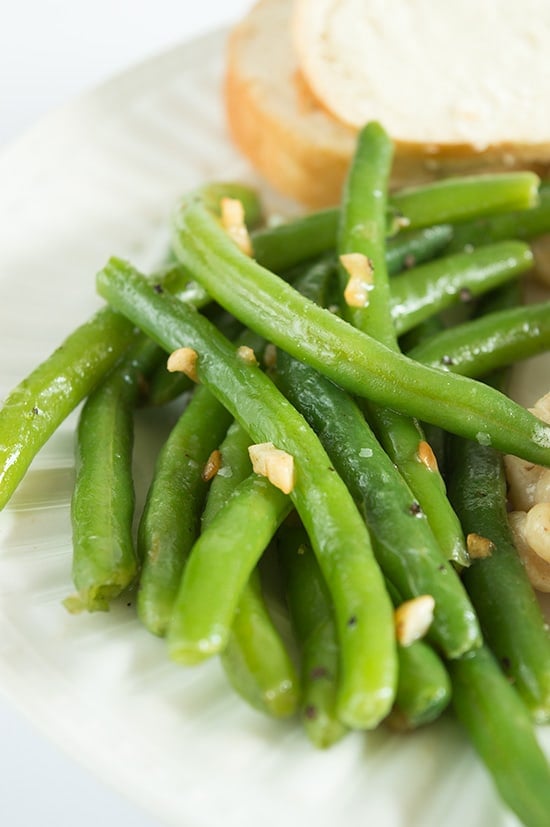
These Butter and Garlic Green Beans are perfectly cooked and tossed with butter and toasted garlic. They’re a quick, easy, and delicious vegetable side dish.
Ready for your new go-to no-fail veggie side dish? I’d like to meet these perfect, wonderful garlic green beans that are ABSOLUTELY FOOLPROOF.
They’re boiled, so you don’t have to worry about burning them while they cook. You can make them with pre-trimmed green beans, so no cutting required if you don’t want to.
And, best of all, if your timing is off and the green beans finish cooking 20 minutes before your main dish, they get tossed in a hot pan with butter right before serving, so they’ll heat right back up!

Like I said, foolproof.
Ingredients
- Fresh green beans: You can use regular green beans or haricots verts. If using the latter, just adjust the simmering time as needed since they’re thinner and will cook a bit quicker.
- Butter: Salted or unsalted butter will work just fine.
- Fresh garlic: If you don’t feel like mincing the garlic, you can use a garlic press, but the little cubes of minced garlic are really delicious in this, so if you can mince the garlic, do!
- Salt and pepper: A little salt and pepper to taste is all the spicing up these green beans really need.
How to prepare green beans?
To prep your beans, wash them and use a sharp knife to trim the ends.
To trim the green beans, grab a handful of beans, line the ends up, and slice them all off at once. Line the beans up on the other side and trim the second side. Once all the beans are trimmed, they’re ready to go.
If prepping in advance, trimmed green beans can be stored in an airtight container for up to 2 days before cooking.

How to cook fresh green beans
- Transfer your prepared green beans to a medium pot and add just enough cold water to cover them. Add a couple good pinches of salt and bring to a simmer. Cook for 5 to 10 minutes, until they reach your preferred level of doneness.
- Drain and set aside.
- Just before serving, melt butter in a large skillet and toast garlic for 30 seconds to 1 minute, until lightly golden. Add green beans and toss until they’re well coated in the butter and garlic and reheated. Add salt and pepper to taste.
What to serve with garlic green beans?
Everything! Sauteed green beans go with practically everything, but to start you off, I’d recommend:
- Tri-tip
- Country-style Pork Ribs
- Baked Ziti
- Easy Tomato Soup
Can I use canned/frozen green beans?
Yes. Warm/cook the beans according to package instructions and then toss them with the melted butter and garlic.

More Green Bean Recipes
- Roasted Green Beans
- Green Beans in the Microwave
- Green Beans With Bacon

Ingredients
- ▢ 1 pound green beans trimmed and washed
- ▢ 2 cloves garlic minced*
- ▢ 1 tablespoon butter
- ▢ Salt and pepper to taste
Instructions
- In a medium pot, cover green beans with cold water and bring to a boil. Lower the heat and simmer for 5-10 minutes, until they reach your preferred level of doneness. Drain and set aside.
- Melt butter over medium heat in a large skillet. Add the garlic and toast until golden, watching carefully to ensure it doesn’t burn.
- Add the cooked green beans to the pan, sprinkle with salt and pepper, and toss to coat (and reheat if they’ve cooled).
- Serve and enjoy!
Notes
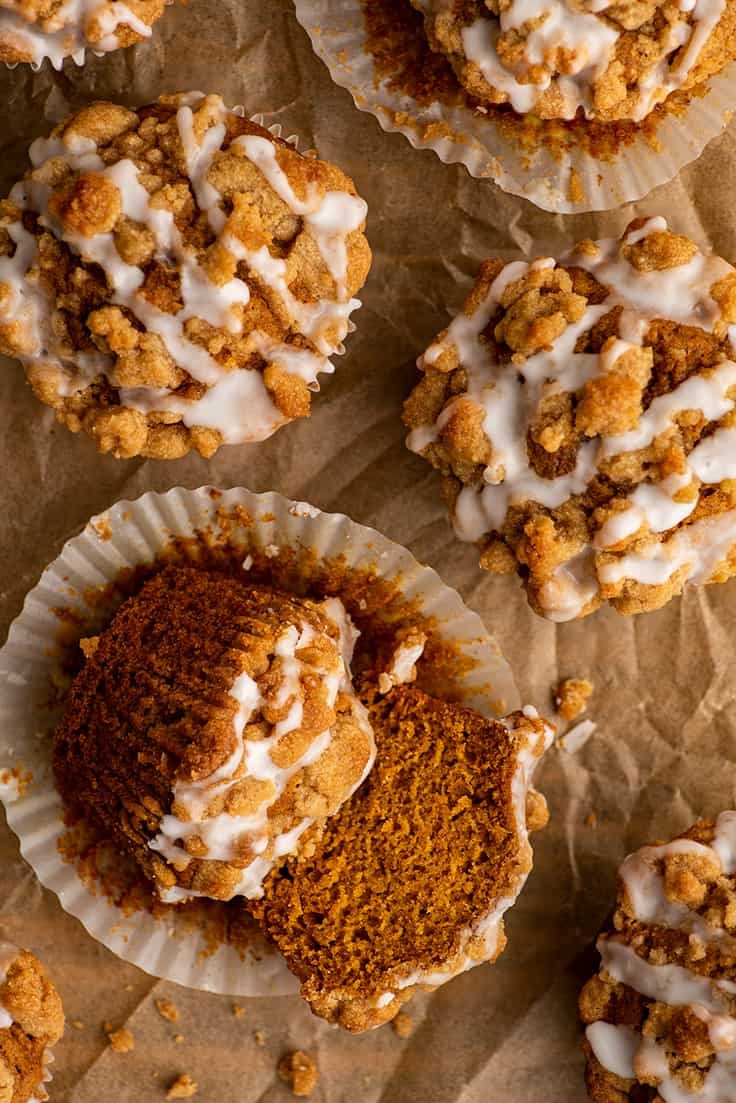
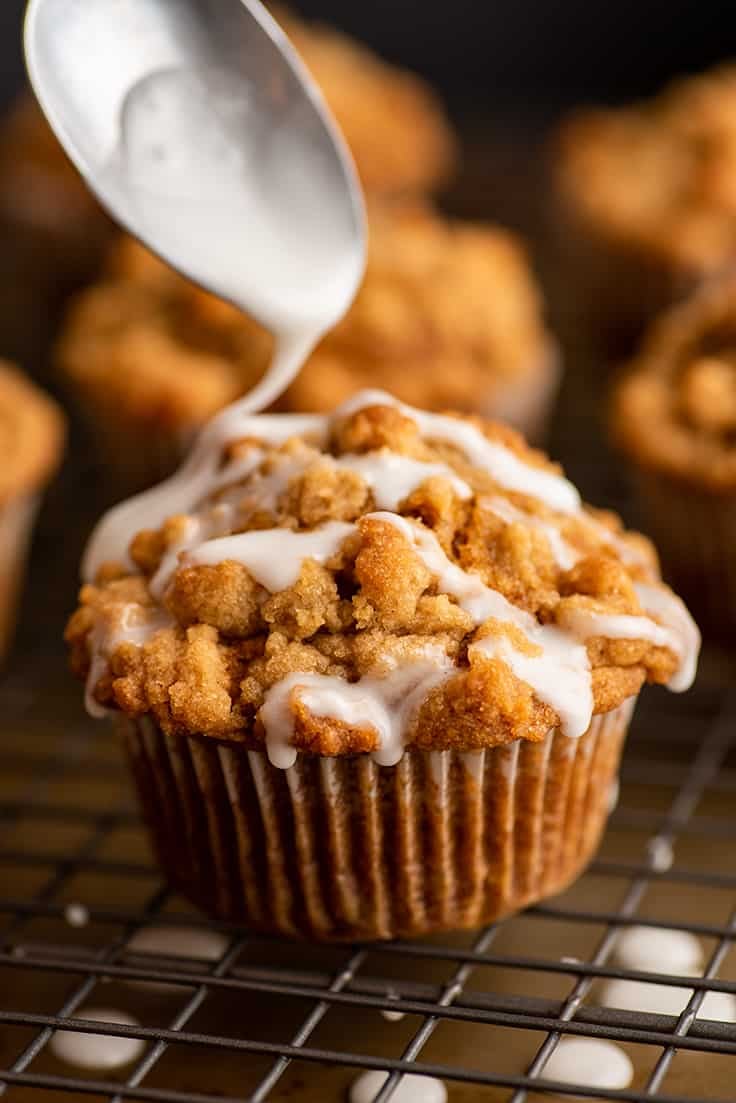
These perfectly soft and moist pumpkin streusel muffins are topped with crumbly, crunchy brown sugar streusel and a quick two-ingredient glaze.
Friend, if you’re a fan of muffins, pumpkin, streusel, or all of the above, please make these muffins right now. You’re going to love them so much.
They’re so easy to toss together and bake up with the most beautiful streusel-covered tops. They make your kitchen smell amazing and you’ll feel like a total baking genius when you take your first bite.
This recipe will make eight muffins so there are just enough to share if you really want to or keep them all for yourself if you don’t. 😉


Ingredients
- Baking staples: The bulk of the ingredients for these muffins is baking staples you probably already have in your cupboard: flour, brown and granulated sugars, butter, baking soda, salt, and an egg.
- Pumpkin pie spice: For convenience sake, this recipe calls for pumpkin pie spice , but if you don’t have any, not a problem. Substitute 1/2 teaspoon cinnamon, 1/8 teaspoon ground nutmeg, 1/8 teaspoon ground ginger, and a generous pinch of ground cloves or allspice
- Vegetable oil: Using vegetable oil in the muffins (along with the pumpkin puree) helps give these muffins their moist and dreamy texture.
- Pumpkin puree: Pumpkin puree is pure pureed pumpkin. You can typically find it in the baking aisle near the premade pie crusts and pie filling. Double check the can to make sure you’re getting pumpkin puree and NOT pumpkin pie filling! The recipe won’t use up an entire can of pumpkin puree, so see my post What to Do With Leftover Pumpkin Puree for storage tips and recipe ideas for the leftovers.

How to Make Pumpkin Streusel Muffins
- Make the streusel by combining cool room temperature butter, flour, and brown sugar in a bowl. The butter should be soft enough to smoosh with a little force but not at all melty or greasy (too melty and it will be difficult to work with). Use your fingers (or a fork) to mix the ingredients until they clump and there is no dry flour or sugar at the bottom of the bowl. Put the streusel in the freezer while you finish the rest of your muffins.
- In a medium bowl, mix the dry ingredients. And in a large bowl mix the wet ingredients. Stir the dry ingredients into the wet using a wooden spoon until just combined. Do not over mix or your muffins can come out tough!
- Spoon the batter into lined muffin tin cups and drop streusel over the top. If the streusel crumbles are too large, gently break them up. If they’re too small, squeeze them together so they form larger pieces.
- To give the muffins nice high muffin tops, they start baking at 425°F and then drop down to 350°F about halfway through baking. They’re done when a toothpick inserted into the center of the muffins comes out clean or with just a few dry crumbs.
- To make the glaze, mix powdered sugar and milk together until you get a glaze that is just pourable. Don’t add too much milk or your glaze won’t set. You can glaze the muffins while warm if you’d like, but if you want really defined perfect lines of glaze, wait until they’re mostly cooled and keep your glaze on the thicker side.
- Glaze the muffins, allow them about 15 minutes for the glaze to set, and enjoy!

Small-batch Pumpkin Muffin Variations
Not feeling streusel today? Skip it and try…
- No topping: These muffins are completely delicious plain or topped with a spread of butter.
- Cinnamon sugar: For cinnamon sugar topped muffins, generously brush the tops with melted butter and then dip in cinnamon sugar (use 1/4 teaspoon of cinnamon to 1/4 cup of sugar).
- Glazed: Double the glaze called for in the recipe and dip the muffin tops in the glaze. Be sure to give them time for the glaze to set.
How to store pumpkin muffins?
Store muffins at room temperature in an airtight container for up to 3 days. The glaze can become slightly sticky after storing, so if making muffins in advance for company, it’s best to glaze them the day you plan on serving them.
Can I freeze pumpkin streusel muffins?
Yes! These muffins freeze quite well, streusel, glaze, and all. Once the glaze is set, wrap muffins individually in plastic wrap and store them in an airtight container or freezer bag in the freezer for up to 2 months.
To defrost, unwrap the muffin from the plastic wrap (the paper liner can stay on) and set it on the counter for 15 minutes to half an hour.
Can I double or triple this recipe?
Yes. This recipe doubles or triples with no changes needed.
More Small-batch Muffin Recipes
- Small-batch Banana Muffins
- Small-batch Chocolate Banana Muffins
- Small-batch Chocolate Chocolate Chip Muffins
- Small-batch Blueberry Muffins
- Small-batch Apple Crumb Muffins


More Fall Recipes
- Dutch Apple Pie
- Pumpkin Snickerdoodles (Small-batch)
- Pumpkin Cupcakes (Small-batch)
- Cinnamon Sugar Pumpkin Donuts
- Pumpkin Pancakes
- Small No-bake Marshmallow Pumpkin Cheesecake

Ingredients
Streusel
- ▢ 1/4 cup + 2 tablespoons ( 45g ) all-purpose flour
- ▢ 1/4 cup + 1 tablespoon ( 63g ) brown sugar
- ▢ 3 tablespoons ( 42g ) salted butter softened to cool room temperature*
Muffins
- ▢ 1 cup ( 120g ) all-purpose flour measured by weight or using the spoon and sweep method*
- ▢ 1/2 teaspoon baking soda
- ▢ 1 teaspoon pumpkin pie spice or 1/2 teaspoon ground cinnamon, 1/8 teaspoon ground nutmeg, 1/8 teaspoon ground ginger, and a generous pinch of ground cloves or allspice
- ▢ 1/4 teaspoon salt
- ▢ 1/2 cup ( 100g ) granulated sugar
- ▢ 1/4 cup ( 50g ) brown sugar
- ▢ 1 large egg
- ▢ 1/4 cup vegetable oil
- ▢ 3/4 cup ( 183g ) pumpkin puree
Glaze
- ▢ 1/2 cup ( 60g ) powdered sugar
- ▢ 1 1/2 teaspoons milk any percentage, plus more as needed
Instructions
Streusel
- Preheat your oven to 425°F and line a muffin pan with 8 liners.
- In a medium bowl, combine flour, brown sugar, and cool room temperature butter.
- Use a fork or your fingers to mix the ingredients until they clump and no dry flour or sugar is left at the bottom of the bowl.
- Place the streusel in the freezer while you make the rest of your muffins.
Muffins
- In a small bowl, whisk together flour, baking soda, pumpkin pie spice, and salt. Set aside.
- In a large bowl, combine granulated and brown sugars, egg, vegetable oil, and pumpkin puree. Whisk until smooth.
- Switch to a wooden spoon, and add the flour mixture to the wet ingredients. Stir until just combined.
- Divide the batter between the prepared cupcake cups, filling about 3/4 of the way full.
- Drop streusel over the batter, dividing it equally between the muffins. If the streusel pieces are too large, gently break them up. If they’re too small, smash them together to form larger crumbs.
- Bake muffins in the center of the oven for 8 minutes before dropping the temperature to 350°F. Bake for an additional 8 to 12 minutes, until a toothpick inserted into the center of the muffins comes out clean or with just a few crumbs.
- Cool muffins in the tin for 10 minutes and then transfer to a cooling rack.
Glaze
- Muffins can be glazed warm, but for thick, defined lines of icing, wait until they are almost completely cooled. In a small bowl, stir together powdered sugar and milk. If needed, add milk by the 1/4 teaspoon, adding just enough to get a drizzling consistency.
- Drizzle glaze over muffins (you may have some leftover), and allow 15 minutes for the icing to set.
- Serve and enjoy!
Notes
This easy tomato soup is the perfect quick and easy lunch or dinner. To make it, you just need one can of tomatoes, a handful of pantry staples, and less than half an hour.
Friend, this is some really good, really easy tomato soup.
It’s sharp and tangy with just enough cream to take the edge off and add a really satisfying richness. It tastes like something whipped up in a charming bistro kitchen, but is so, so easy to make in yours.


You just need one can of tomatoes (crushed, cubed or whole all work fine), a few pantry staples, an immersion or countertop blender, and you’re 25-ish minutes away from some marvelous soup.
A Recipe for One or Two
The recipe makes a little over 1½ cups of soup, which is one very large serving or the perfect amount to split with someone when served alongside a grilled cheese sandwich or homemade panini.
I say go with option two, because there’s nothing like dipping toasty bread and cheese in homemade soup no matter what the weather is like outside.


Ingredients
- Butter: Salted or unsalted butter will work fine here
- Garlic and red pepper flakes: Garlic and red pepper flakes help spice up the soup. You can skip the red pepper flakes if you don’t have any (though are you sure you don’t have a packet leftover from pizza delivery floating around your kitchen somewhere?). The red pepper can create some real heat, so add as much or as little as you’d like.
- Canned tomatoes (whole, cubed, or crushed): This soup is designed to be made with any sort of canned tomatoes you have on hand. If using whole or diced tomatoes, you’ll just cook them slightly longer to help them break down.
- Chicken broth or water: Chicken broth or water helps to thin the soup out to your desired consistency since liquid will evaporate from the tomatoes as they cook.
- Heavy cream: Heavy cream is the secret hero of this dish. It adds a creamy richness to the soup and helps mellow out the intense tang of the tomatoes. If you don’t have heavy cream, sour cream can be substituted (just add to taste). This recipe won’t use up an entire carton of heavy cream so check out my post What to Do With Leftover Whipping Cream for ideas on what to do with the leftovers.
- Salt and pepper: Don’t skimp on the salt!! It makes such a difference. Canned tomatoes vary wildly in saltiness, so you may need quite a bit or very little depending on the brand and whether you use salted chicken broth or water.
How to Make Homemade Tomato Soup
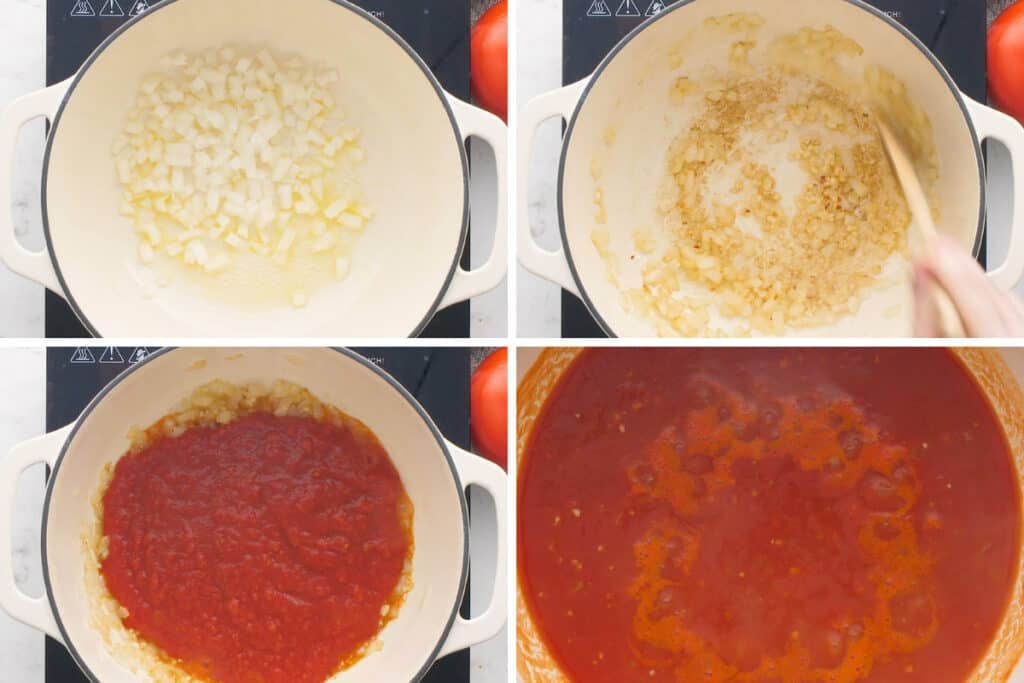

Melt butter and cook onions until softened. You don’t want to brown the onions, so make sure you’re cooking them over a nice medium heat and turn the heat down if at any time they begin to darken instead of soften.
Add garlic and red pepper flakes and cook until golden and aromatic. This helps bring out the flavor of the garlic and pepper flakes before you add the rest of the ingredients.
Add tomatoes and broth/water, bring to a simmer, and cook for about 15 minutes.
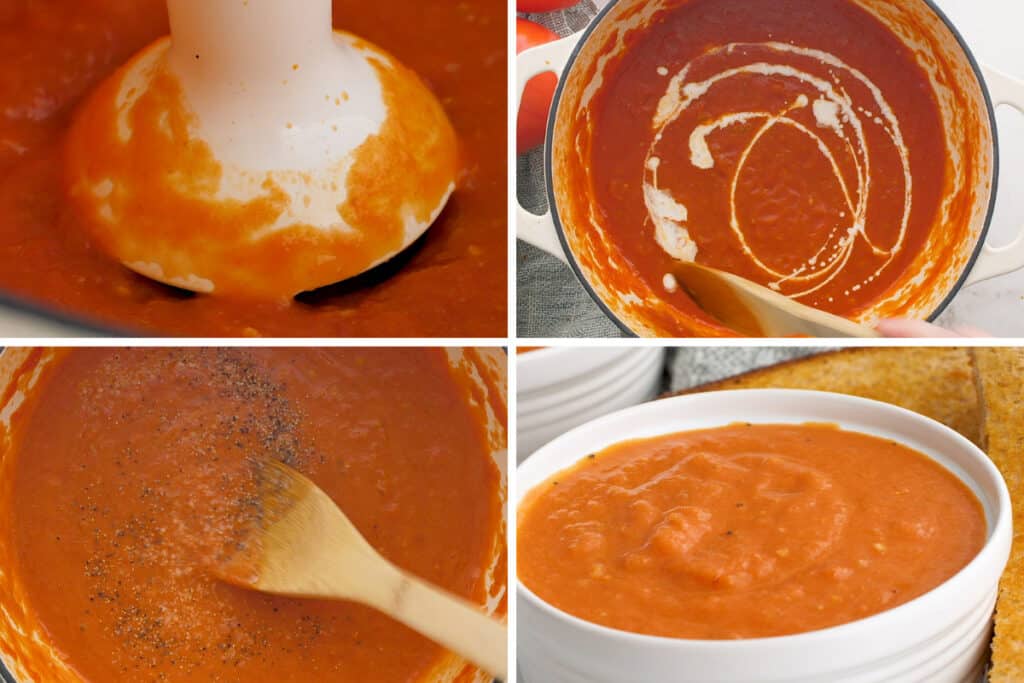

Use an immersion blender or countertop blender to blend the soup until smooth. If using a countertop blender, be sure to cool the soup slightly before blending so it’s safe to handle.
Stir in heavy cream. If the soup is thicker than you’d like, stir in just a bit of chicken broth or water. Then add salt and pepper to taste.
Variations & Topping Ideas
- Basil tomato soup: Add 5 chopped fresh basil leaves to the soup before blending.
- Tortellini tomato soup: While your soup cooks, cook 1 cup of tortellini in a separate pot. Drain and add to tomato soup just before serving.
- Croutons: Top your soup with croutons, store-bought or homemade!
Immersion Blender Notes
I always use an immersion blender for this soup, it purees the tomatoes and onions but still leaves you with a bit of texture, which I like. If you prefer a perfectly smooth tomato soup, use a regular high-powered blender .
You may have to tilt the pot slightly to fully process all the soup. Be careful blending and always keep the blades completely submerged so you don’t splatter hot soup all over!
Can you freeze tomato soup?
Yes! Tomato soup freezes beautifully.
To freeze the soup, allow it to mostly cool and then transfer it to a freezer bag or airtight container. Freeze and store for up to 2 months.
To reheat the soup, defrost in the refrigerator or submerge bag with frozen soup in a bowl of warm water for about 10 minutes (make sure there are no holes in the bag first!!) and then reheat in the microwave or on the stove.
For more tips and tricks on freezing soup, check out my post How to Freeze Soup .
What to serve with tomato soup?
The perfect tomato soup pairing is a grilled cheese sandwich (I’m partial to this pesto grilled cheese version myself). It’s also delicious with just about any sandwich or panini .
Simple roast broccoli , roasted asparagus , or parmesan zucchini would be the perfect veggie complement to the soup.


Can you make tomato soup without a blender?
You can make this soup without a blender if you’re using pureed tomatoes to start. It’s going to be a pretty chunky soup, but if you like your soup with plenty of texture, go for it. Just be sure to dice your onions small at the start.
Can I double this recipe?
Yes! I almost always double this recipe when cooking it so I can freeze the leftovers. To double the recipe ingredients, hover over the serving size or click if you’re on mobile, and slide the slider. No other cooking changes are needed.
More Easy Soup Recipes
- Ham and Potato Soup
- Chicken Carcass Soup
- Creamy Chicken Noodle Soup
- Cheesy Sausage Potato Soup
- Quick Chicken Tortellini Soup

Ingredients
Special Equipment
- ▢ Immersion blender OR
- ▢ Countertop blender
Tomato Soup for Two
- ▢ 1 tablespoon ( 14g ) butter
- ▢ ½ cup diced onion
- ▢ 2 cloves garlic minced
- ▢ Pinch of red pepper flakes optional
- ▢ 1 14-ounce can tomatoes whole, cubed, or crushed
- ▢ ¾ cup chicken broth or water
- ▢ 3 tablespoons heavy cream
- ▢ Salt and pepper
Instructions
- In a medium saucepan, melt butter over medium heat. Add onions and cook until softened, 5 to 7 minutes.
- Add garlic and red pepper and cook for 30 seconds.
- Add tomatoes. If using whole tomatoes, crush with a spoon and simmer for 10 minutes to soften. If using diced tomatoes, simmer for 5 minutes. If using crushed tomatoes, continue to next step.
- Add broth. Bring to a simmer, and cook for 15 minutes. Remove from heat.
- If using an immersion blender, blend soup until mostly smooth. You may need to tilt the pot for the blender to work effectively. If using a countertop blender, cool the soup for 10 minutes before transferring it to the blender and blend until smooth or mostly smooth. If soup is too thick, you can blend in a little more broth or water. Return to saucepan.
- Stir in cream and salt and pepper to taste. Reheat over medium heat if necessary and enjoy!
Notes
Recipe Adapted From Chow Hound
These Butter and Garlic Green Beans are perfectly cooked and tossed with butter and toasted garlic. They’re a quick, easy, and delicious vegetable side dish.
Ready for your new go-to no-fail veggie side dish? I’d like to meet these perfect, wonderful garlic green beans that are ABSOLUTELY FOOLPROOF.
They’re boiled, so you don’t have to worry about burning them while they cook. You can make them with pre-trimmed green beans, so no cutting required if you don’t want to.
And, best of all, if your timing is off and the green beans finish cooking 20 minutes before your main dish, they get tossed in a hot pan with butter right before serving, so they’ll heat right back up!
Like I said, foolproof.
Ingredients
- Fresh green beans: You can use regular green beans or haricots verts. If using the latter, just adjust the simmering time as needed since they’re thinner and will cook a bit quicker.
- Butter: Salted or unsalted butter will work just fine.
- Fresh garlic: If you don’t feel like mincing the garlic, you can use a garlic press, but the little cubes of minced garlic are really delicious in this, so if you can mince the garlic, do!
- Salt and pepper: A little salt and pepper to taste is all the spicing up these green beans really need.
How to prepare green beans?
To prep your beans, wash them and use a sharp knife to trim the ends.
To trim the green beans, grab a handful of beans, line the ends up, and slice them all off at once. Line the beans up on the other side and trim the second side. Once all the beans are trimmed, they’re ready to go.
If prepping in advance, trimmed green beans can be stored in an airtight container for up to 2 days before cooking.
How to cook fresh green beans
- Transfer your prepared green beans to a medium pot and add just enough cold water to cover them. Add a couple good pinches of salt and bring to a simmer. Cook for 5 to 10 minutes, until they reach your preferred level of doneness.
- Drain and set aside.
- Just before serving, melt butter in a large skillet and toast garlic for 30 seconds to 1 minute, until lightly golden. Add green beans and toss until they’re well coated in the butter and garlic and reheated. Add salt and pepper to taste.
What to serve with garlic green beans?
Everything! Sauteed green beans go with practically everything, but to start you off, I’d recommend:
- Tri-tip
- Country-style Pork Ribs
- Baked Ziti
- Easy Tomato Soup
Can I use canned/frozen green beans?
Yes. Warm/cook the beans according to package instructions and then toss them with the melted butter and garlic.
More Green Bean Recipes
- Roasted Green Beans
- Green Beans in the Microwave
- Green Beans With Bacon

Ingredients
- ▢ 1 pound green beans trimmed and washed
- ▢ 2 cloves garlic minced*
- ▢ 1 tablespoon butter
- ▢ Salt and pepper to taste
Instructions
- In a medium pot, cover green beans with cold water and bring to a boil. Lower the heat and simmer for 5-10 minutes, until they reach your preferred level of doneness. Drain and set aside.
- Melt butter over medium heat in a large skillet. Add the garlic and toast until golden, watching carefully to ensure it doesn’t burn.
- Add the cooked green beans to the pan, sprinkle with salt and pepper, and toss to coat (and reheat if they’ve cooled).
- Serve and enjoy!
Notes

No-fail Butter and Garlic Green Beans
Ingredients
- 1 pound green beans trimmed and washed
- 2 cloves garlic minced*
- 1 tablespoon butter
- Salt and pepper to taste
Instructions
- In a medium pot, cover green beans with cold water and bring to a boil. Lower the heat and simmer for 5-10 minutes, until they reach your preferred level of doneness. Drain and set aside.
- Melt butter over medium heat in a large skillet. Add the garlic and toast until golden, watching carefully to ensure it doesn’t burn.
- Add the cooked green beans to the pan, sprinkle with salt and pepper, and toss to coat (and reheat if they’ve cooled).
- Serve and enjoy!
