My favorite flaky, delicious buttermilk pie crust (made with a food processor). This is seriously the easiest pie dough you will ever make or work with!

Hey, it’s a Saturday. What’s a Baking Mischief recipe doing in your feed!? Welcome to Simple Saturdays!
I have a ton of foundation recipes or simple tips and tricks I have been wanting to add to the blog but just haven’t been able to fit into the Monday/Wednesday/Friday schedule.
I’ve simply published a couple of them backdated in the feed so I can link to them in recipes, but adding another posting day to the schedule seemed like the best compromise to make sure they are seen (and can therefore be of use), so every other Saturday, we’ll have a simple recipe, trick, or maybe a round up I’ve been dying to do.
And if you have any requests for posts or something you would like to see, shoot me an email ! I want to post the things that are going to best help you!
Okay, table setting aside. On to the recipe: My Favorite Buttermilk Pie Crust! You’ve seen this recipe before. I used it for my Green Eggs and Ham Mini Quiche , my Easy Beef Pasties , and it will show up again in a recipe this Friday, but I know pie crust can be intimidating for a lot of people (it certainly was for me), so I wanted to do a step by step walk through.

I LOVE this pie crust for these reasons, in this order:
- It’s SO delicious and flaky. It’s an all butter crust, and nothing beats the rich taste of pure butter in pie crust.
- It’s incredibly easy to work with when rolling out and shaping.
- It’s the easiest thing in the world to make. Seriously. I have pictures to prove it.
This method uses a food processor. You CAN make this dough with a pastry cutter * and a bowl–that’s how I make most of my other pie crusts to ensure a nice and flaky finished product, but this dough produces such a flaky crust that making it in the food processor doesn’t seem to affect it at all. So for the convenience, if at all possible, I say use a food processor!
If you don’t own one, this is the food processor I have *, and I love it.
This recipe makes about 24 ounces of dough. That’s enough for two 9-inch crusts. A half batch will make a single 9-inch crust or two 6-inch pie crusts for mini pies. If you have a small food processor, I recommend making only a half batch at a time, as the 5-cup models will have trouble processing this amount of dough.
And now how to make the easiest buttermilk pie crust in the world:
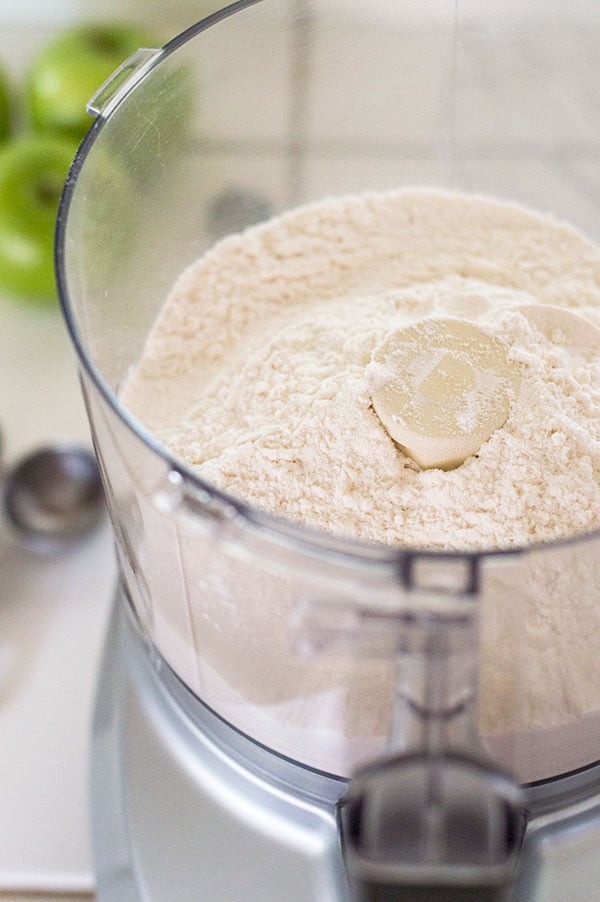
Dump all the dry ingredients in your food processor.

Add chilled butter and pulse until butter is about the size of a pea.


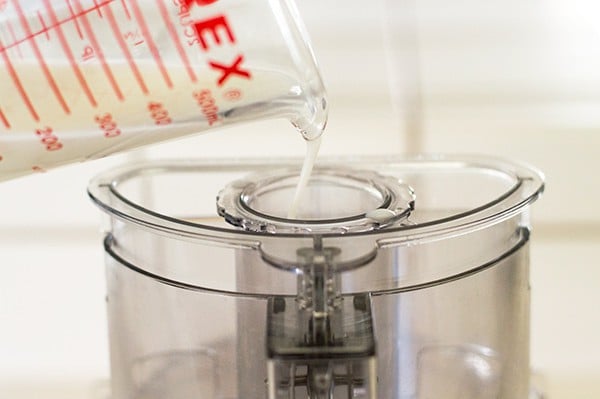
Drizzle in buttermilk…

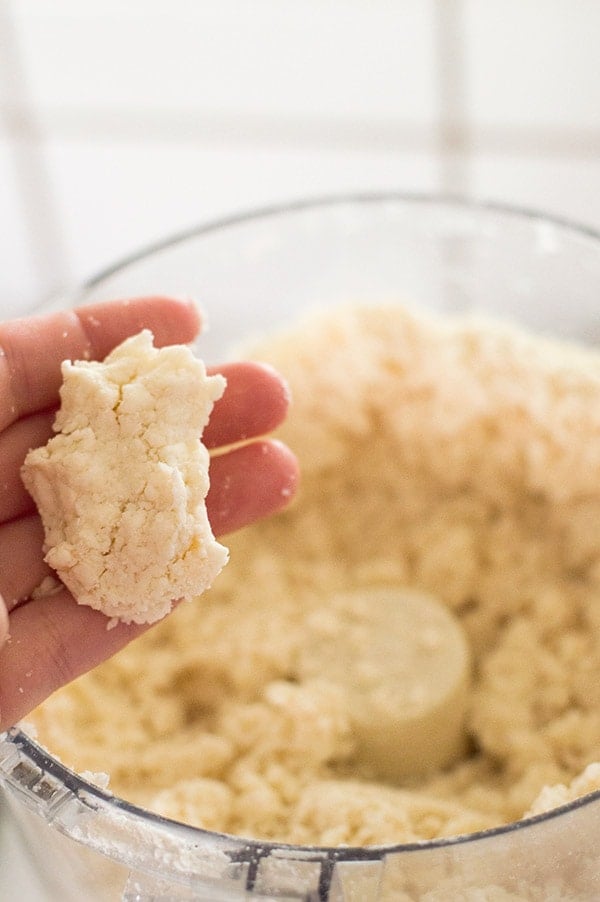
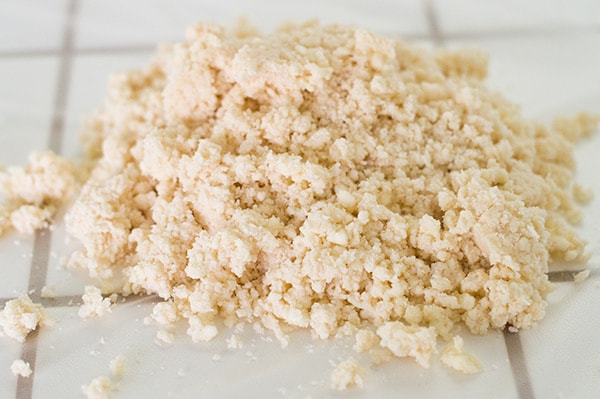
…and pulse until mixture just begins to clump together.
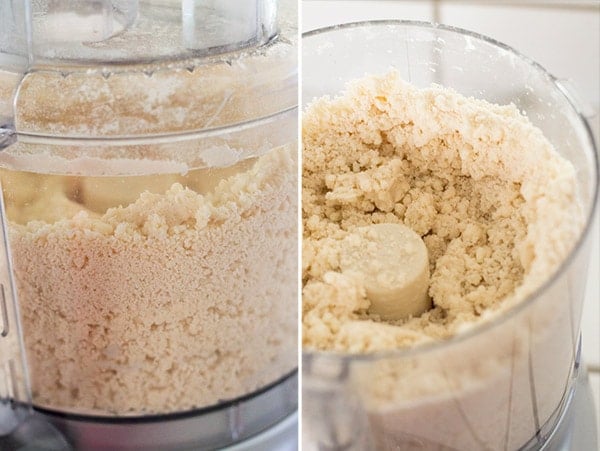

You know it’s done and has enough liquid if it holds its shape when pressed together.

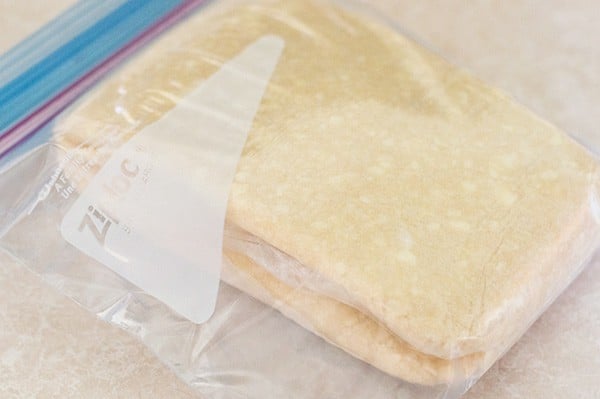
Lay a sheet of plastic wrap on the counter and dump half of the mixture onto the wrap.

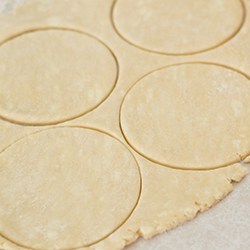
Press tightly into a disk (if you are going to make full, round crusts, make your disk as circular as possible since it will make rolling easier later–these were destined to become mini pie crusts so I didn’t bother) and repeat with the other half of the crumbs. Store in a plastic bag and refrigerate for at least an hour, up to two days before using.

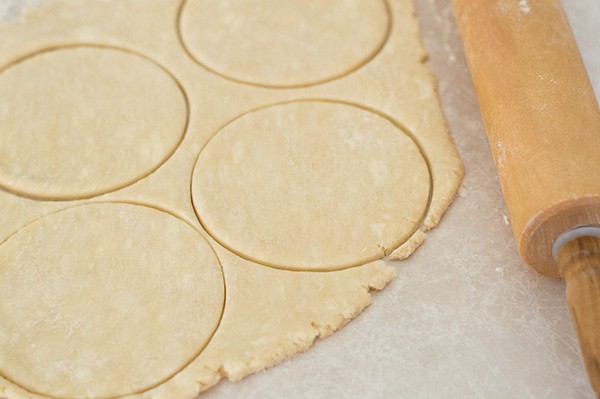
Roll out, shape, and make into something delicious like:
- Easy Dutch Apple Pie
- Game of Thrones Frey Pie
- Pie Crust Pizza Tarts
- Individual Chicken Pot Pies
- Mini Dutch Apple Galette
P.S. If you have any leftover scraps of pie dough, check out this post on What to Do With Leftover Pie Dough .

Ingredients
Full Batch (9-inch Double Crust)
- ▢ 1 cup ( 8 oz, 2 sticks) cold unsalted butter cut into 1/2-inch chunks
- ▢ 2 1/2 cups ( 300 g) all-purpose flour
- ▢ 1 tablespoon ( 13 g) granulated sugar
- ▢ 1 teaspoon salt
- ▢ 1/2 to 2/3 cup buttermilk*
Half Batch (9-inch Single Crust or 6-inch Double Crust)
- ▢ 8 tablespoons ( 4 oz, 1 stick) cold unsalted butter cut into 1/2-inch chunks
- ▢ 1 1/4 cups ( 150 g) all-purpose flour
- ▢ 2 teaspoons granulated sugar
- ▢ 1/2 teaspoon salt
- ▢ 1/4 to 1/3 cup buttermilk
Quarter Batch (6-inch Single Crust)
- ▢ 4 tablespoons ( 2 oz) cold unsalted butter cut into 1/2-inch chunks
- ▢ 1/2 cup and 2 tablespoons ( 75 g) all-purpose flour
- ▢ 1 teaspoon granulated sugar
- ▢ 1/4 teaspoon salt
- ▢ 2 tablespoons to 2 tablespoons and 2 teaspoons buttermilk
Instructions
- Before you begin measuring everything out, place the cubed butter in the freezer to chill.
- Stir together flour, sugar, and salt, and pour into the food processor. Add butter and pulse until butter is cut into the flour, but still has visible chunks no larger than a pea.
- While pulsing, slowly pour in 1/2 cup of the buttermilk (1/4 for half batch, 2 tablespoons for a quarter batch) and continue to pulse until the buttermilk is incorporated into the dough. At this point, your dough should look like rough crumbs and just hold its shape if squeezed together. If the dough does not, add a a little more buttermilk, a teaspoon at a time.
- Lay a sheet of plastic wrap on the counter and dump half of your dough crumbs onto the sheet. (If you are making only a single crust, do not divide dough.) Gather the edges and press tightly together to form a 1-inch thick disk. Do the same with the rest of the dough. Place in a plastic bag and refrigerate for at least an hour, up to 24.
Notes
Nutritional Information Recipe Adapted From: B.Britnell Make-ahead Instructions: This dough does very well when made ahead of time. Simply store as shown, in the refrigerator, and use within 48 hours or freeze. Freezer Instructions: Freeze plastic-wrapped dough in a freezer bag and keep for up to 3 months. To use, defrost in the refrigerator overnight.
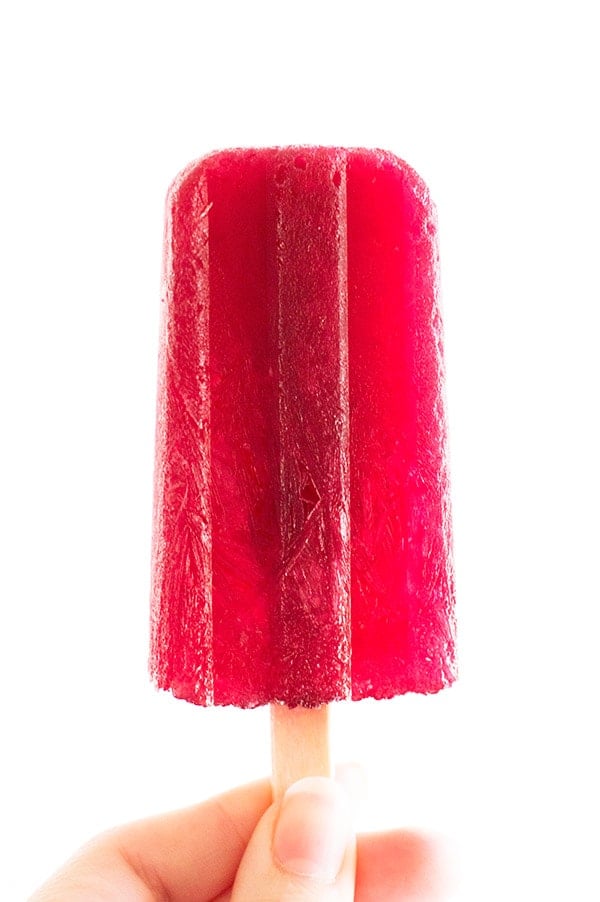
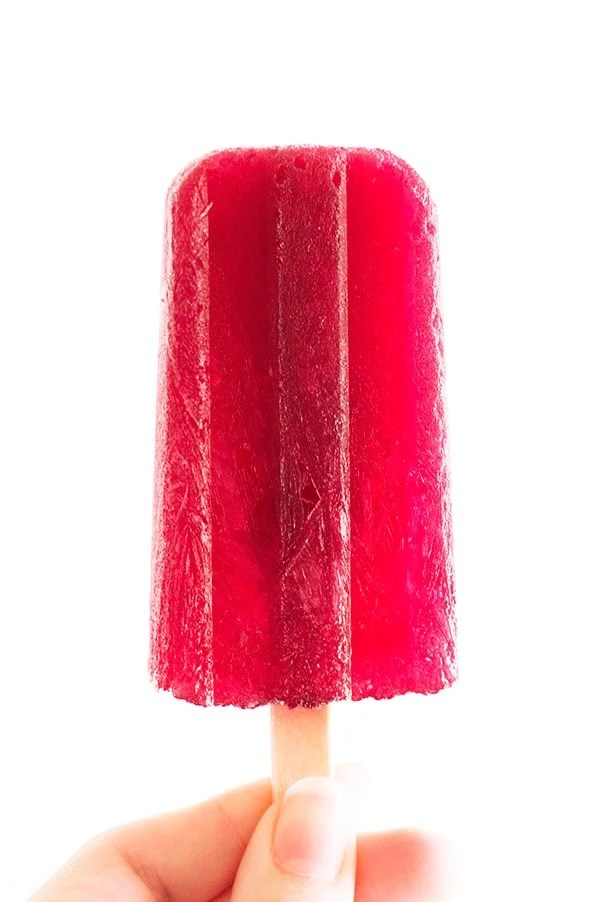
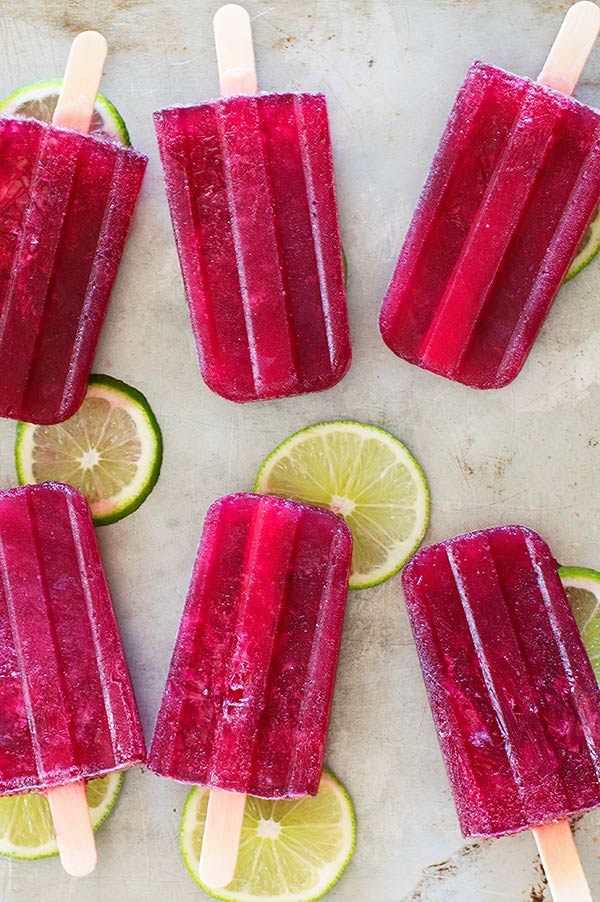
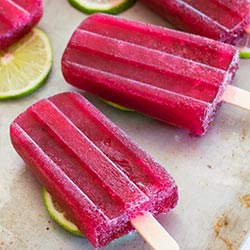
Super easy Tinto De Verano red wine popsicles made with your favorite red wine, lemon lime soda, and a homemade lime simple syrup. Delicious, boozy treats perfect for a grown-up summer.


Well, we made it. A whole month of nerdy recipes and Nerd Month is finally coming to a close with a show that is very dear to my black heart, Black Books .
Black Books (available on Hulu and Netflix) is an earlier effort from the creator of the IT Crowd (which also got the Nerd Month treatment in the form of Sea Parks Mashed Potatoes) . It’s just as funny but with slightly worse people.
Main character Bernard Black (possibly one of my favorite characters ever) is terrible, misanthropic, bitter, mean, and owns/lives above a book shop where he never seems to actually sell any books.
He is also quite fond of the drink and on one hot day, comes up with the best possible way of enjoying one.
Would that we all could be as brilliant as Bernard Black, (we can’t) but we can booze like him. Wine Lolly, anyone?
Coming up with these red wine popsicles was actually a ton of fun because I’m not a huge drinker of red wine and had no idea how to make it into a palatable popsicle. When I came across the Tinto De Verano cocktail, an easy mix of Spanish red wine and lime soda, I knew it would make the perfect summery popsicle.
I made a batch and while it was a good cocktail, the frozen popsicles were a little bland. So for round two, I added a lime simple syrup to the mix, and that did the trick.
You still have the deep richness of the red wine (use whatever type you like best), but the tartness of the lime and sugar sweet of the syrup make the popsicles so much tastier. If you are looking for a boozy frozen summer treat, it doesn’t get much better than this.
I think even Bernard Black would approve.

Going into summer without a popsicle mold? This is the one * I bought recently and am very happy with. The plastic base feels high quality and I’ve had no trouble with the lid catching on the sticks when you go to remove it, which seems to be a problem with a ton of models. I’ll report back next summer on the mold’s longevity, but so far, I love it!

Ingredients
Lime Simple Syrup*
- ▢ 1/4 cup granulated sugar
- ▢ 1/4 cup filtered water
- ▢ Juice of 1 lime about 2 tablespoons
Tinto De Verano
- ▢ 1 1/4 cups red wine
- ▢ 1 1/4 cups lemon-lime soda
Instructions
Lime Simple Syrup
- In a small pot, combine sugar and water. Heat over medium-high heat until sugar dissolves completely.
- Remove from heat and stir in lime juice. Set aside to cool slightly.
Mix
- In a large liquid measuring cup, combine wine and soda. Add cooled lime syrup and stir.
- Divide liquid between popsicle mold slots, leaving a little room at the top for popsicles to expand.
- Freeze for at least 4 hours, preferably overnight.
- Run popsicle mold under warm water and gently remove popsicles. Wrap individually in wax paper and store in an air-tight container.
- Serve with a napkin and enjoy!
Notes
Nutritional Information

Saturday Morning Snapshot
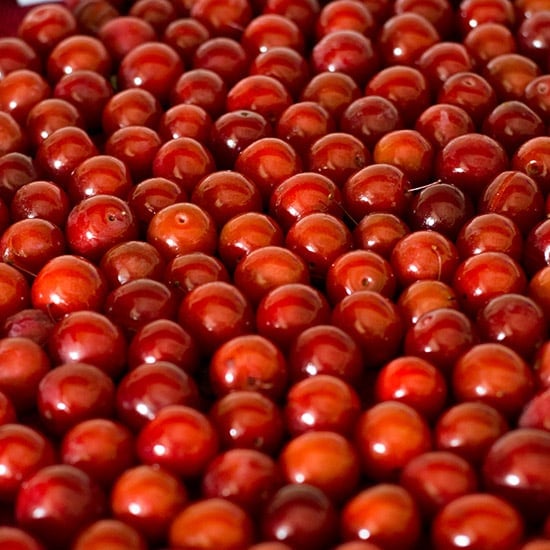

Was given about a million of these strange tiny plums. Don’t know what type they are, but I do know they’re pretty tasty!
State of the Blog
This week was the last week of Nerd Month ! I had so much fun this month coming up with recipes for and writing about shows, movies, and books (okay, book, singular ) I love, but I’m glad we’ve reached the end of it. Finding the perfect GIFs to use in posts is surprisingly time-consuming, as was editing down my gushing over every single book/movie/tv show I posted about.
For the last set of Nerd Month recipes, I posted two from British television favorites and one from Bob’s Burgers , the sweetest animated comedy on television.
Next week the blog turns six months old! My baby blog is growing up. 🙂 To celebrate, I’m adding an extra posting day to the schedule every other week. Starting yesterday, two Saturdays a month, a simple foundation recipe or favorite tip or trick will go up. This way I can still keep more interesting recipes coming during the week, but provide step-by-step walk throughs for some of my most-used basics. This week I started with with my favorite buttermilk pie crust .
Later this week, there will be the usual end-of-the-month theme roundup post, a healthy and easy dinner, and my new favorite summer dessert.
Recipes/posts released this week were:
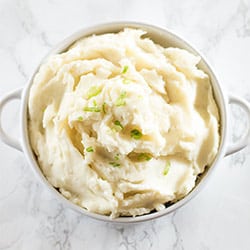


No-recipe Homemade Mashed Potatoes – How to make easy homemade mashed potatoes with no recipe required, instructions I wish someone had given me during my childhood of eating boxed mashed potatoes!
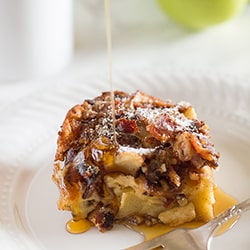
Bacon Dutch Apple Baby For Two – Smokey bacon and tart apples make this Dutch Apple Baby pancake the perfect breakfast for a lazy weekend morning.
Tinto De Verano Red Wine Popsicles – Super easy Tinto De Verano red wine popsicles made with your favorite red wine, lemon lime soda, and a homemade lime simple syrup. Delicious, boozy treats perfect for a grown-up summer.
My Favorite Buttermilk Pie Crust – My favorite flaky, delicious buttermilk pie crust (made with a food processor). This is seriously the easiest pie dough you will ever make or work with!
Pop-culture Corner
It’s season finale time! How are all your favorite shows wrapping up? Any good twists or cliffhangers?
I caught The Nice Guys this weekend and it was soooooo charming and funny! Have you seen it yet?
Fellow Game Of Thrones fans, what did you think of last week’s hold the door moment? Did it get you? I might just be a monster, because I was UNMOVED!
Then again, this is coming from someone who cried over the shenanigans of a Winchester on the Supernatural finale this week, so my emotional responses are clearly suspect.
It’s James Bond casting speculation time! Who do you want to replace him? I know Tom Hiddleston is the front runner , but I really had my heart set on Tom Hardy or Idris Elba.
Finally, speaking of Tom Hiddleston, I let all the episodes of the Night Manager build up on my DVR. Now that it’s finished airing in the States, I can’t wait to binge it. Has anyone watched this yet?
Meal Planning
Saturday: Homemade Margherita Pizza Sunday: Chicken and Asparagus Pasta Monday: BBQ Steak with Corn on the Cob Tuesday: Slightly Spicy Chipotle Chicken Salad Wednesday: Mom’s Chicken Noodle Soup Thursday: Sausage and Zucchini Bake Friday: TBD
Wishing you a great weekend and a peaceful Memorial Day!
My favorite flaky, delicious buttermilk pie crust (made with a food processor). This is seriously the easiest pie dough you will ever make or work with!
Hey, it’s a Saturday. What’s a Baking Mischief recipe doing in your feed!? Welcome to Simple Saturdays!
I have a ton of foundation recipes or simple tips and tricks I have been wanting to add to the blog but just haven’t been able to fit into the Monday/Wednesday/Friday schedule.
I’ve simply published a couple of them backdated in the feed so I can link to them in recipes, but adding another posting day to the schedule seemed like the best compromise to make sure they are seen (and can therefore be of use), so every other Saturday, we’ll have a simple recipe, trick, or maybe a round up I’ve been dying to do.
And if you have any requests for posts or something you would like to see, shoot me an email ! I want to post the things that are going to best help you!
Okay, table setting aside. On to the recipe: My Favorite Buttermilk Pie Crust! You’ve seen this recipe before. I used it for my Green Eggs and Ham Mini Quiche , my Easy Beef Pasties , and it will show up again in a recipe this Friday, but I know pie crust can be intimidating for a lot of people (it certainly was for me), so I wanted to do a step by step walk through.
I LOVE this pie crust for these reasons, in this order:
- It’s SO delicious and flaky. It’s an all butter crust, and nothing beats the rich taste of pure butter in pie crust.
- It’s incredibly easy to work with when rolling out and shaping.
- It’s the easiest thing in the world to make. Seriously. I have pictures to prove it.
This method uses a food processor. You CAN make this dough with a pastry cutter * and a bowl–that’s how I make most of my other pie crusts to ensure a nice and flaky finished product, but this dough produces such a flaky crust that making it in the food processor doesn’t seem to affect it at all. So for the convenience, if at all possible, I say use a food processor!
If you don’t own one, this is the food processor I have *, and I love it.
This recipe makes about 24 ounces of dough. That’s enough for two 9-inch crusts. A half batch will make a single 9-inch crust or two 6-inch pie crusts for mini pies. If you have a small food processor, I recommend making only a half batch at a time, as the 5-cup models will have trouble processing this amount of dough.
And now how to make the easiest buttermilk pie crust in the world:
Dump all the dry ingredients in your food processor.
Add chilled butter and pulse until butter is about the size of a pea.
Drizzle in buttermilk…
…and pulse until mixture just begins to clump together.
You know it’s done and has enough liquid if it holds its shape when pressed together.
Lay a sheet of plastic wrap on the counter and dump half of the mixture onto the wrap.
Press tightly into a disk (if you are going to make full, round crusts, make your disk as circular as possible since it will make rolling easier later–these were destined to become mini pie crusts so I didn’t bother) and repeat with the other half of the crumbs. Store in a plastic bag and refrigerate for at least an hour, up to two days before using.
Roll out, shape, and make into something delicious like:
- Easy Dutch Apple Pie
- Game of Thrones Frey Pie
- Pie Crust Pizza Tarts
- Individual Chicken Pot Pies
- Mini Dutch Apple Galette
P.S. If you have any leftover scraps of pie dough, check out this post on What to Do With Leftover Pie Dough .

Ingredients
Full Batch (9-inch Double Crust)
- ▢ 1 cup ( 8 oz, 2 sticks) cold unsalted butter cut into 1/2-inch chunks
- ▢ 2 1/2 cups ( 300 g) all-purpose flour
- ▢ 1 tablespoon ( 13 g) granulated sugar
- ▢ 1 teaspoon salt
- ▢ 1/2 to 2/3 cup buttermilk*
Half Batch (9-inch Single Crust or 6-inch Double Crust)
- ▢ 8 tablespoons ( 4 oz, 1 stick) cold unsalted butter cut into 1/2-inch chunks
- ▢ 1 1/4 cups ( 150 g) all-purpose flour
- ▢ 2 teaspoons granulated sugar
- ▢ 1/2 teaspoon salt
- ▢ 1/4 to 1/3 cup buttermilk
Quarter Batch (6-inch Single Crust)
- ▢ 4 tablespoons ( 2 oz) cold unsalted butter cut into 1/2-inch chunks
- ▢ 1/2 cup and 2 tablespoons ( 75 g) all-purpose flour
- ▢ 1 teaspoon granulated sugar
- ▢ 1/4 teaspoon salt
- ▢ 2 tablespoons to 2 tablespoons and 2 teaspoons buttermilk
Instructions
- Before you begin measuring everything out, place the cubed butter in the freezer to chill.
- Stir together flour, sugar, and salt, and pour into the food processor. Add butter and pulse until butter is cut into the flour, but still has visible chunks no larger than a pea.
- While pulsing, slowly pour in 1/2 cup of the buttermilk (1/4 for half batch, 2 tablespoons for a quarter batch) and continue to pulse until the buttermilk is incorporated into the dough. At this point, your dough should look like rough crumbs and just hold its shape if squeezed together. If the dough does not, add a a little more buttermilk, a teaspoon at a time.
- Lay a sheet of plastic wrap on the counter and dump half of your dough crumbs onto the sheet. (If you are making only a single crust, do not divide dough.) Gather the edges and press tightly together to form a 1-inch thick disk. Do the same with the rest of the dough. Place in a plastic bag and refrigerate for at least an hour, up to 24.
Notes
Nutritional Information Recipe Adapted From: B.Britnell Make-ahead Instructions: This dough does very well when made ahead of time. Simply store as shown, in the refrigerator, and use within 48 hours or freeze. Freezer Instructions: Freeze plastic-wrapped dough in a freezer bag and keep for up to 3 months. To use, defrost in the refrigerator overnight.

My Favorite Buttermilk Pie Crust
Ingredients
Full Batch (9-inch Double Crust)
- 1 cup ( 8 oz, 2 sticks) cold unsalted butter cut into 1/2-inch chunks
- 2 1/2 cups ( 300 g) all-purpose flour
- 1 tablespoon ( 13 g) granulated sugar
- 1 teaspoon salt
- 1/2 to 2/3 cup buttermilk*
Half Batch (9-inch Single Crust or 6-inch Double Crust)
- 8 tablespoons ( 4 oz, 1 stick) cold unsalted butter cut into 1/2-inch chunks
- 1 1/4 cups ( 150 g) all-purpose flour
- 2 teaspoons granulated sugar
- 1/2 teaspoon salt
- 1/4 to 1/3 cup buttermilk
Quarter Batch (6-inch Single Crust)
- 4 tablespoons ( 2 oz) cold unsalted butter cut into 1/2-inch chunks
- 1/2 cup and 2 tablespoons ( 75 g) all-purpose flour
- 1 teaspoon granulated sugar
- 1/4 teaspoon salt
- 2 tablespoons to 2 tablespoons and 2 teaspoons buttermilk
Instructions
- Before you begin measuring everything out, place the cubed butter in the freezer to chill.
- Stir together flour, sugar, and salt, and pour into the food processor. Add butter and pulse until butter is cut into the flour, but still has visible chunks no larger than a pea.
- While pulsing, slowly pour in 1/2 cup of the buttermilk (1/4 for half batch, 2 tablespoons for a quarter batch) and continue to pulse until the buttermilk is incorporated into the dough. At this point, your dough should look like rough crumbs and just hold its shape if squeezed together. If the dough does not, add a a little more buttermilk, a teaspoon at a time.
- Lay a sheet of plastic wrap on the counter and dump half of your dough crumbs onto the sheet. (If you are making only a single crust, do not divide dough.) Gather the edges and press tightly together to form a 1-inch thick disk. Do the same with the rest of the dough. Place in a plastic bag and refrigerate for at least an hour, up to 24.
