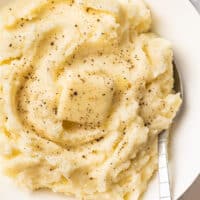
Creamy and buttery microwave mashed potatoes are a quick and easy side dish you can make without ever having to turn on your stove.
Need a super speedy and simple side tonight? Make a homemade batch of mashed potatoes in the microwave!
Microwave mashed potatoes are everything you love about classic homemade mashed potatoes. They’re buttery, rich, and completely satisfying. They just happen to be made in your microwave. 😉

Equipment & Ingredient Notes
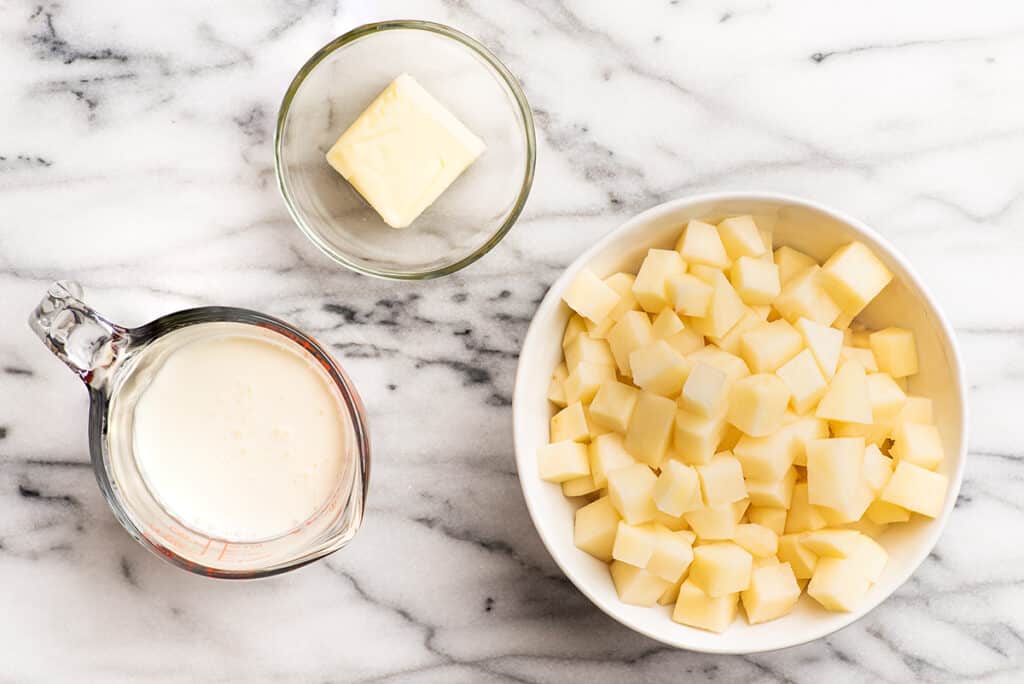

- A large microwave-safe bowl: Make sure you use a bowl that is large enough that the potatoes/water only fill about ½ to ⅔ of the bowl. If the bowl is too full, the contents can bubble over while cooking and make a bit of a mess in your microwave.
- Russet potatoes: I like to use russets for this dish, but if you have red or Yukon Gold potatoes on hand, you can use them (or a combo of them) instead.
- Milk, half and half, or heavy cream: Milk, half and half, and heavy cream will all work. Cream will give you the richest mashed potatoes and milk the lightest. If you have leftover cream or half and half after making the potatoes, check out my What to Do With Leftover Half and Half and What to do With Leftover Heavy Cream posts for recipe ideas to use up the leftovers.
How to Make Mashed Potatoes in the Microwave
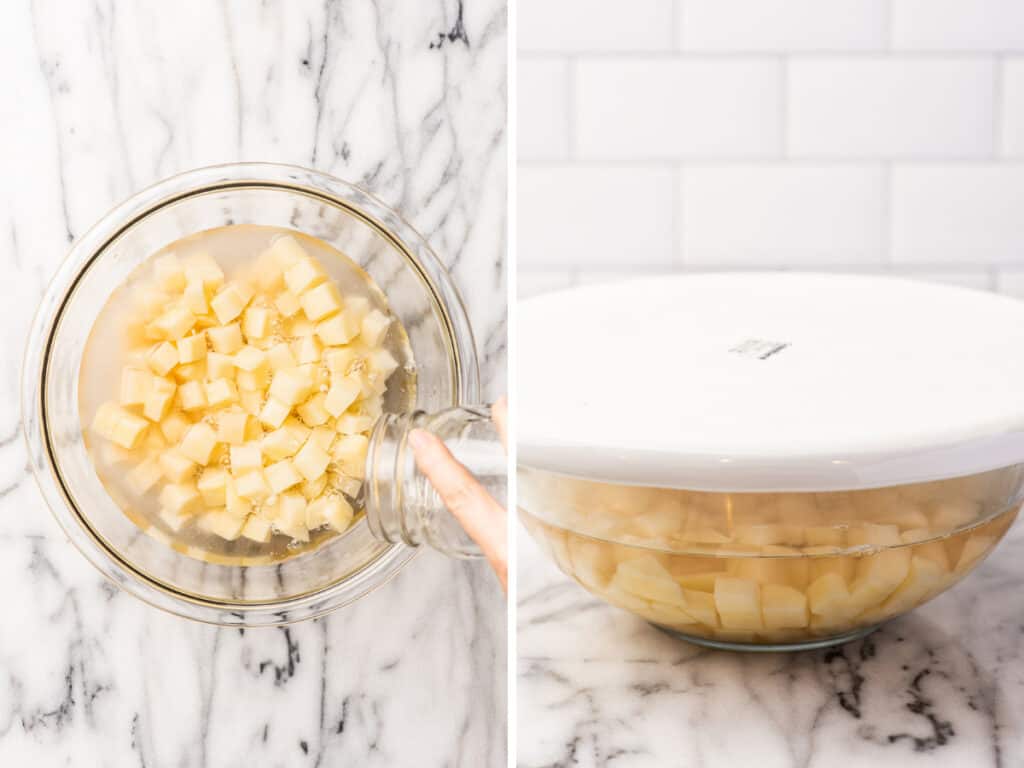

Microwave potatoes: Place potatoes in a microwave-safe bowl and add just enough cold water to completely cover them. Add salt and cover the bowl with an upside-down, microwave-safe plate. Microwave for 10 minutes and allow to sit for 1 minute after the timer goes off.
Check potatoes: Very carefully (the plate, bowl, and steam will be hot!) remove the plate. Check to make sure the potatoes are fork-tender. If not, replace the plate and continue to microwave in 1-minute increments until the potatoes are cooked through.

Warm cream/milk: Place cream/milk in a microwave-safe container and heat until warm, 30 to 45 seconds. Using warm liquid will keep it from cooling down your potatoes so they stay piping hot on their way to the table.
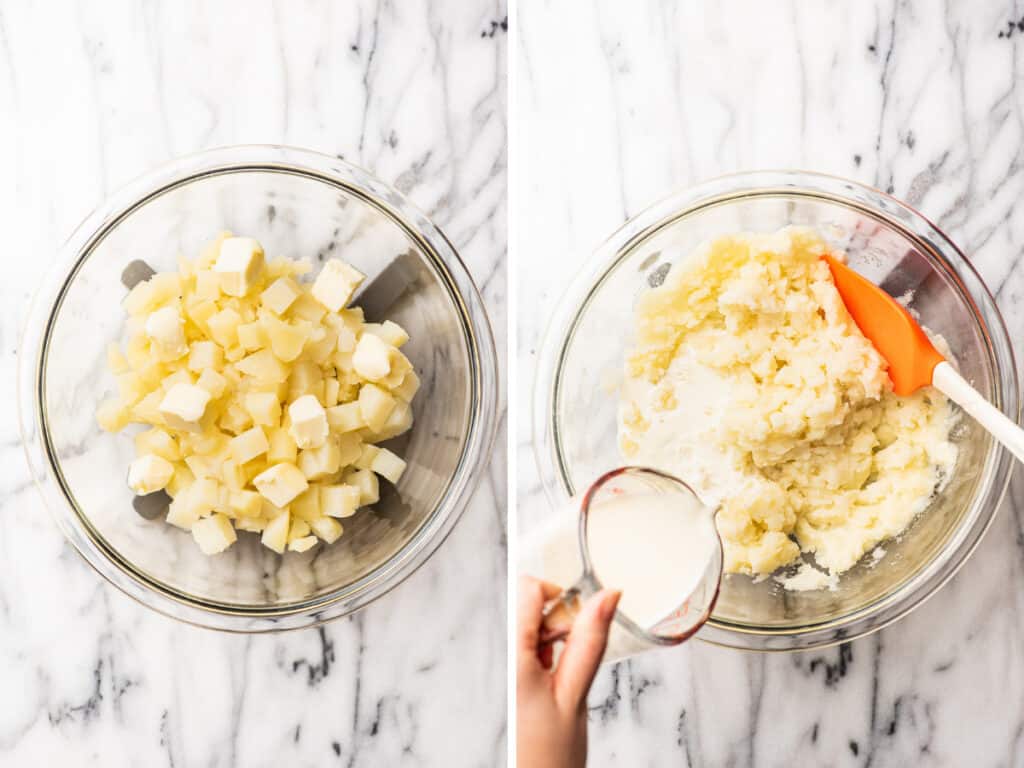
Mash and mix: Drain the potatoes and add butter to the bowl. Use a fork or potato masher to mash potatoes. Add half of the milk or cream and stir until mixed. If needed, stir in more of the liquid until the potatoes reach your desired consistency. Add salt and pepper to taste. Don’t skimp on this step. Salt until the potatoes taste amazing!
Variations
- Vegan mashed potatoes: To make microwave potatoes that are vegan, you can use dairy-free butter or margarine and your favorite non-dairy milk.
Can I double/halve this recipe?
Yes. You may need a slightly longer cooking time if you’re doubling the recipe, but it will work. To change the recipe yield, in the recipe card, hover over the servings or click if you’re on mobile and slide the slider.
Do I need a potato masher to make mashed potatoes?
No, you can mash your potatoes with a good sturdy fork, but if you’re going to regularly make mashed potatoes in the future, you might want to invest in one. Potato mashers are not super pricey and make mashing potatoes so much quicker and easier.
What to serve with microwave mashed potatoes?
I love a good gravy with my potatoes, so I recommend a quick and easy gravy , but if you have some leftover drippings, try my gravy from drippings . For main dishes, serve this with something quick and easy like:
- Oven BBQ Chicken Thighs
- Roasted Tri-tip
- Crispy Lemon Chicken Thighs
- Easy Balsamic Chicken


More Easy Microwave Sides
- Microwave Baked Potato
- Microwave Sweet Potato
- Microwave Broccoli
- Microwave Corn on the Cob
- Microwave Green Beans
Recipe Notes
- Substitutions: You can try replacing the dairy in the potatoes with warmed chicken or vegetable broth. The potatoes won’t be as rich or as creamy as if you had used half and half/heavy cream, but it’s a good option if you’re out of milk or are dairy-free.
- Potato weight: This recipe calls for 1 pound of potatoes. That’s about 3 medium or 2 large russet potatoes. If you’re a couple ounces over or under, that’s not going to hurt anything, so just aim for about a pound.
- Yield: This recipe will make 2 large servings or 4 smaller ones.
Equipment
- Potato masher
- Medium microwave-safe bowl*
- Large microwave-safe plate
Ingredients
- ▢ 1 pound (about 3 medium or 2 ) large russet potatoes peeled and diced
- ▢ ¾ teaspoon salt divided, plus more as needed
- ▢ ⅓ cup milk, half and half, or heavy cream *
- ▢ 4 tablespoons (56g) butter cut into chunks, salted or unsalted is fine*
Instructions
- To a medium, microwave-safe bowl, add potatoes and just enough cold water to completely cover them. Add ½ teaspoon of the salt and cover the bowl with an upside microwave-safe down plate.
- Microwave for 10 minutes and allow to sit for 1 minute after the timer goes off.
- Very carefully (the plate, bowl, and steam will be hot!) remove the plate. Check to make sure the potatoes are fork-tender. If not, replace the plate and continue to microwave in 1-minute increments until the potatoes are cooked through.
- Place milk/cream in a microwave-safe container and heat until warm, 30 to 45 seconds.
- Drain potatoes and add butter to the potatoes. Use a fork or potato masher to mash potatoes. Add half of the milk or cream and stir until mixed. If needed, stir in more of the liquid until the potatoes reach your desired consistency. Add remaining ¼ teaspoon of the salt. Taste and add more salt and pepper as needed.
- Serve and enjoy!
Notes
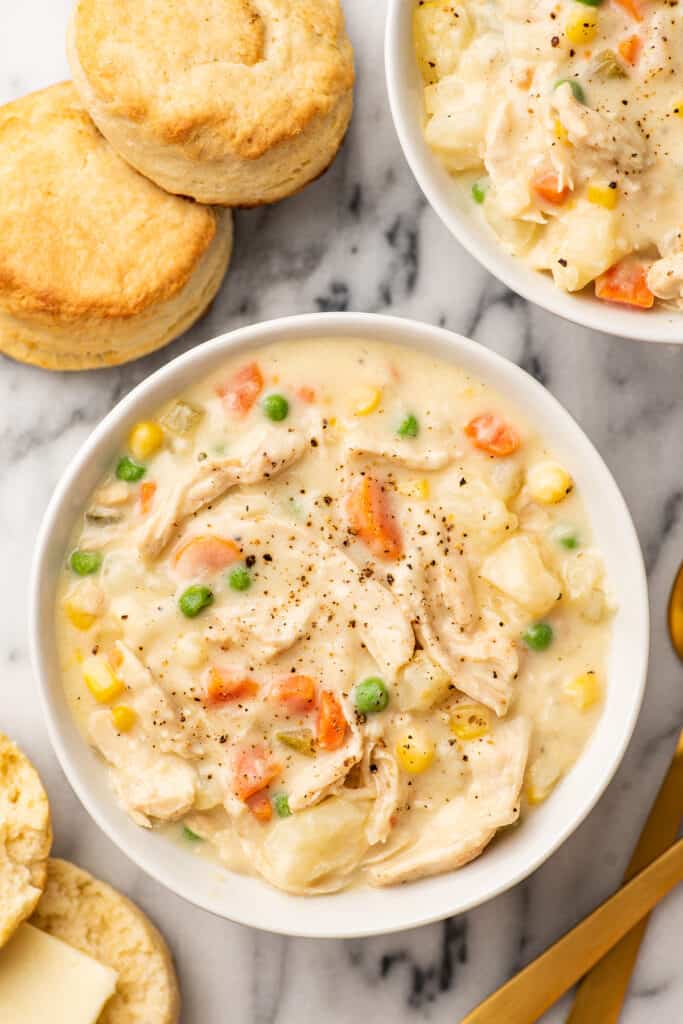
Super thick and creamy chicken pot pie soup has all the delicious flavor of chicken pot pie without the long cooking time.
Short on time tonight, but craving a warm and comforting slice of chicken pot pie? You should make pot pie soup instead!
What is Chicken Pot Pie Soup?
Pot pie soup is basically chicken pot pie filling with a little extra milk and broth that turns it into a super creamy and rich soup.
And where a whole pot pie is going to set you back a couple hours between making the dough, chilling it, and baking the pie, this soup can be on your table in less than half that time.

Things You Should Know About This Soup
- The chicken is seared in the hot pan and then cooked in the soup before being shredded or chopped, so no need to have pre-cooked chicken on hand.
- This is a real stick-to-your bones sort of soup packed with veggies, chicken, heavy cream and a splash of white wine, so it’s rich, creamy, and full of flavor.
- The vegetables are added in 3 stages so everything gets a chance to be cooked to the perfect level of doneness.
Ingredient Notes
- Boneless skinless chicken breasts: As mentioned above, the chicken in this recipe is cooked in the soup, but if you have a rotisserie chicken or cooked shredded chicken on hand, feel free to use 2 to 3 cups of cooked chicken instead. Simply stir it in at the end along with the corn and peas. You can also substitute cooked turkey for the chicken. This is a great soup to make with Thanksgiving leftovers!
- Dry white wine: Sauvignon Blanc and Pinot Grigio are both good options. I love the subtle boost in flavor the wine gives this dish, but you can omit it if needed. Simply use a splash of the chicken broth to deglaze the pot instead.
- Heavy cream: Heavy cream adds extra richness to the soup, but if you don’t have any, you can replace it with more milk. If you have leftover heavy cream, check out my post What to Do With Leftover Whipping Cream for storage tips and recipe ideas to use up the leftovers.
How to Make Chicken Pot Pie Soup


Sear chicken: Pat the chicken dry and generously salt and pepper both sides. Cook the chicken until well-browned, 3 to 4 minutes, flip and repeat. Transfer chicken to a plate and set aside.
Start your veggies: To the same pot, add garlic, onion, celery, and carrots, and cook, stirring occasionally, until the vegetables begin to soften. Stir in the white wine, using a wooden spoon to scrape any cooked-on bits from the bottom of the pot.
Simmer: Add potatoes and chicken broth and bring to a simmer. Cut chicken breasts in half (so they cook faster) and return the chicken pieces to the pot and simmer until the chicken is cooked through and potatoes are fork tender, 15 to 20 minutes. Remove the chicken from the pot and set on a clean plate or cutting board to cool slightly.


Make the roux: While your chicken cools, in a medium pot, melt butter over medium heat. Add flour and cook, whisking continuously, until the flour is lightly golden and forms a sticky paste with the butter.
Add milk: Slowly drizzle in the milk followed by the cream, whisking out any lumps as they form. Cook, whisking continuously, until mixture is thickened (it should be the consistency of thick gravy) and bubbly around the edges, about 5 minutes.
Add to soup: Stir the milk mixture into the soup. Shred or chop the cooked chicken and add it to the soup.
Add remaining ingredients: Stir in corn and peas and heat over medium heat until vegetables are heated through, 2 to 3 minutes. If soup is too thick, add up to 1 cup more broth until it reaches your desired consistency.
Serve: Adjust salt to taste. Serve, and enjoy!


Can I make this in advance?
Yes. You can make this soup up to 48 hours in advance. When you’re ready to eat it, reheat gently on the stove over medium heat, stirring occasionally, until heated through.
Can you make chicken pot pie soup in a crockpot?
Yes, but you’ll still have to make the roux on your stovetop. To your slow cooker, add all the ingredients except the butter, flour, milk, and cream. Cook on high for 3 to 4 hours, low for 6 to 7 hours, until chicken can be easily shredded and potatoes are tender.
Remove chicken, shred it, and return it to the pot. Follow the recipe instructions for making the roux and adding the milk and cream, and then stir the sauce into the soup. Add salt and pepper to taste.
What to serve with chicken pot pie soup?
I love to serve chicken pot pie with a side of cream biscuits or cheese scones and a simple veggie side like roasted broccoli or green beans .

More Easy Soup Recipes
- Ham and Potato Soup
- Creamy Tortellini Soup
- Tomato Soup
- Broccoli and Potato Soup

Ingredients
- ▢ 1½ pounds (about 2 medium) boneless skinless chicken breasts *
- ▢ 2 tablespoons olive oil divided
- ▢ 3 garlic cloves minced or pressed
- ▢ ½ medium onion diced
- ▢ 2 celery ribs diced ¼-inch
- ▢ 2 medium carrots peeled and diced ¼-inch
- ▢ ¼ cup dry white wine
- ▢ 1 large russet potato peeled and diced ½-inch
- ▢ 3 to 4 cups chicken broth divided
- ▢ 5 tablespoons ( 71g ) butter salted or unsalted is fine
- ▢ ¼ cup and 1 tablespoon (44g) all-purpose flour
- ▢ 1½ cups milk any percentage
- ▢ ½ cup heavy cream *
- ▢ ⅔ cup frozen or canned corn optional
- ▢ ⅔ cup frozen or canned peas optional
- ▢ ¼ teaspoon black pepper
- ▢ Salt
Instructions
- Pat chicken dry and generously salt and pepper both sides.
- In a large pot, heat 1 tablespoon of the oil over medium-high heat. Cook the chicken until well-browned, 3 to 4 minutes, flip and repeat. Transfer chicken to a plate and set aside.
- Turn heat down to medium and to the same pot, add remaining 1 tablespoon of the olive oil. Add garlic, onion, celery, and carrots, and cook, stirring occasionally, until the vegetables begin to soften, 5 to 8 minutes.
- Stir in the white wine, using a wooden spoon to scrape any cooked-on bits from the bottom of the pot.
- Add potatoes and 3 cups of the chicken broth and bring to a simmer. Cut the chicken breasts in half*, return them to the pot and simmer until the chicken is cooked through and potatoes are fork tender, 15 to 20 minutes. Remove pot from heat and use tongs to transfer the chicken pieces from the liquid to a clean plate or cutting board to cool slightly.
- While your chicken cools, in a medium pot, melt butter over medium heat. Add flour and cook, whisking continuously, until the flour is lightly golden and forms a sticky paste with the butter.
- Slowly drizzle in the milk followed by the cream, whisking out any lumps as they form. Cook, whisking continuously, until mixture is thickened (it should be the consistency of thick gravy) and bubbly around the edges, about 5 minutes.
- Stir the milk mixture into the soup. Shred or chop the cooked chicken and add it to the soup.
- Stir in corn and peas and heat over medium heat until vegetables are heated through, 2 to 3 minutes.
- If soup is too thick, add up to 1 cup more broth until it reaches your desired consistency.
- Add pepper and salt to taste. Serve, and enjoy!
Notes
Chocolate whipped cream is a fun twist on classic whipped cream that is so good spooned over hot chocolate, coffee, and your favorite desserts.
One of my favorite things about making whipped cream at home instead of getting it from a spray can is that you can control everything about it, the texture, the sweetness level, and best of all, you can customize the flavor any way you want.
Not quite feeling classic vanilla whipped cream today? Add a little cocoa powder and make that whipped cream into chocolate whipped cream.


Chocolate whipped cream is such a fun (and ridiculously good) twist on classic whipped cream.
It feels decadent enough to eat with a spoon and call it dessert, but it’s especially good spooned over hot chocolate , coffee, or your favorite desserts to add a little boost of chocolate flavor.
Best of all, it’s just as easy to make at home as regular whipped cream. The process is exactly the same, you’ll just add a bit of cocoa powder to the mix to get this chocolate version.
Ingredient Notes
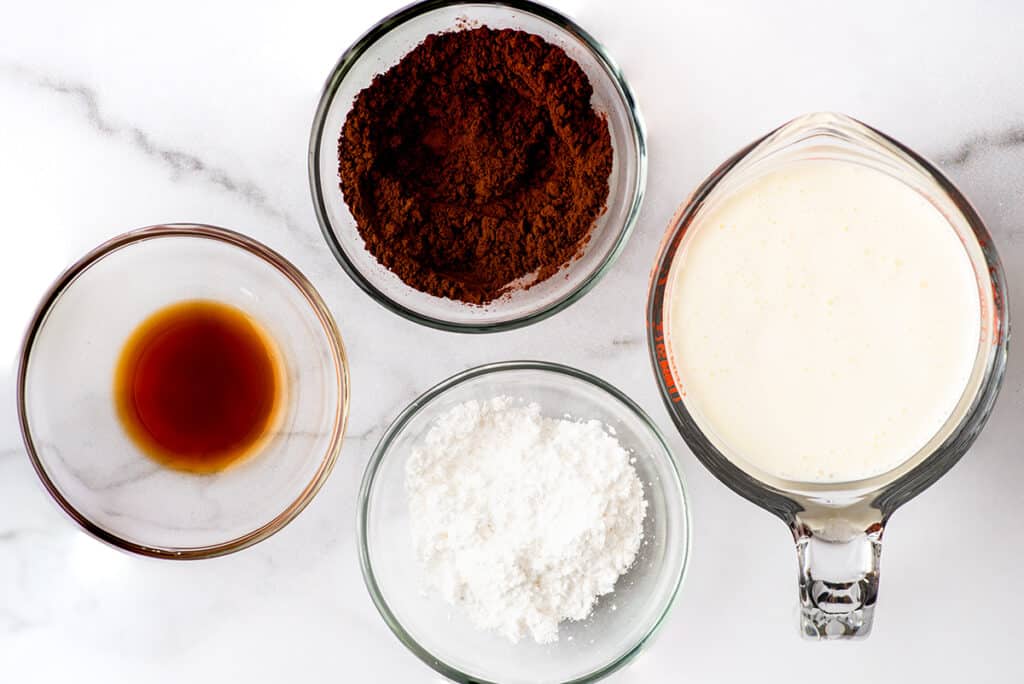

- Heavy cream/heavy whipping cream: Both heavy cream (30–36% milk fat) and heavy (whipping) cream (36%+ milk fat) work just fine for whipped cream, so use whichever one you have on hand. Have leftover heavy cream? Check out my post What to Do With Leftover Whipping Cream for ideas for using up the leftovers. (I recommend using it to make a cute little batch of cream scones .)
- Granulated or powdered sugar: You can use granulated or powdered sugar when making whipped cream, but I prefer to use powdered sugar because it contains cornstarch which helps stabilize the whipped cream.
- Cocoa powder: Both natural and Dutch-process cocoa powder will work for this recipe. Experiment and see which cocoa flavor you prefer (I go back and forth on which is my favorite).
A note on sugar choice: When adding sugar, keep in mind that by weight, 1 tablespoon of granulated sugar is almost twice as much sugar as 1 tablespoon of powdered sugar, so whipped cream made with the same volume of granulated sugar will be much sweeter than whipped cream made with powdered sugar.
How to Make Chocolate Whipped Cream

If whipping the cream by hand, chill your bowl in the freezer for 15 minutes before starting. This will help your cream whip up a little faster and more easily.
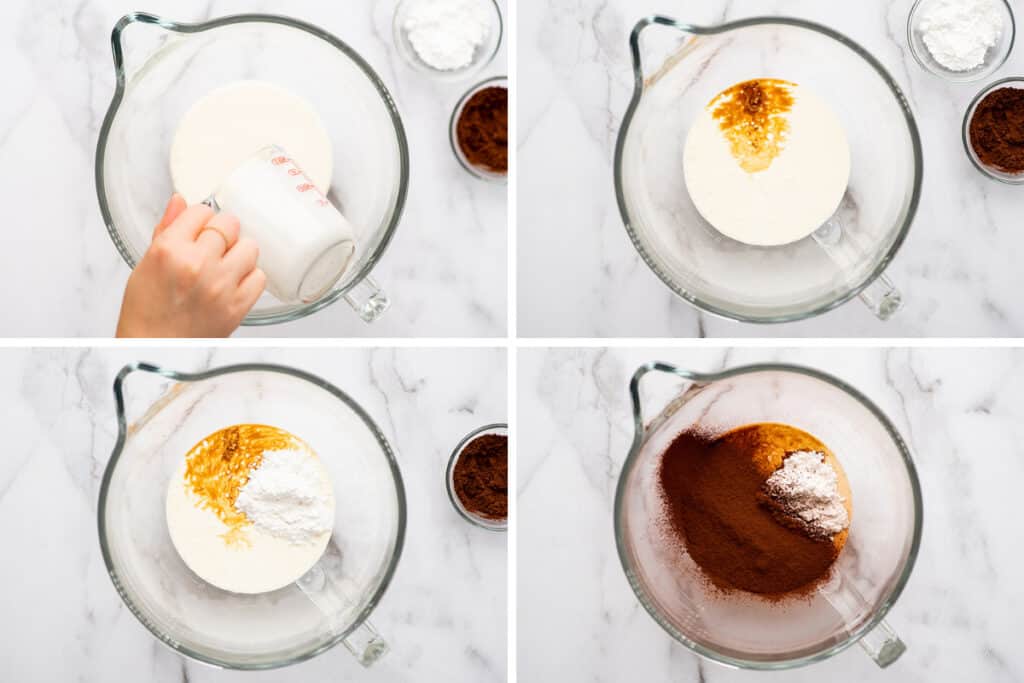
In your chilled bowl or the bowl of your stand mixer, combine heavy cream, vanilla, sugar, and cocoa powder. I recommend using a fine-mesh strainer to sift the cocoa powder into the bowl. You can skip the extra step if you want, but you might end up with a few cocoa powder lumps in the finished whipped cream.
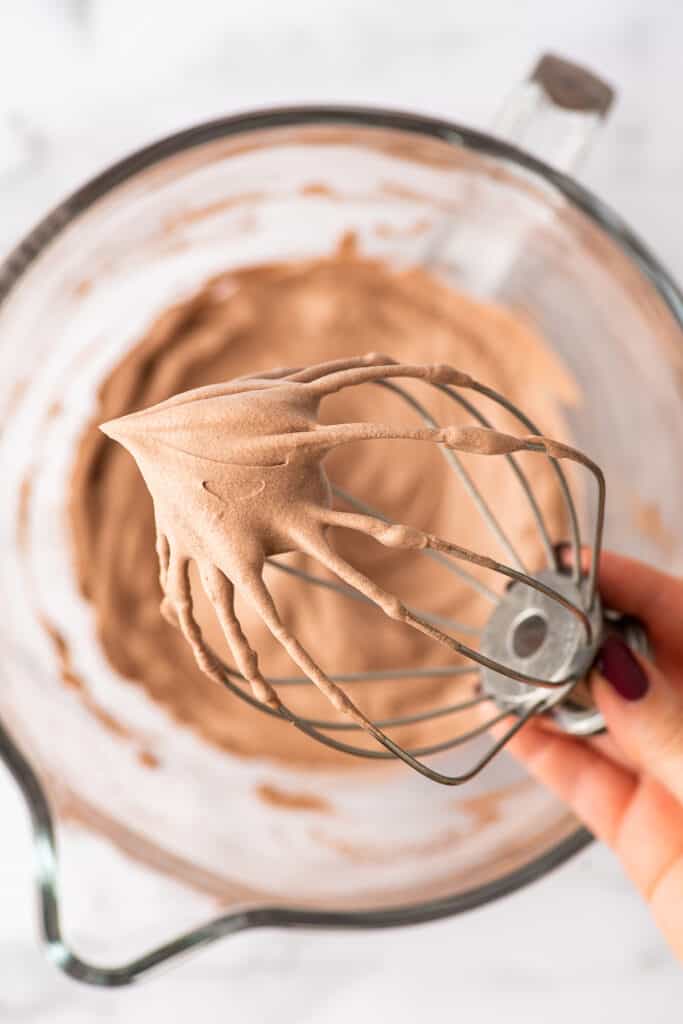
Use a whisk, handheld electric mixer, or the whisk attachment of your stand mixer to whisk the cream until it reaches your desired consistency (soft peaks for spooning over drinks, stiff peaks for piping).
Serve and enjoy!

Where to Use Chocolate Whipped Cream
- Hot Chocolate
- Homemade Mocha
- The BEST Crockpot Hot Chocolate
- Chocolate Chip Waffles
- Chocolate Milkshake
- Strawberries!!
How do you store chocolate whipped cream?
Whipped cream is best when made right before serving, but you can store the leftovers in a covered container in the refrigerator for 48 hours.
Can I use this as frosting/can it be piped?
You can absolutely pipe chocolate whipped cream and use it as a frosting. It pairs best with light desserts like fruit or angel food cupcakes .
I should note, while you can frost cakes with whipped cream, it’s considerably more challenging to work with than regular buttercream and not nearly as stable.
If you plan on making whipped cream to pipe, be sure to whisk it to stiff peaks so it’s able to hold its shape once piped.


Can you freeze leftover whipped cream?
You can, but I find whipped cream to be extra susceptible to freezer burn and “off” freezer flavors, so you’ll want to use it within a few weeks of freezing.
To freeze the whipped cream, pipe or spoon dollops onto a parchment paper-lined plate or baking sheet and freeze until solid. Once frozen, cut the parchment paper into squares and transfer the whipped cream (still on the parchment paper) to a freezer bag for storage.
When you’re ready to use one of the dollops, remove it from the bag and place it in a warm drink and serve immediately or give it 15 to 20 minutes to defrost and serve it over a dessert.
For more information on freezing whipped cream, check out my post, Can You Freeze Whipped Cream?
More Chocolate Desserts
- Small Chocolate Cake
- Chocolate Souffles for Two With Creme Anglaise
- Small-batch Chocolate Chip Cookies
- Decadent Frosted Brownies

Ingredients
Full Batch
- ▢ 1 cup heavy cream
- ▢ ½ teaspoon vanilla extract optional
- ▢ 2 tablespoons to ¼ cup (15-30g ) powdered sugar*
- ▢ 3 tablespoons ( 15g ) unsweetened cocoa powder sifted
Single Serving
- ▢ 2 tablespoons heavy cream
- ▢ A couple drops vanilla extract optional
- ▢ 1 to 2 teaspoons ( 3-5g ) powdered sugar*
- ▢ 1 teaspoon ( 2g ) unsweetened cocoa powder sifted
Instructions
- In a large bowl* or the bowl of your stand mixer, combine heavy cream, vanilla, sugar, and cocoa powder.
- Use a whisk, handheld electric mixer, or the whisk attachment of your stand mixer to whisk the cream until it reaches your desired consistency (soft peaks for spooning over drinks, stiff peaks for piping).
- Serve and enjoy!
Notes

Microwave Mashed Potatoes
Equipment
- Potato masher
- Medium microwave-safe bowl*
- Large microwave-safe plate
Ingredients
- 1 pound (about 3 medium or 2 ) large russet potatoes peeled and diced
- ¾ teaspoon salt divided, plus more as needed
- ⅓ cup milk, half and half, or heavy cream *
- 4 tablespoons (56g) butter cut into chunks, salted or unsalted is fine*
Instructions
- To a medium, microwave-safe bowl, add potatoes and just enough cold water to completely cover them. Add ½ teaspoon of the salt and cover the bowl with an upside microwave-safe down plate.
- Microwave for 10 minutes and allow to sit for 1 minute after the timer goes off.
- Very carefully (the plate, bowl, and steam will be hot!) remove the plate. Check to make sure the potatoes are fork-tender. If not, replace the plate and continue to microwave in 1-minute increments until the potatoes are cooked through.
- Place milk/cream in a microwave-safe container and heat until warm, 30 to 45 seconds.
- Drain potatoes and add butter to the potatoes. Use a fork or potato masher to mash potatoes. Add half of the milk or cream and stir until mixed. If needed, stir in more of the liquid until the potatoes reach your desired consistency. Add remaining ¼ teaspoon of the salt. Taste and add more salt and pepper as needed.
- Serve and enjoy!
