Microwave corn on the cob is the easiest way to cook a whole ear of corn. It’s quick, mess-free, and comes out perfect every time.
I have another microwave vegetable recipe for you today, and honestly, this one’s kind of a game-changer: Microwave Corn on the Cob.
This is the BEST way to cook corn on the cob, because it is SO quick, SO easy, and mess-free.

The Easiest Way to Make Corn on the Cob
Cooking corn in the microwave means no need to shuck the corn or peel off those annoying little stringy bits.
You literally just cut the end off an ear of corn, shove it in the microwave, and once it’s cooked, it slides right out of the husk, silk-free and ready to eat.
It. Is. Magic.
To Make Corn on the Cob in the Microwave, You Will Need
- A very sharp knife
- A microwave
- Corn on the cob
- 3 minutes
How to Cook Corn on the Cob in the Microwave
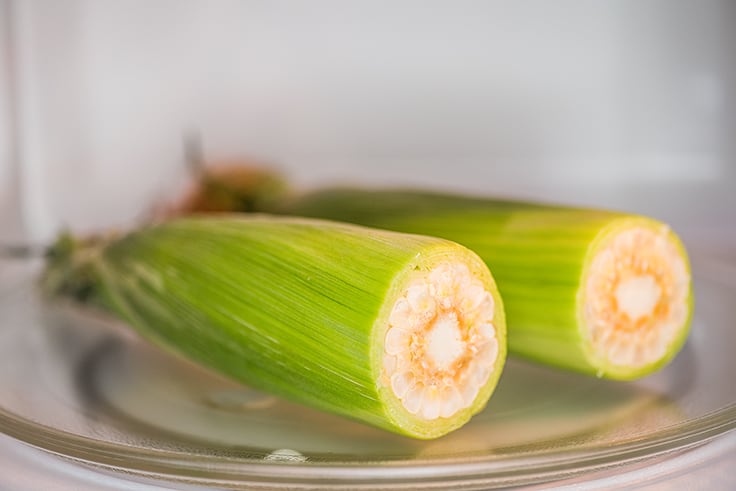
- To microwave corn on the cob in the husk, you’ll first cut off one end so you can slide the corn out once it’s cooked. To do this, find the point at the stalk end (the closed end without all the corn silk) where the cob begins to taper into a point.
You’re going to slice off the end just before that (don’t cut the end off after the cob starts to narrow or you won’t be able to slide the corn out of the husk easily).
Use a sharp knife to make a shallow cut all the way around the cob to help guide the knife, and then apply a little force and slice all the way through.


A Note on Cutting Corn: Cutting through the cob takes a bit of muscle and a sharp knife, as cobs are quite tough. If you’re really struggling to cut the corn or the pressure needed is making you nervous, stop, skip this step and finish cutting off the end after microwaving.
The corn will be softer and easier to cut after microwaving. You’ll just need to let it cool long enough for you to safely handle it.
- Place the corn in the microwave and microwave for 3 minutes. Let it sit for one minute to cool slightly, but don’t leave cooked corn sitting in the microwave for more than a couple minutes or it might not slide out of the husk as easily as it should.

- Carefully, using an oven mitt or towel if necessary, squeeze the corn out of the husk. Make sure to keep squeezing all the way to the end. This helps keep the silk trapped inside.


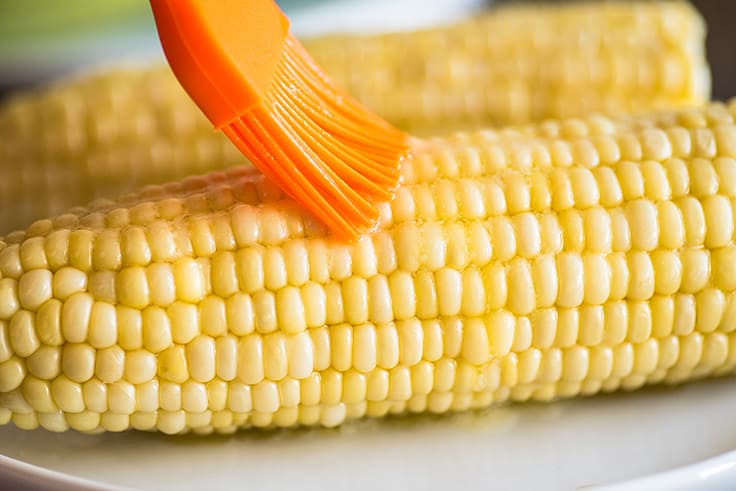
- Rinse to remove any stray strands of silk, brush with melted butter if that’s your thing, and enjoy!

How to Microwave Husked Corn on the Cob
If your corn is already husked, not a problem. You can microwave corn in a paper towel and get the same effect.
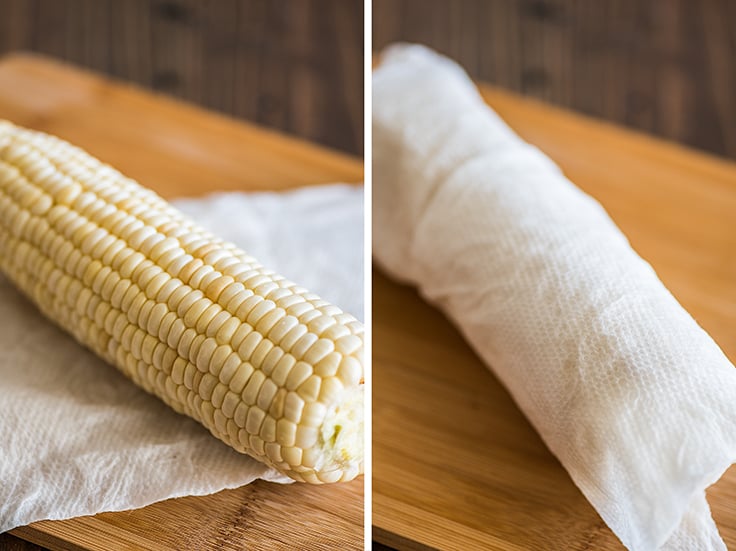

- Fold a paper towel in half, run it under water, and then squeeze out most of the liquid so that it is not dripping. Wrap the damp towel around your corn and it’s ready to go.
- If you have a pack of corn that’s half-shucked, with the ends trimmed but some husks still on, just leave the husks on and wrap the paper towel over them. They and the corn silk will be easier to remove after microwaving.
What to Put on Corn on the Cob
If you want to add a flavor boost to your corn, try one of these combos:
- Elote-style: Drizzle corn with melted butter and then spread mayonnaise over the entire thing. Sprinkle with cotija or Parmesan cheese, a bit of chili powder and a squeeze of lime juice.
- Honey Butter Corn: Combine melted butter and honey (about 3 parts butter to 1 part honey) and stir until mixed. Brush mixture over the cooked corn.
- Herbed Butter Corn: Whip your favorite herbs into softened butter (try one of these flavor combos if you’re not sure where to start ) and spread the flavored butter over the corn.
Can I Microwave More than One Ear of Corn in the Microwave?
Yes. You can microwave more than one ear of corn in the microwave. The rule of thumb is you’ll want to add 1 to 2 minutes per ear of corn and not cook more than what will fit in a single layer with a little space between, so 3 to 4 ears is usually the limit.
- Microwave 2 ears of corn: 4-5 minutes
- Microwave 3 ears of corn: 5-6 minutes
- Microwave 4 ears of corn: 6-7 minutes
How do you store cooked corn on the cob?
Store cooked corn in an airtight container or plastic bag in your refrigerator for 2 to 3 days.
How do you reheat cooked corn on the cob?
Corn on the cob can be reheated in the microwave. Wrap the corn in a slightly damp paper towel and microwave in 20-second increments until it is heated through.
What Goes With Corn on the Cob?
If you’ve craving corn on the cob and need some ideas on what to serve it with, these are some of my favorites:
- Marinated Rib-eye Steaks
- Turkey Burgers
- Tri-tip Sandwiches
- Slow Cooker Beef Ribs
More Microwave Veggie Recipes
- Broccoli in the Microwave
- Cauliflower in the Microwave
- Green Beans in the Microwave
- Carrots in the Microwave
Tips and Tricks
- Microwave power varies wildly, so if your first ear of corn seems under/overcooked, don’t give up! Next time, try reducing or extending the cooking time next time a little as needed for your microwave and preference.

Ingredients
- ▢ Un-husked corn on the cob *
- ▢ Butter optional for brushing
- ▢ Salt optional
Instructions
- Place corn on a cutting board, and cut off the stalk end by making a shallow cut all the way around the corn and then slicing through.
- Place the corn in the microwave and microwave for 3 minutes. Let it sit for 1 minute.
- Carefully, using an oven mitt or towel if necessary, squeeze the top of the corn so that the cob slides out.
- Rinse, pat dry, brush with melted butter and sprinkle with salt if desired, and enjoy!
Notes
- Microwave 2 ears of corn: 4-5 minutes
- Microwave 3 ears of corn: 5-6 minutes
- Microwave 4 ears of corn: 6-7 minutes
Choose your own adventure with this (giant) One Chocolate Chip Cookie for Two, made three different ways, classic, caramel and sea salt, and triple chocolate.
Hey, friends, it’s time for another reader-requested post from the survey I ran a while back. After requests for posts on meal planning ( I wrote two ), and where to buy small-batch baking tools , the third most popular request was for multi-use recipes.
Again, this one surprised me! Choose your-own-adventure-type recipes weren’t even something I’d thought about adding to the blog, but now that so many of you have said something, I totally get it.
Having options is fun, so get hyped because today’s recipe gives you at least three.

One Giant Cookie, Three Ways
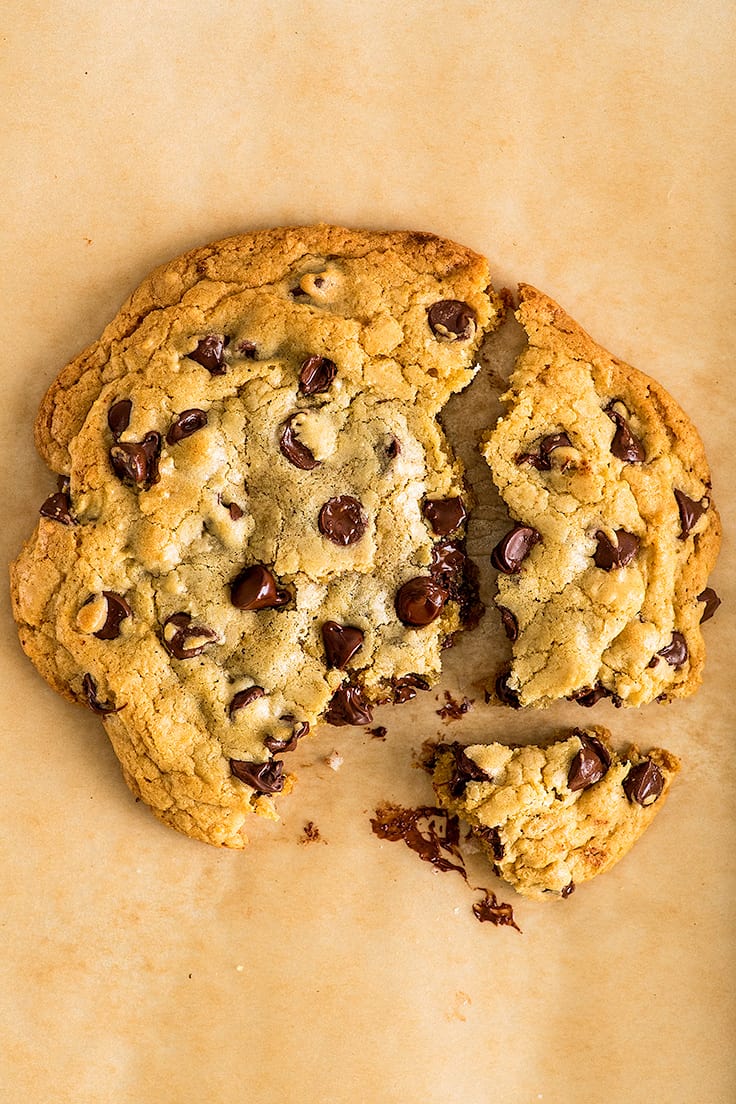
Yes, this is one big, beautiful cookie, and it’s ready and able to be customized any way you want it.
The base recipe is a modified version of my ever-popular Small-batch Chocolate Chip Cookies , so it’s all the great things about that recipe, quick, zero prep needed, and DELICIOUS.
Only this one is about six inches wide. Hold up your hand, spread out your fingers, and that’s about how big this cookie is. It’s the perfect size for two people to bake and nibble on all afternoon or to share warm out of the oven for dessert.
Drop cookies like this can be made with endless variations because it’s just a matter of choosing mix-ins and seeing how much you can pack into a single cookie, but today, to get you started, I’m sharing three.
One Chocolate Chip Cookie
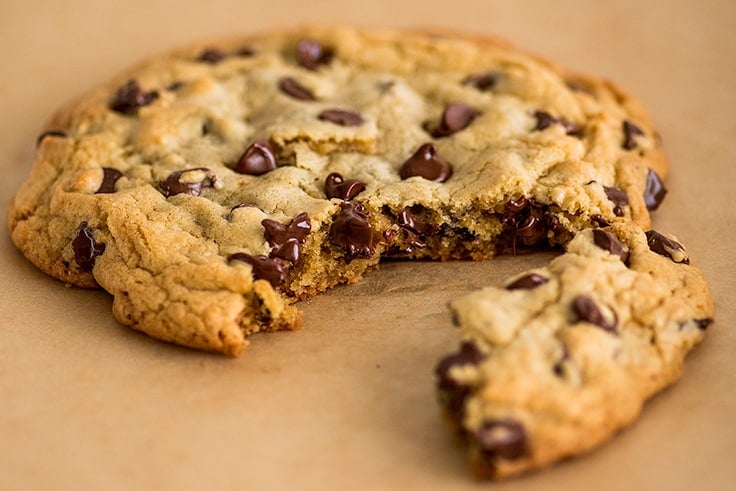

The first option is your Classic Chocolate Chip Cookie. It’s LOADED with chocolate chips, the edges are crispy, and the center is gooey.
It must be eaten with a tall glass of cold milk and it’s pretty perfect. You can’t go wrong with a classic.
Moving on.
One Triple Chocolate Cookie


Option two is for all the chocoholics out there, a Triple Chocolate Cookie. A little cocoa powder in the dough turns the cookie base chocolate, and to offset its slightly bitter richness, you add two different types of chocolate chips, semi-sweet and bright and creamy white chocolate.
It tastes a bit like a cross between a cookie and a brownie, and as with cooking brownies, undercooking it just a bit for extra chocolate gooeyness is highly recommended.
One Caramel and Sea Salt Chocolate Chip Cookie
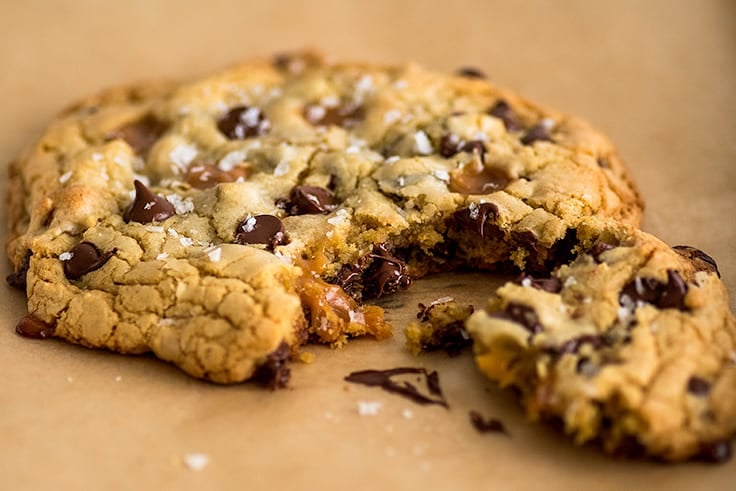

And finally, option three gets just a little classier, chocolate chips plus caramel and some crunchy sea salt.
It’s classic chocolate chip goodness with an added caramel chew and salty sophistication. It’s kind of a must.
Ingredient Notes
- An egg yolk: Because this is a super small-batch recipe, you just need one yolk. For ideas on what to do with the leftover egg white, check out my post What to Do With Leftover Egg Whites (I recommend a small batch of frosted sugar cookies!! ).
- Butter: Either salted or unsalted butter will work in these cookies. If using salted butter, cut the salt in the recipe by half.
How to Make One Chocolate Chip Cookie
- Whisk together butter and brown and granulated sugars. Add egg yolk and vanilla and whisk until well-combined.
- Stir in flour, (cocoa powder if making Triple Chocolate Cookie), baking soda, and salt.
- Fold in the chocolate chips or other mix-ins.
- Scoop dough onto baking sheet and bake until set.
- Serve and enjoy!
Other Variations
- Make your own: To create your own cookie variation, mix in up to 1/4 cup of mix-ins like chopped chocolate candies, nuts, or dried fruit.
- S’mores cookie: Go check out my S’mores Cookie recipe for instructions on how to smash a s’mores inside of your chocolate chip cookie. It’s so good!!
- Chocolate chip cookie sundae: Make the cookie of your choice, and while it’s still warm and gooey, top it with ice cream and chocolate sauce , hot fudge sauce , or peanut butter sauce and whipped cream .
Can I make this into multiple cookies instead of one big one?
Yes. You can divide the dough in half and make two smaller cookies. Reduce the baking time to 9 to 12 minutes.
Can I just use a whole egg in this recipe?
No!! Sometimes people tell me they’ve used an entire egg when a recipe calls for just a yolk or an egg white, and sometimes it works fine.
DO NOT do that with this recipe. It will be far too much liquid and you will end up with a cookie puddle.
Can I double this recipe?
Go for it. The recipe doubles with no preparation changes needed. To change the recipe yield, hover over the serving size in the recipe card below or click if you’re on mobile, and slide the slider.

Recipe Notes
- To avoid having to split a whole egg, this cookie is made with a single egg yolk. If you are sensitive to the taste of egg yolk in baked goods, you can replace the egg yolk with 1 tablespoon of a whisked whole egg.
More Small-batch Desserts
- Buckeye Brownie Cookies
- Hot Chocolate for One
- Easy Kettle Corn
- Small Chocolate Cake

Ingredients
- ▢ 2 tablespoons ( 1oz ) butter melted and slightly cooled
- ▢ 2 tablespoons ( 25g ) brown sugar
- ▢ 1 heaping tablespoon ( 18g ) granulated sugar
- ▢ ¼ teaspoon vanilla extract
- ▢ 1 large egg yolk OR 1 tablespoon whisked whole egg
- ▢ ⅓ cup ( 40g ) all-purpose flour measured by weight or using the spoon and sweep method*
- ▢ ⅛ teaspoon baking soda
- ▢ ⅛ teaspoon salt if using salted butter, cut salt by half
Classic Mix-ins
- ▢ ¼ cup ( 1.5oz ) semi-sweet chocolate chips
Sea Salt & Caramel Mix-ins
- ▢ ¼ cup ( 1.5oz ) semi-sweet chocolate chips
- ▢ 2 tablespoons chopped baking caramels
- ▢ Pinch of sea salt for topping
Triple Chocolate Mix-ins
- ▢ 1 tablespoon ( 5g ) cocoa powder
- ▢ 2 tablespoons ( 0.75oz ) semi-sweet chocolate chips
- ▢ 2 tablespoons ( 0.75oz ) white chocolate chips
Instructions
- Preheat your oven to 350°F and line a baking sheet with parchment paper or a silicone baking mat.
- In a small bowl, whisk together melted and slightly cooled butter, brown sugar and granulated sugar. Add vanilla extract and egg yolk, and mix well.
- Add flour, (cocoa powder if making Triple Chocolate Cookie), baking soda, and salt, and stir until combined.
- Stir in mix-ins of choice and scoop cookie dough onto prepared baking sheet. (Top with a sprinkle of sea salt if making Sea Salt & Caramel Cookie.)
- Bake for 11 to 14 minutes, until the top of the cookie looks mostly set and edges are starting to brown. Allow to cool on the baking sheet for 5 minutes and enjoy!
Notes
This small-batch of Garlic Aioli, made with just three ingredients, is your new best friend if you want to upgrade your sandwich, french fry, and veggie dipping game.
Today’s recipe is a total game-changer of a recipe: Small-batch Garlic Aioli.
It’s made with just three ingredients, mayonnaise, garlic, and lemon juice (plus a little salt and pepper), that when mixed together basically become magic.
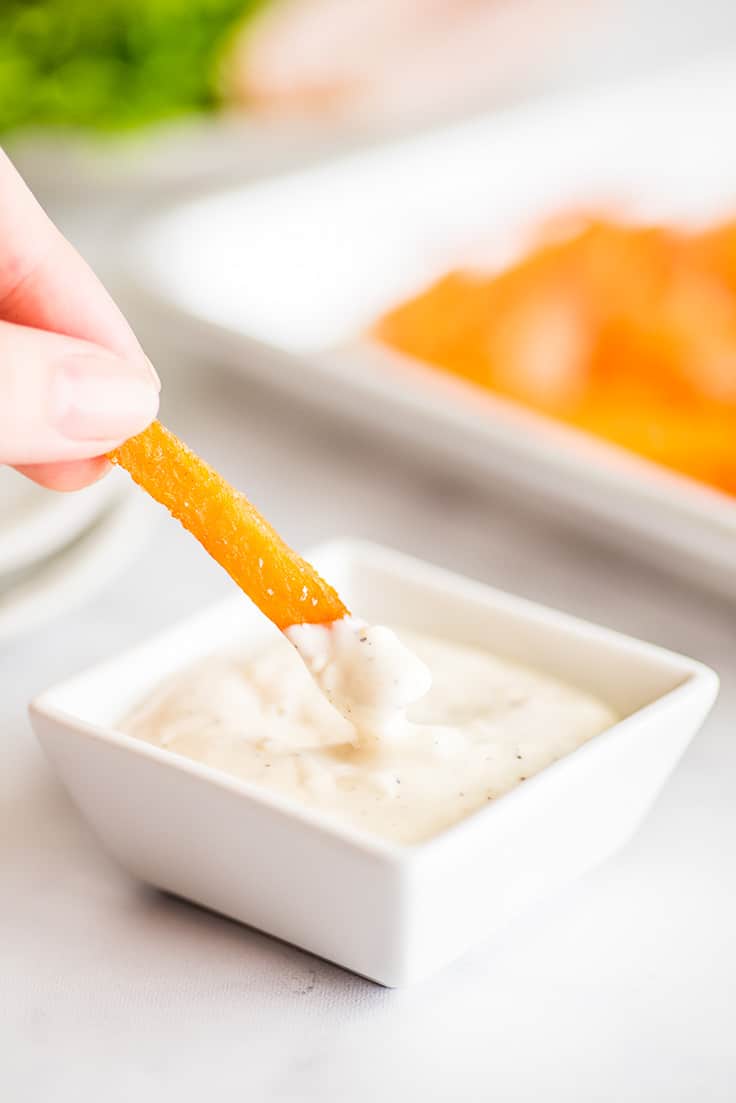

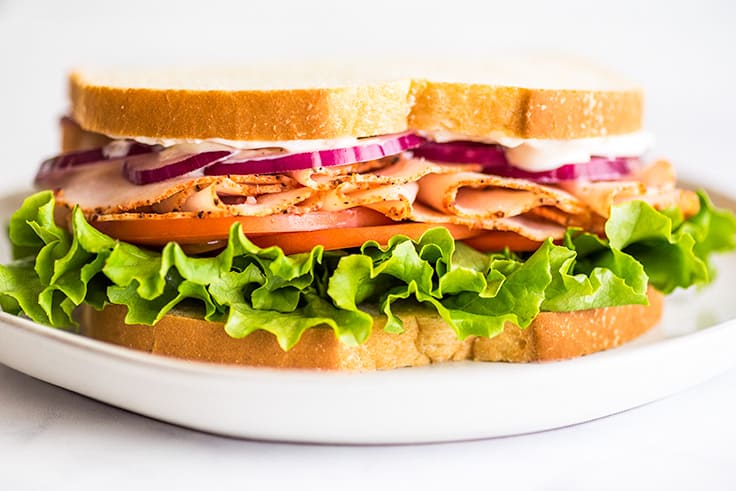
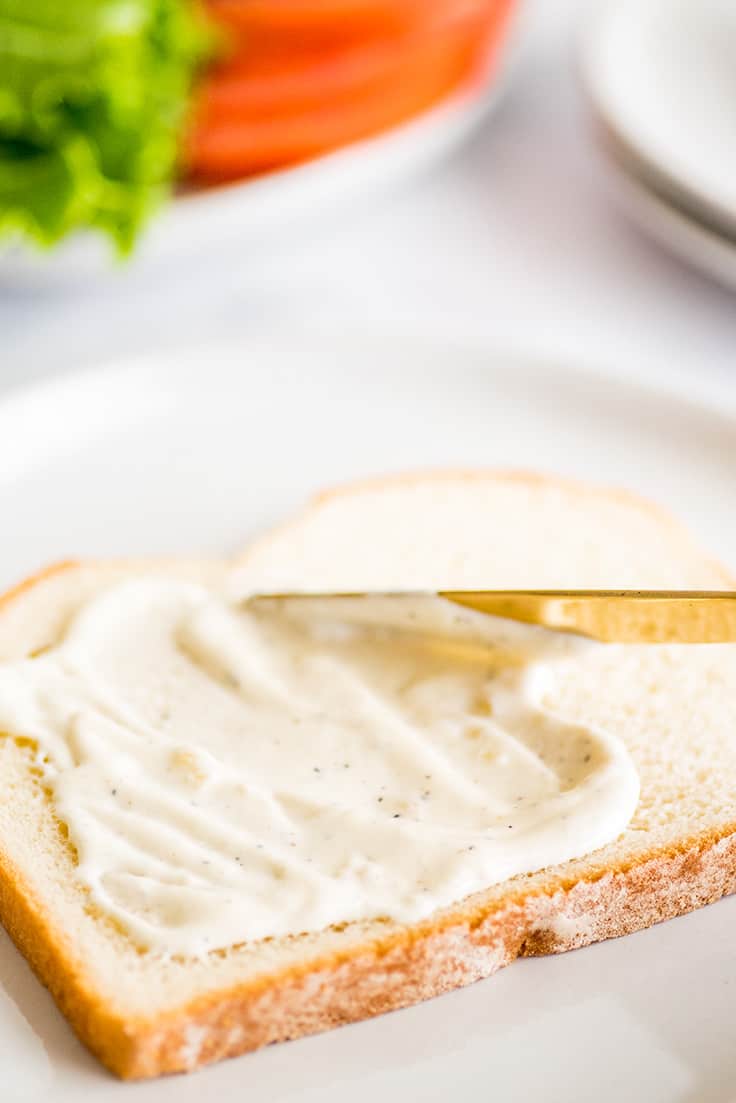
You get a creamy spread perfect for dipping fries and veggies or slathering over sandwiches. The kick of garlic and acidic tang of the lemon really bring out the best of whatever you’re eating it on/over/with.
Trust me, if you’ve never made aioli at home, you need this recipe in your life.
Ingredient Notes
- Mayonnaise: Any mayo will work here including vegan and low-fat. If you want to lighten up your aioli, you can substitute up to two tablespoons of unsweetened yogurt for part of the mayonnaise. Especially when using it as dip, you don’t miss the fat, and it dramatically cuts the calories.
- Fresh garlic: It’s best to steer clear of sprouted garlic in your aioli. While you can usually get away with using sprouted garlic to some degree in cooking, when using it raw, it can give your aioli an “off” flavor even if you cut away the sprouted portion.
- Lemon juice: Fresh or bottled lemon juice works just fine in this recipe.
How to Make Small-batch Homemade Aioli
- In a small bowl, combine mayonnaise, pressed garlic, lemon juice, and salt and pepper.
- Stir, and add more salt and pepper to taste if needed.
That’s it. I included measurements in the full recipe below to get you started, but after you’ve made it once or twice, you won’t need them. Just a couple dollops of mayo in a bowl, a crushed garlic clove and lemon to taste. You’ll be able to make aioli in your sleep in about 30 seconds.
It’s a perfect back-pocket recipe to pull out any time a turkey and cheese sandwich at lunch feels a little boring or homemade batch of sweet potato fries needs a little spicing up.

Variations
- Chipotle aioli: You can make chipotle yogurt aioli by stirring 1/8 teaspoon chipotle powder OR 1/2 to 1 teaspoon of adobo sauce from a can of chipotle peppers for a smokey, spicy flavor.
- Greek yogurt aioli: Replace the mayonnaise with plain, unsweetened yogurt for a light and delicious aioli.
I don’t have a garlic press. What can I use instead?
If you own a microplane , you can also use it to grate your garlic. Or in a pinch, you can crush garlic with a knife (read on for instructions).
How to Crush Garlic Without a Garlic Press
To crush your garlic without a garlic press, peel and finely dice a clove of garlic. Sprinkle with a little salt and then use the flat of your knife blade to smash/scrape the garlic into a paste. ( Here’s a good video of this being done .)
Then just scrape that paste into the bowl with the rest of your aioli ingredients (salt to taste since you’ve already added some salt), and you’re good to go.

Can I make garlic aioli ahead of time?
Yes. You can make aioli up to 48 hours in advance. Store it in an airtight container in the refrigerator. Aioli not used within 2 days of being made should be discarded because of the raw garlic.
Can I make a big batch of garlic aioli?
Yes! The recipe can be scaled up with no recipe changes needed. To change the recipe yield, in the recipe card below, hover over the serving size or click if you’re on mobile, and slide the slider.
You Might Also Enjoy
- Small-batch Cheese Sauce
- Pesto Chicken Sandwiches
- Chipotle Turkey Sandwiches
- Carne Asada Sandwich
- Homemade Panini

Ingredients
Special Equipment
- ▢ Garlic press
Small-batch Aioli
- ▢ 1/4 cup ( 56g ) mayonnaise
- ▢ 1 garlic clove pressed
- ▢ 1 teaspoon lemon juice
- ▢ 1/8 teaspoon salt
- ▢ 1/8 teaspoon pepper
Instructions
- In a small bowl, combine all ingredients and stir until well-combined.
- Taste and add more salt and pepper if needed.
- Serve and enjoy!
Notes

Microwave Corn on the Cob
Ingredients
- Un-husked corn on the cob *
- Butter optional for brushing
- Salt optional
Instructions
- Place corn on a cutting board, and cut off the stalk end by making a shallow cut all the way around the corn and then slicing through.
- Place the corn in the microwave and microwave for 3 minutes. Let it sit for 1 minute.
- Carefully, using an oven mitt or towel if necessary, squeeze the top of the corn so that the cob slides out.
- Rinse, pat dry, brush with melted butter and sprinkle with salt if desired, and enjoy!
Notes
- Microwave 2 ears of corn: 4-5 minutes
- Microwave 3 ears of corn: 5-6 minutes
- Microwave 4 ears of corn: 6-7 minutes
