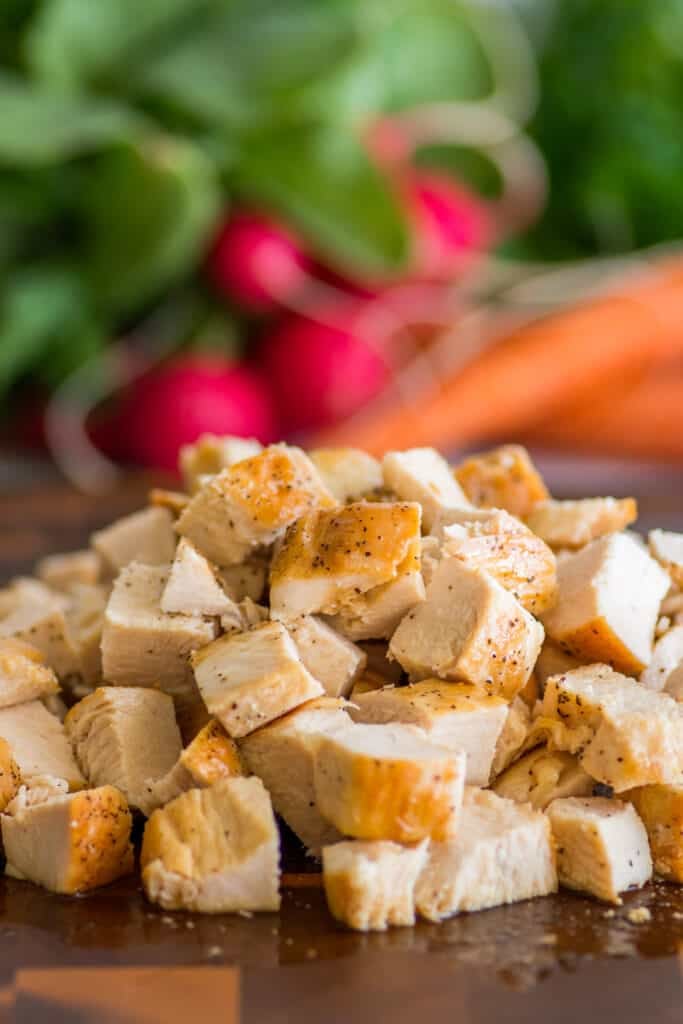
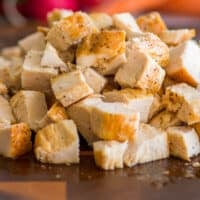
This is a quick tutorial on how to cook chicken breasts when you get a recipe that calls for “cooked chicken.” It’s simple, easy, and mostly hands-off, so you can do the rest of your recipe prep while the chicken cooks. You end up with juicy, tender chicken breasts that are perfect to cube and mix into pasta, soups, and other recipes or just enjoy for a light, healthy lunch.
Question! What do you do when you make a recipe and the ingredient list calls for “cooked chicken?”
Do you throw a chicken breast in the oven for half an hour and hope for the best? Run out and buy a rotisserie chicken? Pick a different recipe because come on, why doesn’t it say how to cook the chicken–half the recipe is missing?
Yes? Yes? or Yes? Friend, today’s recipe is for you.

The Best Way to Cook Chicken Breasts
This is the BEST way to cook chicken breast when you come across a recipe that calls for “cooked chicken.” It tastes a hundred times better than oven-cooked chicken breast, you don’t need to make a trip to the grocery store, and it’s so easy that after you’ve made it once, you’ll never need a recipe for cooked chicken ever again.
This method, which is a mix of pan frying and something similar to poaching, produces chicken that is moist, tender, and super flavorful.
Best of all, the chicken can go from fridge to stove with almost no prep and needs no babysitting. Once you get it cooking, you can walk away and do the rest of your recipe prep. It’s the best.
Ingredients and Tools
- A skillet with a lid: You’ll need a skillet with a lid for this recipe since once the chicken is browned it cooks covered to trap the heat and steam of the simmering liquid for quicker, more even cooking. If you don’t own a skillet with a lid, or you’re planning on making soup and don’t want to get two dishes dirty, you can cook your chicken in a large pot with a lid.
- Instant-read thermometer : An instant-read thermometer takes all the guesswork out of cooking meat so you can pull your chicken from the stove at exactly the right moment. You can cook chicken without one, but if you cook meat regularly, go buy a thermometer. It will change your life!
- Boneless skinless chicken breasts: Chicken breast size varies wildly, so don’t be alarmed if your chicken is taking longer to cook than expected. There are some huge chicken breasts out there these days, and they will take significantly longer to cook than a 6-ounce breast. Just keep adding water if it all simmers away and trust your thermometer!
- Seasonings: Unless the recipe calls for additional seasonings, I typically just salt and pepper the chicken, but you can get creative with the spices to add extra flavor. Italian seasoning and taco seasoning are both excellent options.
How to Cook Chicken Breasts for Recipes
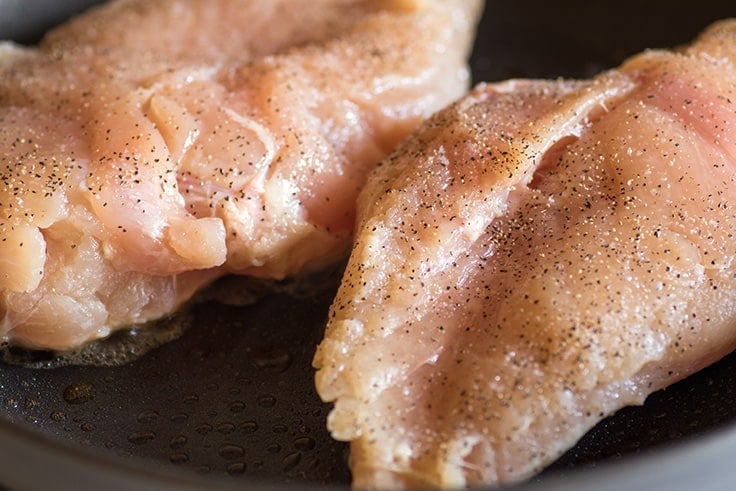
- Salt and pepper both sides of your chicken breasts and heat your skillet over medium-high heat. Once hot, lightly grease with cooking spray or a drizzle of oil. Place chicken breasts in the pan and cook until the first side is nicely browned, 3 to 4 minutes.

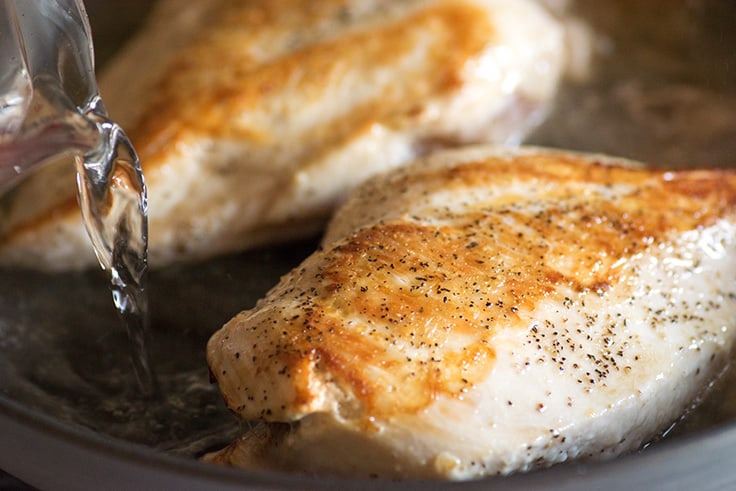
- Flip chicken breasts and brown second side, 2 to 3 minutes. Once both sides are browned, add about 1/2-inch of water to the pan. Turn heat down to medium, cover and cook for 5 to 8 minutes (longer with larger breasts). Walk away and do your prep work for the rest of your recipe, checking every once in a while and adding more water if it all evaporates.

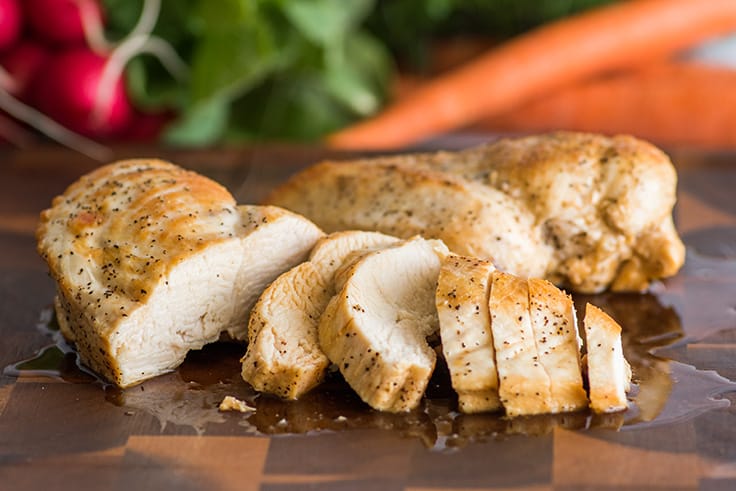
- The chicken is done when an instant-read thermometer inserted into the thickest part of the breast reads 165°F.


- Remove breasts from heat and allow to rest for 5 minutes before cutting as recipe calls for. Enjoy!
Now tell me that wasn’t the easiest thing ever!

Making Shredded Chicken for Recipes
If your recipe calls for shredded chicken, this cooking method works great. Just let your chicken breast rest a little longer after cooking, about 10 minutes and then use two forks to pull the chicken apart.
For more shredding methods and extra tips and tricks, go check out my post How to Make Shredded Chicken .
Recipes Using Cooked Chicken
Not sure what to make with your cooked chicken? Here are a few of my favorites:
- BBQ Chicken Pizza
- Chicken Parm Soup
- Creamy Chicken and Broccoli Orzo
- Creamy Chicken Tortellini Soup
How Many Chicken Breasts Equals a Cup?
Recipes usually call for cooked chicken measured by volume, and that can be tricky to estimate when you’re holding a package of raw chicken measured by weight.
Chicken breast sizes vary a ton, but a good rule of thumb is that you can expect to get a little over 2 cups of cooked meat from 1 pound of raw chicken. Medium-sized raw chicken breasts usually weigh about 8 ounces so:
For 1 cup cooked meat, cook 1 medium chicken breast.
Unless you are trying to accurately estimate calories (in which case, you should be using a scale , not volume), being a little over or under on chicken is not going to hurt your recipe, so don’t stress too much about it.
Can I cook chicken this way and freeze it?
Yes. Once your chicken is fully cooked and cooled, you can either freeze it whole or cut into pieces in a freezer bag. Be sure to squeeze as much air as possible out of the bag before freezing to reduce the chance of freezer burn. Cooked chicken can be stored in the freezer for up to 3 months.
How many chicken breasts can I cook at once using this method?
You can cook as few or as many chicken breasts as you’d like as long as the chicken fits in a single layer in the pan without being crowded. It’s okay if some edges touch, since the chicken will shrink as it cooks, but you don’t want a solid layer of chicken with no space in between. You won’t get good browning or even cooking.
Chicken Breast Recipe Tips
- There will typically be some liquid left at the bottom of the pan after your chicken is cooked. This liquid is full of flavor, so if making soup, add it to the broth for a flavor boost. And if making the chicken in advance, you can pour it back over the chopped breasts to help keep them moist.
More Chicken Tutorials
- How to Co ok Perfect Chicken Breasts for Salads and Sandwiches
- Roasted Chicken Guide
- How to Cook Chicken Shredded Chicken
- How to Make Chicken Stock
- How to Make Soup from a Chicken Carcass
Equipment
- Skillet with a lid
- Instant-read thermometer
Ingredients
- ▢ Boneless skinless chicken breasts
- ▢ Salt
- ▢ Pepper
- ▢ Water
Instructions
- Salt and pepper both sides of your chicken breasts.
- Heat skillet over medium-high heat. Once hot, lightly grease with cooking spray or a drizzle of oil. Place chicken breasts in the pan and cook until the first side is nicely browned, 3 to 4 minutes.
- Flip chicken breasts and brown second side, 2 to 3 minutes. Once both sides are browned, add about 1/2-inch of water to the pan. Turn heat down to medium, cover and cook for 5 to 8 minutes (longer with larger breasts), adding more water if it all evaporates, until an instant-read thermometer inserted into the thickest part of the breast reads 165°F.
- Remove breasts from heat and allow to rest for 5 minutes before cutting as recipe calls for. Enjoy!
Notes
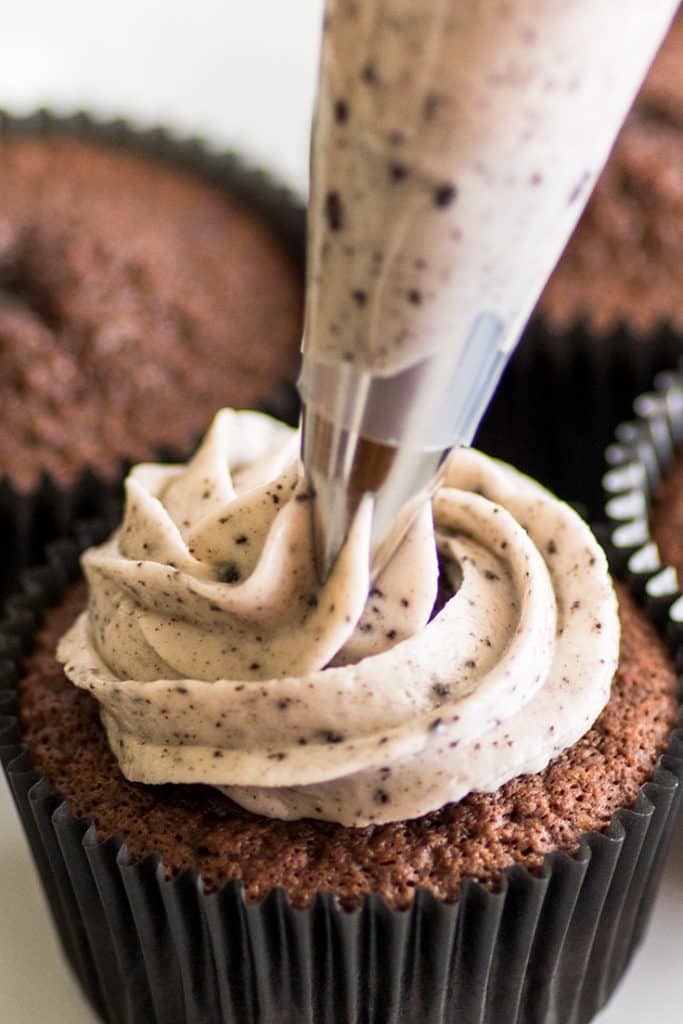
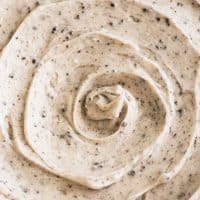
This Small-batch Oreo Frosting, made with cream cheese and crushed Oreo, is the cookies and cream frosting of your dreams.
I have something small and sweet for you today: small-batch Oreo frosting!
This frosting is fabulous over chocolate cupcakes, pillowed between sugar cookies , or if you want to go really wild, serve alongside a plate of Oreos and use as a dip!
It’s going to be a good time no matter how you choose to enjoy it.

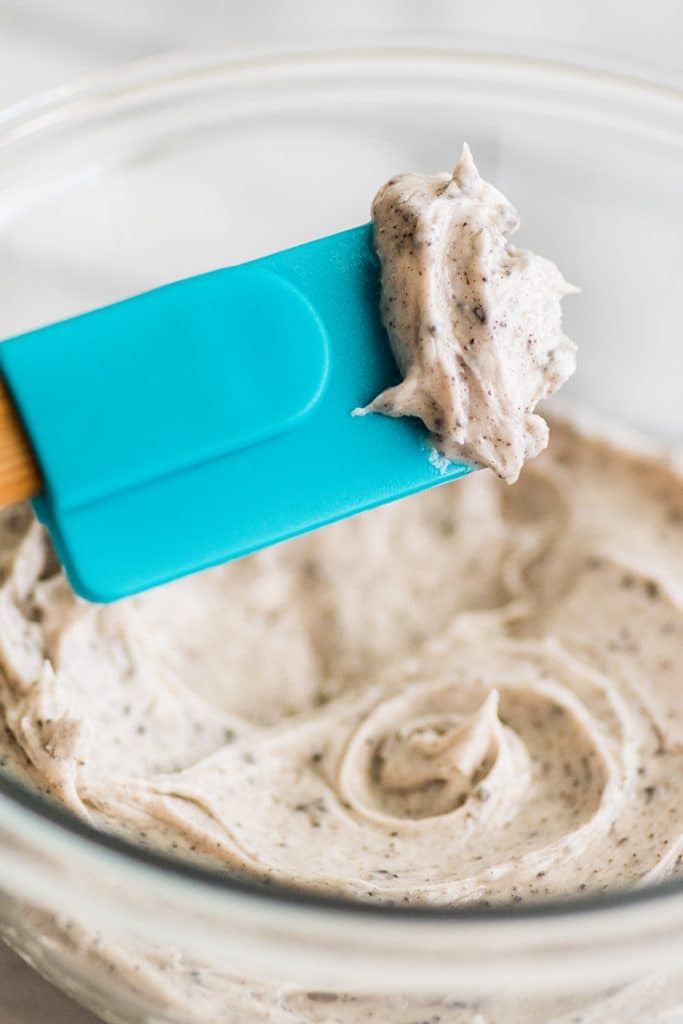
This frosting uses both cream cheese and softened butter as a base alongside powdered sugar and a crushed Oreo. The cream cheese doesn’t give the frosting a strong cream cheese flavor, it just helps to mimic the taste of the creamy center of an Oreo.
Ingredient Notes
- Cream cheese: If you don’t have cream cheese on hand, you can use all butter (just replace the cream cheese with an additional 2 tablespoons of butter), but I really love the creamy, tangy boost that it gives the recipe, so if you can use cream cheese, do!
- Room temperature butter: Make sure you’re starting with room-temperature butter (and cream cheese) or you’ll struggle to get a smooth and creamy frosting. You’ll know your butter is at the right temperature when you can smoosh an indentation into it with your finger, but the butter around it should still hold its shape.
How to Make Oreo Frosting
- Scrape the center out of an Oreo and crush the cookie in a small plastic bag.
- In a medium bowl, combine butter and cream cheese and beat until smooth.
- Add powdered sugar, crushed cookie, salt, and milk and beat until fluffy, adding more milk if necessary.
- Frost something delicious and enjoy!!

Where to Use Cookies and Cream Frosting
- Small-batch Chocolate Cupcakes
- Small-batch Vanilla Cupcakes
- Small-batch Cut-out Sugar Cookies
- Small-batch Fluffy Sugar Cookies
- Small Chocolate Cake (Triple the frosting recipe)
How much frosting will this make?
This recipe will make between ¾ and 1 cup of frosting, depending on how much air you beat into it. That’s enough for about:
- 4 to 6 cupcakes with a piping bag
- 8 cookies or cupcakes with a knife
- 1 single-layer 6-inch or 7×5-inch cake or brownies (top and sides)
- 1 8-inch cake (a thin layer over top only) – This is for people who don’t LOVE frosting. Double the frosting if you’re a big fan.
Can I double this recipe?
Yes! You can scale up this recipe with no preparation changes needed. To change the recipe yield, hover over the serving size in the recipe card below or click if you’re on mobile, and slide the slider.

Can I freeze Oreo frosting?
Yes. American buttercreams like this one freeze really well. Store in a freezer bag in the freezer for up to 2 months. When you’re ready to use it, allow it to defrost in the fridge and then set it out on the counter until it comes up to room temperature for easy spreading.
More Small-batch Frosting Recipes
- Vanilla Frosting
- Chocolate Frosting
- Cream Cheese Frosting
- Cookie Dough Frosting
- Strawberry Frosting
- Chocolate Cream Cheese Frosting
More Oreo Recipes
- Small-batch Oreo Cupcakes
- Oreo Cheesecake Bites
- Oreo Milkshake
- No-churn Peanut Butter Oreo Ice Cream
- Small-batch Chocolate Cookies With Oreos and Andes
Equipment
- Piping bag
- Piping tips*
Ingredients
- ▢ 1 Oreo
- ▢ 2 tablespoons ( 1oz ) unsalted butter softened*
- ▢ 1 ounce cream cheese softened
- ▢ 1 cup ( 120g ) powdered sugar
- ▢ Pinch of salt
- ▢ 1 teaspoon to 1 tablespoon milk or cream
Instructions
- Separate Oreo and discard (or eat) filling. Place cookie halves in a small plastic bag and crush into a fine crumb with a rolling pin or the bottom of a heavy glass. Set crumbs aside.
- In a medium bowl combine softened butter and cream cheese. Beat until smooth.
- Add powdered sugar, cookie crumbs, salt, and 1 teaspoon of milk or cream. Beat until sugar is completely incorporated and frosting is fluffy. Add up to 2 teaspoons more of milk or cream if necessary until frosting reaches your desired consistency.
- Frost something delicious and enjoy!
Notes
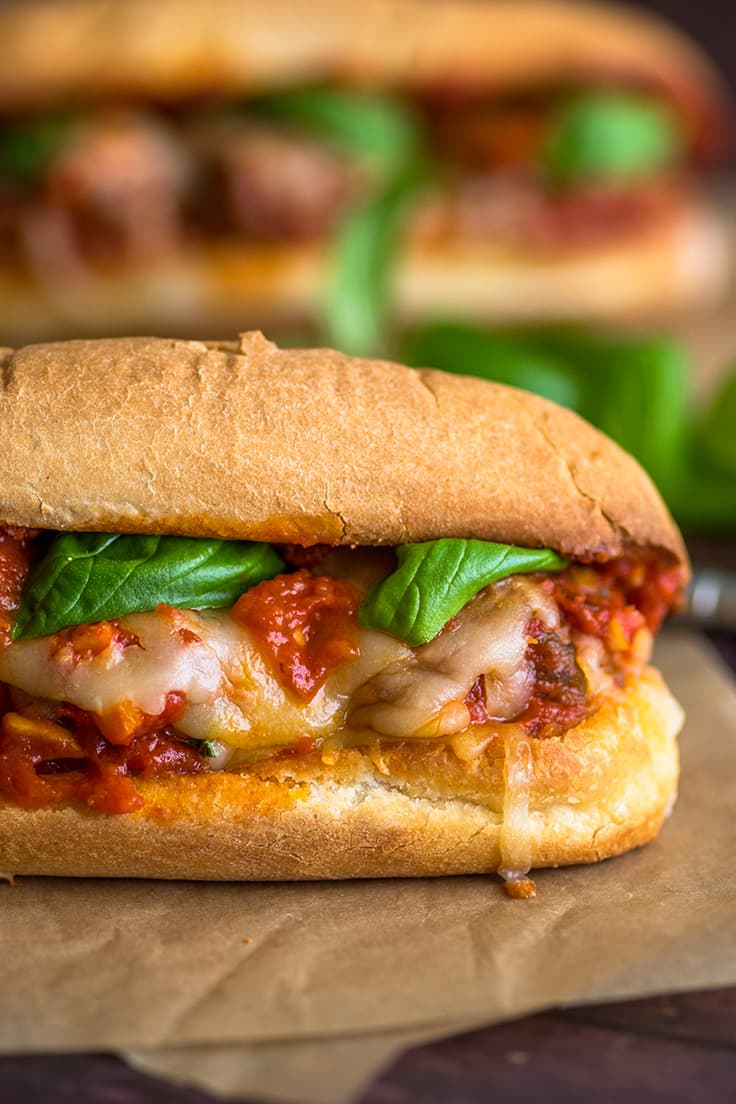
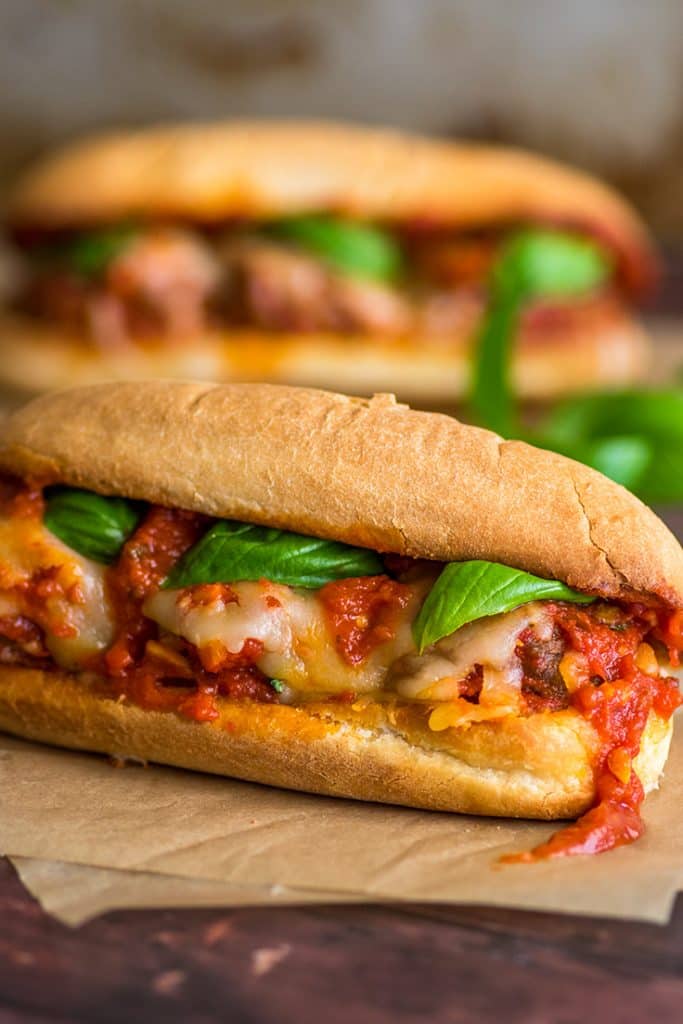
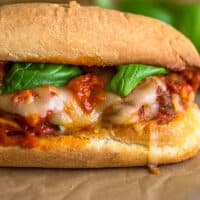
This is The Perfect Meatball Sandwich recipe, made on toasted, buttery garlic bread, with an easy homemade marinara sauce and my favorite beef and sausage meatballs.
A while back, I shared these fantastic freezer meatballs. (If you haven’t made a batch yet, please do. They are one of my favorite things on the site, and if you have a batch in your freezer you can make today’s recipe in about half an hour.)
Anyway, in that post, I promised meatball sandwiches would be coming soon and we have reached that day. Hooray for Meatball Sandwich day!

Ingredient Notes
There are a few things that go into making the perfect meatball sandwich.
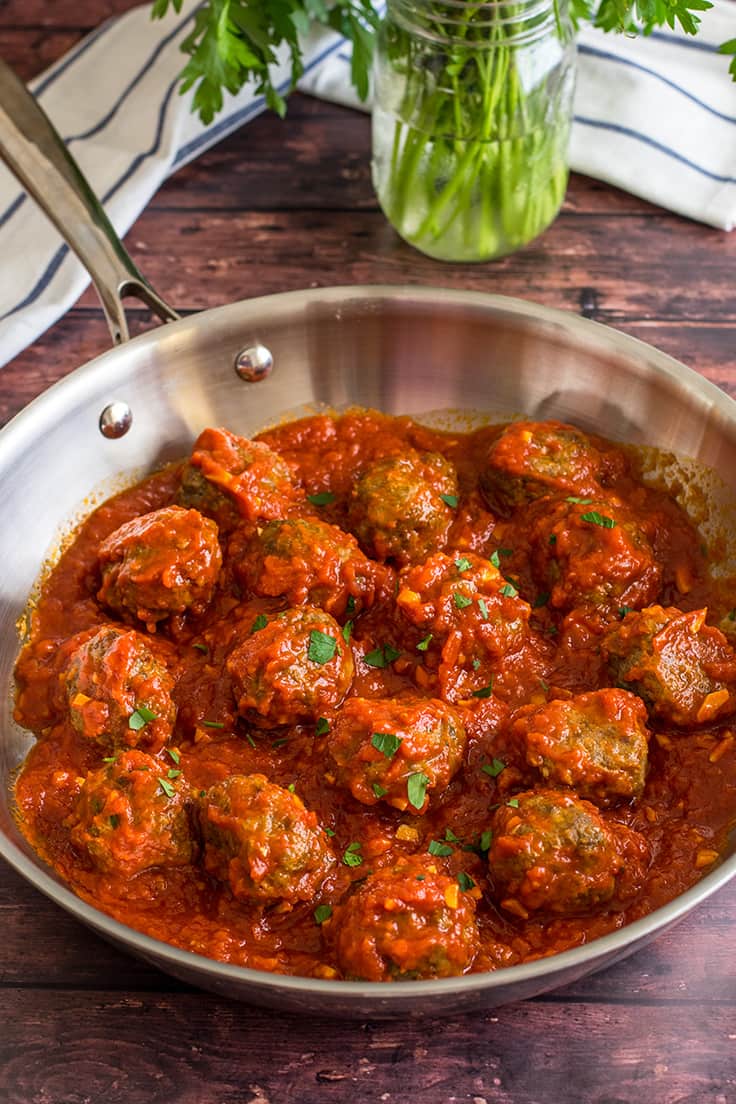
- Good meatballs: I recommend using my absolute favorite meatball recipe for these sandwiches, but if you want to use your own meatball recipe or you’re in a hurry and want to use frozen meatballs, go for it.
- Excellent marinara sauce: The homemade marinara sauce on these sandwiches is just about the perfect marinara sauce. It’s pretty quick-cooking (for a red sauce), is made with just 5 ingredients, and is so tangy and bright and delicious. Good luck not just eating it with a spoon.
- Toasty bread: Soggy meatball sandwiches are the worst. And the best way to avoid soggy sandwiches is to build your sub on lightly toasted bread. And for this recipe, we’re not just going to toast the bread but turn it into buttery, perfect toasted garlic bread.

How to Make Meatball Sandwiches
- Make/warm your meatballs: Make or heat up your premade meatballs so they’re hot and ready to go.
- Make the marinara sauce: While the meatballs heat, throw together your marinara sauce. This process is mostly hands-off. You just brown some garlic, stir in the rest of your sauce ingredients, and let it simmer away.
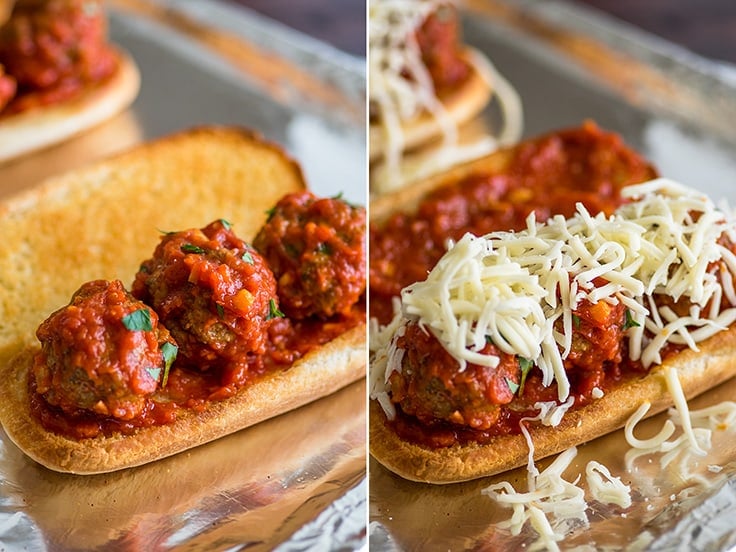
- Make garlic bread: Slather your rolls with butter and then sprinkle with garlic powder. Bake until they are just lightly toasted.
- Assemble: Top the garlic bread with meatballs, sauce, and a sprinkle of mozzarella cheese, and bake until the cheese is melted.

What kind of bread should I use?
French rolls are ideal for meatball marinara sandwiches. They toast up nicely but are soft so they’re easy to bite into even when stuffed full.
Hot dog buns also work well and are a great size for smaller eaters. Depending on the size of your meatballs, you may want to cut them in halves or quarters so they fit better in the smaller buns.
What do you put on a meatball sub?
Aside from meatballs, marinara sauce, and cheese, cooked bell peppers and onions are a delicious addition to meatball subs. To add them to your sub, thinly slice the onions and peppers and cook them in a little olive oil with salt and pepper over medium heat until they are tender-crisp. Load them onto your sandwich and enjoy!

What goes with meatball sandwiches?
Meatball sandwiches are extremely rich and filling, so simple sides like a green salad or garlic green beans complement them nicely. If you want that true deli experience, serve them with a crunchy coleslaw and some kettle chips.
Can I make these in advance?
Yes! Don’t make the garlic bread and assemble the sandwiches until just before you’re ready to serve them, but the sauce and meatballs can be made up to 2 days in advance.
When you’re ready to eat, all you have to do is heat the sauce and meatballs, toast the garlic bread, and assemble your sandwiches.
More Sandwich Recipes
- Pesto Chicken Sandwich on Sourdough
- Panini Without a Panini Press
- Tri-tip Sandwich
- Carne Asada Sandwich
- Pesto Grilled Cheese Sandwich
Recipe Notes
- This sauce recipe calls for a skillet and a splatter screen. The wide skillet is used to increase the cooking surface area so the sauce cooks faster, but you absolutely must use a splatter screen or you will have a mess on your hands. If you don’t own a splatter screen, you can buy one– they are pretty cheap and super handy. Or you can just use a large pot without a screen and turn the sauce down a little so it’s not popping as high. Your sauce will take a bit longer, but there will be less mess.
- If you are cooking for only one or two people, the marinara sauce freezes very well. Just freeze leftover sauce in a mason jar or freeze flat in a freezer bag and it can be frozen for up to three months.
Equipment
- Splatter screen
- Large skillet
Ingredients
Quick Marinara Sauce
- ▢ 1 28-ounce can whole San Marzano tomatoes
- ▢ ¼ cup extra-virgin olive oil
- ▢ 7 cloves garlic peeled and slivered or minced
- ▢ ¼ cup water
- ▢ ¼ teaspoon salt or to taste
- ▢ 1 ½ teaspoon sugar
- ▢ ¼ teaspoon dried oregano
- ▢ Pinch crushed red pepper flakes
- ▢ 1 large fresh basil sprig or ¼ teaspoon dried basil
Meatball Sandwich
- ▢ 4 French rolls
- ▢ Butter
- ▢ Garlic powder
- ▢ 12 to 16 large meatballs fully cooked and warmed
- ▢ 1 cup shredded mozzarella cheese
- ▢ Fresh basil optional for topping
Instructions
Quick Marinara Sauce
- With an immersion blender, food processor, or blender, process tomatoes until mostly pureed–the texture of chunky salsa. You can also turn the tomatoes out into a bowl and crush them with your hands (don’t discard the juices).
- In a large skillet, heat oil over medium heat. Once hot, add the garlic and cook just until it starts to turn lightly golden–watch carefully so it doesn’t burn! Add the tomatoes and their juices to the skillet along with water, salt, sugar, oregano, red pepper flakes, and sprig of basil. Cover with splatter screen and bring to a good simmer, turning up the heat if necessary. Simmer, stirring occasionally, for 15 to 20 minutes until sauce is thickened. Taste and add more salt if needed.
- Remove basil sprig.
Meatball Sandwiches
- Preheat your oven to 400°F. Butter both sides of your French rolls and sprinkle garlic powder over the top. Place on a baking sheet and bake for 3 to 4 minutes until lightly toasted.
- Add a couple tablespoons of sauce to both sides of each French roll and top with 3 to 4 meatballs and 1/4 cup of mozzarella. Bake for an additional 2 to 3 minutes, until cheese is melted.
- Add fresh basil if desired. Serve and enjoy!
Notes
Sauce Adapted From The New York Times
This is a quick tutorial on how to cook chicken breasts when you get a recipe that calls for “cooked chicken.” It’s simple, easy, and mostly hands-off, so you can do the rest of your recipe prep while the chicken cooks. You end up with juicy, tender chicken breasts that are perfect to cube and mix into pasta, soups, and other recipes or just enjoy for a light, healthy lunch.
Question! What do you do when you make a recipe and the ingredient list calls for “cooked chicken?”
Do you throw a chicken breast in the oven for half an hour and hope for the best? Run out and buy a rotisserie chicken? Pick a different recipe because come on, why doesn’t it say how to cook the chicken–half the recipe is missing?
Yes? Yes? or Yes? Friend, today’s recipe is for you.
The Best Way to Cook Chicken Breasts
This is the BEST way to cook chicken breast when you come across a recipe that calls for “cooked chicken.” It tastes a hundred times better than oven-cooked chicken breast, you don’t need to make a trip to the grocery store, and it’s so easy that after you’ve made it once, you’ll never need a recipe for cooked chicken ever again.
This method, which is a mix of pan frying and something similar to poaching, produces chicken that is moist, tender, and super flavorful.
Best of all, the chicken can go from fridge to stove with almost no prep and needs no babysitting. Once you get it cooking, you can walk away and do the rest of your recipe prep. It’s the best.
Ingredients and Tools
- A skillet with a lid: You’ll need a skillet with a lid for this recipe since once the chicken is browned it cooks covered to trap the heat and steam of the simmering liquid for quicker, more even cooking. If you don’t own a skillet with a lid, or you’re planning on making soup and don’t want to get two dishes dirty, you can cook your chicken in a large pot with a lid.
- Instant-read thermometer : An instant-read thermometer takes all the guesswork out of cooking meat so you can pull your chicken from the stove at exactly the right moment. You can cook chicken without one, but if you cook meat regularly, go buy a thermometer. It will change your life!
- Boneless skinless chicken breasts: Chicken breast size varies wildly, so don’t be alarmed if your chicken is taking longer to cook than expected. There are some huge chicken breasts out there these days, and they will take significantly longer to cook than a 6-ounce breast. Just keep adding water if it all simmers away and trust your thermometer!
- Seasonings: Unless the recipe calls for additional seasonings, I typically just salt and pepper the chicken, but you can get creative with the spices to add extra flavor. Italian seasoning and taco seasoning are both excellent options.
How to Cook Chicken Breasts for Recipes
- Salt and pepper both sides of your chicken breasts and heat your skillet over medium-high heat. Once hot, lightly grease with cooking spray or a drizzle of oil. Place chicken breasts in the pan and cook until the first side is nicely browned, 3 to 4 minutes.
- Flip chicken breasts and brown second side, 2 to 3 minutes. Once both sides are browned, add about 1/2-inch of water to the pan. Turn heat down to medium, cover and cook for 5 to 8 minutes (longer with larger breasts). Walk away and do your prep work for the rest of your recipe, checking every once in a while and adding more water if it all evaporates.
- The chicken is done when an instant-read thermometer inserted into the thickest part of the breast reads 165°F.
- Remove breasts from heat and allow to rest for 5 minutes before cutting as recipe calls for. Enjoy!
Now tell me that wasn’t the easiest thing ever!
Making Shredded Chicken for Recipes
If your recipe calls for shredded chicken, this cooking method works great. Just let your chicken breast rest a little longer after cooking, about 10 minutes and then use two forks to pull the chicken apart.
For more shredding methods and extra tips and tricks, go check out my post How to Make Shredded Chicken .
Recipes Using Cooked Chicken
Not sure what to make with your cooked chicken? Here are a few of my favorites:
- BBQ Chicken Pizza
- Chicken Parm Soup
- Creamy Chicken and Broccoli Orzo
- Creamy Chicken Tortellini Soup
How Many Chicken Breasts Equals a Cup?
Recipes usually call for cooked chicken measured by volume, and that can be tricky to estimate when you’re holding a package of raw chicken measured by weight.
Chicken breast sizes vary a ton, but a good rule of thumb is that you can expect to get a little over 2 cups of cooked meat from 1 pound of raw chicken. Medium-sized raw chicken breasts usually weigh about 8 ounces so:
For 1 cup cooked meat, cook 1 medium chicken breast.
Unless you are trying to accurately estimate calories (in which case, you should be using a scale , not volume), being a little over or under on chicken is not going to hurt your recipe, so don’t stress too much about it.
Can I cook chicken this way and freeze it?
Yes. Once your chicken is fully cooked and cooled, you can either freeze it whole or cut into pieces in a freezer bag. Be sure to squeeze as much air as possible out of the bag before freezing to reduce the chance of freezer burn. Cooked chicken can be stored in the freezer for up to 3 months.
How many chicken breasts can I cook at once using this method?
You can cook as few or as many chicken breasts as you’d like as long as the chicken fits in a single layer in the pan without being crowded. It’s okay if some edges touch, since the chicken will shrink as it cooks, but you don’t want a solid layer of chicken with no space in between. You won’t get good browning or even cooking.
Chicken Breast Recipe Tips
- There will typically be some liquid left at the bottom of the pan after your chicken is cooked. This liquid is full of flavor, so if making soup, add it to the broth for a flavor boost. And if making the chicken in advance, you can pour it back over the chopped breasts to help keep them moist.
More Chicken Tutorials
- How to Co ok Perfect Chicken Breasts for Salads and Sandwiches
- Roasted Chicken Guide
- How to Cook Chicken Shredded Chicken
- How to Make Chicken Stock
- How to Make Soup from a Chicken Carcass

Equipment
- Skillet with a lid
- Instant-read thermometer
Ingredients
- ▢ Boneless skinless chicken breasts
- ▢ Salt
- ▢ Pepper
- ▢ Water
Instructions
- Salt and pepper both sides of your chicken breasts.
- Heat skillet over medium-high heat. Once hot, lightly grease with cooking spray or a drizzle of oil. Place chicken breasts in the pan and cook until the first side is nicely browned, 3 to 4 minutes.
- Flip chicken breasts and brown second side, 2 to 3 minutes. Once both sides are browned, add about 1/2-inch of water to the pan. Turn heat down to medium, cover and cook for 5 to 8 minutes (longer with larger breasts), adding more water if it all evaporates, until an instant-read thermometer inserted into the thickest part of the breast reads 165°F.
- Remove breasts from heat and allow to rest for 5 minutes before cutting as recipe calls for. Enjoy!
Notes

How to Cook Chicken Breasts for Recipes
Equipment
- Skillet with a lid
- Instant-read thermometer
Ingredients
- Boneless skinless chicken breasts
- Salt
- Pepper
- Water
Instructions
- Salt and pepper both sides of your chicken breasts.
- Heat skillet over medium-high heat. Once hot, lightly grease with cooking spray or a drizzle of oil. Place chicken breasts in the pan and cook until the first side is nicely browned, 3 to 4 minutes.
- Flip chicken breasts and brown second side, 2 to 3 minutes. Once both sides are browned, add about 1/2-inch of water to the pan. Turn heat down to medium, cover and cook for 5 to 8 minutes (longer with larger breasts), adding more water if it all evaporates, until an instant-read thermometer inserted into the thickest part of the breast reads 165°F.
- Remove breasts from heat and allow to rest for 5 minutes before cutting as recipe calls for. Enjoy!
