This 20-minute one-pan honey garlic chicken is an easy weeknight dinner that everyone will love.
I have another quick and easy chicken recipe for you today, honey garlic chicken.
This is one of those recipes you’ll be glad to have in your back pocket on busy weeknights because it cooks up fast and easy. You just need a handful of pantry ingredients, 20 minutes, and one pan.
The chicken comes out moist and tender, cooked in a sweet honey garlic sauce that you’ll want to drizzle over everything. Serve it with some steamed rice and a green veggie, and you have a super simple, super quick meal that everyone will love.

Ingredient Notes & Substitutions
- 2 medium-to-large chicken breasts: Because we want the chicken to cook quickly, this recipe starts with 2 chicken breasts (about 1 to 1 1/2 pounds of meat), sliced in half to make 4 thinner cutlets. Cutlets cook much faster than full chicken breasts, allowing us to cook the chicken in the honey garlic sauce without it burning.
- Flour: Dusting the chicken with flour before frying is optional, but it gives it a nice golden crust and helps the sauce stick to the chicken after cooking. If you’re gluten-free or just short on time, you can skip the flour in the recipe, just sprinkle the chicken breasts with a little salt before browning.
- Honey and white vinegar: Honey is the primary ingredient in this sauce, which makes it quite sweet. A little vinegar helps cut through that sweetness and adds a little acidic edge to the sauce. I really love vinegar in recipes, so I like to use 2 tablespoons here. If you’re not a huge fan, you can cut the vinegar in half or use a less aggressive vinegar like apple cider or rice vinegar.
- Cornstarch: Cornstarch helps thicken the sauce, but it’s optional. In this recipe, you’ll mix it with 1 tablespoon of water before adding it to the rest of your ingredients. Don’t try and toss dry cornstarch into the pan with hot liquids or you’ll get cornstarch lumps that you won’t be able to get rid of.


How to Make Honey Garlic Chicken
- Slice each piece of meat into 2 even cutlets by placing your hand on top of the chicken breast and running a sharp knife horizontally through the breast, slicing the top and bottom into two thin, even pieces.
- Toss the chicken breast pieces in flour and then in a large skillet, sear on both sides until golden brown.
- Remove the chicken from the pan, melt butter, and brown the garlic. Add sauce ingredients and bring to a low simmer.
- Return the chicken to the pan, cover, and simmer until the chicken is cooked through. Remove the chicken from the sauce and allow it to rest for 5 minutes before serving.


Can I make this dish ahead of time?
Yes. You can make the chicken and the sauce up to 48 hours in advance.
Can I double the sauce?
Yes. You can double the sauce with no recipe changes except you may need to simmer it a little longer for it to thicken. BUT, this sauce is quite sweet. A little goes a long way, so you might not need as much sauce as you think you do.
How do you thicken honey garlic sauce?
A slurry of cornstarch and water helps thicken the honey garlic sauce. If your sauce is still not as thick as you’d like, just continue to simmer it until more liquid cooks off and it thickens to your desired consistency.


What to serve with honey garlic chicken?
Serve the chicken over steamed white rice with a simple veggie side like:
- Steamed broccoli
- Roasted green beans
- Roasted zucchini
- Steamed green beans
More Easy Weeknight Recipes
- Easy BBQ Chicken Sandwiches
- Oven-roasted Tri-tip
- Quick Beef Teriyaki
- Asparagus-stuffed Chicken Breasts

Equipment
- 12-inch skillet with a lid
Ingredients
- ▢ 2 medium (about 1 to 1½ pounds) boneless, skinless chicken breasts
- ▢ ⅓ cup ( 40g ) all-purpose flour
- ▢ ¼ teaspoon salt
- ▢ 1 tablespoon extra virgin olive oil
- ▢ 1 tablespoon ( 14g ) butter
- ▢ 3 cloves garlic crushed or minced
- ▢ Pinch of red pepper flakes optional
- ▢ ⅓ cup honey
- ▢ ¼ cup water
- ▢ 3 tablespoons soy sauce
- ▢ 2 tablespoons white vinegar
- ▢ 1 teaspoon cornstarch whisked with 1 tablespoon of water
Instructions
- Slice each piece of chicken into 2 cutlets by placing your hand on top of the chicken breast and running a sharp knife horizontally through the breast, slicing the top and bottom into two thin, even pieces.
- In a bowl or container large enough to fit a chicken breast, stir together flour and salt. Dredge each chicken breast piece in the mixture until lightly coated.
- In a 12-inch skillet with a lid, heat oil over medium-high heat. Once hot, add chicken breasts and cook until well-browned, 2-3 minutes. Flip and repeat with the second side. Transfer chicken breasts to a plate.
- Turn heat down to medium and add the butter to the pan. Once the butter is melted, add garlic and optional red pepper flakes and cook until garlic is lightly golden, about 1 minute.
- Add honey, water, soy sauce, vinegar, and cornstarch/water mixture and bring to a simmer, using a wooden spoon to scrape any cooked-on bits from the bottom of the pan. Carefully add chicken back to the pan. Cover and cook, stirring occasionally, until chicken is cooked through, 5 to 8 minutes. If at any point the sauce becomes too thick and looks like it might burn, add a couple tablespoons of water to the pan.
- Transfer chicken breasts to a clean plate and allow them to rest for 5 minutes. If sauce is not quite thick enough, you can allow it to continue simmering uncovered while your chicken rests until it reaches your desired consistency.
- Serve the chicken topped with the sauce and a side of rice.
Here’s how to make an outrageously good chocolate peanut butter milkshake at home with just a few simple ingredients.
I’ve written here many times before that I think chocolate and peanut butter are just about the perfect pair, and today I have a particularly good peanut butter and chocolate pairing for you, a chocolate peanut butter milkshake.


This shake is so creamy and dreamy. If you tried the peanut butter milkshake I posted a few weeks ago and loved it, you absolutely have to try this chocolate version.
Adding chocolate to an already incredibly good shake takes things to a whole new level because truly, isn’t everything better with chocolate?
Ingredient Notes
- Fudge sauce or chocolate syrup: I like to use my favorite homemade fudge sauce in this recipe, but any store-bought chocolate sauce/syrup will work well.
- Milk: Any percentage or type of milk will work here. The higher fat milk you use, the richer/creamier your shake will be.
Substitution note: If you don’t have any chocolate sauce on hand, you can also use 2 tablespoons of unsweetened cocoa powder for a slightly less rich and sweet shake.


How to Make a Chocolate Peanut Butter Milkshake
- In a blender, combine ice cream, milk, chocolate syrup, and peanut butter. Blend until well-combined and pourable.
- Pour into a glass, top with whipped cream and other toppings if desired, and enjoy.
Toppings
This shake is so good that it doesn’t need any toppings, but if you’d like to use them, I recommend:
- Whipped Cream
- Peanut Butter Sauce
- More Fudge Sauce
- Chopped Peanut Butter Candy
Can I use natural/chunky peanut butter in this shake?
Yes. While I prefer to use a creamy, processed brand of peanut butter like classic Jif or Skippy because that will give you the smoothest shake possible, you can use natural or chunky peanut butter if that’s what you have on hand.
You can also use any sort of nut butter, not just peanut butter.


Can I make a healthier version of this milkshake?
If you’re looking for a lighter version of a chocolate peanut butter milkshake, go make my No-Ice-Cream Banana Milkshake and make the chocolate/PB variation described in the recipe.
More Chocolate & Peanut Butter Recipes
- Peanut Butter Hot Chocolate
- Peanut Butter Swirl Brownies
- Small-batch Peanut Butter Bars
- Tagalong Cupcakes
More Milkshake Recipes
- How to Make a Milkshake
- The BEST Chocolate Milkshake
- Banana Milkshake
- Strawberry Milkshake
Or check out my Milkshake Recipes Cheat Sheet

Ingredients
- ▢ 1½ cups vanilla ice cream about 3 scoops
- ▢ ½ to ¾ cup milk* any percentage
- ▢ 3 tablespoons chocolate syrup or fudge sauce plus optional more for topping*
- ▢ 2 lightly heaping tablespoons ( 41g ) peanut butter
- ▢ Whipped cream optional for topping
Instructions
- In a blender, combine ice cream, milk, chocolate syrup, and peanut butter. Blend until well-combined and pourable.
- Pour into a glass, top with whipped cream if desired, and enjoy.
Notes
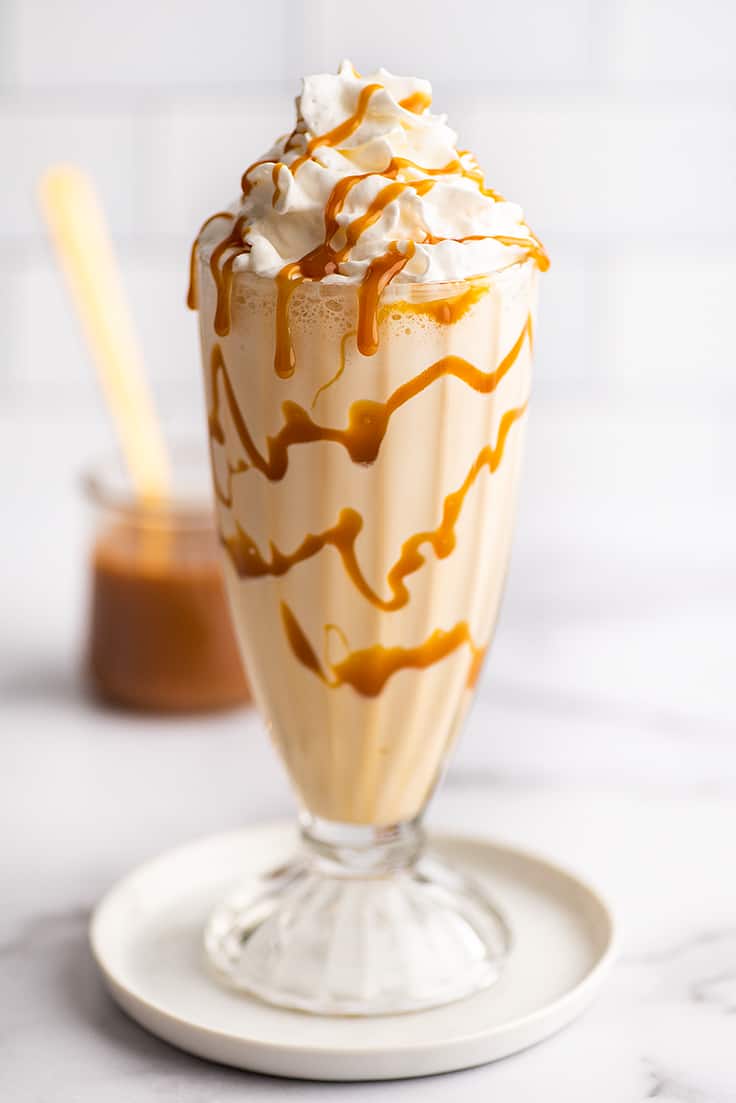
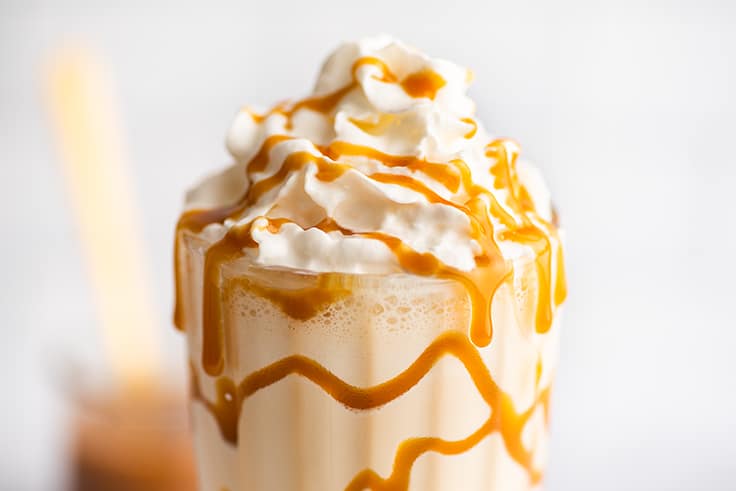
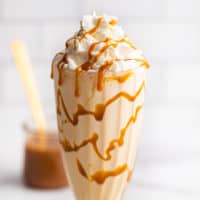
This deliciously decadent caramel milkshake is quick and easy to make at home. You’ll just need three ingredients: vanilla ice cream, milk, and caramel–homemade or store-bought is just fine.
Hey, friend. Have some caramel sauce in your fridge and some vanilla ice cream in your freezer? You should definitely make a caramel shake right now.
The Perfect Caramel Milkshake
This caramel shake is a total sweet caramel dream, and all you need to make it is the perfect milkshake ratio (three scoops of vanilla ice cream and 1/2 cup of milk) and some caramel.

Ingredient Notes
- Caramel: If caramel sauce isn’t something you keep stocked at home, pick some up the next time you’re at the store, make my quick shortcut caramel sauce , or you can whip out a heavy-bottom pot, melt some sugar, and make some traditional caramel sauce yourself. If you have dulce de leche , you can also substitute it for the caramel and make a dulce de leche milkshake .
- Vanilla Ice Cream: Vanilla ice cream pairs well with the caramel flavor in this shake. For best results, use a high-quality vanilla ice cream you enjoy.
- Milk: Any milk will work for your milkshake, but the higher fat your milk, the richer your shake will be. You can even substitute a little half and half or heavy cream for some of the milk for an extra rich and creamy shake.

How to Make a Caramel Milkshake
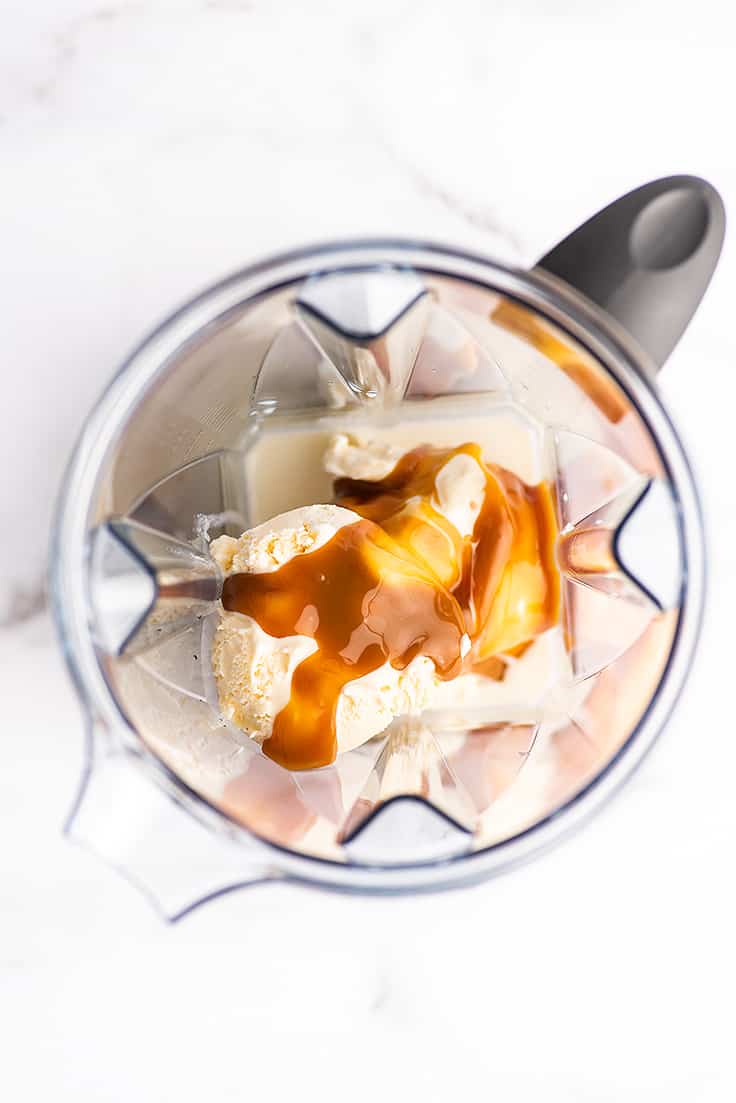
- Combine all your ingredients in a blender and blend until smooth. If your blender is struggling to blend the shake, let everything sit at room temperature for 10 minutes before trying again. This will allow the ice cream to soften slightly and blend more easily without having to add additional milk which can water down the shake.
- Drizzle extra caramel sauce around the inside of a glass (if desired) and add the shake. Top with whipped cream and more caramel and enjoy!
Caramel Shake Variations
For more caramel shake combos, try adding some mix-in to this recipe:
- Banana Caramel Milkshake: Add 1/2 to 1 whole ripe banana before blending. Use a frozen banana for a creamier shake.
- Vanilla Bean Caramel Milkshake: Add the seeds scraped from 1/2 of a vanilla bean before blending.
- Coffee Caramel Milkshake: Replace the milk with the same amount of cold coffee.
How can I make this a salted caramel milkshake?
If you’re craving a salted caramel shake, not a problem. You can use salted caramel if you have it in place of regular OR add a generous pinch of salt to your shake before blending. Taste the shake and add more as needed.
To be a little extra, you can also dip the rim of your cup in more caramel and sprinkle flakey sea salt over the top, but that’s totally optional.
Do I have to use vanilla ice cream for a caramel shake?
Nope. You can use whatever ice cream you have on hand as long as the flavor goes well with caramel. I just like vanilla as a base because it really lets the caramel flavor shine through and be the star of the show.

Can I make my milkshake in advance?
I don’t recommend it. Milkshakes are always best right after they’ve been made. Even when stored in the fridge, they will begin to melt and be less thick and creamy the longer they sit.
More Milkshake Recipes
- Banana Milkshake
- The Best Chocolate Milkshake
- Strawberry Milkshake
- Oreo Milkshake
- The Best Vanilla Milkshake
Recipe Notes
- This will make approximately 1 1/2 to 2 cups, enough for one restaurant-sized shake or two smaller ones.
Ingredients
- ▢ 1½ cups vanilla ice cream about 3 scoops
- ▢ ½ to ¾ cup milk *
- ▢ 2 tablespoons caramel sauce plus optional more for drizzling
- ▢ Whipped cream optional for topping
Instructions
- In your blender, combine ice cream, milk, and caramel. Blend until caramel is incorporated and shake is pourable.
- Pour into glass(es), top with optional whipped cream and more caramel if desired. Serve and enjoy!
Notes

Honey Garlic Chicken
Equipment
- 12-inch skillet with a lid
Ingredients
- 2 medium (about 1 to 1½ pounds) boneless, skinless chicken breasts
- ⅓ cup ( 40g ) all-purpose flour
- ¼ teaspoon salt
- 1 tablespoon extra virgin olive oil
- 1 tablespoon ( 14g ) butter
- 3 cloves garlic crushed or minced
- Pinch of red pepper flakes optional
- ⅓ cup honey
- ¼ cup water
- 3 tablespoons soy sauce
- 2 tablespoons white vinegar
- 1 teaspoon cornstarch whisked with 1 tablespoon of water
Instructions
- Slice each piece of chicken into 2 cutlets by placing your hand on top of the chicken breast and running a sharp knife horizontally through the breast, slicing the top and bottom into two thin, even pieces.
- In a bowl or container large enough to fit a chicken breast, stir together flour and salt. Dredge each chicken breast piece in the mixture until lightly coated.
- In a 12-inch skillet with a lid, heat oil over medium-high heat. Once hot, add chicken breasts and cook until well-browned, 2-3 minutes. Flip and repeat with the second side. Transfer chicken breasts to a plate.
- Turn heat down to medium and add the butter to the pan. Once the butter is melted, add garlic and optional red pepper flakes and cook until garlic is lightly golden, about 1 minute.
- Add honey, water, soy sauce, vinegar, and cornstarch/water mixture and bring to a simmer, using a wooden spoon to scrape any cooked-on bits from the bottom of the pan. Carefully add chicken back to the pan. Cover and cook, stirring occasionally, until chicken is cooked through, 5 to 8 minutes. If at any point the sauce becomes too thick and looks like it might burn, add a couple tablespoons of water to the pan.
- Transfer chicken breasts to a clean plate and allow them to rest for 5 minutes. If sauce is not quite thick enough, you can allow it to continue simmering uncovered while your chicken rests until it reaches your desired consistency.
- Serve the chicken topped with the sauce and a side of rice.
