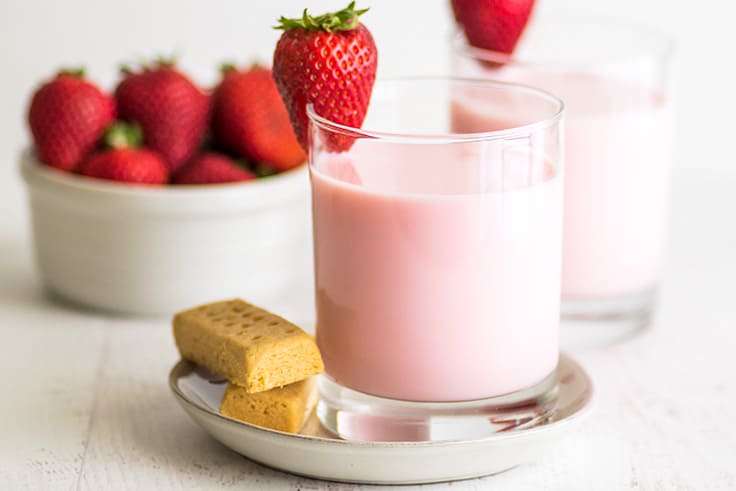
This Homemade Strawberry Milk is a million times better than the powdered stuff but almost as easy to make. Rich and creamy, with the best sweet and barely tart strawberry flavor, you’re going to love it.

A couple weeks ago, I shared my Strawberry Milk for One or Two for everyone looking for a way to use up those early summer strawberries, and I promised that I’d share a larger recipe for everyone who went really crazy with the strawberry buying.
Today is that day.
Let’s make a big batch of strawberry milk syrup and tons of Homemade Strawberry Milk.
And if you’ve never made strawberry milk at home, you are in for such a treat.
It’s a million times better than the powdered stuff, rich and creamy, with the best sweet and barely tart strawberry flavor. I love it.
And this is coming from someone who thought she hated strawberry milk growing up.

How to Make Strawberry Milk
If you were a kid raised on the powdered stuff like I was, you might be surprised at just how easy it is to make strawberry milk at home. You just need four ingredients, 15 minutes, a pot, and an optional fine-mesh strainer.
- Start by combining all your ingredients in a medium pot. Bring to a low boil and cook for 10 minutes.
- Drain liquid and discard (or eat) cooked strawberries.
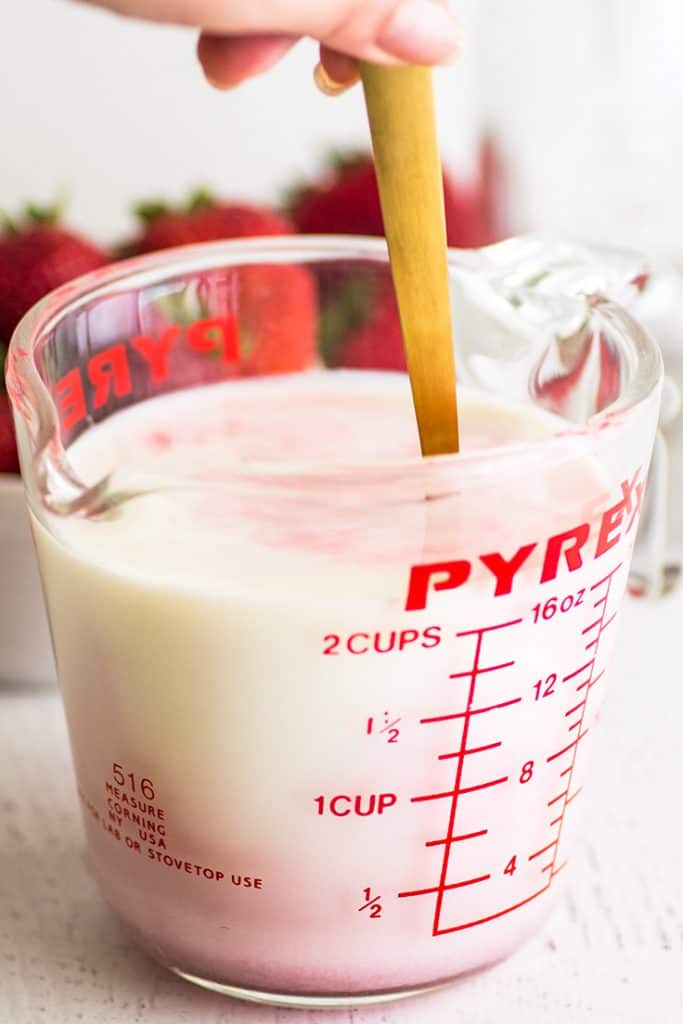
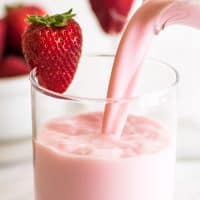
- Stir a few tablespoons of the syrup into cold milk.

And that’s it. Tell me you wouldn’t have been making this daily during strawberry season as a kid.
Homemade Strawberry Milk Recipe Notes
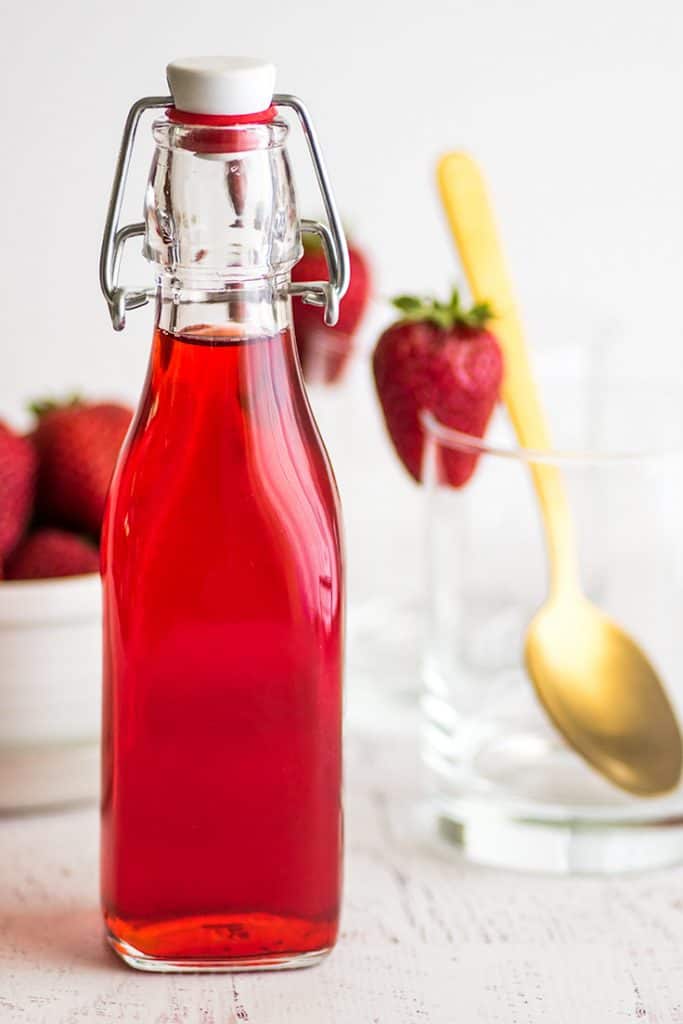
- This recipe will make a little more than 2 cups of strawberry syrup, enough for about 12 to 15 cups of strawberry milk.
- The strawberry milk syrup will keep in the fridge for at least a week or two. You can store it in a mason jar or any other airtight container. You can find jars like the one I used on Amazon (you’ll need 2 to fit all the syrup).
- This recipe calls for a fine mesh strainer to strain out seeds and strawberry pieces from the strawberry syrup. If you don’t own one, they are cheap on Amazon and can be found in the baking aisle at most grocery stores, or you can simply use a slotted spoon to remove strawberries. You’ll just have some seeds and pulp at the bottom of your glass, which doesn’t hurt anything.
- You can make your strawberry milk with whatever milk you have in the fridge, but whole milk makes the richest, tastiest drink. If you have heavy cream or half and half on hand, you can also add a splash of that to the mix for a richer end product (highly recommended).
- This bottle of syrup went to my mom, and she also really enjoyed mixing it with La Croix to make homemade sodas.
- Craving more sweet drinks? Try my Chocolate Milk for One , Caramel Macchiato , Strawberry Limeade , and White Chocolate Mocha ,

Ingredients
Special Equipment
- ▢ Fine-mesh strainer
Homemade Strawberry Milk
- ▢ 3 cups hulled and chopped strawberries frozen is fine
- ▢ 1 1/2 cups ( 300g ) granulated sugar
- ▢ 1 1/2 cups water
- ▢ 12 to 15 cups milk preferably whole
- ▢ Red food coloring optional
Instructions
- In a medium pot, combine strawberries, sugar, and water. Bring to a low boil. Keep at a low boil for 10 minutes, stirring occasionally, until reduced and strawberries are fragrant.
- Strain syrup from strawberries and discard the strawberries. Store syrup in an airtight container in the fridge.
- Mix 3 to 4 tablespoons of syrup per 1 cup of milk. Add more to taste. If desired, stir in a drop or two of red food coloring. Serve and enjoy!

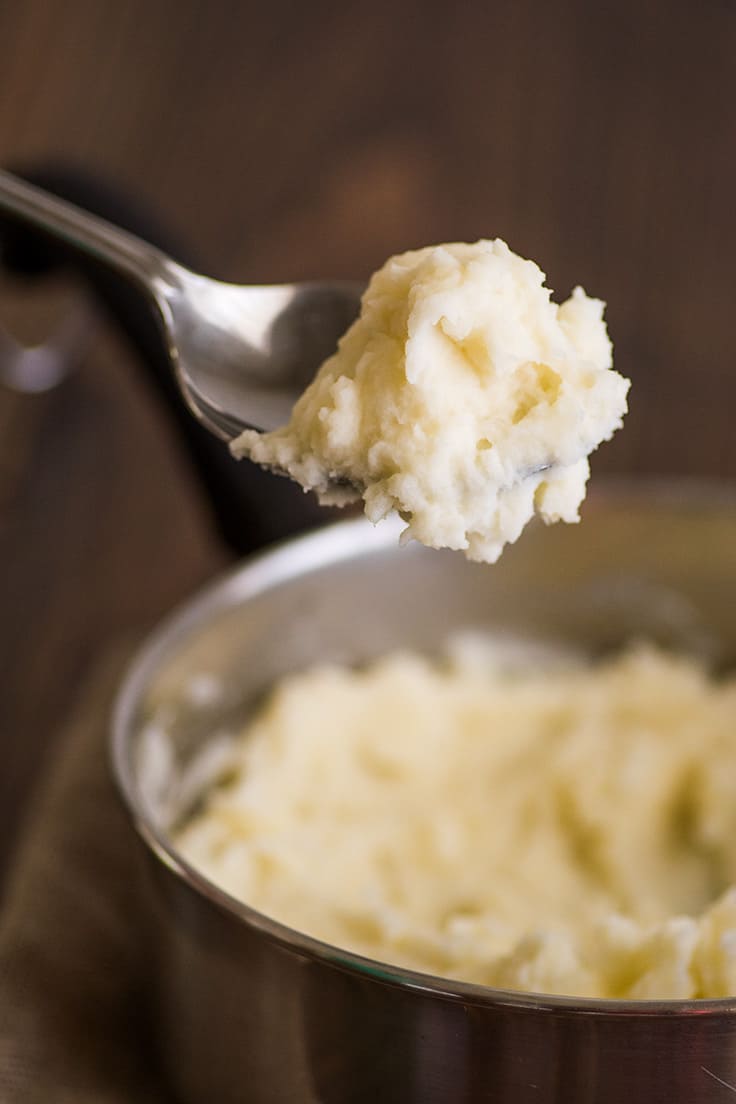
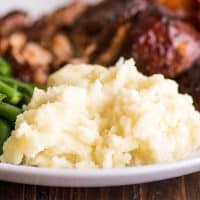
These Mashed Potatoes for Two couldn’t be simpler to make. You just need one medium to large potato (or a couple reds), some butter, cream or milk, and salt, and you’re 15 minutes away from an excellent small batch of mashed potatoes.

Hey, friend. Super simple, super easy, super essential recipe post coming at you today: Mashed Potatoes for Two!
If you’ve ever gotten halfway through putting together a meal and realized your plate could really use some carbs, ever found a single sad potato at the back of your pantry cupboard, ever needed some comfort food on a solo or date night, this is the recipe for you.
You just need one medium to large potato or a couple reds, some butter, cream or milk, and salt, and you’re 15 minutes away from some excellent mashed potatoes that will serve one or two.
How to Make Mashed Potatoes for Two
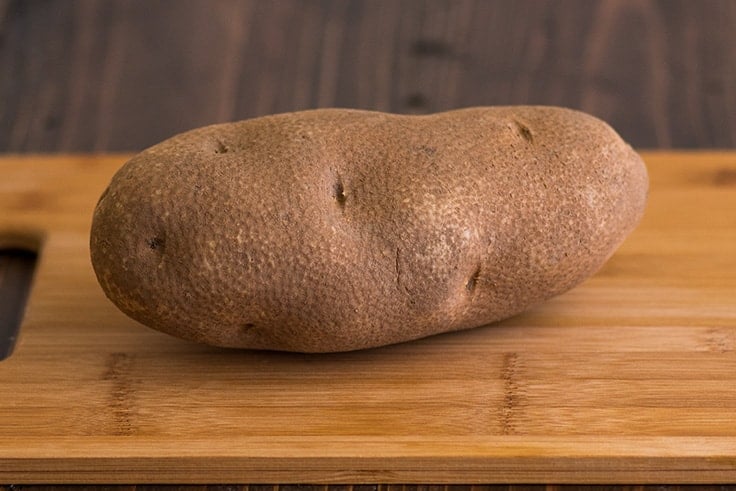
Take a potato. This is a russet. You can use a Yukon gold or a couple of reds.

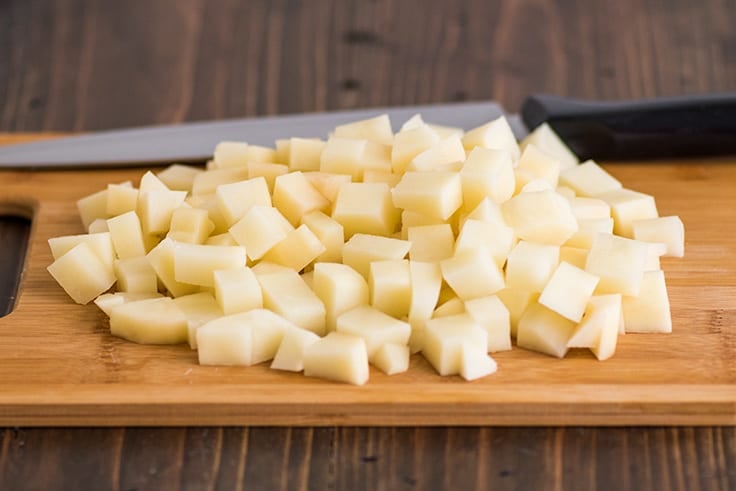
Peel and chop that thing.

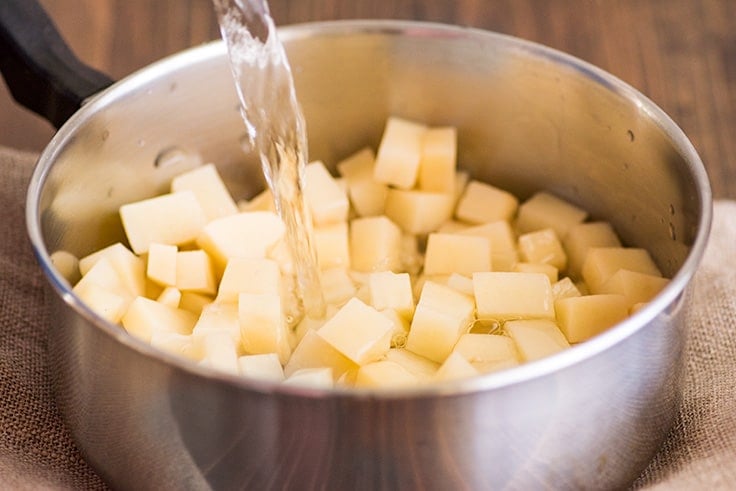
Then cover with cold water. Add enough salt to make it salty like the sea.

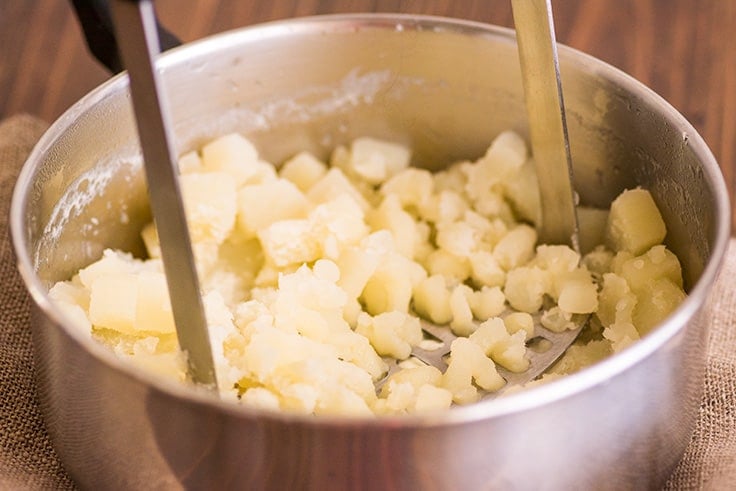
Bring to a simmer and simmer for 8 to 12 minutes, until the potatoes are fork-tender. If you can crush a potato piece against the side of the pot with a fork, they’re done. Drain and add about a tablespoon of butter. More if you like a really buttery flavor, less if you don’t. And mash mash mash.

Then add a tablespoon of cream or milk and switch to a spoon.
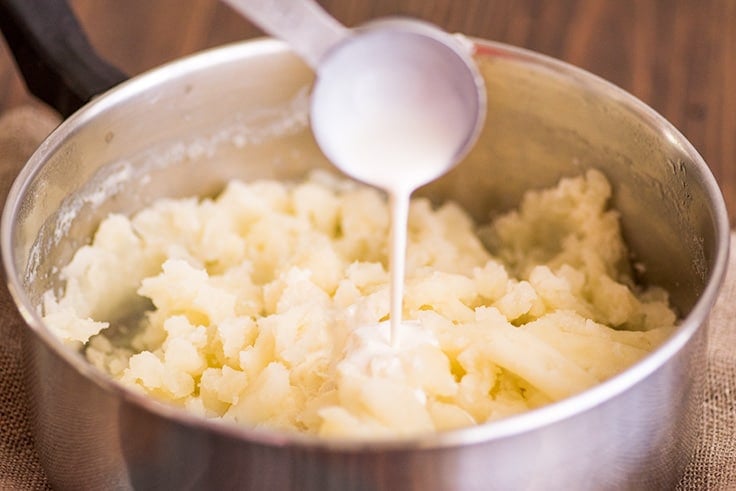

Mix everything well and add more salt and some pepper. And taste. Want creamier potatoes? Add more liquid. Not buttery enough, add more butter.


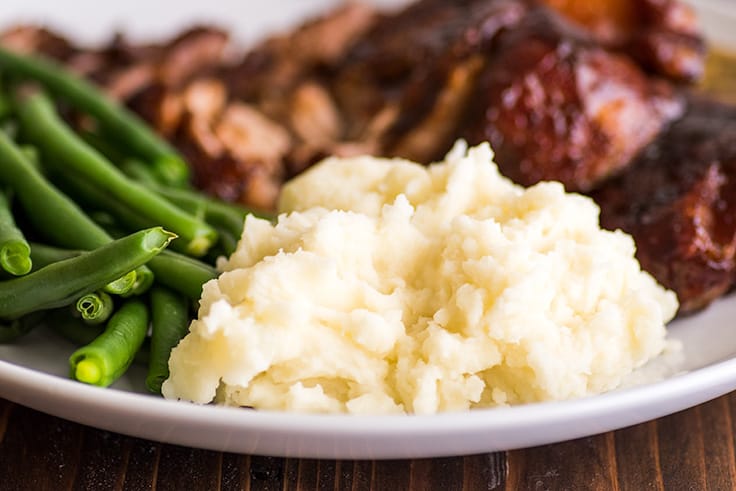
And that’s it. Top with a quick gravy or serve alongside something amazing (like Country-style Pork Ribs ) and enjoy.

More Easy Potato Side Dishes
- Microwave Mashed Potatoes
- Crispy Smashed Potatoes
- Homemade Cheese Fries
- Italian Roasted Potatoes
Mashed Potatoes for Two Recipe Notes
- If you make mashed potatoes more than once a year, I recommend buying a potato masher if you don’t already own one. They’re cheap and make mashing potatoes quick and easy. Plus you can use them to make Banana Pancakes or Chocolate Banana Muffins .
- Looking for main dishes that go well with mashed potatoes? Try these Oven-baked Beef Ribs , Roasted Chicken , Tri-tip in the Oven , and Creamed Turkey .
Ingredients
Special Equipment
- ▢ Potato masher
Mashed Potatoes for Two
- ▢ 1 medium to large potato
- ▢ Salt
- ▢ 1 tablespoon ( 14g ) butter
- ▢ 1 tablespoon cream or milk
- ▢ Pepper
Instructions
- In a medium pot, cover potatoes with cold water and salt generously.
- Bring to a simmer and cook for 8 to 12 minutes, until potatoes are fork tender. Remove from heat and drain.
- Add butter to the potatoes and use a potato masher or fork to mash potatoes.
- Add cream or milk and stir until incorporated. Add salt, pepper, and more cream or milk to taste.
- Serve and enjoy.
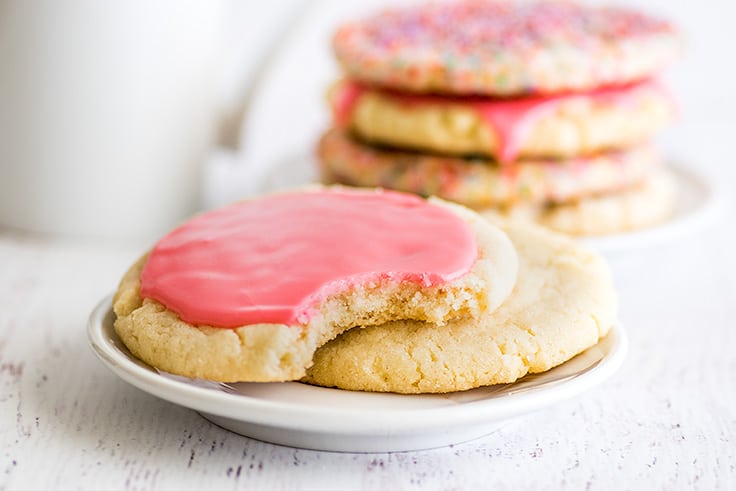
These Small-batch Sugar Cookies are perfect sugar cookies. Buttery, with slightly crisp edges and chewy centers, they’re fast and easy to make, require no chilling time, and can be made in just one bowl. Plus tips and tricks for making your perfect sugar cookie.


Hey, friend. What’s your perfect sugar cookie?
Is it a cut-out sugar cookie, a little crunchy, a tiny bit chewy, one that you can spend an hour decorating and thirty seconds eating? Then you’ll probably like these Small-batch Cut-out Sugar Cookies .
Is it fluffy, soft, and absolutely smothered with buttercream and sprinkles? Sounds like you should try these Small-batch Frosted Sugar Cookies .
But if your perfect sugar cookie is simple and buttery with slightly crisp edges and chewy centers, stay right here. I have the cookie you’re looking for.


These cute (not-so)-little Small-batch Sugar Cookies I’m sharing today are my perfect sugar cookie, and you’re going to LOVE them.
They’re superb plain or dusted with powdered sugar.
They’re fabulous rolled in crunchy sugar or sprinkles before baking.
And they’re amazing drizzled with a powdered sugar glaze. (I’ve included instructions for all three ways in the recipe, so you can make the cookie your heart desires.)
And best of all, they’re small-batch, no-chill, and easy peasy to make so any time you’re craving a sugar cookie, this recipe has your back.
How to Make Soft and Chewy Small-batch Sugar Cookies
Like my Small-batch Chocolate Chip Cookies , this is another one-bowl cookie recipe that comes together fast and easy.
You start with butter, melted if you’re in a hurry, softened if you remember to plan ahead (we’ll talk more about butter in a moment), and whisk it together with sugar.
Add an egg yolk and vanilla or almond extract (my favorite).
And stir in flour, baking soda, and salt.
That’s it.
Then you can use a cookie scoop to transfer the dough to a baking sheet or scoop into balls and roll in sugar or sprinkles. Give them a little press so they spread nicely while baking and cook for 9 to 12 minutes.
Finally, add quick glaze or enjoy them as soon as your cookies are cool enough to eat. It’s up to you.

Your Perfect Sugar Cookie
Okay, so that was how to make my perfect sugar cookie, but I want you to make your perfect sugar cookie.
And creating that cookie is really easy to do with this recipe. It’s very flexible, and by slightly changing the way you treat your ingredients and dough, you can get drastically different sugar cookie results.
If you like a cookie that’s fluffier/crunchier/softer/chewier, than my base model, one of these changes might be for you.
The Perfect Base Cookie: Softened Butter + Flattened Before Baking This is the cookie you see in the photos. Creaming butter and sugar together before adding the rest of the ingredients beats air into the dough so the cookies come out a little lighter and softer than cookies made with melted butter. Flattening before baking means that they really spread in the oven so you get nice big cookies with crispy edges while the centers stay soft and chewy.
Puffier, Soft and Chewy Cookies: Softened Butter + Not Flattened Before Baking These cookies come out slightly domed, with wrinkled tops, a soft, chewy texture, and very little crunchiness (unless overbaked).
Denser, Chewiest Cookie: Melted Butter If you like a very chewy cookie, this is the method you want to use. However, using melted butter makes a wetter, slightly greasy dough, that is a little more difficult to work with. If coating with sprinkles or sugar, I recommend scooping the dough into your bowl of sprinkles and coating before rolling into a ball. It will make the dough easier to work with.
Soft Cookie, Underbaked Center: Not Flattened + Cooled Off Tray When left on a hot tray after baking, cookies will continue to cook, so if you’re one of those people who like a slightly under-baked cookie (you know who you are), don’t flatten your cookies before baking and remove them from the tray after just a minute or two out of the oven so they stop cooking and stay soft and underdone.
Crispy Crunchy Sugar Cookie: Flattened + Baked Max Time + Cooled on Tray On the opposite end of the spectrum, if you like a cookie that’s crunchy nearly all the way through, cook your cookies closer to the max time (or over if necessary), until the edges are turning gold, and allow them to cool on the hot baking sheet so they keep getting crunchier even as they cool.
Small-batch Sugar Cookies Recipe Notes
- Correct flour measurement is very important in this recipe. Too much flour can result in cakey cookies, cookies that don’t spread, or dough that doesn’t come together. I recommend measuring your ingredients by weight ( kitchen scales are inexpensive and worth their weight in gold) or using the scoop and sweep method for measuring (stir you flour to fluff it up, scoop it into your measuring cup, and sweep off the excess with the flat of a knife.
- These are the rainbow sprinkles I used in this recipe (I LOVE them), but I’ve also tested these cookies with Jimmies and Nonpareils , and they both work great too.
- If you’d like to add a frosting instead of glaze to the cookies, try this Small-batch Vanilla Frosting, Chocolate Buttercream or any of my other small-batch frostings on the site.
- Looking for more small-batch desserts? Try these Small-batch Peanut Butter Cookies , Small-batch Shortbread , and Small-batch Vanilla Cupcakes .

Ingredients
Special Equipment
- ▢ Handheld electric mixer optional but helpful
Small-batch Sugar Cookies
- ▢ 1/3 cup ( 76g ) salted butter softened
- ▢ 1/3 cup + 1 tablespoon ( 80g ) granulated sugar
- ▢ 1 large egg yolk
- ▢ 1/2 teaspoon vanilla extract or 1/8 teaspoon almond extract
- ▢ 3/4 cup + 1 tablespoon ( 98g ) all-purpose flour measured by weight or using the spoon and sweep method*
- ▢ 1/4 teaspoon baking soda
- ▢ 1/8 teaspoon salt
- ▢ 1/3 cup powdered sugar, granulated sugar or sprinkles for rolling (optional)
Optional Glaze
- ▢ 1 cup ( 120g ) powdered sugar sifted
- ▢ 1 tablespoon milk + more to reach desired consistency
- ▢ 1/4 teaspoon vanilla extract
- ▢ 2 teaspoons light corn syrup *
- ▢ 2 to 4 teaspoons food coloring optional
Instructions
Small-batch Sugar Cookies
- Preheat your oven to 350°F and a line baking sheet with parchment paper or silicone baking mat.
- In a medium bowl, cream together butter and sugar until light and fluffy.
- Add egg yolk and vanilla (or almond extract) and beat until well-combined.
- Add flour, baking soda, and salt, and mix until there is no dry flour left at the bottom of the bowl and the dough begins to clump.
- Divide dough into six parts and roll into balls. If rolling in sprinkles or sugar, do so now.
- Place dough on the prepared cookie sheet, well-spaced, and use the palm of your hand to press cookies out to 1/2-inch thick (no thinner).
- Bake for 9 to 12 minutes, until you see just a hint of golden color around the bottom edges of the cookies. Cool completely on the cookie sheet.
Optional Glaze
- Once cookies are cooled, in a medium bowl, combine powdered sugar, milk, and vanilla. Stir until well-combined.
- Add corn syrup and stir until smooth. Add about 2 to 4 drops of food coloring if desired and stir until uniform in color. Add more milk if necessary to get a drizzling consistency.
- Spoon over cookies and allow 10 to 15 minutes for the glaze to set. Enjoy!
Notes

Homemade Strawberry Milk Recipe
Ingredients
Special Equipment
- Fine-mesh strainer
Homemade Strawberry Milk
- 3 cups hulled and chopped strawberries frozen is fine
- 1 1/2 cups ( 300g ) granulated sugar
- 1 1/2 cups water
- 12 to 15 cups milk preferably whole
- Red food coloring optional
Instructions
- In a medium pot, combine strawberries, sugar, and water. Bring to a low boil. Keep at a low boil for 10 minutes, stirring occasionally, until reduced and strawberries are fragrant.
- Strain syrup from strawberries and discard the strawberries. Store syrup in an airtight container in the fridge.
- Mix 3 to 4 tablespoons of syrup per 1 cup of milk. Add more to taste. If desired, stir in a drop or two of red food coloring. Serve and enjoy!
