Simple but impressive homemade margherita pizza with dough and sauce from scratch!

Welcome to another week and another Monday. How was everyone’s weekend? I had the most lazy, self-indulgent couple of days and did nothing but lie on the couch, and do a massive Netflix binge of Daredevil and Happy Valley . It was delightful. Almost as delightful as today’s recipe. Segue!
Today’s Meatless Monday recipe (number 3 for this month after my Slow Cooker Baked Potatoes With Broccoli and Cheese Sauce and Mexican Vegan Vegetable Stew ) is one of my absolute favorites, Homemade Margherita Pizza.
Let’s be real, is there anything more insufferable and twee than people who brag about making their own pizza from scratch? And double real, don’t we all secretly wish we were one of them, casually dropping into morning work conversations how delicious our perfectly simmered sauce and hand-made dough was the night before?
No? What are you doing here? You have hipsters to mock elsewhere on the internet.
Yes? You’re in luck, because I’m about to help you be one of those people.

Homemade margherita pizza is a different breed from your pizza parlor pizza. It’s not too greasy or overloaded with so much cheese you could drown in it. It’s fresh tasting, sharp and a little sweet and tart from the long-simmered tomatoes. The dough is thin with a soft center and crisp edges, without being too crunchy.


It’s a pizza you don’t have to take a nap after eating, and of course, will feel great about yourself after making. If you want to add the word “artisan” when describing your pizza on social media, no one is going to stop you. They’re going to be too busy being impressed by your culinary feat (which BTdubs, is super easy–shhhhh don’t tell any one).


I’ve included instructions for using a stand mixer or by hand. Both methods are easy, and I find this dough to be very forgiving!

Ingredients
Dough
- ▢ 2 1/4 teaspoon active dry yeast one 1/4oz package
- ▢ 2 cups 1 tablespoon ( 248 g) all-purpose flour divided, plus more for dusting
- ▢ 3/4 cup warm water 105-110°F, divided
- ▢ 1 teaspoon salt
- ▢ 1 1/2 teaspoon olive oil
Sauce
- ▢ 1 15-oounce can whole tomatoes
- ▢ 2 tablespoons olive oil
- ▢ 2 large garlic cloves pressed or minced
- ▢ 4 large fresh basil leaves julienned, plus optional more for topping
- ▢ 1/4 teaspoon sugar
Assemble
- ▢ 2 tablespoons cornmeal
- ▢ 6-8 ounces mozzarella sliced thin
- ▢ 1 large tomato optional, sliced thin
Instructions
Dough
- In a large bowl or the bowl of your stand mixer, combine 1 tablespoon of the flour, yeast, and 1/4 cup of the warm water. Stir until mostly combined (it’s fine if there are a few lumps). Allow to sit for 5-10 minutes until top looks foamy and bubbles form on the surface. If the top does not become foamy, your yeast may be bad or your water may have been too hot and killed it. Give it another try with a fresh packet.
- Add 1 1/2 cup of the flour, remaining 1/2 cup of warm water (you may have to reheat it if it has cooled), salt, and olive oil and stir together.
- If using a stand mixer: use the dough attachment on low and mix in 1/4-1/2 cup of flour until the dough pulls away from the side of the bowl. Knead for 6-8 minutes on low until dough is smooth and elastic. When it’s done, flour your hands and work surface and turn dough out. Knead 5-10 times until it is no longer sticky, adding more flour as necessary. Skip to step 5.
- If kneading by hand: fill a 1/2-cup measuring cup full of flour. Using some of that flour, add to your dough, stirring in a little at a time, until dough pulls away from the sides of your bowl. Use more of the flour to flour your hands and work surface very well. Turn dough out onto the surface and knead for about 8 minutes, adding flour from your cup any time the dough becomes sticky. The dough is ready when it is smooth, elastic and passes the windowpane test (dough is elastic enough that you can stretch it without tearing and when held up to the light, you can see light through it).
- Pat dough with flour, place in a large bowl, cover with a clean towel, and place in a warm place. Allow to rise for 60 to 90 minutes, until doubled in size.
Sauce
- While the dough is rising, you are going to make the sauce. Using a blender or food processor pulse the tomatoes until mostly pureed with some pieces of tomato still intact–think salsa. (In a pinch, you could just really go to town with a pair of scissors in the can.)
- Heat oil in a large pot (the pot is going to seem much too big, but this sauce likes to splatter and the larger pot will cut down on cooking time). Add garlic and cook until browned and fragrant. Add pureed tomatoes, sugar, and basil. Stir and bring to a simmer.
- Simmer uncovered for 20-30 minutes (your cooking time can very greatly depending on the size of your pan and type of tomatoestirring occasionally until sauce has reduced down to about 3/4 cup.
Assemble
- Preheat oven to 500°F.
- Cover pizza tray or cookie sheet with corn meal (the corn meal will keep your pizza from sticking). Turn your bowl of dough upside down over the tray and allow dough to drop out. If your dough is sticky, you can flour your hands. Gently stretch and manipulate dough to form a circle (or rectangle if making on a baking sheet). Spread sauce over your dough, leaving about an inch and a half of crust. Add mozzarella and top with optional tomato slices and more basil if desired*.
- Bake 12-16 minutes, until crust is golden and cheese is browned and bubbly.
- Allow to cool for at least 5 minutes before cutting and serving.
Notes
Nutritional Information Recipe Adapted From: Epicurious & Williams-Sonoma
Small-yield Instructions: Because of the way these ingredients are sold 1/4 oz yeast packet, 15 oz tomatoes, etc., it’s easier just to make the full recipe and freeze half of the sauce and dough for later use. See below for dough-freezing instructions. Make-ahead Instructions: You can allow the dough to rise over 24 hours in the fridge. Finish kneading, dust with flour and place in a large bowl. Cover tightly with plastic wrap before placing in the refrigerator. Sauce can be made up to 5 days in advance. Freezer Instructions: Cooked pizza freezes surprisingly well. Allow slices to cool completely and then freeze in a plastic bag. To reheat, place pizza into the oven at 400°F and cook until warmed through, about 6-10 minutes. To freeze the pizza dough, allow dough to complete its rise and then spray with cooking spray or rub with olive oil before wrapping in plastic wrap and putting in a plastic freezer bag. Allow to defrost for at least 12 hours in the refrigerator before using. Dough will keep for up to 3 months.


Saturday Morning Snapshot

It was a lazy morning for everyone here at casa mia…
State of the Blog
Am I crazy, or did this week go by insanely fast? It seems like I just hit publish on last week’s Weekend Post…
This was a fun week on the blog. I got to share a recipe that was one of my most made meals in college, some cornbread made exactly how I like it, and a cupcake recipe I love to look at, but would never, ever eat (if you haven’t, read that post to find out why ).
Next week, there will be another Meatless Monday Meal , a super fun and colorful roundup, and the last cupcake in my Girl Scout Cookie Cupcakes series .
Recipes/posts released this week were:


Mexican Vegan Veggie Stew – Potatoes, corn, carrots, and celery simmered in a slightly spicy, tangy tomato base. A flavor-packed, low-calorie dinner that just happens to be vegan.
Sweet Buttermilk Cornbread Muffins With Honey Butter – Moist and sweet cornbread muffins topped with homemade honey butter make a tasty and easy side dish!
Samoa Cupcakes – Toasted coconut, quick homemade caramel, and chocolate coating over a pound cake cupcake is sure to please lovers of the Girl Scout’s most divisive cookie.
Pop-culture Corner
I’m finally making my way through more of this year’s Oscar noms. I started with Room , and I thought I was emotionally prepared . I. Was. Wrong.
It’s Daredevil season 2 weekend on Netflix! Are you watching?
Also on Netflix this week is the second season of Happy Valley . If you like heart-rending British crime dramas, you’re going to love crying over this one (It’s so good!!!).
And finally, CBS announced an air date for the fifth and final season of Person of Interest . Episodes will air twice weekly, Mondays and Tuesdays, starting May 3, giving the entire world just under a month and a half to catch up with the show, which is available in its entirety on Netflix. In related news, a Person of Interest related recipe is being tested in my kitchen this weekend…
Meal Planning
Saturday: Bacon and Feta Stuffed Chicken Breasts with Orzo Sunday: Tacos Monday: Quick Rosemary Pork Chops with Broccoli Tuesday: Takeout Wednesday: BLT Salad Thursday: Sharp Cheddar Broccoli and Ham Chowder Friday: TBD
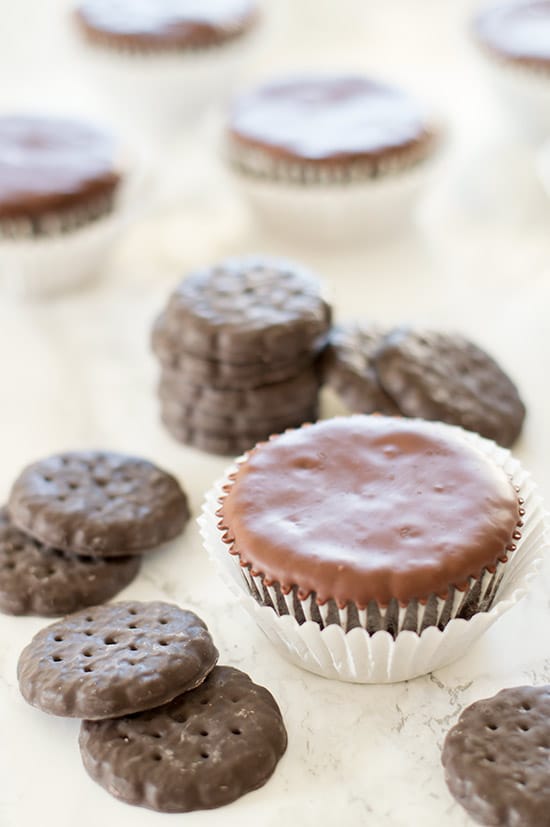
These Thin Mint Cupcakes are moist chocolate and peppermint cake covered with a smooth chocolate coating. A delicious cupcake version of the most popular Girl Scout cookie.

Welcome to the last cupcake in my Girl Scout Cupcake Series! Over the course of the month, we’ve had Tagalong Cupcakes , based on my personal favorite Girl Scout cookies. There were the intensely peanut buttery Do-si-do Cupcakes. And last week, we had Samoa Cupcakes for people who like that sort of thing, which I hear are delicious, but cannot confirm. <3
Today we tackle the best-selling Girl Scout cookie, Thin Mints! Thin Mints are the favorite cookie of almost everyone I know, so pressure was high to get this cupcake right. And you know what? I feel pretty good about these.
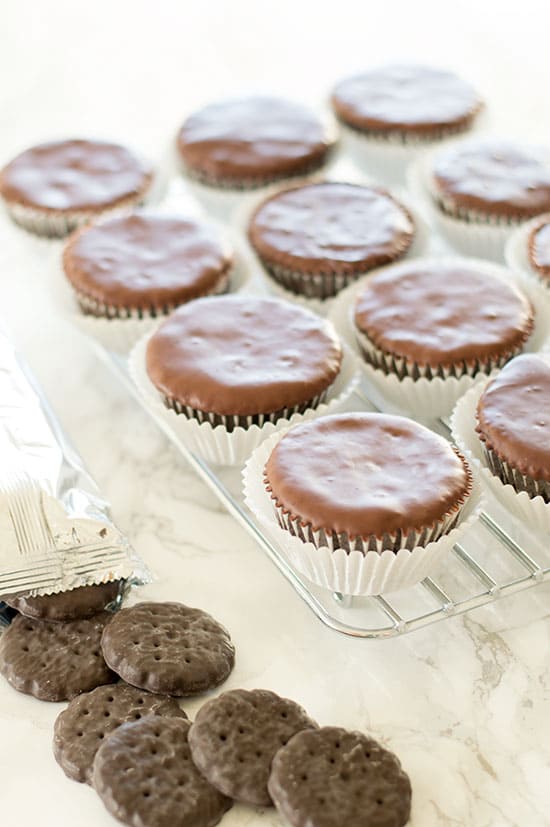

Thin Mints are a pepperminty, crunchy chocolate cookie dipped in chocolate. They are good at room temperature but best when stored in the freezer and eaten cold. So my Thin Mint Cupcakes are my favorite chocolate cake base infused with peppermint and dipped in a smooth chocolate coating. They are excellent at room temperature but also very, very good after being popped in the freezer and chilled.
The flavors in this one are pretty on point because chocolate and peppermint are generally going to taste like chocolate and peppermint. So my Thin Mint Cupcakes taste quite a bit like cookie Thin Mints, which translates to, AMAZING.
Texture is where these cupcakes shine. The chocolate cake is moist and light, laced through with the fresh taste of peppermint. And the hard chocolate coating provides a delightful contrast, and really looks just like the top of a Thin Mint!
They are a total crowd-pleaser and also the easiest to make of all the cupcakes in the series, so if you have to pick just one Girl Scout cupcake to make, I recommend these
Girl Scout cookie season generally runs through April, so very soon we will have to say goodbye to our favorite cookies (whichever ones they may be) until next year. Fortunately, these cupcakes will be here to tide you over in the mean time.

More Girl Scout Cookie Cupcakes


Tagalong Cupcakes
Samoa Cupcakes


Do-si-do Cupcakes

Ingredients
Cupcakes
- ▢ 3/4 cup and 2 tablespoons ( 125 g) all-purpose flour
- ▢ 1 cup ( 200 g) granulated sugar
- ▢ 1/4 cup and 2 tablespoons ( 30 g) cocoa powder
- ▢ 1 teaspoon baking soda
- ▢ 1/2 teaspoon baking powder
- ▢ 1/2 teaspoon salt
- ▢ 1/2 cup buttermilk shaken
- ▢ 1/4 cup vegetable oil
- ▢ 1 large egg room temperature
- ▢ 1/2 teaspoon vanilla extract
- ▢ 1/2 cup hot coffee
- ▢ 3/4 to 1 teaspoon peppermint extract
Chocolate Coating
- ▢ 2/3 cup ( 4 oz) semi-sweet chocolate chopped (high quality chips or baking chocolate are fine)
- ▢ 1 tablespoon canola or vegetable oil
Instructions
Cupcakes
- Preheat oven to 350°F and line cupcake cups.
- In a large bowl, sift together flour, sugar, cocoa powder, baking soda, baking powder, and salt.
- In a medium bowl, whisk together buttermilk, oil, egg, and vanilla.
- Add wet ingredients to dry and slowly whisk until combined.
- Pour in the coffee and peppermint and whisk until batter is smooth. The batter is going to look alarmingly runny at this point, but don’t worry! It’s supposed to look like that.
- Fill cupcake cups just 2/3 of the way full, no higher. This should make 15-16 cupcakes. If you have one, transferring the batter to a liquid measuring cup and pouring it into the cupcake cups makes this process much tidier!
- Bake for 17-20 minutes. Try not to open the oven door too often or jostle the pan while cupcakes are cooking. It can cause them to sink. Cupcakes are done when a toothpick inserted into the center comes out clean. Allow to cool in the cupcake pan on a wire rack before adding chocolate coating.
Chocolate Coating
- Place chocolate and oil in a small microwave-safe dish wide enough for cupcake dipping. Microwave on medium in 30 second bursts, stirring in between until all chocolate is melted. Stir vigorously until chocolate is smooth and shiny.
- Dip the tops of the cupcakes in the coating and allow the excess to run off. If you’d like, you can use a toothpick or cake tester to poke holes in the top of the cupcakes like the holes on the cookies. Place on a wire rack to dry. Chocolate will set more quickly in the refrigerator but will set if left on the counter in about an hour.
Notes

Homemade Pizza Margherita
Ingredients
Dough
- 2 1/4 teaspoon active dry yeast one 1/4oz package
- 2 cups 1 tablespoon ( 248 g) all-purpose flour divided, plus more for dusting
- 3/4 cup warm water 105-110°F, divided
- 1 teaspoon salt
- 1 1/2 teaspoon olive oil
Sauce
- 1 15-oounce can whole tomatoes
- 2 tablespoons olive oil
- 2 large garlic cloves pressed or minced
- 4 large fresh basil leaves julienned, plus optional more for topping
- 1/4 teaspoon sugar
Assemble
- 2 tablespoons cornmeal
- 6-8 ounces mozzarella sliced thin
- 1 large tomato optional, sliced thin
Instructions
Dough
- In a large bowl or the bowl of your stand mixer, combine 1 tablespoon of the flour, yeast, and 1/4 cup of the warm water. Stir until mostly combined (it’s fine if there are a few lumps). Allow to sit for 5-10 minutes until top looks foamy and bubbles form on the surface. If the top does not become foamy, your yeast may be bad or your water may have been too hot and killed it. Give it another try with a fresh packet.
- Add 1 1/2 cup of the flour, remaining 1/2 cup of warm water (you may have to reheat it if it has cooled), salt, and olive oil and stir together.
- If using a stand mixer: use the dough attachment on low and mix in 1/4-1/2 cup of flour until the dough pulls away from the side of the bowl. Knead for 6-8 minutes on low until dough is smooth and elastic. When it’s done, flour your hands and work surface and turn dough out. Knead 5-10 times until it is no longer sticky, adding more flour as necessary. Skip to step 5.
- If kneading by hand: fill a 1/2-cup measuring cup full of flour. Using some of that flour, add to your dough, stirring in a little at a time, until dough pulls away from the sides of your bowl. Use more of the flour to flour your hands and work surface very well. Turn dough out onto the surface and knead for about 8 minutes, adding flour from your cup any time the dough becomes sticky. The dough is ready when it is smooth, elastic and passes the windowpane test (dough is elastic enough that you can stretch it without tearing and when held up to the light, you can see light through it).
- Pat dough with flour, place in a large bowl, cover with a clean towel, and place in a warm place. Allow to rise for 60 to 90 minutes, until doubled in size.
Sauce
- While the dough is rising, you are going to make the sauce. Using a blender or food processor pulse the tomatoes until mostly pureed with some pieces of tomato still intact–think salsa. (In a pinch, you could just really go to town with a pair of scissors in the can.)
- Heat oil in a large pot (the pot is going to seem much too big, but this sauce likes to splatter and the larger pot will cut down on cooking time). Add garlic and cook until browned and fragrant. Add pureed tomatoes, sugar, and basil. Stir and bring to a simmer.
- Simmer uncovered for 20-30 minutes (your cooking time can very greatly depending on the size of your pan and type of tomatoestirring occasionally until sauce has reduced down to about 3/4 cup.
Assemble
- Preheat oven to 500°F.
- Cover pizza tray or cookie sheet with corn meal (the corn meal will keep your pizza from sticking). Turn your bowl of dough upside down over the tray and allow dough to drop out. If your dough is sticky, you can flour your hands. Gently stretch and manipulate dough to form a circle (or rectangle if making on a baking sheet). Spread sauce over your dough, leaving about an inch and a half of crust. Add mozzarella and top with optional tomato slices and more basil if desired*.
- Bake 12-16 minutes, until crust is golden and cheese is browned and bubbly.
- Allow to cool for at least 5 minutes before cutting and serving.
