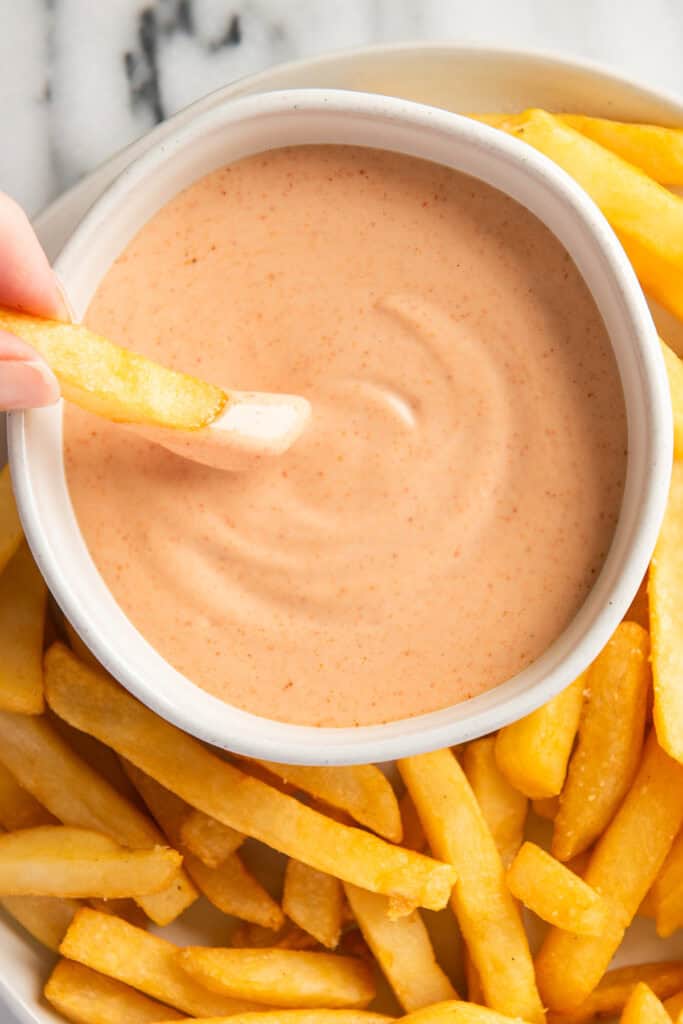
This fry sauce, which takes less than 5 minutes to throw together and uses just a handful of pantry staples, is the perfect way to take your fries and burgers to the next level!
Are your fries feeling a little boring, your burgers a little lackluster? You should definitely give fry sauce a try.
“What is fry sauce?” You might ask. It’s an easy-to-make condiment that is extremely popular in parts of the US.
Although different versions of fry sauce have popped up all over the world, when most people think of it, they will connect it back to Utah. This Utah state favorite originated from Arctic Circle, an American burger and shake restaurant chain that was created in the 1950s.
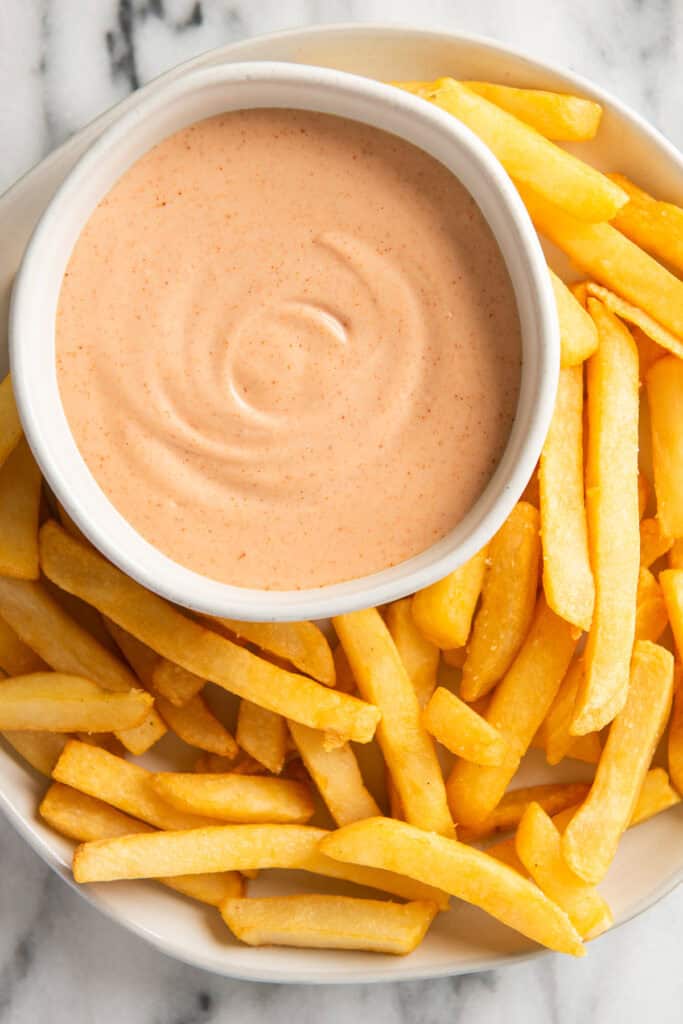

Of the many (many!!) fry sauce variations, my favorite is a simple mixture of mayo, ketchup, Worcestershire sauce, and pickle brine making it a little bit sweet, deliciously savory, and with just a bit of bite from the brine.
Once you start dipping your fries in it or smothering it on your hamburgers, you will never be able to go back!
Ingredient Notes
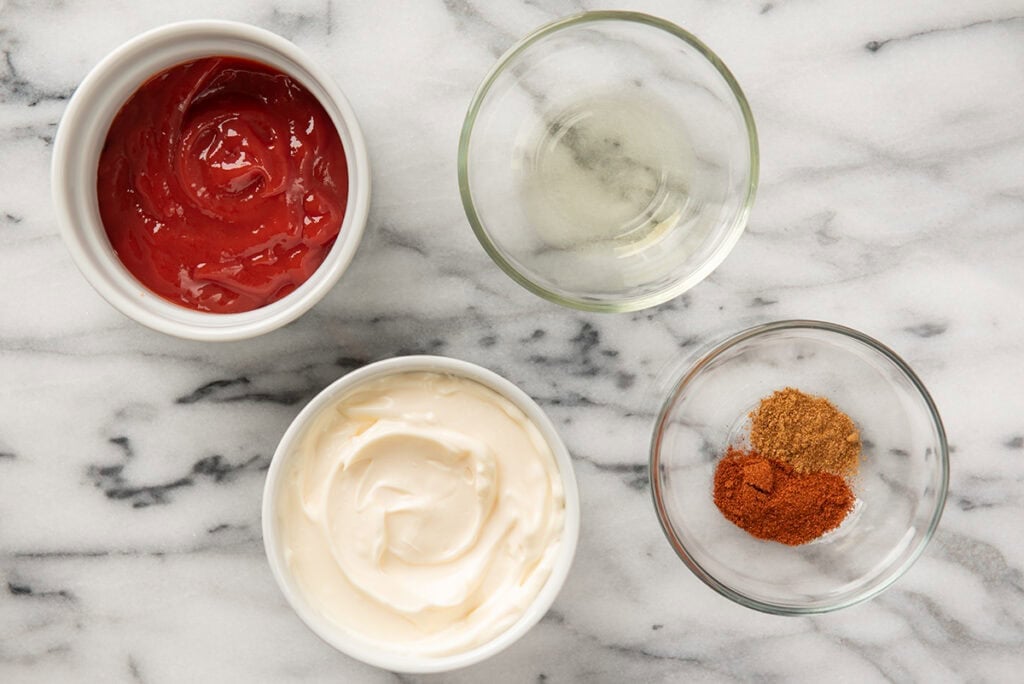

- Mayonnaise: Any mayo will work for this recipe, including light, vegan, or low-fat.
- Pickle Brine: The pickle brine adds a hint of dill to the sauce, which is quite good, but you can replace the brine with the same amount of distilled white vinegar.
- Worcestershire Sauce: The Worcestershire sauce adds depth of flavor to the fry sauce, but is optional.
- Salt: Since different types of mayo have different salt contents and there is A LOT of salt in brine, the amount of salt needed will vary so add salt to taste.
- Cayenne: The cayenne brings some heat but is also optional.
How to Make Fry Sauce
Fry sauce is actually really simple to make!
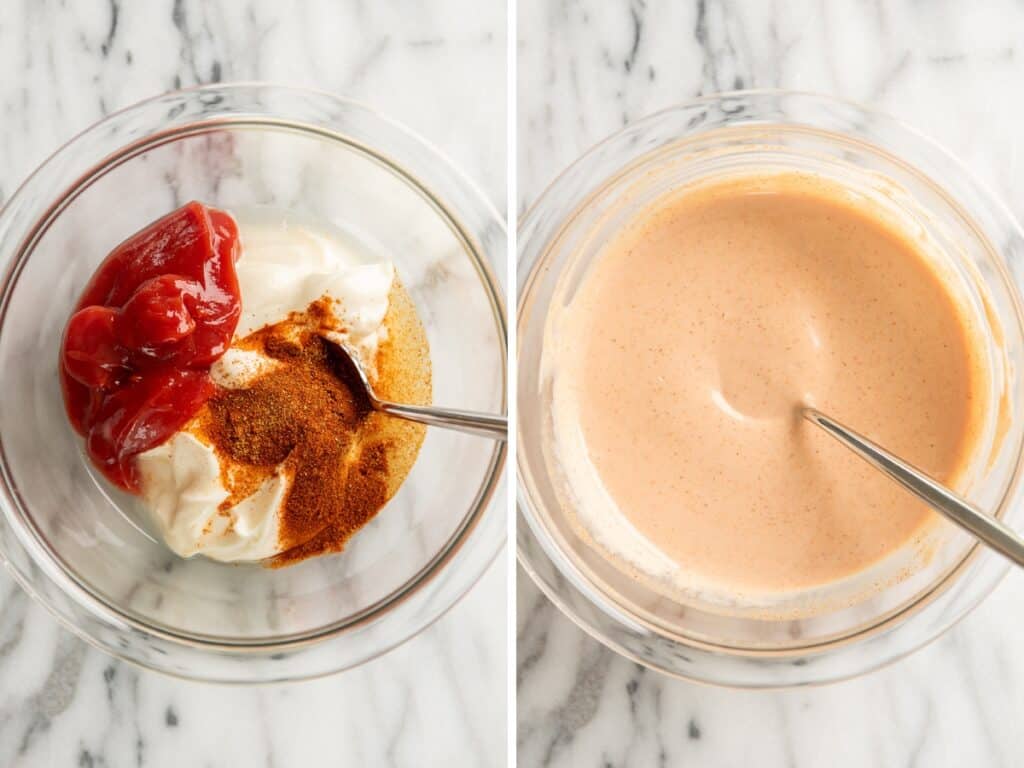

Combine the mayo, ketchup, pickle brine, Worcestershire sauce, and paprika in a small bowl. I recommend measuring the mayonnaise and ketchup by weight using a kitchen scale because it makes things quicker and easier (and means fewer dishes to wash).
Add salt and pepper to taste, and stir in the optional cayenne.
Then, serve and enjoy!

Variations
If you look around the internet, people have very strong opinions about what they like in their fry sauce. This is the classic fry sauce recipe, but to really make it your own, try adding in a little:
- Prepared horseradish
- BBQ sauce
- Mustard
- Pickle relish
- Hot sauce
- Adobo sauce from a can of chipotle peppers
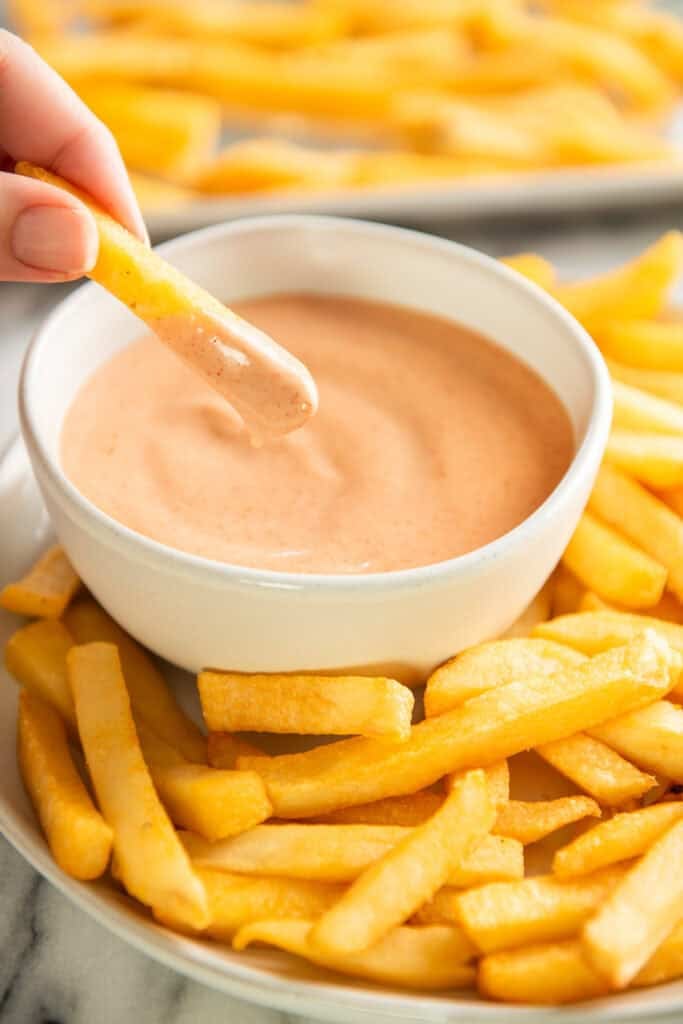
Places to Use Fry Sauce
Fry sauce is obviously great on fries, and my personal favorite way to eat it is as a condiment on burgers, but it would also be great with…
- Chicken strips or nuggets
- Tater tots
- Onion rings
- Hot dogs or Polish dogs
- Fish sticks
How to store fry sauce?
Store fry sauce tightly covered in the refrigerator for up to 5 days.

More Favorite Dipping Sauces
- Garlic Aioli
- Sriracha Aioli
- Chipotle Aioli
- Yogurt Aioli

Ingredients
- ▢ ¾ cup ( 168g ) mayonnaise
- ▢ ¼ cup ( 68g ) ketchup
- ▢ 1 tablespoon brine from a jar of dill pickles OR distilled white vinegar
- ▢ 1 teaspoon Worcestershire sauce
- ▢ ½ teaspoon paprika
- ▢ ¼ teaspoon cayenne pepper plus more to taste if desired (optional)
- ▢ Salt as needed
Instructions
- In a small bowl, mix together mayonnaise, ketchup, pickle brine or vinegar, Worcestershire sauce, and paprika.
- If using cayenne, stir in 1/4 teaspoon and then add more to taste. Add salt if needed. Use for dipping fries or as a spread for burgers, and enjoy!
Notes
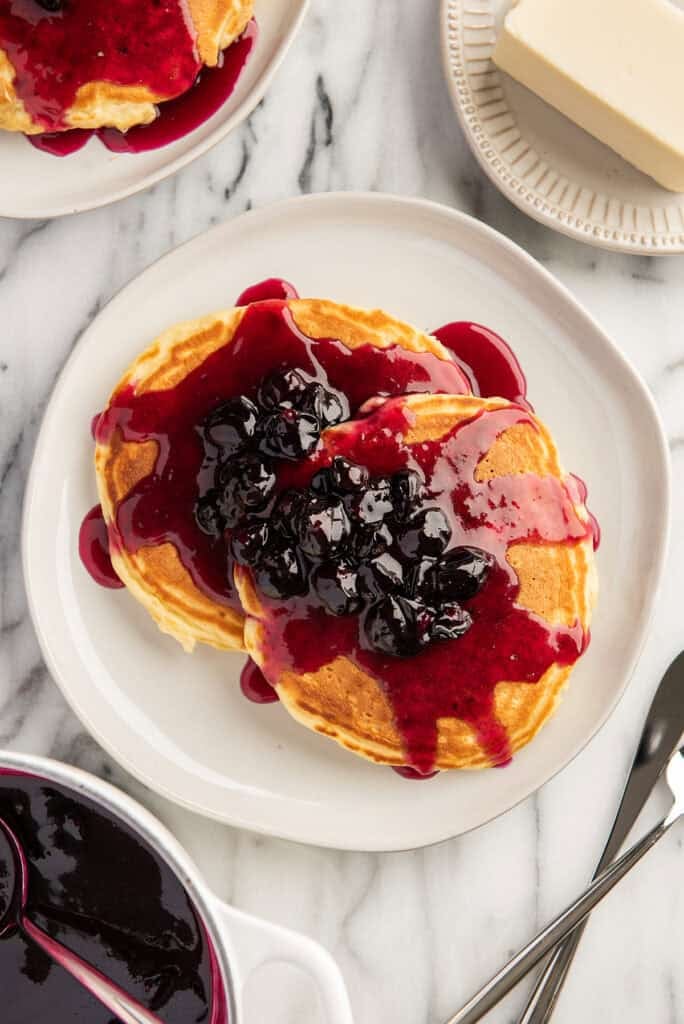
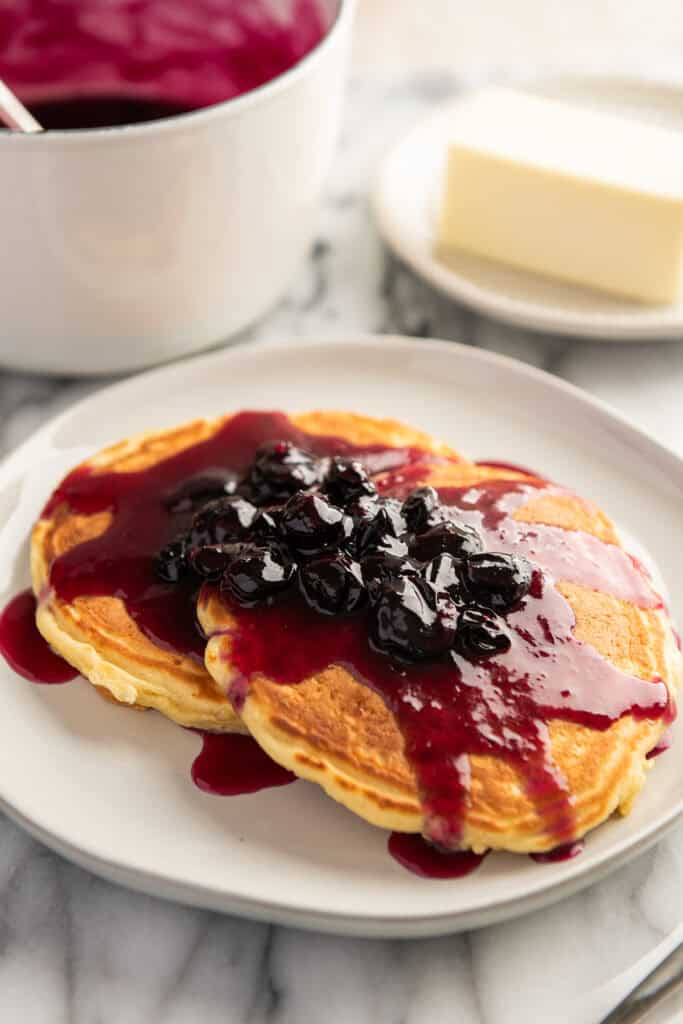
This blueberry syrup is quick, easy to make, and the perfect topping for pancakes, waffles, ice cream, and so much more.
A batch of sweet and sticky homemade blueberry syrup can take a good breakfast and turn it into something truly memorable and special. And the best part about adding blueberry syrup to your breakfast table is that it’s so, so easy to do.
Homemade blueberry syrup is surprisingly quick and simple to make. All you need is blueberries (fresh or frozen work fine) and a handful of pantry staples. You can make the syrup in about 30 minutes, and most of that is hands-off cooking or cooling time.

Once done, you have a lusciously thick syrup perfect for drizzling over your favorite breakfast foods or desserts. You can even use it in drinks with just a couple of recipe tweaks.
Ingredient Notes
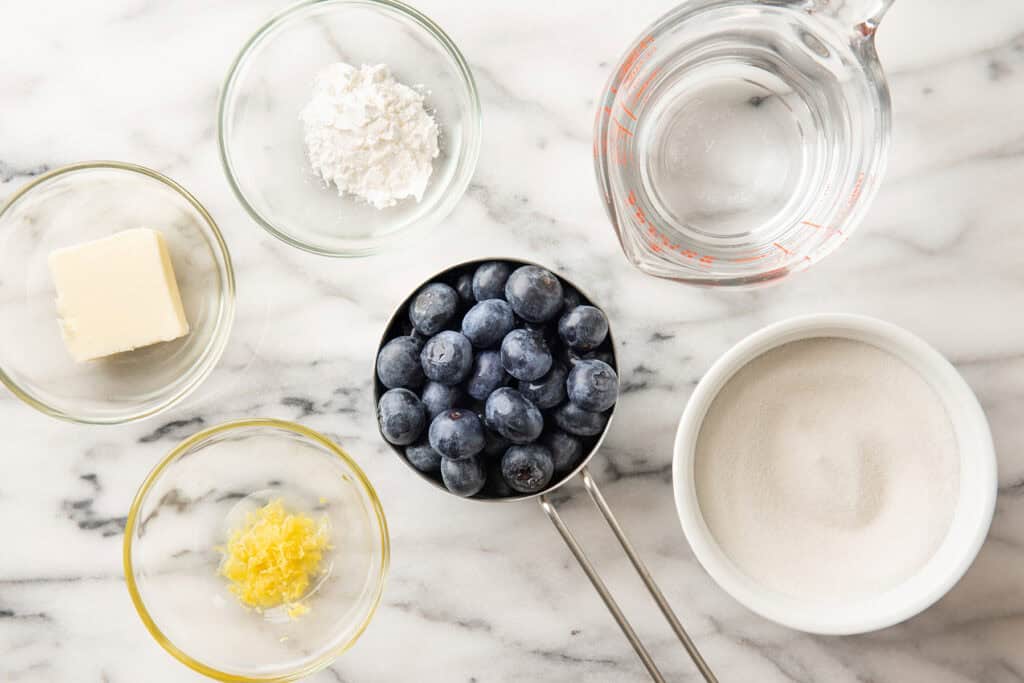

- Blueberries: You can use either fresh or frozen blueberries or substitute whatever berries you have on hand.
- Lemon Juice: I suggest using fresh lemon juice if you can, but you can also use bottled in a pinch.
- Butter: The butter adds richness to the syrup, but you can omit it if you don’t eat dairy.
- Lemon Zest: Lemon zest adds a little extra flavor punch to the syrup, but you can skip it if you don’t have fresh lemons on hand.
- Cornstarch Slurry: The cornstarch slurry helps to thicken the syrup but can be omitted.
How to Make Blueberry Syrup

Optional cornstarch slurry: In a small bowl, stir together your cornstarch and water and then set the slurry aside. The cornstarch slurry helps thicken the syrup, so, while optional, I recommend using it if you want a traditional thick pancake syrup.
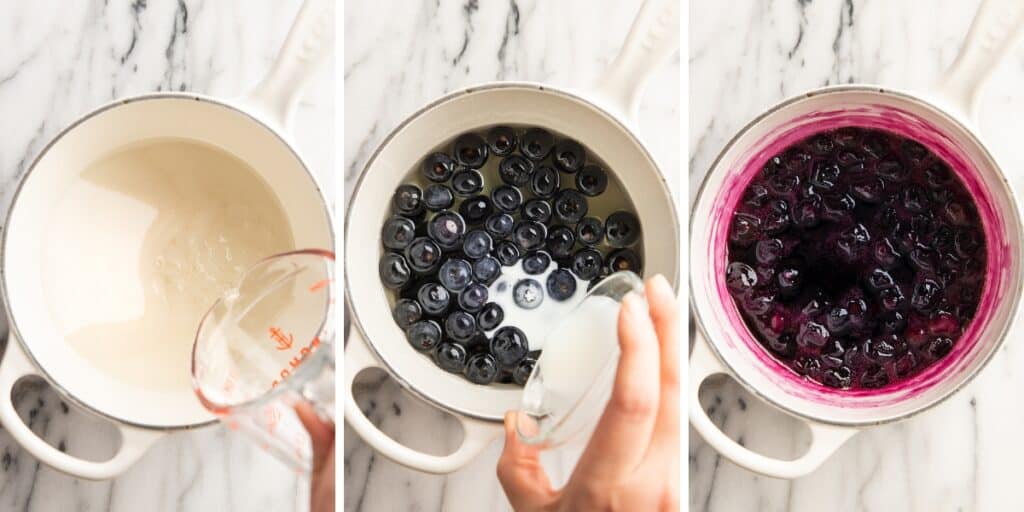
Dissolve your sugar: In a small saucepan, combine your sugar and water. Once combined, heat over medium-high heat, stirring continuously. Bring the mixture to a boil, and cook until the sugar is completely dissolved.
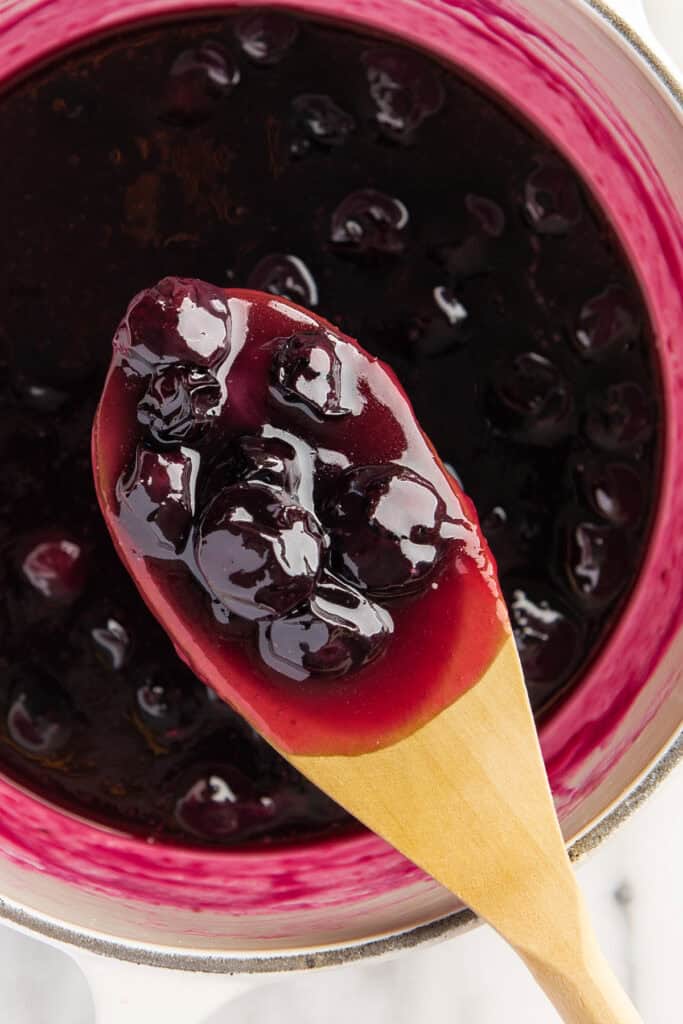
Cook blueberries and (optional) cornstarch slurry: Stir in your blueberries and cornstarch slurry into the sugar water. Then simmer until the sauce is reduced and slightly thickened. You will know it is thick enough when the syrup easily and thickly coats the back of a spoon.


Add the rest of your ingredients: Remove the saucepan from the heat and add in the butter, lemon juice and zest, and a pinch of salt. Strain the sauce if you want a completely smooth syrup, or add more blueberries if you want more of a chunky sauce.
Finish it up: Give your sauce time to cool down before using, and then serve it over something delicious, and enjoy!
Blueberry Syrup for Drinks
This recipe makes a thick syrup that is a perfect topping to pancakes , waffles , and ice cream, but with a couple of adjustments, you can use this recipe to make blueberry syrup for drinks.
To make a simple syrup that will mix easily into liquid, follow the recipe as written but omit the cornstarch slurry and the butter, and strain the syrup before storing. This will give you a thin but richly flavored syrup, perfect for drinks.

How long does homemade blueberry syrup last?
Stored in an airtight container in the refrigerator, homemade blueberry syrup will last for up to two weeks. However, if it starts to look off due to the fresh berries, trust your judgment and discard it early.
Syrup should be served warmed or at room temperature. To reheat, microwave in 15-second increments, stir and repeat until it reaches your preferred temperature.
Can I use another type of berry?
Yes! This recipe works well with blackberries, raspberries, strawberries or even mixed berries.
Can I use frozen blueberries?
Absolutely! Frozen blueberries are a great option when blueberries are out of season, and they are often cheaper as well. No need to thaw before use. Just add them to the pot and they will thaw while they cook.

How do I thicken blueberry syrup?
Cornstarch is what will give you a thicker syrup. A lot of blueberry syrup recipes are simple syrup recipes because they only use blueberries, sugar, and water. This recipe adds a cornstarch slurry in order to make it thick and syrupy which makes it more of an ice cream or pancake syrup.
What are some ideas for using blueberry syrup?
- Pancakes
- Waffles
- French Toast
- Ice Cream
- Cheesecake
- Oatmeal
More Favorite Berry Recipes
- Strawberry Breakfast Cake
- The Best Blueberry Waffles
- Small-batch Blueberry Muffins
- Easy Strawberry Milk
Ingredients
Cornstarch Slurry (Optional for a thicker syrup)
- ▢ 1 tablespoon (8g) cornstarch
- ▢ 2 teaspoons cold water
Blueberry Syrup
- ▢ 1 cup (200g) granulated sugar
- ▢ ¾ cup filtered water
- ▢ 1 cup fresh blueberries
- ▢ 2 tablespoons butter salted or unsalted is fine
- ▢ 1 teaspoon lemon juice preferably fresh
- ▢ 1 teaspoon grated lemon zest optional
- ▢ 1 pinch salt
Optional Mix-ins
- ▢ ½ cup fresh blueberries optional for mixing into syrup
Instructions
Optional Cornstarch Slurry
- In a small bowl, stir together the cornstarch and 2 teaspoons of water to make a slurry. Set aside.
Blueberry Syrup
- In a small saucepan, combine sugar and water. Over medium-high heat, stirring constantly, bring to a boil and cook until sugar is completely dissolved, 4-5 minutes.
- Stir in blueberries and cornstarch slurry if using. Bring to a simmer and then turn the heat down to keep the sauce at just a gentle simmer. Simmer for 10 to 15 minutes, until the sauce is reduced and slightly thickened. When ready, it should easily and thickly coat the back of a spoon.
- Remove from heat, stir in butter, lemon juice, lemon zest, and pinch of salt. Strain for a completely smooth syrup or add additional blueberries for more of a chunky sauce. Let sauce sit for 10-15 minutes to cool before using.
- Serve over something delicious, and enjoy!
Notes
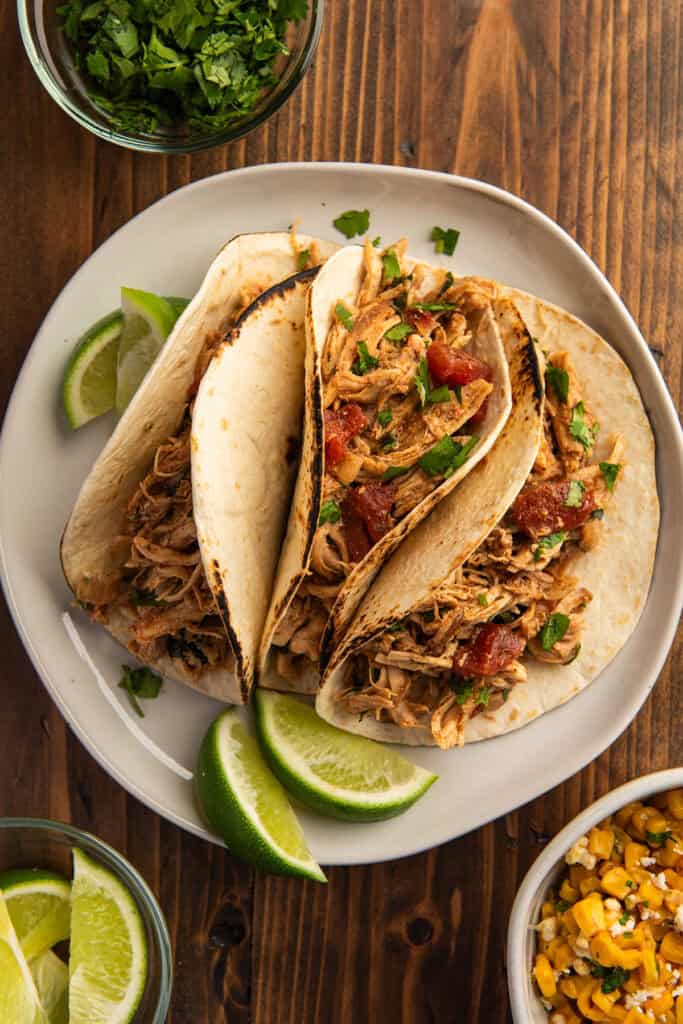
These Slow Cooker Chicken Tacos are quick to prep, easy to make, and filled with tons of flavor!
Slow cooker chicken tacos are a great quick and easy meal for busy weeknights. Toss the handful of ingredients in the slow cooker in the morning, and then all you have to do when dinner comes around is shred the meat and assemble some seriously good tacos.

Upgraded Slow Cooker Chicken Tacos
In college, the classic way I learned to make chicken tacos in the crockpot was just to top chicken breasts with salsa, press “start,” and call it a day. And they were fine if a little boring.
But these days, we don’t have to settle for just “fine.” Let’s make some tacos we can be excited about. This recipe uses a combination of canned tomatoes with honey or brown sugar for a hint of sweetness, classic taco spices for a kick of flavor, and a little vinegar to finish things off with a little bite of acidity.
You end up with deliciously juicy chicken packed with a ton of flavor that is anything but boring.
Ingredient Notes
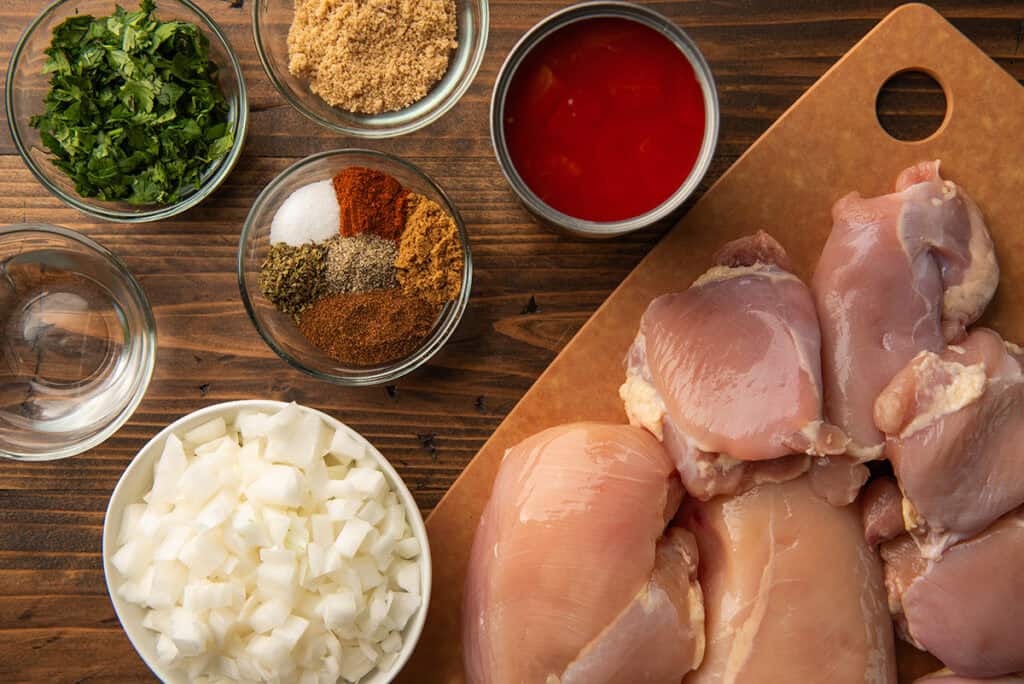

- Your choice of chicken: You can use either 3 lbs of boneless skinless chicken breasts or thighs in this recipe, OR a mix of 1½ pounds of each. I really like the combo of thighs and and breasts because you get the richness of the dark meat without it being too rich.
- Diced canned tomatoes: If all you have on hand is canned whole tomatoes, roughly chop them before adding them to the slow cooker. I do not recommend substituting crushed tomatoes here.
- Taco spices: All spices and the salt can be replaced by 3 tablespoons of store-bought taco seasoning. If using homemade taco seasoning without salt, add the salt called for in the recipe.
How to Make Slow Cooker Chicken Tacos
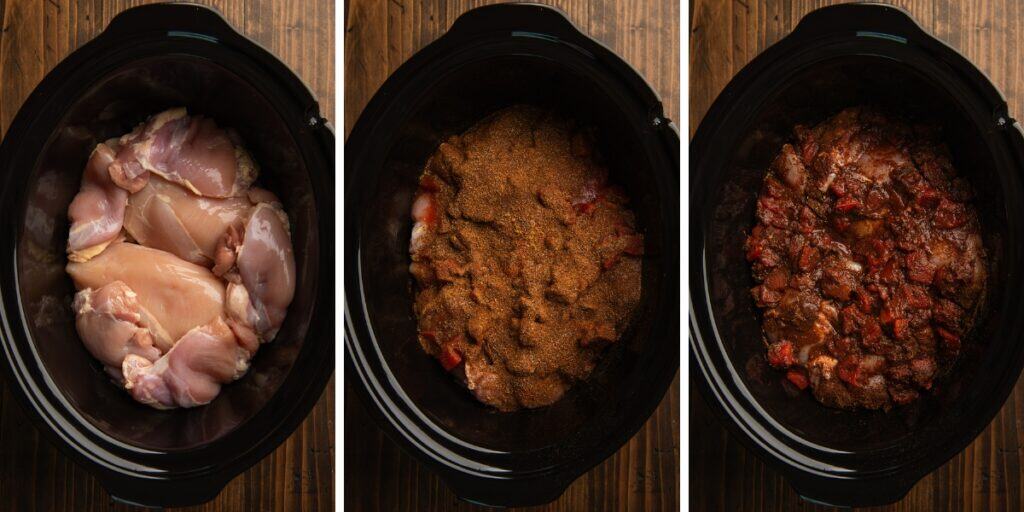

Add onions and chicken to slow cooker: Dice your onion, and then spread the onion over the bottom of your slow cooker. Place the chicken in an even layer over the top of the onion.
Add canned tomatoes, honey OR brown sugar, and all spices: You can stir everything on top of the chicken together if you want, but skip if you’re running short on time.
Start your slow cooker: Place the lid on the slow cooker, and cook until the internal temperature of the chicken reaches 165°F for chicken breasts and 175°F for thighs.
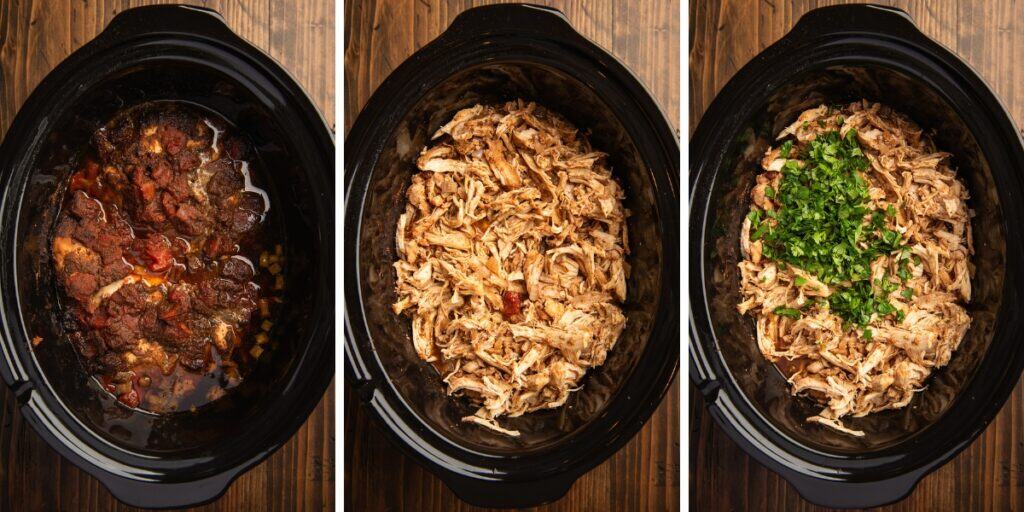

Shred the chicken: Transfer the chicken from the slow cooker to a cutting board, and shred the chicken.
Add the remaining ingredients: Add white vinegar to the cooking juices before returning the chicken to the slow cooker. Then stir in shredded chicken and cilantro. Salt and pepper to taste.
Make your tacos, and enjoy!

Variations
For spicier tacos, try substituting Rotel Diced Tomatoes & Green Chilies for the diced tomatoes or take canned chipotle chili peppers in adobo sauce and add a couple diced peppers and tablespoon of the adobo sauce for more of a smokey spice.
For creamy chicken tacos, try stirring in 1 cup of sour cream to the finished taco meat.
How to Store Your Slow Cooker Chicken Tacos
Chicken taco meat stores quite well in both the refrigerator and freezer, making this an excellent make-ahead meal.
- Refrigerator: Store the chicken taco meat in its juices in an airtight container for up to 4 days.
- Freezer: Store in individual portions in quart-sized freezer bags in the freezer for up to 6 months. Use within 3 months for best results.
Can I use frozen chicken in the slow cooker?
Although many people will just add an extra 30 minutes to 1 hour to their cooking time and toss their chicken in frozen, it is not recommended. Current USDA guidelines recommend only using thawed chicken in the slow cooker because the food will spend too much time in the “danger zone” while thawing, making it potentially unsafe to eat.
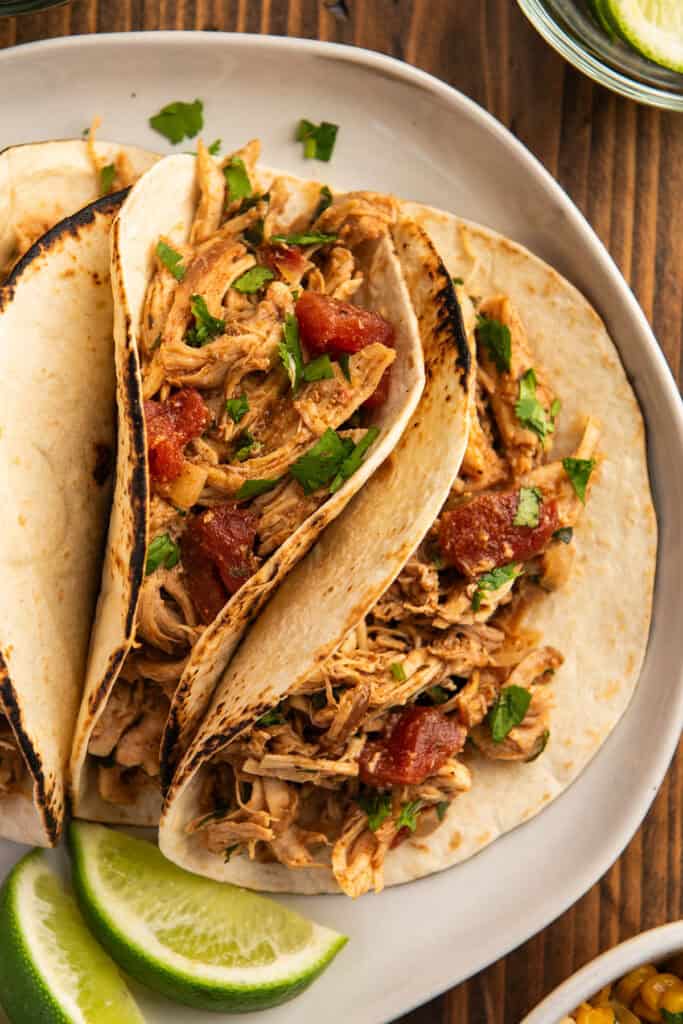

What are the best toppings for these tacos?
These tacos don’t need a ton of toppings. I like them best with a little sour cream and extra chopped cilantro, but feel free to add your favorite toppings like cheese, diced onions, or avocado.
Related Recipes
- Slow cooker carnitas
- Easy carne asada tacos
- Chipotle chicken tacos

Ingredients
- ▢ ½ medium white or yellow onion diced
- ▢ 3 pounds of boneless skinless chicken breasts or thighs OR a mix of 1 ½ pound of each
- ▢ 1 14-ounce can diced tomatoes *
- ▢ 2 tablespoons brown sugar or honey
- ▢ 2 tablespoons chili powder *
- ▢ 1 ½ teaspoons cumin
- ▢ 1 ½ teaspoons paprika
- ▢ 1 teaspoon table salt plus more as needed
- ▢ ¾ teaspoon dried oregano
- ▢ ¾ teaspoon ground black pepper plus more as needed
- ▢ 2 tablespoons distilled white vinegar
- ▢ ¼ cup chopped cilantro plus more for topping
- ▢ 12 taco-sized tortillas
- ▢ Sour cream for topping
Instructions
- Spread the onions over the bottom of your slow cooker and then place the chicken in an even layer over the top.
- Add canned tomatoes with their juices followed by the honey or brown sugar. Then sprinkle all spices and salt over the top.
- Place the lid on your slow cooker, and cook until the chicken reaches at least 165°F for chicken breasts and 175°F for thighs, about 2-3 hours on high or 3 to 6 hours on low.
- Transfer chicken from the slow cooker to a cutting board, allow to cool until cool enough to handle and then and use 2 forks to shred the chicken.
- Before returning the chicken, add 2 tablespoons of white vinegar to the cooking juices. Stir in shredded chicken and cilantro, and salt and pepper to taste.
- Serve the taco meat with your favorite tortillas and a dollop of sour cream and enjoy!
Notes
- Refrigerator: Store the chicken taco meat in its juices in an airtight container for up to 4 days.
- Freezer: Store in individual portions in quart-sized freezer bags in the freezer for up to 6 months. Use within 3 months for best results.

Fry Sauce
Ingredients
- ¾ cup ( 168g ) mayonnaise
- ¼ cup ( 68g ) ketchup
- 1 tablespoon brine from a jar of dill pickles OR distilled white vinegar
- 1 teaspoon Worcestershire sauce
- ½ teaspoon paprika
- ¼ teaspoon cayenne pepper plus more to taste if desired (optional)
- Salt as needed
Instructions
- In a small bowl, mix together mayonnaise, ketchup, pickle brine or vinegar, Worcestershire sauce, and paprika.
- If using cayenne, stir in 1/4 teaspoon and then add more to taste. Add salt if needed. Use for dipping fries or as a spread for burgers, and enjoy!
