This Frosty Bantha Milk recipe (AKA Star Wars Blue Milk) is super easy to make and perfect for your next Star Wars Party!

Happy Friday everyone! How was your week?
It’s time for another Fandom Foodies recipe! What’s Fandom Foodies? It’s a fun monthly collaboration where a group of fellow nerdy bloggers all get together and create a recipe based off of a favorite piece of pop culture. (BTW, I’m hosting Fandom Foodies next month and the theme is Game of Thrones !!).
This month’s theme is Star Wars , hosted by My Main is a Cook , and I couldn’t be more excited. Star Wars was my very first fandom and it still holds a special place in my heart.
A ton of other Fandom Foodies have already posted their Star Wars -inspired recipes; go check them out in that link-up. They are fantastic!
I have a couple of Star Wars party perfect treats on the site, my BB-8 Cupcakes and Poe’s Jacket Cookies , and I love, love, love those recipes, but they are both Work. I thought that for Fandom Foodies, I’d post something a little simpler, maybe something with just four ingredients, something like Frosty Bantha Milk!
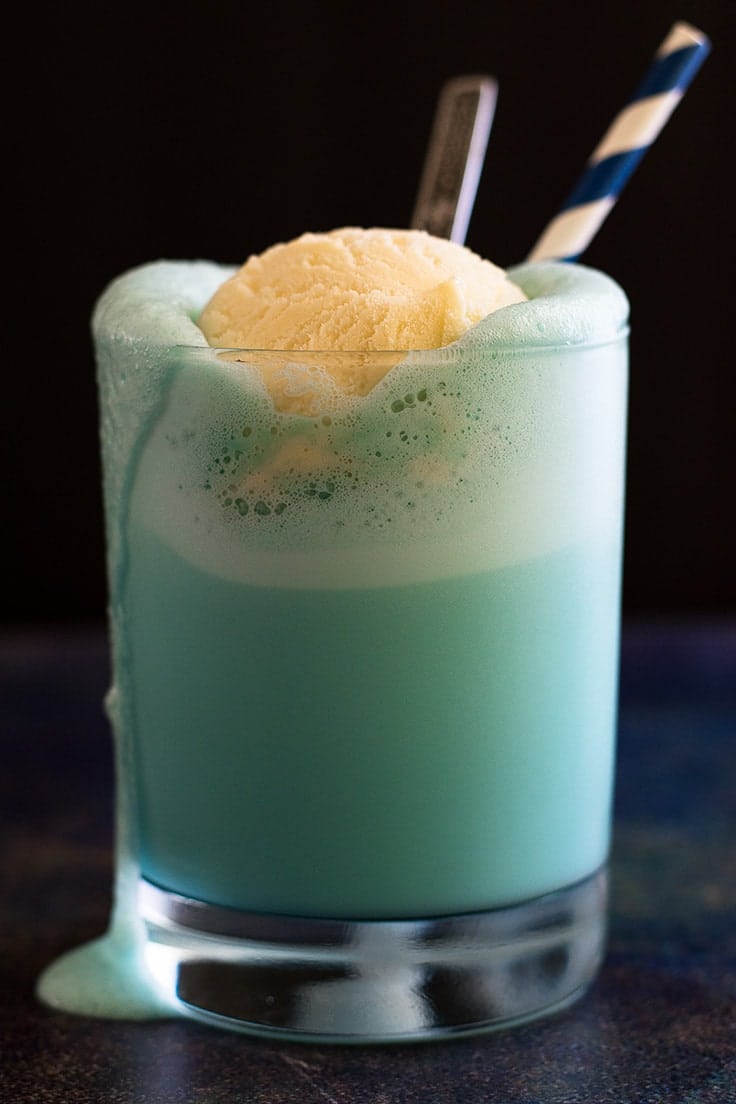

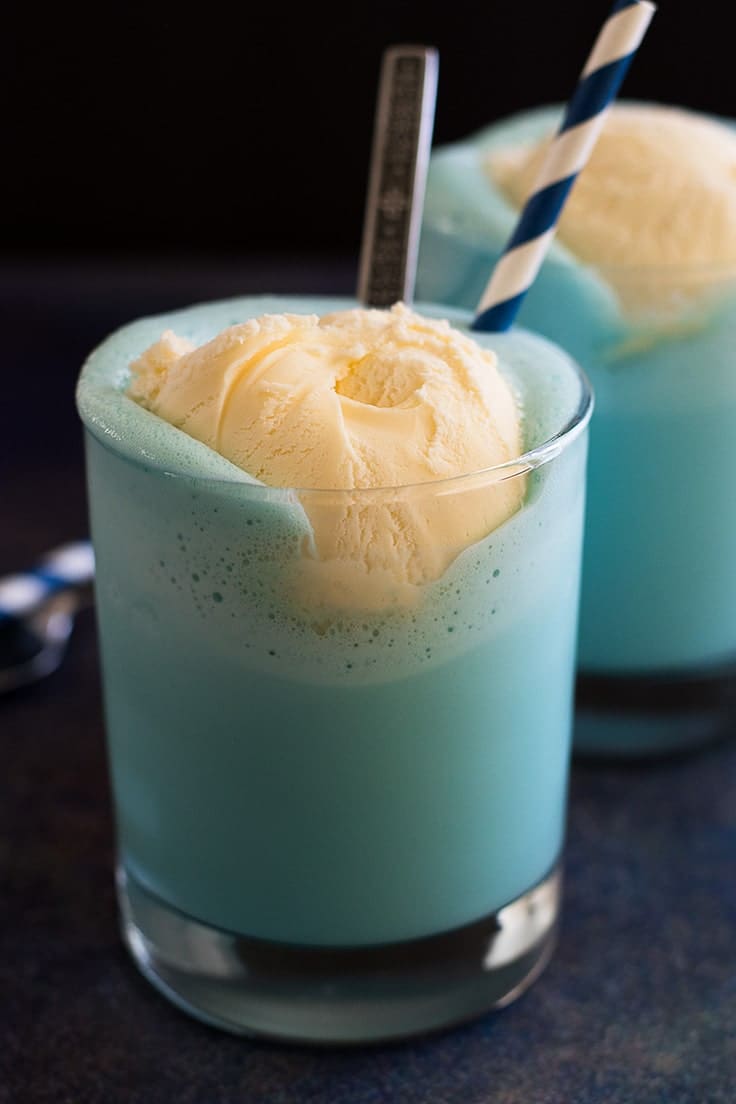
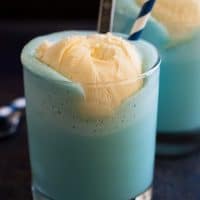
Bantha milk/Blue Milk shows up a couple times in the Star Wars films, most recently in the background of one of the opening scenes of Rogue One . Canonically, bantha milk comes straight from giant yak-looking creatures, but the recipe for my bantha milk is a little more appetizing. It’s a sweet milk shake mixture of vanilla ice cream, milk, blue drink mix-in like Hawaiian Punch or Kool Aid, and a couple drops of blue food coloring, and it’s preeeeety great.
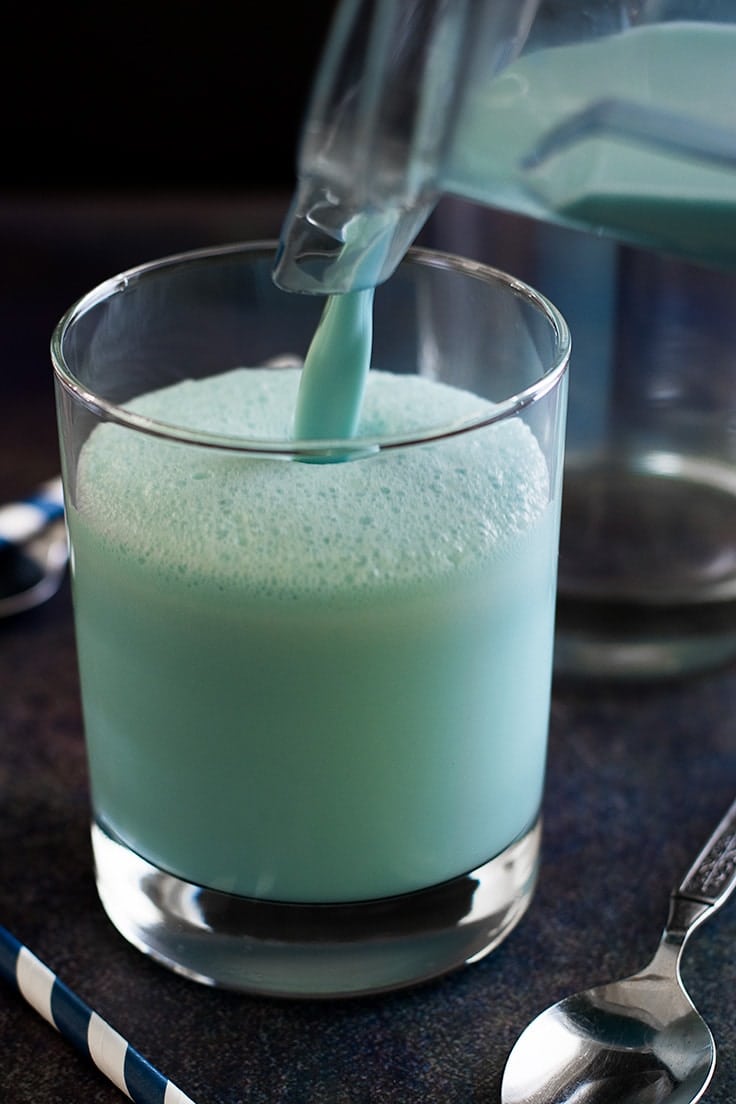

I highly recommend these for summer movie watching parties, because they are FUN, tasty, and so easy. You just blend all the ingredients together, pour into a glass, top with a scoop of ice cream, and easy peasy frosty Star Wars drink.
The texture of the shakes is very creamy and a little thinner than a traditional shake so it’s not overwhelmingly rich, with a slightly fruity tropical vanilla flavor. They are definitely kid-friendly and great for Star Wars birthday parties, but if your party has nerds of the more adult kind, a little splash of something stronger in the mix is not a bad addition. 😉


Frosty Bantha Milk Recipe Notes
- If you are having trouble finding Hawaiian Punch, blue Kool-Aid, or other blue drink mixes, I found sugar-free single-serving packets of Hawaiian Punch in the drink mixes part of my grocery store (you can also find them on Amazon ) and they worked great for these. I’m not usually a fan of artificial sweeteners in drinks, but since there’s plenty of sugar in the ice cream the sweetener is not very noticeable.
- This recipe makes 3 cups of liquid, which is enough for 3 8-ounce or 2 12-ounce drinks. You can adjust the recipe yield by hovering over the serving size (or clicking if you are on mobile) and sliding the slider.
Ingredients
- ▢ 2 cups ( 260 g) vanilla ice cream plus 3 scoops
- ▢ 1 1/2 cup milk , any percentage
- ▢ Sweetened blue drink mix (enough for 2 cups/ 16 oz of liquid*)
- ▢ 10 to 12 drops blue food coloring
Instructions
- In your blender, combine all ingredients and blend until smooth. Divide between 3 8-ounce glasses and top with a scoop of vanilla ice cream. Serve and enjoy!
Notes

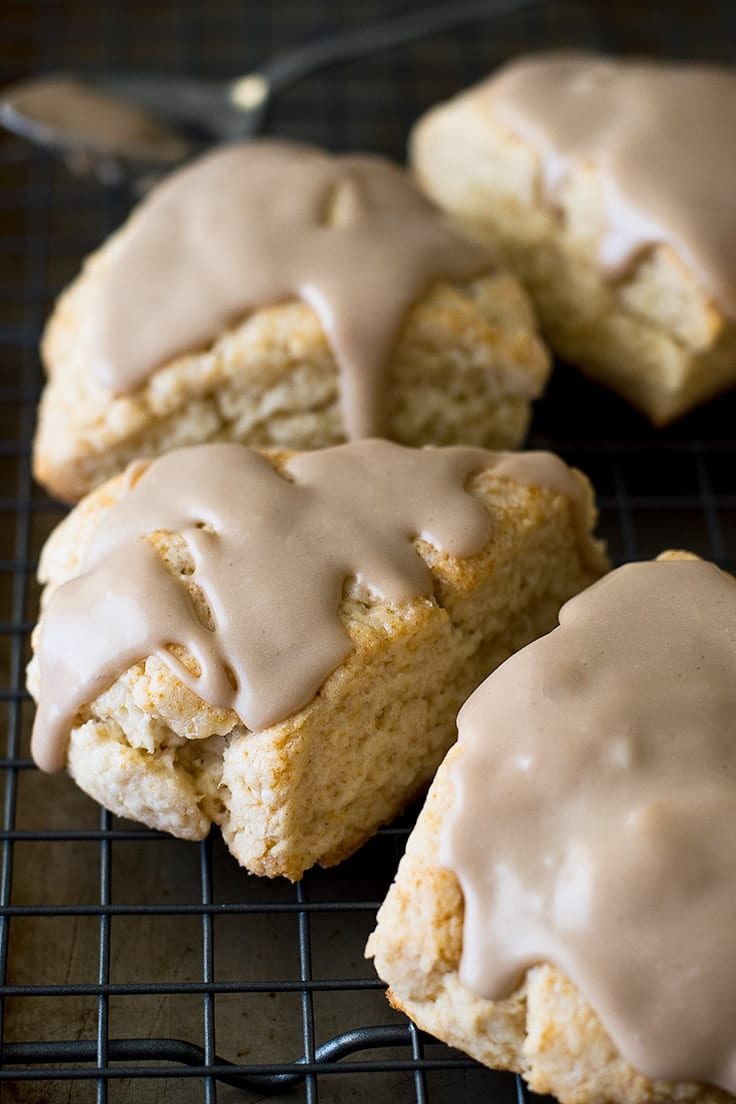
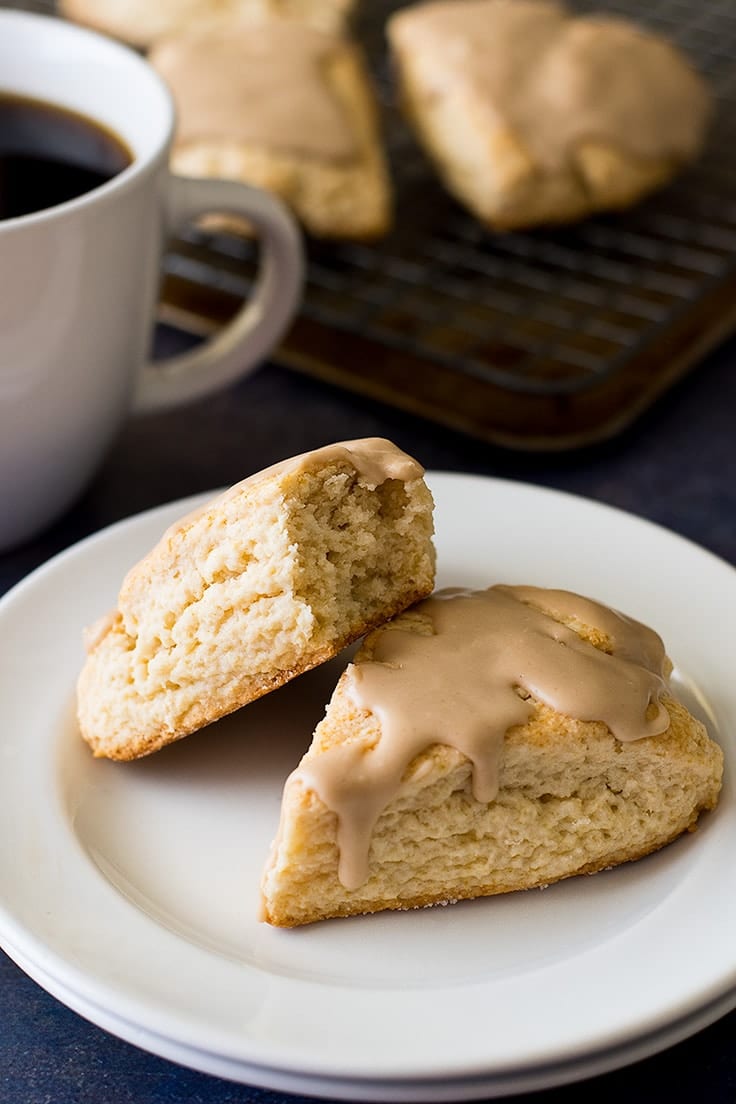
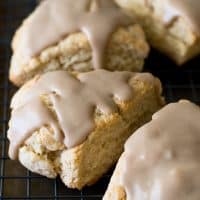
This small batch of Maple Scones is perfect for a last-minute brunch. The cream scones are quick and easy to make, and you’ll want to eat this maple glaze with a spoon!

Have you watched The Good Place ? If you haven’t, you absolutely should. It’s sweet, incredibly funny, and very, very clever. If there’s been a bit of a hole in your heart since Parks and Rec left the air, this might be just the show you’re looking for.

NBC
If you don’t know the premise of the show, it’s that Eleanore, a pretty terrible person in life, accidentally ends of in “the good place” when she dies. It’s clear to her right from the beginning that she doesn’t belong there and that her presence seems to be destabilizing heaven, so the show is mostly a series of wacky, heavenly hi-jinks and misadventures as Eleanore and the lovable weirdos she meets along the way try to keep her from being found out while the afterlife is going crazy around them. And it’s a damn delight.
In the third episode, after the latest Eleanore-induced disaster, Eleanore and her bff/mortal enemy, the disgustingly perfect Tahani, go around their bit of heaven to deliver maple butter scones to all of their neighbors, and as soon as I heard the words “maple” “butter” and “scones,” I was intrigued.
<img loading=“lazy” src=“https://bakingmischief.com/wp-content/uploads/2017/11/maple-butter-scones-image-the-good-place.gif" onerror=“this.onerror=null;this.src=‘https://blogger.googleusercontent.com/img/a/AVvXsEhe7F7TRXHtjiKvHb5vS7DmnxvpHiDyoYyYvm1nHB3Qp2_w3BnM6A2eq4v7FYxCC9bfZt3a9vIMtAYEKUiaDQbHMg-ViyGmRIj39MLp0bGFfgfYw1Dc9q_H-T0wiTm3l0Uq42dETrN9eC8aGJ9_IORZsxST1AcLR7np1koOfcc7tnHa4S8Mwz_xD9d0=s16000';" alt=“Gif of Eleanore from The Good Place saying, “Fork that’s good.” - 14”>
NBC
I mean, how good do maple butter scones sound!?
Now, I’m not sure what combination of maple butter and/or maple and butter went into Tahani’s scones because when I went to go look up a maple butter scone recipe, I found none (seriously, go google them. I’ll wait.).
And then I realized that it made perfect sense, because of course Tahani’s go-to scone recipe would be one-of-a-kind. Of course.
And of course I then wanted to make her scones, so I did.

My take on Tahani’s maple butter scones is a simple cream scone finished off with a fabulous maple (and) butter glaze.
The end result?
They are heavenly.
(Okay, no more heaven puns. I promise.)
Cream scones are a bit different from classic scones like my Bacon Scones . They use cream in the dough rather than cold butter (some recipes use both) and the result is a scone that is on the moist side rather than crumbly with a slightly crispy exterior.
They are also insanely easy to make. You just throw all the dry ingredients into a bowl, stir in the wet, and the next thing you know, you have a batch of scones ready to go into the oven.
I cut my scones into wedges because I think they are cuter that way, but you can make them into rounds like Tahani if that’s more your style. Then once your scones come out of the oven and cool a bit, you drizzle on a simple and sweet maple butter glaze.
This small-batch scone recipe will make six regular-size scones or about four large round ones (extend the baking time just a bit if you’re going that route). You can eat them all yourself or follow Tahani’s lead, put on a flowing skirt and giant hat, and take a couple to share with some friends and neighbors. 😉

More Easy Breakfast Recipes
- Buttermilk Pancakes for Two
- Crispy Waffles
- Pancakes for One
- Banana Pancakes
- Small-batch Cinnamon Rolls
- The Best Cinnamon Toast
Ingredients
Cream Scones
- ▢ 1 1/2 cup (180g) all-purpose flour measured by weight or using the spoon and sweep method*
- ▢ 1 1/2 teaspoon baking powder
- ▢ 1/2 teaspoon salt
- ▢ 3 tablespoons ( 37g ) granulated sugar
- ▢ 3/4 cup heavy cream , plus more for brushing on scones*
- ▢ 1/2 teaspoon vanilla extract
Maple Glaze
- ▢ 1 cup (120g) powdered sugar, sifted
- ▢ 1 tablespoon (14g) butter, melted
- ▢ 1 to 3 tablespoons milk
- ▢ 1/4 teaspoon maple extract
- ▢ Pinch of salt
Instructions
- Preheat your oven to 425°F and line a baking sheet with parchment paper or silicone baking mat. In a large bowl, whisk together flour, baking powder, salt, and sugar.
- In a liquid measuring cup or bowl, stir together heavy cream and vanilla.
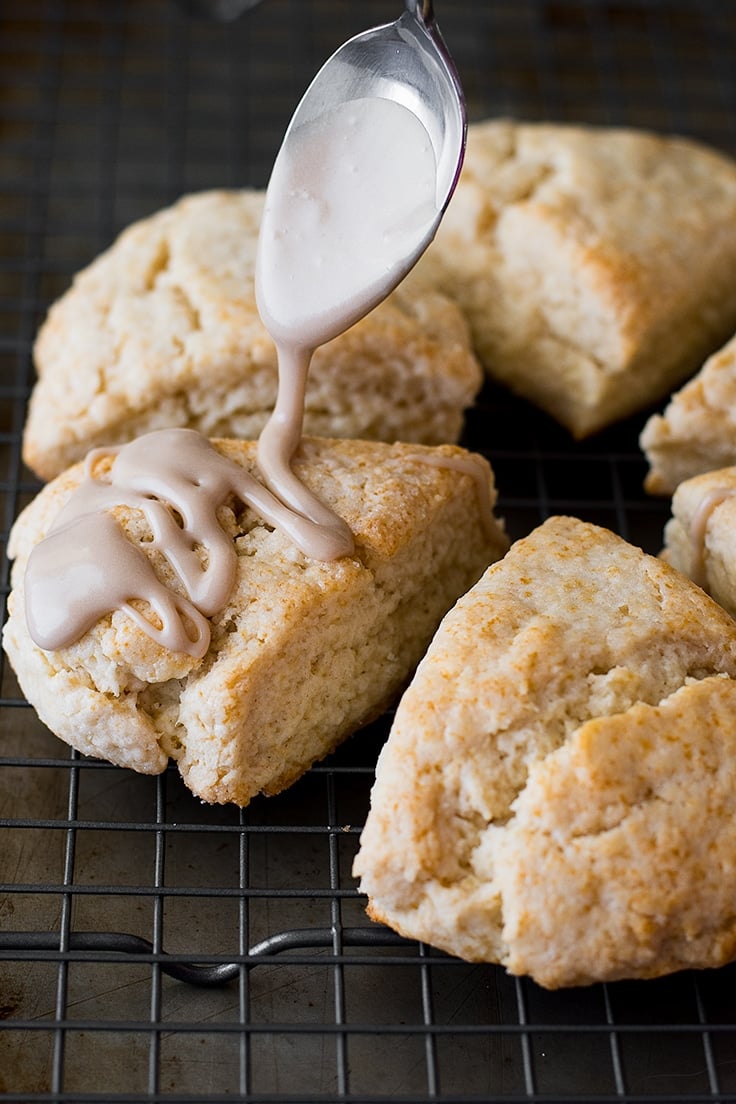
- Drizzle cream mixture over your dry ingredients and stir, using just enough cream so that a dry dough forms with no loose flour at the bottom of your bowl*. Use clean hands to finish mixing and shape dough into a ball. Turn out onto a lightly floured surface. Press dough out to a disk about 5 1/2-inches across or 3/4-inch thick.
- Use a dough scraper or knife to cut circle into 6 triangles. Transfer scones to your prepared baking sheet, arranging the wedges in a circle about 1-inch apart. Brush the scones with a little cream to help them brown.
- Bake for 14 to 16 minutes, until scones are baked through and lightly golden brown.
- Cool before glazing.
- In a small bowl, whisk together powdered sugar, melted butter, 1 tablespoon of the milk, maple extract, and salt. Add milk by the 1/4 teaspoon until glaze reaches a drizzling consistency and drizzle over scones. Allow glaze to set for 5 minutes and enjoy!
Notes
Recipe Adapted From King Arthur Flour
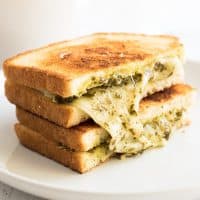
Class up your grilled cheese game with this super easy Pesto Grilled Cheese Sandwich!

Growing tired with your regular old grilled cheeses? Have a bit of pesto left over in that jar from dinner last night? I have just the recipe for you! Pesto grilled cheese!
We all know pesto’s great when added to carbs and cheese in the form of cheesy pasta (like maybe some Pesto Chicken Pasta for Two ), so pairing it with carbs and cheese in the form of toasty bread and melty provolone is going to be A++.
I love these sandwiches because they are just as easy as making a classic grilled cheese, but they look and taste so much classier. So whether you’re whipping one up lunch or having one for dinner with a bowl of tomato soup (soooo highly recommended– this is my current go-to tomato soup recipe ) you don’t feel like a five-year-old eating one. Not that there’s anything wrong with eating like a five-year-old, you are talking to the person who just posted a cake for breakfast recipe (my Mini Strawberry Breakfast Cake –have you tried it yet?)…
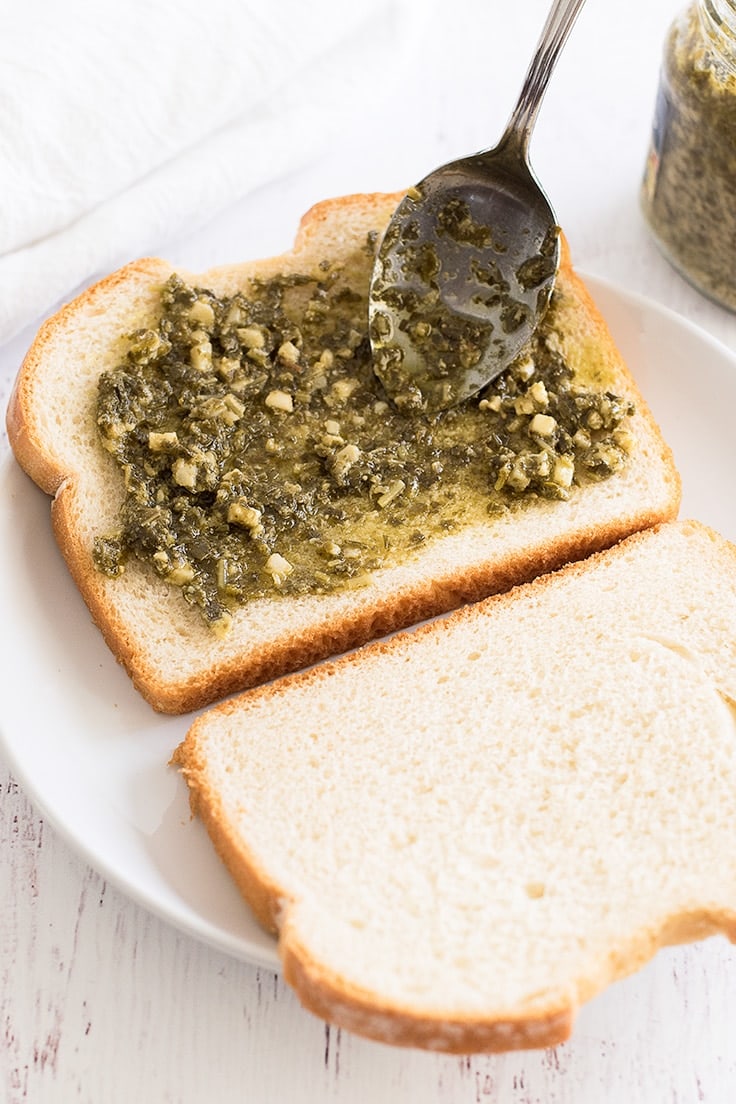

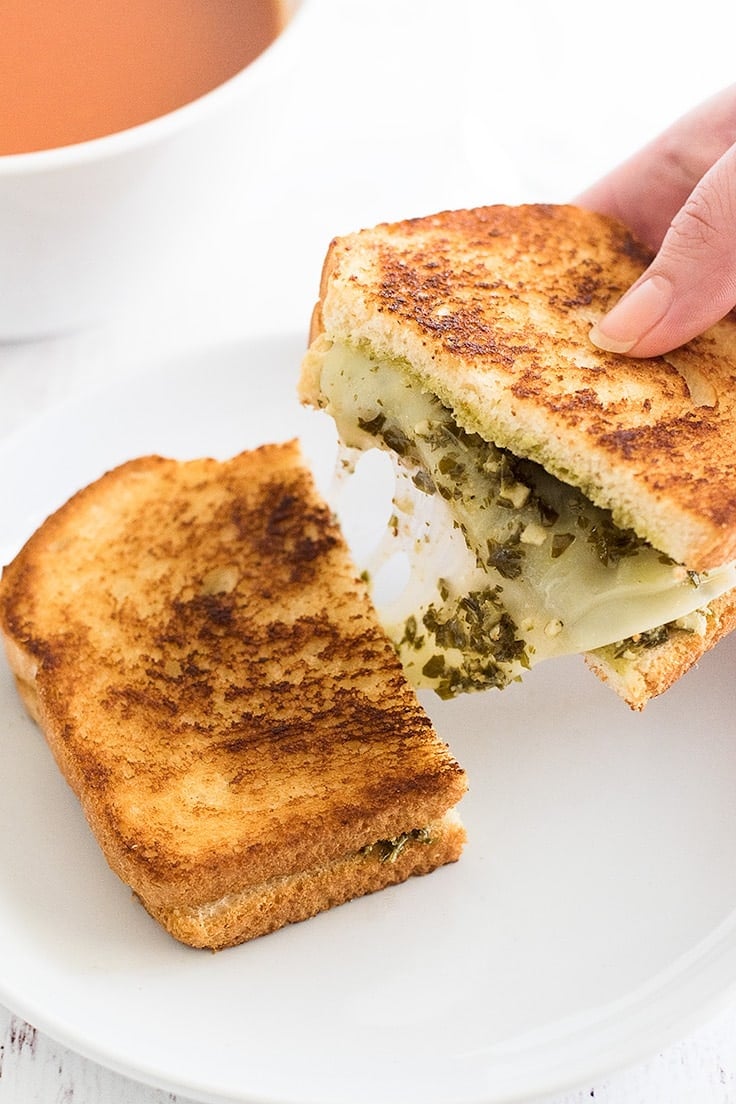
This is your standard grilled cheese making method, spread your choice of fat over your bread so it toasts up nice and crispy and golden, layer on a little (or a lot) of pesto, some cheese, maybe a tomato slice or two if you’re feeling real fancy, and toast that baby up.
In about five minutes, you have a sandwich that looks and tastes like you should be eating it on the terrace of some cute little lunch cafe with a book and a glass of wine.

Ingredients
- ▢ 2 slices white bread
- ▢ 1 to 2 tablespoons pesto
- ▢ 1 slice provolone cheese
- ▢ 1 tablespoon butter (or mayonnaise)
Instructions
- Make sandwich, spreading pesto over both pieces of bread and placing a slice of provolone cheese between.
- Heat a small skillet over medium heat.
- Spread butter or mayonnaise over the outside of your sandwich and cook until both sides are golden brown and cheese is melted.
- Serve and enjoy!
Notes
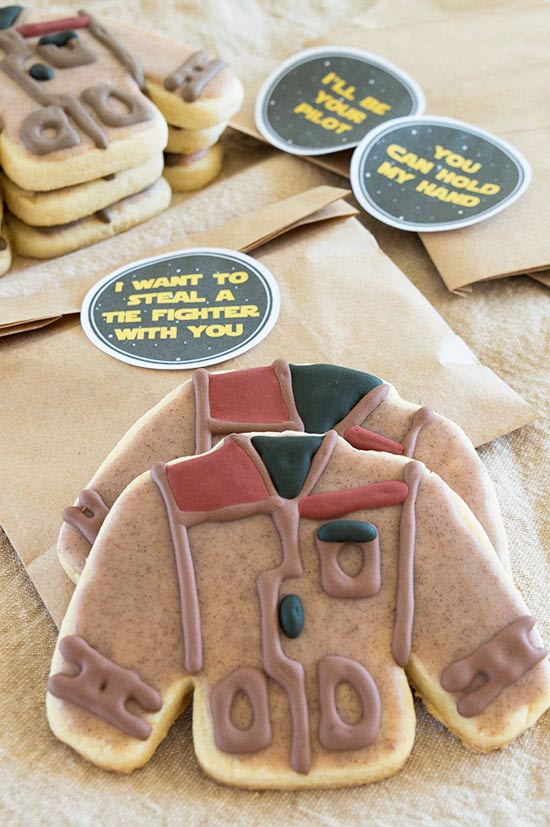
Cookiefied versions of “Star Wars: The Force Awakens’” best character: Poe’s Jacket.

Okay guys, I was not going to do another Star Wars recipe after my BB-8 Cupcakes . When I started this blog, I said I’d limit myself to one nerdy recipe per franchise, lest the blog just become all Hannibal recipes all the time (people-free obviously, and I’m saving that one for a special occasion). BUT, I wanted to do a nerdy/pop-culture Valentine’s Day treat and once this idea popped into my head, it refused to leave. So here you go: Poe’s Jacket Cookies.
Why are these my Valentine’s Day treats? Because, was there a purer expression of love and friendship in all of pop-culture this year than the sharing of Poe’s jacket? I think not. The movie might as well be called Star Wars: Siblinghood of the Travelling Jacket for all that thing gets passed around by our three heroes. AND IT’S BEAUTIFUL!!


Disney via Dork Side of the Force
The jacket starts off the film with the best pilot in the Resistance, who passes it off to the universe’s most adorable stormtrooper, who then loans it out to our favorite young Jedi, who then gives it back to our newly minted Resistance member, where it, SPOILER probably helps save his life. And each time it’s handed off, it’s given in the spirit of friendship and affection. I love it so much, I might just cry. And if that jacket doesn’t get repaired and make it into the sequel, I really will.
I made these cookies with the recipe from my Copycat Heart Cookies with Cinnamon Icing , minus the food coloring. If you want to see me rave over how delicious they are, click over to that post. Just trust me when I say they’re really, really good, but you can use whatever cutout cookie dough you like best (or store-bought to make things simple). I do recommend using the cinnamon icing I link to though, because the cinnamon is what gives the coat the great, slightly distressed leather look, no coloring needed!
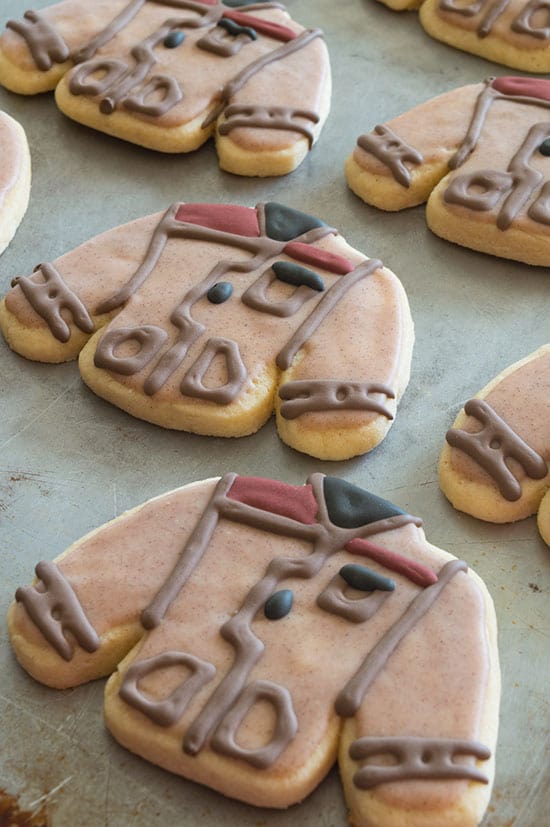

In case you want to use these as valentines or party favors, I created some printables to go with the cookies. You can print them out on sticker paper or just use double-stick tape like I did. (Click on each one for a large version.)


And before we move on to the instructions, I’ll tell you now, these cookies are a bit of a labor of love. They are easy to make, BUT they require a few resting periods, so they are not quick cookies. Don’t start these at 8pm on Valentine’s Day eve or the morning of a party. There will be tears. With that dire warning out of the way, on to the instructions!


Ingredients
Cookies
- ▢ 18 sweater-shaped sugar cookies cooled - I used my Copycat Heart Cookies dough
- ▢ 1 batch of my Cinnamon Icing without food coloring
- ▢ 2-3 cups royal icing made thick* - I used a double batch of Cake Wiz’s Royal Icing
- ▢ Red, yellow, green, and black food coloring
You Will Also Need
- ▢ Piping bags
- ▢ A coupler and #2 tip
Instructions
Icing
- Cover cookies by dipping them in the cinnamon icing. Use a knife to scrape off the excess and clean up the edges. Set aside to harden.
- Separate royal icing into three bowls. 1/4 in two of them and 1/2 in the third. In one of the small bowls, make black icing. In the other small, make the maroon. I used mostly red with a couple drops of yellow and green. In the largest, make your brown icing. I used about 57 drops of red, 45 green, and 11 yellow.
- Stir and check the consistency of your icing. You want 15-second icing, which means, if you run a knife through it, it takes about 15 seconds to fill back in. If it is too thick, add a little water to it in 1/4-teaspoon increments. If it becomes too thin, stir in a little sifted powdered sugar.
- If your cookies are firm enough to handle without smudging the base icing, you can begin piping. Otherwise, cover the royal icing and wait.
Piping
- Fill your piping bag with the brown icing and pipe on the jacket details.
- Switch to maroon and do the breast line and shoulder patch. I used a toothpick to spread the icing around and get into the corners.
- Finally, switch to black and do the accents and fill in the shirt. Again, using a toothpick for the corners if needed.
Rest
- Allow to dry for at least four hours before stacking or packing. The royal icing will dry quickly, but the base icing needs a few hours, or it will dent and smear.
Notes
Used to make this recipe:

Frosty Bantha Milk
Ingredients
- 2 cups ( 260 g) vanilla ice cream plus 3 scoops
- 1 1/2 cup milk , any percentage
- Sweetened blue drink mix (enough for 2 cups/ 16 oz of liquid*)
- 10 to 12 drops blue food coloring
Instructions
- In your blender, combine all ingredients and blend until smooth. Divide between 3 8-ounce glasses and top with a scoop of vanilla ice cream. Serve and enjoy!
