Roasted green beans are simple, delicious, and one of the easiest vegetable sides to make.

One of the early popular recipes on this site was my Butter and Garlic Green Beans , and for the longest time, that has been my go-to green bean recipe. I love it. It’s so easy. And I make it constantly.
But over the last few months, another even easier green been recipe has been creeping up my green bean rankings and just might unseat that recipe as number one in my heart: Roasted Green Beans.
The Best Roasted Green Beans
Green beans roasted in the oven are so good. Roasting really brings out their flavor, and while green beans don’t get burnt and crunchy in the oven the way something like roasted broccoli does, they do come out slightly blistered, perfectly tender-crisp, and amazing.
Whenever I make these with family around, people are constantly stealing beans off the hot baking sheet and eating them like fries before I can dish them up.
But the number one reason why I love making green beans in the oven is that it is so, so, so easy and simple. The only measurements you need to remember are 1 pound of green beans, 1 tablespoon of olive oil, so after you’ve made them once, you’ll never have to look at a recipe again.
How to Make Roasted Green Beans
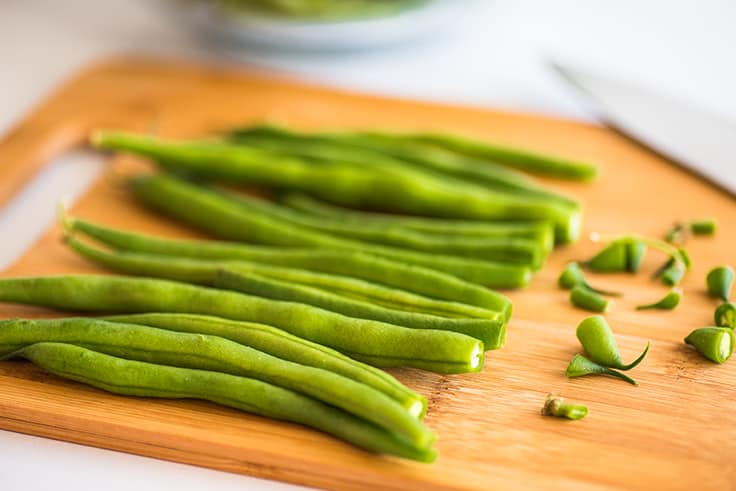

To start, wash your green beans and dry them with a salad spinner or spread them out on a kitchen towel and pat dry.
Then snap or trim off the ends. If you want bite-size green beans, you can cut them into smaller pieces, but I think the long ones are kind of fun, so I usually leave them as is.
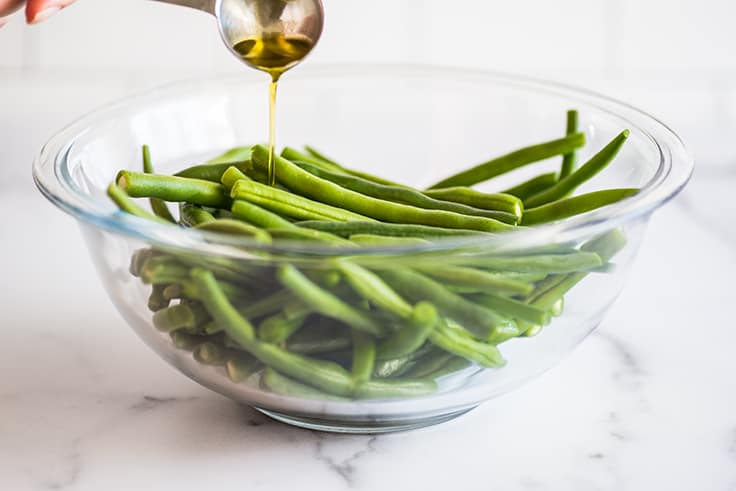

- Next, drizzle and toss with olive oil. I usually do this step in a bowl because you get better coverage, but you can also do it right on a baking sheet if you don’t want to dirty an extra dish.
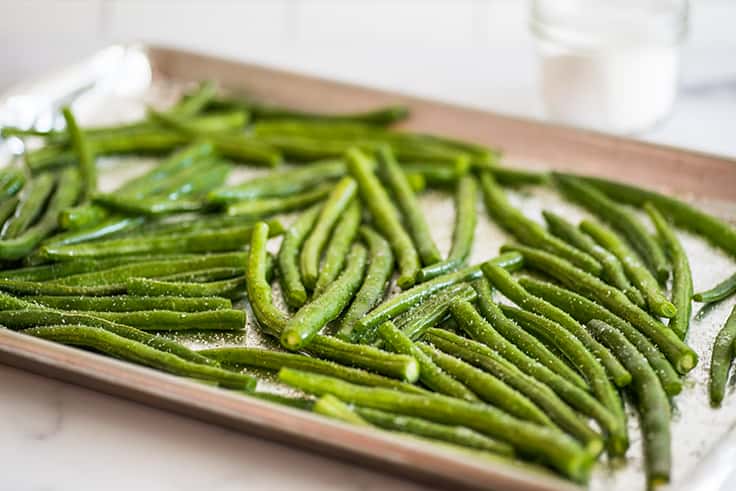

Spread beans in a single layer on a baking sheet and sprinkle with salt (kosher if you have it), pepper, and garlic powder. Don’t waste time measuring. Just sprinkle generously.
Finally, bake for 8 minutes, give the pan a shake and continue to bake until green beans are fork tender. And that’s it. They’re ready to eat.
Baked Green Bean Variations (Switch things up!)
Green beans cooked in the oven can be made with endless variations so you never get bored. Here are some of my favorites:
- Lemon Green Beans : Add the juice and zest of 1/2 of a lemon before baking.
- Parmesan Green Beans: Add 1/2 to 1 cup of finely grated parmesan cheese over the top before baking.
- Mushroom Green Beans: Add 1/2 pound of thinly sliced mushrooms before tossing with olive oil and baking.
What to Serve With Oven-roasted Green Beans
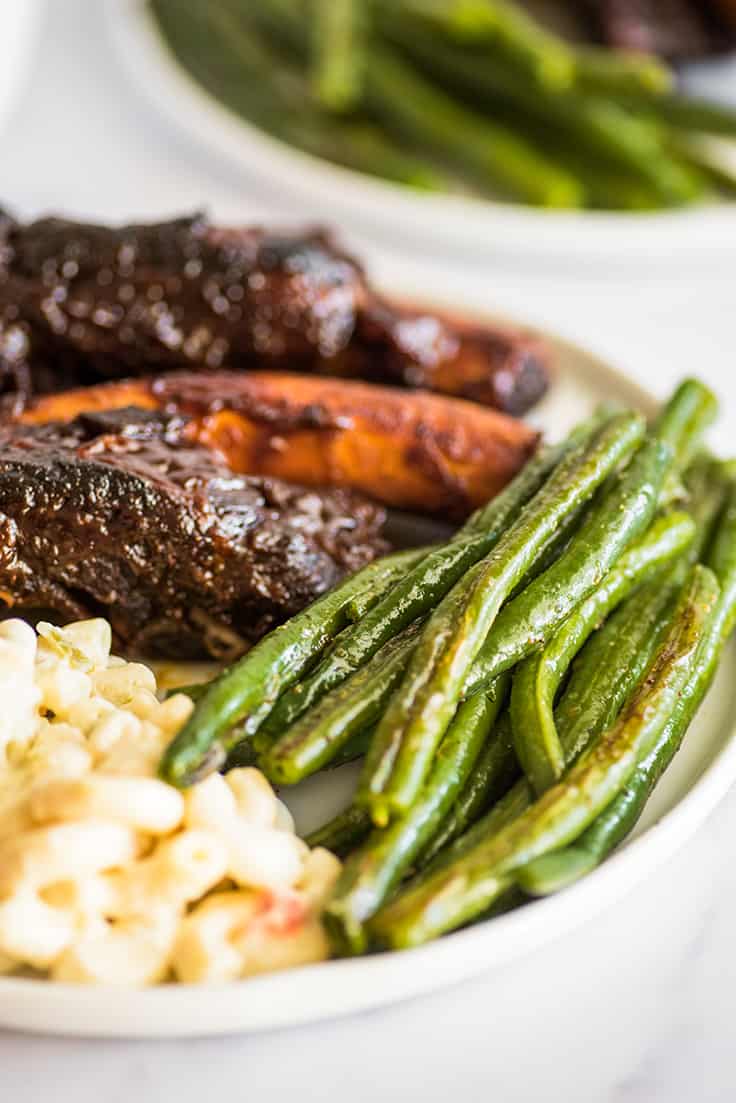
Roasted green beans complement almost any meal but go particularly well with Marinated Ribeyes , Tri-tip Sandwiches , Slow Cooker Beef Ribs , and Chicken in Cream Sauce .


Ingredients
- ▢ 1 pound fresh green beans washed, dried, and trimmed
- ▢ 1 tablespoon olive oil
- ▢ Salt and pepper
- ▢ 1/4 teaspoon garlic powder (approximately)
Instructions
- Preheat your oven to 425°F.
- In a bowl or on a baking sheet, toss green beans with olive oil. Spread beans in a single layer on baking sheet.
- Sprinkle generously with salt, pepper, and garlic powder. Bake for 8 minutes and shake pan a couple of times.
- Bake for an additional 4 to 6 minutes, until green beans are tender-crisp or reach your desired level of doneness.
- Serve and enjoy!
Your complete How to Make a Milkshake Guide with tips and trick for creating the best milkshake possible.

Hey, friends. Summer officially starts this week, so I thought it’d be a good time to have a little chat about one of my favorite summer desserts, milkshakes.
Milkshakes are simple enough to make at home, but if you’ve ever accidentally made a too-milky mess of a shake or stood shouting at your blender full of ice cream as it runs and runs but does not blend, you know that they also have the potential to be a little frustrating.
Which is why we’re chatting shakes today. In this post, we’ll go over how to make the perfect milkshake, some of my favorite milkshake recipes, and extra milkshake tips and tricks.
The Ideal Milkshake Ratio
A good shake starts with the right mix of ice cream to milk for a shake that is creamy, frosty, and easy to blend. The perfect ice cream to milk ratio for a homemade milkshake is about:
1 1/2 cups ice cream : 1/2 to 3/4 cup milk
This is enough milk to blend using home kitchen equipment without making your shake too thin. If you like a thicker shake, go with 1/2 cup milk, a thinner shake, use 3/4 cup.
And no, you don’t need to pack ice cream into measuring cups to get the exact right amount of ice cream in your shakes (unless you want to) 1 scoop of ice cream equals about 1/2 cup so use:
3 scoops ice cream : 1/2 to 3/4 cup milk
Start With Slightly Softened Ice Cream
The second most important tip for making the perfect shake is to start with softened ice cream. This will allow your shake to blend more easily with less milk so you don’t dilute your shake. This tip is especially handy if you’re working with an underpowered or older blender.
Your ice cream doesn’t need to sit out long. Just scoop it into your blender and allow it to sit for 5 to 10 minutes at room temperature until it just starts to soften.
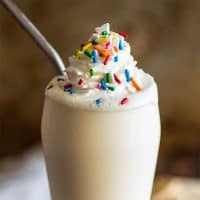
How to Make a Milkshake (With a Blender)
- In your blender, combine slightly softened ice cream, milk and any mix-ins (more on mix-ins in a bit), and blend until well-mixed and pourable. 2. Pour into a frosty glass, add a straw and whipped cream, and enjoy!
How to Make a Milkshake Without a Blender
If you don’t have a blender, don’t let that stop you from making a milkshake. You can make a shake with a large mason jar , your microwave, and a little muscle power.
- Scoop your ice cream into a quart-size mason jar and microwave for 15 to 30 seconds, until ice cream begins to melt but is not completely liquified.
- Pour in milk and mix-ins, screw on lid, and shake until everything is well-mixed. If there are any large bits of ice cream left after shaking, use a spoon to help mix them in. And then pour into a glass and enjoy.
More Milkshake Recipes

The basic milkshake ratio will work for any flavor ice cream, but most classic milkshake recipes start with vanilla ice cream. To make any of these shakes, add these mix ins to the base milkshake ratio before blending:
- Chocolate Milkshake : Add 3 tablespoons of chocolate sauce .
- Oreo Milkshake : Add 3 to 4 Oreos.
- Fruit Milkshake: Add about 3/4 cup of fruit (fresh or frozen) and up to 1 tablespoon of sugar depending on the sweetness of your fruit.
- Caramel Milkshake: Add 2 tablespoons caramel, butterscotch, or dulce de leche .
And, before we go, some of the most common milkshake questions answered:
How do you thicken a milkshake?
If you’ve made your milkshake and it’s not thick enough, that’s an easy fix. Just add more ice cream and blend. If you’re making a fruit milkshake, you can also add more frozen fruit to help thicken things up.
Which fruits can be used for milkshakes?
You can use almost any fruit, fresh or frozen, in milkshakes. Strawberry Milkshakes and Banana Milkshakes are always popular, but don’t be afraid to try new flavor combos like blueberry or mango. Depending on the fruit and the strength of your blender, you may want to peel fruits with oddly textured skin like peaches before blending.
Using frozen fruit will make your shake thicker and creamier, but may also be more difficult to blend. If using frozen fruit, be sure to start with ice cream that has been slightly softened at room temperature and don’t be afraid to use a little more milk if necessary.
Which milk is used for milkshakes?
You can use any percentage milk for a milkshake. The higher fat milk, the creamier and richer your milkshake will be in the end, but the change will be subtle, so don’t feel like you need to go out of your way unless you really want to.
For more frozen treats, try Frozen Hot Chocolate , Cookies and Cream Popsicles , and Homemade Pudding Pops .
Ingredients
- ▢ 1 1/2 cups ice cream about 3 scoops, slightly softened
- ▢ 1/2 to 3/4 cup milk any percentage
- ▢ Whipped cream optional for topping
- ▢ Sprinkles optional for topping
Instructions
- In a blender, combine ice cream and milk, and blend until pourable.
- Pour into a glass, top with whipped cream if desired, and enjoy!

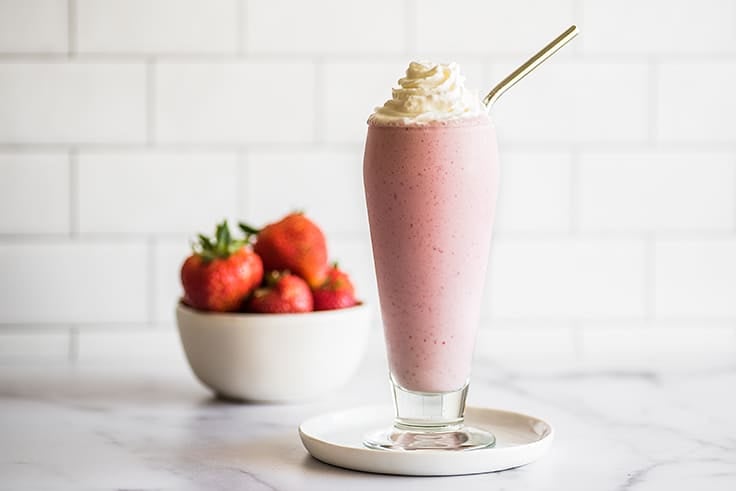
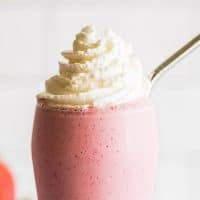
This Strawberry Milkshake is beautifully pink, rich and frosty, and bursting with sweet-tart strawberry flavor.

What is your go-to milkshake flavor? I’m usually an Oreo Shake or Chocolate Milkshake fan, but there are days where it feels like nothing in the world would be better than a strawberry milkshake.
Is today one of those days? If so, let’s make the very best strawberry milkshake.
The Very Best Strawberry Milkshake with Strawberries
IMHO, the best strawberry shake is made with vanilla ice cream and real strawberries. If you have strawberry ice cream in your freezer, you can totally make a milkshake with just ice cream and milk (follow the classic milkshake ratio of 3 scoops ice cream to 1/2-3/4 cup milk), but starting with vanilla ice cream and strawberries gives you a ton of real fruit flavor that just can’t be beat.


How to Make a Strawberry Milkshake
- In your blender, you’ll combine ice cream, strawberries, a little sugar, and milk, and blend until smooth.
- Pour into a chilled glass, top with whipped cream, and enjoy!
Fresh or Frozen Strawberries for a Strawberry Milkshake?
Either fresh or frozen berries work just fine in a milkshake. You’ll get a thicker, frostier shake with frozen berries, but your blender might also struggle a little more blending them.
To help things blend more easily, if using frozen berries, scoop your ice cream into the blender and let it sit at room temperature for 5 to 10 minutes, until it just starts to melt, before adding the rest of your ingredients and blending.
If your blender is still struggling, give it another few minutes or add just a bit more milk until it blends without trouble.
More Strawberry Milkshake Flavors
This strawberry shake is a great base recipe for experimenting with more strawberry combos. If you’re looking for something new, try adding some of these mix-ins:
- Strawberry Cheesecake Milkshake: Add 1 1/2 to 2 ounces cream cheese to the shake before blending. (This one is SOOOOO good!!)
- Chocolate-covered Strawberry Milkshake: Swirl 1 tablespoon of fudge sauce around the glass before pouring the shake in and add 1 tablespoon sauce over the top (do not stir or your shake will turn brown).
- Strawberry Banana Milkshake : Add 1 ripe banana (fresh or frozen) to the shake before blending.


Strawberry Milkshake Recipe Notes
- This recipe makes about 16-ounces or 2 cups of milkshake, enough for one restaurant-size serving or two smaller servings.
- Looking for more strawberry recipes? Try Strawberry Milk for One or Two , Small-batch Strawberry Frosting , and Homemade Strawberry Sauce .
Ingredients
- ▢ 1 1/2 cups vanilla ice cream* about 3 scoops
- ▢ 1/2 to 3/4 cup milk* any percentage
- ▢ 3/4 cup chopped hulled strawberries fresh or frozen is fine
- ▢ 1 tablespoon ( 13g ) granulated sugar optional but recommended*
- ▢ Whipped cream optional for topping
Instructions
- In a blender, combine ice cream, milk, strawberries, and sugar, and blend until well-combined and pourable.
- Pour into a glass, top with whipped cream, and enjoy.
Notes

Easy Roasted Green Beans
Ingredients
- 1 pound fresh green beans washed, dried, and trimmed
- 1 tablespoon olive oil
- Salt and pepper
- 1/4 teaspoon garlic powder (approximately)
Instructions
- Preheat your oven to 425°F.
- In a bowl or on a baking sheet, toss green beans with olive oil. Spread beans in a single layer on baking sheet.
- Sprinkle generously with salt, pepper, and garlic powder. Bake for 8 minutes and shake pan a couple of times.
- Bake for an additional 4 to 6 minutes, until green beans are tender-crisp or reach your desired level of doneness.
- Serve and enjoy!
