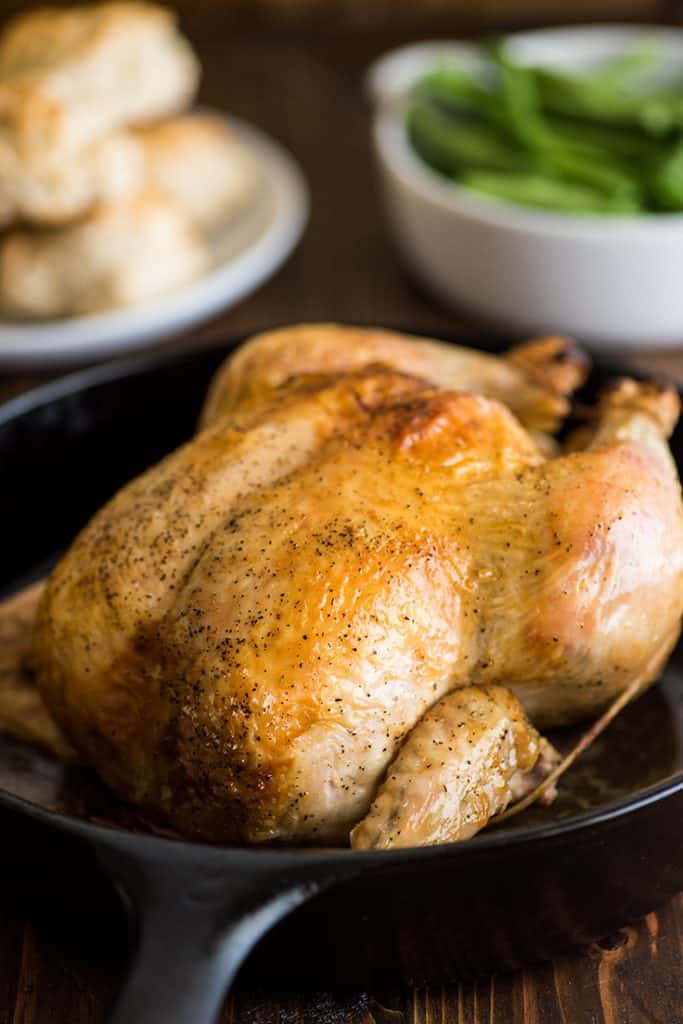
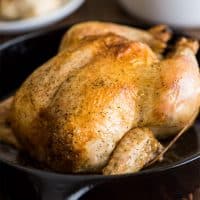
Your complete Easy Roasted Chicken Guide. Everything you ever wanted to know about cooking a whole chicken in the oven that comes out with crispy skin and moist, juicy meat.

So, it’s the last week of August, fall is right around the corner, and it’s just about cool enough to start using the oven again.
Let’s all celebrate by roasting a chicken.
I mean, can you think of a better way to welcome September than with a perfectly golden, crispy skinned, super moist and beautiful piece of poultry?
Of course not.
September 1st through about mid-March, this is one of my favorite easy dinners, and unlike that Tomato Soup I shared way too late last season, I’m getting this recipe to you early so you can enjoy it all through cozy sweater weather and into the spring.
If you’ve ever wanted to roast a chicken and been too intimidated to try or do it rarely and find the process a little stressful, this is the post for you.
It’s the guide I wish I’d had when I started cooking, and it will take you through everything you ever wanted to know about roasting a chicken.
Since this is a complete guide to roasted chicken, it’s long. Sections are bolded so you can easily find the answers to your questions, or you can just scroll down to the recipe if that’s what you’re here for.
And if you’re feeling real confident, here’s tl:dr version of the recipe: Salt + Pepper, 450°F, check at 45 minutes, cook till 165°F.
For those of you who’d like a little more guidance than that, read on.
How to Roast a Chicken in the Oven
You Will Need…
To get started, you’ll need four things (aside from your chicken of course).
- Something to cook your chicken in
- Paper towels (more on those later)
- A thermometer
- Kitchen twine (optional)

What to Roast a Chicken in? Here’s the great thing about roasting a chicken: you can roast a chicken in practically anything. If it’s oven-safe, has a rim to catch the pan juices, and can fit a chicken, you can roast a chicken in it.
A classic roasting pan with a rack is many people’s go-to because it keeps your chicken up out of its juices so it will get crispy over and under, but if you don’t have one in your cupboard, buying one is absolutely not necessary.
A simple oven-safe skillet (in any material) will get the job done just fine and is especially convenient since it can go from oven to stovetop if you are making a pan sauce afterwards (quality roasting pans can also do this).
And if you don’t own an oven-safe skillet, a rimmed baking sheet or casserole dish is the way to go. Just toss your chicken on there and bake.
Technically an instant-read thermometer is optional , but if you cook any sort of meat ever, buy one. They take all the uncertainty out of cooking meat, and you can get a good one for less than $20.
Kitchen twine is completely optional. If you decide to truss your chicken, you’ll want about 3 feet of it. You can order twine online or find it at your local grocery store in the meat department (or stashed down a random aisle–I almost always have to ask at the meat counter where to find it).
Once you know you have the right equipment, it’s time to buy your chicken, and before you do that, you’ll want to know how many people you’re feeding so you know how big of a chicken to buy.
How Many People Will a Chicken Feed?
2 1/2 to 4 pounds feeds 2 to 3 people 5 to 6 pounds feeds 4 people
Four people is the max I would attempt to feed from one chicken. This allows everyone to have both white and dark meat (split the breasts and serve each half with a thigh or drumstick).
How Long to Defrost a Whole Chicken?
So, you picked a size, bought your chicken…and then froze it.
Give your whole chicken a full 24 hours for small chickens to 48 hours for larger ones to thaw in the refrigerator. If you need your bird defrosted more quickly, try the USDA-approved cold water thawing method, and it should defrost in 3 to 4 hours.
How to Prepare a Chicken for Roasting?
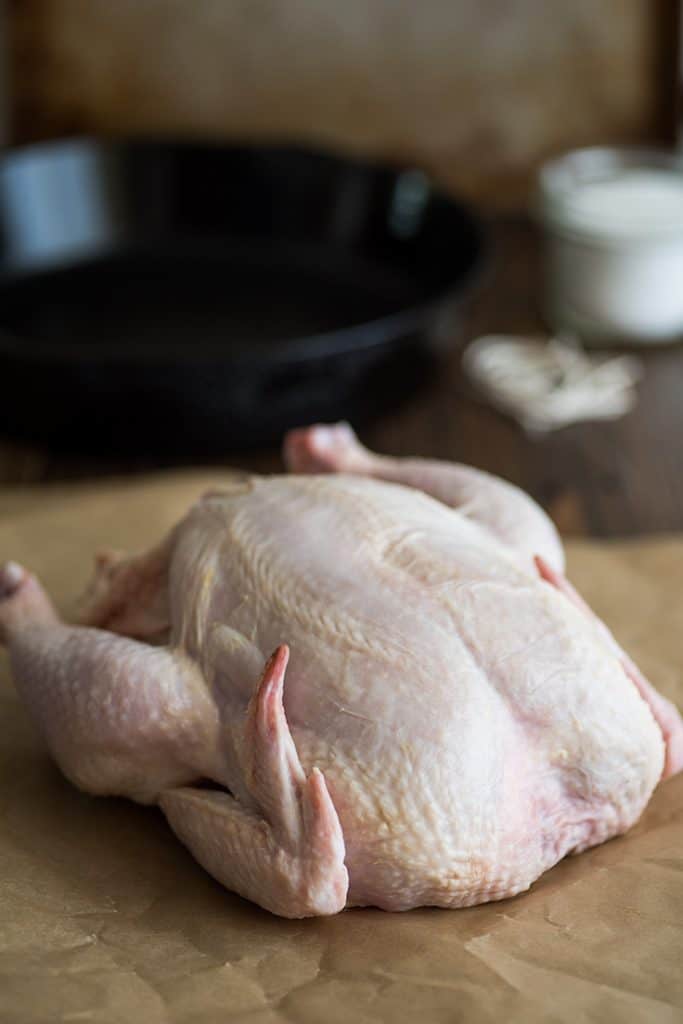

Okay, chicken is thawed. Time to prep your chicken.
Remove it from the packaging, set it on a dishwasher-safe cutting board or plate, and check the body cavity to see if there is anything inside. If there are, those are the giblets: the heart, liver, gizzard, and sometimes neck of the chicken. Pull those things out.
What to do with giblets? You can toss the giblets in the garbage, or if you are going to make stock or soup with the chicken leftovers, keep everything except the liver to throw in with the broth later for added flavor. The liver is the dark, smooth, lung-shaped piece and can make stock bitter , so it can be discarded or fried up on the stovetop for you or your pets.
Should you wash your chicken? No. The USDA recommends skipping washing as it can spread bacteria all over your kitchen. Instead, just use a couple paper towels to wipe away anything on the bird and pat your chicken dry.
The drier your chicken, the crispier your chicken skin will be, so pat away.
Finally, give your chicken a quick once over to make sure there aren’t any quills remaining, and pull them if there are.
Seasoning a Roasted Chicken

Now that your chicken is ready to go, it’s time to season it.
If you’re feeling a little extra, you can add fresh herbs or quartered citrus to the cavity of the chicken or sprinkle it with your favorite rub.
But honestly, a classic roast chicken has plenty of flavor all on its own and really doesn’t need much dressing up. For this particular recipe, we’re going very simple: salt and pepper. That’s it.
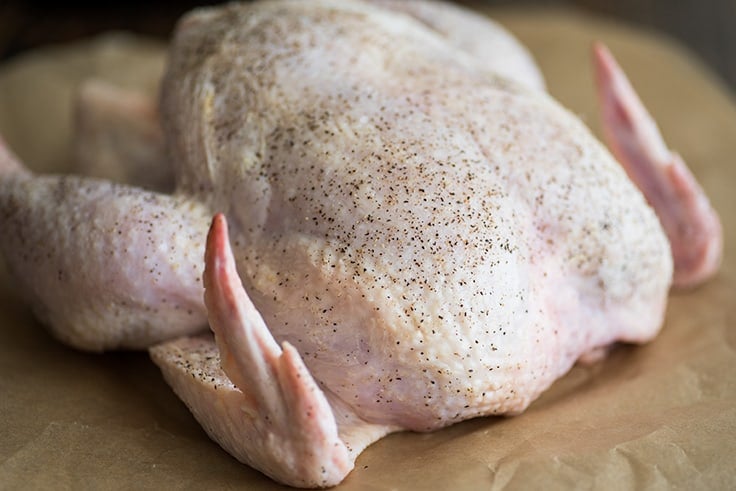
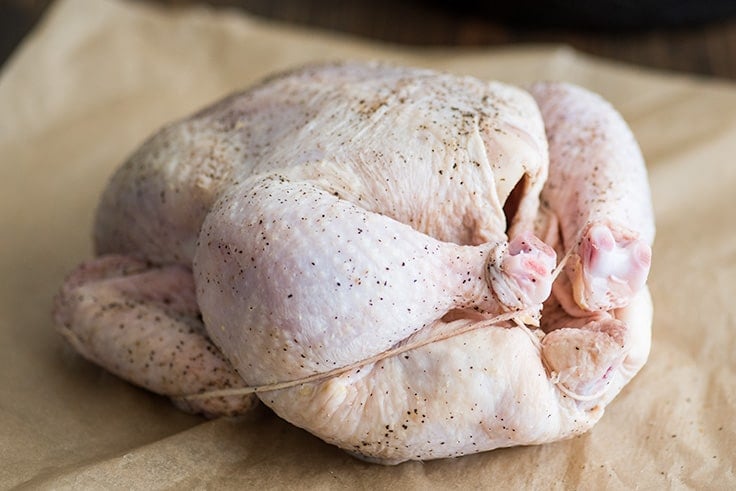
Sprinkle the entire bird, inside and out, with salt (kosher if you have it) and pepper.
The Wing Tips
After your chicken has been seasoned and before it goes into the oven, you’ll want to deal with the wing tips (the third section of the wing after the last joint).
If left alone, they have a tendency to poke up after baking and can sometimes burn. That really doesn’t hurt anything, but it doesn’t look quite as attractive as neatly tucked wings.
You can either slice them off at the joint or tuck them under the bird to keep them down. To tuck the wing tips, bring the tip towards the breast and just fold the tip behind the rest of the wing, and you’re good to go.
Should You Truss Your Chicken?
Now it’s time to truss…or not.
To truss or not to truss is totally up to you. Trussing makes a tidy-looking roasted chicken and helps keep the meat moist since the chicken is gathered closely together so smaller parts don’t dry out before the meatier bits are finished cooking.
If you have butcher’s twine and want the moistest meat possible and prettiest bird, truss your chicken. But it’s not a necessity.
An untrussed bird will NOT be dry if properly cooked. When cooking for myself, I almost always skip trussing, and I actually prefer the meat texture when the chicken has not been trussed.
How to Truss a Chicken

If you decide to truss your chicken, you’ll need about 3 feet of kitchen twine.
Tip: Don’t feel like getting out your ruler? Hold the end of the twine between your thumb and index finger and pull the string taut to the crook of your arm. Triple that length, and unless you have very short or long arms, you should have about the right length of twine.
There are tons of of different ways to truss a chicken. My favorite way is this:
- Lay the chicken breast-up. Place the center of the string under the tail and hold one end in each hand. Bring the string up around the drumstick ends and cross it, swapping the hands holding each end.
- Take the string that’s in your right hand and run it under the right drumstick end. Do the same with the left hand and left drumstick.
- Pull the strings tight so everything is neatly gathered. Flip the chicken and run the string up the sides to the neck of the chicken. You can either make a bow there or secure the string under the wing.
For a visual, watch this video .
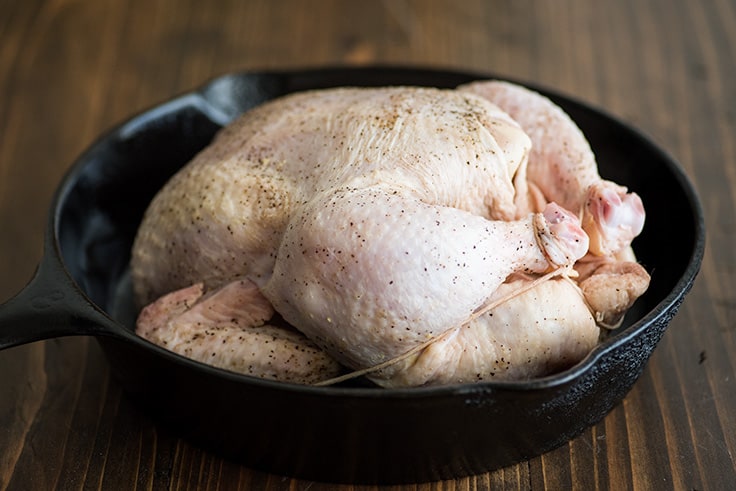
Once your chicken is trussed (or not), transfer it to a baking dish, breast-up, and it’s time to cook.
What Temperature to Cook a Whole Chicken
There’s no one right temperature at which to cook a chicken. Generally, the lower and slower you cook the meat, the moister it’s going to be. The higher, the crispier the skin will be and the quicker you’ll get to eat. The recommended range is usually somewhere between 350°F and 450°F.
350°F Skin not as crispy, the moistest meat, longest cooking time 400°F Middle ground 450°F Crispiest skin, meat not quite as moist, sometimes ovens smoke at this temperature
I prefer the meat texture, skin, and cooking speed of a bird cooked at 450°F, so that’s what I would recommend, but experiment and find your perfect cooking temperature.
How Long to Cook a Whole Chicken
Again, there’s no set answer. Bird size and roasting temperature options mean there’s a huge range in cooking times. A single bird could take between 40 minutes all the way up to 2 and 1/2 hours.
Cooked at 350°F – 1 hour to 2 1/2 hours Cooked at 400°F – 50 minutes to 2 hours Cooked at 450°F – 40 minutes to 1 1/2 hours
Minimum times are for a 2 1/2 pound bird all the way up to 6 or 7 pounds.
How to Tell if Roasted Chicken is Done
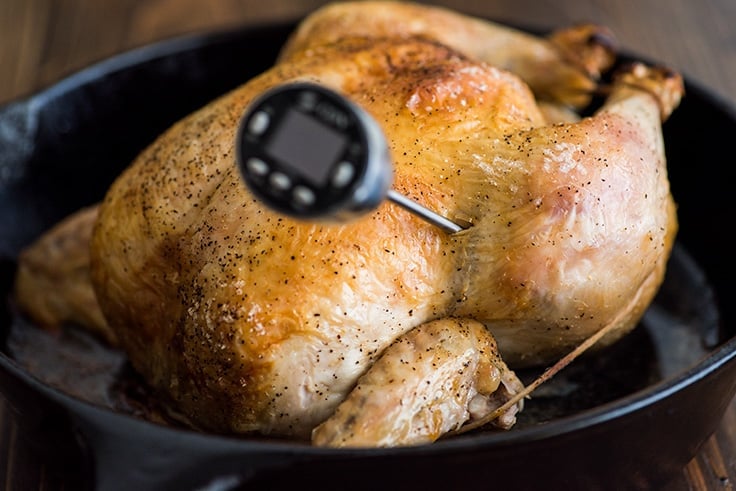

Your chicken is done when it reaches an internal temperature of 165°F. Use an instant-read thermometer inserted into the thigh (make sure it’s not touching the bone) to check for doneness.
If you don’t own a thermometer, you can also use a knife to pierce the thigh, and if the juices run clear, your bird is good to go.
Pull your chicken from the oven and allow it to rest for 10 minutes before cutting and serving.
How to Carve a Roast Chicken
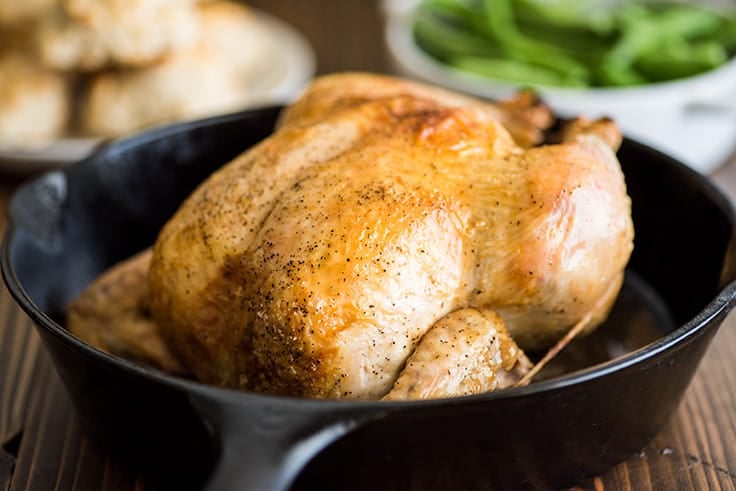

Start by using a sharp knife above the drumstick to remove the entire leg. Slice the thigh and drumstick apart at the joint. Repeat with the other side.
At this point, the wings can either be pulled off and eaten or served attached to the breast.
To remove the chicken breasts, starting just to one side of the keel (the breastbone), slice the first breast away from the bone, skin and all. Repeat with the second breast.
Oh, and don’t forget to turn the bird over and pop out the oysters, the small, round, tender pieces of meat on either side of the spine, if they didn’t come out with the thigh. They’re many people’s favorite part of the chicken, and the cook gets to decide whether to eat them or share.
For a visual, this is a great video on carving .
Time to serve!
What to Serve With Roasted Chicken
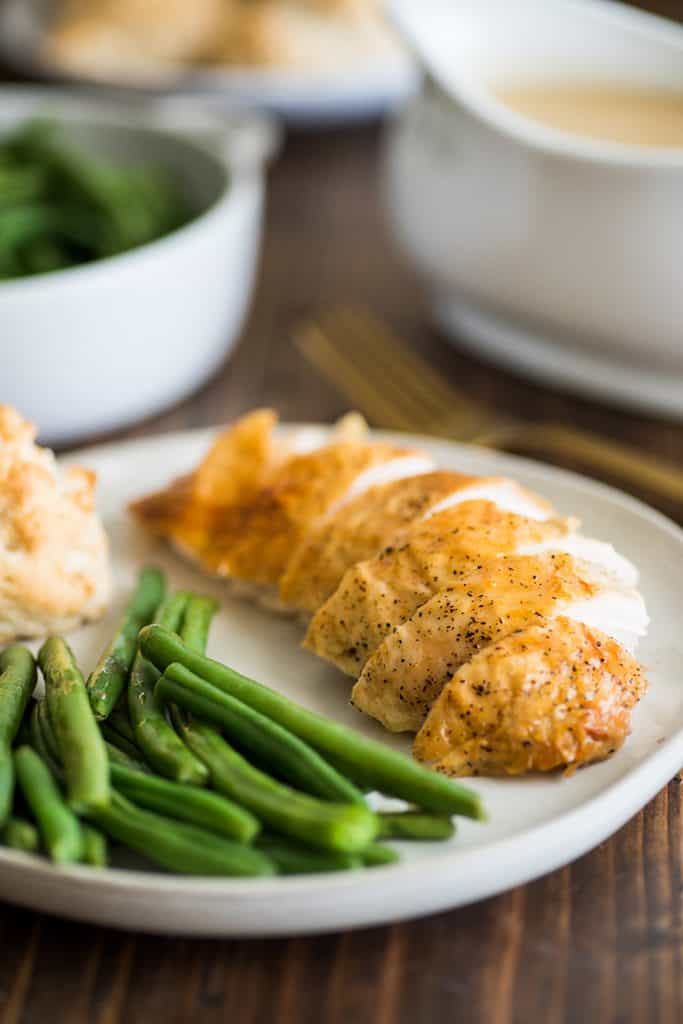

A beautiful roasted chicken deserves something equally delicious to serve alongside. My favorites are:
Mashed Potatoes with Easy Gravy (here’s a Mashed Potato recipe for two ) Orzo Roasted Broccoli or Roasted Sweet Potatoes —prep it while your chicken is cooking and then pop it in the oven while the chicken is resting Butter and Garlic Green Beans
What to Do With Leftover Roasted Chicken
And finally, dinner’s done. The chicken was excellent. Now there’s just a pile of bones and a couple cups of meat left. You should definitely turn the leftovers into something good.
Make the bones into Chicken Carcass Soup or Homemade Chicken Stock . And use the meat for Creamed Turkey (or chicken) , Naan Chicken Alfredo Pizza , Keto Chicken Soup , or toss it a single serving of homemade Fettuccine Alfredo .
That’s it, folks. Thanks for taking this roasted chicken journey with me. I wish you many perfect roast chicken dinners in the future. And if you liked this post, try these other chicken guides:
- How to Cook Chicken for Salads and Sandwiches
- How to Cook Shredded Chicken
- How to Cook Chicken Breasts
Ingredients
Special Equipment
- ▢ Paper towels
- ▢ Instant-read thermometer
- ▢ Kitchen twine
Roasted Chicken
- ▢ 1 whole chicken
- ▢ Salt and pepper
Instructions
- Preheat your oven to 450°F.
- To prepare your chicken, remove any organs from the body cavity of the bird. Pat chicken dry with paper towels and remove any stray feather quills left in the skin.
- Sprinkle generously with salt and pepper over the entire chicken, inside and out.
- Slice off wing tips or tuck them behind the wing in so they don’t burn. If trussing the bird, do so now. Place chicken breast-side up (tail should be on the bottom) in baking dish or roasting pan
- Bake for 40 to 90 minutes depending on the size of the chicken (about 1 hour for a 4-pound chicken), until an instant-read thermometer inserted into the meat of the thigh reads 165°F or juices run clear when thigh is pierced with a knife.
- Remove chicken from the oven and let it rest for 10 minutes before carving.
- Serve and enjoy!
Notes
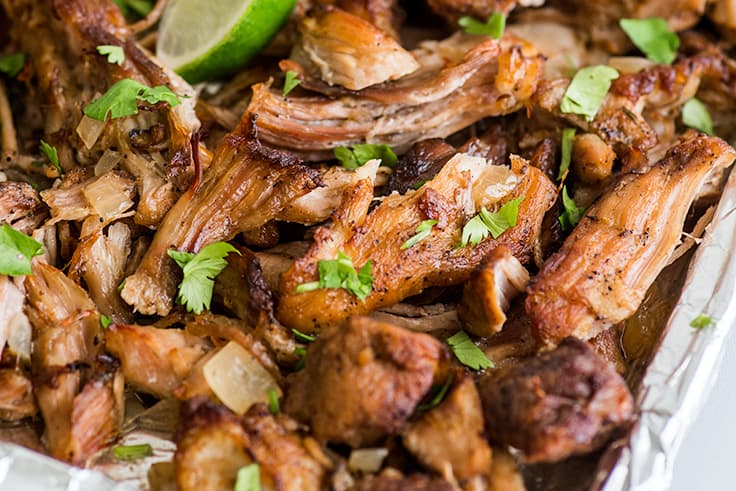
These Carnitas Burrito Bowls with crispy carnitas and homemade cilantro lime rice make a fabulous dinner or batch of meal prep lunches for the week.

Hey, friend. Need something good and simple and easy today? How about a burrito bowl?
Yes, I said a burrito bowl.
I used to be kind of down on the whole food-in-a-bowl trend (someone, please explain to me how smoothie bowls are anything but exhausting), but you know what?
I think burrito bowls are a force for good in the world.
They’re a big ol’ bowl of comfort foods thrown together and smothered with guacamole. Definitely on the side of the angels.
These Carnitas Burrito Bowls are meant as a companion recipe to my Easy Carnitas made on the stove or Slow Cooker Carnitas . Those recipes make huge batches of meat, so the bowls are perfect for using up some of the leftovers.

If you don’t have any carnitas made (and don’t feel like cooking some), you can use store-b
ought carnitas or substitute sliced cooked chicken thighs (try the thigh recipe from my Chipotle Chicken Tacos ).
The base for these bowls is a batch of homemade cilantro lime rice , made with chicken broth , a little butter, fresh lime juice and cilantro. It’s super quick and easy to throw together and gives an excellent flavor boost to everything you pile on top of it.
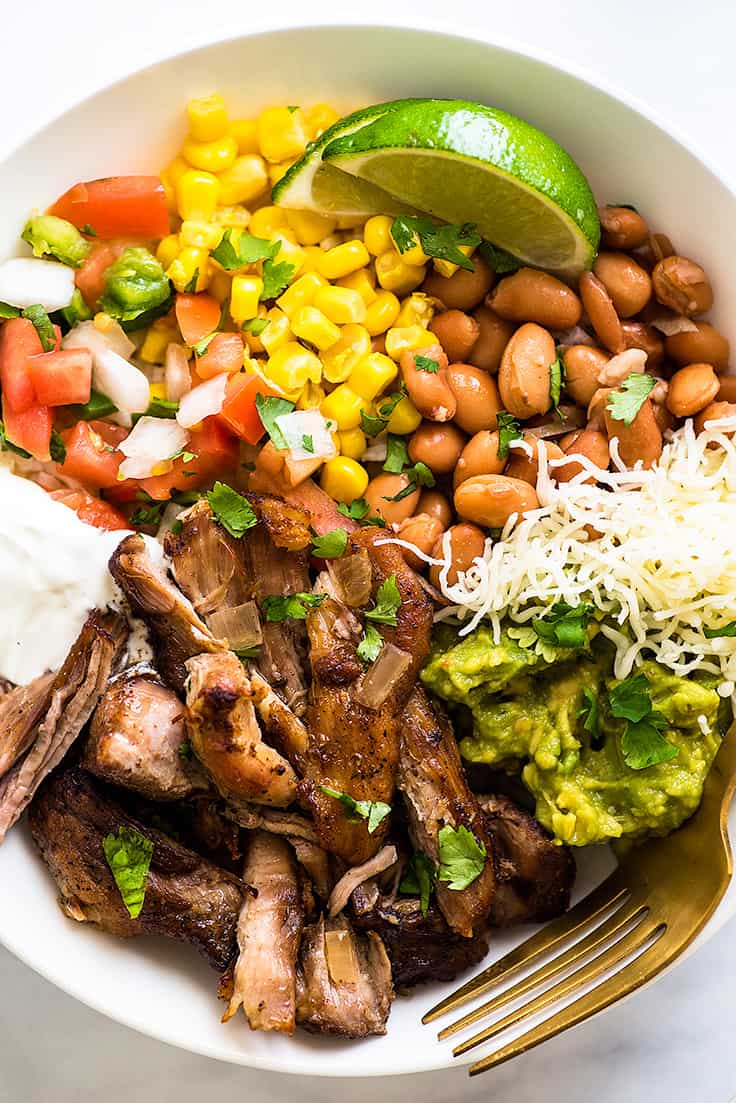

And those toppings are really up to you. I topped mine with corn, pinto beans, Monterey cheese, Pico de Gallo , guacamole, and sour cream. There’s an ingredient list in the recipe below, but think of it as more of a suggestion.
Add your favorite burrito ingredients: peppers, pickles, potato chips (what? I’d eat it). Go wild.
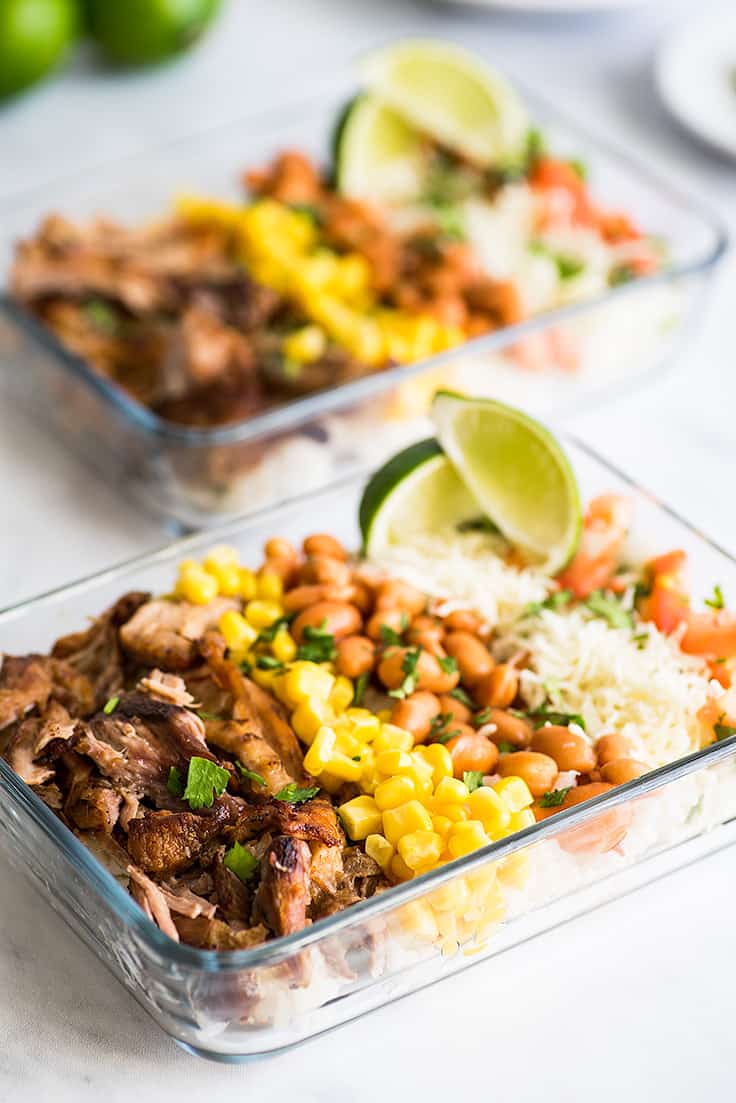
This recipe makes four bowls, so if you’re a household of one or two, that’s a dinner and lunch (or a couple of them), but the recipe can be easily doubled if you’re feeding a big family or want to meal prep at the beginning of the week.
Meal Prep Burrito Bowls

I love carnitas for meal prepping because their flavor only improves in the refrigerator. Seriously, day two or three carnitas are the best carnitas.
Since these bowls are best enjoyed warm, pack everything that can be microwaved into meal prep containers (I use these 3-cup Pyrex ones ). If taking to work for lunch, pack a little sour cream together with anything else that you don’t want to microwave in a small separate container, and you’re all set.
Then maybe hide in your office to enjoy your lunch, because these bowls are definitely going to make everyone jealous. 😉
More Easy Dinner Recipes
- Carne Asada
- Steak Fajitas
- Carne Asada Fries
- Chicken Fajitas
- Salsa Chicken
Carnitas Burrito Bowl Recipe Notes
- If meal prepping these bowls for the week, omit the guacamole unless you’re magic and know how to keep it fresh for more than a day, in which case, please tell me your secret. The bowls are still great without it.

Ingredients
Cilantro Lime Rice
- ▢ 1 1/2 to 2 cups chicken broth
- ▢ 1 cup long-grain or extra-long-grain rice
- ▢ 1 lime zested and juiced (keep juice and zest separated)
- ▢ 1 tablespoon ( 14g ) butter
- ▢ 1/4 teaspoon salt
- ▢ 1/4 cup chopped, loosely packed cilantro
Carnitas Burrito Bowls
- ▢ 2 cups cooked carnitas warmed
- ▢ 1 15-ounce can pinto or black beans warmed and drained
- ▢ 1 15-ounce can corn warmed and drained
- ▢ 1 cup pico de gallo
- ▢ 1/2 cup ( 2oz ) shredded Monterey jack or Mexican blend cheese
- ▢ 1/2 cup guacamole
- ▢ 1/4 cup sour cream
For Topping
- ▢ 1 lime quartered (optional)
- ▢ Cilantro chopped (optional)
Instructions
Cilantro Lime Rice
- In a medium saucepan, cook rice according to package instructions, substituting chicken broth for water and adding lime juice, butter, and salt to the pot along with the rice.*
- Once rice is cooked, stir in half the lime zest and half of the cilantro. Taste and add more of each if desired.
- Divide rice between 4 bowls (or food prep containers.)
Carnitas Burrito Bowls
- Add equal parts of remaining burrito bowl ingredients to each bowl of rice.
- Add a squeeze of lime and a sprinkle of cilantro if desired.
- Serve and enjoy!
Notes
This chicken carcass soup is a great way to use up leftovers from a roasted or rotisserie chicken. It’s from-scratch chicken noodle soup that is easy, warming, and completely delicious.
Hey, friends. Yesterday, I published a complete guide to Roasted Chicken (if you haven’t read it yet, go check it out!), and today, I have a follow-up recipe for you.
This recipe is for the day after (or the day after the day after) you’ve roasted a chicken. When the carcass is picked bare and your beautiful golden bird is mostly just a pile of bones.
Time to make some chicken carcass soup.

This recipe is great for so many reasons. First, because the name is just deliciously gruesome and second, because there is something so satisfying about making a pot of soup from scratch without even a can of broth.
You’ll walk around with a smile, feeling capable and accomplished the entire rest of the day. (Okay, maybe that’s just me.)
On top of the ego boost, this is just some really good soup. Soup started from bones simmered into stock beats the canned stuff every time.
Ingredient Notes
- Chicken carcass: The larger your chicken, the more flavor your chicken stock will have. If you have a particularly small rotisserie chicken, you can save it in your freezer until you have another one and cook two at once for maximum flavor. This recipe will also work with a turkey, though if you like, you can double the rest of the recipe because of the significantly larger carcass.
- Filtered water: You don’t have to use filtered water for your stock, but if you don’t like the taste of your tap water, don’t use it in your soup. 😉
- Two sets of carrots, onions, and celery: You’ll use two sets of vegetables in this soup. The first will simmer with the stock to help flavor it and then be discarded (the veggies will be mushy and flavorless after the long simmer), and the second set will be added to the soup.

How to Make Chicken Carcass Soup
- Prep your chicken: To start, take your chicken carcass and remove and reserve any leftover chicken meat from the bones. If there are more than two cups of meat, great. You’ll use that in the soup. If not, we’ll cook some chicken later to add to it.
Use a pair of good kitchen shears, a sharp chef’s knife, or cleaver to chop up the carcass just enough so that you can lay the bones mostly flat.
Then heat a tablespoon of oil in a large pot over medium-high heat and add your bone pieces.

- Brown the chicken bones: Cook, using cooking tongs or chopsticks to turn the pieces occasionally, until bones and remaining skin are browned. Any meaty bits still attached won’t brown much, but the fat and the bones should turn nicely golden.

- Add the rest of the stock ingredients: Add a splash of water to deglaze the pan and scrape all the browned bits off the bottom with a wooden spoon.
Then add a couple of roughly chopped carrots, celery ribs, and half an onion, along with about 10 cups of water and a little salt.
Bring the water to barely a simmer (watch closely to make sure it never comes to a boil as that can make your soup cloudy), and then turn the heat down to keep it there.

- Simmer: Simmer for 90 minutes, scraping fat off the surface of the water occasionally, and checking to make sure your broth has not started to boil.
If there were less than two cups of meat remaining on your chicken, now’s a good time to cook a couple of chicken breasts.
If you don’t have a go-to chicken-cooking method, try the posts How to Cook Shredded Chicken or How to Cook Chicken Breasts if you prefer cubed meat.

- Finish stock: You’ll know your stock is done when it has a good chicken flavor. If it still tastes too watery after 90 minutes, simmer it a little longer.
Once the stock is done, use a large slotted spoon to remove and discard large pieces of bone and vegetable before straining broth through a fine-mesh strainer .

- Start your soup: Rinse pot to remove any chicken or vegetable remnants and return broth to pot. Bring to a simmer and add chopped carrots, celery, onion, and spices. Those simmer for 20 to 25 minutes, until tender.
While your vegetables cook, cook 1 to 1½ cups of noodles (depending on your preferred broth to noodle ratio) in a separate pot until just al dente.
Cooking your pasta separately keeps it from soaking up all your broth and gives you complete control of the cooking time. I like egg noodles in my chicken soup, but you can use whatever pasta you like best.

7: Add pasta and chicken: When noodles and veggies are done, add cooked (and drained) pasta and chicken to the pot of broth.
Stir everything together and add more salt and pepper to taste. Bring to a simmer and cook for 1 minute longer to make sure the chicken is heated through.
- Enjoy: And that’s it. Serve and enjoy.
What to serve with chicken carcass soup?
Serve your soup with a slice of crusty bread, some Cheddar Scones or quick Cream Biscuits, and a simple veggie side like Oven-Roasted Broccoli , Butter and Garlic Green Beans , or Roasted Zucchini .
Can I make this in advance?
Yes. You can make the soup or just the stock up to 48 hours in advance. Store covered in the refrigerator and reheat gently over medium heat. For best results, make and add the noodles just before serving, but this is optional.
Can I freeze this soup?
Yes, with some modifications. I don’t love freezing soup with noodles in it, so I recommend freezing the soup before you add the noodles. So if you know you’re going to eat only half the soup, add the chicken and then divide the soup and freeze half before you add the cooked noodles.
That being said, if you usually freeze soup with noodles and want to do it, you can.
For more tips and tricks on freezing soup, check out my post How to Freeze Soup .

More Favorite Soup Recipes
- Ham and Potato Soup
- Simple Beef Stew
- Tomato Soup
- Broccoli Potato Soup
- Creamy Chicken Tortellini Soup
Chicken Carcass Soup Recipe Notes
- Small-batch instructions: This is a full batch of soup that makes about four servings. It is great as leftovers, but if you’re part of a small household and want to make it Chicken Carcass Soup for Two, you can freeze half of the broth after straining and cut the rest of the recipe in half. Broth will keep in the freezer for about 3 months.

Equipment
- Fine mesh strainer
Ingredients
Chicken Stock
- ▢ 1 tablespoon olive oil
- ▢ 1 chicken carcass picked clean of meat and cut into pieces
- ▢ 10 cups filtered water
- ▢ 2 large carrots roughly chopped
- ▢ 2 celery ribs roughly chopped
- ▢ ½ large onion roughly chopped
- ▢ ½ teaspoon salt
Chicken Noodle Soup
- ▢ 2 large carrots chopped
- ▢ 2 celery ribs chopped
- ▢ ½ onion diced
- ▢ 1 bay leaf
- ▢ ¼ heaping teaspoon dried oregano
- ▢ ¼ heaping teaspoon dried basil
- ▢ ⅛ teaspoon ground thyme
- ▢ 1 to 1½ cups pasta
- ▢ 2 cups cooked chicken shredded or chopped
- ▢ Salt and pepper
Instructions
- In a large pot, heat oil over medium-high heat until shimmering. Add chicken carcass pieces and cook, turning occasionally, until bones and any remaining skin are browned.
- Add a splash of the water to deglaze the pan and scrape all the browned bits off the bottom. Add the vegetables, remaining water, and salt. Bring to barely a simmer (watch closely to make sure it never comes to a boil as that can make your soup cloudy).
- Simmer for 90 minutes, scraping fat off the top occasionally, and checking to make sure your broth has not started to boil.
- Discard large pieces of bone and vegetable before straining broth through a fine-mesh strainer. Rinse pot to remove any chicken or vegetable remnants and return broth to pot. Bring to a simmer and add carrots, celery, onion, and spices. Simmer for 20 to 25 minutes, until vegetables are tender.
- While your vegetables cook, bring a pot of generously salted water to boil and cook noodles according to package instructions. Drain and set aside.
- Stir cooked, drained pasta and cooked chicken into the broth and vegetables. Add more salt and pepper to taste. Bring to a simmer and cook for 1 minute to make sure the chicken is heated through.
- Serve and enjoy.
Notes
- To substitute a turkey carcass: Double the rest of the ingredients.
- Freezing: Stock or finished soup can be frozen for up to 3 months. Defrost overnight in the refrigerator before reheating.
Recipe Adapted From Chowhound

Easy Roasted Chicken
Ingredients
Special Equipment
- Paper towels
- Instant-read thermometer
- Kitchen twine
Roasted Chicken
- 1 whole chicken
- Salt and pepper
Instructions
- Preheat your oven to 450°F.
- To prepare your chicken, remove any organs from the body cavity of the bird. Pat chicken dry with paper towels and remove any stray feather quills left in the skin.
- Sprinkle generously with salt and pepper over the entire chicken, inside and out.
- Slice off wing tips or tuck them behind the wing in so they don’t burn. If trussing the bird, do so now. Place chicken breast-side up (tail should be on the bottom) in baking dish or roasting pan
- Bake for 40 to 90 minutes depending on the size of the chicken (about 1 hour for a 4-pound chicken), until an instant-read thermometer inserted into the meat of the thigh reads 165°F or juices run clear when thigh is pierced with a knife.
- Remove chicken from the oven and let it rest for 10 minutes before carving.
- Serve and enjoy!
