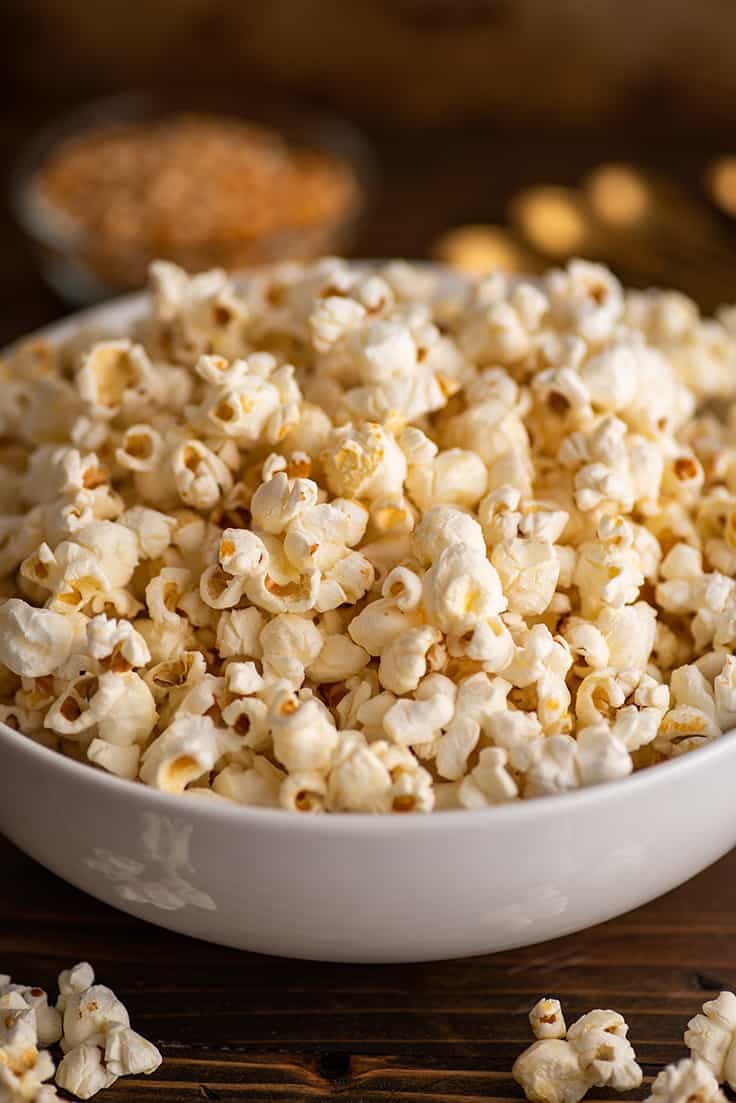
An easy sweet and salty homemade Kettle Corn recipe plus tips on how to make the best kettle corn without burning the sugar.
Kettle corn is usually considered a fair-time or amusement park treat (who doesn’t love wandering around eating handfuls of the stuff out of a giant $9 bag??), but it’s actually incredibly easy to make at home and just as delicious.

What is Kettle Corn? How is it Different from Popcorn?
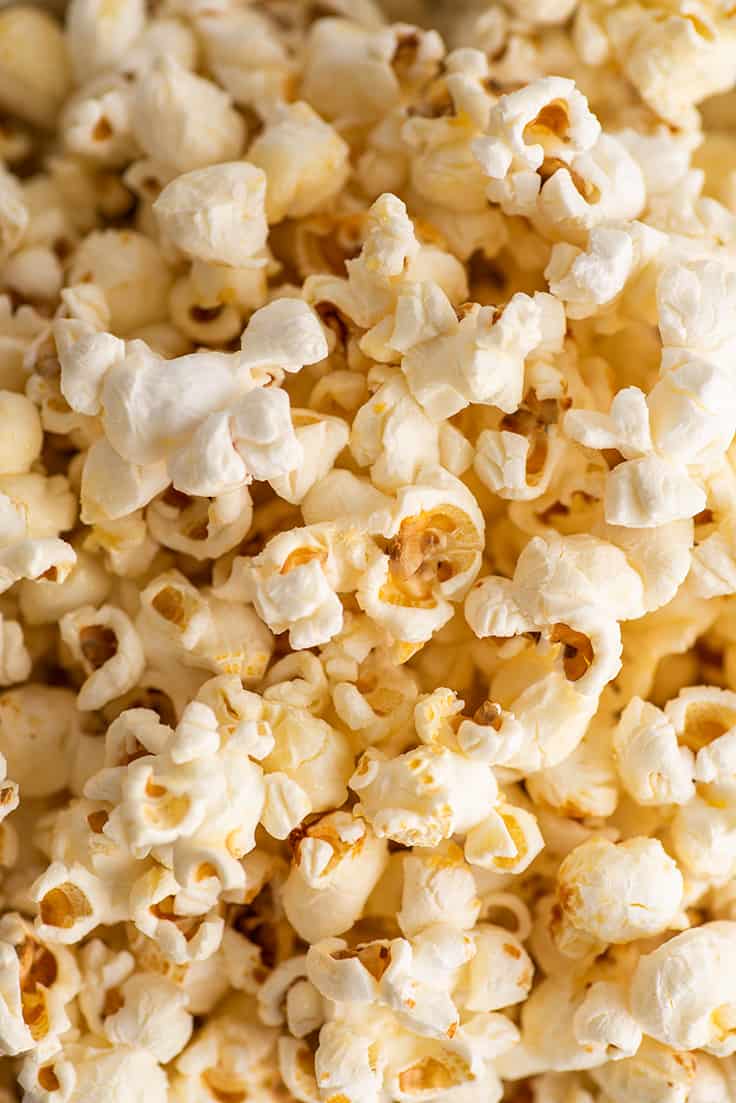
The only difference between popcorn and kettle corn is a little bit of sugar. Unlike popcorn, kettle corn is cooked with sugar, which when heated melts and coats the popping kernels making them both sweet and salty.
It makes a perfect movie-night snack or quick and simple dessert.
Ingredients
- Vegetable oil: You can use your favorite neutral cooking oil here. Refined coconut oil also makes a fabulous kettle corn oil as it has a clean, light flavor (unrefined will make your popcorn taste like coconut). But I think cheap, easily accessible vegetable or canola oil gives you the most classic fair-time flavor.
- Popcorn kernels: You can find loose kernels of popping corn at the store next to the boxes of the bagged microwave stuff. Any brand should work, but Orville Redenbacher’s popcorn is my go-to.
- Granulated sugar: Classic kettle corn uses white granulated sugar, but if you want a more caramel-y flavor, you can substitute brown sugar to make Brown Sugar Kettle Corn .
- Salt: We’ll use just a bit of salt because good kettle corn should be both sweet and salty.
Equipment
You don’t need any special equipment to make kettle corn, just a pot or large skillet with a long handle and a lid. Make sure your pot is at least 3 quarts (larger if doubling the recipe) and not too heavy. You’re going to be vigorously shaking the pan while the kettle corn cooks so you don’t want something that’s going to be too heavy to easily handle.

How to Make Kettle Corn (Without Burning the Sugar)
- Accept that you are probably going to burn a little sugar at first. I know, I know, I just said we weren’t going to be burning our sugar, but the first time or two you make kettle corn with a new pot/range/type of popcorn, you’re probably going to get a burnt kernel or two until you know how everything handles heat. Just pick them out and move on.
- Set a large bowl or sheet pan on the counter next to your stove so you can immediately pour your finished kettle corn into it. The bottom layer of kettle corn will burn in a hot pan quite quickly, even off the heat. You want to get finished kettle corn out of the pot as quickly as possible once it’s finished popping.
- Start with hot oil. Starting with hot oil means that your sugar will spend less time in the pan while the oil heats up, so it won’t have as long to start burning. To make sure you start with oil that is the right temperature, put three unpopped kernels in with your oil, and once you hear all three pop, it’s time to add the rest of your popcorn!
- Use more pot than you think you need. We already covered this above, but using a large pot gives everything room to move so your sugar isn’t just sitting on the heat, burning. I always use at least a 3-quart pot for 1/4-cup unpopped popcorn.
- Pull homemade kettle corn from heat before your corn stops popping. Standard popcorn wisdom says to pull your popcorn when you have 3 seconds between pops. For kettle corn, you want to pull it at around 1 to 2. As you get to know your pan and stove better, you might be able to extend this time, but it’s best to start here.
A Note About Unpopped Kernels: If you have dental work or are feeding this to kids, it’s best to pour the popped kettle corn onto a baking tray, let it cool for just a minute, and then sift through and pick out any unpopped kernels.
Unlike regular popcorn, the unpopped kernels don’t always just fall to the bottom of the bowl. They can clump in with the popped kettle corn pieces and are easy to bite into if you’re not careful.
How to Store Kettle Corn
You probably won’t have leftovers, but if you’d like to make a big batch, kettle corn should stay fresh for up to a week. Store at room temperature in an airtight container.
Kettle Corn Troubleshooting
If your kettle corn is coming out a little chewy rather than crunchy, it’s probably because your pot has a tightly fitting lid and there was too much steam trapped inside while the popcorn popped.
Next time, crack the lid just slightly while cooking. To do this safely, hold the handle of the pot in your left hand and with your right, use a small kitchen towel wrapped around the lid handle to protect your wrist, and offset the lid (with the crack facing away from you) just enough to let steam escape but keep the popcorn kernels in.


More Easy Desserts
- Small-batch Chocolate Chip Cookies
- Cinnamon Bun Kettle Corn
- Small-batch Brownies
- S’mores Cookie (For Two)
A Note on Yield and Multiple Batches
This recipe makes about 10 cups of kettle corn, which sounds like a lot, but a single person can definitely eat that on their own. If you plan on eating this with someone else and you’re not great at sharing (I’m not 😉 ), double the recipe. As long as your pot is large enough, doubling the recipe won’t change the cooking process in any way.
If you need to make a ton of kettle corn and you’re making multiple batches, be sure to wash the pan and let it cool slightly between each batch. Any remaining sugar in the pan will immediately burn if you try to make a second batch without washing it out.
Ingredients
- ▢ 2 tablespoons vegetable oil or cooking oil of your choice
- ▢ 1/4 cup popcorn kernels
- ▢ 2 tablespoons ( 25g ) granulated sugar
- ▢ 1/4 teaspoon salt
Instructions
- Set a large bowl on the counter to pour your popped kettle corn into.*
- To a large heavy-bottomed pot (with a lid) add oil and 3 kernels of popcorn. Cover and heat over medium-high heat (medium if your stove runs hot) until you hear all 3 kernels pop.
- Add the rest of your popcorn and shake the pan for a few seconds to coat the kernels. Pour sugar and salt directly over the popcorn. Cover and shake for 3 seconds, rest for 3 seconds, repeat, until popcorn begins to pop steadily.
- Once that starts, shake pan mostly continuously, pausing occasionally to listen for breaks in popping. Once there is about a 2 second break between pops, pull from heat. Transfer popcorn immediately to your bowl.
- Allow to cool for a couple of minutes (sugar will be VERY hot) before eating. Keep an eye out for unpopped kernels as you eat, and enjoy.
Notes
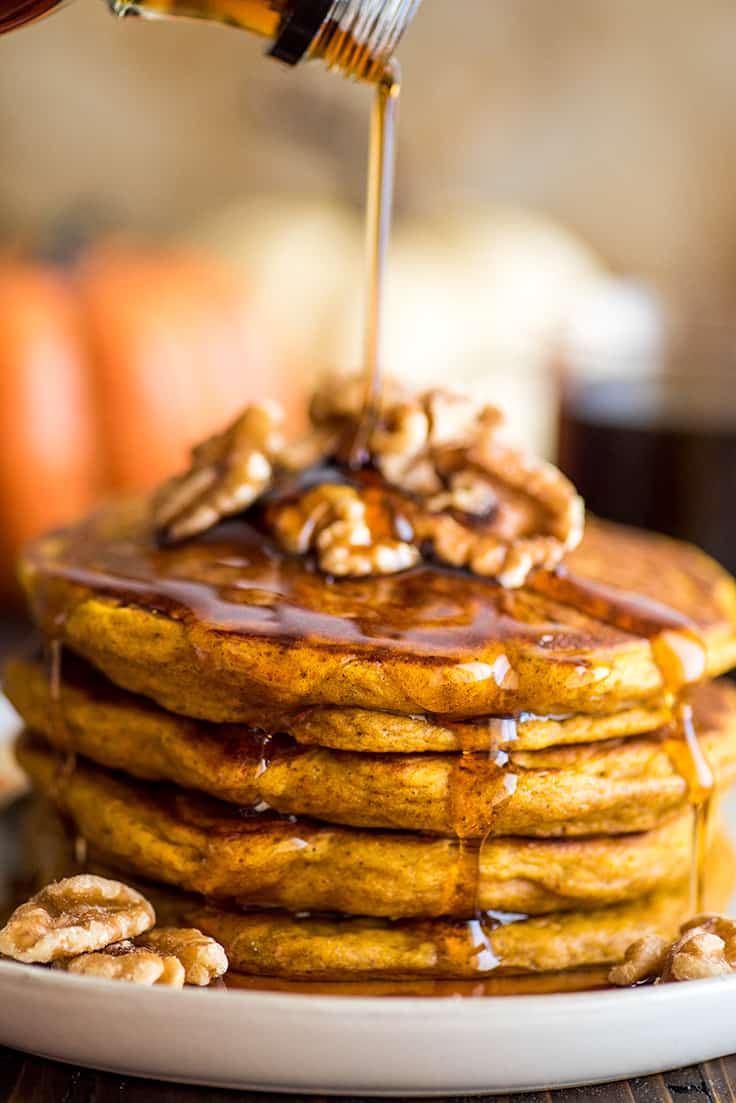
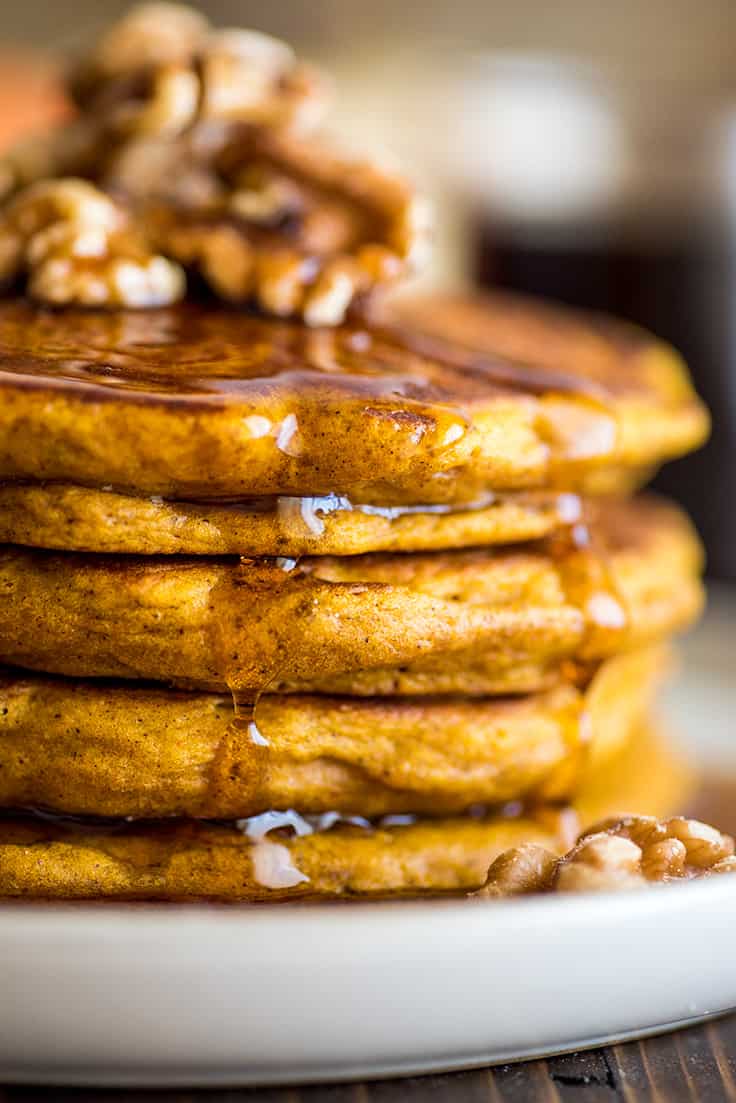
These fluffy and perfect Pumpkin Pancakes are packed with pumpkin and warming spices and might just be your new favorite fall breakfast.
These pancakes are everything good about fall: a brisk October morning, a worn-in slouchy sweater, a grande Pumpkin Spice Latte , all served up in a beautiful heaping stack of carbs.
They’re completely delicious, perfectly fluffy, and really, really simple to make. If you have a can of pumpkin puree in your pantry, you probably have the ingredients make some pumpkin pancakes right now.

Pumpkin Pancake Ingredients
Buttermilk or buttermilk substitute: This recipe calls for buttermilk, which makes the pancakes soft and moist and just a little tangy. But if you don’t have buttermilk, you can make a quick buttermilk substitute with regular milk (dairy-free milk works too) and lemon juice or vinegar. Baking staples: The bulk of the ingredients here are just baking staples, flour, brown sugar, baking powder and soda, salt, and an egg. Pumpkin pie spices: These pancakes are spiced with cinnamon, allspice, ginger, and nutmeg. You can use all those spices separately, or if you have pumpkin pie spice in your spice drawer, use 1 slightly heaping teaspoon pumpkin spice instead. Pumpkin puree: Pumpkin puree is just pure, pureed pumpkin (don’t mix it up with sweetened pumpkin pie filling). You can usually find it in the baking aisle. This recipe won’t use up an entire can of pumpkin puree, so see my post What to Do With Leftover Pumpkin Puree for storage tips and recipe ideas for the leftovers. Vegetable oil: Just a little vegetable oil in the batter helps keep the pancakes moist. If you don’t have vegetable oil, you can substitute the same amount of melted butter.

How to Make Pumpkin Pancakes.
- If you don’t have buttermilk, mix vinegar/lemon juice and milk together and let it sit to make a faux buttermilk while you measure your other ingredients.
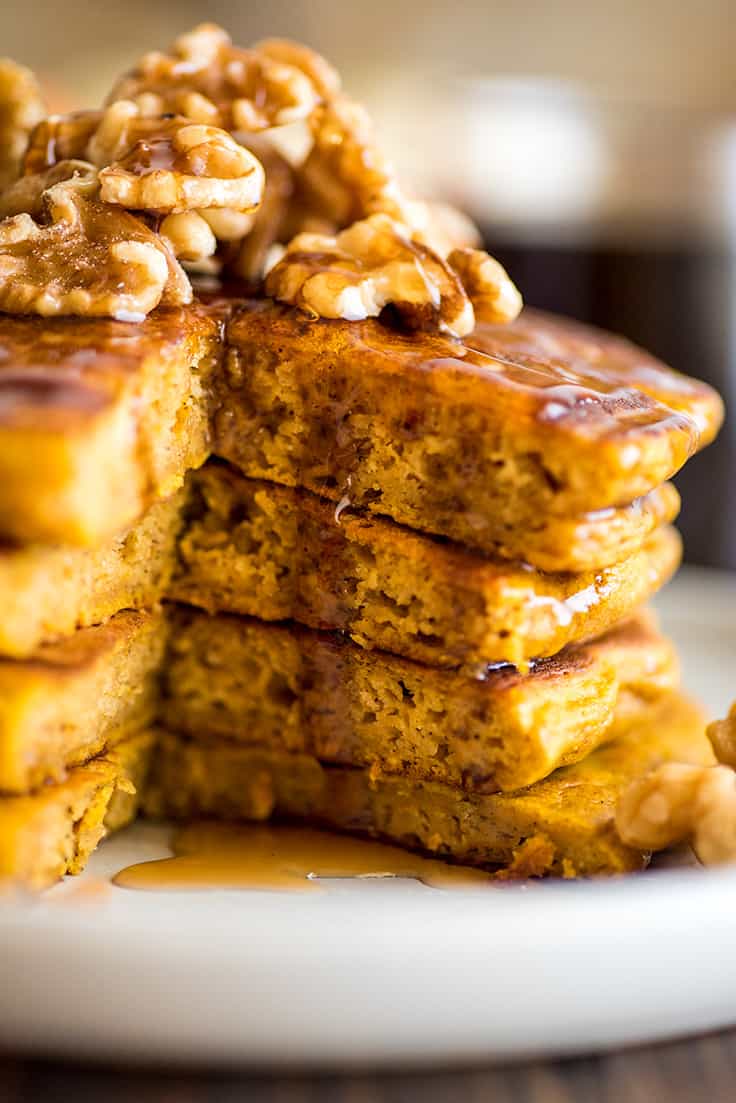
- Mix together dry ingredients in one bowl, wet in another, and then stir wet into dry until just combined. Don’t over mix or your pancakes can end up too chewy and tough!
- Drop heaping 1/3 cups of batter onto a greased griddle set to 350° or a skillet heated over medium heat. Because of the added moisture of the pumpkin, these pancakes take longer to cook than regular pancakes, so don’t be worried if they seem to be taking a while. Just keep the heat at 350°F or medium (any higher and they might burn before they cook through), and check the centers by cutting into one before you remove them from heat.
- If making your pancakes in a skillet rather than a griddle, you will have to cook them two at a time. To keep your first batch of pancakes warm while the second cooks, set them on a plate inside your oven and turn your oven to warm or its lowest setting.
- Top with lots of butter and (preferably real) maple syrup, and enjoy!

Can I freeze pumpkin pancakes?
Yes! Pancakes in general freeze pretty well. Freeze in a freezer bag with a small sheet of parchment paper between each pancake and reheat in the microwave for 20-30 seconds. Extend the time slightly for each additional pancake you’re reheating.
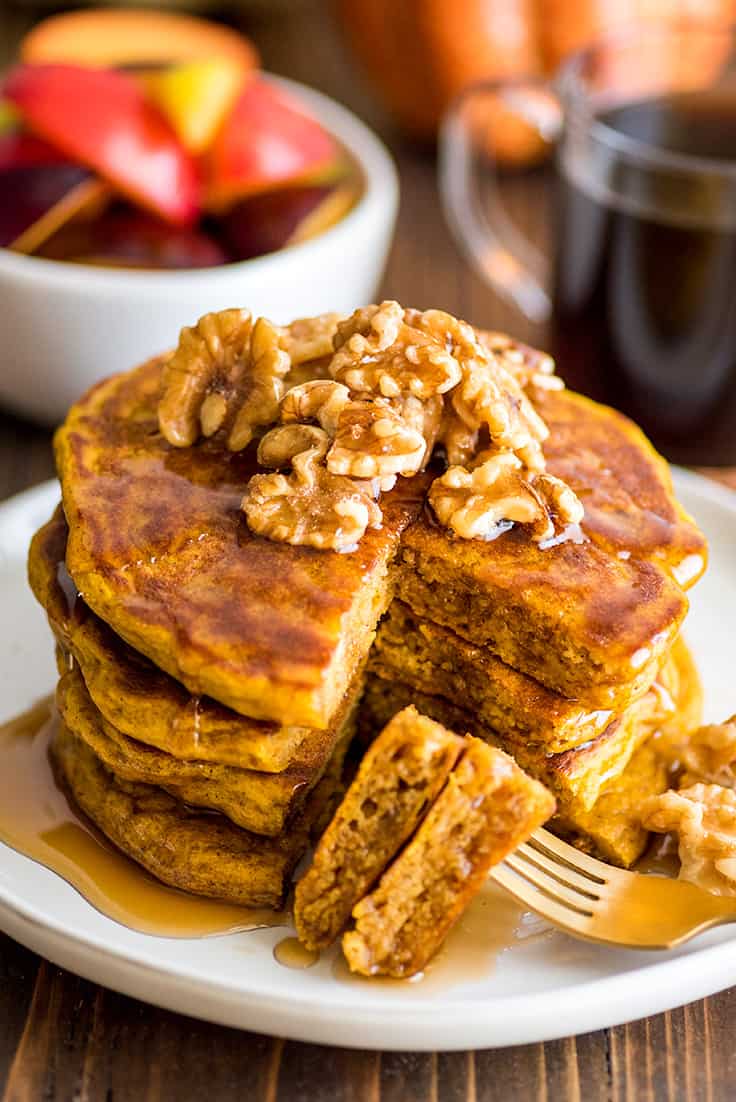
What goes with pumpkin pancakes?
These pancakes can be served on their own with just a side of fall fruits ( apples, grapes, mangos, pears, and raspberries are what are in season right now ). Or serve as part of a full breakfast spread with eggs, thick-cut bacon or sausage, and maybe some roasted potatoes .
More Pancake (and Waffle) Recipes
- Fluffy Pancakes for Two
- Banana Pancakes for Two
- Pancakes for One
- Crispy Waffles

A Note on Recipe Yield
This recipe is designed to serve two, so it will make exactly four large and fluffy pancakes. But if you’re serving the pancakes alongside a full breakfast or making them for kids/dainty eaters, you could definitely stretch the recipe to make six smaller pancakes and feed three.
If you’d like to double or triple the recipe, hover over the serving size below or click if you’re on mobile, and slide the slider.
Ingredients
- ▢ 1 tablespoon white vinegar *
- ▢ Scant 3/4 cup milk
- ▢ 1 cup ( 120g ) all-purpose flour
- ▢ 2 tablespoons ( 25g ) brown sugar
- ▢ 1 teaspoon baking powder
- ▢ 1/2 teaspoon baking soda
- ▢ 1/2 teaspoon ground cinnamon
- ▢ 1/4 teaspoon ground allspice
- ▢ 1/4 teaspoon ground ginger
- ▢ Generous pinch of nutmeg
- ▢ 1/4 teaspoon salt
- ▢ 1/2 cup ( 122g ) pumpkin puree
- ▢ 1 large egg
- ▢ 1 tablespoon vegetable oil
Instructions
- Before you start measuring out any of your other ingredients, add 1 tablespoon vinegar to a 3/4 cup measuring cup and fill the rest of the way with milk. Set aside to sour.
- In a medium bowl, combine flour, brown sugar, baking powder, baking soda, spices, and salt. Whisk until well-combined.
- In a small bowl, whisk together soured milk, pumpkin puree, egg, and vegetable oil.
- Pour liquid into the flour mixture and use a spoon to stir until just combined. Do not over mix.
- Heat a griddle to 350°F or skillet over medium heat and rub a stick of butter over the surface or grease with cooking spray. Drop heaping 1/3 cups of batter to the surface. If making in a skillet, you will need to make the pancakes in two batches.
- Cook until bubbles form on the top of the pancakes and flip, making sure to cook all the way through—these pancakes will take slightly longer to cook than regular pancakes because of the pumpkin.
- Top with butter and maple syrup, and enjoy!
Notes
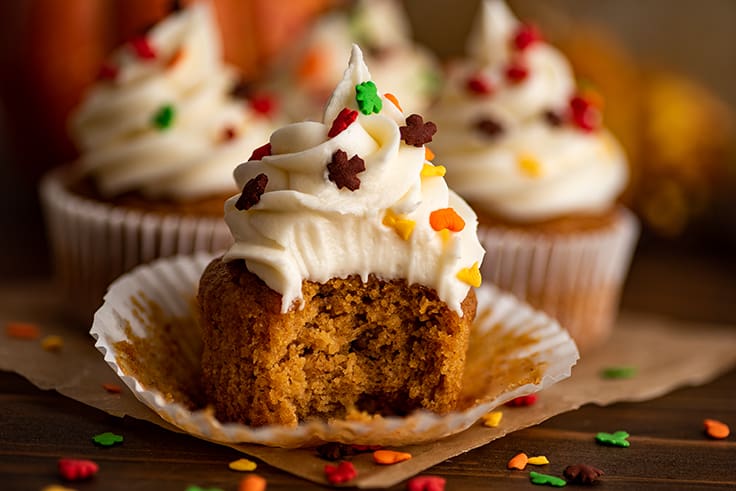
These Small-batch Pumpkin Cupcakes with Cream Cheese Frosting are easy to make and so, so good.
Ready for some pumpkin cupcakes that are soft, incredibly moist, and exactly perfect for fall (or almost fall, whatever)?
This recipe will make four adorable cupcakes, which is the perfect number if you don’t need to make cupcakes today, but there’s a pumpkin cupcake song in your heart.


Ingredients
- Baking staples: Most of the ingredients for these cupcakes are basic baking staples, flour, baking powder, salt, granulated, brown, and powdered sugar, and vanilla extract. Pumpkin pie spices: The cupcake batter is spiced with cinnamon, allspice, and nutmeg. If you have premixed pumpkin pie spice , you can replace these spices with 1/2 teaspoon of pumpkin pie spice. Vegetable oil: Vegetable oil in the batter along with the pumpkin puree makes these cupcakes extra moist and delicious. Egg white: Since this is a small-batch recipe, you don’t need an entire egg, just the white. For ideas on what to make with the leftover yolk, see my post What to Do With Leftover Egg Yolks (I recommend a small batch of Chocolate chip cookies !). Pumpkin puree: Pumpkin puree is just pure, pureed pumpkin (not to be confused with pumpkin pie filling). You can usually find it in the baking aisle near the canned pie fillings. This recipe won’t use up an entire can of pumpkin puree, so see my post What to Do With Leftover Pumpkin Puree for storage tips and recipe ideas for the leftovers. Butter: You’ll need butter for the cream cheese frosting. I typically recommend unsalted butter for frosting, but salted butter will work, just omit the pinch of salt in the recipe. Cream cheese: My go-to cream cheese brand for baking and frosting is Philadelphia cream cheese . Make sure to allow enough time for your cream cheese to soften at room temperature. Cream cheese that’s too cold will leave cream cheese lumps in your frosting.

How to Make Pumpkin Cupcakes
- Mix the dry ingredients together in a small bowl.
- In a medium bowl, mix wet ingredients together and then stir in the dry ingredients until just mixed. Don’t overmix or your cupcakes will come out tough.
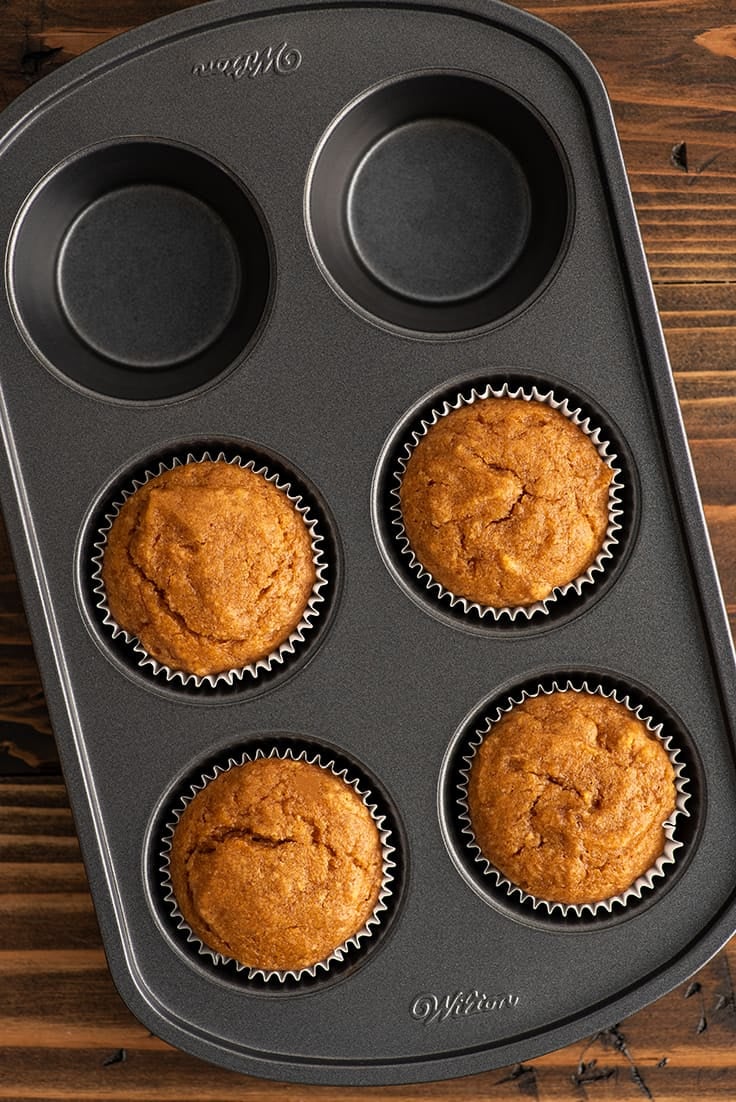
- Transfer the batter to your cupcake pan and bake until cooked through.
- Once cool enough to handle, move the cupcakes to a cooling rack and cool completely before frosting. Don’t try to frost even slightly warm cupcakes or the frosting will melt right off.
- To make the frosting, make sure your butter and cream cheese are at room temperature. Too cold and they will not mix properly for a completely smooth frosting. Beat the butter, cream cheese, and vanilla together until completely mixed. If they aren’t mixing smoothly, let them sit at room temperature for another 10 minutes and try again.
- Add powdered sugar and beat until smooth and creamy. Frost cupcakes and enjoy!


What Frosting Goes With Pumpkin Cupcakes?
Cream cheese frosting is the classic pairing for pumpkin cupcakes. But you do have other options. Try Vanilla Frosting, Chocolate Frosting , or Small-batch Chocolate Cream Cheese Frosting.
How to Store These Cupcakes
Before frosting, cupcakes can be stored at room temperature in an airtight container for 2 to 3 days. Once frosted, they should be stored in an airtight container in the refrigerator because of the cream cheese.
Can I Freeze Pumpkin Cupcakes?
Yes. Pumpkin cupcakes freeze pretty well, even if the frosting looks a little smashed after freezing. Place cupcakes on a plate in the freezer and freeze for 20 minutes, until the frosting is mostly frozen solid and then double wrap the cupcakes individually in plastic wrap. Store wrapped cupcakes in a freezer bag or airtight container for up to 2 months.
Allow frozen cupcakes to come to room temperature on the counter for 20 minutes or so before eating.

More Pumpkin Recipes
- Pumpkin Pancakes
- Small Pumpkin Cake
- Small-batch Pumpkin Snickerdoodles
- Pumpkin Donuts
- Small-batch Pumpkin Cookies With Cream Cheese Frosting
Ingredients
Special Equipment
- ▢ Handheld electric mixer optional but convenient
Pumpkin Cupcakes
- ▢ 1/2 cup ( 60g ) all-purpose flour
- ▢ 1/2 teaspoon baking powder
- ▢ 1/4 teaspoon ground cinnamon *
- ▢ 1/8 teaspoon ground allspice
- ▢ 1/8 teaspoon ground nutmeg
- ▢ 1/8 teaspoon salt
- ▢ 1/4 cup ( 50g ) granulated sugar
- ▢ 1/4 cup ( 50g ) brown sugar
- ▢ 2 tablespoons vegetable oil
- ▢ 1 large egg white
- ▢ 1/4 cup canned pumpkin puree
- ▢ 1/2 teaspoon vanilla extract
Cream Cheese Frosting
- ▢ 4 tablespoons ( 2oz ) unsalted butter softened
- ▢ 2 ounces cream cheese softened
- ▢ 1/4 teaspoon vanilla extract
- ▢ 1 cup ( 120g ) powdered sugar sifted, plus more as needed
- ▢ Pinch salt
Instructions
Pumpkin Cupcakes
- Preheat your oven to 350°F and line a cupcake pan with 4 cupcake liners.
- In a small bowl, whisk together flour, baking powder, cinnamon, allspice, nutmeg, and salt. Set aside.
- In a medium bowl, combine both sugars, vegetable oil, egg white, pumpkin puree, and vanilla extract. Whisk until smooth. Add flour mixture and use a spoon to stir until just combined.
- Divide batter between the prepared cupcake cups, filling about 2/3 of the way full. Bake for 19 to 23 minutes, until a toothpick inserted into the center of the cupcakes comes out with just a few moist crumbs.
- Cool cupcakes in the pan for 5 minutes before transferring to a cooling rack to cool completely before frosting.
Cream Cheese Frosting
- In a medium bowl, combine butter, cream cheese, and vanilla, and beat until well-combined and fluffy. Add powdered sugar and beat until smooth. If needed, beat in a little more powdered sugar until it reaches your desired consistency. Transfer to a piping bag and pipe onto cooled cupcakes. Serve and enjoy!
Notes
An easy sweet and salty homemade Kettle Corn recipe plus tips on how to make the best kettle corn without burning the sugar.
Kettle corn is usually considered a fair-time or amusement park treat (who doesn’t love wandering around eating handfuls of the stuff out of a giant $9 bag??), but it’s actually incredibly easy to make at home and just as delicious.
What is Kettle Corn? How is it Different from Popcorn?
The only difference between popcorn and kettle corn is a little bit of sugar. Unlike popcorn, kettle corn is cooked with sugar, which when heated melts and coats the popping kernels making them both sweet and salty.
It makes a perfect movie-night snack or quick and simple dessert.
Ingredients
- Vegetable oil: You can use your favorite neutral cooking oil here. Refined coconut oil also makes a fabulous kettle corn oil as it has a clean, light flavor (unrefined will make your popcorn taste like coconut). But I think cheap, easily accessible vegetable or canola oil gives you the most classic fair-time flavor.
- Popcorn kernels: You can find loose kernels of popping corn at the store next to the boxes of the bagged microwave stuff. Any brand should work, but Orville Redenbacher’s popcorn is my go-to.
- Granulated sugar: Classic kettle corn uses white granulated sugar, but if you want a more caramel-y flavor, you can substitute brown sugar to make Brown Sugar Kettle Corn .
- Salt: We’ll use just a bit of salt because good kettle corn should be both sweet and salty.
Equipment
You don’t need any special equipment to make kettle corn, just a pot or large skillet with a long handle and a lid. Make sure your pot is at least 3 quarts (larger if doubling the recipe) and not too heavy. You’re going to be vigorously shaking the pan while the kettle corn cooks so you don’t want something that’s going to be too heavy to easily handle.
How to Make Kettle Corn (Without Burning the Sugar)
- Accept that you are probably going to burn a little sugar at first. I know, I know, I just said we weren’t going to be burning our sugar, but the first time or two you make kettle corn with a new pot/range/type of popcorn, you’re probably going to get a burnt kernel or two until you know how everything handles heat. Just pick them out and move on.
- Set a large bowl or sheet pan on the counter next to your stove so you can immediately pour your finished kettle corn into it. The bottom layer of kettle corn will burn in a hot pan quite quickly, even off the heat. You want to get finished kettle corn out of the pot as quickly as possible once it’s finished popping.
- Start with hot oil. Starting with hot oil means that your sugar will spend less time in the pan while the oil heats up, so it won’t have as long to start burning. To make sure you start with oil that is the right temperature, put three unpopped kernels in with your oil, and once you hear all three pop, it’s time to add the rest of your popcorn!
- Use more pot than you think you need. We already covered this above, but using a large pot gives everything room to move so your sugar isn’t just sitting on the heat, burning. I always use at least a 3-quart pot for 1/4-cup unpopped popcorn.
- Pull homemade kettle corn from heat before your corn stops popping. Standard popcorn wisdom says to pull your popcorn when you have 3 seconds between pops. For kettle corn, you want to pull it at around 1 to 2. As you get to know your pan and stove better, you might be able to extend this time, but it’s best to start here.
A Note About Unpopped Kernels: If you have dental work or are feeding this to kids, it’s best to pour the popped kettle corn onto a baking tray, let it cool for just a minute, and then sift through and pick out any unpopped kernels.
Unlike regular popcorn, the unpopped kernels don’t always just fall to the bottom of the bowl. They can clump in with the popped kettle corn pieces and are easy to bite into if you’re not careful.
How to Store Kettle Corn
You probably won’t have leftovers, but if you’d like to make a big batch, kettle corn should stay fresh for up to a week. Store at room temperature in an airtight container.
Kettle Corn Troubleshooting
If your kettle corn is coming out a little chewy rather than crunchy, it’s probably because your pot has a tightly fitting lid and there was too much steam trapped inside while the popcorn popped.
Next time, crack the lid just slightly while cooking. To do this safely, hold the handle of the pot in your left hand and with your right, use a small kitchen towel wrapped around the lid handle to protect your wrist, and offset the lid (with the crack facing away from you) just enough to let steam escape but keep the popcorn kernels in.
More Easy Desserts
- Small-batch Chocolate Chip Cookies
- Cinnamon Bun Kettle Corn
- Small-batch Brownies
- S’mores Cookie (For Two)
A Note on Yield and Multiple Batches
This recipe makes about 10 cups of kettle corn, which sounds like a lot, but a single person can definitely eat that on their own. If you plan on eating this with someone else and you’re not great at sharing (I’m not 😉 ), double the recipe. As long as your pot is large enough, doubling the recipe won’t change the cooking process in any way.
If you need to make a ton of kettle corn and you’re making multiple batches, be sure to wash the pan and let it cool slightly between each batch. Any remaining sugar in the pan will immediately burn if you try to make a second batch without washing it out.

Ingredients
- ▢ 2 tablespoons vegetable oil or cooking oil of your choice
- ▢ 1/4 cup popcorn kernels
- ▢ 2 tablespoons ( 25g ) granulated sugar
- ▢ 1/4 teaspoon salt
Instructions
- Set a large bowl on the counter to pour your popped kettle corn into.*
- To a large heavy-bottomed pot (with a lid) add oil and 3 kernels of popcorn. Cover and heat over medium-high heat (medium if your stove runs hot) until you hear all 3 kernels pop.
- Add the rest of your popcorn and shake the pan for a few seconds to coat the kernels. Pour sugar and salt directly over the popcorn. Cover and shake for 3 seconds, rest for 3 seconds, repeat, until popcorn begins to pop steadily.
- Once that starts, shake pan mostly continuously, pausing occasionally to listen for breaks in popping. Once there is about a 2 second break between pops, pull from heat. Transfer popcorn immediately to your bowl.
- Allow to cool for a couple of minutes (sugar will be VERY hot) before eating. Keep an eye out for unpopped kernels as you eat, and enjoy.
Notes

Easy Kettle Corn
Ingredients
- 2 tablespoons vegetable oil or cooking oil of your choice
- 1/4 cup popcorn kernels
- 2 tablespoons ( 25g ) granulated sugar
- 1/4 teaspoon salt
Instructions
- Set a large bowl on the counter to pour your popped kettle corn into.*
- To a large heavy-bottomed pot (with a lid) add oil and 3 kernels of popcorn. Cover and heat over medium-high heat (medium if your stove runs hot) until you hear all 3 kernels pop.
- Add the rest of your popcorn and shake the pan for a few seconds to coat the kernels. Pour sugar and salt directly over the popcorn. Cover and shake for 3 seconds, rest for 3 seconds, repeat, until popcorn begins to pop steadily.
- Once that starts, shake pan mostly continuously, pausing occasionally to listen for breaks in popping. Once there is about a 2 second break between pops, pull from heat. Transfer popcorn immediately to your bowl.
- Allow to cool for a couple of minutes (sugar will be VERY hot) before eating. Keep an eye out for unpopped kernels as you eat, and enjoy.
