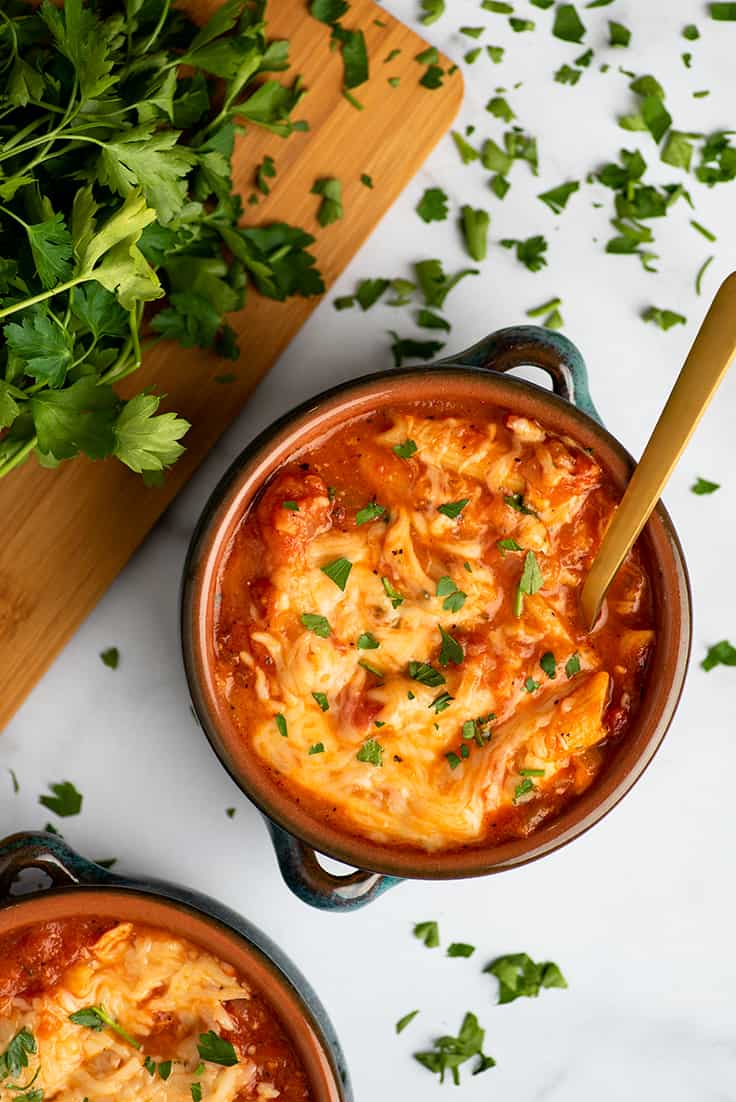
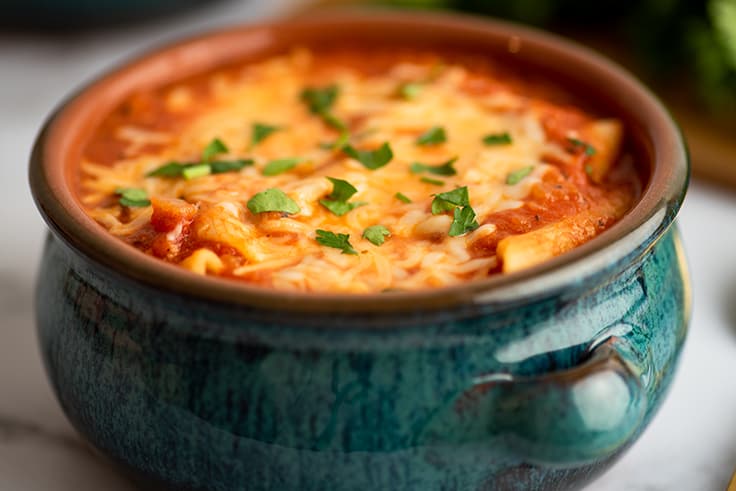
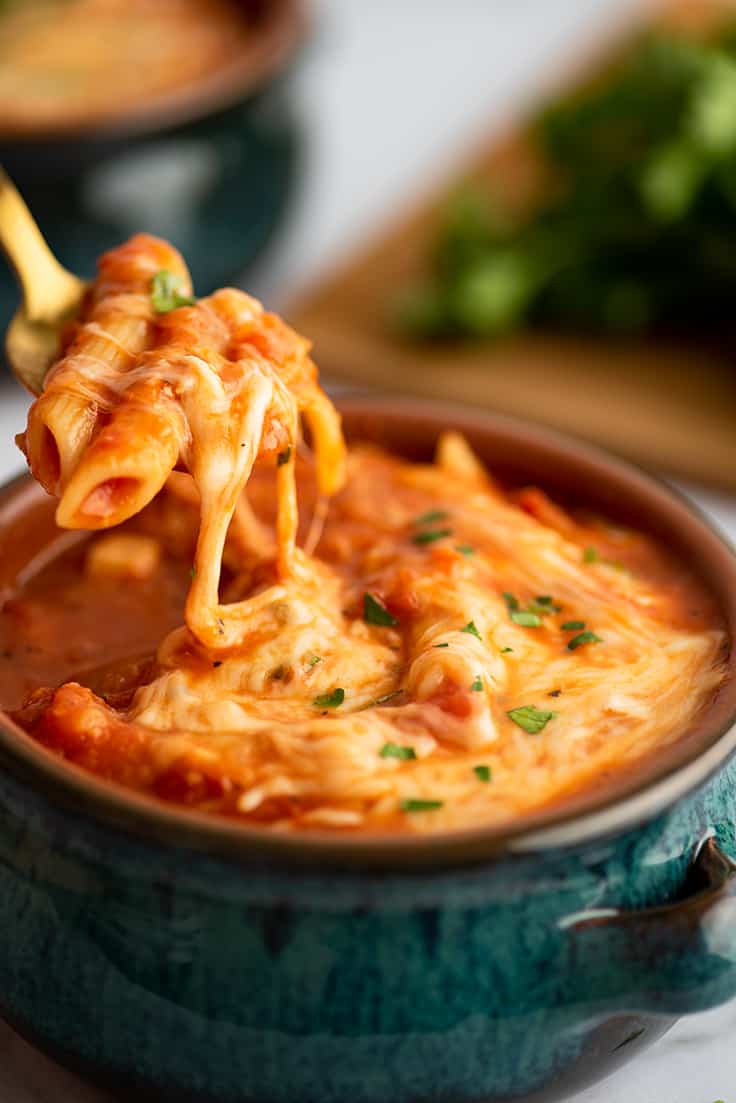
This easy Chicken Parm Soup is basically deconstructed chicken parmesan in a bowl. Big chunks of chicken in a rich tomato soup with the pasta of your choice and p-l-e-n-t-y of gooey mozzarella and Parmesan.
Chicken Parmesan Soup is a perfect soup for chilly winter weeknights. It’s warming and delicious and could not be easier to make.
If you’re craving a big bowl of comfort food, this soup totally delivers.

Incredibly Easy Chicken Soup
I wrote this recipe to use leftover cooked chicken , so you can use leftover chicken you have on hand or grab a rotisserie chicken at the store and use the white meat from that (save the thighs and drumsticks for lunches and the carcass to make soup !).
Since you’re starting with cooked chicken, this soup comes together super quick and easy in one pot with minimal fuss.
Ingredient Notes
- Cooked chicken: To save time, I call for cooked chicken in the recipe, but if you don’t have any cooked chicken on hand, not a problem. I’ve included instructions for cooking your own in the recipe notes, and it will only add a couple of minutes to the overall cooking time.
- Tomato paste: You won’t use a full can of paste in this recipe, so check out my post What to Do With Leftover Tomato Paste for storage tips and recipe ideas to use up the leftovers.
- Crushed tomatoes: The recipe calls for crushed tomatoes, but you can use canned diced tomatoes if you don’t mind a chunkier soup. If you want to use canned whole tomatoes, lightly puree them with an immersion blender or chop them by hand before using.
How to Make Chicken Parm Soup
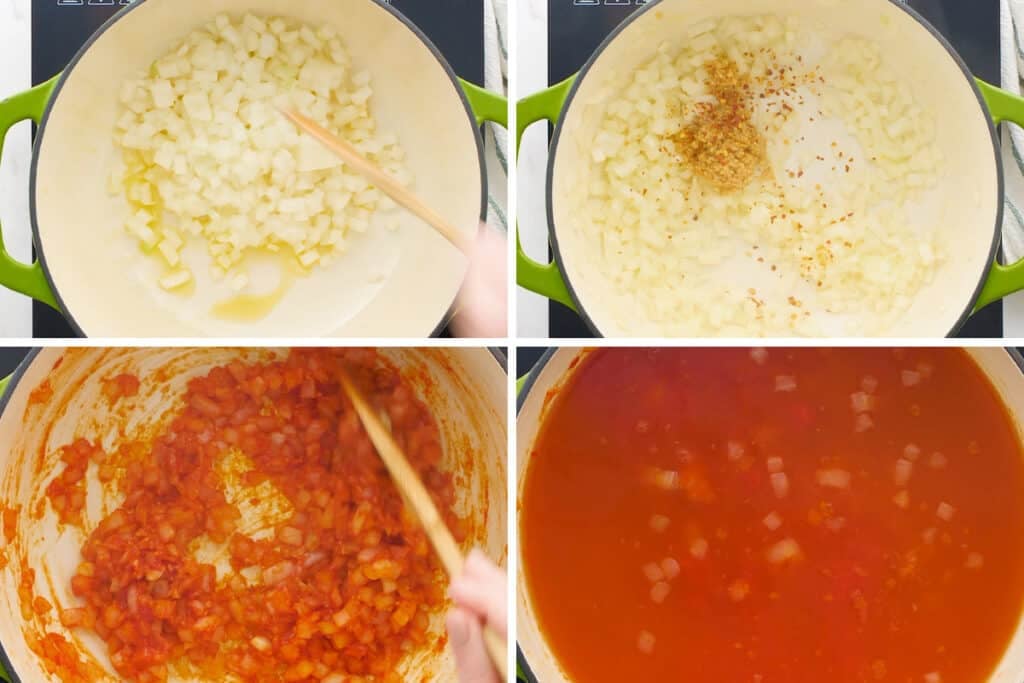

Cook onions until softened in a large pot.
Add garlic and red pepper flakes and cook until the garlic is lightly browned before adding the tomato paste and cooking for 1 to 2 minutes.
Stir in chicken broth and tomatoes, cover, and simmer for 8 minutes.
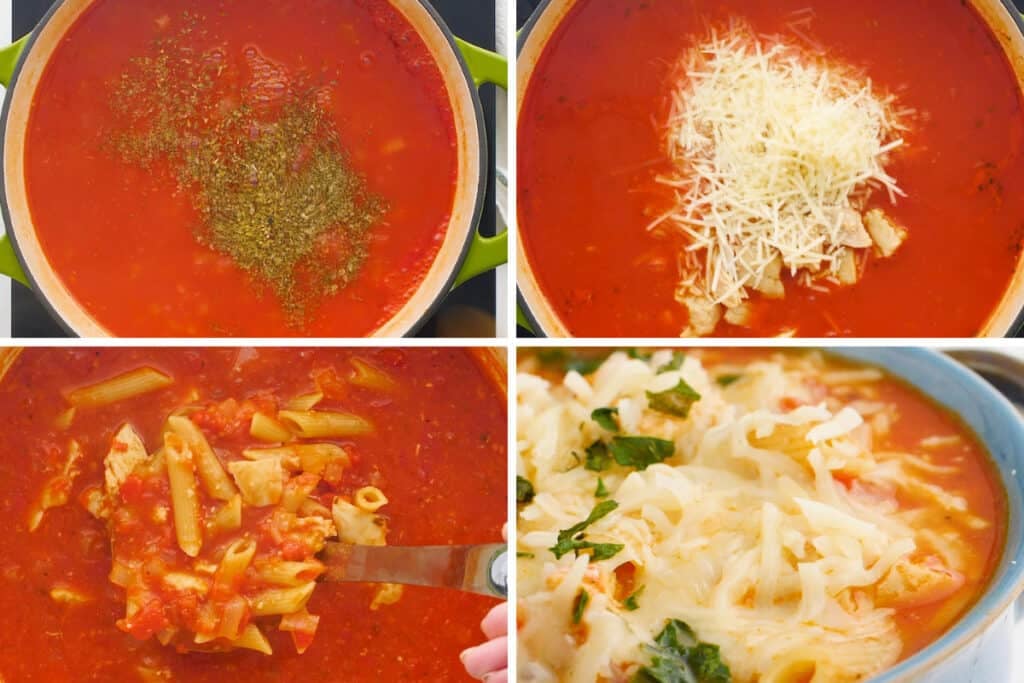

Add pasta and spices and cook until pasta is al dente.
Stir in cooked chicken and Parmesan and dish into bowls.
Top each bowl of soup with mozzarella and enjoy!
Soup Variations
- Pasta shape: Feel free to get creative with the pasta here. Medium shells or orecchiette work great or try subbing in cheese tortellini for an extra cheesy soup.
- Creamy chicken parm soup: Add ¼ cup to ½ cup of heavy cream to the soup when you stir in the chicken and parmesan for a rich and creamy soup.
What to Serve With Chicken Parm Soup

Can I freeze chicken parm soup?
I don’t recommend freezing soup with pasta and cheese because the pasta bloats in the freezer and cheese can become grainy. But if you leave out the pasta and parmesan, this soup freezes extremely well.
- To freeze, cook the soup according to the recipe, simply omit the pasta and the parmesan.
- Then freeze the soup either all together or in single-serving portions.
- When you’re ready to eat, defrost the soup in the refrigerator and then reheat in either the microwave or on the stove.
- Boil the pasta separately (use 4 ounces for the entire batch or 1 ounce for single servings), and then drain and add them to the heated soup. Stir in parmesan and then dish up the soup and top with mozzarella.
See my post How to Freeze Soup for more tips and tricks.

More Easy Soup Recipes
- Creamy Chicken Noodle Soup
- Quick Chicken Tortellini Soup
- Ham and Potato Soup
- Cheesy Sausage Potato Soup
- Tomato Tortellini Soup
More Favorite Chicken Recipes
- Easy Chicken Francaise
- Chicken Shawarma
- BBQ Chicken Pizza
- Chicken in White Wine Lemon Butter Sauce
- Pesto Chicken Sandwich

Ingredients
- ▢ 1 tablespoon olive oil
- ▢ ½ large onion finely diced
- ▢ 3 cloves garlic minced or pressed
- ▢ ¼ teaspoon crushed red pepper flakes
- ▢ 2 tablespoons ( 33g ) tomato paste
- ▢ 4 cups ( 2 14.5-ounce cans) chicken broth
- ▢ 2 14-ounce cans crushed tomatoes *
- ▢ 4 ounces (about 1 ⅓ cup) penne or favorite pasta for soup
- ▢ ½ teaspoon dried basil
- ▢ ¼ heaping teaspoon dried oregano
- ▢ 2 cups cooked chicken diced or shredded, white or dark meat is fine*
- ▢ ½ cup ( 2oz ) shredded Parmesan
- ▢ 1 cup ( 4oz ) shredded mozzarella divided
- ▢ Salt and pepper to taste
Instructions
- In a large pot with a lid, heat oil over medium heat. Add onions and cook until they begin to soften and turn translucent around the edges, about 5 minutes.
- Add garlic and red pepper flakes and cook until garlic begins to turn golden and fragrant, about 1 minute. Stir in tomato paste and cook, watching closely, until the paste begins to stick and caramelize on the bottom of the pan, 1 to 2 minutes.
- Stir in chicken broth and crushed tomatoes, scraping the bottom of the pot as you go making sure to dislodge any cooked-on bits.
- Cover and bring to a simmer, adjusting heat as necessary. Simmer for 8 minutes. Add pasta, basil, and oregano, and cook, covered, until pasta is al dente, 10 to 12 minutes. Stir in cooked chicken and parmesan and heat until chicken is warmed through and parmesan is melted.
- Add salt and pepper to taste.
- Ladle into bowls and top each bowl with 1/4 cup of mozzarella cheese. Serve and enjoy!
Notes
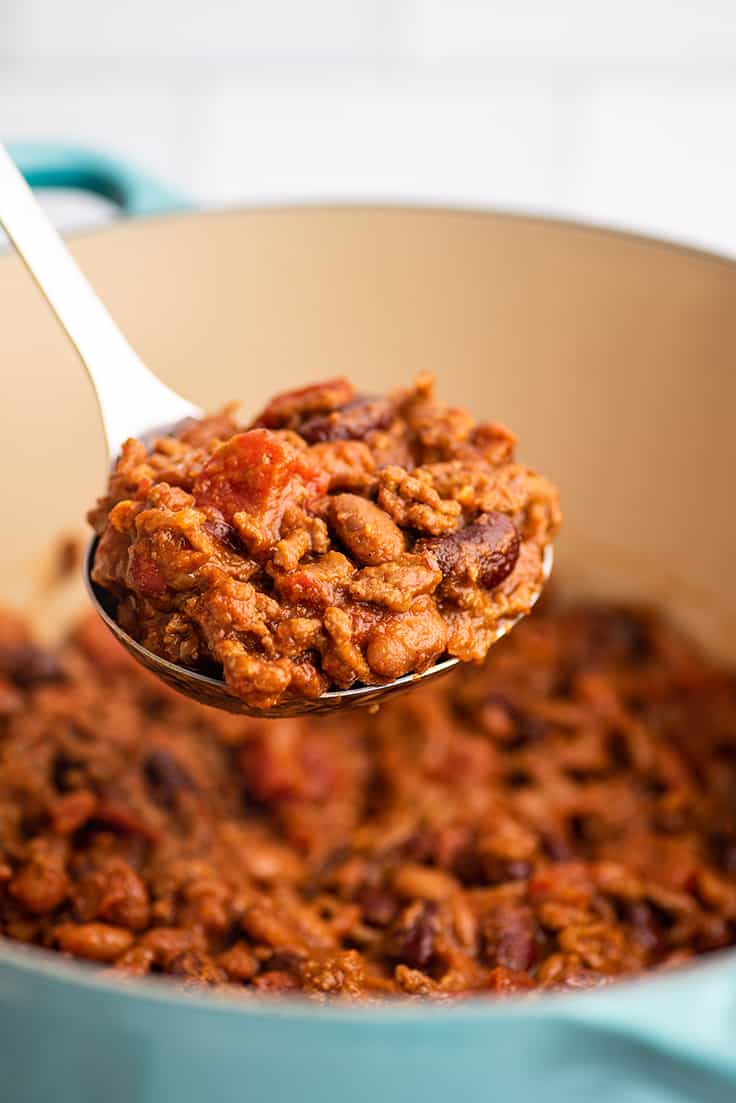
This simple and easy chili recipe can be made in one pot in a little over half an hour and with only a handful of pantry staple ingredients.
Chili recipes can be a little intense and intimidating sometimes. It took me forever to start making chili at home because it seemed like all of the BEST MOST AUTHENTIC CHILI RECIPES EVER had just crazy long ingredient lists or cooking times.
And then I realized that as great and aspirational as those recipe are, not every chili recipe has to be the BEST MOST AUTHENTIC CHILI RECIPE EVER.
Sometimes chili recipes can just be really good and really easy. And that’s this recipe.
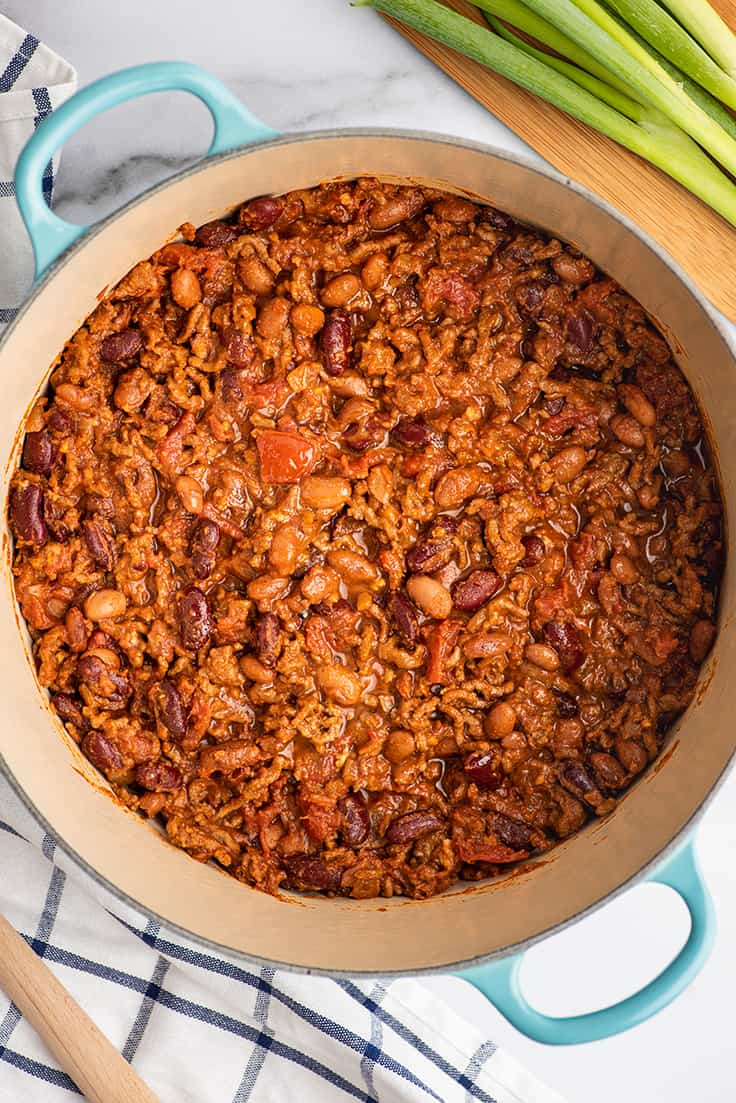

This chili is thick and beefy with tons of flavor and texture. It’s good enough to serve on its own with just a dollop of sour cream and a little cheese, but fast enough to make for topping burgers, hot dogs, or baked potatoes. It’s a handy (and delicious) little recipe that you’ll be glad to have in your arsenal.
Ingredient Notes
- Ground beef: I like to use 85% lean beef for chili, but use whatever you have on hand or is on sale. If using fattier beef and there is a ton of fat in your pot after browning the meat, you can drain it out or use a clean paper towel to absorb some of the grease.
- Tomato paste: Tomato paste helps add depth of flavor to the chili. This recipe won’t use a full can. Check out my post What to Do With Leftover Tomato Paste for storage tips and recipe ideas for the leftovers.
- Beans: This recipe calls for 2 15-ounce cans of beans. I like a mix of pinto and kidney beans, but use whatever beans you prefer. Be sure to drain and rinse all the starchy liquid from the beans before adding them to the chili.
- Beef broth: If you don’t have beef broth, go ahead and substitute chicken broth or water. It helps add a bit of flavor to the chili but is not essential.


How to Make Homemade Chili
- Prep all your ingredients before starting the chili. Open cans, drain beans, line up your spices, etc. Things move fast once you get going, and your cooking experience will be much more pleasant if everything is prepped and ready to go before starting.
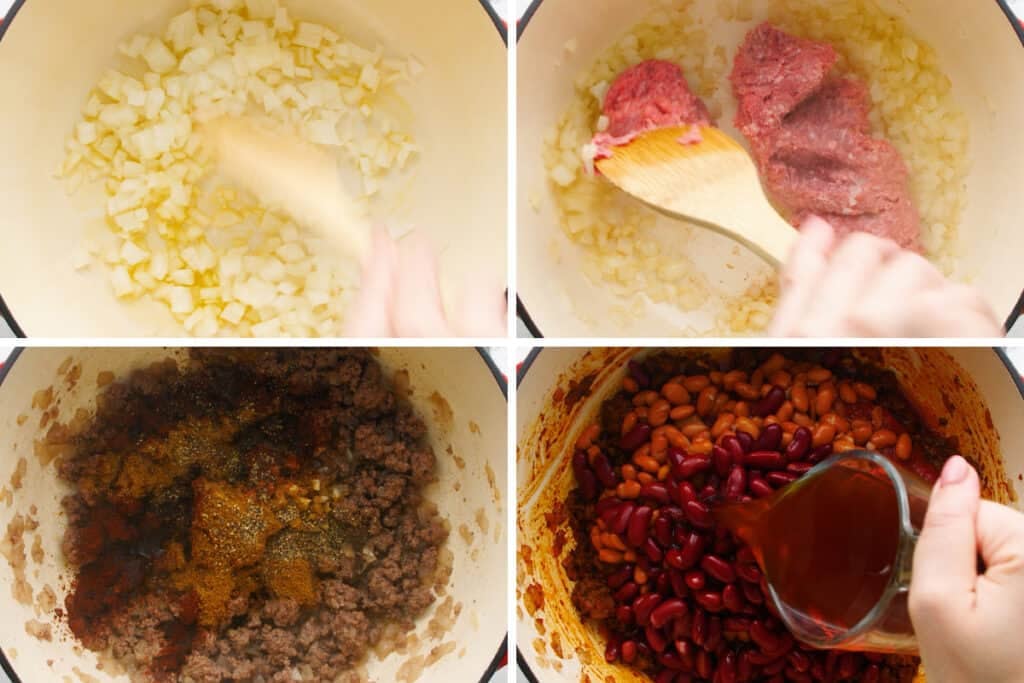

In a large pot, cook diced onion in olive oil until softened.
Add the ground beef and salt and brown the beef. If there is more than about a tablespoon of fat in your pot after browning the meat, you can drain the beef or use a paper towel to absorb some of the grease.
Add garlic, tomato paste, and spices and cook for 1 to 2 minutes to give the flavors a chance to bloom before adding the liquid ingredients.
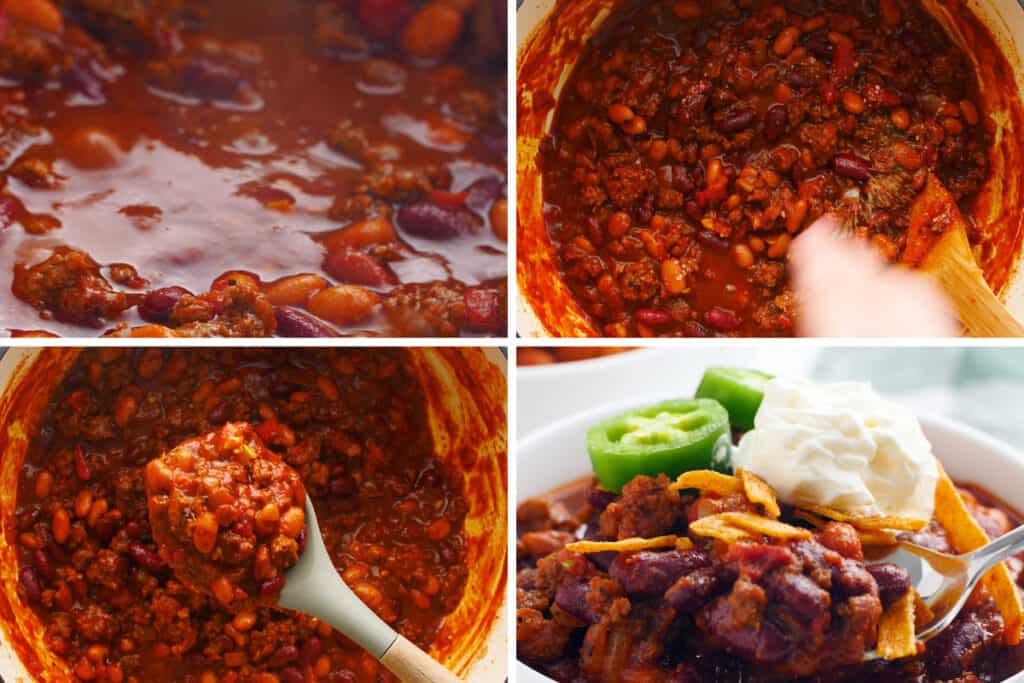

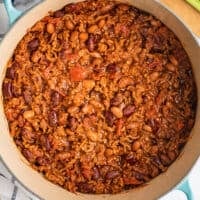
Stir in the remain ingredients and bring everything to a simmer. Simmer for 20 to 30 minutes, until the chili has thickened.
Add salt and pepper to taste, and enjoy!
Chili Variations
This chili is easily customizable. Try adding/swapping:
- Meat: You can replace the beef with the ground meat of your choice. Ground chicken and turkey are both excellent options for a lighter chili.
- Peppers/veggies: Like your chili with more veggies? Add chopped up peppers or veggies such as corn or zucchini to the ground beef just after browning, before adding the spices.
Topping Ideas
Chili gets even better when you add toppings. Some favorites are:
- Sour cream
- Cheese
- Chopped avocado
- Cilantro
- Fritos/tortilla chips
- Green onions/chives


Can I make this in advance?
Yes! Chili is one of those foods that gets better the longer it sits. Make it up to 2 days in advance and store covered in the refrigerator.
Can I freeze chili?
This chili freezes really well. Freeze flat in a freezer bag either all together or in individual servings. Store in the freezer for up to 2 months. Defrost in the refrigerator and reheat in the microwave or on the stove.

What to serve with chili?
Serve the chili on its own in a bowl with toppings or:
- Pile over hamburgers and make chili burgers
- Top hot dogs for chili dogs
- Serve over Fritos with cheese and make Frito boats
- Use it over baked potatoes or baked sweet potatoes for chili baked potatoes
For side dishes, serve simple roasted vegetables along with the chili, like roasted zucchini or asparagus . I also LOVE serving chili over roasted sweet potato chunks and stirring them into the chili.
More Easy Comfort Food Recipes
- Tri-tip
- Country-style Pork Ribs
- Barbacoa
- Slow-cooker Beef Ribs
- Hungarian Goulash
Ingredients
- ▢ 1 tablespoon olive oil
- ▢ 1 large yellow or white onion diced
- ▢ 1 pound ground beef
- ▢ 1 teaspoon salt
- ▢ ¼ cup ( 66g ) tomato paste
- ▢ 4 cloves garlic minced or pressed
- ▢ 2 tablespoons chili powder
- ▢ 2 teaspoons ground cumin
- ▢ ½ teaspoon black pepper
- ▢ 1 14-ounce can crushed or diced tomatoes
- ▢ 1 15-ounce can pinto beans drained and rinsed
- ▢ 1 15-ounce can kidney beans drained and rinsed
- ▢ 1 cup beef broth
Toppings
- ▢ Sour cream optional
- ▢ Shredded cheese optional
Instructions
- In a large pot, heat oil over medium heat. Once hot add onion and cook until onions just begin to turn translucent around the edges, about 5 minutes.
- Add ground beef and salt, and cook, stirring often, until beef is browned. If the beef released an excessive amount of fat (more than a tablespoon or two), you can drain the meat or use a paper towel to absorb some of the grease
- Stir in tomato paste, garlic, and spices, and cook for 1 to 2 minutes until aromatic.
- Stir in tomatoes (with their juices), beans, and broth. Bring to a simmer and simmer the chili uncovered, stirring occasionally, for 20 to 30 minutes, until the meat is cooked through and chili has thickened.
- Taste and add salt and pepper if necessary. Spoon into bowls, top with sour cream and cheese if desired, and enjoy!
Video
Notes
How to Cook Broccoli in the Oven: your complete guide to making the best, crispiest oven-roasted broccoli.
Hey, friends. I have another simple side dish tutorial for you today, how to cook broccoli in the oven.
And I am SO excited about this one because if this isn’t how you’ve been oven-roasting your broccoli, your life will from here on forever be changed for the better.
Because this broccoli is the best broccoli.
We’re talking crispy, crunchy, toasty, roasty broccoli tops and creamy, dreamy broccoli stems.
We’re talking literally 5 minutes of prep time and 15 minutes in the oven.
And we’re talking broccoli so good that if you’re not careful, you’ll eat half of it off the baking tray before it ever makes its way to a plate.

If you’ve read some of my earlier side dish tutorials like How to Steam Broccoli in the Microwave , How to Cut Butternut Squash , and How to Steam Cauliflower in the Microwave , you’ll know I usually keep these posts pretty short and sweet, but this one’s a bit longer because it’s full of tons of broccoli tips and tricks from how to prep broccoli in advance to how to get the crispiest roasted broccoli.
But if you’re in a hurry, feel free to scroll right past to the recipe. 😉
Okay, let’s talk all about roasting broccoli in the oven.
How to Prepare Broccoli for Roasting
Prepping broccoli for roasting is easy. You just need to start with clean, dry(-ish), broccoli florets cut into bite-size pieces.
Why start with dry broccoli? Because wet broccoli heads will steam rather than crisp up, so for the crispiest broccoli, get it as dry as possible before roasting.
To dry your broccoli, you can leave it to dry on a towel on the counter for an hour, use a salad spinner , or wrap it in a towel and shake off as much liquid as possible.
How large of florets to cut your broccoli for roasting is up to you. I do find that smaller florets end up crispier, so I usually cut mine into small bite-size pieces.
Packaged pre-washed and cut broccoli works perfectly well for oven-roasting, and while I don’t love the extra cost or packaging, sometimes the convenience can be a real lifesaver. If using pre-cut florets, don’t be afraid to cut them into smaller chunks.

How to Get the Crispiest Broccoli
Everyone knows crispy broccoli is the best. To get the crispiest broccoli with toasted, almost burnt edges, this is what you’re going to want to do:
- Start with dry broccoli (we already covered the why above).
- Don’t crowd the broccoli. There should be enough space to lay the broccoli out in a single layer so all the edges can get crispy.
- Smaller florets = crispier broccoli.
- Flip if you really want to. Flipping your broccoli half-way through will give you slightly crispier broccoli, but I hate doing it unless I’m roasting large chunks because it takes forever. I find smaller florets already get really crispy without this step. But if you’re roasting larger florets, give it a go or use a spatula to stir the broccoli halfway through.
Those are all the tips and tricks I have for you today. Ready to roast some broccoli?
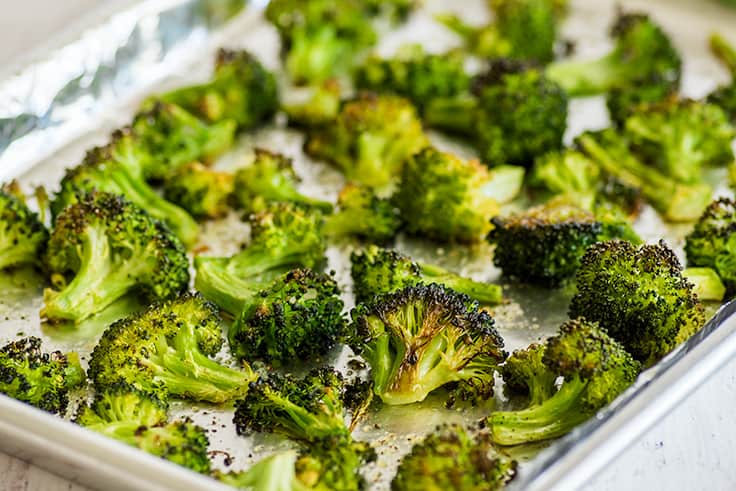
How to Cook Broccoli in the Oven
- Start with clean, dry broccoli cut into small florets.


- On the baking tray, combine broccoli and oil and use your hands to toss the broccoli so all sides are coated. For the crispiest broccoli, I recommend using the full 2 tablespoons, but if you are trying to cut back the amount of oil you cook with, you can get away with just 1 tablespoon. Arrange broccoli in a single layer.


- Sprinkle generously with salt, pepper, and garlic powder (and/or other preferred spices). Bake at 450° for 12 to 20 minutes, until stems are fork-tender.
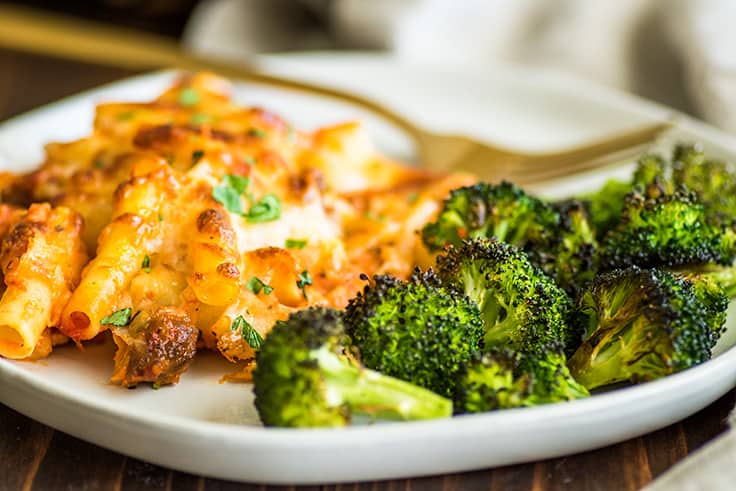
- And that’s it! Serve alongside something delicious (like Homemade Carnitas , Oven-roasted Tri-tip , Baked Ziti, or Salsa Chicken ) before your broccoli gets cold, and try not to hog all the crispiest bits. 😉
Can I prep broccoli in advance for roasting?
Absolutely. Prepping a big batch of broccoli in advance is a great way to make sure that you have an easy vegetable side available at all times. Wash and cut your broccoli and then dry completely.
Store broccoli in a loosely covered (not air-tight) container or half-closed bag with a folded dry paper towel to help absorb moisture. Properly prepped broccoli will keep for 3 to 4 days, up to a week if you’re lucky.
When you’re ready to serve the broccoli, all you have to do is transfer it to a baking sheet, toss with oil and seasoning, and bake.
Does roasted broccoli make good leftovers?
Yes and no. Roasted broccoli is best right out of the oven when it’s still hot and crispy. Once cooled and reheated, it still maintains all that delicious roasted broccoli flavor, but it becomes quite soft and no longer has all those little crispy bits. I’ll happily eat leftover reheated roasted broccoli, but I’d rather just prep a big batch of precut, prewashed broccoli at the beginning of the week and roast it fresh every meal.
Can I roast frozen broccoli?
Yes. I find that frozen broccoli doesn’t come out crispy the way fresh broccoli does, but it still roasts up beautiful and delicious. Follow the recipe as written when cooking frozen broccoli. No changes are needed.
How can I get really dark, almost burnt broccoli?
Okay, if you’re like me and prefer broccoli that’s basically been charred within an inch of its life, here’s a little extra tip for you.
After prepping your broccoli on the pan with olive oil and seasoning, give it a light spray all over with a cooking spray like PAM. The extra oil will really help everything crisp up extra well.
Bake for an additional 5 minutes or so over the recommended cooking time, until the florets are as charred as you want them, keeping a close eye on the broccoli in the last few minutes of cooking time.
More Easy Vegetable Sides
- Roasted Green Beans
- Roasted Zucchini
- Microwave Corn on the Cob
- Microwave Baked Potato
- Microwave Sweet Potato

Ingredients
- ▢ 1 pound of broccoli
- ▢ 1 to 2 tablespoons olive oil
- ▢ Salt
- ▢ Pepper
- ▢ Garlic powder
Instructions
- Preheat oven to 450°F.
- Start with clean, dry broccoli and cut it into small bite-size florets.
- On a baking sheet, combine broccoli and oil and use your hands to toss the broccoli so all sides are coated. Arrange broccoli in a single layer.
- Sprinkle generously with salt, pepper, and garlic powder (and/or other preferred spices). Bake for 12 to 20 minutes, until stems are fork-tender.
- Serve and enjoy immediately.

Chicken Parm Soup
Ingredients
- 1 tablespoon olive oil
- ½ large onion finely diced
- 3 cloves garlic minced or pressed
- ¼ teaspoon crushed red pepper flakes
- 2 tablespoons ( 33g ) tomato paste
- 4 cups ( 2 14.5-ounce cans) chicken broth
- 2 14-ounce cans crushed tomatoes *
- 4 ounces (about 1 ⅓ cup) penne or favorite pasta for soup
- ½ teaspoon dried basil
- ¼ heaping teaspoon dried oregano
- 2 cups cooked chicken diced or shredded, white or dark meat is fine*
- ½ cup ( 2oz ) shredded Parmesan
- 1 cup ( 4oz ) shredded mozzarella divided
- Salt and pepper to taste
Instructions
- In a large pot with a lid, heat oil over medium heat. Add onions and cook until they begin to soften and turn translucent around the edges, about 5 minutes.
- Add garlic and red pepper flakes and cook until garlic begins to turn golden and fragrant, about 1 minute. Stir in tomato paste and cook, watching closely, until the paste begins to stick and caramelize on the bottom of the pan, 1 to 2 minutes.
- Stir in chicken broth and crushed tomatoes, scraping the bottom of the pot as you go making sure to dislodge any cooked-on bits.
- Cover and bring to a simmer, adjusting heat as necessary. Simmer for 8 minutes. Add pasta, basil, and oregano, and cook, covered, until pasta is al dente, 10 to 12 minutes. Stir in cooked chicken and parmesan and heat until chicken is warmed through and parmesan is melted.
- Add salt and pepper to taste.
- Ladle into bowls and top each bowl with 1/4 cup of mozzarella cheese. Serve and enjoy!
