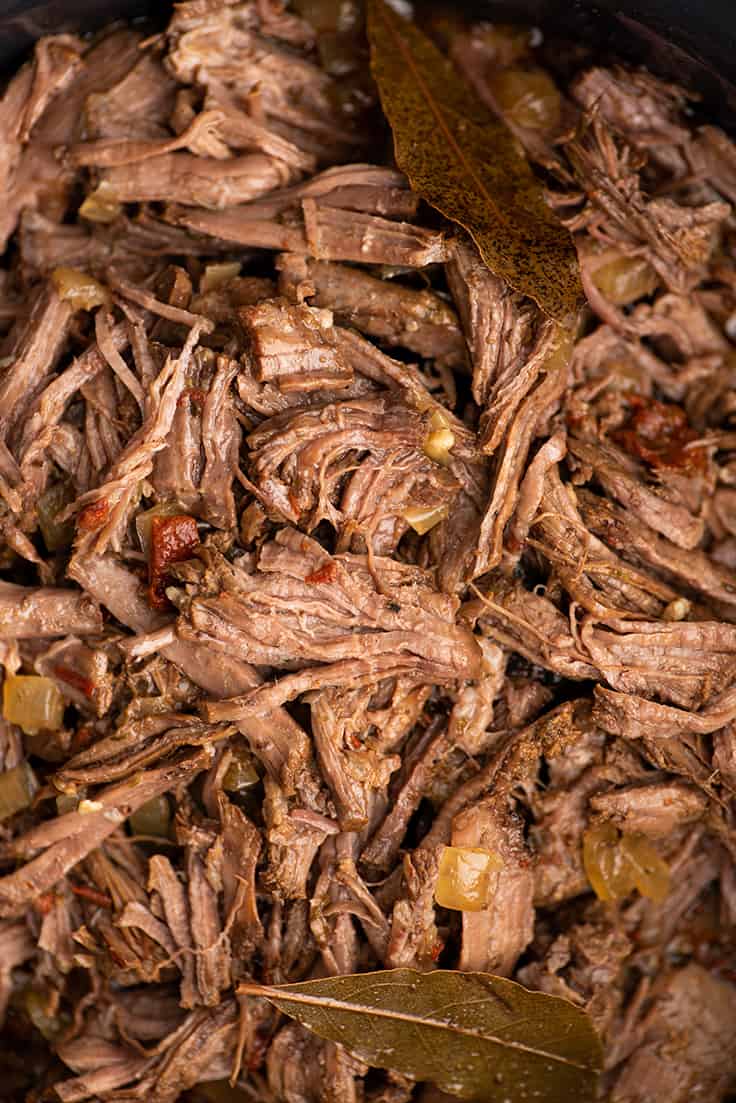
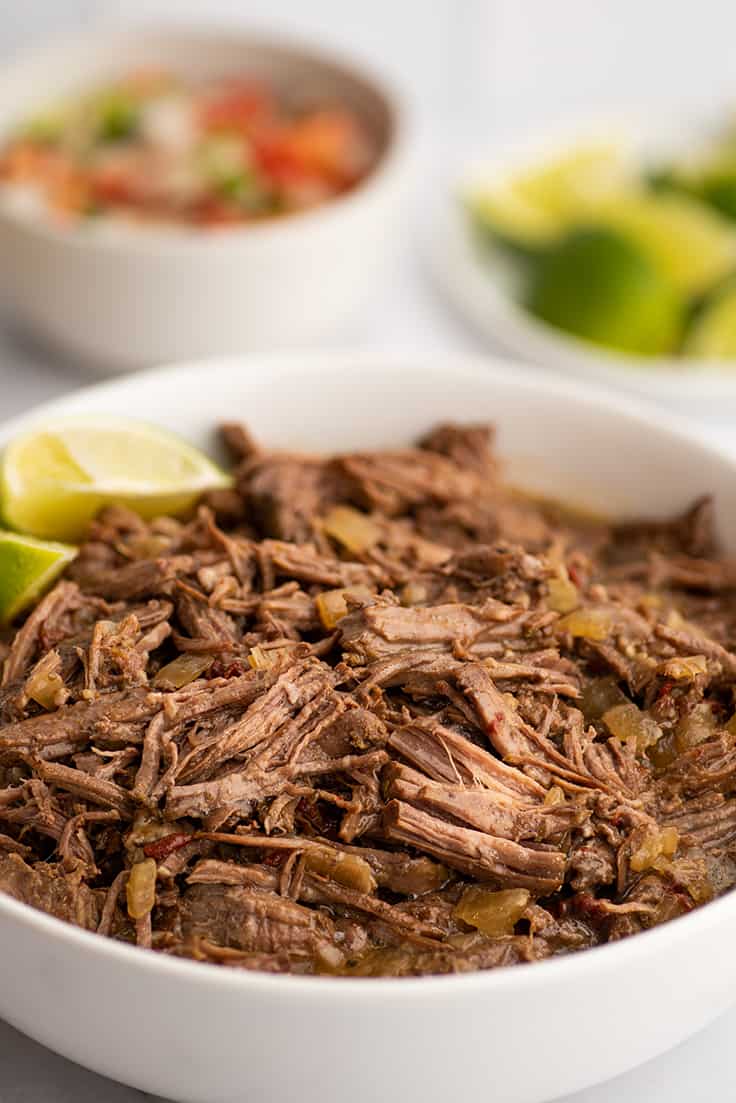
This easy homemade barbacoa recipe makes fall-apart tender beef that’s perfect for tacos, burritos, and sandwiches.
Today’s recipe is my favorite sort of recipe to share because like my carne asada and carnitas recipes, it’s endlessly useful. You make a big batch of barbacoa at the beginning of the week, and you can eat it a million delicious ways.
Its smokey, tangy flavor only gets better as it sits in your fridge, so it’s ideal for leftovers. And if you’re cooking for a smaller household, it freezes amazingly well. Stock your freezer and enjoy barbacoa for weeks to come.

What is barbacoa?
Barbacoa refers to the method of cooking meat low and slow. Traditionally this was done either over an open flame or fire pit. The method is believed to have originated in the Caribbean and then made its way to Mexico and much later, the Southwestern United States.
Ingredients
- Chuck roast: Chuck roast is a perfect cut of meat for homemade barbacoa because it’s easy to find and is well-marbled with fat, which means it cooks up meltingly tender after a long braise.
- Onion: You can use a white or yellow onion here.
- Beef or chicken broth: Using broth as our braising liquid adds an extra boost of flavor to the meat.
- Lime juice and apple cider vinegar: Lime juice and apple cider vinegar give the barbacoa a deliciously tangy flavor.
- Canned chipotle peppers: Chipotle peppers add a bit of heat and smokiness to the beef. You can omit the peppers or cut the amount in half if you’re worried about spiciness, but as-written, this dish is only slightly spicy.
- Fresh garlic, ground cumin, oregano, and bay leaves: Garlic and a handful of pantry-staple spices add a ton of additional flavor.
- Ground cloves: Cloves are a common ingredient in many barbacoa recipes. They have a pungent, slightly bitter flavor that some people love and others really don’t. Feel free to leave them out if you’re not a fan of cloves in savory recipes.
A Note on Chuck Roasts: Chuck is a pretty fatty cut of meat, so this recipe calls for it to be trimmed before cooking. When trimming the roast, cut away the large bits of fat and silver skin (the thin silvery membrane that sticks tightly to the meat), but don’t spend too much time worrying about any hard-to-trim pieces throughout the meat. You can just pick out any remaining fat while shredding the meat after braising.
How to Make Barbacoa on the Stove
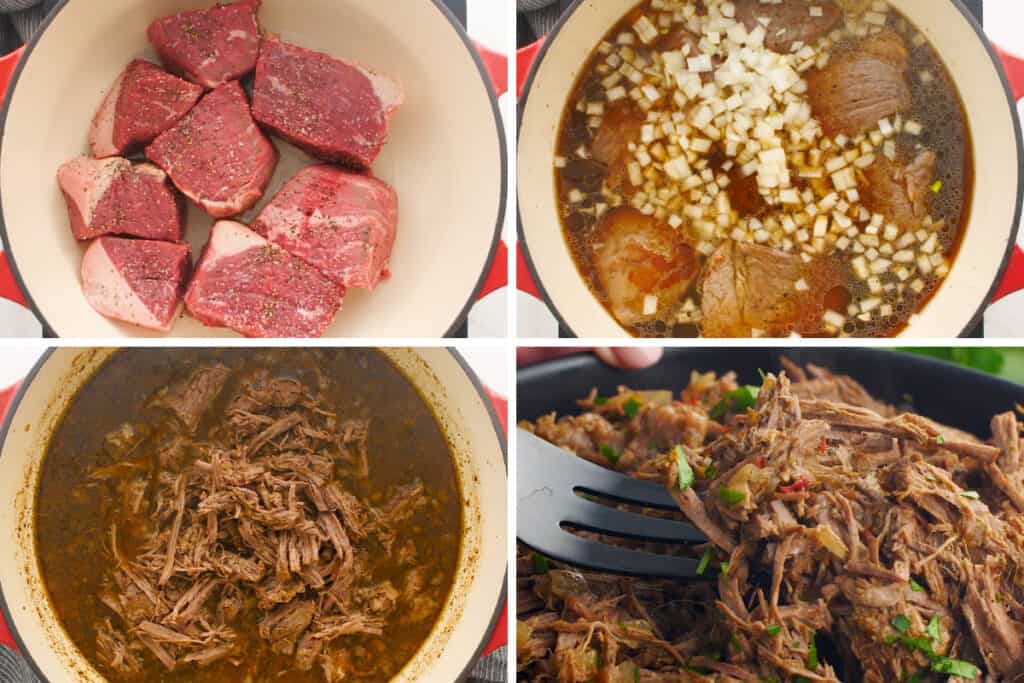

- Salt and pepper the meat and then brown it in a large pot. All those little brown bits in the pan from browning the meat are going to add a ton of flavor to the beef.
- Add remaining ingredients and just enough broth to mostly submerge the meat. Bring to a simmer.
- Simmer covered for 2 1/2 to 3 hours , stirring occasionally, until meat can be pulled apart with a fork.
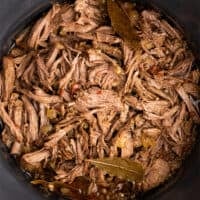
- Once the meat is cooked, use a slotted spoon to transfer the barbacoa to a cutting board and use two forks to shred it into pieces, discarding any remaining fat as you go. Return meat to juices.
How to Make Barbacoa in the Slow Cooker
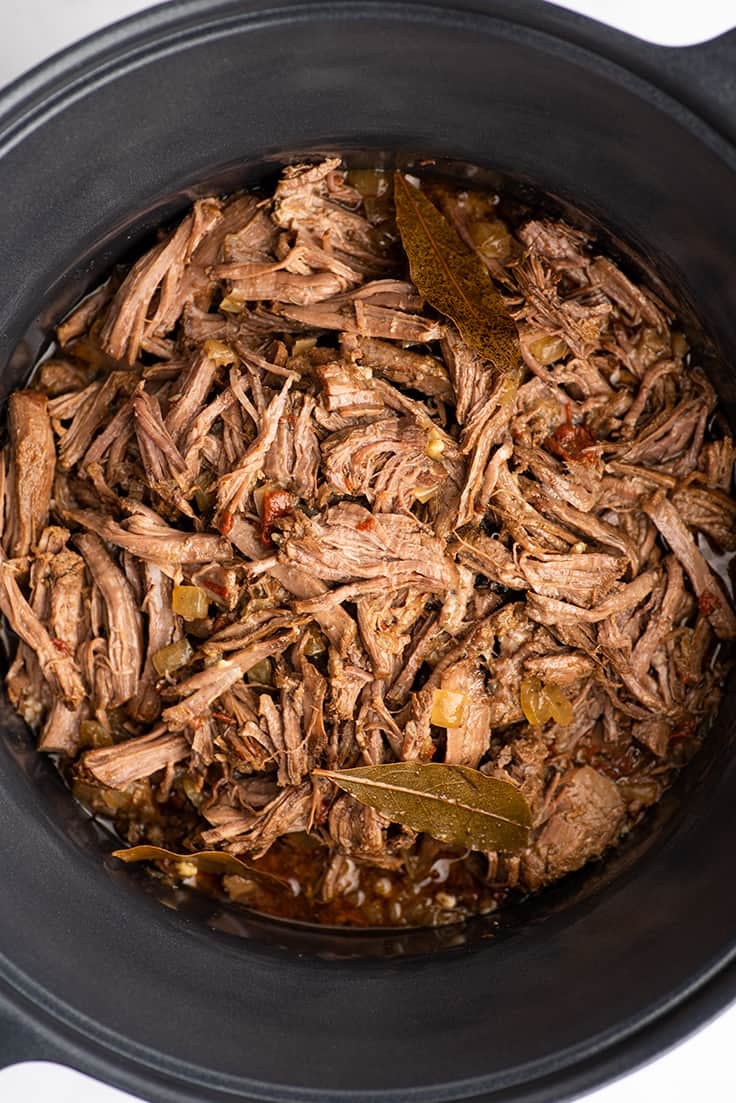

- Brown the meat in a large skillet and then transfer the meat and all pan juices to your slow cooker.
- Add the rest of the ingredients and cook for 3-4 hours on high, 7-8 hours on low.
- Shred meat and enjoy!
How to Use Barbacoa
Barbacoa can be used in so many different ways, but here are a few to get you started:
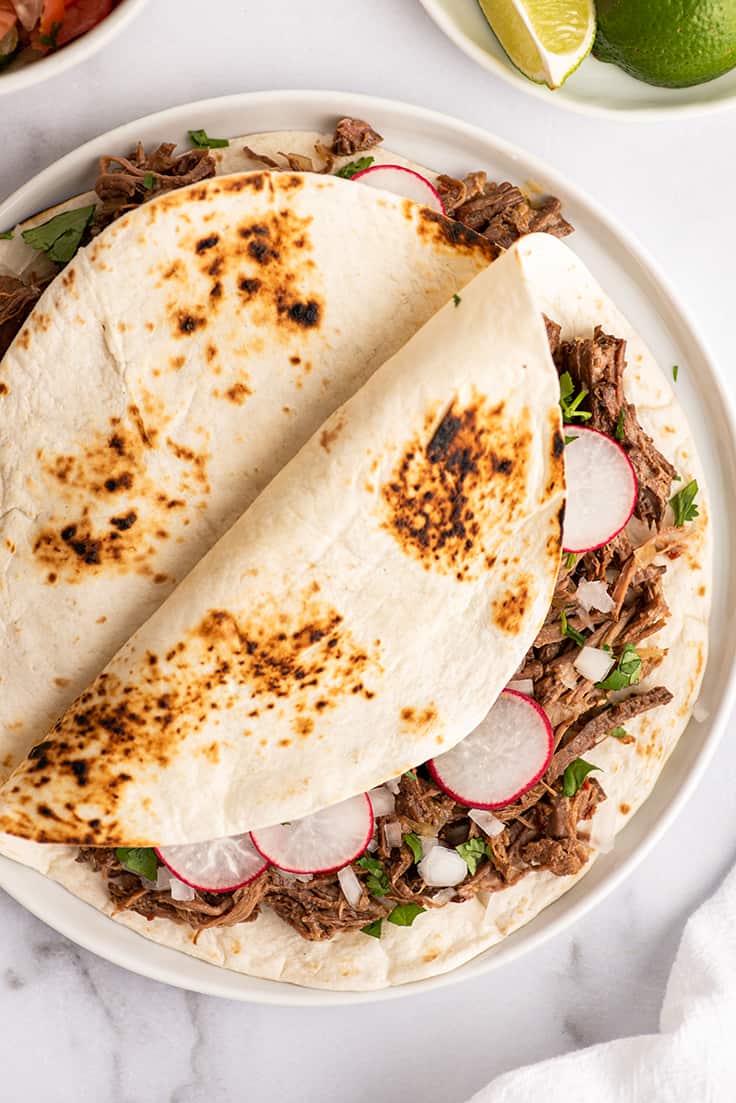
- Barbacoa Tacos – Pile meat over warm tortillas (corn or flour) and top with diced onion, cilantro, and sliced radishes.
- Burritos – Combine cilantro lime rice , beans, and your favorite burrito fillings and wrap it all up in a flour tortilla.
- Quesadillas – On the stove, layer cheese and barbacoa between two flour tortillas and cook in butter until cheese is melted and tortillas are golden and crispy.
- Burrito Bowls – Take all your favorite burrito ingredients and pop them in a bowl instead of a tortilla. Top with spoonfuls of sour cream and guacamole .
- Nachos – Layer tortilla chips ( or fries!! ) with barbacoa, beans, pico de gallo , and nacho cheese sauce .

Can you freeze barbacoa?
Yes! Barbacoa freezes extremely well.
- To freeze: Freeze barbacoa with some of its juices in a freezer bag, and it will keep in the freezer for up to 3 months.
- To reheat: Defrost meat in the refrigerator and reheat in the microwave.
How to store leftovers?
Store leftover meat in its juices in an airtight container in the refrigerator for two to three days.
What kind of meat is barbacoa?
Traditionally barbacoa was made with a variety of meats, including poultry, fish, beef, pork, and goat. In the US, you’ll typically find it made with cheaper cuts of beef (and sometimes pork) that do well with a long, slow cooking time. In the Southwestern United States, it’s often made with fatty beef cheeks or sometimes the meat from an entire head of the cow , which cooks down extremely rich and tender.
For today’s recipe, we’re using beef chuck roast, which comes from the shoulder of the cow. It’s easier to get a hold of in most of the US than beef cheeks but still has plenty of beautiful fat marbling that creates tender and delicious barbacoa.

What to serve with barbacoa beef?
Since barbacoa is so rich, it pairs well with simple vegetable sides. Try roasted zucchini or broccoli . For that restaurant experience, add a side of warm tortilla chips (spread them on a cookie sheet and bake them at 350°F for 5 minutes) topped with a squeeze of lime juice.
You Might Also Enjoy
- Chipotle Chicken Tacos
- Steak Fajitas
- Quick Chicken Fajitas
- Carne Asada Fries
- Freezer Burritos
Ingredients
- ▢ 1 boneless 3-4 pound chuck roast trimmed and cut into fist-size chunks
- ▢ Salt and pepper
- ▢ 3 tablespoons vegetable oil
- ▢ 1 medium white or yellow onion diced
- ▢ 1-6 cups beef or chicken broth
- ▢ 1/4 cup lime juice
- ▢ 1/4 cup apple cider vinegar
- ▢ 2 chipotle peppers in adobo sauce minced, optional
- ▢ 4 cloves garlic pressed or minced
- ▢ 1 tablespoon ground cumin
- ▢ 1 tablespoon dried oregano
- ▢ 1/4 teaspoon ground cloves optional
- ▢ 3/4 teaspoon salt
- ▢ 3 bay leaves
Instructions
Prepare the Meat
- Generously salt and pepper meat on all sides.
- In a large dutch oven with a lid (or skillet if you’ll be using a slow cooker), heat oil over medium-high heat. Brown meat on all sides, in batches if necessary. This may take up to 15 minutes.
On the Stovetop
- Add onion and just enough chicken or beef broth to mostly submerge the meat. Stir, scraping the bottom of the pan to remove any stuck-on bits. Stir in remaining ingredients and bring mixture to a low simmer. Cover and cook, stirring occasionally for 2 1/2 to 3 hours, until meat is very tender and can be pulled apart with a fork.
In the Slow Cooker
- Transfer meat and any drippings remaining in the pan to the slow cooker. Return the pan to medium-high heat and add a splash of chicken broth or water to deglaze the pan. Scrape off any cooked-on bits in the pan and then pour the liquid over the meat in the slow cooker.
- To the slow cooker, add onions, 1 cup of broth and remaining ingredients. Cook on high for 3 to 4 hours, low for 7 to 8 hours, until the beef is tender and can be easily shredded with a fork.
Shred
- Once meat is done, use a slotted spoon to transfer the pieces to a cutting board. Use two forks to shred the meat, discarding any large pieces of fat as you go.
- Return shredded meat to the cooking liquid. Add more salt and pepper to taste, serve and enjoy.
Notes
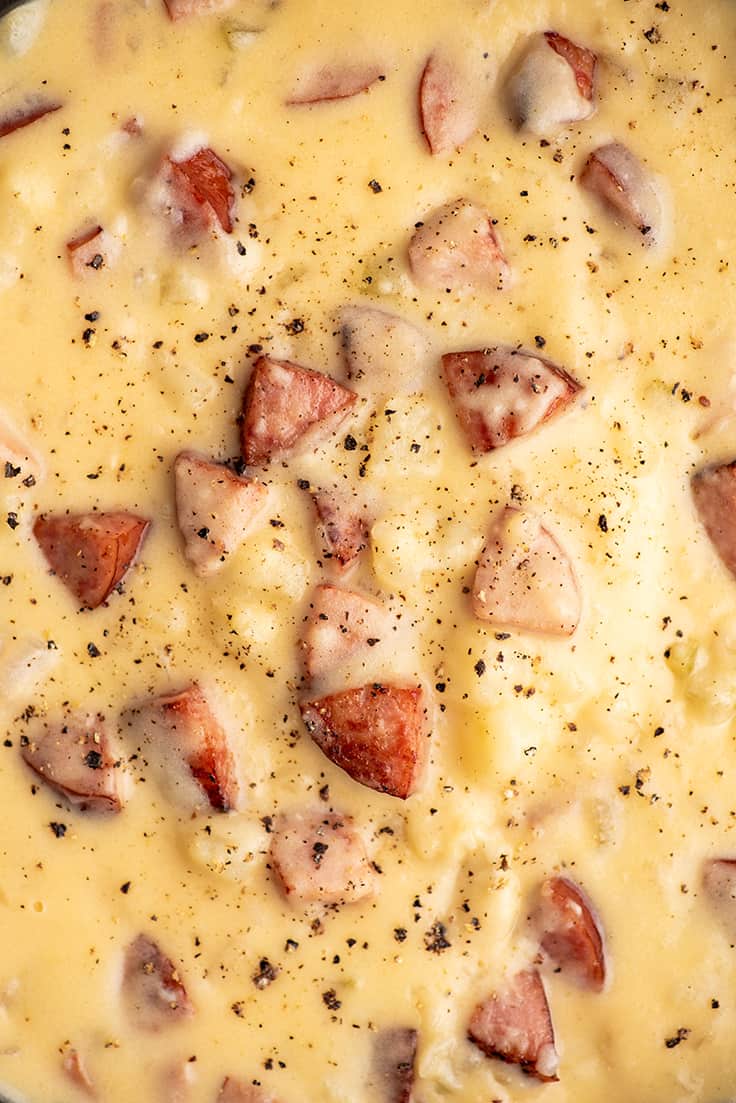
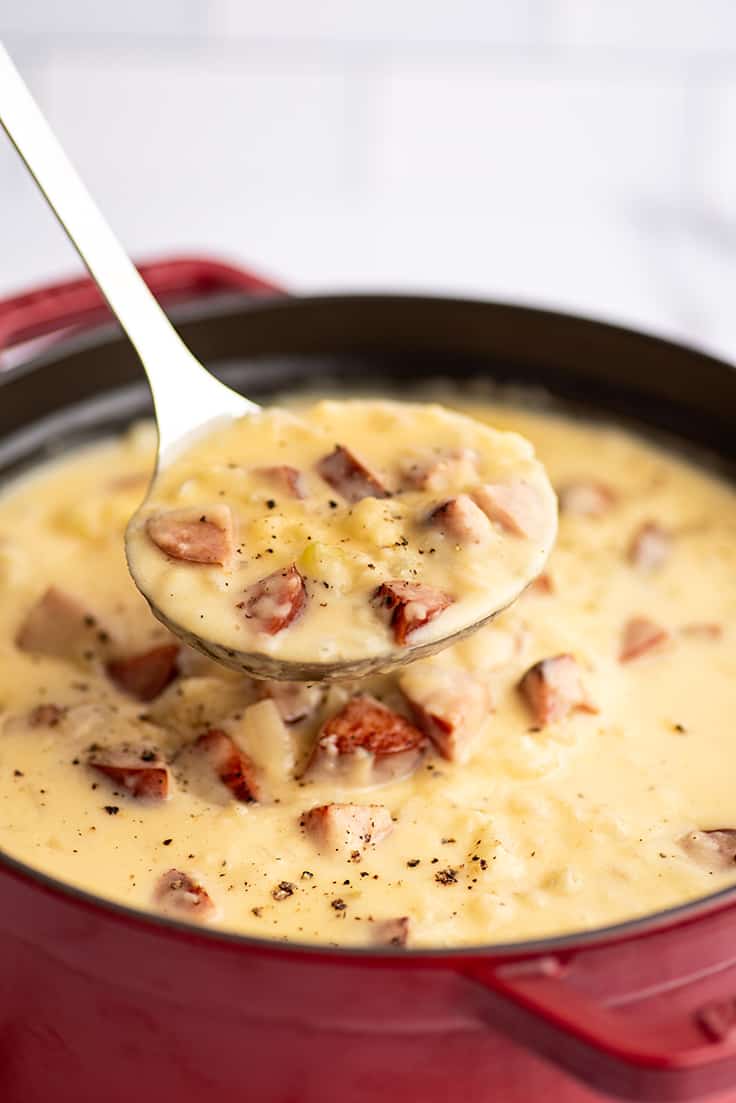
This incredibly good sausage potato soup is thick, cheesy, and decadent but so, so easy to make.
My ham and potato soup is one of Baking Mischief’s OG reader favorite recipes. You all are constantly sending me nice messages about that recipe, and it’s been pinned more than 180k times on Pinterest. So today, in the hopes of giving you another soup you might love, I present, cheesy sausage potato soup.
This is a spinoff version of that original fav made with smoked sausage and cheese, so it’s extra rich and creamy and stick-to-your-bones filling.
If you’re craving something warming and decadent tonight, I highly recommend that you give this soup a try.

Ingredient Notes
- About 2 russet potatoes: The recipe calls for 3½ cups of potatoes. This is about 2 medium-to-large russet potatoes. If you end up with a bit more than the 3½ cups called for, feel free to use them. Your soup will just be extra thick.
- Smoked sausage: You can usually find smoked sausage in the deli meat and cheese aisle near the hot dogs. Any type of smoked sausage or kielbasa should work, including chicken/turkey smoked sausage, but I prefer a beef/pork blend. Rather than slicing the sausage into rounds, for this recipe, we’ll dice it into small chunks so you get sausage in every bite of the soup.
- Chicken broth: You can use homemade chicken stock if you have it, but this soup is just as fantastic with the canned stuff.
- Butter and all-purpose flour: This soup is thickened with a roux made of butter and flour.
- Milk and cheddar cheese: Adding milk and cheese to the roux creates a thick and glorious cheese sauce that gets stirred into the soup. Use whatever percentage milk you have on hand. The higher fat, the richer the soup will be. I also recommend grating your own cheese rather than using pre-shredded bagged cheese because the anti-clumping additives added to bagged cheese can prevent it from melting completely smooth.
(Scroll to the recipe card for complete instructions and printable recipe.)

How to Make Sausage Potato Soup
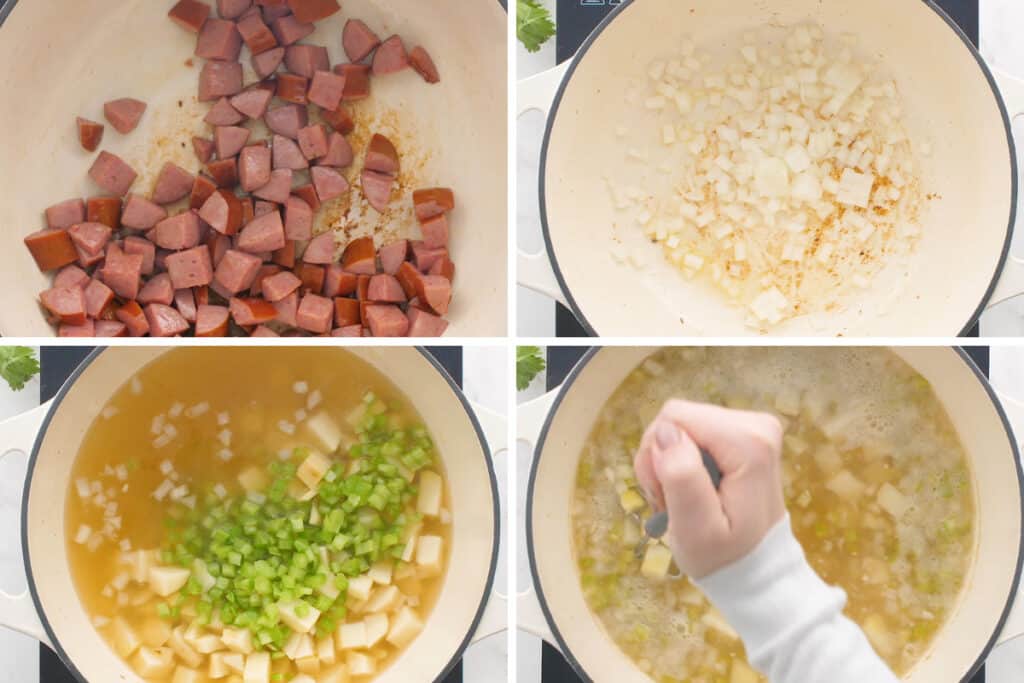

In a large Dutch oven or pot, lightly brown the diced sausage in olive oil. As tempting as it is to sear them really dark, don’t go overboard. You want the sausage somewhat tender, not crispy in the soup, and if the fond (the little cooked-on bits in the pot) turn too dark, it can add a burnt flavor and color to your soup. Once browned, use a slotted spoon to transfer the pieces to a bowl and set aside.
Add onions to the pan and cook until they just begin to turn translucent around the edges, and then add the garlic and cook until it’s golden and smells amazing.
Add the potatoes, celery, and chicken broth , and bring to a simmer. Cook for 10 to 15 minutes, until potatoes can be easily smashed against the side of the pot with a fork.
Using a potato masher or spatula, roughly smash about half of the potatoes in the pot. This will make a thicker, creamier soup while still leaving some pieces of potato for texture.
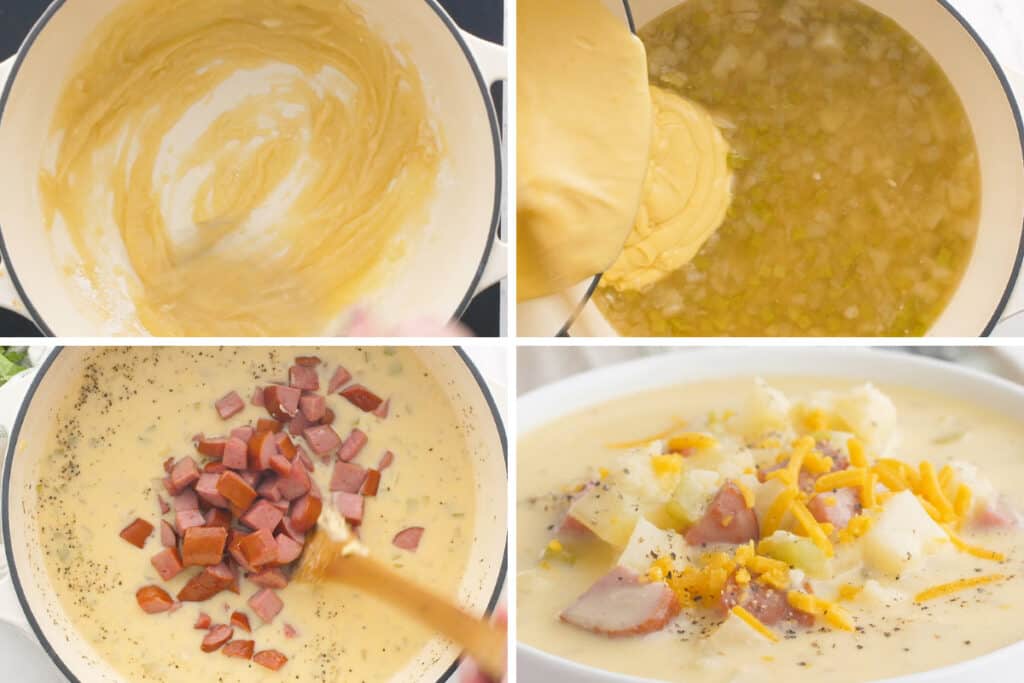

In a medium pot, melt butter and add flour. Cook until flour begins to turn lightly golden—this will cook the raw flour taste out of the roux.
Slowly drizzle in milk, whisking constantly as you go to whisk out any lumps. Cook, whisking continuously, until mixture is thickened and bubbly around the edges. Turn heat off, and slowly whisk in cheese, a handful at a time. Whisking the cheese in slowly, off the heat, will produce the smoothest sauce possible.
Once all your cheese is melted, stir the cheese sauce into the soup, add pepper and salt to taste (don’t skip this step!), and add the sausage back to the pot. Stir everything together, serve, and enjoy!

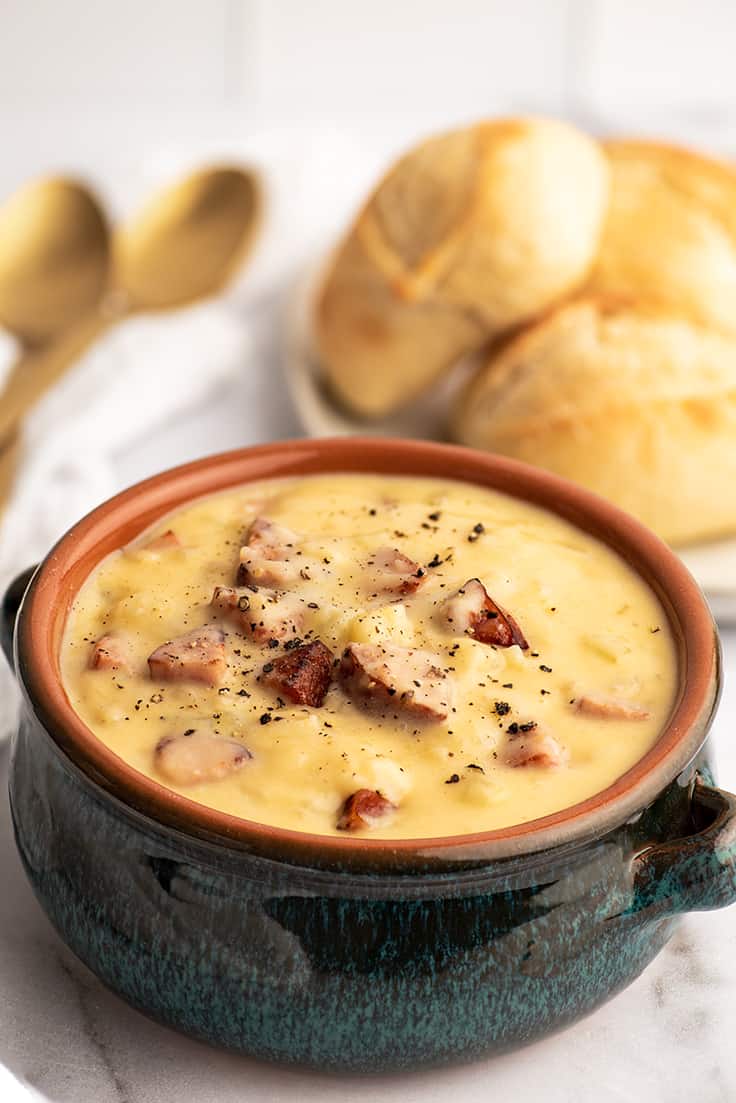
What to serve with sausage potato soup?
With a decadent soup like this, I like something light and simple on the side. Go with steamed or roasted vegetables like roasted broccoli or green beans and crusty bread for scooping the last bit of soup out of your bowl.
Can I freeze potato soup?
I don’t recommend freezing potato soup or any soup with potatoes in it, as potatoes don’t maintain their texture well when frozen and reheated. That being said, you can freeze this soup if you really want to. It’s not going to hurt anything, and some people really don’t mind the texture change.
Can I prepare this soup in advance?
Yes! You can make this soup from start to finish up to 2 days in advance. It will be quite thick after refrigeration but rewarm gently on the stove and it will be creamy and beautiful again in no time.

How can I make this soup healthier?
If you want to cut some calories, use chicken or turkey sausage instead of beef/pork, leave out the cheese, and use skim milk rather than whole. This will reduce the calories significantly. If you still want that cheesy flavor, you can sprinkle a little cheese over the top of each bowl when serving.
Can I use Italian sausage in this soup?
You can. If you’d like to use Italian sausage rather than smoked, cook the sausage all the way through at the beginning of the recipe and transfer it to a bowl. If the sausage has released a ton of grease, pour off (or use a paper towel) to absorb all but about a tablespoon of it, and then make the rest of the recipe as written.
More Decadent Dinners
- Easy Short Ribs
- The Best Stroganoff Recipe
- Baked Ziti
- Bacon and Feta Chicken
- Hungarian Goulash
- Bacon Potato Soup

Ingredients
- ▢ 1 tablespoon olive oil
- ▢ 1 14-ounce smoked sausage chopped into ½-inch pieces
- ▢ ½ cup finely diced onion
- ▢ 3 garlic cloves minced or pressed
- ▢ 4 cups ( 2 15oz cans) chicken broth
- ▢ 3½ cups (about 2 large) russet potatoes peeled and diced medium
- ▢ 2 celery ribs diced small
- ▢ 5 tablespoons ( 71g ) butter salted or unsalted is fine
- ▢ ¼ cup and 1 tablespoon ( 44g ) all-purpose flour
- ▢ 2 cups milk any percentage
- ▢ 6 ounces ( about 1½ cups ) shredded cheddar cheese plus more as desired for topping
- ▢ ¼ teaspoon black pepper
- ▢ Salt
- ▢ Sour cream optional for topping
Instructions
- In a large pot, heat olive oil over medium heat. Add diced sausage, and cook until lightly browned. Use a slotted spoon to transfer the sausage to a bowl and set aside.
- Add onions to the pot and cook over medium heat, stirring often for about 5 minutes, until the onions have just begun to turn translucent around the edges.
- Add garlic and cook until lightly golden, about 1 minute.
- Add chicken broth, potatoes, and celery to the pot. Bring to a simmer and then cook for 10 to 15 minutes, until potatoes can be easily smashed against the side of the pot with a fork.
- Use a potato masher or spatula to roughly smash about half of the potatoes in the pot.
- In a medium pot, over medium heat, melt butter and then add flour. Cook, whisking continuously, until flour begins to turn lightly golden, about 1 minute.
- Slowly drizzle in milk, whisking constantly as you go to whisk out any lumps. Cook, whisking continuously, until mixture is thickened and bubbly around the edges, about 5 minutes.
- Remove pot from heat and slowly whisk in cheese, a handful at a time. Once all your cheese is melted, stir the cheese sauce into the soup. Add pepper. Taste the soup and add salt if needed.
- Add the sausage back to the pot and stir everything together.
- Serve, top with sour cream and more cheese if desired, and enjoy!
Video
Notes
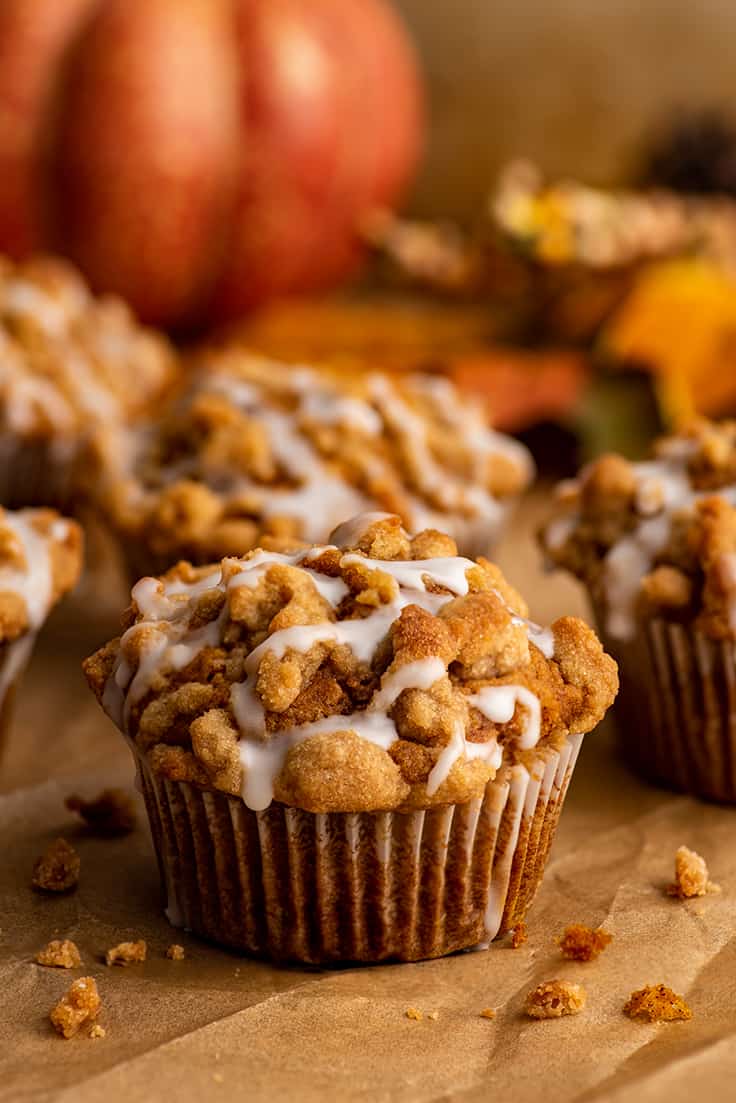
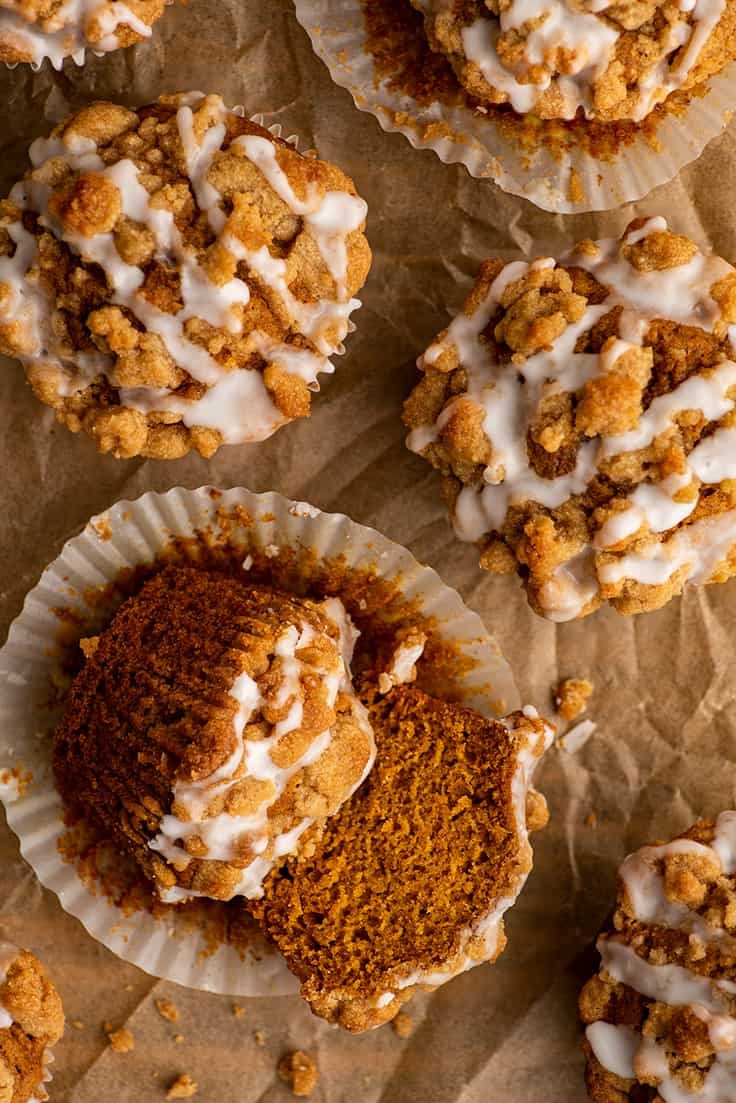
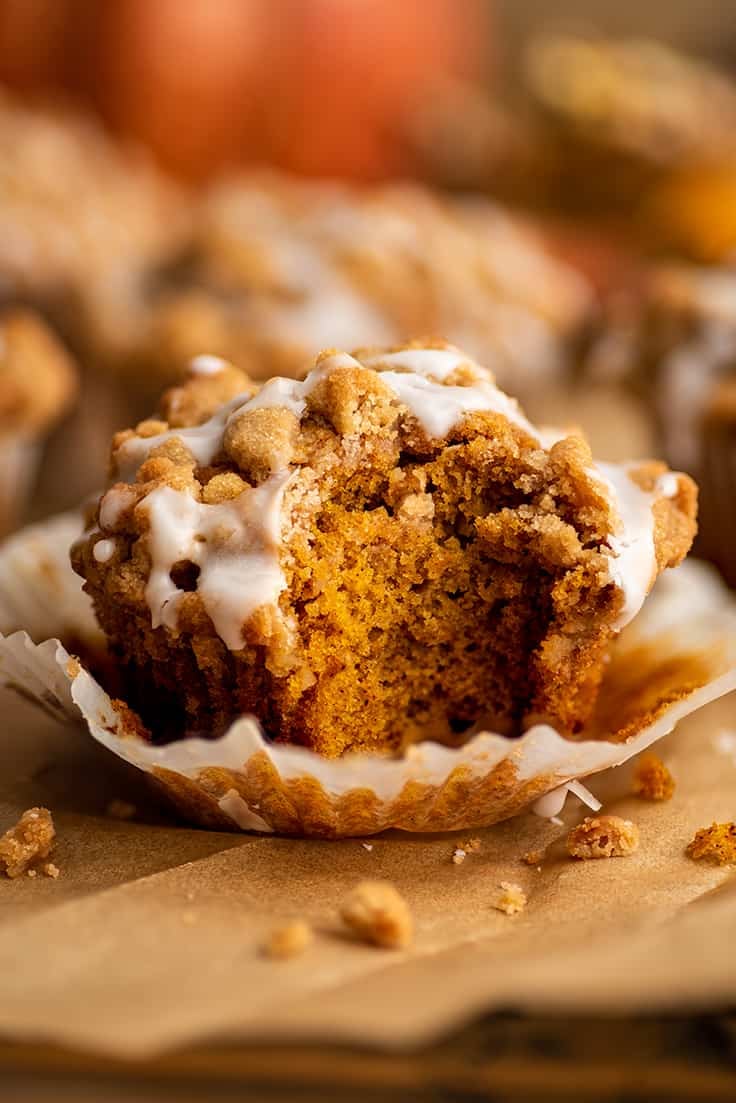
These perfectly soft and moist pumpkin streusel muffins are topped with crumbly, crunchy brown sugar streusel and a quick two-ingredient glaze.
Friend, if you’re a fan of muffins, pumpkin, streusel, or all of the above, please make these muffins right now. You’re going to love them so much.
They’re so easy to toss together and bake up with the most beautiful streusel-covered tops. They make your kitchen smell amazing and you’ll feel like a total baking genius when you take your first bite.
This recipe will make eight muffins so there are just enough to share if you really want to or keep them all for yourself if you don’t. 😉

Ingredients
- Baking staples: The bulk of the ingredients for these muffins is baking staples you probably already have in your cupboard: flour, brown and granulated sugars, butter, baking soda, salt, and an egg.
- Pumpkin pie spice: For convenience sake, this recipe calls for pumpkin pie spice , but if you don’t have any, not a problem. Substitute 1/2 teaspoon cinnamon, 1/8 teaspoon ground nutmeg, 1/8 teaspoon ground ginger, and a generous pinch of ground cloves or allspice
- Vegetable oil: Using vegetable oil in the muffins (along with the pumpkin puree) helps give these muffins their moist and dreamy texture.
- Pumpkin puree: Pumpkin puree is pure pureed pumpkin. You can typically find it in the baking aisle near the premade pie crusts and pie filling. Double check the can to make sure you’re getting pumpkin puree and NOT pumpkin pie filling! The recipe won’t use up an entire can of pumpkin puree, so see my post What to Do With Leftover Pumpkin Puree for storage tips and recipe ideas for the leftovers.

How to Make Pumpkin Streusel Muffins
- Make the streusel by combining cool room temperature butter, flour, and brown sugar in a bowl. The butter should be soft enough to smoosh with a little force but not at all melty or greasy (too melty and it will be difficult to work with). Use your fingers (or a fork) to mix the ingredients until they clump and there is no dry flour or sugar at the bottom of the bowl. Put the streusel in the freezer while you finish the rest of your muffins.
- In a medium bowl, mix the dry ingredients. And in a large bowl mix the wet ingredients. Stir the dry ingredients into the wet using a wooden spoon until just combined. Do not over mix or your muffins can come out tough!
- Spoon the batter into lined muffin tin cups and drop streusel over the top. If the streusel crumbles are too large, gently break them up. If they’re too small, squeeze them together so they form larger pieces.
- To give the muffins nice high muffin tops, they start baking at 425°F and then drop down to 350°F about halfway through baking. They’re done when a toothpick inserted into the center of the muffins comes out clean or with just a few dry crumbs.
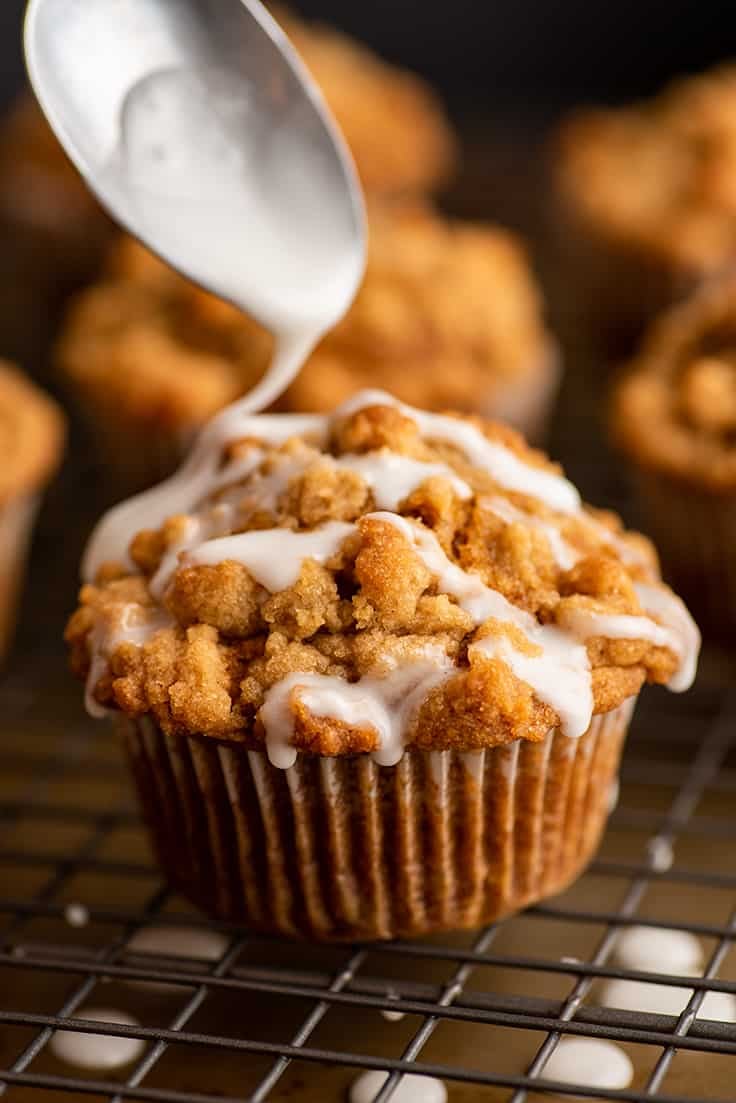
- To make the glaze, mix powdered sugar and milk together until you get a glaze that is just pourable. Don’t add too much milk or your glaze won’t set. You can glaze the muffins while warm if you’d like, but if you want really defined perfect lines of glaze, wait until they’re mostly cooled and keep your glaze on the thicker side.
- Glaze the muffins, allow them about 15 minutes for the glaze to set, and enjoy!

Small-batch Pumpkin Muffin Variations
Not feeling streusel today? Skip it and try…
- No topping: These muffins are completely delicious plain or topped with a spread of butter.
- Cinnamon sugar: For cinnamon sugar topped muffins, generously brush the tops with melted butter and then dip in cinnamon sugar (use 1/4 teaspoon of cinnamon to 1/4 cup of sugar).
- Glazed: Double the glaze called for in the recipe and dip the muffin tops in the glaze. Be sure to give them time for the glaze to set.
How to store pumpkin muffins?
Store muffins at room temperature in an airtight container for up to 3 days. The glaze can become slightly sticky after storing, so if making muffins in advance for company, it’s best to glaze them the day you plan on serving them.
Can I freeze pumpkin streusel muffins?
Yes! These muffins freeze quite well, streusel, glaze, and all. Once the glaze is set, wrap muffins individually in plastic wrap and store them in an airtight container or freezer bag in the freezer for up to 2 months.
To defrost, unwrap the muffin from the plastic wrap (the paper liner can stay on) and set it on the counter for 15 minutes to half an hour.
Can I double or triple this recipe?
Yes. This recipe doubles or triples with no changes needed.
More Small-batch Muffin Recipes
- Small-batch Banana Muffins
- Small-batch Chocolate Banana Muffins
- Small-batch Chocolate Chocolate Chip Muffins
- Small-batch Blueberry Muffins
- Small-batch Apple Crumb Muffins

More Fall Recipes
- Dutch Apple Pie
- Pumpkin Snickerdoodles (Small-batch)
- Pumpkin Cupcakes (Small-batch)
- Cinnamon Sugar Pumpkin Donuts
- Pumpkin Pancakes
- Small No-bake Marshmallow Pumpkin Cheesecake

Ingredients
Streusel
- ▢ 1/4 cup + 2 tablespoons ( 45g ) all-purpose flour
- ▢ 1/4 cup + 1 tablespoon ( 63g ) brown sugar
- ▢ 3 tablespoons ( 42g ) salted butter softened to cool room temperature*
Muffins
- ▢ 1 cup ( 120g ) all-purpose flour measured by weight or using the spoon and sweep method*
- ▢ 1/2 teaspoon baking soda
- ▢ 1 teaspoon pumpkin pie spice or 1/2 teaspoon ground cinnamon, 1/8 teaspoon ground nutmeg, 1/8 teaspoon ground ginger, and a generous pinch of ground cloves or allspice
- ▢ 1/4 teaspoon salt
- ▢ 1/2 cup ( 100g ) granulated sugar
- ▢ 1/4 cup ( 50g ) brown sugar
- ▢ 1 large egg
- ▢ 1/4 cup vegetable oil
- ▢ 3/4 cup ( 183g ) pumpkin puree
Glaze
- ▢ 1/2 cup ( 60g ) powdered sugar
- ▢ 1 1/2 teaspoons milk any percentage, plus more as needed
Instructions
Streusel
- Preheat your oven to 425°F and line a muffin pan with 8 liners.
- In a medium bowl, combine flour, brown sugar, and cool room temperature butter.
- Use a fork or your fingers to mix the ingredients until they clump and no dry flour or sugar is left at the bottom of the bowl.
- Place the streusel in the freezer while you make the rest of your muffins.
Muffins
- In a small bowl, whisk together flour, baking soda, pumpkin pie spice, and salt. Set aside.
- In a large bowl, combine granulated and brown sugars, egg, vegetable oil, and pumpkin puree. Whisk until smooth.
- Switch to a wooden spoon, and add the flour mixture to the wet ingredients. Stir until just combined.
- Divide the batter between the prepared cupcake cups, filling about 3/4 of the way full.
- Drop streusel over the batter, dividing it equally between the muffins. If the streusel pieces are too large, gently break them up. If they’re too small, smash them together to form larger crumbs.
- Bake muffins in the center of the oven for 8 minutes before dropping the temperature to 350°F. Bake for an additional 8 to 12 minutes, until a toothpick inserted into the center of the muffins comes out clean or with just a few crumbs.
- Cool muffins in the tin for 10 minutes and then transfer to a cooling rack.
Glaze
- Muffins can be glazed warm, but for thick, defined lines of icing, wait until they are almost completely cooled. In a small bowl, stir together powdered sugar and milk. If needed, add milk by the 1/4 teaspoon, adding just enough to get a drizzling consistency.
- Drizzle glaze over muffins (you may have some leftover), and allow 15 minutes for the icing to set.
- Serve and enjoy!
Notes

Easy Barbacoa
Ingredients
- 1 boneless 3-4 pound chuck roast trimmed and cut into fist-size chunks
- Salt and pepper
- 3 tablespoons vegetable oil
- 1 medium white or yellow onion diced
- 1-6 cups beef or chicken broth
- 1/4 cup lime juice
- 1/4 cup apple cider vinegar
- 2 chipotle peppers in adobo sauce minced, optional
- 4 cloves garlic pressed or minced
- 1 tablespoon ground cumin
- 1 tablespoon dried oregano
- 1/4 teaspoon ground cloves optional
- 3/4 teaspoon salt
- 3 bay leaves
Instructions
Prepare the Meat
- Generously salt and pepper meat on all sides.
- In a large dutch oven with a lid (or skillet if you’ll be using a slow cooker), heat oil over medium-high heat. Brown meat on all sides, in batches if necessary. This may take up to 15 minutes.
On the Stovetop
- Add onion and just enough chicken or beef broth to mostly submerge the meat. Stir, scraping the bottom of the pan to remove any stuck-on bits. Stir in remaining ingredients and bring mixture to a low simmer. Cover and cook, stirring occasionally for 2 1/2 to 3 hours, until meat is very tender and can be pulled apart with a fork.
In the Slow Cooker
- Transfer meat and any drippings remaining in the pan to the slow cooker. Return the pan to medium-high heat and add a splash of chicken broth or water to deglaze the pan. Scrape off any cooked-on bits in the pan and then pour the liquid over the meat in the slow cooker.
- To the slow cooker, add onions, 1 cup of broth and remaining ingredients. Cook on high for 3 to 4 hours, low for 7 to 8 hours, until the beef is tender and can be easily shredded with a fork.
Shred
- Once meat is done, use a slotted spoon to transfer the pieces to a cutting board. Use two forks to shred the meat, discarding any large pieces of fat as you go.
- Return shredded meat to the cooking liquid. Add more salt and pepper to taste, serve and enjoy.
