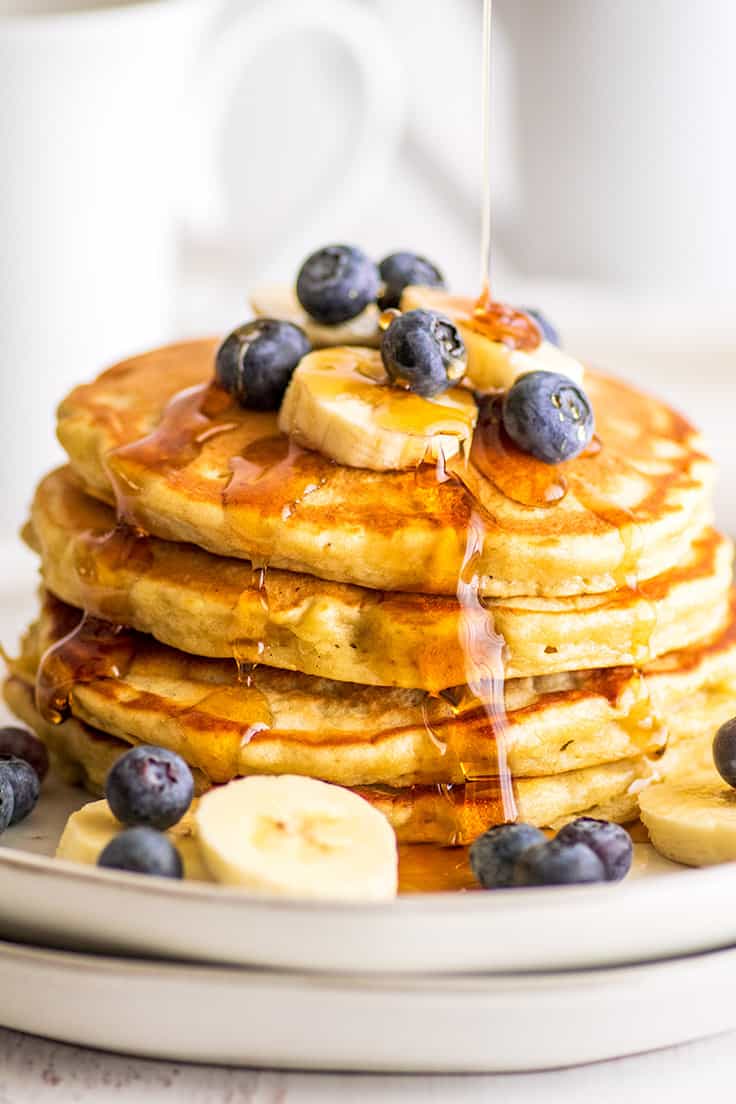
These easy banana pancakes for two are made with just one overripe banana and a handful of pantry staples. They’re quick to make, fluffy, and packed full of banana flavor.
Say hello to your new favorite small-batch pancake recipe, friend. These pancakes are perfectly fluffy, incredibly good, and designed to serve two.
Like my buttermilk pancakes for two , this banana pancake recipe will make exactly four good-sized pancakes, so you can enjoy them with someone else or make them solo and freeze the extra two for next weekend (always an excellent option).

Ingredients of Note
- One overripe banana: This recipe is perfect for using up that single sad banana sitting on your counter, but if you’re craving banana pancakes and don’t have any brown bananas, check out my post on how to quickly ripen bananas .
- Vegetable oil: A little vegetable oil in the batter helps these pancakes cook up moist and perfect. I prefer to use oil in pancakes, but if you don’t have any, the same amount of melted butter can be substituted.
How to Make the Best Banana Pancakes
- Whisk together the dry ingredients: flour, a little sugar, baking powder, and salt. Then in a separate bowl, mash your banana and add an egg, some milk, oil, and vanilla.
- Finally, mix everything together until just combined, and your batter is ready to go.
- When it comes to cooking, the key to getting a nice fluffy banana pancake that isn’t soggy in the center is to start with a preheated pan/griddle and keep the temperature just at medium. Any higher, and your pancakes are going to burn before they are cooked through, and no one wants burnt and/or undercooked pancakes.
- Once completely cooked, plate those babies up and it’s time to add toppings.

Topping Ideas
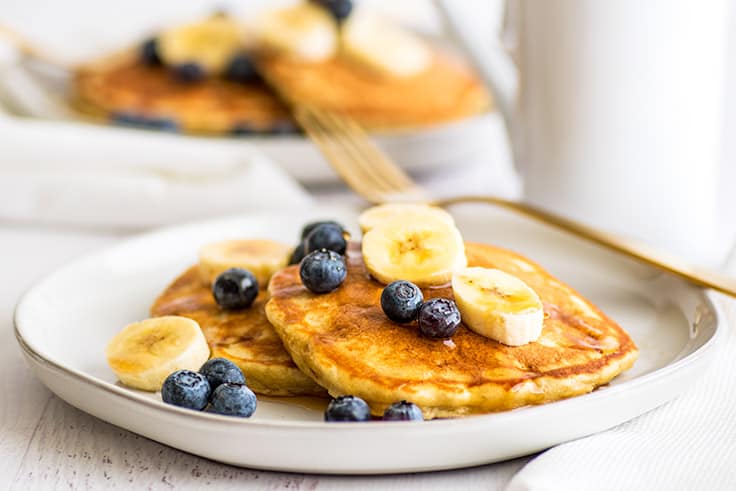
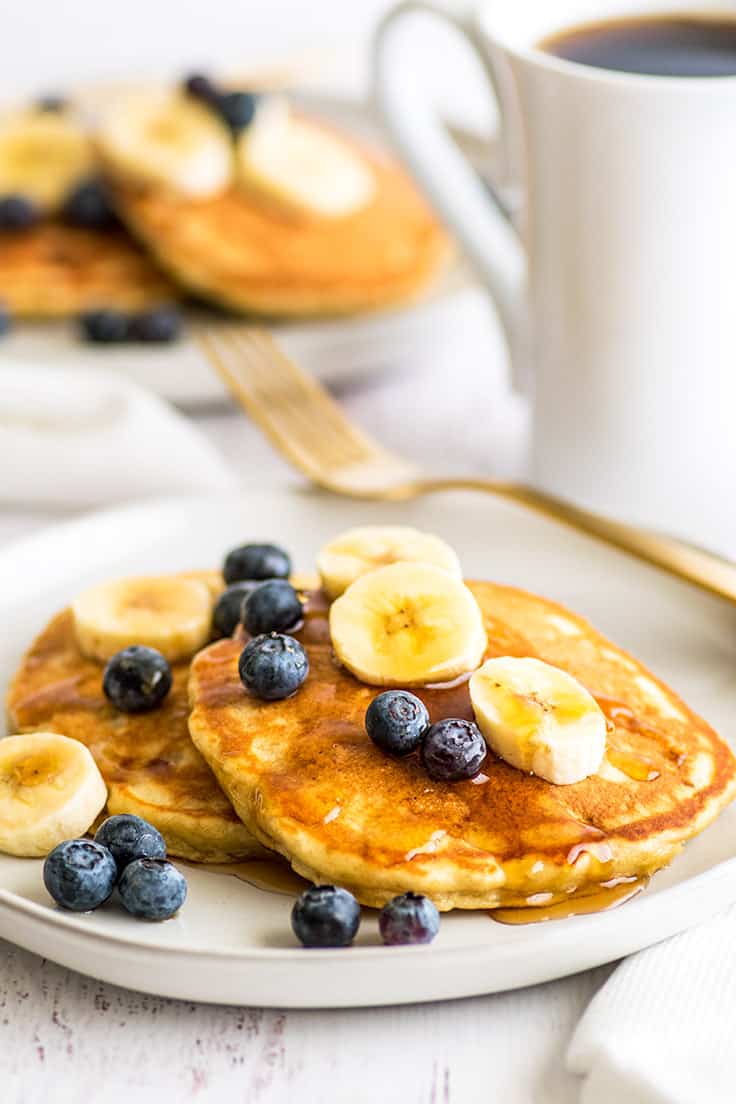
My little sister, a banana pancake connoisseur, says that the mark of a good banana pancake is that you can eat it plain, straight off the griddle. And you can absolutely do that with these pancakes (as one of my taste testers, that’s what she did and gave them her thumbs up), but my favorite way is as you see in the photos, with butter, some fresh fruit, and maple syrup.
It’s so good. Other ways you can enjoy these include:
- Spread with Nutella or Nutella sauce
- Slathered with peanut butter and honey, peanut butter sauce , or chocolate sauce
- Topped with strawberry sauce and whipped cream
Variations
Feel like changing things up? Try some of these mix-ins:
- Chocolate chip banana pancakes: Add about 1/3 cup of chocolate chips or chopped chocolate to the batter just before cooking.
- Blueberry banana pancakes: Make the pancakes according to the recipe instructions, and once you spoon the batter out onto the hot griddle, drop blueberries evenly spaced over the top of the pancakes.
Can I freeze banana pancakes?
Absolutely. Banana pancakes free pretty well. Freeze them in a freezer bag with a small sheet of parchment paper between each pancake and reheat in the microwave for 20-30 seconds. Extend the reheating time slightly for each additional pancake you’re reheating.
And if you have extra brown bananas you’re not quite ready to use, check out my post of How to Freeze Bananas .
What to serve with banana pancakes?
These pancakes are filling enough to be served on their own, but if you want to do a full breakfast spread, scrambled eggs with sausage and roasted red potatoes are an excellent way to go.

Can I double this recipe?
Yes. You can double the recipe with no changes needed. To change the yield, in the recipe card below, hover over the serving size or click if you’re on mobile, and slide the slider.
If doubling the recipe, I recommend using a griddle if you have one so you can cook all your pancakes at once. If you’re cooking the pancakes in batches on the stove, keep the finished pancakes warm in a 200°F oven while you cook the full batch.
More Banana Recipes
- Small-batch Banana Muffins
- Small-batch Chocolate Banana Muffins
- Small Banana Cake
- The Best Banana Milkshake
- Banana Pudding
More Small-batch Breakfasts
- Waffles for Two
- Small-batch Cinnamon Rolls
- Pumpkin Pancakes for Two
- Pancakes for One
- Small-batch Cream Scones

Ingredients
- ▢ ½ cup ( 60g ) all-purpose flour
- ▢ 1 ½ teaspoons ( 6g ) granulated sugar
- ▢ 1 teaspoon baking powder
- ▢ ⅛ teaspoon salt
- ▢ 1 medium-to-large very ripe banana
- ▢ 1 large egg
- ▢ 2-3 tablespoons milk any percentage, divided
- ▢ 1 tablespoon vegetable oil or melted butter
- ▢ ½ teaspoon vanilla
Instructions
- In a small bowl, whisk together flour, sugar, baking powder, and salt.
- In a medium bowl, use a fork or potato masher to mash peeled banana very well. Add egg, 2 tablespoons of the milk, oil, and vanilla, and mix until well-combined.
- Add flour mixture and use a spoon to stir until just combined. If batter seems too thick, add up to 1 tablespoon more milk.
- Heat a griddle to 350°F or a skillet over medium heat (no higher). Once cooking surface is hot, lightly grease with butter or cooking spray and add pancake batter using a 1/3 cup. Cook first side until the tops of the pancakes begin to bubble. Flip and cook until cooked through.
- Serve and enjoy!
Notes
This post was originally published on 3/14/18. It was updated on 11/1/20 with new photos and additional information and tips.
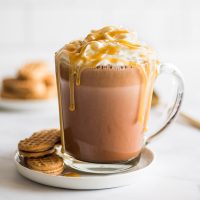
Peanut Butter Hot Chocolate is easy to make at home and so, so good.
I have a ton of hot chocolate recipes on the site, Classic Hot Chocolate , Rich and Thick Hot Chocolate , White Hot Chocolate , Pink Hot Chocolate , Baileys Hot Chocolate , so I thought I had pretty much all my hot chocolate bases covered.
But last year someone left me a comment blew my mind. They told me that they had taken my classic hot chocolate and made it into peanut butter hot chocolate.
As a lover of all things peanut butter, obviously I had to give this a try, and friends, I’m so glad I did, because it’s real good.
Adding peanut butter to hot chocolate not only makes your hot chocolate a peanut buttery delight, it also gives it a rich and creamy texture, so it feels 10xs more decadent.


Ingredients
- Sugar, cocoa powder, and water: Instead of using a store-bought chocolate sauce, we’ll use these three ingredients to make a quick chocolate syrup to flavor the hot chocolate base.
- Milk: Any percentage milk will work for hot chocolate. The higher fat the milk, the richer and creamier your hot chocolate will be.
- Peanut butter: I recommend using a processed creamy peanut butter like this so you get the smoothest hot chocolate possible.
Peanut Butter Hot Chocolate Variations
- Vegan: Replace the dairy milk with your favorite plant-based milk and you have instant vegan peanut butter hot chocolate.
- Extra chocolatey: Add 2 tablespoons of good-quality chocolate chips or chopped chocolate to the chocolate syrup and stir until melted before adding the milk. The extra boost of real chocolate flavor is so good.
- Extra creamy: Replace 2 tablespoons of the milk with heavy cream (or 1/4 cup with half and half ) for an incredibly rich and creamy peanut butter and chocolate experience.


How to Make Peanut Butter Hot Chocolate
- Stir together sugar, cocoa powder, and water over medium heat until smooth.
- Add milk and peanut butter and heat, stirring occasionally until milk is steaming hot and peanut butter is completely mixed in. Do not allow the milk to come to a boil as it can scald.
- Pour into a mug (if you are feeling a little extra, you can add whipped cream and peanut butter sauce like I did, but that’s totally optional) and enjoy!
Can I double this recipe?
Yes, you can scale up the recipe with no preparation changes needed. To change the yield, in the recipe card below, hover over the serving size or click if you’re on mobile, and slide the slider.


Can I use natural peanut butter?
I haven’t tested this hot chocolate with natural peanut butter, but I wouldn’t recommend it. I have a feeling even smooth natural peanut butter will have too much texture to stir into a drink unless you use a blender to mix it.
Can I make this in the microwave?
Yes! To make peanut butter hot chocolate in the microwave, combine cocoa powder, sugar, and water in a mug. Stir until well-mixed and microwave for 15 seconds. Add peanut butter and stir until smooth before adding the milk. Microwave 1 to 1 ½ minutes, until steaming. Stir once more, and enjoy!
More Cold-weather Drink Recipes
- Snickerdoodle Hot Chocolate
- Homemade Mocha
- White Chocolate Mocha
- Chai Tea Latte
- The BEST Crockpot Hot Chocolate
More Peanut Butter Recipes
- Buckeye Brownie Cookies
- Peanut Butter Oatmeal Cookies
- Small-batch Peanut Butter Cookies
- Small-batch Monster Cookie Bars
- Peanut Butter Swirl Brownies
- Easy Homemade Peanut Butter Cups
Recipe Notes
This recipe makes 1 cup of hot chocolate, enough to fill an 8-ounce mug. If you’d like to fill an oversized mug, 1 1/2 or double the recipe.
Ingredients
- ▢ 2 tablespoons ( 25g ) granulated sugar
- ▢ 1 tablespoon ( 7g ) cocoa powder
- ▢ 1 tablespoon water
- ▢ 1 cup milk any percentage
- ▢ 1 heaping tablespoon creamy peanut butter not natural peanut butter
Optional Toppings
- ▢ Whipped cream
- ▢ Peanut butter sauce
Instructions
- In a small saucepan, combine sugar, cocoa powder, and water. Heat over medium heat and stir until sugar and cocoa powder dissolve.
- Add milk and peanut butter and stir. Heat, stirring occasionally, until milk begins to steam and peanut butter is completely dissolved.
- Pour into an 8-ounce mug, top with optional whipped cream and peanut butter sauce if desired and enjoy.
Notes
This post was originally published on 11/30/18. It was updated on 11/1/20 with new photos and additional information and tips.
Your complete guide on how to freeze soup from the best soups to freeze to what containers to use. Plus a ton more tips and tricks.
A few weeks ago, in my freezer burritos post, I talked about how freezing meals for the future is one of the kindest things you can do for yourself.
It’s something I wish everyone could find time to do because knowing you have a ready-to-go meal in your freezer is such a relief after a long day.
And since the weather is turning colder, I thought today would a perfect time to talk about one of my favorite foods for freezing: soup.

Can you freeze soup?
Yes! Soup freezes and reheats so, so well. Even better, you can store it in a variety of containers so you pretty much always have space in your freezer for some soup.
That being said, certain soups freeze better than others. Some ingredients degrade or separate or bloat in the freezer and this can change the texture of frozen and reheated soups.
Some soups you can freeze fully cooked, others you’ll want to modify before freezing for the best results.
The Best Soups for Freezing
Clear and vegetable-based soups without pasta, rice, or potatoes: Things like Chicken Taco Soup with lots of chicken and beans can go straight from stove to the freezer and reheat beautifully without any modifications.
Freezing Tip: All vegetables will be slightly softer after freezing and reheating. If you prefer your veggies with more bite, undercook them just a bit before freezing so they are firmer when you finally eat them.
Soups That Need Some Modifications for Freezing
Part 1: Soups With Dairy
This includes soups with cheese, cream/milk, and roux-based soups. Dairy in soups can separate and cheese and roux-based soups can become grainy when frozen.
How to Freeze Soups With Dairy
This is a really simple fix: leave the the dairy out if possible.
- Make the soup recipe as written up to the point of adding the dairy and then freeze.
- When you’re ready to serve the soup, defrost, heat, and add in the dairy.
This even works with soups made with a roux. When your soup base is defrosted and reheated, make the roux and stir it into the soup.
A Note on cream and milk-based soups: Even though they tend to separate when frozen, many people, myself included, will sometimes choose to freeze soups with milk and cream in them. This is because they usually come back together pretty well with a good stir.
The texture is often not quite as nice as when made fresh, but sometimes you have milk/cream that’s about to expire and it’s easier just to freeze everything now. If you’re not sure if you’ll mind the texture change, try it once and see how you feel about it. I find that it’s usually more of an aesthetic issue than a taste one.
Part 2: Soups With Starches Like Pasta, Rice, and Potatoes
Rice and pasta tend to bloat when frozen and potatoes will become mealy and fall apart. Some people don’t mind this, so you definitely can freeze soups with these ingredients, but their texture won’t be the same as freshly made soup.
How to Freeze Soups With Starches
A better option is to treat these ingredients as you would dairy and simply omit them while cooking.
- Freeze the soup without the pasta/rice/potatoes.
- When you’re ready to reheat the soup, cook the pasta/rice/potatoes separately and then add them to the reheated soup. You can do this for the whole recipe or individual servings.
What is the best container for freezing soup?
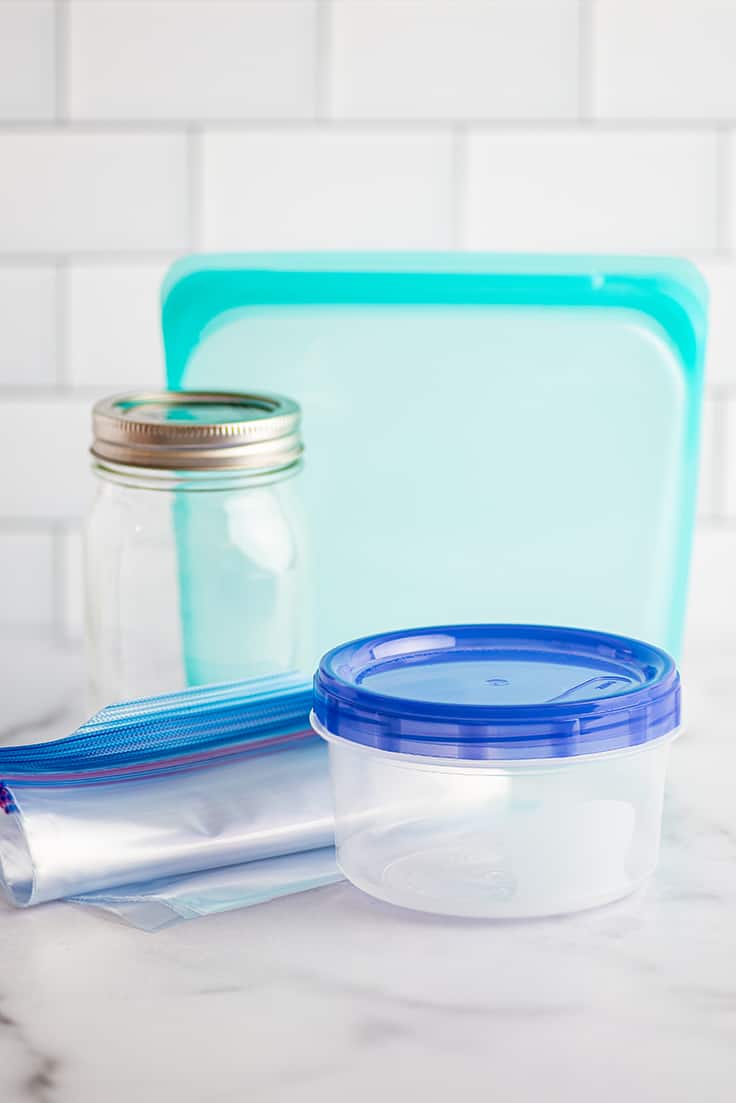

You have a few options for soup freezing containers, and they all have their pros and cons.
Plastic Storage Containers
- Pros: Cheap (usually), easy to fill, reusable
- Cons: Made of plastic, less durable than glass (long term), can be bulky in the freezer, can pick up stains and smells
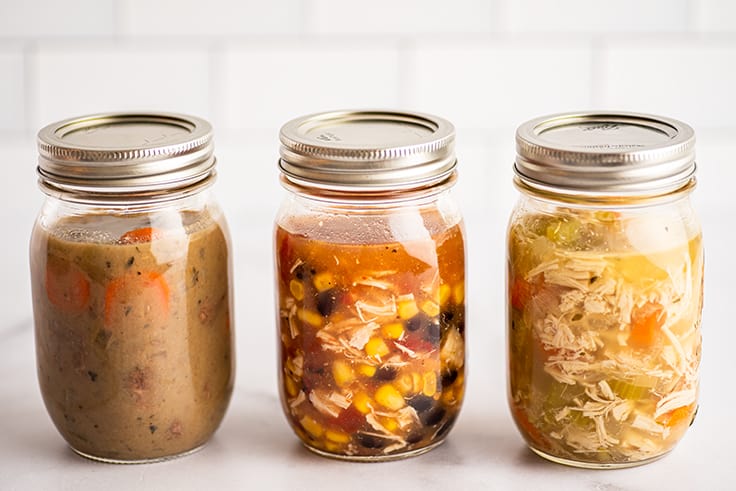
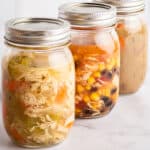
Mason Jars
- Pros: They look nice, relatively cheap, easier to fill than bags, will last basically forever
- Cons: Can break, must defrost completely before pouring soup out, bulky and not stackable in the freezer
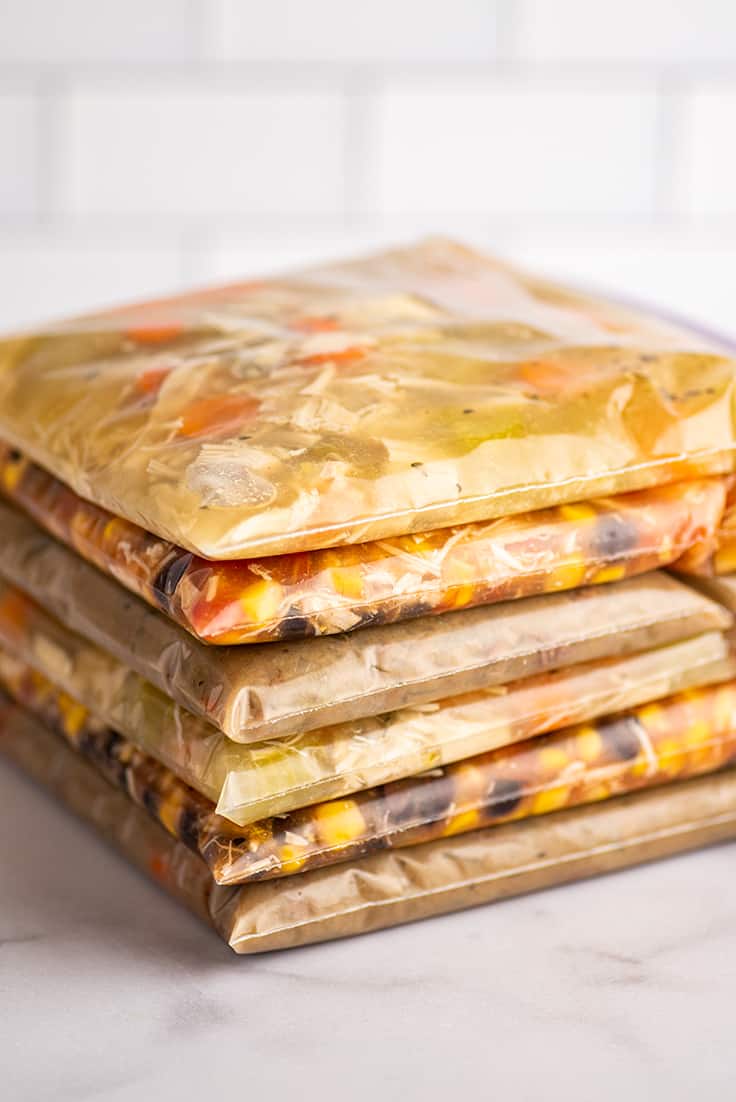
Plastic Freezer Bags
- Pros: They’re cheap, easy to stack and store in small places, can be reused once or twice
- Cons: Not very reusable, hard to fill, made of plastic, can rip or be punctured in the freezer
Silicon Freezer Bags
- Pros: Reusable, most are dishwasher safe, easy to stack and store
- Cons: Fairly expensive, not super easy to fill
My preference: I do most of my soup freezing in quart-size freezer bags (I like to freeze soup in individual portions). I’m also a big fan of the silicon freezer bags , but at $10+/bag for some brands, they’re a little too pricey for me to wholeheartedly recommend to everyone.

How to Freeze Soup
1. Cool
Always, always, always cool your soup to room temperature before freezing. Putting warm food in your freezer can raise the temperature of your freezer and cause the foods around it to begin to thaw and/or melt.
2. Label and Date
Never put anything in your freezer without a label and date. You think you’ll remember that this bag of red stuff is the tomato soup that you made on October 2nd, but I guarantee, by Nov 2nd, you won’t!
3. Freeze
Jars and plastic storage containers can go right into your freezer. If using freezer bags, stack them on a flat surface like a cutting board or small baking sheet (I usually use my quarter sheet pan ) and freeze until solid. Once frozen solid, you can stand the bags of soup upright and file them in wherever they’ll fit.
4. Defrost
Defrost soup overnight in the fridge. If using a disposable freezer bag, it’s always smart to put your soup on a baking tray or in a large bowl just incase it was punctured at all in the freezer so you don’t end up with soup leaking everywhere.
For single servings in freezer bags , you can also place them in a bowl of warm water, and they will defrost in about 15 minutes.
For quicker defrosting with most other containers, place the container of soup in a bowl/sink of warm water for about 5 minutes until the sides have melted enough for the frozen soup to slip out of the container. Dump the frozen soup in a pot and melt/reheat the soup very gently over medium heat.
5. Reheat
Reheat defrosted soup in the microwave or gently on the stove. Don’t try to microwave frozen soup unless it’s as a last resort. The amount of microwave time needed to reheat frozen soup will seriously overcook most ingredients in the soup.
Freezing Tip to Prevent Freezer Burn: The cause of freezer burn is air which allows ice crystals to form. To prevent this, squeeze all excess air out of freezer bags so there’s no chance for it to form. For jars and plastic containers, you can take a piece of plastic wrap and press it over the surface of the soup.
How to freeze soup in individual portions?
Freezing soup in individual portions is no different than freezing full batches. You just need smaller containers. This is actually my preferred way to freeze soup. When your soup is cooked, simply divide it between your storage containers.
If it’s a soup with dairy or starches and you’ve held back an ingredient, divide that ingredient by the number of servings and make a note on the label of what was left out and how much of it to add to the soup after reheating.
How long will soup last in the freezer?
Soups are best when consumed within 2 to 3 months of freezing. They’re safe to eat past that, but you start to run the risk of freezer burn the longer they’re in there.

Favorite Soups for Freezing
- Simple Beef Stew (omit the potatoes until ready to serve)
- Creamy Chicken Noodle (omit the pasta until ready to serve)
- Quick Chicken Tortellini Soup (omit the pasta until ready to serve)
- Easy Chicken Parm Soup (omit the cheese and pasta until ready to serve)
- Chicken Carcass Soup (omit the pasta until ready to serve)
- Tomato Soup (omit the cream if you’d like, I usually don’t)
- Tomato Tortellini Soup (omit the pasta and cream until ready to serve)
- Ground Turkey Vegetable Soup (freeze as is)
How to Freeze Soup
Ingredients
- Soup for freezing
Instructions
Cool
- Cool your soup to room temperature before freezing.
Label and Date
- Label and date your soup and make a note of any ingredients and their amounts to add back to the soup after reheating.
Freeze
- Jars and plastic storage containers can go right into your freezer. If using freezer bags, stack them on a flat surface like a cutting board or small baking sheet and freeze until solid. Once frozen solid, you can stand the bags of soup upright and file them in wherever they’ll fit.
Defrost
- Defrost soup overnight in the fridge. If using a disposable freezer bag, it’s always smart to put your soup on a baking tray or in a large bowl just incase it was punctured at all in the freezer so you don’t end up with soup leaking everywhere.
Reheat
- Reheat defrosted soup in the microwave or gently on the stove. Don’t try to microwave frozen soup unless it’s as a last resort. The amount of microwave time needed to reheat frozen soup will seriously overcook most ingredients in the soup.
- Cook and add any ingredients that you omitted back to the soup like heavy cream or pasta.
- Serve and enjoy!
Notes
These easy banana pancakes for two are made with just one overripe banana and a handful of pantry staples. They’re quick to make, fluffy, and packed full of banana flavor.
Say hello to your new favorite small-batch pancake recipe, friend. These pancakes are perfectly fluffy, incredibly good, and designed to serve two.
Like my buttermilk pancakes for two , this banana pancake recipe will make exactly four good-sized pancakes, so you can enjoy them with someone else or make them solo and freeze the extra two for next weekend (always an excellent option).
Ingredients of Note
- One overripe banana: This recipe is perfect for using up that single sad banana sitting on your counter, but if you’re craving banana pancakes and don’t have any brown bananas, check out my post on how to quickly ripen bananas .
- Vegetable oil: A little vegetable oil in the batter helps these pancakes cook up moist and perfect. I prefer to use oil in pancakes, but if you don’t have any, the same amount of melted butter can be substituted.
How to Make the Best Banana Pancakes
- Whisk together the dry ingredients: flour, a little sugar, baking powder, and salt. Then in a separate bowl, mash your banana and add an egg, some milk, oil, and vanilla.
- Finally, mix everything together until just combined, and your batter is ready to go.
- When it comes to cooking, the key to getting a nice fluffy banana pancake that isn’t soggy in the center is to start with a preheated pan/griddle and keep the temperature just at medium. Any higher, and your pancakes are going to burn before they are cooked through, and no one wants burnt and/or undercooked pancakes.
- Once completely cooked, plate those babies up and it’s time to add toppings.
Topping Ideas
My little sister, a banana pancake connoisseur, says that the mark of a good banana pancake is that you can eat it plain, straight off the griddle. And you can absolutely do that with these pancakes (as one of my taste testers, that’s what she did and gave them her thumbs up), but my favorite way is as you see in the photos, with butter, some fresh fruit, and maple syrup.
It’s so good. Other ways you can enjoy these include:
- Spread with Nutella or Nutella sauce
- Slathered with peanut butter and honey, peanut butter sauce , or chocolate sauce
- Topped with strawberry sauce and whipped cream
Variations
Feel like changing things up? Try some of these mix-ins:
- Chocolate chip banana pancakes: Add about 1/3 cup of chocolate chips or chopped chocolate to the batter just before cooking.
- Blueberry banana pancakes: Make the pancakes according to the recipe instructions, and once you spoon the batter out onto the hot griddle, drop blueberries evenly spaced over the top of the pancakes.
Can I freeze banana pancakes?
Absolutely. Banana pancakes free pretty well. Freeze them in a freezer bag with a small sheet of parchment paper between each pancake and reheat in the microwave for 20-30 seconds. Extend the reheating time slightly for each additional pancake you’re reheating.
And if you have extra brown bananas you’re not quite ready to use, check out my post of How to Freeze Bananas .
What to serve with banana pancakes?
These pancakes are filling enough to be served on their own, but if you want to do a full breakfast spread, scrambled eggs with sausage and roasted red potatoes are an excellent way to go.
Can I double this recipe?
Yes. You can double the recipe with no changes needed. To change the yield, in the recipe card below, hover over the serving size or click if you’re on mobile, and slide the slider.
If doubling the recipe, I recommend using a griddle if you have one so you can cook all your pancakes at once. If you’re cooking the pancakes in batches on the stove, keep the finished pancakes warm in a 200°F oven while you cook the full batch.
More Banana Recipes
- Small-batch Banana Muffins
- Small-batch Chocolate Banana Muffins
- Small Banana Cake
- The Best Banana Milkshake
- Banana Pudding
More Small-batch Breakfasts
- Waffles for Two
- Small-batch Cinnamon Rolls
- Pumpkin Pancakes for Two
- Pancakes for One
- Small-batch Cream Scones

Ingredients
- ▢ ½ cup ( 60g ) all-purpose flour
- ▢ 1 ½ teaspoons ( 6g ) granulated sugar
- ▢ 1 teaspoon baking powder
- ▢ ⅛ teaspoon salt
- ▢ 1 medium-to-large very ripe banana
- ▢ 1 large egg
- ▢ 2-3 tablespoons milk any percentage, divided
- ▢ 1 tablespoon vegetable oil or melted butter
- ▢ ½ teaspoon vanilla
Instructions
- In a small bowl, whisk together flour, sugar, baking powder, and salt.
- In a medium bowl, use a fork or potato masher to mash peeled banana very well. Add egg, 2 tablespoons of the milk, oil, and vanilla, and mix until well-combined.
- Add flour mixture and use a spoon to stir until just combined. If batter seems too thick, add up to 1 tablespoon more milk.
- Heat a griddle to 350°F or a skillet over medium heat (no higher). Once cooking surface is hot, lightly grease with butter or cooking spray and add pancake batter using a 1/3 cup. Cook first side until the tops of the pancakes begin to bubble. Flip and cook until cooked through.
- Serve and enjoy!
Notes
This post was originally published on 3/14/18. It was updated on 11/1/20 with new photos and additional information and tips.

Easy Banana Pancakes for Two
Ingredients
- ½ cup ( 60g ) all-purpose flour
- 1 ½ teaspoons ( 6g ) granulated sugar
- 1 teaspoon baking powder
- ⅛ teaspoon salt
- 1 medium-to-large very ripe banana
- 1 large egg
- 2-3 tablespoons milk any percentage, divided
- 1 tablespoon vegetable oil or melted butter
- ½ teaspoon vanilla
Instructions
- In a small bowl, whisk together flour, sugar, baking powder, and salt.
- In a medium bowl, use a fork or potato masher to mash peeled banana very well. Add egg, 2 tablespoons of the milk, oil, and vanilla, and mix until well-combined.
- Add flour mixture and use a spoon to stir until just combined. If batter seems too thick, add up to 1 tablespoon more milk.
- Heat a griddle to 350°F or a skillet over medium heat (no higher). Once cooking surface is hot, lightly grease with butter or cooking spray and add pancake batter using a 1/3 cup. Cook first side until the tops of the pancakes begin to bubble. Flip and cook until cooked through.
- Serve and enjoy!
