This easy baked ziti recipe is a fabulous no-stress, no-fail dinner recipe that tastes great, looks beautiful, and couldn’t be simpler to throw together.
Hello, lovely friends, I’ve got another cheesy pasta recipe for you today, baked ziti!
And not just any ziti: super easy, super delish, made with SAUSAGE, crushed tomatoes, and just a hint of cream, ziti.
You’re going to love it.


Why You Should Make This Baked Ziti Immediately
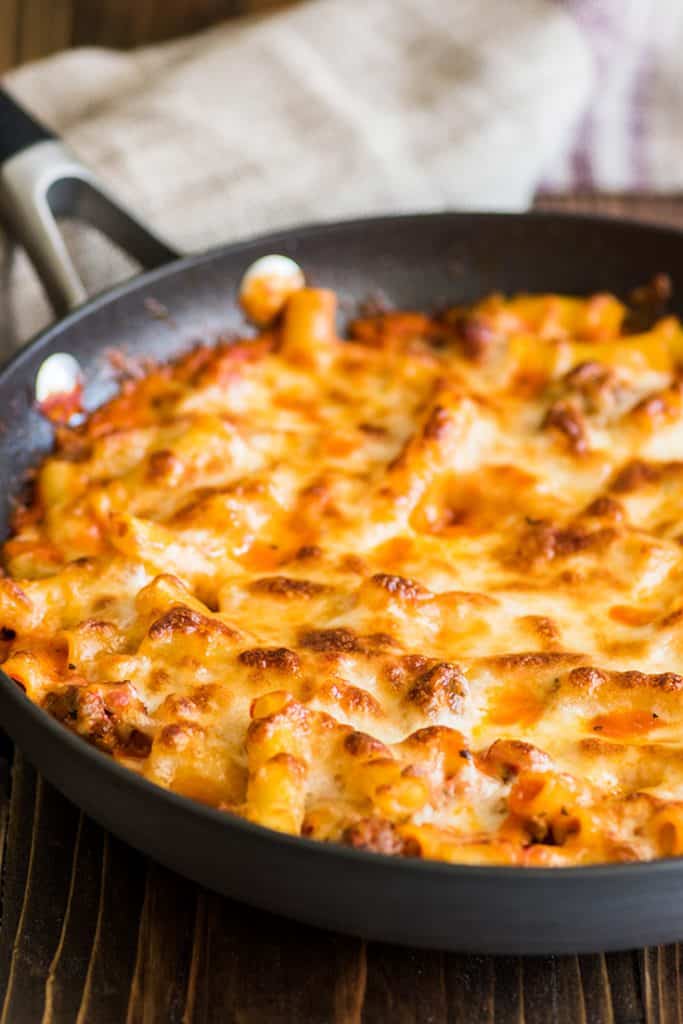
First, because this is an A++ pasta experience from beginning to end. You’ll feel like an absolute kitchen rockstar when you pull the ziti out of the oven with the skillet sizzling and the cheese browned and beautiful.
And you’re going to feel like an even bigger rockstar when you try the first bite because this is some real good cheesy, meaty pasta. Using Italian sausage instead of hamburger gives the dish tons of extra flavor, and a couple tablespoons of cream in the sauce add just a slightly creamy, rich base note that makes such a difference.
Reason two is that this is one of the easiest dinners you’ll ever make. Seriously, if you can open a can of tomatoes and operate a kitchen timer, you’ve got this with your eyes closed.

Ingredient and Tools Notes
- Italian sausage: Hot, mild, or sweet Italian sausage will all work in this dish. If you don’t usually cook with/buy Italian sausage, you can generally find packages of it near the hamburger in the meat department. If your sausage came in links, you’ll want to remove the casings before cooking. To remove sausage casings, you can make a shallow slice down the sausage lengthwise and peel it off, or just squeeze the sausage until it bursts out the top or bottom and squeeze the meat into a bowl.
- Pasta: Obviously, ziti is traditional here, but penne or rigatoni work great as well.
- Heavy cream: This recipe won’t use up an entire carton of heavy cream. If you need some ideas to use up the leftovers, check out my post on What to Do With Leftover Heavy Cream .
- An oven-safe skillet with a lid: This recipe is designed to go from stovetop to oven. If you don’t own an oven-safe skillet, you can make the sauce in a regular skillet and then transfer it to a baking dish before baking. And if your oven-safe skillet doesn’t have a lid, you can cook the sauce uncovered. Just add ¼ cup of water along with the tomatoes and add another tablespoon or two of liquid towards the end of the cooking time if it seems like too much liquid has evaporated. I also recommend using a splatter screen if you own one because the sauce will pop and make a bit of a mess on the stovetop.
How to Make Baked Ziti
To make this baked ziti, all you have to do is cook some pasta, ziti if you’ve got it, penne or rigatoni if you don’t, farfalle or rotini if you’re feeling like a rebel. While that cooks, you’ll brown some sausage and then a bit of garlic and red pepper flakes.
In goes a can of crushed tomatoes and a bit of salt and pepper. You let that simmer for 15 minutes, stir in the cooked pasta, cream, Parmesan, and basil, top with mozzarella, and then bake.
10 minutes later you pull that beautiful, bubbly pan of ziti out of the oven.
Stop for a moment and appreciate the sizzle.
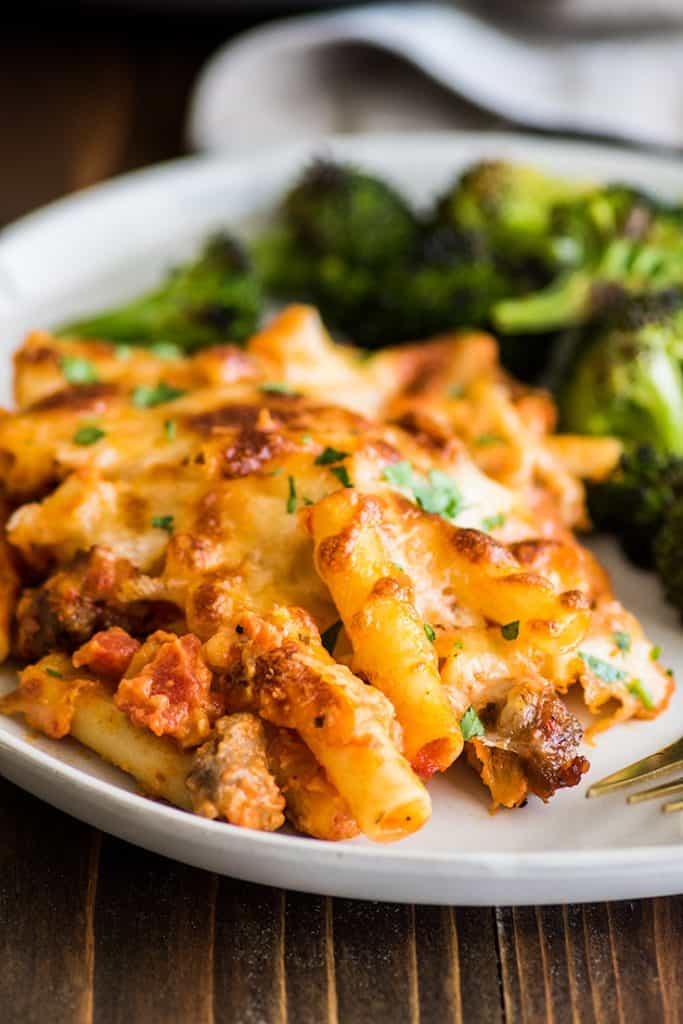
Then serve with a delicious veggie side ( butter and garlic green beans, roasted zucchini , or oven-roasted broccoli are, as always, HIGHLY recommended) and dig in.
Can you freeze baked ziti?
You can freeze baked ziti, but the pasta will have a slightly softer texture after being frozen and reheated and the cheese texture will suffer slightly.
My prefered way to freeze ziti is to just freeze the sauce. Cook the sauce as instructed in the recipe and then transfer half of it (or whatever portion you’re not going to eat) to a freezer bag and freeze for up to 3 months.
When you’re ready for more ziti, defrost the sauce, mix it with freshly cooked pasta and cheese, and bake. There’s zero loss in quality, and it takes almost no effort to throw together once the sauce is defrosted.
Can I make this baked ziti for two?
Absolutely. This recipe was originally written for two, and you can find that smaller version here , but I found that I and most readers were doubling the recipe when we made it, so I scaled it back up.
While you can make the original smaller version, even if you’re cooking for one or two, I actually recommend just making a full batch of the sauce and freezing half of it following the instructions above. It works super well, and even if you don’t want to use the sauce for baked ziti in the future, you can toss reheated sauce with any pasta for a quick creamy sausage pasta .
I don’t like/have sausage. Can I use hamburger/ground turkey instead?
You can, but the dish won’t have quite as much flavor. Make sure to salt the meat generously while it’s cooking, and I’d add a teaspoon of Italian seasoning as well.
Can I leave out the heavy cream?
You can, but the cream adds a really spectacular richness to the dish. I don’t recommend omitting it.

Easy Baked Ziti Recipe Notes
- As written, this recipe will make four huge servings or six smaller ones.
More Easy Pasta Dishes
- Mac and Cheese for One
- Pesto Chicken Pasta
- Creamy Chicken Pasta
- The Best Beef Stroganoff
- Easy Lasagna
- 15-minute Vodka Sauce

Ingredients
Special Equipment
- ▢ Large oven-safe skillet with a lid
Baked Ziti
- ▢ 1 tablespoon olive oil
- ▢ 8 ounces (about 2⅔ cups ) uncooked ziti penne, or rigatoni
- ▢ 1 pound Italian sausage mild or hot, casings removed
- ▢ 6 cloves garlic pressed or minced
- ▢ Pinch red pepper flakes
- ▢ 2 14-ounce cans crushed tomatoes
- ▢ Salt and pepper
- ▢ ⅓ cup heavy cream
- ▢ ½ cup ( 2oz ) shredded Parmesan
- ▢ 1 teaspoon dried basil
- ▢ 1½ cup ( 6oz ) shredded mozzarella
Instructions
Start Pasta
- Preheat oven to 475°F.
- Bring a medium pot of lightly salted water to a boil and cook ziti according to package instructions until just barely al dente. Don’t overcook the pasta as it will become too soft after baking. Drain and set aside.
Sauce
- While your water boils and pasta cooks, in a large, oven-safe skillet with a lid, heat oil over medium heat. Brown sausage, breaking it into crumbles as it cooks. If there is a lot of grease in the pan, drain sausage or use a paper towel to absorb some of the grease.
- Stir in garlic and red pepper flakes and cook for 30 seconds. Add tomatoes and a sprinkle of salt and pepper. Turn heat up to medium-high and bring to a simmer. Once simmering, reduce heat to medium-low and cover. Simmer, covered, for 15 minutes, stirring occasionally.
- Stir in cooked pasta, cream, Parmesan, and basil. Add more salt and pepper to taste.
Bake
- Sprinkle mozzarella over the top and bake for 10 to 15 minutes until cheese is melted and bubbly. Serve and enjoy!
Notes
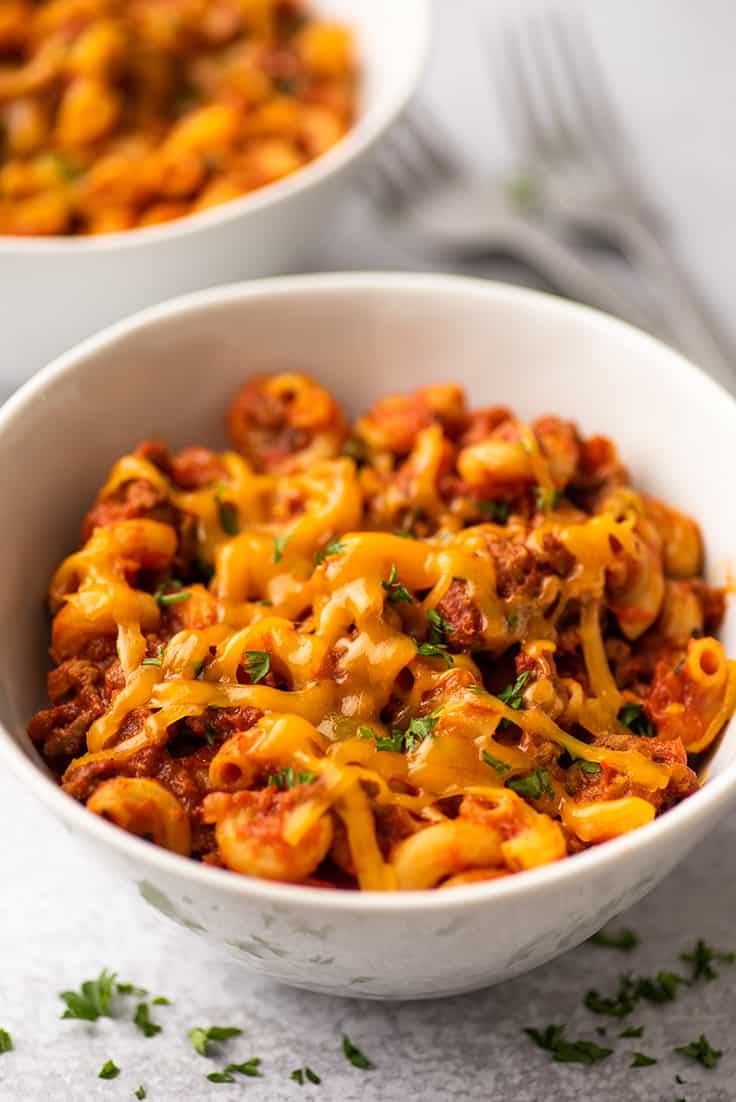
This American goulash recipe is an easy one-pot meal made with ground beef and macaroni pasta in a tangy red sauce and covered with cheddar cheese. It’s classic American comfort food.
Did you eat American goulash growing up? I didn’t, but I got completely obsessed with it a while back when I was working on my Hungarian goulash recipe . This American version has total grown-up Hamburger Helper vibes and feels like such a nostalgic treat every time you make it.
It’s simple to throw together, and even though it requires a slightly longer cooking time than most of my favorite weeknight meals, most of the cooking time is hands-off so it’s still a great candidate for busy nights when you need something easy and filling for dinner.

What is American goulash?
American goulash, also known as chop suey and in casserole form, the Johnny Marzetti, is an Americanized version of Hungarian goulash, a dish that was brought to the United States by Hungarian immigrants.
It’s almost always made with ground beef, pasta (usually macaroni), and tomato sauce (either homemade or store-bought), and seasoned with Italian seasonings.
Ingredient Notes
- Ground beef: I prefer to use 85% ground beef in this recipe, but you can use whatever ground beef you have on hand.
- Tomato paste: Tomato paste helps add depth of flavor to the sauce. You won’t use a full can in this recipe, so check out my post What to Do With Leftover Tomato Paste for storage tips and recipe ideas to use up the leftovers.
- Crushed tomatoes: This is my preferred brand of canned tomatoes. If all you have are diced, diced will work here too. You’ll just have a chunkier red sauce.
- Elbow macaroni: Classic American goulash uses elbow macaroni, but you could also use other small-to-medium pasta in this dish like medium shells or rotini.
How to Make American Goulash
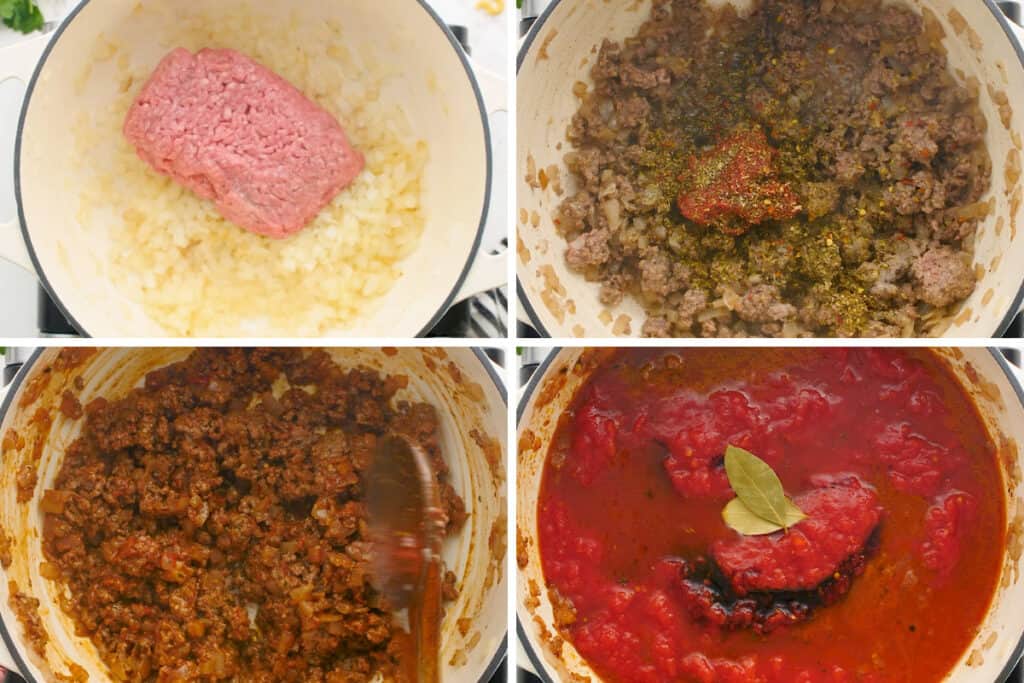

Cook the onions in olive oil until they begin to soften.
Brown the beef, breaking it up into crumbles as it cooks.
3 Add the garlic and then the tomato paste and spices. Cook them until the garlic and spices start to smell amazing.
- Add the rest of the sauce ingredients, give everything a good stir, and then simmer covered for 25 minutes to let the flavors meld.
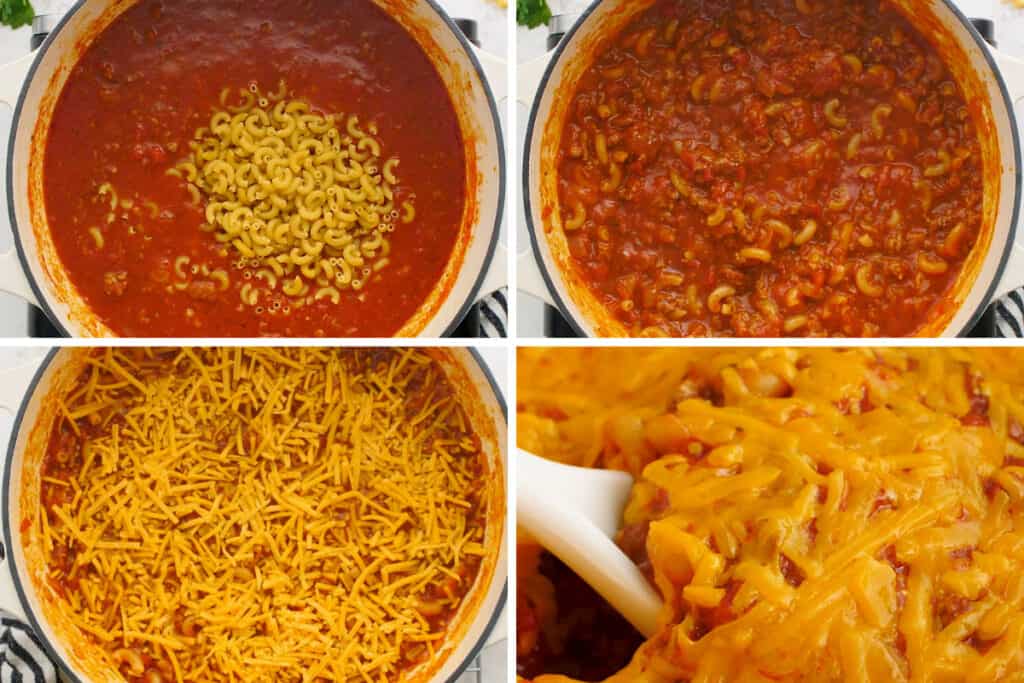

Stir in the pasta and cook until al dente.
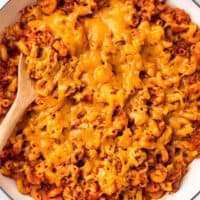
Add cheese, cover the pot, and let it sit for 2 to 3 minutes for the cheese to melt.
Uncover, admire all that beautiful melty cheese, serve, and enjoy!
What to serve with American goulash?
Serve the goulash with a couple slices of crusty bread and a simple vegetable side like:
- Garlic and Butter Green Beans
- Broccoli in the Oven
- Roasted Zucchini
- Roasted Green Beans
What is the difference between American and Hungarian goulash?
Even though American goulash evolved from Hungarian goulash , they are two extremely different dishes. Where American goulash is usually made with hamburger and macaroni, Hungarian goulash is made with chunks of beef chuck roast, which cooks with thinly sliced onions and beef broth for about 2 hours to make a thick and rich stew, that is served over egg noodles or potatoes.
Both versions are delicious but are very different.
Can I freeze American goulash?
I don’t love freezing recipes that contain pasta as the pasta will bloat slightly in the freezer and have a different texture after reheating. But if you don’t mind the slight texture change, you absolutely can freeze this dish.
Just freeze in an airtight container for up to 3 months and defrost overnight in the fridge before reheating. DO NOT try to microwave still-frozen pasta to reheat. It will turn the pasta to mush.

Can I make this ahead of time?
Yes. Make the dish completely but don’t add the cheese. Store covered in the refrigerator. When you’re ready to eat, reheat the goulash gently on the stove. Once hot, add the cheese, cover and let sit until the cheese is melted and then serve and enjoy!
Why are my noodles taking forever to cook!!?
I feel your pain! Pasta in one-pot pasta dishes always takes longer to cook than when boiled in water, so don’t worry if your pasta seems to be taking a while. Just keep cooking it with the lid on, stirring every few minutes, and it will reach al dente eventually. I promise!
More Comfort Food Favorites
- Easy Stroganoff
- Pork Ragu
- Beef Short Ribs
- Sheet Pan Sausage and Veggies
- Easy Lasagna
Ingredients
- ▢ 1 tablespoon olive oil
- ▢ ½ large onion diced
- ▢ 1 pound ground beef *
- ▢ 4 cloves garlic crushed or minced
- ▢ ¼ cup ( 60g ) tomato paste
- ▢ ½ teaspoon salt
- ▢ ½ teaspoon dried oregano
- ▢ ½ teaspoon dried basil
- ▢ ¼ teaspoon ground black pepper
- ▢ Pinch red pepper flakes optional
- ▢ 1 28-ounce can crushed tomatoes *
- ▢ 2 cups chicken broth
- ▢ 1 tablespoon soy sauce
- ▢ 2 bay leaves
- ▢ 6 ounces ( about 1 ½ cups ) elbow macaroni
- ▢ 1 cup ( 4oz ) shredded cheddar cheese preferably sharp
Instructions
- In a large pot with a lid, heat oil over medium heat. Add onions and cook until the edges begin to turn translucent, about 5 minutes.
- Add ground beef and cook, breaking the meat into crumbles as you go, until meat is browned.
- Stir in garlic and cook for 30 seconds before adding tomato paste, salt, oregano, basil, pepper, and optional red pepper flakes. Stir until the meat is well-coated and you can really begin to smell the garlic and spices, 1 to 2 minutes.
- Add crushed tomatoes, chicken broth, soy sauce, and bay leaves and bring to a simmer. Cover and simmer, stirring occasionally, for 25 minutes.
- Remove bay leaves, stir in the macaroni, and cover. Simmer covered, stirring occasionally, until pasta is al dente, about 10 to 15 minutes.
- Turn off heat and add cheese. Replace lid and let sit for 2 to 3 minutes until cheese is melted. Serve and enjoy!
Notes
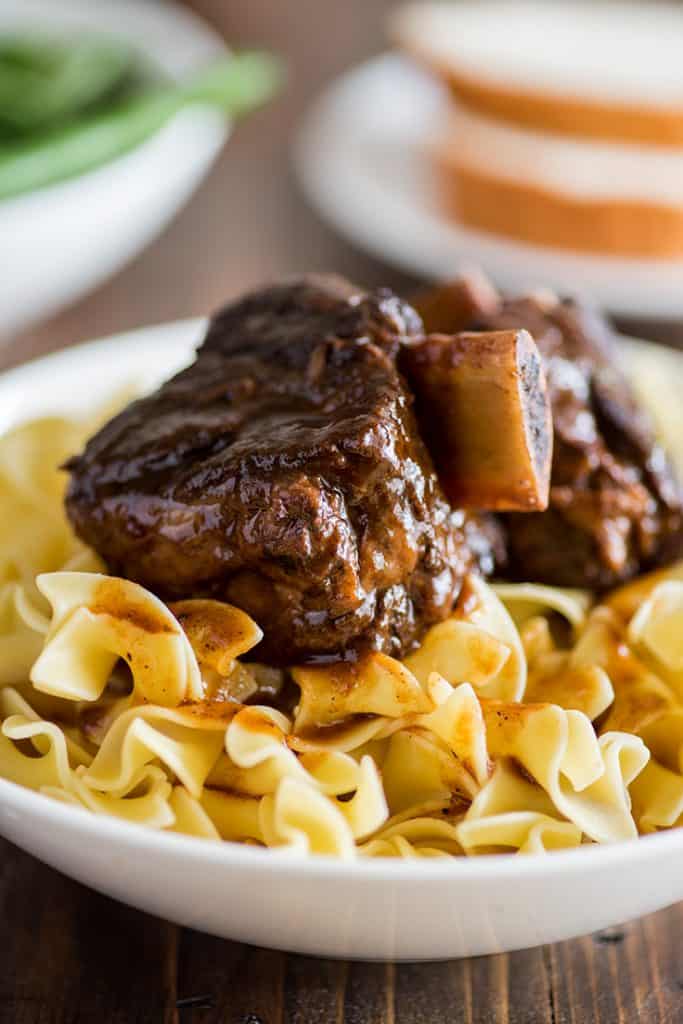
These easy short ribs are fall-off-the-bone tender, decadently rich, and such a show stopper.
Hey, friends. I have another rib recipe for you today, AMAZING, easy braised short ribs.
After my Oven-baked Beef Ribs and Country-style Pork Ribs , these are the ribs I get asked about making most often, and honestly, that makes me so happy, because these ribs are kind of the best things ever.

Properly cooked short ribs are fall-off-the-bone tender, decadently rich, and such a show stopper. They’ll make your house smell amazing while they cook, and if you need a meal to impress, braised short ribs are perfect for guests because they’re actually pretty difficult to screw up and are even better when made 24 hours in advance.
This is going to be a longer post than usual. Short ribs are very easy in that there are no difficult techniques you need to master to cook them, but they have a lot of steps, so I’m going to walk you through the cooking process with a few tips and tricks along the way.
If you are feeling confident and just want the printable recipe no prob. Scroll past the photos down to the recipe card for the quick and dirty instructions.
What are Short Ribs?
Short ribs come from the lower section of the rib, under the plate area. Unlike beef back ribs (your typical BBQ rib), which have meat in between long, curved bones, short ribs have a thick layer of meat over straight bones with a lovely marbling of fat throughout.
If you’re curious, this is a really interesting video on how butchers cut short ribs .
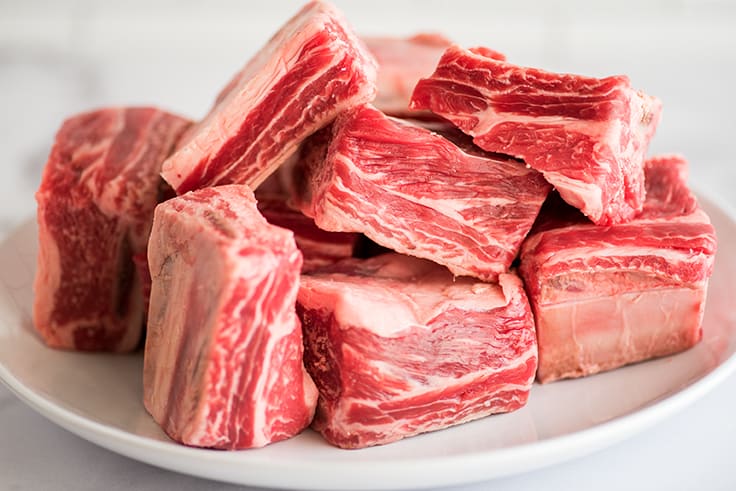

When short ribs are cut across the bone, they’re called flanken-style ribs, but we’ll be using English-cut short ribs today, ribs that have been cut in between the bones so there is only one bone per piece of meat.
If you have the choice, look for ribs that are 2 to 3 inches thick, with a good ratio of meat to fat. If you can get ribs that are all about the same size, that’s ideal, but sometimes the packs that you buy at the grocery store can be pretty mixed, so it’s not the end of the world if there’s some variation.
Overnight Short Ribs
Short ribs are great candidates for making ahead. Their flavor only improves with time and refrigerating the ribs after cooking allows the fat in the dish (of which there is a lot) to solidify so you can scrape it off rather than trying to skim it off the top.
I included instructions in the recipe for same-day and overnight preparation, but given the choice, I recommend making these the day before you’re ready to eat them.
Oven or on the Stovetop Recipe
These ribs can be made in the oven or on the stovetop. If you cook them on the stove, they’ll need a little more babysitting because it’s more difficult to keep them at just the right temperature, but stovetop or oven, your ribs will still come out great.


How to Cook Short Ribs
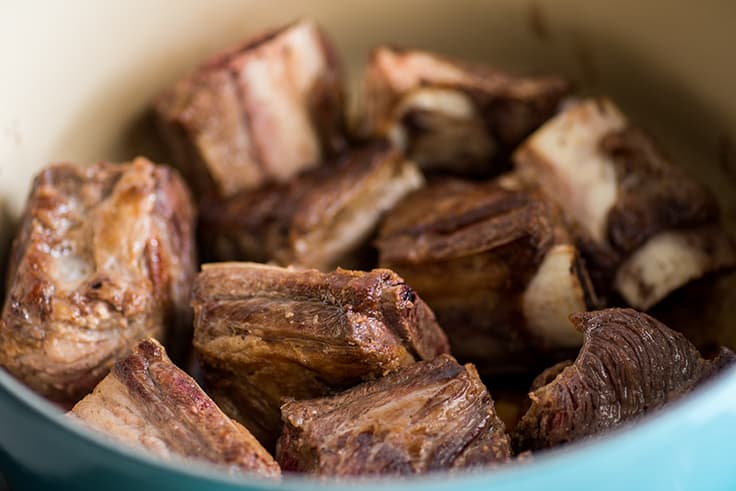
- You’ll start by browning salted and peppered ribs on all sides , which helps to deepen and intensify their flavor. It’s going to take a little while to get them nicely browned, so be prepared to spend about 15 minutes on this step.
Bonus tip: Before you start browning your meat, make sure all of your other ingredients are cut and measured. This will make the rest of the steps much quicker and smoother.

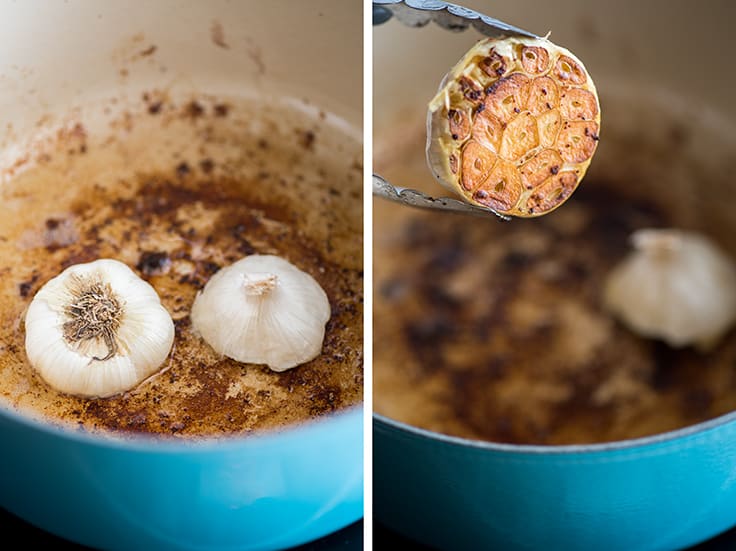
- After browning your meat, you’ll pour off most of the fat, turn down the heat, and brown a couple of garlic halves. Make sure to watch your garlic closely at this point so you don’t burn it.
Don’t worry if your garlic doesn’t cut as neatly as the head in this photo–garlic doesn’t always cooperate. If your halves fall apart a bit, just do the best you can and toss the loose cloves in with the larger pieces. They’ll be strained out at the end anyway.

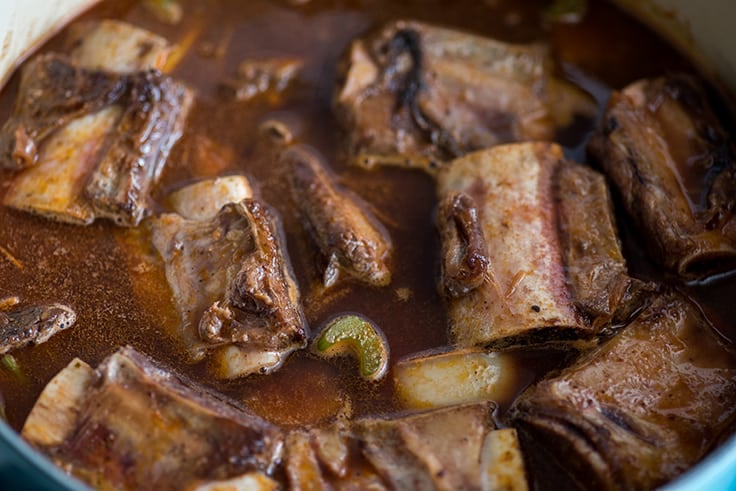
- Next, in go the vegetables followed by the tomato paste and then about half a bottle of red wine followed by beef broth.


- The ribs get returned to the pot and nestled in amongst the vegetables. Before you bring everything back to a simmer, arrange the ribs so that if any parts of them are sticking up out of the liquid, it’s the bone. You want all the meat submerged so that it cooks completely.
Then it’s time for the long slow braising process. These ribs will take about 3½ to 4 hours in the oven or on the stove. They’re done when the meat is fall-apart tender.
At this point, you can serve the ribs or allow them to cool slightly on the counter before refrigerating overnight.

- When you’re ready to reheat the ribs, use a spoon to scrape the solidified fat off the top. Gross, I know, but oddly satisfying too. Reheat the ribs on the stove, discard the veggies (they’re flavorless mush at this point), and strain the braising liquid to remove any small veggie bits.
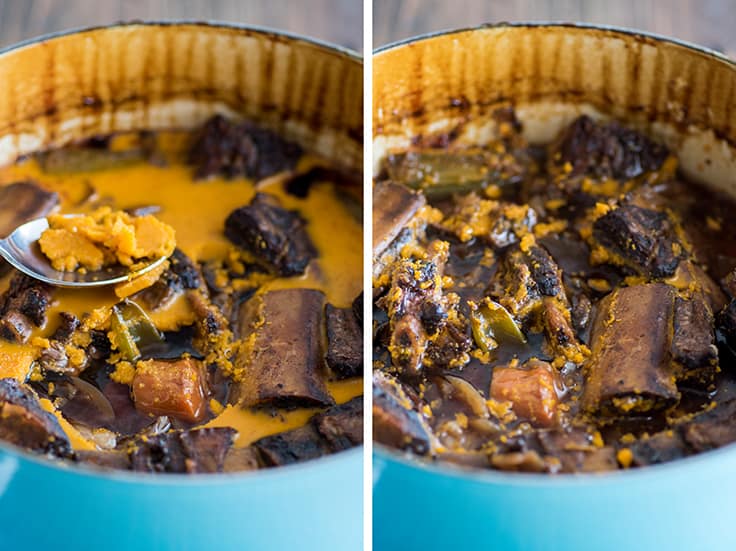

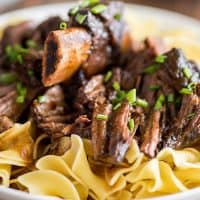
- If you’d like a thicker sauce, you can bring it to a simmer and let it reduce while you make the rest of your dinner. Serve the ribs over egg noodles, mashed potatoes , or polenta and spoon sauce over the top.
And that’s it. Enjoy!


What do you serve with short ribs?
Because they are so rich, I like to serve short ribs with crusty bread and a simple veggie side like:
- Butter and Garlic Green Beans
- Roasted Broccoli
- Roasted Zucchini
- Roasted Green Beans
Can you freeze leftover short ribs?
Yes! Short ribs freeze really nicely. I recommend removing the meat from the bones and freezing it along with some of the cooking liquid in a freezer bag for up to 3 months. When you’re ready to eat the leftover short ribs, defrost overnight in the refrigerator and simply reheat in the microwave.
How many short ribs should you serve per person?
For serving, 2 large ribs or 3 smaller ribs per person is typically a good serving size.
Recipe Notes
- As with carnitas , these ribs take a long time to cook between browning, braising, and reducing the liquid at the end. If you plan on eating them the same day you’re going to cook them, start cooking early and give them PLENTY of time.
- Have some leftovers? Try Short Rib Mac & Cheese .
More Favorite Recipes for Guests
- Roasted Chicken
- Tri-tip in the Oven
- Easy Stroganoff
- Baked Ziti
Ingredients
Special Equipment
- ▢ Large Dutch oven with a lid
- ▢ Fine mesh strainer optional for straining braising liquid
Short Ribs
- ▢ 2 tablespoons vegetable oil
- ▢ 3 to 5 pounds bone-in short ribs ideally, 2 to 3 inches thick
- ▢ Salt and pepper
- ▢ 1 head garlic sliced in half horizontally
- ▢ 1 medium onion roughly chopped
- ▢ 4 celery ribs roughly chopped
- ▢ 2 medium carrots peeled and roughly chopped
- ▢ 3 tablespoons ( 50g ) tomato paste
- ▢ 2 cups dry red wine *
- ▢ 2 cups beef broth plus more if needed
- ▢ ¾ teaspoon ground thyme or 4 sprigs fresh thyme
Serve Over
- ▢ Egg noodles, polenta, or mashed potatoes
Instructions
- Cut vegetables and measure out your ingredients before you begin. Once you start cooking, there isn’t much downtime to prep other ingredients.
- If making in the oven, preheat your oven to 275°F and adjust your baking racks so your Dutch oven will fit.
- Generously salt and pepper short ribs on all sides.
- In a large Dutch oven, heat oil over medium-high heat. In batches, if necessary, deeply brown ribs on all sides. This may take 15 minutes or more.
- Transfer ribs to a plate and pour off all but about 2 tablespoons of the fat (it doesn’t need to be precise).
- Turn heat down to medium and return pan to heat. Add garlic halves, cut-side down, and cook until deeply golden but not burned (watch garlic closely!), 1 to 2 minutes.
- Add the onions, carrots, and celery, and stir. Cook, stirring occasionally for 5 minutes, until the very edges of the onions are starting to turn translucent.
- Add tomato paste and stir to coat the veggies. Cook for about 3 minutes, until the tomato paste begins to caramelize and stick to the bottom of the pot.
- Pour in red wine and bring to a simmer. Use a wooden spoon to scrape any remaining browned bits from the bottom of the pot. Simmer for 2 minutes.
- Add the beef broth and thyme, and stir.
- Return the ribs to the pot, bone-side up, and press them down so they are completely submerged. If any meat is sticking up out of the liquid (bone is fine), add just enough broth to cover.
- Bring the liquid to a simmer over medium-high heat.
- If making in the oven, cover pot and transfer it to the oven. If making on the stove, reduce heat so liquid is just barely at a simmer before covering the pot.
- Cook (in the oven or on stovetop) for 3½ to 4 hours, checking occasionally to make sure meat is completely submerged and braising liquid is just barely simmering. Short ribs are done when meat is very tender and can be easily pulled apart with a fork.
- If serving immediately, skim fat off the top and skip to step 18. If making in advance, refrigerate overnight or until ready to serve.
- About 40 minutes before you are ready to eat, take ribs out of the refrigerator and use a large metal spoon to scrape solid fat off as best you can. Don’t worry if you can’t get every single bit.
- Heat over medium heat and bring to a simmer. If necessary, move meat around so all the meaty bits are submerged. Once at a simmer, cover and cook until meat is heated through, about 5 to 10 minutes.
- Set water on the stove to boil for egg noodles or begin prepping your mashed potatoes.
- Transfer meat to a plate and top with foil to keep warm. Remove and discard the majority of the vegetables with a slotted spoon. Strain the liquid through a fine-mesh strainer into a large bowl or measuring cup.
- Rinse out the pot and return the strained liquid to the pot. Simmer while your pasta/potatoes cook to reduce the liquid slightly.
- Return meat to the pot for the last minute or two of cooking time to reheat.
- Serve ribs over egg noodles or mashed potatoes and spoon sauce over the top. Enjoy!
Video
Notes
Recipe Adapted From The New York Times
This easy baked ziti recipe is a fabulous no-stress, no-fail dinner recipe that tastes great, looks beautiful, and couldn’t be simpler to throw together.
Hello, lovely friends, I’ve got another cheesy pasta recipe for you today, baked ziti!
And not just any ziti: super easy, super delish, made with SAUSAGE, crushed tomatoes, and just a hint of cream, ziti.
You’re going to love it.
Why You Should Make This Baked Ziti Immediately
First, because this is an A++ pasta experience from beginning to end. You’ll feel like an absolute kitchen rockstar when you pull the ziti out of the oven with the skillet sizzling and the cheese browned and beautiful.
And you’re going to feel like an even bigger rockstar when you try the first bite because this is some real good cheesy, meaty pasta. Using Italian sausage instead of hamburger gives the dish tons of extra flavor, and a couple tablespoons of cream in the sauce add just a slightly creamy, rich base note that makes such a difference.
Reason two is that this is one of the easiest dinners you’ll ever make. Seriously, if you can open a can of tomatoes and operate a kitchen timer, you’ve got this with your eyes closed.
Ingredient and Tools Notes
- Italian sausage: Hot, mild, or sweet Italian sausage will all work in this dish. If you don’t usually cook with/buy Italian sausage, you can generally find packages of it near the hamburger in the meat department. If your sausage came in links, you’ll want to remove the casings before cooking. To remove sausage casings, you can make a shallow slice down the sausage lengthwise and peel it off, or just squeeze the sausage until it bursts out the top or bottom and squeeze the meat into a bowl.
- Pasta: Obviously, ziti is traditional here, but penne or rigatoni work great as well.
- Heavy cream: This recipe won’t use up an entire carton of heavy cream. If you need some ideas to use up the leftovers, check out my post on What to Do With Leftover Heavy Cream .
- An oven-safe skillet with a lid: This recipe is designed to go from stovetop to oven. If you don’t own an oven-safe skillet, you can make the sauce in a regular skillet and then transfer it to a baking dish before baking. And if your oven-safe skillet doesn’t have a lid, you can cook the sauce uncovered. Just add ¼ cup of water along with the tomatoes and add another tablespoon or two of liquid towards the end of the cooking time if it seems like too much liquid has evaporated. I also recommend using a splatter screen if you own one because the sauce will pop and make a bit of a mess on the stovetop.
How to Make Baked Ziti
To make this baked ziti, all you have to do is cook some pasta, ziti if you’ve got it, penne or rigatoni if you don’t, farfalle or rotini if you’re feeling like a rebel. While that cooks, you’ll brown some sausage and then a bit of garlic and red pepper flakes.
In goes a can of crushed tomatoes and a bit of salt and pepper. You let that simmer for 15 minutes, stir in the cooked pasta, cream, Parmesan, and basil, top with mozzarella, and then bake.
10 minutes later you pull that beautiful, bubbly pan of ziti out of the oven.
Stop for a moment and appreciate the sizzle.
Then serve with a delicious veggie side ( butter and garlic green beans, roasted zucchini , or oven-roasted broccoli are, as always, HIGHLY recommended) and dig in.
Can you freeze baked ziti?
You can freeze baked ziti, but the pasta will have a slightly softer texture after being frozen and reheated and the cheese texture will suffer slightly.
My prefered way to freeze ziti is to just freeze the sauce. Cook the sauce as instructed in the recipe and then transfer half of it (or whatever portion you’re not going to eat) to a freezer bag and freeze for up to 3 months.
When you’re ready for more ziti, defrost the sauce, mix it with freshly cooked pasta and cheese, and bake. There’s zero loss in quality, and it takes almost no effort to throw together once the sauce is defrosted.
Can I make this baked ziti for two?
Absolutely. This recipe was originally written for two, and you can find that smaller version here , but I found that I and most readers were doubling the recipe when we made it, so I scaled it back up.
While you can make the original smaller version, even if you’re cooking for one or two, I actually recommend just making a full batch of the sauce and freezing half of it following the instructions above. It works super well, and even if you don’t want to use the sauce for baked ziti in the future, you can toss reheated sauce with any pasta for a quick creamy sausage pasta .
I don’t like/have sausage. Can I use hamburger/ground turkey instead?
You can, but the dish won’t have quite as much flavor. Make sure to salt the meat generously while it’s cooking, and I’d add a teaspoon of Italian seasoning as well.
Can I leave out the heavy cream?
You can, but the cream adds a really spectacular richness to the dish. I don’t recommend omitting it.
Easy Baked Ziti Recipe Notes
- As written, this recipe will make four huge servings or six smaller ones.
More Easy Pasta Dishes
- Mac and Cheese for One
- Pesto Chicken Pasta
- Creamy Chicken Pasta
- The Best Beef Stroganoff
- Easy Lasagna
- 15-minute Vodka Sauce

Ingredients
Special Equipment
- ▢ Large oven-safe skillet with a lid
Baked Ziti
- ▢ 1 tablespoon olive oil
- ▢ 8 ounces (about 2⅔ cups ) uncooked ziti penne, or rigatoni
- ▢ 1 pound Italian sausage mild or hot, casings removed
- ▢ 6 cloves garlic pressed or minced
- ▢ Pinch red pepper flakes
- ▢ 2 14-ounce cans crushed tomatoes
- ▢ Salt and pepper
- ▢ ⅓ cup heavy cream
- ▢ ½ cup ( 2oz ) shredded Parmesan
- ▢ 1 teaspoon dried basil
- ▢ 1½ cup ( 6oz ) shredded mozzarella
Instructions
Start Pasta
- Preheat oven to 475°F.
- Bring a medium pot of lightly salted water to a boil and cook ziti according to package instructions until just barely al dente. Don’t overcook the pasta as it will become too soft after baking. Drain and set aside.
Sauce
- While your water boils and pasta cooks, in a large, oven-safe skillet with a lid, heat oil over medium heat. Brown sausage, breaking it into crumbles as it cooks. If there is a lot of grease in the pan, drain sausage or use a paper towel to absorb some of the grease.
- Stir in garlic and red pepper flakes and cook for 30 seconds. Add tomatoes and a sprinkle of salt and pepper. Turn heat up to medium-high and bring to a simmer. Once simmering, reduce heat to medium-low and cover. Simmer, covered, for 15 minutes, stirring occasionally.
- Stir in cooked pasta, cream, Parmesan, and basil. Add more salt and pepper to taste.
Bake
- Sprinkle mozzarella over the top and bake for 10 to 15 minutes until cheese is melted and bubbly. Serve and enjoy!
Notes

Easy Baked Ziti Recipe
Ingredients
Special Equipment
- Large oven-safe skillet with a lid
Baked Ziti
- 1 tablespoon olive oil
- 8 ounces (about 2⅔ cups ) uncooked ziti penne, or rigatoni
- 1 pound Italian sausage mild or hot, casings removed
- 6 cloves garlic pressed or minced
- Pinch red pepper flakes
- 2 14-ounce cans crushed tomatoes
- Salt and pepper
- ⅓ cup heavy cream
- ½ cup ( 2oz ) shredded Parmesan
- 1 teaspoon dried basil
- 1½ cup ( 6oz ) shredded mozzarella
Instructions
Start Pasta
- Preheat oven to 475°F.
- Bring a medium pot of lightly salted water to a boil and cook ziti according to package instructions until just barely al dente. Don’t overcook the pasta as it will become too soft after baking. Drain and set aside.
Sauce
- While your water boils and pasta cooks, in a large, oven-safe skillet with a lid, heat oil over medium heat. Brown sausage, breaking it into crumbles as it cooks. If there is a lot of grease in the pan, drain sausage or use a paper towel to absorb some of the grease.
- Stir in garlic and red pepper flakes and cook for 30 seconds. Add tomatoes and a sprinkle of salt and pepper. Turn heat up to medium-high and bring to a simmer. Once simmering, reduce heat to medium-low and cover. Simmer, covered, for 15 minutes, stirring occasionally.
- Stir in cooked pasta, cream, Parmesan, and basil. Add more salt and pepper to taste.
Bake
- Sprinkle mozzarella over the top and bake for 10 to 15 minutes until cheese is melted and bubbly. Serve and enjoy!
