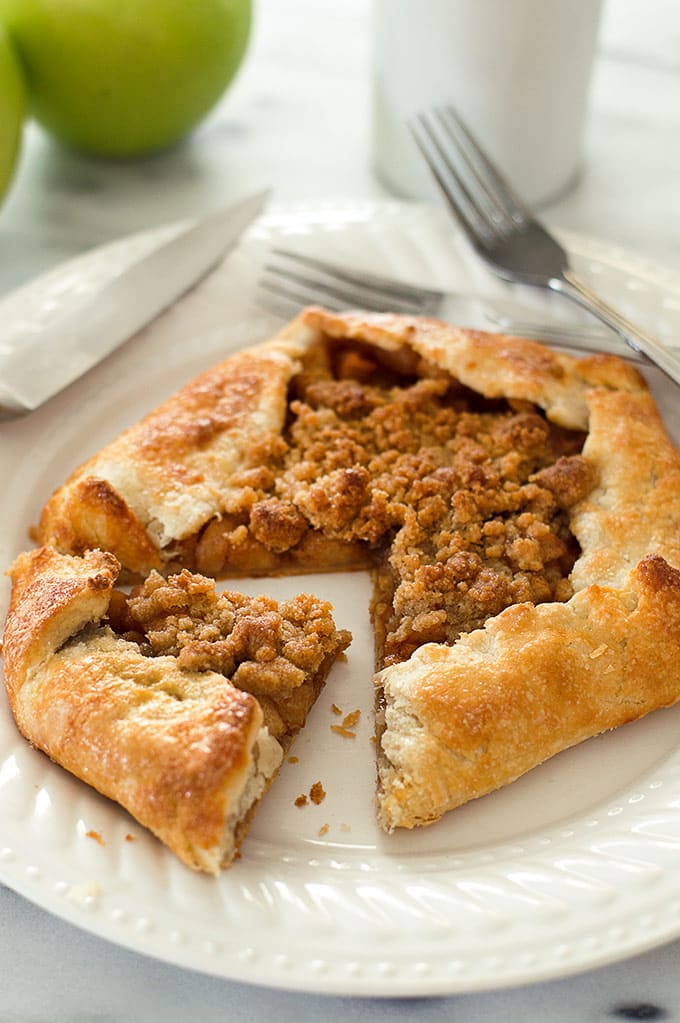
This Dutch Apple Galette for Two is an easy and beautiful rustic dessert for those days when you feel like pie without all the hassle.

Sometimes you feel like pie, but you don’t feel like actually making pie.
Sometimes you feel like eating a slice of pie, but you don’t feel like eating pie leftovers for a week.
Sometimes a galette for two might be just the thing you are looking for.
Guys, I love galettes. They have all the trappings of pie without the all the fussy bits. No one’s spending 45 minutes creating a perfectly braided lattice top for a galette. You roll some pie dough out to something vaguely resembling a circle, fill it with fruit, fold it, and bake. It’s perfectly perfect in its imperfection.
You can turn most fruit pies into a galette, but given that this is September and apple season is just getting started, I thought we’d kick off this galette train with a Dutch Apple Galette for Two.

This dessert is good-looking enough to serve for a special occasion, but simple enough to make on a random Saturday afternoon when you feel like bumming around the kitchen for a while. (This recipe was born in my kitchen on just such a Saturday. ;))
And if making a pie from scratch is something you’ve never gotten around to, a galette is a great place to start building your pie-making muscles.
It takes half the effort and less than half the skill since there’s no fussy top to work with. Plus, since we are using my favorite–and after being pinned 16,000+ times on Pinterest , I’m going to say, Famous– buttermilk pie crust , you know this dough is going to be easy to make and easy to work with. I LOVE IT.

Okay, I’ve been singing the praises of galettes in general, but why should you make a Dutch Apple Galette specifically? Because it’s knock-you-down fantastic. The crust is flakey and dusted with sugar. The apples are cooked to sweet cinnamon perfection. And hey, do you like streusel topping?
Because I’ll give you streusel topping. This thing is piled high (some might say too high (NOT ME!)) with streusel, which offers a fantastic sweet and slightly crunchy contrast with the apples and buttery pie crust.
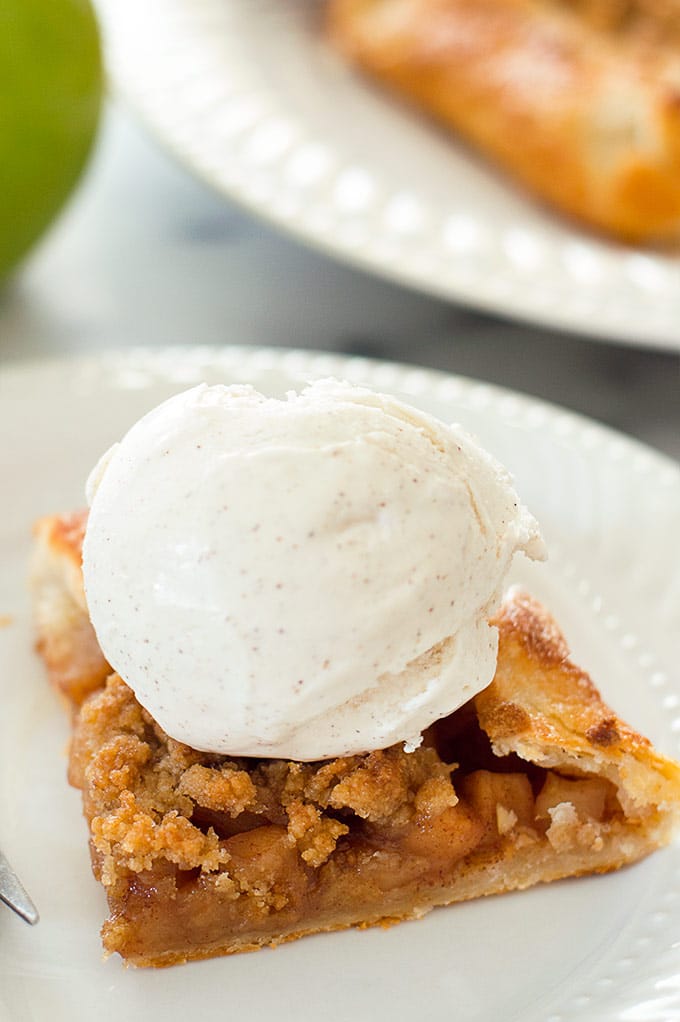
Serve it hot, straight out of the oven. Serve it drizzled in caramel sauce . Serve it with a comically large scoop of ice cream and take hasty pictures of it before devouring it at 9 in the morning.
The only bad option is not serving it at all.

More Perfect Fall Desserts
- Small Apple Cinnamon Cake
- Pumpkin Donuts With Maple Glaze
- Small-batch Banana Muffins
- Small-batch Apple Cinnamon Muffins

Ingredients
Crust
- ▢ 1/4 batch My Favorite Buttermilk Pie Crust prepared and chilled
Apple Filling
- ▢ 1 1/2 cups diced granny smith apples about 2 small apples
- ▢ 1 tablespoon ( 14 g) unsalted butter
- ▢ 1 tablespoon ( 12 g) granulated sugar
- ▢ 1 tablespoon ( 12 g) brown sugar
- ▢ 1/4 teaspoon cinnamon
- ▢ 1/8 teaspoon nutmeg
- ▢ 1/8 teaspoon salt
- ▢ 1/4 teaspoon vanilla
Streusel
- ▢ 1 tablespoon ( 14 g) unsalted butter softened
- ▢ 2 tablespoons ( 15g ) all-purpose flour
- ▢ 1 tablespoon and 1 1/2 teaspoon ( 19 g) brown sugar
Egg Wash
- ▢ 1 egg
- ▢ 1 tablespoon milk
- ▢ 1 teaspoon ( 4 g) granulated sugar
Instructions
- Preheat oven to 400°F. Line a baking sheet with parchment paper.
Apple Filling
- Combine apples, butter, granulated sugar, brown sugar, cinnamon, nutmeg, and salt in a small sauce pan. Bring to a simmer over medium heat and cook, stirring occasionally for 4 to 6 minutes, until apples are slightly softened. Remove from heat and stir in vanilla.
Roll Dough and Assemble
- Take your dough out of the fridge and allow it to sit out for about 5 to 10 minutes, depending on how warm your kitchen is. You want it pliable enough to roll without cracking, but not so warm that the chunks of butter in the dough become melty.
- On a well-floured surface, roll the dough ball out to a circle 1/8-inch thick (This is the best thickness for folding. Don’t be afraid to check it with a ruler!). When rolling, start from the middle of your dough and work your way out first in one direction, then the other. After every other roll, pick up your dough and rotate it 1/4 turn. If anything begins to stick, add more flour under or over your dough.
- Once your dough reaches the proper thickness, dust off the excess flour and transfer it to the center of your prepared baking sheet. Pour the apple mixture into the center of the dough, stopping at least 1 1/2-inch from the edge.
- Fold the edges over the apples in 5 or 6 folds (or as many as you need!). Edges will be ragged and if they rip, you can “glue” pieces back together with a tiny bit of water rubbed on with your finger tip.
Streusel
- In a small bowl, stir together flour and sugar. Add softened butter and use your fingers to mix until everything is well-incorporated, thick, and crumbly. Drop in crumbles over the apples.
Egg Wash
- In a small bowl, whisk together egg and milk. Brush over the edges of your galette. Sprinkle crust with sugar.
- Bake for 20 to 25 minutes until fruit is bubbly and crust browned. Cool for at least 10 minutes before slicing and serving.
Notes
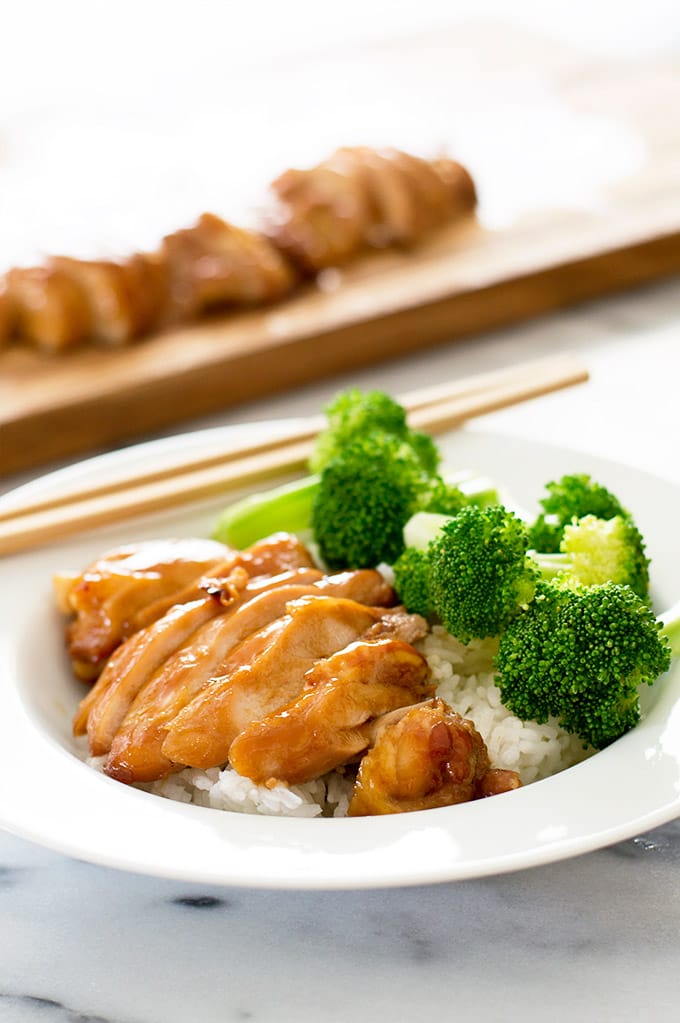
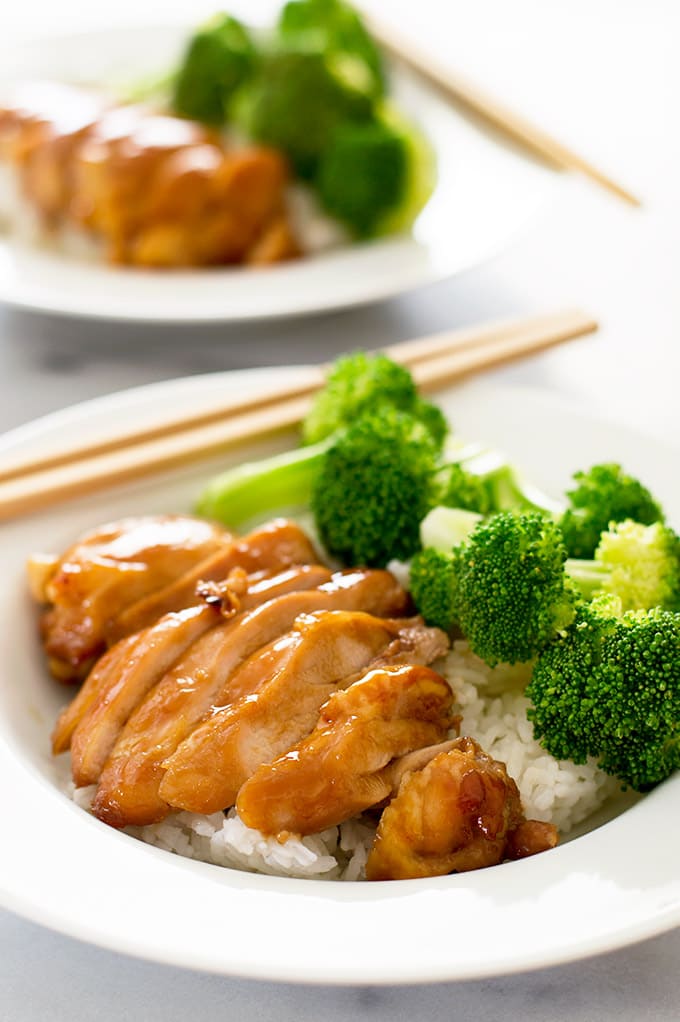
This easy teriyaki chicken with homemade teriyaki sauce has to be one of the simplest, most delicious dinners ever.

We’re well into September, which means it’s time for a new recipe theme for the month! Last month’s theme was Slow Cooker recipes since it was way too hot in August to be running an oven. This month since it’s (nearly) fall, school has started, and the days are getting shorter, I thought I’d go with a theme we could all use right about now, dead simple recipes.
I have a few of those on the site already, like my Quick Rosemary Pork Chops or the World’s Easiest Chicken Taco Soup , but we can always use a few more.
These are the recipes I make when there is no bone left in my body that can even fathom picking up a knife when dinnertime comes around.
They are all easy, quick, and healthy. These are some of my most-made recipes, and I think you are going to love them. We’ll start out with Easy Teriyaki Chicken because it’s about as simple of a recipe as you can get.
Before we get to the good stuff, I want to say: I’m including a homemade teriyaki sauce recipe here. It’s thick, quite sweet, and AMAZING. It makes enough for 2 to 3 meals and will keep for a few weeks in the fridge. The recipe calls for a couple of ingredients that you might not keep on hand if you don’t cook Japanese food often, but I’ve included substitutions in the recipe notes.
This homemade teriyaki doesn’t require any cutting or grating, just a little measuring, mixing, and simmering, but if that sounds like too much for you tonight, this cooking method works just as well with a store-bought sauce. (I’m kind of partial to the Panda Express Mandarin Sauce * myself.)
It’s great when it is, but sauce doesn’t always need to come from scratch. 😉
Moving on.
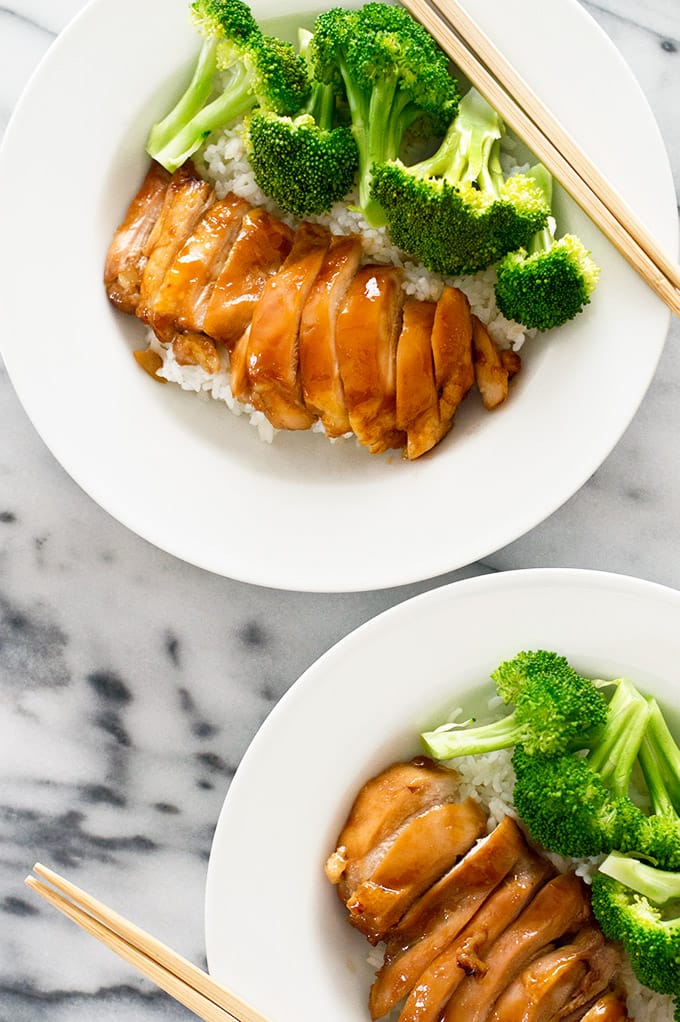

This is just about the best, easiest chicken recipe out there. Just pour a bit of teriyaki sauce over some boneless skinless chicken thighs in the morning or at least 30 minutes before cooking. Then plop those babies on a greased baking sheet and bake in a nice hot oven so they cook quick without drying out.
We’ll baste them once about halfway through so you get a lovely baked-on glaze, and then, boom. You have teriyaki chicken that is honestly better than takeout, and you didn’t have to lift a knife to get it. (Okay, you will have to pick up a knife to eat it.) The whole thing takes about 15 minutes from start to finish.
Serve this Easy Teriyaki Chicken with a side of steamed broccoli and some rice ( Calrose is my favorite * for serving with Asian dishes), and enjoy the rest of your evening with a glass of wine and some Netflix.

As written, this Easy Teriyaki Chicken recipe serves 2. See recipe notes for doubling instructions.

Ingredients
Homemade Teriyaki Sauce
- ▢ 1/3 cup soy sauce
- ▢ 1/4 cup water
- ▢ 2 tablespoons mirin*
- ▢ 1 tablespoon rice wine vinegar*
- ▢ 1/4 cup ( 50 g) granulated sugar
- ▢ 3 tablespoons ( 37 g) brown sugar
- ▢ 1/2 teaspoon garlic powder
- ▢ 1/2 teaspoon ground ginger
- ▢ 1/2 tablespoon cornstarch whisked with 1 tablespoon water
Teriyaki Chicken
- ▢ 2 large or 4 small boneless skinless chicken thighs
Serve With
- ▢ Rice
- ▢ Steamed Broccoli
Instructions
Homemade Teriyaki Sauce
- Combine soy sauce, water, mirin, rice wine vinegar, granulated sugar, brown sugar, garlic powder, ground ginger, and cornstarch and water mixture in a small sauce pan. Bring to a simmer over medium-high heat, stirring occasionally. Turn heat down to medium and simmer for 4 to 6 minutes, until sauce is thickened. (It will thicken further as it cools.)
Teriyaki Chicken
- In a small bowl or plastic bag, combine chicken thighs and about 3 tablespoons of teriyaki sauce. Toss to coat. Marinate for at least 30 minutes, up to 12 hours.
- Preheat your oven to 400°Line your baking sheet with foil for easy clean up and lightly grease. Remove thighs from the marinade and transfer to baking sheet. Bake for 8 minutes. Pour about 3 tablespoons of sauce into a small bowl and use to baste the chicken thighs. Discard remaining basting sauce.
- Bake for an additional 3 to 5 minutes before using an instant-read thermometer in the thickest part of the meat. Once the meat reads 165°, pull it from the oven and allow it to rest for at least 5 minutes before slicing. Thigh size varies wildly, so baking time will too. Don’t be alarmed if your thighs take longer to cook.
- Brush with additional teriyaki sauce if desired. Serve over white rice with steamed broccoli and enjoy!
Notes
Teriyaki Sauce Adapted From Food Network
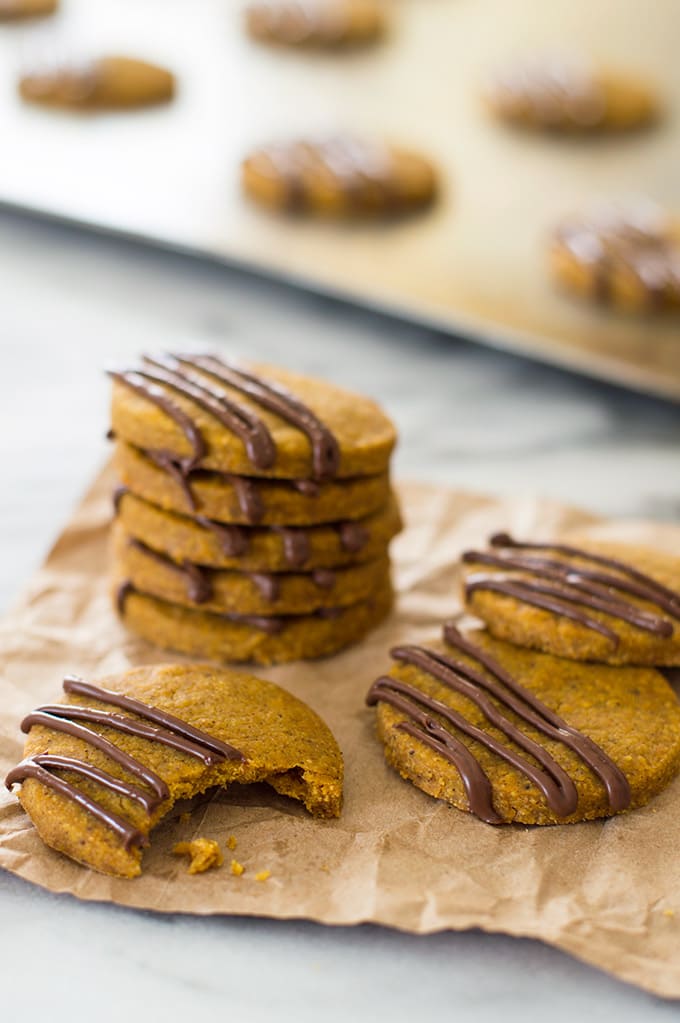
These Pumpkin Shortbread Cookies made with browned butter and pumpkin puree are lightly spiced, the perfect combo of crunchy and crumbly, and full of pumpkin flavor.

But when I went looking for pumpkin shortbread cookie recipes, I realized a pumpkin/shortbread hybrid was easier said than created.
Here’s the thing about cooking with pumpkin: pumpkin holds a ton of moisture. That’s why cooking with it gives you the softest, moistest breads, cakes, cookies in the world.
So adding pumpkin to shortbread gives you a bit of a problem.
To get the correct shortbread texture and use pumpkin, you have to remove some of the moisture from the ingredients. I initially thought about cooking the pumpkin until it was reduced, but that meant a fairly long cooking time that I didn’t want to build into the recipe. But, by a stroke of luck, while researching a different recipe, I discovered that you can actually just literally squeeze the moisture out of canned pumpkin.
Seriously. It’s easy. And only takes a few paper towels and about 30 seconds. Win!
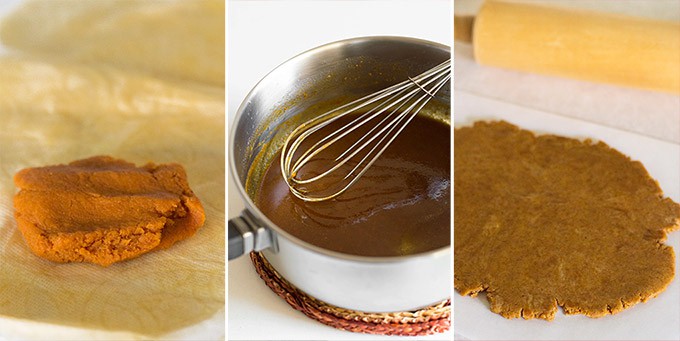
Squeezed Pumpkin Puree, Browned Butter and Pumpkin Puree, Dough (1/2 batch)
The second thing I knew I was going to have to do was cook some of the water out of the butter. This means browning it over medium heat for 4 to 5 minutes while some of the water evaporates, and you are left with butter that is dark, aromatic, and beautiful. Plus, the browned butter gives these cookies a rich, nutty base flavor. Double win!
If you’ve never browned butter before, I’ve embedded a how-to video from America’s Test Kitchen below the recipe. The process isn’t hard, but sometimes it’s nice to have a visual reference.
Once you have your pumpkin and butter prepared, these cookies come together in a flash and are so worth the little extra trouble at the start.
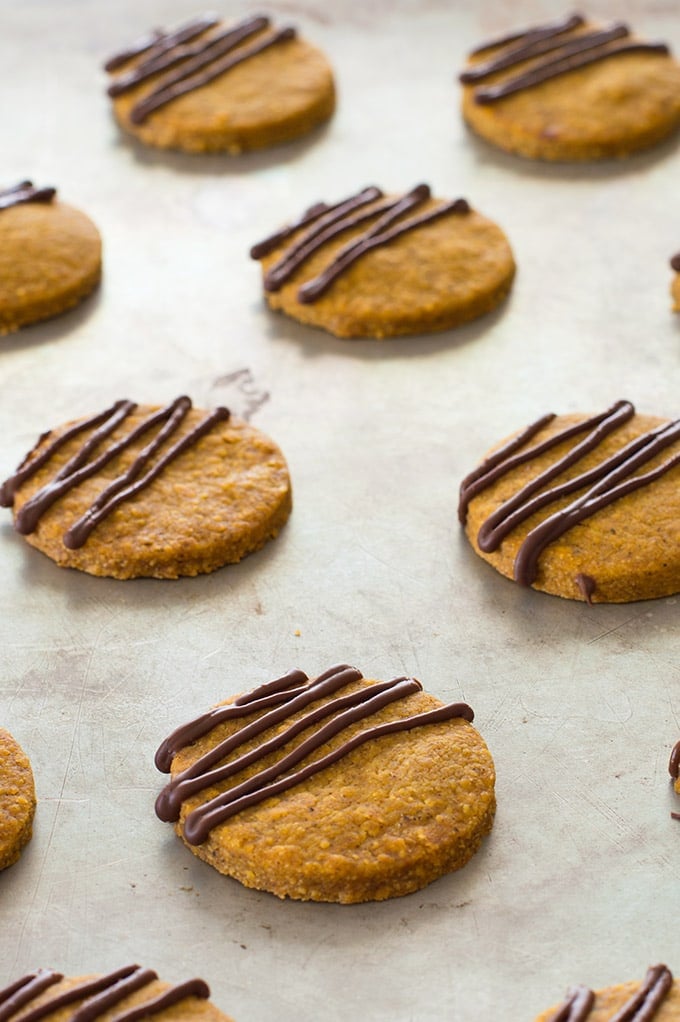

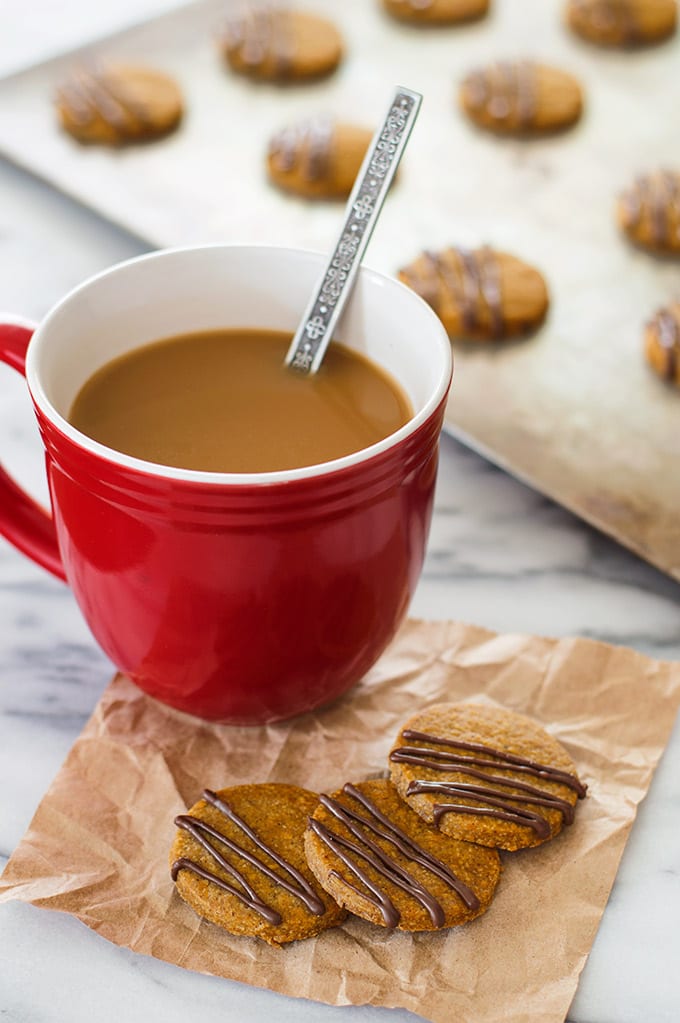
I’m a huge fan of these pumpkin shortbread cookies. They are full of pumpkin flavor and have just the right balance between crunchy and crumbly, sweet but not too sweet, and spiced but not overwhelmingly so. I drizzled the cookies with a bit of melted chocolate for added visual interest in the photos (and I put instructions for it in the recipe) but they don’t really need it.
These cookies are just as tasty naked. 😉

This recipes uses 1/4 cup of pumpkin puree, which about 1/7 of a standard 15-ounce can. You can check out my post What to Do With Leftover Pumpkin Puree for some ideas on what to do with the other 6/7s.
For more pumpkin recipes, try P umpkin Donuts With Maple Glaze , Small-batch Pumpkin Cupcakes , and this Small Pumpkin Cake .

Ingredients
Pumpkin Shortbread Cookies
- ▢ 1/4 cup ( 61 g) pumpkin puree
- ▢ 1/2 cup ( 4 oz) salted butter cubed
- ▢ 1 cup ( 120 g) all-purpose flour
- ▢ 1/4 cup and 2 tablespoons ( 45 g) powdered sugar
- ▢ 1 teaspoon cinnamon
- ▢ 1/8 teaspoon ground cloves
- ▢ 1/8 teaspoon nutmeg
- ▢ 1/8 teaspoon ginger
Chocolate Drizzle
- ▢ 1/3 cup semi-sweet chocolate chopped (high-quality chips are fine)
- ▢ 1 teaspoon vegetable oil
Instructions
Pumpkin Shortbread Cookies
- Preheat your oven to 350°F and line baking sheet with parchment paper or a baking mat.
- Scoop pumpkin puree onto a very clean dish towel or a couple layers of paper towels, fold towel over the puree, and press down firmly, squeezing moisture out of. Flip the puree onto a dry spot and repeat once or twice more until most of the moisture has been removed and you can pick the puree up in a ball.
- Melt butter in a medium, heavy-bottomed, light-colored saucepan over medium heat. Bring to a simmer and cook, swirling the pan frequently, until butter becomes a medium nutty brown color. Do not leave the butter unattended as the milk solids will burn easily. Remove from heat.
- Add prepared pumpkin puree to the butter and whisk vigorously until well-combined (it will bubble and pop, so be careful).
- In a large bowl, whisk together all of the dry ingredients. Pour pumpkin and butter mixture over the top and use a rubber spatula to stir the ingredients until well-combined.
- Place the dough between 2 sheets of parchment paper and roll out to about 1/4-inch thick. Place in the refrigerator while you clean up, about 5 minutes.
- Remove dough from the refrigerator and cut out 30 to 40 1 1/2-inch rounds. Use a metal spatula to transfer rounds to prepared baking sheet. Gathering scraps and re-rolling (between your sheets of parchment paper) as necessary.
- Bake for 10 to 12 minutes, until the tops of the cookies lose their shiny, under-cooked look.
- Cool completely on the tray, at least 20 min.
Chocolate Drizzle
- In a small, microwave-safe bowl, combine chopped chocolate and oil. Microwave on medium for 30 seconds. Stir. Continue to microwave in 15-second increments if necessary, until your chocolate is smooth. Use a spoon to drizzle chocolate or transfer chocolate to a small plastic bag and snip a very small piece of the corner so you can “pipe” lines.
- Chocolate will set in about 1 hour, or transfer cookies to the refrigerator and it will set almost immediately.
How to Brown Butter

Dutch Apple Galette for Two
Ingredients
Crust
- 1/4 batch My Favorite Buttermilk Pie Crust prepared and chilled
Apple Filling
- 1 1/2 cups diced granny smith apples about 2 small apples
- 1 tablespoon ( 14 g) unsalted butter
- 1 tablespoon ( 12 g) granulated sugar
- 1 tablespoon ( 12 g) brown sugar
- 1/4 teaspoon cinnamon
- 1/8 teaspoon nutmeg
- 1/8 teaspoon salt
- 1/4 teaspoon vanilla
Streusel
- 1 tablespoon ( 14 g) unsalted butter softened
- 2 tablespoons ( 15g ) all-purpose flour
- 1 tablespoon and 1 1/2 teaspoon ( 19 g) brown sugar
Egg Wash
- 1 egg
- 1 tablespoon milk
- 1 teaspoon ( 4 g) granulated sugar
Instructions
- Preheat oven to 400°F. Line a baking sheet with parchment paper.
Apple Filling
- Combine apples, butter, granulated sugar, brown sugar, cinnamon, nutmeg, and salt in a small sauce pan. Bring to a simmer over medium heat and cook, stirring occasionally for 4 to 6 minutes, until apples are slightly softened. Remove from heat and stir in vanilla.
Roll Dough and Assemble
- Take your dough out of the fridge and allow it to sit out for about 5 to 10 minutes, depending on how warm your kitchen is. You want it pliable enough to roll without cracking, but not so warm that the chunks of butter in the dough become melty.
- On a well-floured surface, roll the dough ball out to a circle 1/8-inch thick (This is the best thickness for folding. Don’t be afraid to check it with a ruler!). When rolling, start from the middle of your dough and work your way out first in one direction, then the other. After every other roll, pick up your dough and rotate it 1/4 turn. If anything begins to stick, add more flour under or over your dough.
- Once your dough reaches the proper thickness, dust off the excess flour and transfer it to the center of your prepared baking sheet. Pour the apple mixture into the center of the dough, stopping at least 1 1/2-inch from the edge.
- Fold the edges over the apples in 5 or 6 folds (or as many as you need!). Edges will be ragged and if they rip, you can “glue” pieces back together with a tiny bit of water rubbed on with your finger tip.
Streusel
- In a small bowl, stir together flour and sugar. Add softened butter and use your fingers to mix until everything is well-incorporated, thick, and crumbly. Drop in crumbles over the apples.
Egg Wash
- In a small bowl, whisk together egg and milk. Brush over the edges of your galette. Sprinkle crust with sugar.
- Bake for 20 to 25 minutes until fruit is bubbly and crust browned. Cool for at least 10 minutes before slicing and serving.
