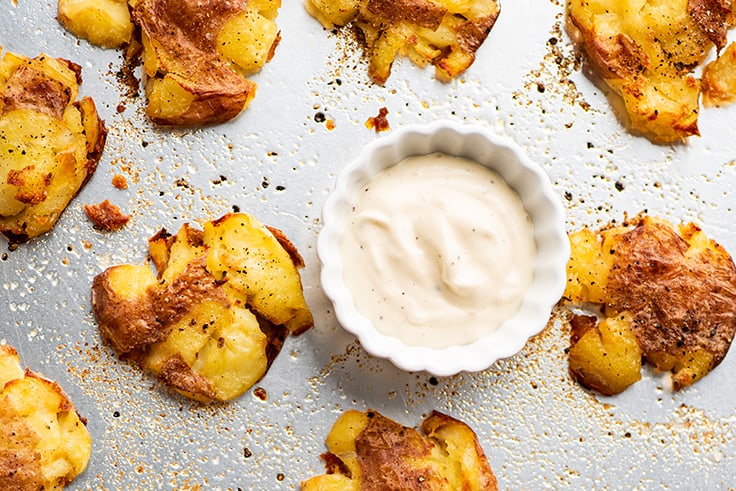
These smashed red potatoes have creamy centers and crispy, almost potato-chip-like edges. They’re easy to make and completely irresistible.
Last summer I shared my favorite crispy oven-roasted potatoes with you, and I have another favorite potato side dish for you today, one that’s EVEN CRISPIER: roasted smashed red potatoes.
Have you ever had smashed potatoes before? Friend, they are sooooo good, and I’m genuinely SO excited for you to try them.
They have these fabulous creamy centers and crispy, almost potato-chip-like edges. You make them once, and you’ll probably end up a little obsessed and find yourself making them constantly because they are impossibly good.


Ingredient Notes
- Small/new red potatoes: Smashed potatoes are best with small/new potatoes. If you’re having trouble finding them in the produce section, they’re often sold in bags rather than as loose individual potatoes the way larger potatoes are.
- Olive oil: There are 3 tablespoons of olive oil in this recipe. Don’t try to reduce the oil as it’s part of what helps these potatoes become so crispy and delicious in the oven!!
A Note on Potato Size
Most smashed potato recipes will call for small/new potatoes. This is because larger potatoes are too big to cook evenly all the way through when boiling, so you end up with overcooked outsides that will not hold together after smashing.
You can make smashed potatoes with medium-to-large red potatoes, but they’re not going to be pretty individual potato bites that hold together like the ones in these photos.


How to Make Smashed Potatoes
Smashed potatoes take a little while to make, about 45 to 55 minutes, but all the steps are super easy, and 95% of that cooking time is hands-off.
- Start with cleaned and dried potatoes and use a knife or potato peeler to scrape away any bad spots.
- Simmer in generously salted water until fork tender.
- Smash on a baking sheet, drizzle with olive oil, and bake until suuuuuuper crispy.
- Eat. 😉
To make this recipe with larger red potatoes , after smashing (you might want to use the bottom of a small pot to smash them), you’ll have a giant mass of smashed potatoes. Separate the mass into smaller sections on the tray so there are plenty of edges (the edges are what become crispy) and then cook according to the recipe instructions.

Garlic Aioli
Smashed potatoes are fabulous on their own, but they are even better when dipped in tangy garlic aioli . This aioli can be made with either mayonnaise or plain, unsweetened yogurt for yogurt aioli , and really just takes the potatoes to a whole new level of amazing.
What to Serve With Smashed Potatoes
Smashed potatoes make a pretty great side for most proteins, but since they’re going to occupy your oven for upwards of half an hour, I like to serve them with grilled or pan-cooked mains like a Marinated Steak or Panini and a side of corn or broccoli .
What is the difference between mashed potatoes and smashed potatoes?
That’s an easy one. Mashed potatoes are boiled until soft and then mashed with butter and cream or milk until creamy and delicious. Smashed potatoes are boiled until fork tender and then smashed on a baking sheet, drizzled with oil and baked until they are crispy and perfect. Both are amazing but one is creamy and one is crispy.
Do you boil water before adding potatoes?
No. Always start potatoes in cold water. This is because potatoes are quite dense but cook quickly, so it’s easy to overcook the outside of the potatoes before the insides are tender. Starting the potatoes in cold water allows them to cook more evenly all the way through.
More Favorite Side Dishes
- Roasted Zucchini
- Butter and Garlic Green Beans
- Roasted Broccoli
- Parmesan Orzo
- Italian Roasted Potatoes
Recipe Notes
- These potatoes are best when eaten immediately (reheated leftovers become a little chewy), so this recipe is written to serve 2-3. If you’re feeding a larger number of people, the recipe doubles with no adjustments needed. To change the recipe yield, hover over the serving size or click if you’re on mobile, and slide the slider.

Ingredients
Smashed Potatoes
- ▢ 1 pound small red potatoes scrubbed clean and trimmed of any imperfections
- ▢ 1 tablespoon salt plus more as needed
- ▢ 3 tablespoons olive oil
- ▢ Pepper
Aioli
- ▢ ¼ cup plain yogurt OR mayonnaise *
- ▢ 1 garlic clove pressed
- ▢ 1 teaspoon lemon juice fresh or bottled is fine
- ▢ ⅛ teaspoon salt
- ▢ ⅛ teaspoon pepper
Instructions
- Grease a large, rimmed baking sheet with cooking spray and set aside. Preheat oven to 450°F.
- In a medium pot, cover clean potatoes with cold water and add salt. Bring to a simmer and cook until potatoes are just fork tender, 10 to 15 minutes.
- Drain and let potatoes cool for 5 minutes.
- Drizzle 1 tablespoon of the oil over the prepared baking sheet. Add potatoes to the tray and shake it so the potatoes are coated in oil. Use a potato masher or flat-bottomed glass sprayed with cooking spray to smash each potato. Drizzle remaining oil over the top so potatoes are well-coated.
- Sprinkle with salt and pepper and bake until golden and crispy, about 30 to 40 minutes.
- While your potatoes are baking, make the aioli. Stir together yogurt or mayonnaise, lemon juice, garlic, salt, and pepper in a small bowl.
- Serve potatoes with aioli and enjoy!
Notes
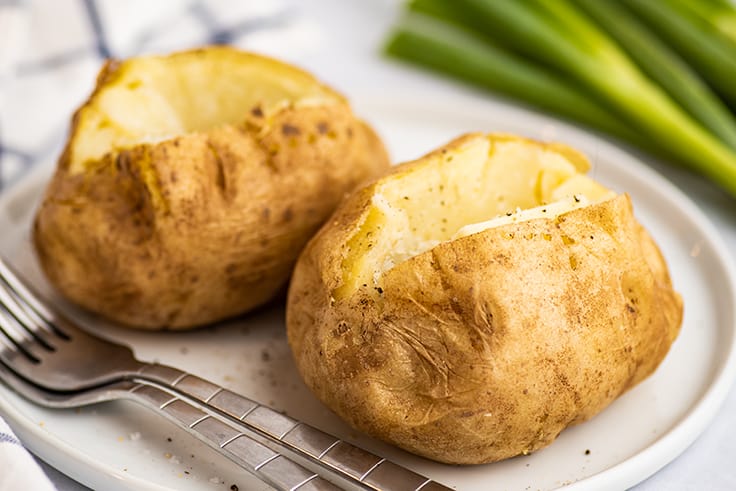
How to make a quick and easy Microwave Baked Potato. Skip the long baking time and make your “baked” potatoes in the microwave in just minutes.
When it’s a baked potato night but you’re short on time, a microwave baked potato is such a time saver.
Potatoes cooked in the microwave are ready in a fraction of the time and still come out soft and fluffy and perfect for loading with toppings.

How Long to Microwave a Baked Potato
If you popped in from search looking for this info, here you go:
- Microwave 1 potato* for 3 to 4 minutes per side
- 2 potatoes for 4 to 5 minutes per side
- 3 potatoes for 5 to 6 minutes per side
*Be sure to pierce potatoes with a fork before microwaving.
These times are for average-to-large-size baking potatoes of around 10 ounces. For smaller potatoes, start with one minute less, and for larger, one minute more.
Now that’s covered, if you want a little more information, keep reading.
How to Prep Microwave Baked Potatoes


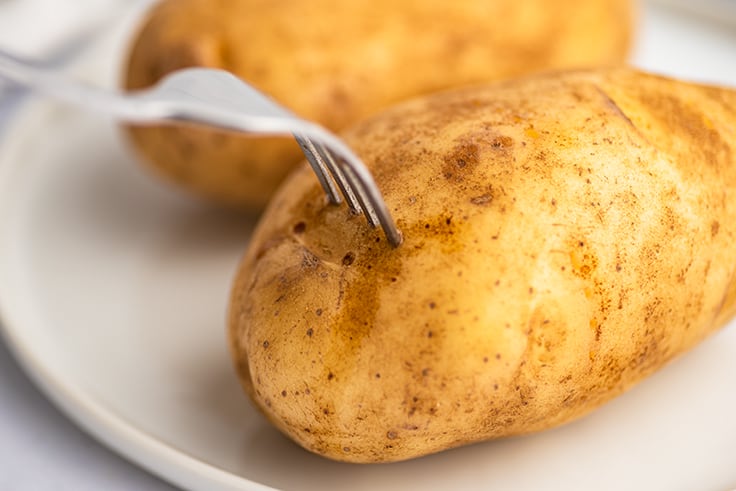
- Always start by giving your potato a good scrub to remove any debris from its skin.
- Dry the potato and then pierce it all over with a fork. This allows steam to escape as the potato cooks and will prevent it from exploding in your microwave.
How to Bake a Potato in the Microwave

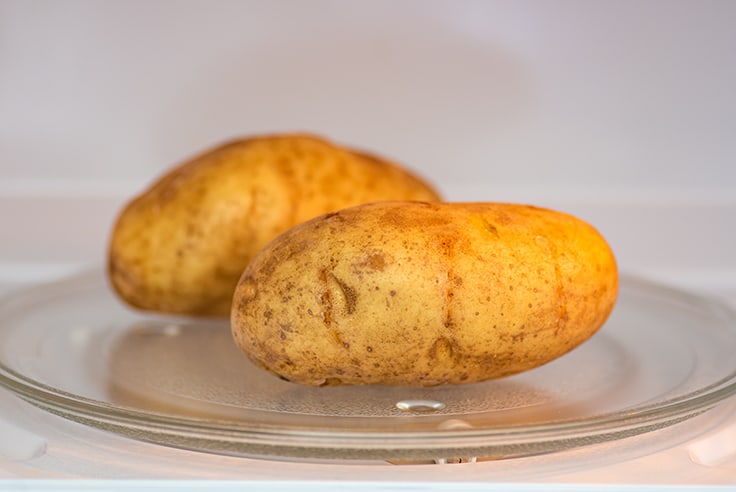
Once your potato is scrubbed, dried, and pierced, place it directly into the microwave. If cooking more than one potato at a time, make sure that the potatoes are not touching.
Cook the potato for 3 to 4 minutes and then carefully flip and cook for an additional 3 to 4 minutes. For every extra potato you’re cooking, add 1 minute for each side.

Use a knife to pierce the potato and check for doneness. The potato should feel tender (but not mushy) all the way through.
If the potato is finished, allow it to sit for 1 minute to cool slightly before removing it from the microwave. If still hard, continue to cook in 1-minute increments until the potato is tender.
Getting Crispy Skin on a Microwave Baked Potato
If you really love a baked potato with crispy skin, you can still get that even if you do most of the cooking in the microwave.
To crisp the skin of a microwave baked potato: Preheat your oven to 425°F and cook the potato(es) in the microwave according to the recipe instructions. Once cooked, rub your potato with olive oil—it will be hot, so handle with care! Sprinkle generously with salt (preferably coarse salt) and place the potato on a baking sheet.
Bake until the skin is crispy, usually 10 to 15 minutes. Serve and enjoy!
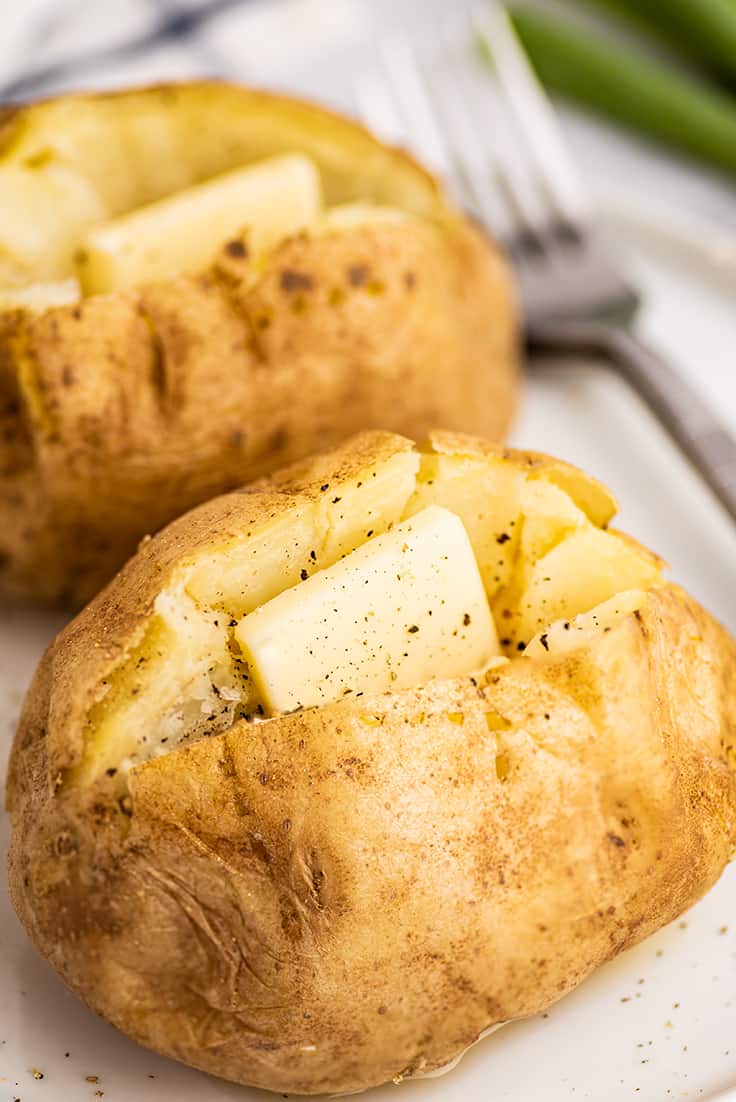
Baked Potato Toppings
Once your potatoes are finished, time to load them up. You can use classic baked potato toppings like:
- Butter
- Cheese
- Sour cream
- Bacon
Or go with some non-traditional toppings like:
- Chili
- Broccoli and cheese sauce
- Taco filling and nacho sauce
How to cut a baked potato like a restaurant?
To cut a baked potato like a restaurant, slice the potato lengthwise across the top, cutting about halfway down. Then, using a thick towel to protect your hands from the hot potato, use the thumb and index finger of each hand to squeeze the sides of the potato inward until the slice splits open.
Use a fork to fluff up the insides of the potato before adding your toppings.

Why do potatoes get hard in the microwave?
Potatoes get hard in the microwave when they’re overcooked and the overcooked sections lose too much moisture and become dry and hard.
If you’re using an older microwave without a revolving plate and find that your potato is developing hard spots before it’s cooked all the way through, try rotating it (not just flipping it) a couple times during the cooking process so it cooks evenly all over.
What to serve with baked potatoes?
A loaded baked potato (like a chili baked potato or broccoli and cheese potato ) can be a meal all on its own, but baked potatoes are also classic sides for meaty mains. I recommend:
- Tri-tip
- Marinated Steak
- Roasted Chicken
- Top Sirloin Steak
More Quick Microwave Recipes
- Microwave Sweet Potatoes
- Broccoli in the Microwave
- Cauliflower in the Microwave
- Corn on the Cob in the Microwave
- Green Beans in the Microwave
- Carrots in the Microwave

Ingredients
- ▢ Medium-to-large baking potato scrubbed and dried*
Instructions
- Pierce potato all over with a fork before placing it directly into the microwave. If cooking more than one potato at a time, make sure that the potatoes are in a single layer and not touching.
- Cook the potato for 3 to 4 minutes and then carefully flip and cook for an additional 3 to 4 minutes. For every extra potato you’re cooking, add 1 minute for each side.*
- Use a knife to pierce the potato and check for doneness. The potato should feel tender (but not mushy) all the way through.
- If the potato is finished, allow it to sit for 1 minute to cool slightly before removing it from the microwave. If still hard, continue to cook in 1-minute increments until the potato is tender.
Notes
- 2 potatoes for 4 to 5 minutes per side
- 3 potatoes for 5 to 6 minutes per side
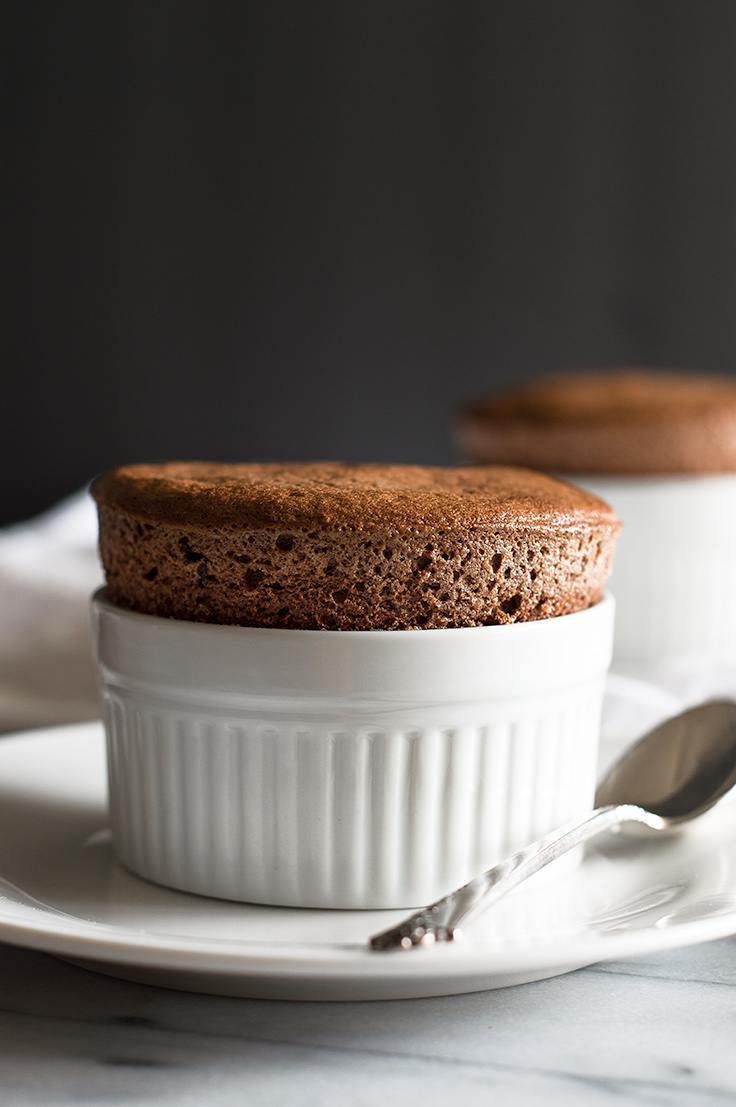
These easy Chocolate Souffles for Two drizzled with homemade creme anglaise are a perfect make-ahead date night dessert.
Hey, do you need a recipe to impress? I have just the thing for you: chocolate souffles!!
Here’s the thing about souffles: They sound fancy. They look and taste amazing. People think they’re hard to make. You are 100 percent capable of making one and winning at hosting forever and ever.

Souffles get a bad rap but they are really not that difficult. If you follow the instructions, you’ll do great.
I’ve literally never had one fail on me, and I don’t think I can say that about any other dessert category under the sun (oh, the fallen cupcake stories I could tell…).
What is a chocolate soufflé?
Chocolate souffles are a French dessert made primarily with eggs and chocolate. Whipped egg whites are folded into a mixture of melted chocolate, butter, and egg yolks and then baked. As it bakes, the mixture puffs up and rises tall and beautiful above the rim of the baking dish.
The tricky thing about souffles is that what goes up must come down. Once removed from the oven, the souffle will begin to sink within minutes, so they’re meant to be served immediately after baking.
And when not mixed properly or treated too roughly, they can sink prematurely which is what gives people such anxiety about making them.
What does a chocolate souffle taste like?
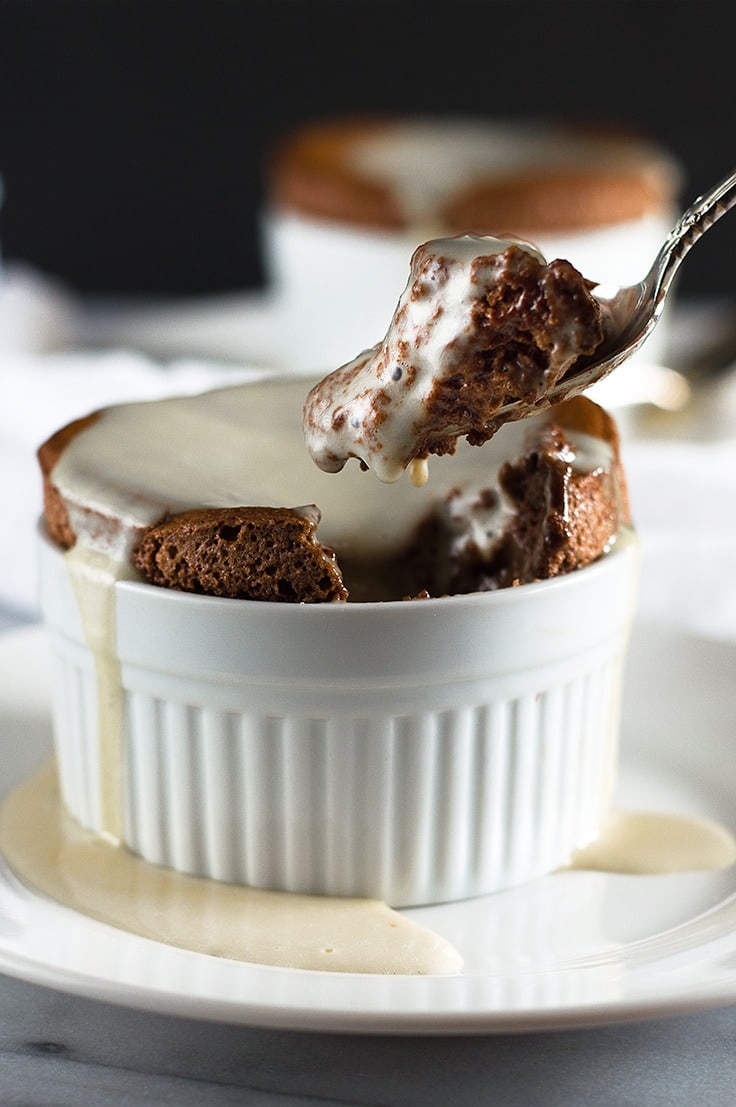
A good chocolate souffle will have a rich chocolate flavor with a light and airy outer texture that practically melts in your mouth. As you get closer to the center of the souffle, the texture becomes creamier and more custardy.
It’s absolutely delicious and an incredibly fun dessert when you’re craving something a little different and special feeling.

Ingredient Notes
- Semi-sweet chocolate: I recommend using good-quality chopped chocolate in this recipe, but high-quality chips like Ghirardelli or Guittard will work.
- Room temperature eggs and butter: It’s very important that the eggs and butter are room temperature because they won’t whip up/incorporate well with the other ingredients if they are cold.
- Cream of tartar: Cream of tartar helps stabilize the egg whites and make them easier to whip up. If you don’t keep it stocked, it’s a handy ingredient to keep around (especially if you’re a fan of snickerdoodles ). You can order it online or find it in the spice aisle at your local grocery store.
How to Make Chocolate Souffles
- Brush ramekins with softened butter and coat with sugar. This gives the souffles something to grasp as they rise (as opposed to smooth, slippery ramekin walls) and helps make taller, more stable souffles.
- Melt chocolate and stir in room temperature butter before setting aside.
- Combine egg whites and cream of tartar and beat until stiff peaks form.
- Whisk egg yolks into the chocolate mixture and then fold whites into the chocolate in four parts.
- Transfer to prepared ramekins, clean up the edges, and bake until tall and beautiful.
- Serve immediately and enjoy!
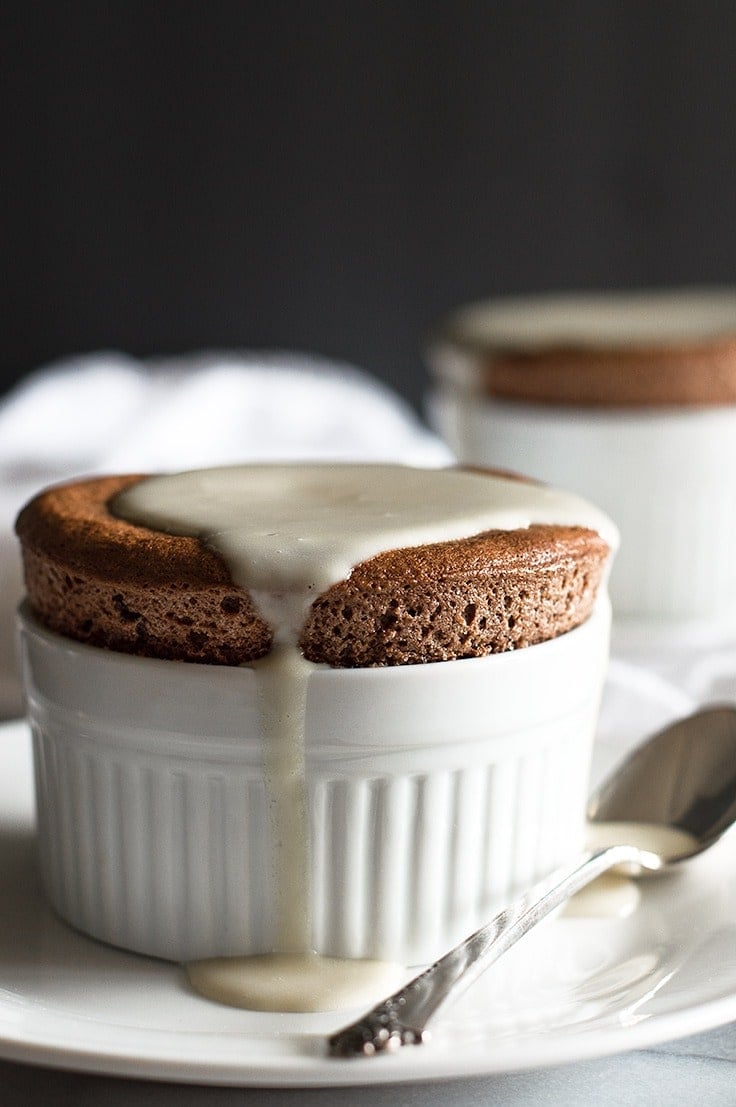

Creme Anglaise Sauce for Souffles
You can serve the chocolate souffles on their own or dusted with powdered sugar and chopped strawberries, but if you really want to take these to the next level, add creme anglaise.
Creme anglaise is a sweet, creamy custard sauce–basically vanilla ice cream minus the ice. It is one of my favorite dessert sauces because it is lovely and rich, but not too sweet and adds a simple sophistication to anything you serve it over.
When you pair it with a chocolate souffle, it makes for a toe-curlingly good dessert. Plus making the souffles will leave you with one extra egg yolk , and this sauce just happens to use one egg yolk. 😉
Can I make a soufflé ahead of time?
Yes, but you must bake them just before serving. These souffles can be assembled up to 24 hours in advance and stored in the refrigerator.
Simply bake according to recipe instructions just before you’re ready to enjoy them. (There are more detailed make-ahead instructions in the note section of the recipe.)

What causes a souffle to collapse?
All souffles will fall eventually. Once removed from the oven, the souffle will begin to sink within minutes. But if your souffle collapsed before it was done baking it might have been:
- Your egg whites were not whipped long enough. Your egg whites need to be whipped to stiff peaks (when you lift the beaters out, the whites should form peaks that stand straight up and don’t curl at the tips). Under-beaten eggs might not provide enough structure and the souffle can collapse.
- The ingredients weren’t properly mixed. There is a fine line between over-mixing which can deflate your egg whites and under-mixing which can leave pockets of dense chocolate. Since these pockets of chocolate don’t have enough egg whites in them, they will not rise with the rest of the souffle creating weak spots that can collapse and take the rest of the souffle with it. To avoid this, you want to make sure to mix the souffles well enough that there are no very distinct streaks of egg whites or chocolate remaining before spooning it into your ramekins.
- You opened the oven too soon/your oven runs cold. If you open your oven door or try to move a souffle before it’s set, the cold air/movement can make it collapse. To avoid this, don’t open the door to check on your souffle until the timer goes off. If you do this and you find that the souffle is still falling when you open the oven door, check your oven temperature with an oven thermometer . Oven temps can often be off by quite a bit, so if your souffle is baking at a lower temperature, it won’t cook as quickly and be ready to come out even if the timer says it should be.
Is a chocolate souffle hard to make?
Not really. Chocolate souffles are easy to make, they’re just also easy to mess up.
If you read the recipe and follow the steps carefully, you’ll do great. The steps themselves are all simple and overall, souffles are about the same amount of work as making a batch of chocolate chip cookies . They are simply less forgiving of mistakes and improvisation.
More Recipes to Impress
- Homemade Carnitas
- Roasted Tri-tip
- Beef Short Ribs
- Easy Roasted Chicken
- Pork Ragu
More Desserts for Two
- Small-batch Cinnamon Rolls
- Small Chocolate Cake
- S’mores Cookie
- Small-batch Brownies

Ingredients
Special Equipment
- ▢ Liquid measuring cup optional but helpful
- ▢ 2 6-ounce ramekins
- ▢ Pastry brush optional but helpful
- ▢ Handheld electric mixer
Creme Anglaise
- ▢ 3 tablespoons heavy cream
- ▢ 2 tablespoons milk
- ▢ 1 large egg yolk you can reserve the white for the souffle*
- ▢ 1 tablespoon granulated sugar
- ▢ ½ teaspoon vanilla
For the Ramekins
- ▢ 1 tablespoon ( 14 g) unsalted butter room temperature
- ▢ 1 tablespoon ( 12 g) granulated sugar
Souffles
- ▢ 1 cup ( 6 oz) chopped semi-sweet chocolate high-quality chips are fine
- ▢ 1 tablespoon ( 14 g) diced unsalted butter room temperature
- ▢ 3 large egg whites room temperature
- ▢ 2 large egg yolks room temperature
- ▢ ⅛ teaspoon cream of tartar
Instructions
Creme Anglaise
- In a 1-quart pot, bring heavy cream and milk to a simmer. Remove from heat and transfer mixture to a liquid measuring cup (if you have one) for easy pouring.
- In a small bowl, vigorously whisk together egg yolk, sugar, and vanilla for 30 seconds. Whisking continuously, very slowly drizzle in hot cream mixture, being careful not to go too fast and scramble the egg.
- Once cream is completely incorporated, wipe out your 1-quart pot and pour in egg and cream mixture. Heat over medium heat, stirring constantly until thickened and custard coats the back of your spoon, 1 to 2 minutes. Do not simmer. Set aside or store covered in the refrigerator if making in advance.
Souffles
- Remove the top rack from your oven so your souffles can sit on the bottom rack and rise unobstructed. Preheat your oven to 400°F.
- Use a pastry brush and softened butter to grease the entire inside of the ramekins. Coat the sides in long brush strokes from the bottom up to the top all the way around. Add 1/2 tablespoon of the sugar to each ramekin and shake so that all of the butter is coated. Discard any loose sugar. Place the ramekins in the fridge.
- Place chocolate in your double boiler* and melt over barely simmering water. Remove from heat and stir in diced, room-temperature butter. Set aside.
- In a medium bowl, combine egg whites and cream of tartar.
- With a handheld electric mixer, beat whites until stiff peaks form–eggs should be glossy and when beaters are lifted straight out, peaks should stand straight up and not flop over at the tip. Place bowl in the refrigerator.
- Whisk the egg yolks into the chocolate mixture until smooth. Remove egg whites from the refrigerator and use a silicone spatula to fold about 1/4 of the whites into the chocolate mixture. Continue to fold the rest of the whites in in thirds until mixed. The mixture will not be completely uniform in color, but there should be no very distinct streaks of white. Divide the mixture between 2 ramekins, filling to the very top. Discard any extra. (If making ahead, skip to the notes.)
- Use a knife or dough scraper to scrape excess off the top for a perfectly flat top, then run the very tip of your index finger all the way around the inside of the ramekin, making a small channel between the souffle and the edge of the dish. Wipe edges and outsides of the ramekins with a clean kitchen towel and place on a baking sheet.
- Bake on the bottom rack of your oven for 11 to 13 minutes, until lifted nicely. Do not open your oven before the timer goes off as the cold air could affect the souffles’ rise. Souffles will begin to slowly drop just a couple minutes after they come out of the oven, so serve immediately. At the table, top with creme anglaise and enjoy.
Notes

Crispy Smashed Red Potatoes
Ingredients
Smashed Potatoes
- 1 pound small red potatoes scrubbed clean and trimmed of any imperfections
- 1 tablespoon salt plus more as needed
- 3 tablespoons olive oil
- Pepper
Aioli
- ¼ cup plain yogurt OR mayonnaise *
- 1 garlic clove pressed
- 1 teaspoon lemon juice fresh or bottled is fine
- ⅛ teaspoon salt
- ⅛ teaspoon pepper
Instructions
- Grease a large, rimmed baking sheet with cooking spray and set aside. Preheat oven to 450°F.
- In a medium pot, cover clean potatoes with cold water and add salt. Bring to a simmer and cook until potatoes are just fork tender, 10 to 15 minutes.
- Drain and let potatoes cool for 5 minutes.
- Drizzle 1 tablespoon of the oil over the prepared baking sheet. Add potatoes to the tray and shake it so the potatoes are coated in oil. Use a potato masher or flat-bottomed glass sprayed with cooking spray to smash each potato. Drizzle remaining oil over the top so potatoes are well-coated.
- Sprinkle with salt and pepper and bake until golden and crispy, about 30 to 40 minutes.
- While your potatoes are baking, make the aioli. Stir together yogurt or mayonnaise, lemon juice, garlic, salt, and pepper in a small bowl.
- Serve potatoes with aioli and enjoy!
