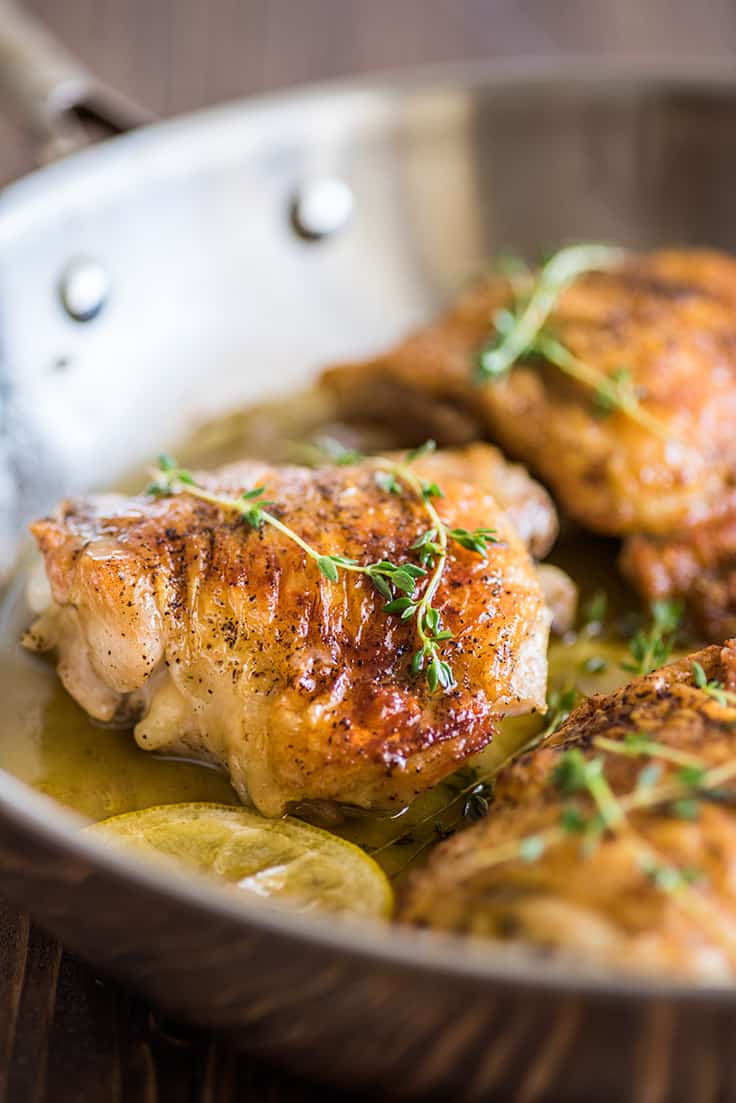
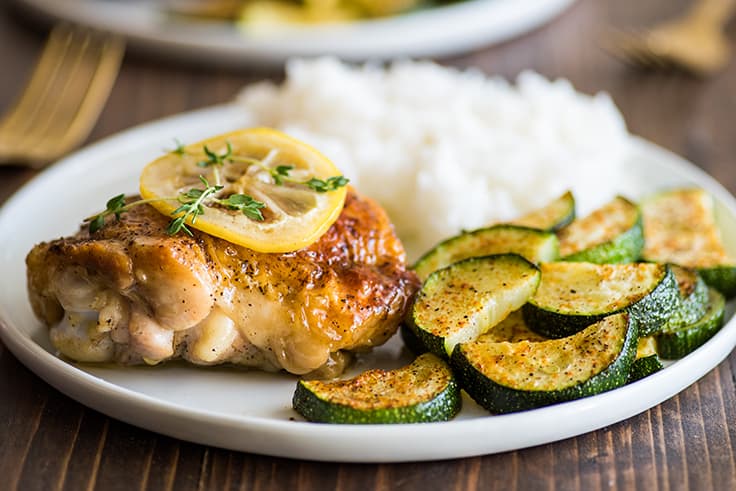
I’ve shared a bunch of uber-easy, busy-weeknight recipes over the years. ( Salsa Chicken , Teriyaki Chicken , and Oven-roasted Tri-tip are some of my favs.) And today I have another quick and simple dinner recipe for you: Crispy Lemon Chicken Thighs.
This is my current go-to recipe for nights I don’t want to cook and I’m two seconds away from takeout or popcorn for dinner. It’s a super-simple one-pan dish, with almost no measuring involved, and the only thing you’re going to have to cut is a lemon.

Lemon Chicken Thigh Ingredient Notes
- Bone-in, skin-on chicken thighs: Thigh size varies quite a bit so plan on serving 2 small thighs or 1 very large thigh per person. If making for guests or big eaters, just automatically plan on 2 thighs per person.
- A lemon: You’ll use both the juice of the lemon and slices of it to help flavor the chicken as it cooks.
- Ground thyme, salt, and pepper: With a big flavor like lemon in the mix, I like to keep rest of the seasoning simple. A dusting of thyme, salt, and pepper is all you need here.
How to Make Lemon Chicken Thighs
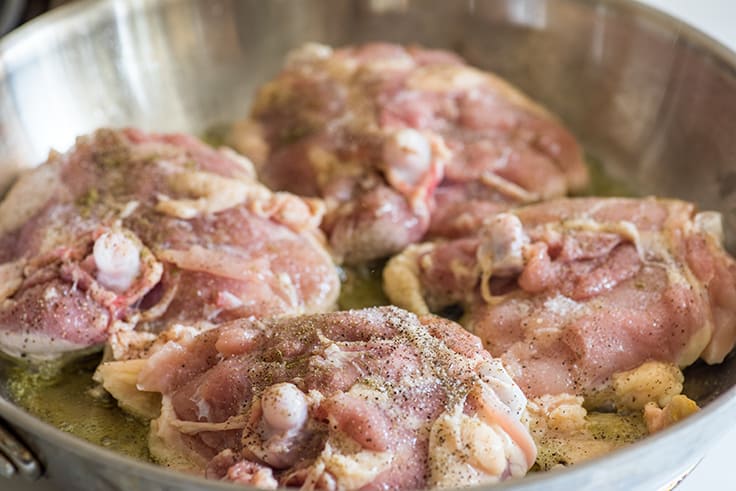
You start by patting down bone-in, skin-on chicken thighs with a paper towel so they are completely dry (this allows the skin to get extra crispy). Then salt and pepper the thighs generously and add a sprinkle of ground thyme over the top. If you want to measure the thyme, use about 1/4 teaspoon, but it’s easier to evenly distribute the thyme by carefully sprinkling it directly out of the spice canister.
Heat oil in a large oven-safe skillet over medium-high heat and add the chicken, skin-side down. The chicken will pop and sizzle as it cooks. This is normal, but if it’s making too much of a mess or making you nervous, cover the chicken with a splatter screen or turn the heat down slightly.

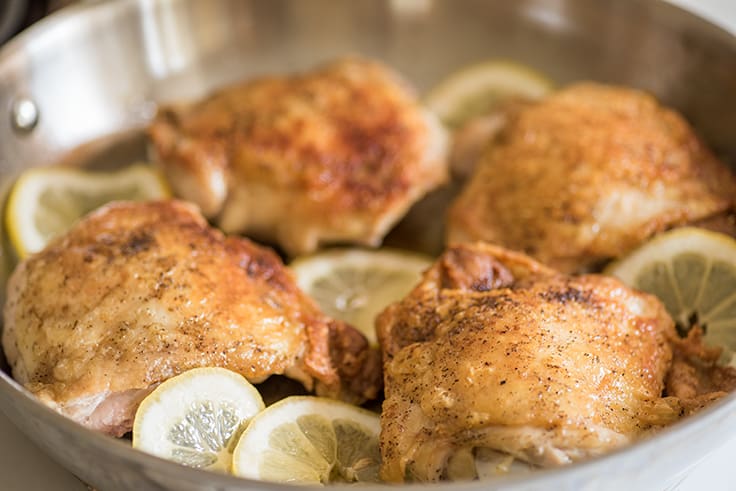
Cook the thighs until the skin is deeply golden and crispy. And then remove the pan from heat and flip. If you try to flip the thighs and the skin is sticking to the pan, the chicken’s not ready to be flipped. Put it back on the heat. The skin will self-release when it’s ready.
Squeeze the juice of 1/2 of a lemon over the pan and then slice the other half and nestle the slices amongst the thighs. Don’t cook the chicken with lemon slices on top of the thighs as the moisture can make the skin less crispy.

- Bake for 15 to 22 minutes, until an instant-read thermometer inserted into the center of the thighs reads at least 165°F. Thigh size varies wildly, so very large thighs may take longer to cook. Let chicken rest for 5 minutes and serve.
Batch-cooked or Meal Prep Chicken Thighs

These chicken thighs are actually a great option for batch cooking and meal prepping if that’s your jam. The recipe’s easy to size up since there’s practically no measuring anyway, and the thighs stay moist and tasty in the fridge. The skin won’t be crispy after reheating, but it will still taste great.
You can also pull the skin off some of the thighs and shred the meat to use on sandwiches, small batches of soup , or salads.
To make a larger batch of thighs, brown the thighs on the stove in batches, squeeze lemon juice over the top, and then transfer them to a lightly greased baking sheet instead of baking them in the skillet. Use the juice of one lemon half per skillet full of chicken thighs and just skip adding the extra lemon slices as described in the recipe as they won’t add much flavor sitting on a baking sheet.
If taking for lunches, you can debone the cooked thighs to make them less messy to eat. Just flip a thigh over, and use a paring knife to slice the meat away from the single bone. The bone should pull away pretty easily. Then you can slice the thighs into easy-to-eat pieces before packing them.
What should I serve with lemon chicken?
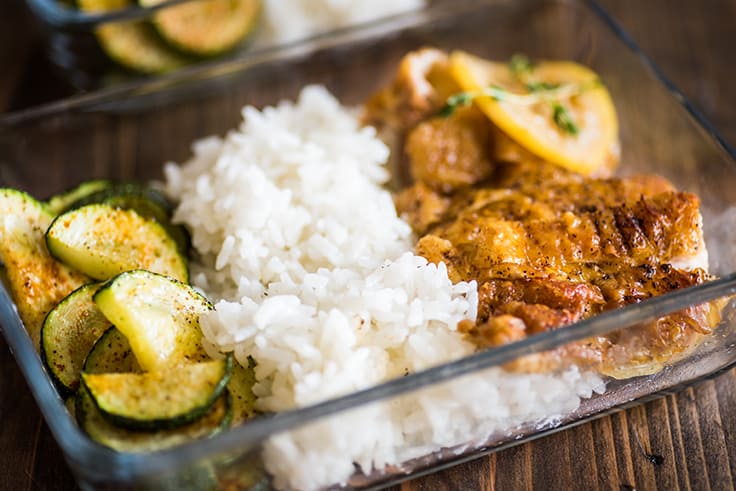
Serve two thighs per person for small thighs, one for large thighs (particularly when serving with a filling carb side). My family loves eating this with a side of white steamed rice and an oven-baked veggie that I cook on a lower rack of the oven at the same time as the chicken, like Roasted Zucchini or Oven-roasted Broccoli .
- More Carb Options: Parmesan Orzo , Mashed Potatoes and Quick Gravy , Cheddar Cheese Scones
- More Vegetable Options: Steamed Broccoli , Butter and Garlic Green Beans , Microwave Corn on the Cob
- Dessert Options (obviously essential): Peanut Butter Oatmeal Cookies, Small-batch Brownies , and M&M Cookies
At what temperature is chicken done in an oven?
Chicken is cooked through when it reaches an internal temperature of 165°F. Use an instant-read thermometer and check the temperature in the thickest part of the meat, making sure that the thermometer is not touching bone as you take the reading.
Can I use boneless skinless chicken breasts/chicken thighs in this recipe?
You can. Just follow the recipe as written but brown both sides of the meat on the stove before baking. Boneless thighs will need a significantly shorter baking time, so start checking on them after about 6 minutes. Depending on their size, boneless chicken breasts should take about the same amount of time as bone-in thighs, but keep an eye on them and start checking the temperature of the meat fairly early.
More EASY Chicken Recipes
- Baked BBQ Chicken Thighs
- Chicken and Broccoli Orzo
- Chicken Francaise
- Quick Chicken Fajitas
- Creamy Chicken Noodle Soup

Ingredients
Special Equipment
- ▢ Oven-safe skillet *
- ▢ Instant-read thermometer
Lemon Chicken Thighs
- ▢ 1 lemon washed
- ▢ 4 to 8 bone-in, skin-on chicken thighs*
- ▢ Salt and pepper
- ▢ Ground thyme
- ▢ 1 tablespoon olive oil
Instructions
- Preheat oven to 425°F.
- Slice half of the lemon into thin slices and set slices and remaining uncut half aside.
- Pat chicken thighs dry and sprinkle both sides with salt, pepper, and a light dusting (about 1/4 teaspoon total) of thyme.
- In a large oven-safe skillet, heat oil over medium-high heat. Once hot, swirl oil around the pan so that it is completely coated. Place thighs in the skillet skin-side down, and cook until well-browned and crispy, about 4-6 minutes.
- Remove from heat and flip chicken thighs. Nestle lemon slices in the pan between the chicken pieces and squeeze juice from remaining lemon half over the chicken.
- Bake for 15 to 20 minutes (longer for very large thighs), until an instant-read thermometer inserted into the center of the thighs reads 165°F.
- Remove from oven, allow to rest for 5 minutes. Serve and enjoy!
Notes
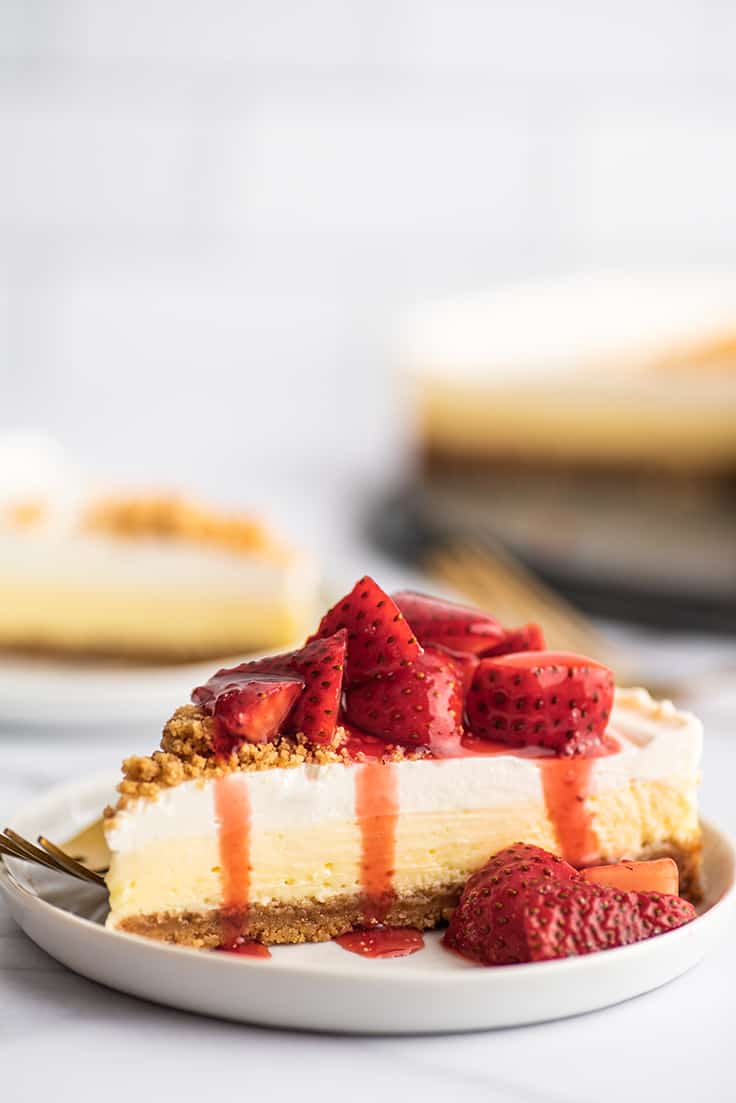
This Easy Cheesecake Recipe is a family favorite, and it makes an extremely creamy baked cheesecake with a smooth sour cream layer over the top and irresistible cinnamon graham cracker crust.
Today is a very exciting day because I’m finally sharing one of my family’s favorite desserts, my mom’s famous cheesecake.
This is the first dessert she ever made for my dad when they started dating, and it’s the one she makes on his birthday every year.
It has a very dear place in my heart AND just happens to be the best, easiest cheesecake in existence. (Also full disclosure, my mom’s famous cheesecake first appeared in Joy of Cooking . 😉 )

A Perfect and Easy Cheesecake
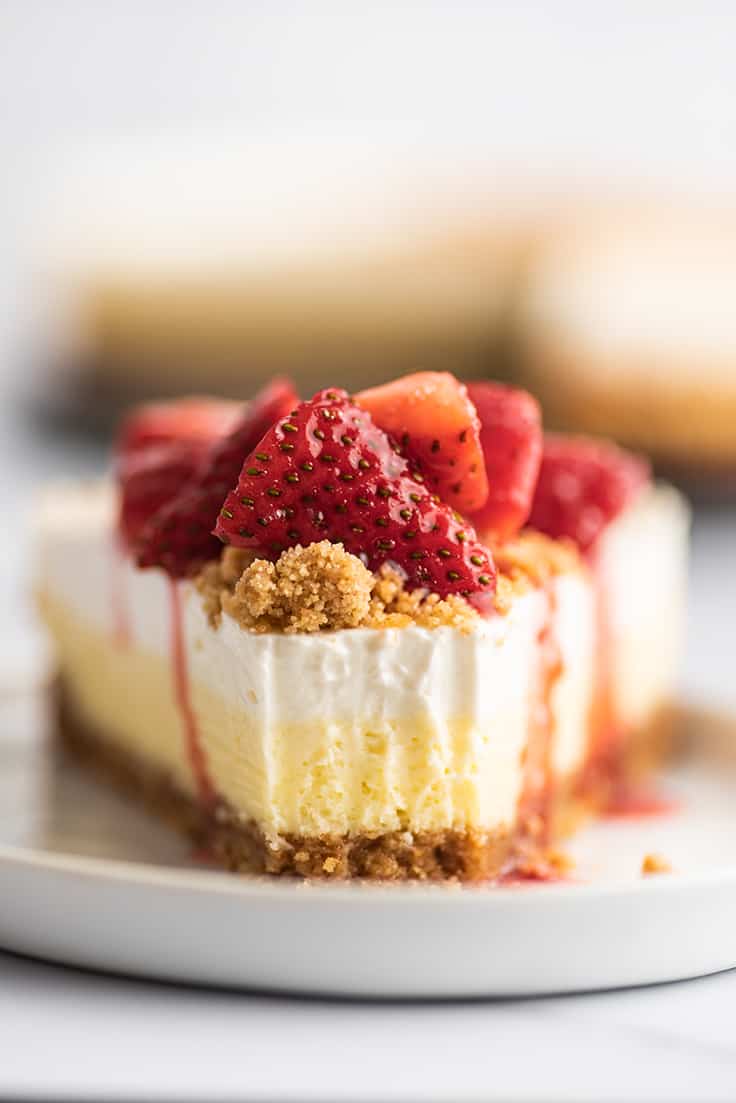
This easy homemade cheesecake is so extremely creamy with a smooth sour cream layer over the top, and to-die-for cinnamon graham cracker crust.
And when I say it’s easy, I’m not kidding. While the cheesecake takes a while from start to finish, that’s only because of the chilling and cooling time. The actual hands-on prep time is pretty minimal and very simple.
Oh, and bonus, that sour cream topping, it not only adds a tangy rich layer to your cake but also covers all manner of cheesecake sins. So if you’re a novice baker and worried about your cheesecake cracking, totally not a problem because no one will be able to see it anyways.
Ingredient Notes
Find the full list of ingredients in the recipe card below.
- Graham cracker crumbs: The quickest way to make graham cracker crumbs is to pulse the crackers in your food processor, but if you don’t own one, you can use a large plastic bag and a rolling pin or meat mallet.
- Salted butter: I call for salted butter in the crust recipe because that’s what my mom has always used. If you’d like to use unsalted butter, add 1/8 teaspoon of salt.
- Cream cheese: For cheesecakes, I always recommend using Philadelphia cream cheese . Most importantly, you ABSOLUTELY must start with softened/room temperature cream cheese. Cream cheese that is too cold will not completely meld with the other ingredients, and you’ll end up with lumps in the finished cheesecake.
- Fresh strawberries: The strawberry sauce/glaze involves cooking strawberries with sugar and cornstarch until saucy. You can serve the glaze with the cooked strawberries or strain them out and mix the sauce with fresh, chopped strawberries if you don’t like the texture and/or look of cooked fruit. The strawberry sauce in the photos on this page was strained and mixed with fresh strawberries.


How to Make The Best Cheesecake
There are three simple stages to making this cheesecake (four if you count the strawberry sauce).
- Make the crust: Mix together graham cracker crumbs, sugar, butter, and cinnamon and press the mixture into your pie pan, reserving a few tablespoons for topping. Chill the crust while you make your cheesecake layer.
- Make the cheesecake base: Mix cream cheese, eggs, sugar, salt, and vanilla together, pour into the chilled crust, and bake until the edges are set. Cool for 30 minutes to 1 hour.
- Make the sour cream top: Mix sour cream, sugar, and vanilla and spread the mixture over the top of the cheesecake. Bake until the top is shiny, about 5 minutes. Cool for about 20 minutes on the counter and then chill the finished cheesecake for 6 to 12 hours in the fridge.
Strawberry Sauce for Cheesecake
We always serve this cheesecake with strawberry sauce in my family, so I’ve included the recipe in the recipe card below.
But if that’s not your thing, you can serve the cheesecake without topping or try something like Dulce de Leche or chocolate sauce.
Can you make cheesecake without a springform pan?
Yes! You do not need a springform pan to make a cheesecake. Cheesecakes can be baked in a regular pie dish, with a few caveats:
- If you want to use a water bath, you’ll need to use a springform pan for those high sides.
- Similarly, depending on the recipe, you might have to adjust the volume of the filling. A recipe that uses four sticks of cream cheese is probably not going to fit in a standard pie pan.
The recipe I’m sharing with you today can be made in a 9-inch springform pan or regular 9-inch pie dish (this is how my mom has always made it) with zero adjustments. So if a pie pan is what you have, a pie pan is what you can use.
Do you need a water bath for cheesecake?
Not always. Water baths are helpful when cooking larger cheesecakes with long cooking times because they (and the steam they produce) help protect the delicate custard from the direct heat of the oven.
If you’re working with a recipe that calls for a water bath, use it, but you don’t need to use one with every single cheesecake recipe.
For this cheesecake specifically, you don’t need one. Since this is not a particularly tall cheesecake and the cooking time is fairly short, it doesn’t need the extra protection (or hassle) of a water bath.
Wait, how can you tell when a cheesecake is done cooking?
You can tell that the cheesecake is done when it passes “the jiggle test.” The edges of the cheesecake should be set and no longer shiny, but the center should still look slightly undercooked and jiggle when you give the pan a (small) shake.
The center will finish cooking and firm up while the cake cools.

Can you freeze cheesecake?
Yes! Cheesecake freezes extremely well. To freeze, place cut slices of cheesecake on a plate or cutting board (that will fit in your freezer) and freeze until mostly solid, 20 to 30 minutes. Wrap each slice individually in plastic wrap and store in an airtight container or freezer bag.
Cheesecake will keep in the freezer for 2 months. Defrost cheesecake by setting it out on the counter for about 20 minutes before eating.
The strawberry sauce also freezes pretty well. The texture of fresh strawberries becomes a little softer, but not unpleasantly so. Freeze individual servings of sauce in small baggies and store with the cheesecake.
More Cheesecake Recipes
- Mini Kahlua Cheesecakes
- No-bake Cheesecake Bites
- No-bake Oreo Cheesecake Bites
- No-bake Mini Unicorn Cheesecakes
- No-bake Small Marshmallow Pumpkin Cheesecake
More of My Mom’s Recipes
- Easy Carrot Cake
- Simple Beef Stew
- Beef Stroganoff
Recipe Notes
- If making for an event or special occasion, make sure to give yourself enough time to bake and chill the cheesecake. It requires at least 6 hours to set, so it’s best to make it the night before when possible.

Ingredients
- ▢ 9-inch springform pan or regular 9-inch pie dish
Graham Cracker Crust
- ▢ 1 ½ cups crushed graham cracker crumbs about 10 full cracker sheets*
- ▢ ½ cup ( 60g ) powdered sugar
- ▢ 6 tablespoons ( 84g ) salted butter melted*
- ▢ 1 teaspoon ground cinnamon
Cheesecake Base
- ▢ 12 ounces Philadelphia cream cheese softened*
- ▢ 2 large eggs well-beaten
- ▢ ½ cup ( 100g ) granulated sugar
- ▢ ½ teaspoon vanilla extract
- ▢ ½ teaspoon salt
Sour Cream Top
- ▢ 1 ½ cups ( 360g ) sour cream
- ▢ 2 tablespoons ( 25g ) granulated sugar
- ▢ ½ teaspoon vanilla
- ▢ ⅛ teaspoon salt
Homemade Strawberry Sauce
- ▢ 4 cups (about 24 oz) hulled and chopped fresh strawberries
- ▢ ⅔ cup ( 132g ) granulated sugar
- ▢ ⅔ cup water
- ▢ 1 teaspoon lemon juice fresh or bottled is fine
- ▢ 2 tablespoons ( 16g ) cornstarch whisked together with 2 tablespoons water
Instructions
Graham Cracker Crust
- Clear enough space in your freezer for your pie pan to fit while the crust chills.
- In a medium bowl, combine graham cracker crumbs, powdered sugar, butter, and cinnamon. Stir until well combined.
- Set aside 3 tablespoons of the crumb mixture to use as topping later.
- Pour remaining crumb mixture into your pie pan and press into a firm layer. Chill crust in the freezer while you make the custard layer.
Cheesecake Base
- Preheat your oven to 375°F.
- In a large bowl, combine softened cream cheese, well-beaten eggs, sugar, vanilla, and salt, and beat until well-combined.
- Pour into the chilled crust.
- Bake for about 20 minutes, until outer edges of the cheesecake look set, but the center of the cheesecake is still slightly shiny and jiggles when gently shaken. Remove from oven.
- Let cool to mostly room temperature, 30 minutes to 1 hour.
Sour Cream Top
- Preheat your oven to 425°F.
- In a small bowl, mix sour cream, sugar, vanilla, and salt. Pour over the cooled cheesecake and smooth into an even layer
- Bake for 5 minutes, until top looks glazed and shiny. Remove from oven, sprinkle with reserved crust mixture. Let cheesecake cool at room temperature for at least 20 minutes, and then refrigerate for 6 to 12 hours before serving.
Homemade Strawberry Sauce
- In a medium saucepan, combine chopped strawberries, sugar, water, lemon juice, and cornstarch/water slurry. Stir and bring to a simmer.
- Keep at a simmer (adjusting temperature as necessary), stirring often until thickened and syrupy, about 4 to 6 minutes. Watch very closely to make sure it doesn’t bubble over!
- Chill before serving.
Notes
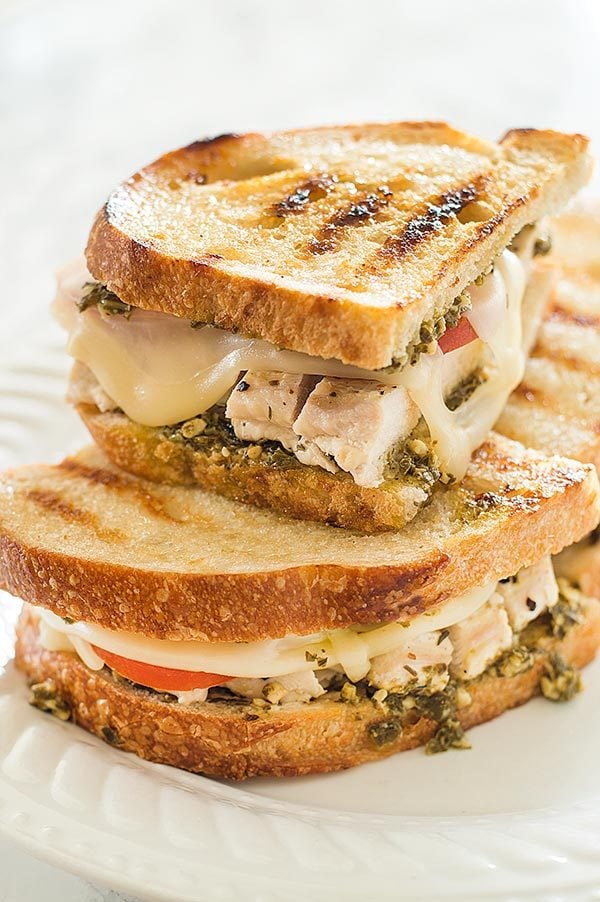
You’re going to love this pesto chicken sandwich. Sourdough, toasted in olive oil and topped with grilled chicken, pesto, Swiss cheese, and fresh tomatoes. A perfect easy dinner for a cozy night in.
In the hierarchy of sandwiches, a Pesto Chicken Sandwich on Sourdough has to be near the top.
You’ve got bright and salty pesto slathered over toasty sourdough and piled high with perfectly grilled chicken, cheese, and tomatoes.
Pretty much all the best things in life in one delicious sandwich.

Ingredient Notes
- Sourdough bread: Slightly tangy sourdough is so good with this sandwich, but if you don’t have any, you can substitute any bread here. Ciabatta rolls or sliced focaccia would be especially good.
- Pesto: If you have a favorite pesto recipe, feel free to use homemade pesto in these sandwiches, but a jar of store-bought pesto makes these sandwiches even quicker and easier. You can usually find pesto in the pasta aisle at your grocery store near the rest of the pasta sauces. This recipe won’t use up an entire jar, so check out my post What to Do With Leftover Pesto for storage tips and recipes to use up the leftovers (I recommend making a batch of Pesto Chicken Pasta ).
- Swiss Cheese: I love Swiss cheese for these sandwiches, but if you’re not a fan of Swiss, provolone would be a good alternative.


How to Make a Chicken Pesto Sandwich
- Cook the chicken breasts: We’ll be using my favorite method for cooking chicken breasts for sandwiches here, where you pound the chicken breasts to an even thickness and then cook them in a pan. They come out juicy and perfect every time.
- Assemble the sandwiches: Once the chicken is cooked, build your sandwich layers with pesto, chicken, tomatoes, cheese, and mayonnaise.
- Toast the bread: Brush the outsides of the sandwiches with olive oil and toast them in a hot pan until browned and beautiful.
- Serve and eat!
Can I make pesto chicken sandwiches ahead of time?
I don’t recommend fully assembling these sandwiches and cooking them ahead of time, but if you’re looking to save time at dinner, you can slice the tomatoes and cook the chicken breasts up to 48 hours in advance (store in an airtight container).
When you’re ready to eat, heat the chicken in the microwave, assemble the sandwiches, and toast the bread. If your chicken is precooked, you should be able to toss these sandwiches together in less than 15 minutes.
What is the best way to reheat a sourdough sandwich?
While I don’t recommend making these ahead of time, they’re big sandwiches so sometimes you have leftovers. The best way to reheat them is to take off the tomatoes and reheat the sandwiches in the oven.
Lightly grease a baking sheet with cooking spray or cover it with parchment paper. Open up the sandwich and divide the chicken between the two halves for quicker heating and place it on the baking sheet. Put the sandwich in a cold oven and set the oven to 350°F. Heat until everything is warmed through. Reassemble the sandwich and enjoy!

What to Serve With Pesto Chicken Sandwiches
These sandwiches are absolutely superb with a side of sweet potato fries (frozen store-bought ones work just fine) and garlic aioli or Greek yogurt aioli if you want something lighter.
Serve with a light veggie like roasted asparagus , roasted broccoli , or zucchini .
More Sandwich Recipes
- Easy Homemade Panini
- Spicy Chicken Bacon Avocado Grilled Cheese Sandwich
- Chipotle Turkey Panini
- Carne Asada Sandwich
- Pesto Grilled Cheese Sandwich

Ingredients
- ▢ 1 pound (about 2 medium) boneless skinless chicken breasts
- ▢ 2 teaspoons Italian seasoning
- ▢ Salt and pepper
- ▢ 8 slices sourdough bread
- ▢ 1/4 cup pesto divided
- ▢ Mayonnaise optional
- ▢ 2 medium tomatoes sliced
- ▢ 4 slices Swiss cheese
- ▢ Olive oil optional
Instructions
- Place chicken breasts smooth-side up between two layers of plastic wrap or in a large disposable plastic bag and use a meat mallet or rolling pin to pound them to an even thickness. Start with the thickest part of the meat and strike it, working outward until the breast is the same thickness all over.
- Sprinkle both sides of your flattened chicken breasts with Italian seasoning, salt, and pepper.
- Heat an electric countertop grill or large skillet over medium heat. If using a skillet, grease cooking surface with cooking spray or a drizzle of olive oil. Cook chicken breasts for 5 to 8 minutes per side, until an instant-read thermometer inserted into the centers of the breasts reads 165°F. Transfer chicken to a cutting board and allow to rest for 5 minutes before slicing into 1/2-inch wide strips. Wipe out your pan.
- Assemble sandwiches by spreading mayonnaise (if desired) and pesto over the bread. Top with chicken, tomatoes, and cheese, and brush tops and bottoms of the sandwiches lightly with olive oil or a thin layer of mayonnaise to help them brown.
- Cook sandwiches over medium to medium high heat until first side is toasted and flip. The sandwiches are done when both sides are golden and the cheese is melted. If making in a skillet, you will probably only be able to fit two sandwiches at a time in the pan. Place cooked sandwiches on a plate in a warm oven while you repeat the process with the last two sandwiches to keep them warm.
Notes


Crispy Lemon Chicken Thighs
Ingredients
Special Equipment
- Oven-safe skillet *
- Instant-read thermometer
Lemon Chicken Thighs
- 1 lemon washed
- 4 to 8 bone-in, skin-on chicken thighs*
- Salt and pepper
- Ground thyme
- 1 tablespoon olive oil
Instructions
- Preheat oven to 425°F.
- Slice half of the lemon into thin slices and set slices and remaining uncut half aside.
- Pat chicken thighs dry and sprinkle both sides with salt, pepper, and a light dusting (about 1/4 teaspoon total) of thyme.
- In a large oven-safe skillet, heat oil over medium-high heat. Once hot, swirl oil around the pan so that it is completely coated. Place thighs in the skillet skin-side down, and cook until well-browned and crispy, about 4-6 minutes.
- Remove from heat and flip chicken thighs. Nestle lemon slices in the pan between the chicken pieces and squeeze juice from remaining lemon half over the chicken.
- Bake for 15 to 20 minutes (longer for very large thighs), until an instant-read thermometer inserted into the center of the thighs reads 165°F.
- Remove from oven, allow to rest for 5 minutes. Serve and enjoy!
