This ultra rich and creamy peanut butter milkshake is quick and easy to make and packed with peanut butter flavor.
Have you ever had a peanut butter milkshake before? I think most of us have at least tried the classics, your chocolate milkshakes , strawberry shakes , Oreo milkshakes , etc. But I feel like peanut butter’s not a super common milkshake flavor, at least not here in Southern California.
But it totally should be.


Not only are peanut butter milkshakes super easy to make (just add a couple scoops of PB to a vanilla shake), but they are incredibly good. Peanut butter obviously adds a ton of PB flavor to a milkshake, but also a totally irresistible creamy texture.
If you love a really rich and creamy milkshake, a peanut butter shake is definitely the one for you.
Ingredient Notes
- Peanut Butter: I like to use a creamy, processed brand of peanut butter like Jif or Skippy because they’ll give you the smoothest finished shake, but you can use natural or chunky peanut butter if that’s what you have on hand.
- Vanilla Extract: Vanilla extract is optional, but the extra pop of vanilla flavor pairs extremely well with the peanut butter.
- Milk: Any percentage or type of milk will work, but the higher fat milk you use, the richer/creamier your shake will be.
Ingredient tip: Because peanut butter is sticky and can be annoying to accurately measure, don’t worry too much about getting the exact correct amount of peanut butter. Just use a tablespoon to add 2 lightly heaping spoonfuls to your shake. A little over on the peanut butter is not going to hurt anything.
If you need exact measurements because you’re keeping track of the nutritional information, I recommend measuring the PB by weight since it’s much easier and more accurate.

How to Make a Peanut Butter Milkshake
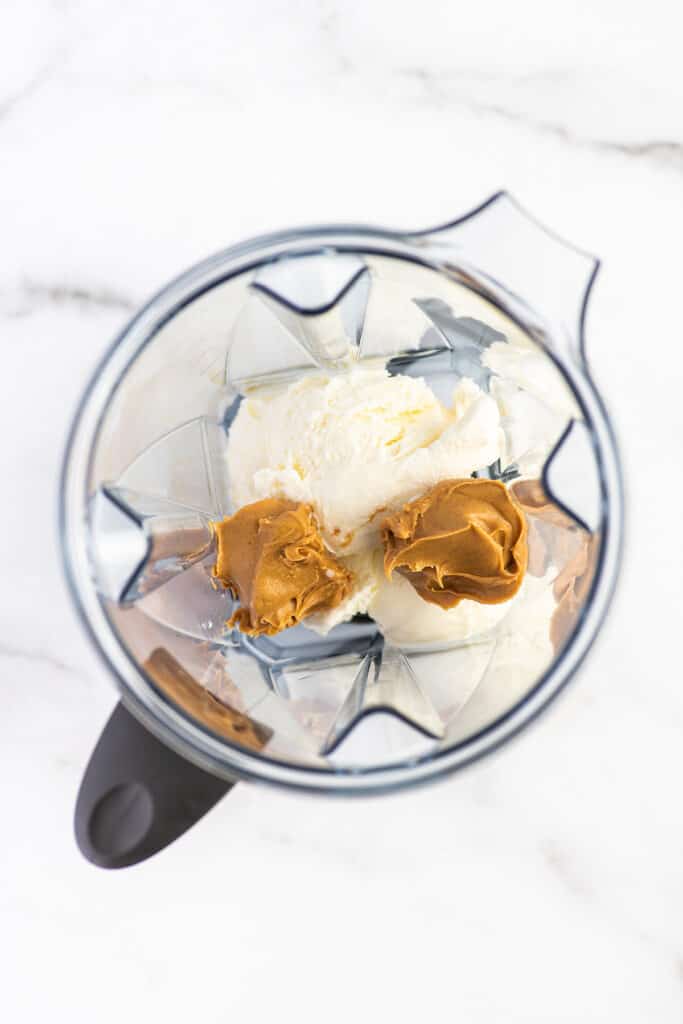
- In a blender, combine ice cream, milk, peanut butter, and optional vanilla and blend until well-combined and pourable.
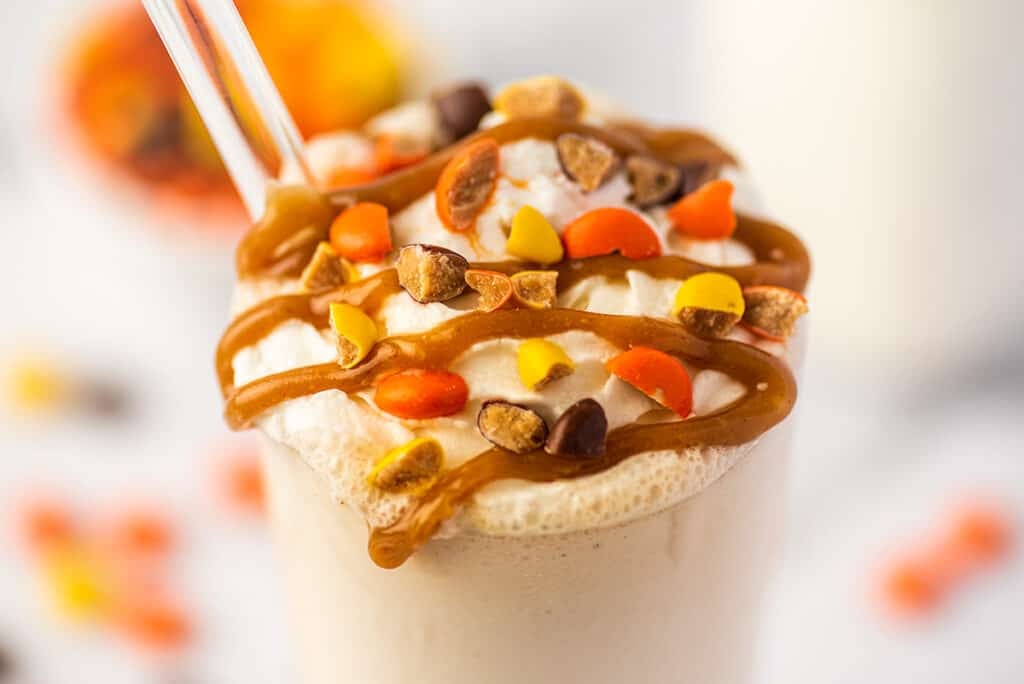
- Pour into glass(es). Top with whipped cream and peanut butter sauce if desired and enjoy.
Variations
- Chocolate peanut butter milkshake: Add 2 to 3 tablespoons of chocolate fudge sauce or syrup or 2 tablespoons of cocoa powder to the shake before blending.
- Banana peanut butter milkshake: Add 1 fresh or frozen banana , broken into pieces, before blending.
- Nutella milkshake: Replace the peanut butter with the same amount of Nutella.
Can I use almond butter instead of peanut butter in this shake?
Yes! You can use any type of nut butter in place of the peanut butter here.
Can I make a peanut butter milkshake without ice cream?
You can’t make this PB milkshake without ice cream, but if you’d like a PB-flavored milkshake without ice cream, go make my Banana Milkshake Without Ice Cream and make the peanut butter variation listed in the recipe. It’s super good and creamy and can be made with just milk, ice, and a frozen banana.
Can I make my milkshake ahead of time?
No. Shakes are always best right after they’ve been blended. Even when stored in the refrigerator, they will slowly begin to melt and become less thick and frosty the longer they sit.

More Peanut Butter Recipes
- Peanut Butter Oatmeal Cookies
- Small-batch Peanut Butter Cookies
- Peanut Butter Hot Chocolate
More Milkshake Recipes
- Caramel Milkshake
- Coffee Milkshake
- Banana Milkshake

Ingredients
- ▢ 1½ cups vanilla ice cream about 3 scoops
- ▢ ½ to ¾ cup milk* any percentage
- ▢ 2 lightly heaping tablespoons ( 41g ) peanut butter
- ▢ ½ teaspoon vanilla extract optional
- ▢ Whipped cream optional for topping
- ▢ Peanut butter sauce optional for topping
- ▢ Chopped candies optional for topping
Instructions
- In a blender, combine ice cream, milk, peanut butter, and optional vanilla extract, and blend until well-combined and pourable.
- Pour into glass(es). Top with whipped cream and additional toppings if desired and enjoy.
Notes
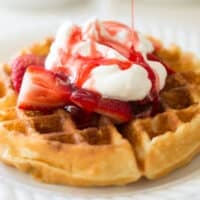
Quick and easy homemade strawberry syrup, perfect for serving over waffles, pancakes, or ice cream.
Here on the blog, I have a recipe for (the best) homemade waffles and whipped cream (made three ways), and today I’m adding the recipe for strawberry syrup so you have all the tools needed to make the breakfast waffle stack of your dreams.

If you’ve never made strawberry syrup at home before, you’ll be shocked at how easy and good it is. The cooking process is mostly hands-off–you just need to slice some strawberries, let them simmer, and give them a stir every once in a while.
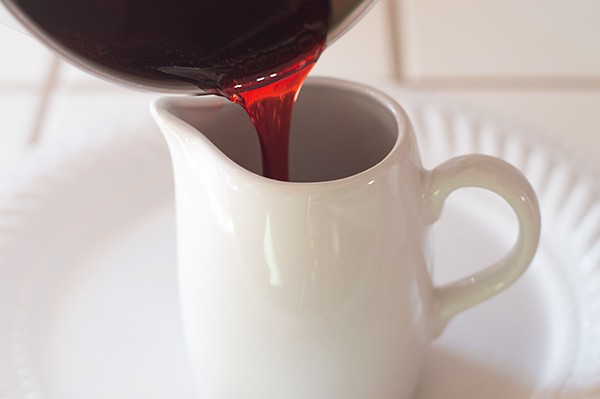
The end result is a sweet and tangy bright red syrup that you’ll want to drizzle over pretty much everything.
Ingredient & Equipment Notes
- Fresh strawberries: It’s okay to use strawberries that are a little past their prime for the syrup, but this will affect the cooking time. The time it takes for the syrup to thicken will vary depending on how much liquid was in your strawberries (old strawberries will produce significantly less liquid and therefore cook much faster). Keep this in mind if it seems like your syrup is thickening more quickly than expected.
- Fine-mesh strainer: A fine-mesh strainer is essential for getting a perfectly smooth and clear syrup. However, if you don’t own one, you can simply remove the cooked strawberries with a slotted spoon. You’ll have some seeds and a bit of strawberry pulp in your syrup, but it will still taste great.
How to Make Homemade Strawberry Syrup
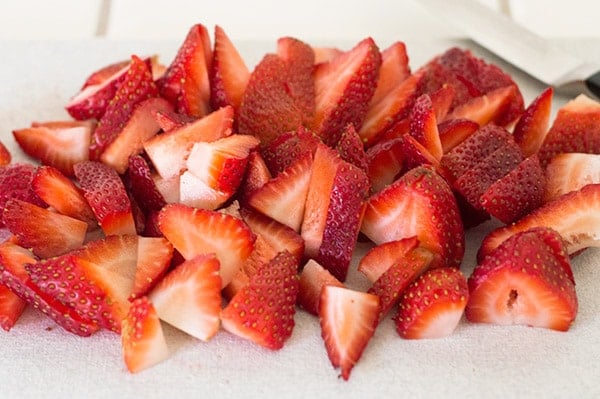
- Roughly chop your strawberries, cover with water, and simmer for 15 minutes.

- Strain the juice from the strawberries.


- Wipe out the pot, return juice, and add your sugar.


- Stir and simmer for 12 to 15 minutes until mixture is thickened. Transfer from the pan and enjoy!

How easy was that!?
Where to Use Strawberry Syrup
- The Best Crispy Waffles
- Pancakes for One
- Buttermilk Pancakes for Two
- Blueberry Waffles
- Banana Pancakes
How much syrup will this make/how many will it serve?
This recipe will make between ½ to ⅔ cup of syrup. Depending on how much you use, that should serve 2 to 3 people.
Can I make a larger batch of this?
Yes. This recipe can be doubled or tripled without any preparation changes. You just might need to extend the second simmering time slightly.
To change the recipe yield, hover over the serving size in the recipe card below or click if you’re on mobile, and slide the slider.
Can I use this syrup in drinks?
This syrup is a little thick to stir into cold drinks. If you’d like a syrup for strawberry milk , milkshakes , or flavored sodas, go check out my strawberry milk recipe . The syrup in that recipe is cooked for less time so it’s thinner and better for stirring into cold liquids.
How do I store this syrup?
Store the syrup in an airtight container in your fridge for up to 2 weeks.
More Sauce & Syrup Recipes
- Strawberry Sauce
- Peanut Butter Sauce
- 30-second Chocolate Sauce
- Nutella Sauce
- Hot Fudge Sauce
Equipment
- Fine mesh strainer
Ingredients
- ▢ 1 cup hulled and chopped strawberries
- ▢ ½ cup water
- ▢ ¼ cup ( 50g ) granulated sugar
Instructions
- In a small pot, combine strawberries and the water and simmer for 10 to 15 minutes, until water is bright red and strawberries are dull.
- Strain the juice from the strawberries through a fine mesh strainer and discard the strawberries.
- Wipe out the pot, return juice, and add your sugar.
- Simmer, stirring occasionally, for 5 to 15 minutes*, until syrup is thickened and reduced to about ½ to ⅔ cup. Syrup will seem a bit runny at this point, but will thicken as it cools.
- Serve over waffles, pancakes, or ice cream, and enjoy!
Notes
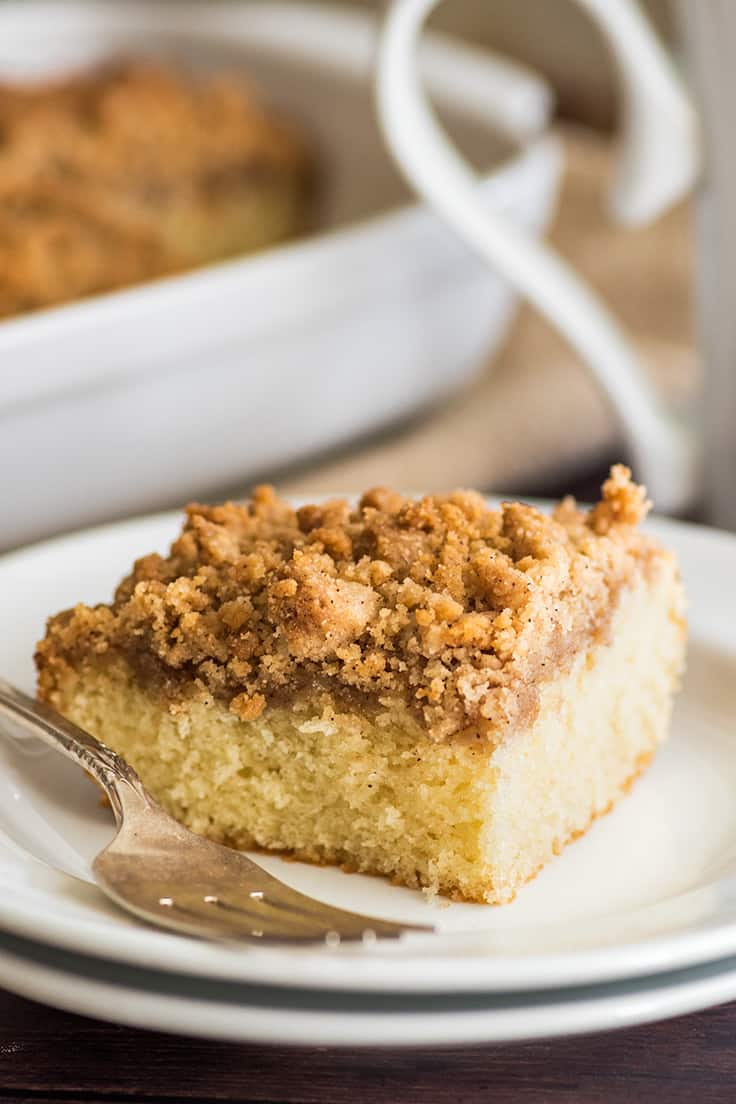
This Mini Coffee Cake is light and fluffy with a ridiculously good buttery, crunchy, crumbly streusel layer over the top. It serves four, but you might not want to share…
Say hello to the world’s perfect (mini) coffee cake.
And by perfect, I mean perfect. It’s light, fluffy, cinnamon spicy, and has the ideal ratio of cake to crumbles.

There was a moment as I was testing this cake for the first time, dropping handfuls of sugar and butter crumbles over the cake batter, that I was like, okay, this is an excessive amount of streusel, even for me. I’m going to have to cut this down.
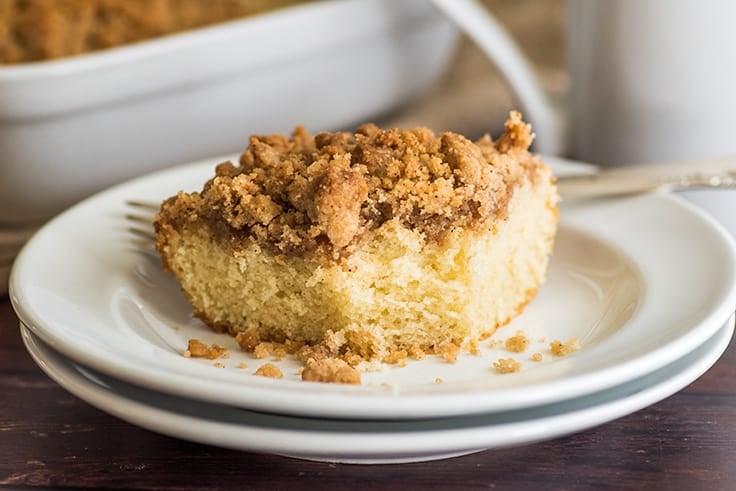
But nope. Once everything bakes up, it turns out that excessive is just right when it comes to coffee cake. The crumb layer is thick and decadent, making up about a third of the cake’s height, but paired with the light, not-too-sweet vanilla cake underneath, it’s perfect.
With every bite, you get just the right amount of moist, fluffy cake and buttery, crumbly, crunchy streusel.
This little cake is stellar enough that you can serve it on its own with just a good cup of coffee alongside. Or make it a part of a breakfast spread.
The cake needs at least 15 minutes to cool, and that’s plenty of time to fry up some bacon, scramble some eggs, cut up a little fruit, and maybe make a mimosa or two . The cake will serve four, especially when served with a full breakfast, so invite a couple friends over and enjoy!


Ingredient Notes
- Unsalted butter: This recipe calls for unsalted butter, but if you only have salted, not a problem. Simply reduce the salt to a pinch (both in the streusel and the cake), and you’ll be good to go.
- Sour cream: The cake calls for a couple tablespoons of sour cream in the batter, which helps give it a fantastic moist texture. In a pinch, you can substitute plain unsweetened yogurt instead.

Can I double this recipe?
Sure. You can double the recipe and bake it in an 8×8-inch baking dish. Just extend the baking time as needed.
I don’t have a 7×5-inch baking dish. What else can I use?
You can also bake this in a 6-inch round or square pan. If using a 6-inch round pan, extend the baking time slightly since the cake will be a little thicker and need a slightly longer baking time.

More Small Cake Recipes
- Small Red Velvet Cake
- Small Lemon Pound Cake
- Mini Chocolate Sheet Cake
- Small Banana Cake
More Small-batch Breakfast Recipes
- Small-batch Cinnamon Rolls
- Crêpes for Two
- Pancakes for Two
- Small-batch Muffins
- One-banana Banana Bread
Mini Coffee Cake Recipe Tips
- If you are making this in a cold kitchen during the winter, your room-temperature butter might be a little too cold to cream easily. You can microwave the softened butter for just a couple seconds, long enough to further soften, but not melt it.
- When testing the cake for doneness, make sure the streusel is not scraping off wet batter from your toothpick or cake tester, making the cake look done while still under-baked. Use the cake tester to clear a very small hole in the topping so you can accurately test your cake.

Ingredients
Special Equipment
- ▢ 7x5-inch baking dish
- ▢ Handheld electric mixer optional but helpful
Streusel
- ▢ 3 tablespoons (36g) brown sugar
- ▢ 3 tablespoons (36g) granulated sugar
- ▢ ½ teaspoon cinnamon
- ▢ ⅛ teaspoon nutmeg optional
- ▢ ⅛ teaspoon salt
- ▢ 4 tablespoons (56g) unsalted butter melted
- ▢ ½ cup + 1 tablespoon (68g) all-purpose flour measured by weight or using the spoon and sweep method*
Cake
- ▢ ½ cup + 2 tablespoons (75g) all-purpose flour measured by weight or using the spoon and sweep method
- ▢ ½ teaspoon + 1/8 teaspoon baking powder
- ▢ ⅛ teaspoon salt
- ▢ 2 tablespoons (28g) unsalted butter softened
- ▢ ¼ cup (50g) granulated sugar
- ▢ 1 large egg room temperature
- ▢ ½ teaspoon vanilla extract
- ▢ 2 tablespoons sour cream
- ▢ 2 tablespoons milk
Instructions
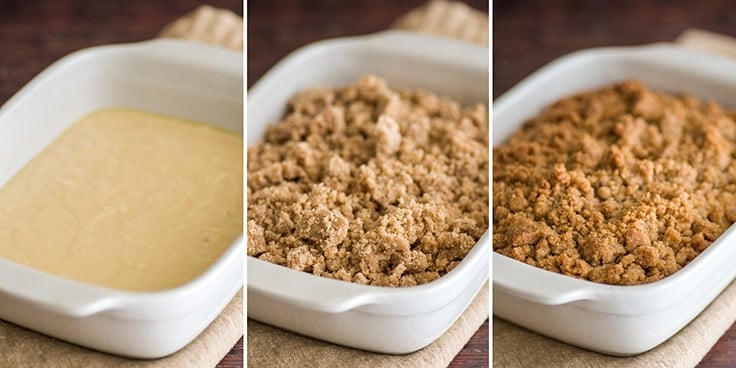
- Preheat your oven to 350°F and lightly grease a 7x5-inch baking dish.
- In a small bowl, whisk together brown and granulated sugars, cinnamon, nutmeg, and salt. Drizzle in melted butter and mix until well combined. Use a spoon to stir in the flour, a little at a time, until flour is completely incorporated. Place in the refrigerator.
- In a small bowl, whisk together flour, baking powder, and salt. Set aside.
- In a medium bowl, combine butter and granulated sugar. Cream them together until light and fluffy, about 1 minute. Add egg and vanilla and beat until well-combined. Add sour cream and mix well. Add half of the flour mixture and stir until just mixed. Add 1 tablespoon of milk and stir until just mixed. Repeat with the remaining flour mixture and milk.
- Pour batter into your prepared dish and drop crumb mixture over the top in pea-size pieces. It will seem like a lot, but don’t worry! It’s just the right amount.
- Bake for 28 to 34 minutes, until a toothpick inserted into the center of the cake comes out with just a few crumbs. Differences in ovens, baking dishes, and environments may affect baking time, so don’t be worried if your cake takes slightly longer to bake. Cool for at least 15 minutes before cutting, and enjoy!
Notes
Adapted From Cooking Classy

Creamy Peanut Butter Milkshake
Ingredients
- 1½ cups vanilla ice cream about 3 scoops
- ½ to ¾ cup milk* any percentage
- 2 lightly heaping tablespoons ( 41g ) peanut butter
- ½ teaspoon vanilla extract optional
- Whipped cream optional for topping
- Peanut butter sauce optional for topping
- Chopped candies optional for topping
Instructions
- In a blender, combine ice cream, milk, peanut butter, and optional vanilla extract, and blend until well-combined and pourable.
- Pour into glass(es). Top with whipped cream and additional toppings if desired and enjoy.
