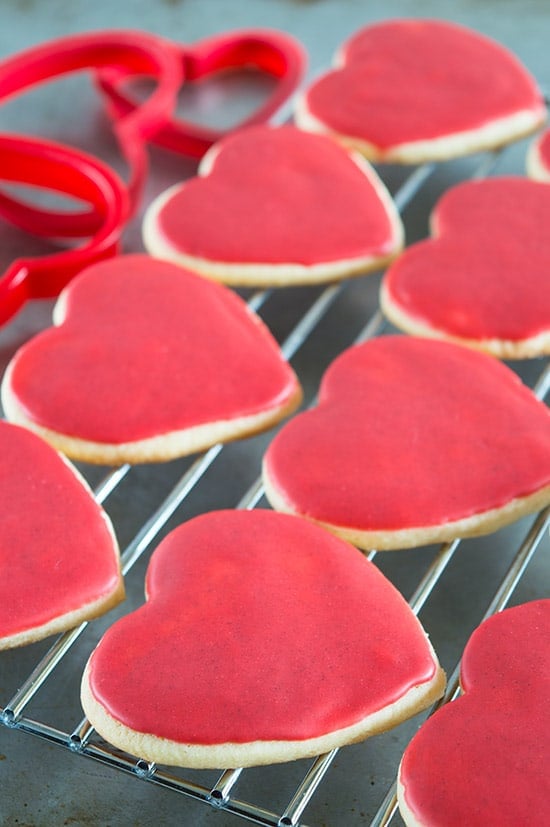
These Heart Cookies with Cinnamon Icing are a copycat recipe inspired by my favorite California bakery. Dense and delicious heart-shaped sugar cookies covered with sweet cinnamon icing for Valentine’s Day and everyday.

There’s a very famous bakery in my home town of Bakersfield known for their amazing cookies and donuts. To be completely honest, they might just be the best thing about the city. Every kid growing up there knows the distinct pleasure of seeing their teacher or a room parent walk into the classroom with one of their white bakery boxes with red lettering on the top and knowing that they are in for a treat. When I went away to college, the two things I most often asked my parents to send me were money (because obvs) and their cookies.
The best time of year to visit the bakery is around Valentine’s day because it is the only time they sell their signature heart cookies. These things are so good, dense sugar cookies covered in bright red icing with the most amazing bite of cinnamon to them. I’m not usually one to make copycat recipes (unless they fall into my lap like the Better Than Starbucks Caramel Macchiato ) but since these are only available seasonally and I am not always in Bakersfield, I decided I was going to figure these babies out.
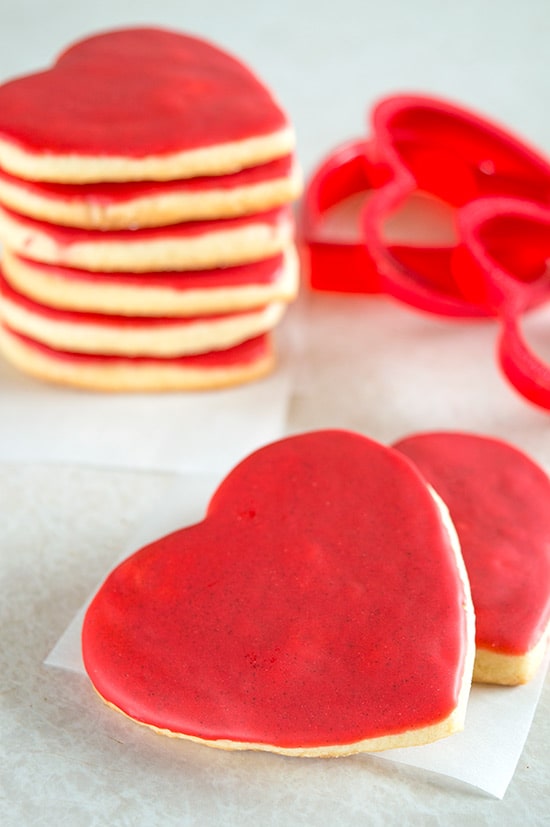

And I did…mostly. The cookies here are even more delicious than I though possible. The base is dense but slightly crumbly, not crunchy, but not overly soft (you should have seen the keywords I put into google trying to describe the type of dough I was looking for).
The icing is where the recipe differs a little. I’m almost 100% sure the original uses cinnamon extract because they have a spicier and more exaggerated cinnamon flavor than these, but I couldn’t easily find cinnamon extract at the stores around town and I hate posting recipes that require people to order ingredients they will only use once, so my icing is made with ground cinnamon. And you know what? I might even like this stuff more.
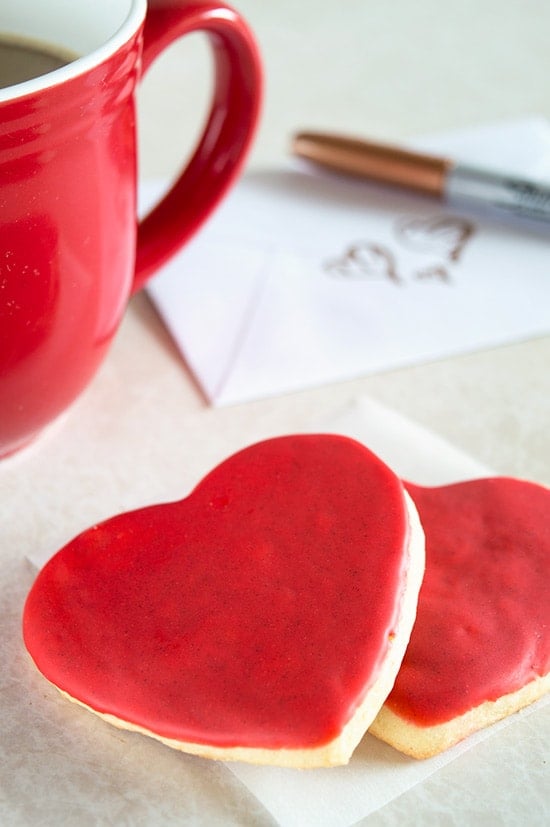
I cannot recommend these cookies enough. Beyond being delicious, the dough is simple to make and the icing (after an overnight rest) dries hard, so they are perfect for gifting as valentines.
I’m not saying that these are going to replace the originals in my life, because nothing ever will, but they are perfect substitutions for when you are living far away and your terrible, horrible, no-good parents won’t send you any because they just sent you a care package the week before, and they’re saying things like, “God, Tracy, no one needs this many cinnamon sugar cookies. We don’t care if you are sharing them. It’s an obsession and we worry about you…”

Looking for more of my favorite sweet treats? Try these Small-batch Chocolate Chip Cookies , Perfect Lemon Bars , and Small-batch Vanilla Cupcakes .

Ingredients
Cookies
- ▢ 1 cup ( 8 oz) unsalted butter softened
- ▢ 1 cup ( 200 g) superfine sugar*
- ▢ 1/2 teaspoon salt
- ▢ 1 large egg plus 1 yolk
- ▢ 2 teaspoons vanilla extract
- ▢ 2 1/2 cups ( 350 g) all-purpose flour
Cinnamon Icing
- ▢ 2 cups ( 240 g) powdered sugar
- ▢ 1 teaspoon cinnamon
- ▢ 2 tablespoons milk
- ▢ 1/2 teaspoon vanilla extract
- ▢ 2 teaspoons light corn syrup
- ▢ 20-30 drops red food coloring
Instructions
Cookies
- Using a stand mixer on medium speed, cream butter, sugar, and salt until light and fluffy, scraping down the sides and bottom of the bowl as necessary. This should take about 3 minutes and you will see the mixture noticeably lighten in color. Since this recipe contains no baking soda or powder, you want to make sure not to skimp on this step.
- Add the whole egg, mix and then the yolk and vanilla, beating until fully incorporated.
- Add flour, mixing on low until just combined. Don’t over mix!
- Divide dough into two parts and wrap tightly in plastic wrap. (I lay the wrap on the counter, scoop the dough on to it and wrap.) Refrigerate for AT LEAST an hour, up to 48 hours in order to firm up the dough. This step cannot be skipped or short cut. Your dough should feel firm and not sticky when it’s ready to be rolled. If you try to work with it before it is chilled properly, your cookies will stick. If it is very warm outside, or your butter very soft when you started, chilling may take more than an hour.
- Cover two baking sheets with parchment paper or a silicone baking mat.
- Dust work station and rolling pin with with flour and roll dough out to 3/8-inch thick. Don’t be afraid to use more flour as you go if things start to stick. Cut into hearts using a 3-inch cookie cutter and transfer to prepared baking sheets with a spatula.
- Refrigerate for 15 minutes to re-firm up cookies. This will stop them from spreading in the oven. Preheat oven to 375 degrees F.
- Bake until cookies are just golden on the bottom edges, 9-12 minutes (more if you used larger cookie cutters). Allow to cool completely before icing.
Icing
- In a medium bowl, wide enough to easily fit your cookies, stir together powdered sugar, cinnamon, milk, and vanilla until smooth. It might seem like it’s not going to mix, but it will. Just keep stirring. Do not add more liquid!
- Add corn syrup and food coloring and mix well. Your icing should be thin enough that if you run a knife through it, the liquid fills back in the gap in 8-10 seconds. Depending on how much food coloring you use, you may need to add a bit more milk, 1/2 teaspoon at a time. Be careful with this step! If you use too much milk, your icing will not set.
- Dip the cookies to ice and scrape the excess off with a knife or the side of the bowl. If you have any air bubbles, you can pop them with a tooth pick.
- Icing will dry enough to eat in under an hour, but allow to dry for at least four hours before stacking or packing.
Notes
Nutritional Information (30 cookies) Cookies adapted from: Karen’s Cookies Cinnamon icing adapted from: AllRecipes

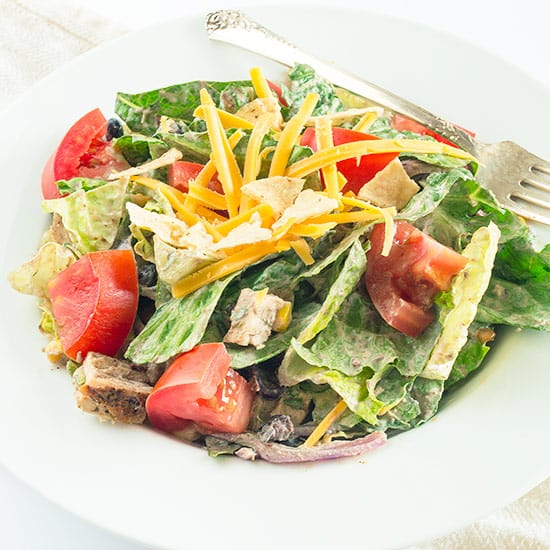
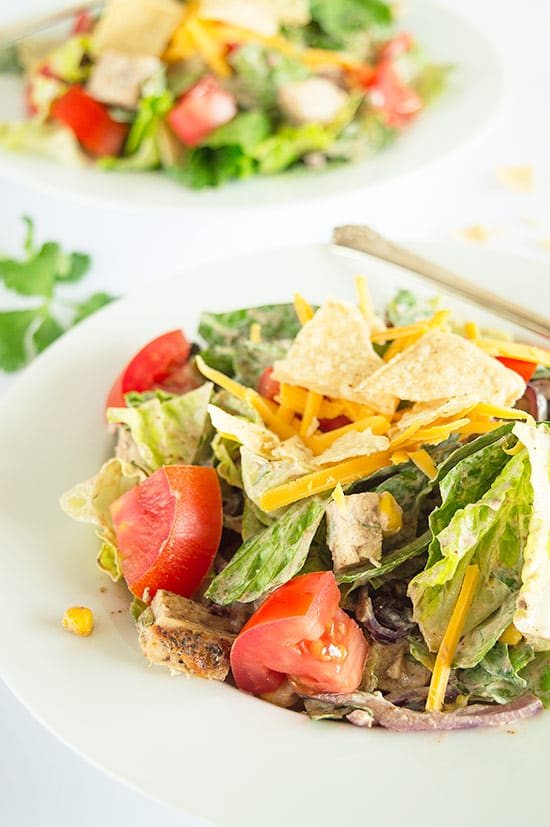
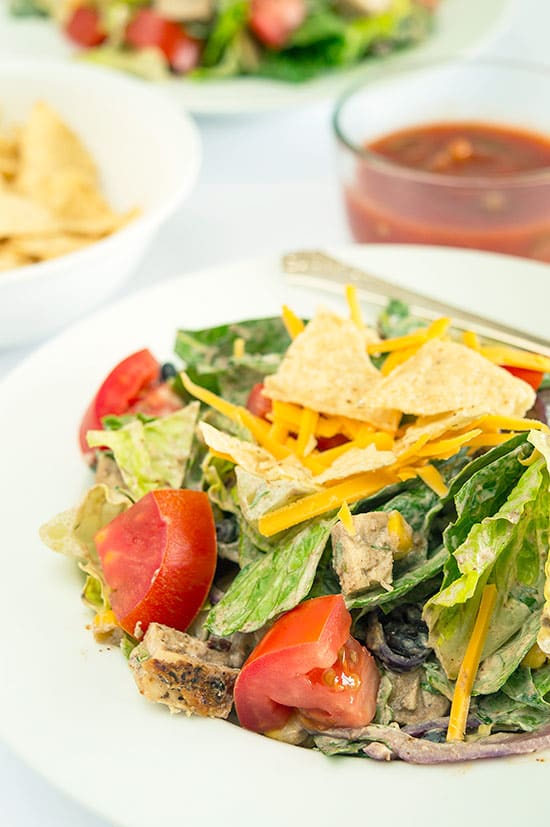
A slightly spicy chicken salad packed with black beans, corn, red onions, and cheese and topped with a chipotle cilantro sour cream dressing.

As sad as it is, all good things must come to an end, and we find ourselves today reaching the end of our January salad series. We’ve been all over the map with these salads. There was the hearty Cobb Salad , the delightfully sweet and fruity Asian Chicken Salad , a BLT in a bowl with the Light and Healthy BLT Salad , and for our last salad, we are going south of the border with a Slightly Spicy Chipolte Chicken Salad!
I should say, I call it slightly spicy because that’s how I like it, but with a couple minor tweaks, this could be burn-your-taste-buds-off spicy. It’s up to you. Whatever your preferred spice level, this salad is the antithesis of the boring greens that come to mind when you think of healthy salads. There are beans, corn, red onions, chicken, and cheese, all topped with a chipotle cilantro sour cream dressing. Oh yeah, and there’s lettuce too.

You definitely won’t feel like you are eating something healthy when you taste this one. It’s perfect for those nights when a giant pile of nachos is just screaming your name. Seriously, give it a try and for a third of the calories, you more than get your cheesy, Mexican food fix.
And as though this salad needed more to recommend it, it’s one of my favorite make-ahead dinners. You can do all the prep work in advance and when you are ready to eat, you just throw everything in a pan to heat and then serve over a bed of cool, crisp greens. It doesn’t get better than that.
I really wish pictures could do this salad justice. Processing these images after taking them, I described this salad to someone as the ugliest, most delicious f-ing salad in the world. That amazing spicy chipotle gives the dressing a slightly red tinge, which over the lettuce makes everything just this side of purple. And purple’s not a good look in food photography. Let’s just say, much cursing was done trying to make this salad look as out-of-the-world tasty as it actually is. But that’s okay, because the photo shoot may have been a disaster, but I still got to eat this salad when I was done.


Ingredients
Special Equipment
- ▢ Meat mallet
- ▢ Instant-read thermometer
Dressing
- ▢ 2/3 cup ( 160g ) sour cream
- ▢ 1/3 cup fresh cilantro minced (loosely packed)
- ▢ 1 canned chipotle chili in adobo sauce seeds removed, and minced*
- ▢ 1 teaspoon lime juice
- ▢ 1 teaspoon ground cumin
- ▢ 1 teaspoon chili powder
- ▢ 1/4 teaspoon salt
Salad
- ▢ 1 large head romaine lettuce chopped
- ▢ 1 pound (about 2 small) boneless skinless chicken breasts pounded thin
- ▢ Salt and pepper
- ▢ Taco seasoning or a little cumin and chili powder
- ▢ 2 tablespoons chicken broth or water to deglaze pan
- ▢ 1/2 small red onion cut root to tip and sliced thin vertically
- ▢ 1 15-ounce can black beans rinsed and drained
- ▢ 1 can whole-kernel corn drained
- ▢ 1-2 tomatoes chopped
- ▢ 1 cup sharp cheddar cheese
- ▢ Crushed tortilla chips for topping optional
Instructions
Dressing
- Combine dressing ingredients in a small bowl and mix. Set aside.
Chicken
- Salt and pepper chicken and sprinkle with taco seasoning (or a little cumin and chili powder). Grease a pan with cooking spray and cook the chicken over medium-high heat , 5-8 minutes per side, until an instant-read thermometer inserted into the center of the breasts reads 160°F. Set aside on a plate.
- Deglaze the pan with a little chicken broth or water, scraping the cooked brown bits off the bottom and pour over chicken. Let rest for 5 minutes, dice, and set aside.
Vegetables & Beans
- Spray the pan with a little more cooking spray and add onions (if you like crunchy onions in your salad, you can skip this step), cooking until they are cooked just shy of your preferred level of doneness. Add beans and corn and cook until heated through. Put chicken back in the pan and mix well.
Assemble
- In a large bowl, combine lettuce, chicken mixture, dressing, and tomatoes. Toss well so that everything is coated in the dressing and serve. Top with cheese and a few crushed tortilla chips if desired. Enjoy!
Notes
Nutritional Information Adapted from: MyRecipes
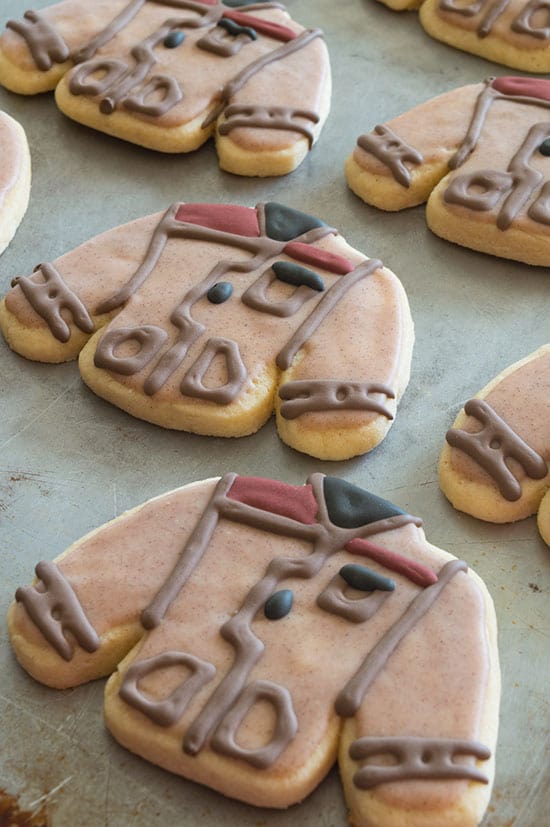
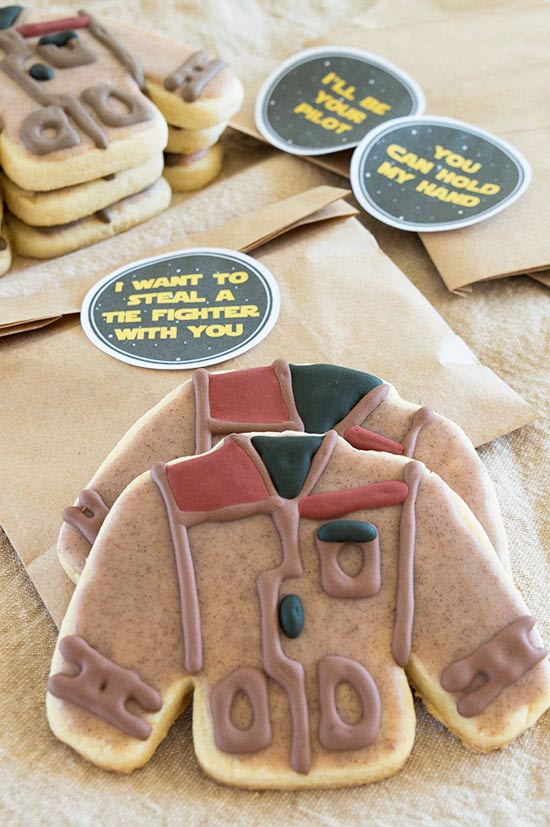
Cookiefied versions of “Star Wars: The Force Awakens’” best character: Poe’s Jacket.

Okay guys, I was not going to do another Star Wars recipe after my BB-8 Cupcakes . When I started this blog, I said I’d limit myself to one nerdy recipe per franchise, lest the blog just become all Hannibal recipes all the time (people-free obviously, and I’m saving that one for a special occasion). BUT, I wanted to do a nerdy/pop-culture Valentine’s Day treat and once this idea popped into my head, it refused to leave. So here you go: Poe’s Jacket Cookies.
Why are these my Valentine’s Day treats? Because, was there a purer expression of love and friendship in all of pop-culture this year than the sharing of Poe’s jacket? I think not. The movie might as well be called Star Wars: Siblinghood of the Travelling Jacket for all that thing gets passed around by our three heroes. AND IT’S BEAUTIFUL!!


Disney via Dork Side of the Force
The jacket starts off the film with the best pilot in the Resistance, who passes it off to the universe’s most adorable stormtrooper, who then loans it out to our favorite young Jedi, who then gives it back to our newly minted Resistance member, where it, SPOILER probably helps save his life. And each time it’s handed off, it’s given in the spirit of friendship and affection. I love it so much, I might just cry. And if that jacket doesn’t get repaired and make it into the sequel, I really will.
I made these cookies with the recipe from my Copycat Heart Cookies with Cinnamon Icing , minus the food coloring. If you want to see me rave over how delicious they are, click over to that post. Just trust me when I say they’re really, really good, but you can use whatever cutout cookie dough you like best (or store-bought to make things simple). I do recommend using the cinnamon icing I link to though, because the cinnamon is what gives the coat the great, slightly distressed leather look, no coloring needed!

In case you want to use these as valentines or party favors, I created some printables to go with the cookies. You can print them out on sticker paper or just use double-stick tape like I did. (Click on each one for a large version.)


And before we move on to the instructions, I’ll tell you now, these cookies are a bit of a labor of love. They are easy to make, BUT they require a few resting periods, so they are not quick cookies. Don’t start these at 8pm on Valentine’s Day eve or the morning of a party. There will be tears. With that dire warning out of the way, on to the instructions!


Ingredients
Cookies
- ▢ 18 sweater-shaped sugar cookies cooled - I used my Copycat Heart Cookies dough
- ▢ 1 batch of my Cinnamon Icing without food coloring
- ▢ 2-3 cups royal icing made thick* - I used a double batch of Cake Wiz’s Royal Icing
- ▢ Red, yellow, green, and black food coloring
You Will Also Need
- ▢ Piping bags
- ▢ A coupler and #2 tip
Instructions
Icing
- Cover cookies by dipping them in the cinnamon icing. Use a knife to scrape off the excess and clean up the edges. Set aside to harden.
- Separate royal icing into three bowls. 1/4 in two of them and 1/2 in the third. In one of the small bowls, make black icing. In the other small, make the maroon. I used mostly red with a couple drops of yellow and green. In the largest, make your brown icing. I used about 57 drops of red, 45 green, and 11 yellow.
- Stir and check the consistency of your icing. You want 15-second icing, which means, if you run a knife through it, it takes about 15 seconds to fill back in. If it is too thick, add a little water to it in 1/4-teaspoon increments. If it becomes too thin, stir in a little sifted powdered sugar.
- If your cookies are firm enough to handle without smudging the base icing, you can begin piping. Otherwise, cover the royal icing and wait.
Piping
- Fill your piping bag with the brown icing and pipe on the jacket details.
- Switch to maroon and do the breast line and shoulder patch. I used a toothpick to spread the icing around and get into the corners.
- Finally, switch to black and do the accents and fill in the shirt. Again, using a toothpick for the corners if needed.
Rest
- Allow to dry for at least four hours before stacking or packing. The royal icing will dry quickly, but the base icing needs a few hours, or it will dent and smear.
Notes
Used to make this recipe:

Copycat Heart Cookies with Cinnamon Icing
Ingredients
Cookies
- 1 cup ( 8 oz) unsalted butter softened
- 1 cup ( 200 g) superfine sugar*
- 1/2 teaspoon salt
- 1 large egg plus 1 yolk
- 2 teaspoons vanilla extract
- 2 1/2 cups ( 350 g) all-purpose flour
Cinnamon Icing
- 2 cups ( 240 g) powdered sugar
- 1 teaspoon cinnamon
- 2 tablespoons milk
- 1/2 teaspoon vanilla extract
- 2 teaspoons light corn syrup
- 20-30 drops red food coloring
Instructions
Cookies
- Using a stand mixer on medium speed, cream butter, sugar, and salt until light and fluffy, scraping down the sides and bottom of the bowl as necessary. This should take about 3 minutes and you will see the mixture noticeably lighten in color. Since this recipe contains no baking soda or powder, you want to make sure not to skimp on this step.
- Add the whole egg, mix and then the yolk and vanilla, beating until fully incorporated.
- Add flour, mixing on low until just combined. Don’t over mix!
- Divide dough into two parts and wrap tightly in plastic wrap. (I lay the wrap on the counter, scoop the dough on to it and wrap.) Refrigerate for AT LEAST an hour, up to 48 hours in order to firm up the dough. This step cannot be skipped or short cut. Your dough should feel firm and not sticky when it’s ready to be rolled. If you try to work with it before it is chilled properly, your cookies will stick. If it is very warm outside, or your butter very soft when you started, chilling may take more than an hour.
- Cover two baking sheets with parchment paper or a silicone baking mat.
- Dust work station and rolling pin with with flour and roll dough out to 3/8-inch thick. Don’t be afraid to use more flour as you go if things start to stick. Cut into hearts using a 3-inch cookie cutter and transfer to prepared baking sheets with a spatula.
- Refrigerate for 15 minutes to re-firm up cookies. This will stop them from spreading in the oven. Preheat oven to 375 degrees F.
- Bake until cookies are just golden on the bottom edges, 9-12 minutes (more if you used larger cookie cutters). Allow to cool completely before icing.
Icing
- In a medium bowl, wide enough to easily fit your cookies, stir together powdered sugar, cinnamon, milk, and vanilla until smooth. It might seem like it’s not going to mix, but it will. Just keep stirring. Do not add more liquid!
- Add corn syrup and food coloring and mix well. Your icing should be thin enough that if you run a knife through it, the liquid fills back in the gap in 8-10 seconds. Depending on how much food coloring you use, you may need to add a bit more milk, 1/2 teaspoon at a time. Be careful with this step! If you use too much milk, your icing will not set.
- Dip the cookies to ice and scrape the excess off with a knife or the side of the bowl. If you have any air bubbles, you can pop them with a tooth pick.
- Icing will dry enough to eat in under an hour, but allow to dry for at least four hours before stacking or packing.
