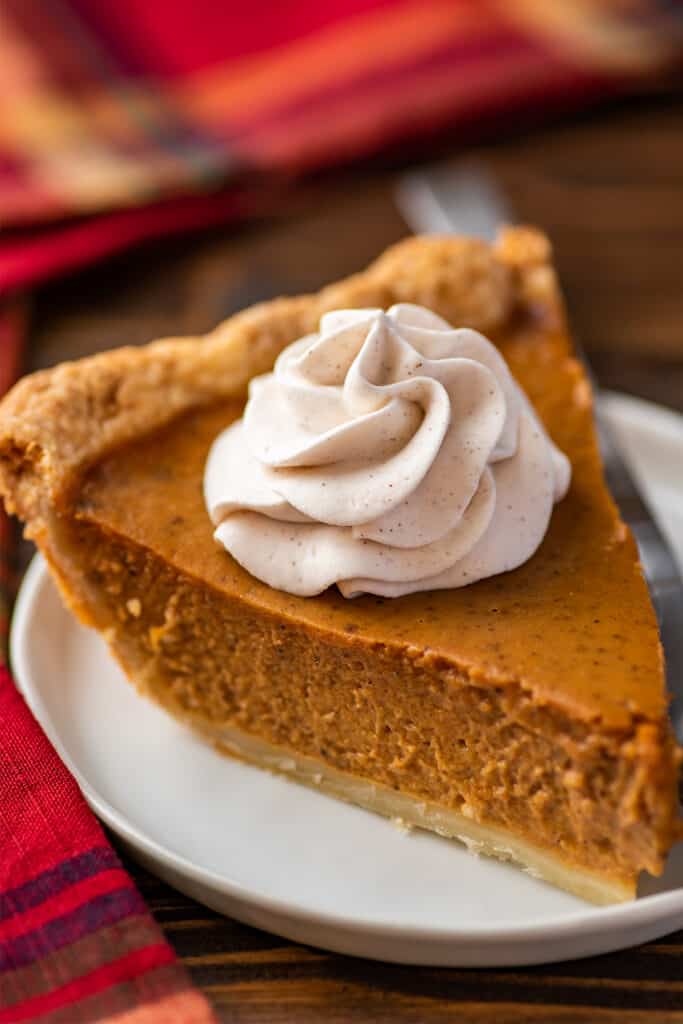
Cinnamon whipped cream is rich, creamy, and perfectly spicy-sweet when served over pie, a cup of coffee, or your favorite dessert.
How do you make dreamy, billowy whipped cream even better? Add a little spice.
Whipping cinnamon into your cream creates a sweet and spicy topping that does absolutely wonderful things for whatever you’re serving it over.

Pair it with a slice of pumpkin pie for an extra boost of cinnamon flavor or serve alongside a piece of chocolate cake and see how well chocolate and cinnamon go together.
Ingredient Notes
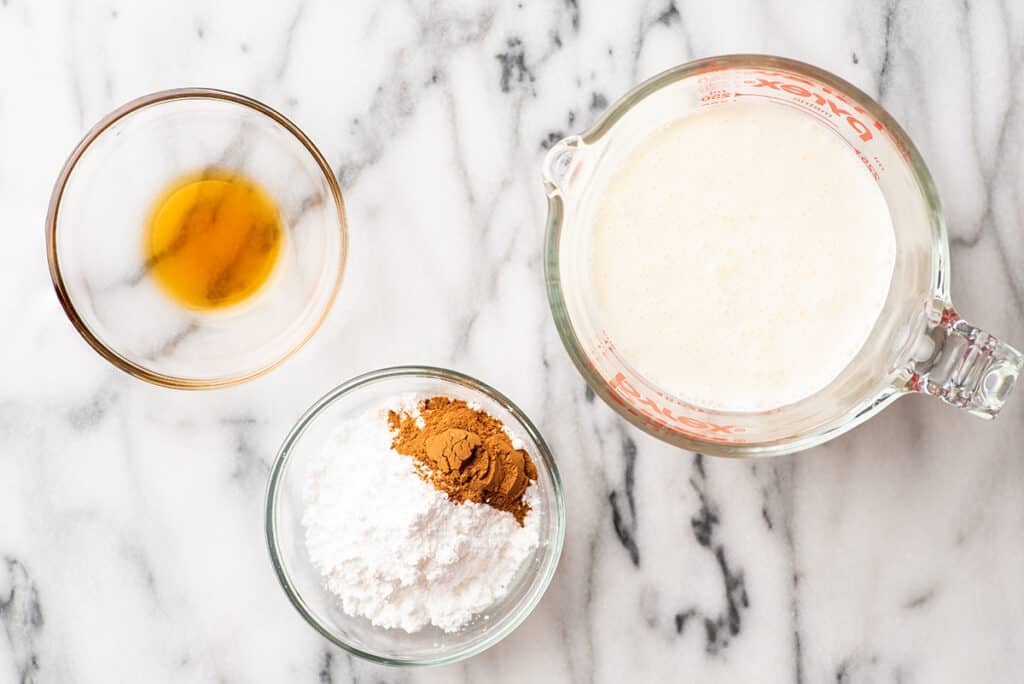

- Heavy cream/heavy whipping cream: Have leftover heavy cream after making this? Check out my post What to Do With Leftover Whipping Cream for ideas for using up the leftovers. (I recommend using it to make an extra creamy cup of hot chocolate .)
- Powdered sugar or granulated: The recipe calls for powdered sugar, but you can use granulated if that’s what you keep on hand. You’ll need less granulated sugar than powdered to achieve the same level of sweetness, so make sure to read the recipe notes in the recipe card if you’re going to switch sugars.
How to Make Cinnamon Whipped Cream
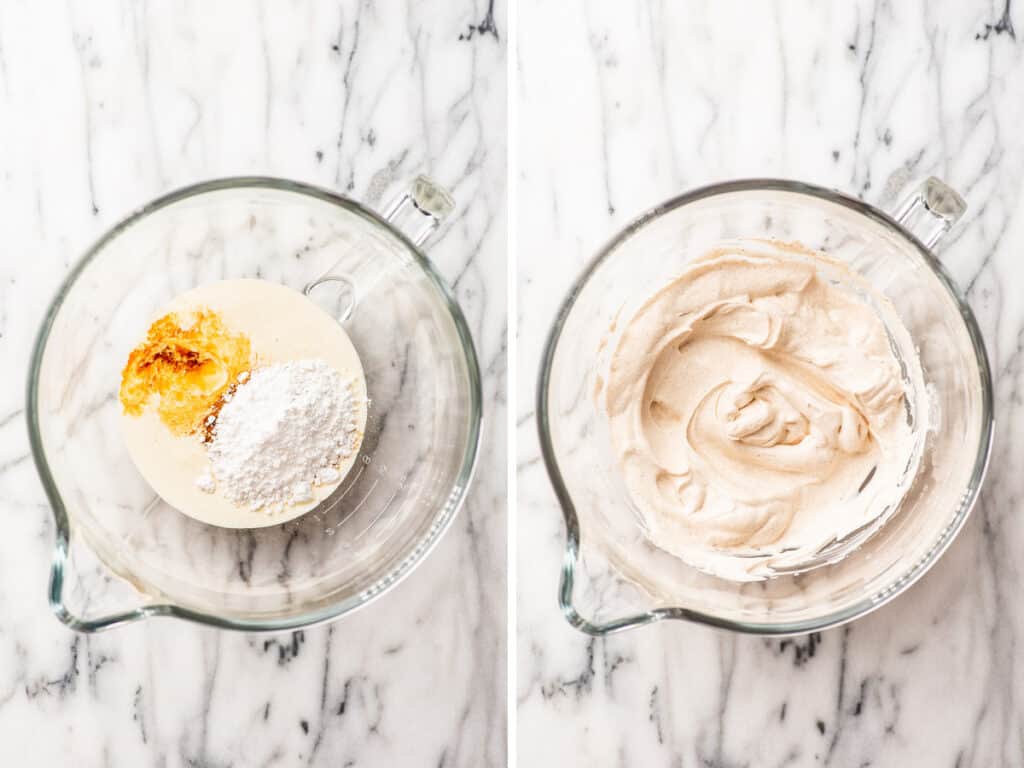

Combine ingredients: In a large bowl or the bowl of your stand mixer, add heavy cream, vanilla extract, sugar, and ground cinnamon.
Whisk vigorously: Use a whisk, handheld electric mixer , or the whisk attachment of your stand mixer to whisk the cream, starting on low and working up to high. Stop as needed to scrape down the sides of the bowl so everything is getting incorporated.
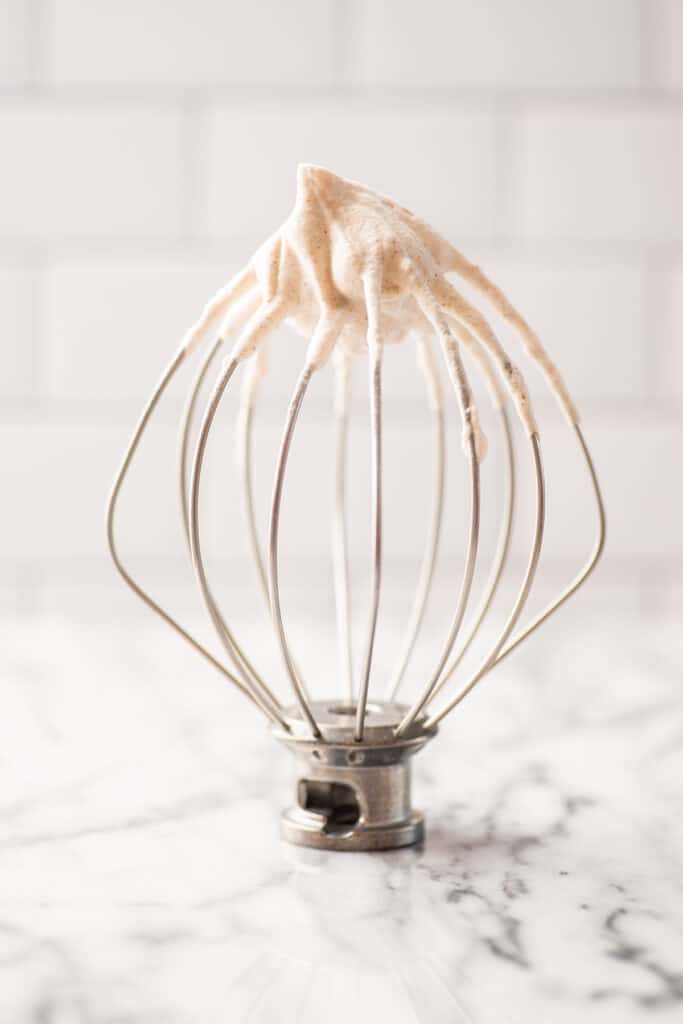
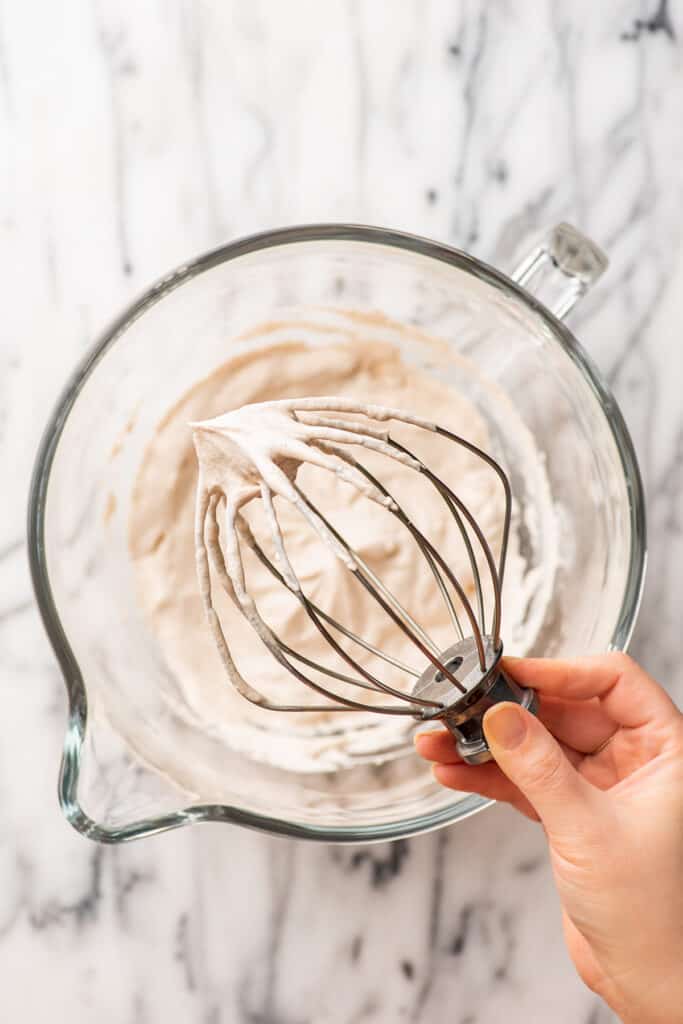
Whisk until the cream reaches your desired consistency (soft peaks are perfect for spooning over drinks and stiff peaks are best for piping).
- Serve and enjoy!

I don’t have any heavy cream. Can I make whipped cream with half and half?
No. Half and half does not contain enough fat to whip into whipped cream. You’ll need to make a grocery run if you want to make this recipe.
Can I use cinnamon sugar to make cinnamon whipped cream?
Sure. If you have a batch of cinnamon sugar mixed up, you can use it instead of plain granulated sugar and cinnamon. Simply omit the cinnamon in the recipe and replace the granulated sugar with cinnamon sugar.
The whipped cream will probably have a more subtle cinnamon flavor depending on the ratios in your cinnamon sugar, but it will still be delicious.
What can I serve with cinnamon whipped cream?
Cinnamon whipped cream can really bring out or complement the flavors of whatever you serve it over. Some of my favorites are:
- Pumpkin Pie
- Cinnamon Dolce Latte
- Waffles
- Pumpkin Pancakes

More Whipped Cream Recipes
- Classic Whipped Cream
- Chocolate Whipped Cream
- Cream Cheese Whipped Cream
- Coffee Whipped Cream
- Peanut Butter Whipped Cream
Recipe Notes
- Storage: Whipped cream will begin to deflate some the longer it sits, so it’s best served right away but can be stored for up to 48 hours tightly covered in the refrigerator.
- Freezing: Whipped cream freezes okay. Freeze dollops on a parchment paper-lined baking sheet or plate until solid. Cut the parchment paper into squares so each dollop is on its own piece and then transfer the squares to a freezer container or freezer bag. Store in the freezer for up to 1 month. You can place frozen whipped cream directly into hot drinks or allow it to come to room temperature for 20 minutes to thaw. See my post, Can You Freeze Whipped Cream for step-by-step photos and instructions.

Ingredients
Full batch
- ▢ 1 cup heavy cream
- ▢ ½ teaspoon vanilla extract optional
- ▢ 2 tablespoons to ¼ cup (15-30g) powdered sugar*
- ▢ ½ teaspoon ground cinnamon
Single serving
- ▢ 2 tablespoons heavy cream
- ▢ A couple drops vanilla extract optional
- ▢ 1 to 2 teaspoons ( 3-5g ) powdered sugar*
- ▢ A generous pinch of ground cinnamon
Instructions
- To a large bowl* or the bowl of your stand mixer, add heavy cream, vanilla extract, sugar, and ground cinnamon.
- Use a whisk, handheld electric mixer, or the whisk attachment of your stand mixer to whisk the cream, starting on low and working up to high. Stop as needed to scrape down the sides of the bowl so everything is getting incorporated.
- Whisk until the cream reaches your desired consistency (soft peaks are perfect for spooning over drinks and stiff peaks are best for piping).
- Serve and enjoy!
Notes
This ground turkey vegetable soup is absolutely packed with hearty and healthy vegetables. It’s filling, satisfying, and incredibly easy to throw together.
In this time of cozy, indulgent comfort foods it’s nice to have some lighter recipes to pepper in between the goulashes and the creamy pastas and the decadent pies .
This turkey vegetable soup is one such option. (And it’s such a good one.)


It’s made with lean ground turkey and a TON of veggies: onions, carrots, celery, shredded cabbage, and zucchini. So each bowl is super filling, warming, and packed with plenty of texture and flavor.
Keep this recipe in your back pocket for nights when you want something veggie-packed and not-too-heavy, or make a batch on Monday, and enjoy it for lunch all week long.
Ingredient Notes
- Ground turkey: I call for 93% lean ground turkey here, but feel free to use 85% if that’s what you keep on hand.
- Shredded cabbage: Even if you’re not a huge cabbage fan (I’m not), you might be surprised at how well it works in this soup. It adds a ton of bulk and texture without being “cabbage-y.” Give it a try, even if you’re on the fence about it! If you’re shredding an entire cabbage, you’ll have quite a bit of shredded cabbage leftover. Go make these BBQ Chicken Sandwiches with some of the leftovers!
- Tomato paste: Tomato paste adds a nice depth of flavor to the soup without making it taste like tomatoes. You’ll need just 3 tablespoons, so check out my post What to Do With Leftover Tomato Paste for ideas on what to do with the leftovers.
How to Make Ground Turkey Vegetable Soup
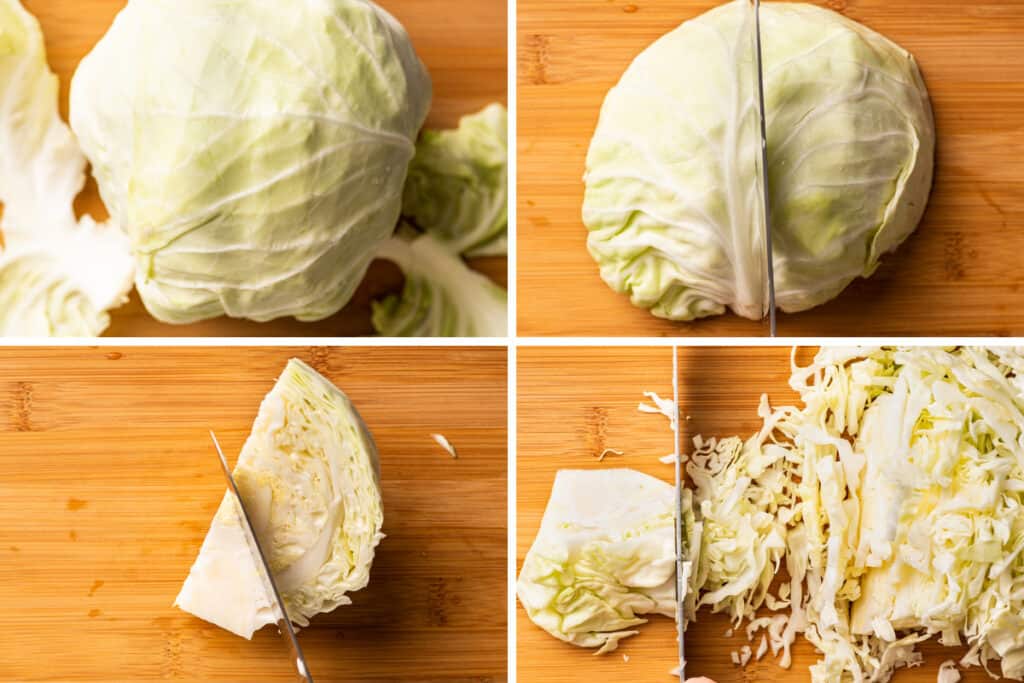
- Shred cabbage: If you don’t usually shred cabbage, it’s super easy. Just remove the outer leaves of the cabbage and then quarter it. Slice away the solid white stem from each piece and then lay a piece on its flat side and finely slice it into shreds.

- Start vegetables: Cook garlic, onions, carrots, and celery until the onions begin to soften and turn translucent around the edges.
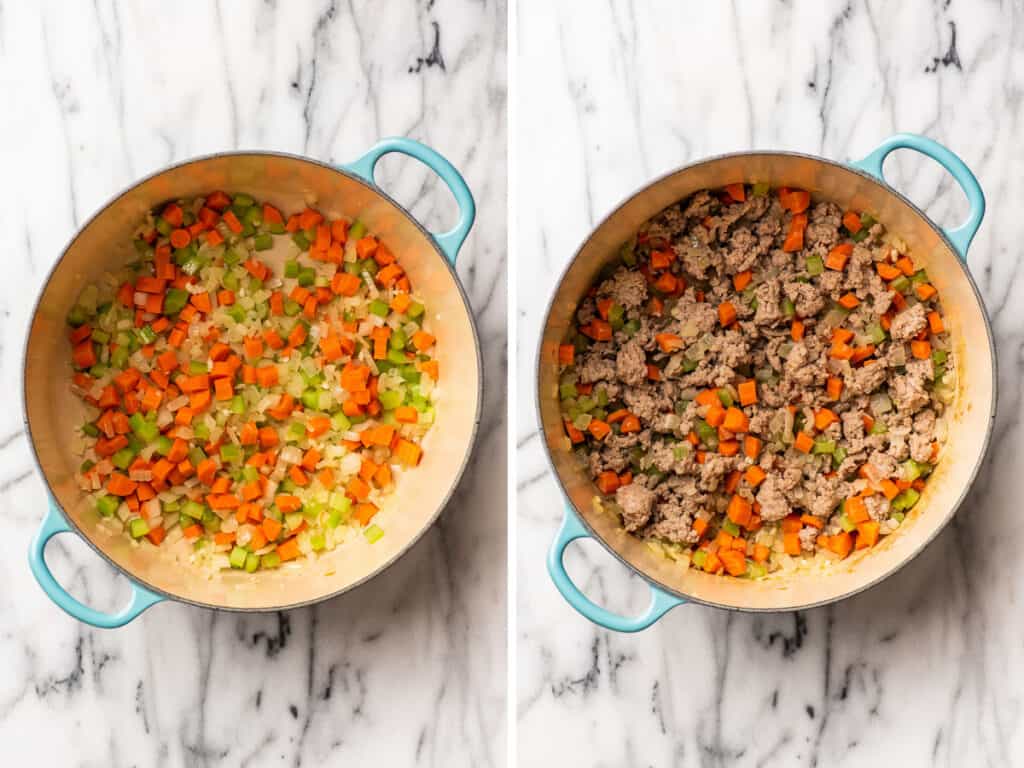

- Lightly brown turkey: Add the turkey. Use a wooden spoon or spatula to break the turkey into crumbles as it cooks.
4: Add tomato paste: Once the turkey is no longer pink, add tomato paste. Cook until the tomato paste begins to stick around the edges of the pan, 2 to 3 minutes. This will cook the raw taste out of the paste and give it a richer flavor.
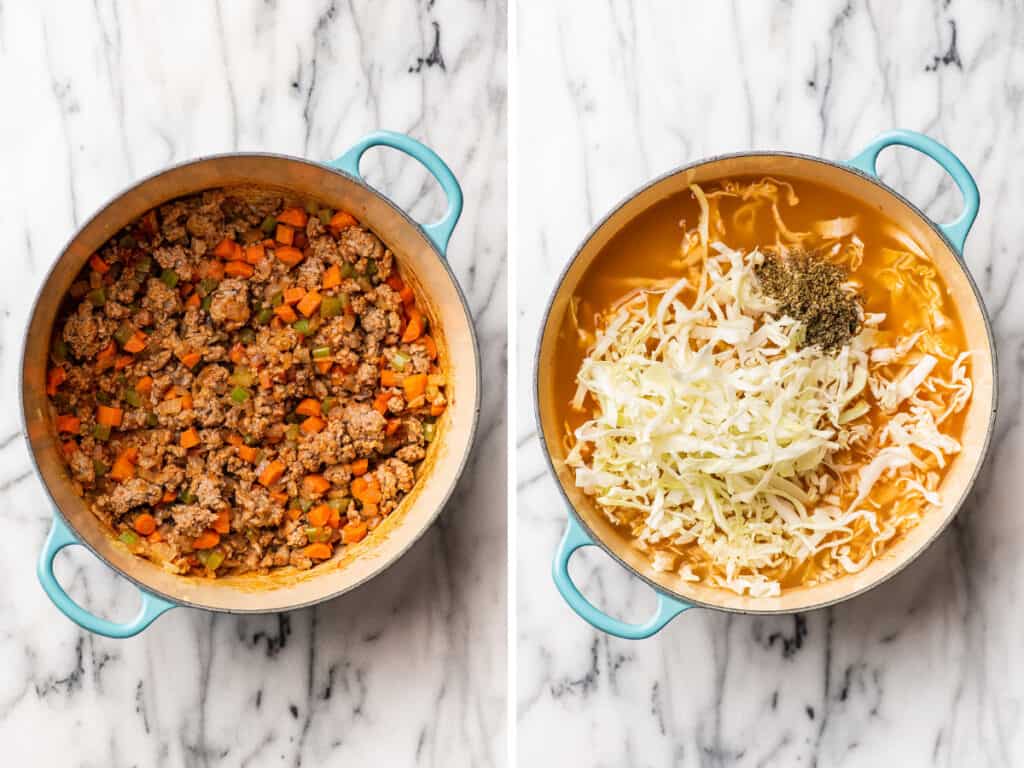

- Simmer: Add broth, cabbage, basil, and oregano and bring to a simmer. Simmer for 10 minutes and then add zucchini. Cook for an additional 5 minutes, until all vegetables are softened.
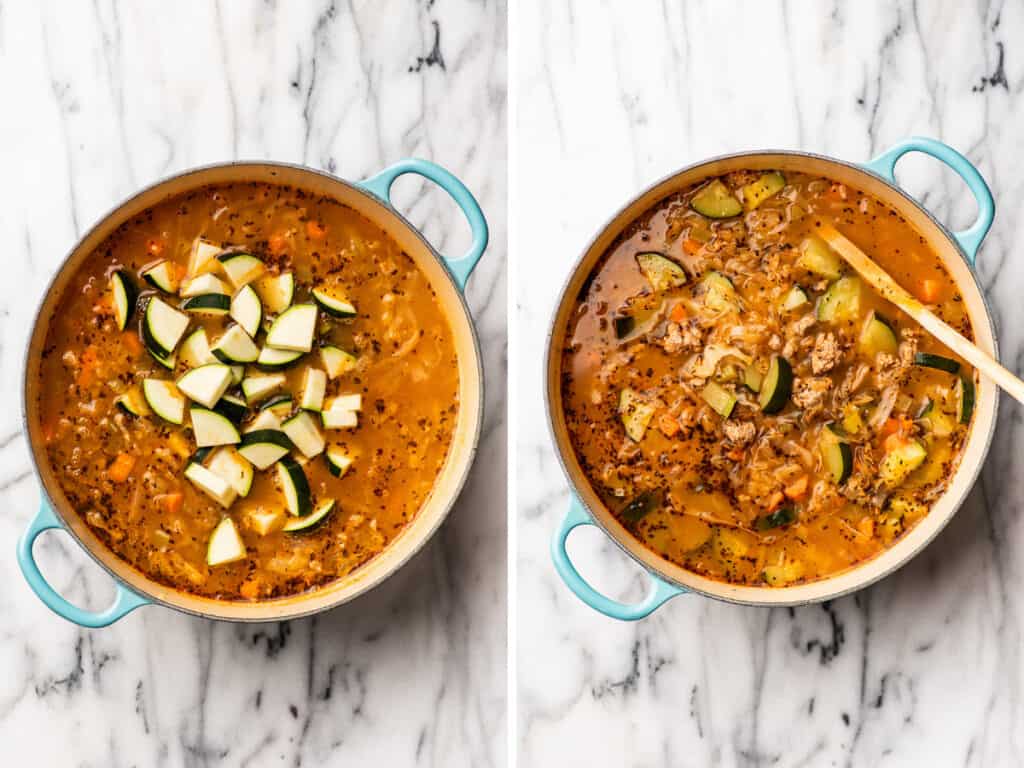

- Add salt and pepper to taste: Depending on the type of broth you used, you may need to add quite a bit of salt. Salt generously! Serve and enjoy!!
Variations
- Beef vegetable soup: You can swap the ground turkey for ground beef and chicken broth for beef broth for a richer beef vegetable soup.
- Shredded chicken or turkey: If you’d like to substitute shredded cooked turkey or chicken, add 2 cups of cooked, shredded meat at the very end.


I don’t like cabbage. Can I leave it out?
I wouldn’t recommend it. The texture of the cabbage kind of acts as the “noodles” in this soup, so without it, it’s just not going to feel balanced or bulky enough. As mentioned above, I’m not a huge fan of cabbage, but I really love it in this soup. Try it, and you might be surprised at how much you like it.
Can I freeze this soup?
Yes! This is one of my favorite soups to keep in the freezer for when I need something light and easy for dinner. It freezes extremely well, and the only vegetable that has a particularly noticeable texture change is the zucchini, which will be softer after freezing and reheating, but not unappealingly so.
To freeze, simply transfer the soup to individual containers and store in the freezer for up to 3 months. When you’re ready to eat the soup, defrost in the refrigerator overnight and reheat gently on the stove or in the microwave.
For more information, tips, and tricks on freezing soup, check out my post How to Freeze Soup .


Can I make this in advance?
Absolutely. This soup reheats very well. You can make it up to 3 days in advance. Store in the refrigerator and reheat over medium heat on the stove, stirring occasionally.
More Easy Soup Recipes
- Creamy Chicken Soup
- Chicken Carcass Soup
- Easy Tomato Soup
- Chicken Pot Pie Soup
Recipe Notes
- Advance Prep: While this soup cooks up quickly, there is quite a bit of chopping involved. You can precut all the vegetables up to 48 hours in advance. Just remember that they are being added in 3 stages, so store the cut onions, carrots and celery separately from the cabbage and the zucchini, which should both be stored on their own.

Ingredients
- ▢ Non-stick cooking spray
- ▢ 4 garlic cloves pressed or minced
- ▢ 1 medium white or yellow onion diced
- ▢ 2 medium carrots peeled and diced ¼ inch
- ▢ 2 celery ribs diced ¼ inch
- ▢ 1 pound 93-percent lean ground turkey
- ▢ 3 tablespoons ( 50g ) tomato paste
- ▢ 8 cups chicken broth
- ▢ 6 cups shredded cabbage
- ▢ 1 teaspoon basil
- ▢ 1 teaspoon oregano
- ▢ 1 small zucchini chopped
- ▢ Salt and pepper
Instructions
- Heat a large pot over medium heat. Spray pot with non-stick cooking spray or a drizzle of olive oil. Add garlic, onions, carrots, and celery. Cook, stirring occasionally, until the onions begin to soften and turn translucent around the edges, about 5 to 8 minutes.
- Turn heat to medium high and add the turkey. Use a wooden spoon or spatula to break the turkey into crumbles as it cooks.
- Once the turkey is no longer pink, add tomato paste. Cook until the tomato paste begins to stick around the edges of the pan, 2 to 3 minutes.
- Add broth, cabbage, basil, and oregano and bring to a simmer. Simmer for 10 minutes and then add zucchini. Cook for an additional 5 minutes, until all vegetables are softened.
- Add salt and pepper to taste. Serve and enjoy!!
Notes
These perfectly delicious small-batch banana muffins can be made with one banana, one bowl, and half an hour.
I have two questions for you today:
Do you have one sad browning banana sitting on your counter?
Do you have a bowl and basic kitchen staples?
Yes and yes? Then you can and absolutely should make these small-batch banana muffins (or if you feel like chocolate, try these Small-batch Chocolate Banana Muffins )!

I’m all about recipes that solve problems, and this recipe solves two. It gets rid of that piece of fruit rotting on your counter and makes sure you won’t overindulge in a sweet treat because it only makes four muffins.
That’s right, just four perfect little moist and delicious banana muffins.
And they are so fast and easy to make. They literally go from banana-on-the-counter to in-the-oven in 5 minutes, because you just mash a banana, mix everything in one bowl, scoop into a muffin pan, and bake.
They come out of the oven so moist and soft and good. It’s the perfect impromptu baking project for a lazy Sunday morning or rainy afternoon.
Ingredient Notes
- One very ripe banana: Craving banana muffins but don’t have any ripe bananas on hand? Go read my post on how to quickly ripen bananas .
- An egg white: This recipe calls for just an egg white. Check out my post of Egg Yolk Recipes for ideas on what to do with the leftover yolk (I recommend a small batch of chocolate chip cookies .)
- Flour: I’ve always made these muffins with all-purpose flour, but I’ve had a number of readers tell me they turn out well with gluten-free flour, so if you’re gluten-free, measure for measure / 1 to 1 should work great.


Banana Muffin Variations
- Chocolate chip banana muffins: This is one of my favorites, fold ⅓ cup of chocolate chips to the batter before you transfer it to your muffin pan.
- Cinnamon sugar crust: Sprinkle ½ to 1 teaspoon of cinnamon sugar over the top of each muffin before baking.
- Streusel topping: If you’d like to add streusel to the muffins, go make my favorite streusel recipe . The half batch will make slightly too much for 4 muffins, so you can either freeze the leftovers for a later batch or eat it. 😉
More Small-batch Muffin Recipes
- Small-batch Blueberry Muffins
- Small-batch Chocolate Chocolate Chip Muffins
- Small-batch Chocolate Chip Muffins
- Small-batch Pumpkin Muffins
- Small-batch Apple Crumb Muffins
Can I double this recipe?
Absolutely! And if doubling the recipe, you can use 1 whole egg instead of 2 egg whites. To change the recipe yield, hover over the serving size in the recipe card below or click if you’re on mobile, and slide the slider.
Can I use a whole egg instead of just an egg white?
Yes. This is the modification readers most often tell me they’ve made with these muffins, so if you don’t want to go through the trouble of separating an egg, just use the whole thing.
More Banana Recipes
- One Banana Banana Bread
- The Best Banana Pudding
- My Favorite Banana Bread
- Banana Pancakes for Two
- 20+ Banana Recipes to Use Up Your Brown Bananas


Small-batch Banana Muffin Recipe Notes
- Freezing: Banana muffins freeze well! Individually wrap muffins in cling wrap and then store them in an airtight container or freezer bag in the freezer for up to 2 months. Allow them to come to room temperature before eating.
- Storage: Store muffins in an airtight container at room temperature for up to 3 days.
- Extra bananas: Have more than one sad brown banana? Freeze the rest! Bananas freeze super well for baking. Go check out my post How to Freeze Bananas for all the freezing tips and tricks.

Ingredients
- ▢ 1 large very ripe banana
- ▢ ¼ cup ( 50 g) granulated sugar
- ▢ 1 large egg white
- ▢ 1 tablespoon and 2 teaspoons vegetable oil
- ▢ ½ cup ( 60 g) all-purpose flour
- ▢ ½ teaspoon baking powder
- ▢ ¼ teaspoon baking soda
- ▢ ⅛ teaspoon salt
- ▢ ⅛ teaspoon cinnamon
- ▢ Pinch of nutmeg
- ▢ ⅓ cup chocolate chips (optional)
Instructions
- Preheat oven to 350°F and line a muffin pan with four liners (or grease).
- In a medium bowl, completely mash banana with a potato masher or fork. Add sugar, egg white, and oil. Stir with a spoon until just combined (mixture will still be lumpy).
- Add flour, baking powder, baking soda, salt, cinnamon, and nutmeg. Stir until just combined. If desired, stir in optional chocolate chips.
- Divide mixture between the four prepared muffin cups, filling each about 2/3 of the way full. Bake for 18 to 25 minutes, until a toothpick inserted into the center of the muffins comes out mostly clean and the tops of the muffins begin to turn golden.
- Cool in the pan until cool enough to handle before transferring to a cooling rack to cool completely.
- Enjoy!
Notes
- Doubling: If doubling, instead of using 2 egg whites, you can use a single whole egg.
- Storage: Store muffins in an airtight container at room temperature for up to 3 days.
- Freezing: Individually wrap muffins in cling wrap and then store them in an airtight container or freezer bag in the freezer for up to 2 months. Allow them to come to room temperature before eating.

Cinnamon Whipped Cream
Ingredients
Full batch
- 1 cup heavy cream
- ½ teaspoon vanilla extract optional
- 2 tablespoons to ¼ cup (15-30g) powdered sugar*
- ½ teaspoon ground cinnamon
Single serving
- 2 tablespoons heavy cream
- A couple drops vanilla extract optional
- 1 to 2 teaspoons ( 3-5g ) powdered sugar*
- A generous pinch of ground cinnamon
Instructions
- To a large bowl* or the bowl of your stand mixer, add heavy cream, vanilla extract, sugar, and ground cinnamon.
- Use a whisk, handheld electric mixer, or the whisk attachment of your stand mixer to whisk the cream, starting on low and working up to high. Stop as needed to scrape down the sides of the bowl so everything is getting incorporated.
- Whisk until the cream reaches your desired consistency (soft peaks are perfect for spooning over drinks and stiff peaks are best for piping).
- Serve and enjoy!
