This Chicken and Broccoli Orzo is a super quick 20-minute dinner recipe that’s creamy, a little bit cheesy, and totally satisfying.
I’m here today with another quick and easy dinner recipe for you, 20-minute Chicken and Broccoli Orzo.
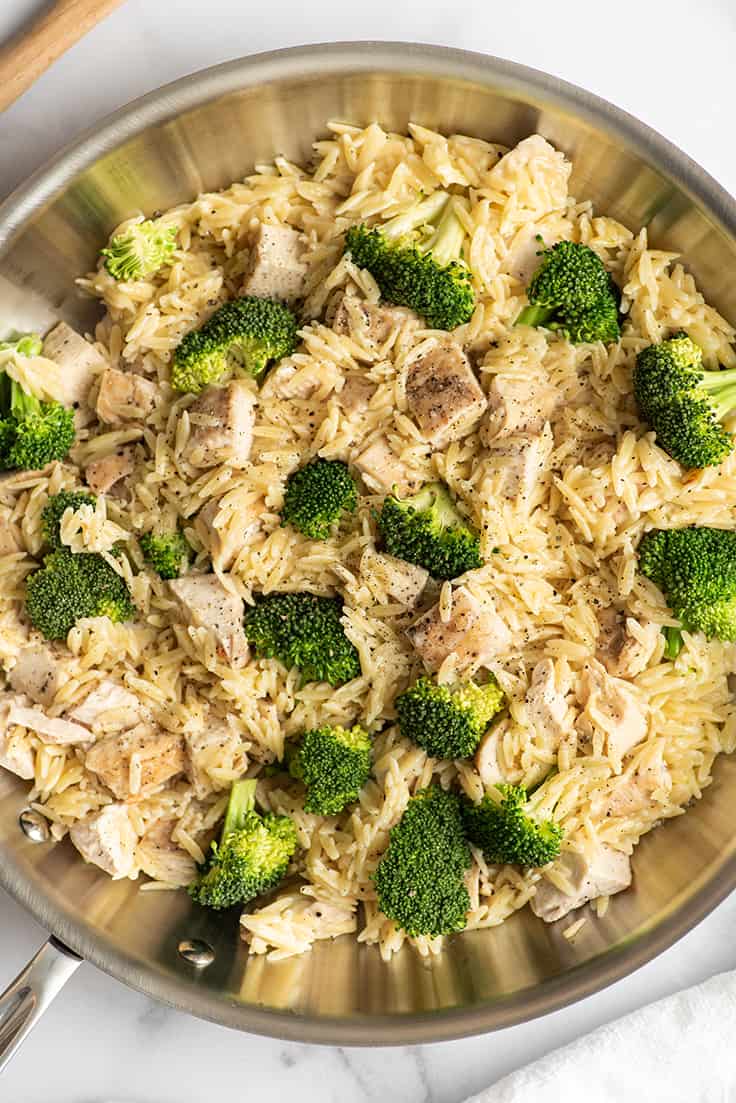
This recipe feels like classic childhood comfort food. It’s a big old skillet of diced or shredded chicken , broccoli florets, and creamy parmesan orzo that is completely irresistible, and it comes together FAST.

Ingredient Notes
- Cooked chicken: To speed things up, this recipe starts with cooked chicken . Leftover roasted chicken works great or you can grab a rotisserie chicken and chop up the white meat to use here. In a pinch, you can even use (warmed) canned chicken if that’s something you keep on hand. But, as always, if you don’t have precooked chicken, don’t sweat it. There are instructions in the recipe card for starting with raw boneless, skinless chicken breasts.
- Heavy cream, half and half, or milk: You can use heavy cream, half and half, or milk in this recipe. I recommend using heavy cream as it gives you the richest, creamiest results, but you can use what you have on hand. If you use heavy cream and have some left over, check out this post What to Do With Leftover Whipping Cream for ideas to use it up.
How to Make Chicken and Broccoli Orzo
- Cook orzo according to package instructions , and in the last 3 minutes of cooking time add broccoli to the water so it cooks while the orzo is finishing.
- In a large skillet, brown garlic in butter, and then add the drained pasta, cream, and Parmesan. Taste and add salt and pepper as needed.
- Stir in cooked chicken and then gently fold in the broccoli.
- Serve topped with more Parmesan cheese if desired, and enjoy!!


Tips and Tricks
A Note on Reheating: Creamy pastas need a little help to be at their best after reheating since they tend to either absorb all the liquid while sitting in the refrigerator or reheat lumpy and weird.
For best results, add a splash of heavy cream or milk and a sprinkle of shredded parmesan before microwaving. Once heated, stir everything together. The extra liquid and cheese will help return the orzo’s creamy consistency.
Can I freeze this dish?
I don’t recommend freezing creamy pasta dishes like this. The pasta texture does not hold up well to freezing. Looking for recipes you can freeze? Go check out my favorite freezer recipes !
Can I use different vegetables?
Sure. This recipe is great for using up leftover roasted or steamed veggies. Just reheat them and stir them in at the end instead of the broccoli. You can also make this with fresh asparagus. Simply chop the asparagus into 1-inch pieces and cook it with the orzo for 3 to 4 minutes instead of the broccoli.
How can I make this creamier?
If you want a really creamy decadent pasta experience, you can double the heavy cream and add more Parmesan to taste. If needed, gently heat everything over medium heat until the cheese is melty.


More Quick and Easy Recipes
- Creamy Sausage Pasta
- Chicken Fajitas
- Salsa Chicken
- Tri-tip in the Oven
- Chicken in White Wine Lemon Butter Sauce
- Naan Pizzas

Ingredients
- ▢ 8 ounces (about 1 ⅓ cup) orzo
- ▢ 12 ounces broccoli florets chopped
- ▢ 2 tablespoons ( 28g ) butter
- ▢ 2 cloves garlic chopped or minced
- ▢ ¼ cup heavy cream, half and half, or milk
- ▢ ½ cup ( 2oz ) shredded Parmesan cheese plus more for topping
- ▢ 2 cups warm cooked chicken diced or shredded*
- ▢ Salt and pepper to taste
Instructions
- Bring a medium pot of lightly salted water to a boil and cook orzo according to package instructions. In the last 3 minutes of cooking time, add broccoli. When timer goes off, use a slotted spoon to remove broccoli and transfer to a plate. Drain the orzo and set aside.
- In a large skillet, melt butter. Add garlic and cook until golden, 30 seconds to 1 minute. Add drained pasta, cream, and Parmesan cheese. Add salt and pepper to taste. Stir in chicken and then gently fold in broccoli.
- Serve, top with more Parmesan cheese if desired, and enjoy!
Notes
You’re going to love these BBQ chicken sandwiches with tangy shredded BBQ chicken and crunchy coleslaw on a toasted bun.
Yesterday I shared my favorite BBQ shredded chicken recipe , and today I’m sharing my very favorite thing to make with that BBQ chicken, BBQ chicken sandwiches.
These sandwiches are pretty much my ideal sandwich. They’re built on a lightly toasted brioche bun with tender smokey sweet shredded chicken and a tangy crunchy coleslaw that brings everything together. Best of all, these sandwiches are super easy and surprisingly fast to make.
No need to break out the BBQ or slow cooker. This BBQ chicken cooks on the stovetop in less than 30 minutes, and most of that cooking time is completely hands-off.

If you’ve made my shredded chicken or stovetop chicken breasts , you’ll recognize the cooking method here. You just lightly brown the chicken breasts and then let them cook in simmering liquid, in this case, a mixture of BBQ sauce, vinegar, and water.
Cooking the chicken this way means it will absorb a ton of flavor from the sauce as it cooks AND cooking the chicken breasts in liquid makes it basically impossible to burn them, so they need very little babysitting.
So while your chicken cooks on the stove, you’re free to prep the rest of your meal, get a head start on dinner clean-up, or take a little you time.
Ingredient Notes
- About 4 small or 2 large boneless skinless chicken breasts: This recipe calls for 1½ pounds of chicken. Since chicken breast size varies so wildly, that translates to between 2 and 4 chicken breasts. If using 2 large breasts, you’ll want to cut them down into cutlets before cooking so they cook more quickly in the sauce. I’ve provided instructions for this in the recipe card.
- Coleslaw: You can shred your own cabbage and carrots if you want ( here’s how to shred cabbage if you’ve never done it before ), but I typically just buy a bag of pre-chopped coleslaw veggies (they’ll be near the other pre-cut veggies and salad mixes in the produce department, not the deli) because it’s cheap and convenient.
- Buns: A nice brioche hamburger bun works well here, but in a pinch, you can use whatever bread you have on hand. Even a couple slices of plain white bread will still make a really good chicken sandwich.


How to Make BBQ Chicken Sandwiches


- Cook the bbq shredded chicken: Lightly brown both sides of your chicken breasts in butter and then simmer them in bbq sauce until they’re cooked through. Shred the chicken, return it to the pan and toss in the sauce to coat.
- Make the coleslaw: While the chicken simmers, stir together all the coleslaw ingredients. Taste and add more sugar/salt/vinegar if needed.
- Toast the buns: Open up the buns and place them on a baking sheet. Toast the buns under your broiler for 1 to 3 minutes until they are lightly toasted. Don’t walk away from your buns while they’re under the broiler as they can burn in a matter of seconds when left unattended.
- Assemble the sandwiches: Top the toasted buns with mayonnaise, shredded chicken, and coleslaw. Serve and enjoy!


More Sandwich Toppings
Switch up your sandwiches and try adding…
- Cheddar cheese
- A slice of pineapple
- Bacon
- Pickles
- Red onions
Recipe Notes, Tips, & Tricks
- The crunchy texture and slightly sweet, bright flavor of the slaw really complements the BBQ chicken, but if you’re not a fan of coleslaw, you can skip it.
Can these sandwiches be made ahead of time?
I don’t recommend assembling the sandwiches ahead of time since the bread will begin to get soggy, but you can make the barbecue chicken and coleslaw up to 48 hours in advance. When you’re ready to serve the sandwiches, simply reheat the chicken and assemble the sandwiches according to the recipe.
What can I do with leftover BBQ shredded chicken?
This recipe makes enough chicken for about 6 sandwiches. If you have leftover chicken and you don’t want to use it in more sandwiches, you can use it to make a salad, a small batch of BBQ chicken nachos, or depending on how much you have left, a BBQ chicken pizza (if you only have a little left, you can still use it to make a smaller naan pizza ).


Can I freeze these sandwiches?
Don’t freeze assembled sandwiches but the BBQ chicken and buns can be frozen separately. Transfer the chicken to a freezer bag and freeze for up to 3 months. Buns can be double wrapped and frozen for up to 1 month.
Defrost the chicken in the refrigerator overnight before reheating. Frozen buns can go directly into a 400°F oven. Bake for 5 to 8 minutes until heated through and lightly toasted and then assemble the sandwiches. I do not recommend trying to freeze the coleslaw.
What to serve with chicken sandwiches?
Serve your sandwiches with a side of kettle chips, homemade fries, smashed potatoes , or maybe some macaroni salad (my fave), and a simple veggie like:
- Roasted Broccoli
- Roasted Zucchini
- Microwave Corn on the Cob
- Microwave Steamed Green Beans
More Easy Chicken Recipes
- Creamy Chicken Pasta
- Chicken Parm Soup
- Chicken Francaise
- Crispy Lemon Chicken Thighs

Ingredients
BBQ Shredded Chicken
- ▢ 1 cup barbecue sauce
- ▢ ¼ cup apple cider vinegar *
- ▢ ¼ cup water
- ▢ 1½ to 2 pounds boneless skinless chicken breasts about 4 small or 2 large*
- ▢ Salt and pepper
- ▢ 3 tablespoons ( 42g ) butter salted or unsalted is fine
Coleslaw
- ▢ 3 cups pre-shredded bagged coleslaw mix or 2½ cups shredded cabbage and ½ cup grated carrots
- ▢ ¼ cup mayonnaise
- ▢ 2 teaspoons apple cider vinegar
- ▢ 2 teaspoons granulated sugar
- ▢ Salt and pepper
Sandwiches
- ▢ 6 hamburger buns
- ▢ 6 tablespoons mayonnaise
Instructions
BBQ Shredded Chicken
- In a medium bowl, whisk together barbecue sauce, apple cider vinegar, and water. Set aside.
- Pat chicken breasts dry and lightly salt and pepper both sides. Heat a large skillet with a lid over medium-high heat and melt butter.
- Add chicken breasts to the pan and cook until lightly browned. Flip the chicken breasts and pour barbecue sauce mixture over the top.
- Bring sauce to a simmer and reduce heat to medium-low, keeping the sauce at just a simmer. Cover and cook for 5 minutes. Flip the chicken, re-cover, and continue to cook until an instant-read thermometer inserted into the thickest part of the meat reads 165°F, usually around 3 to 6 minutes more.
Coleslaw
- While the chicken simmers, in a medium bowl, stir together all the coleslaw ingredients. Taste and add more sugar/salt/vinegar if needed.
Finish Chicken and Assemble Sandwiches
- Transfer the chicken to a cutting board and allow it to rest for 5 to 10 minutes. Allow the sauce to continue simmering uncovered, stirring occasionally, until it thickens.
- Shred chicken breasts and return shredded chicken to the pan of sauce. Stir until well-coated.
- Turn your broiler on high. Open up the buns and place them on a baking sheet. Toast the buns under your broiler for 1 to 3 minutes until they are heated through and lightly toasted. Don’t walk away from your buns while they’re under the broiler as they can burn very quickly.
- Top the toasted buns with mayonnaise, shredded chicken, and coleslaw. Serve and enjoy!
Notes
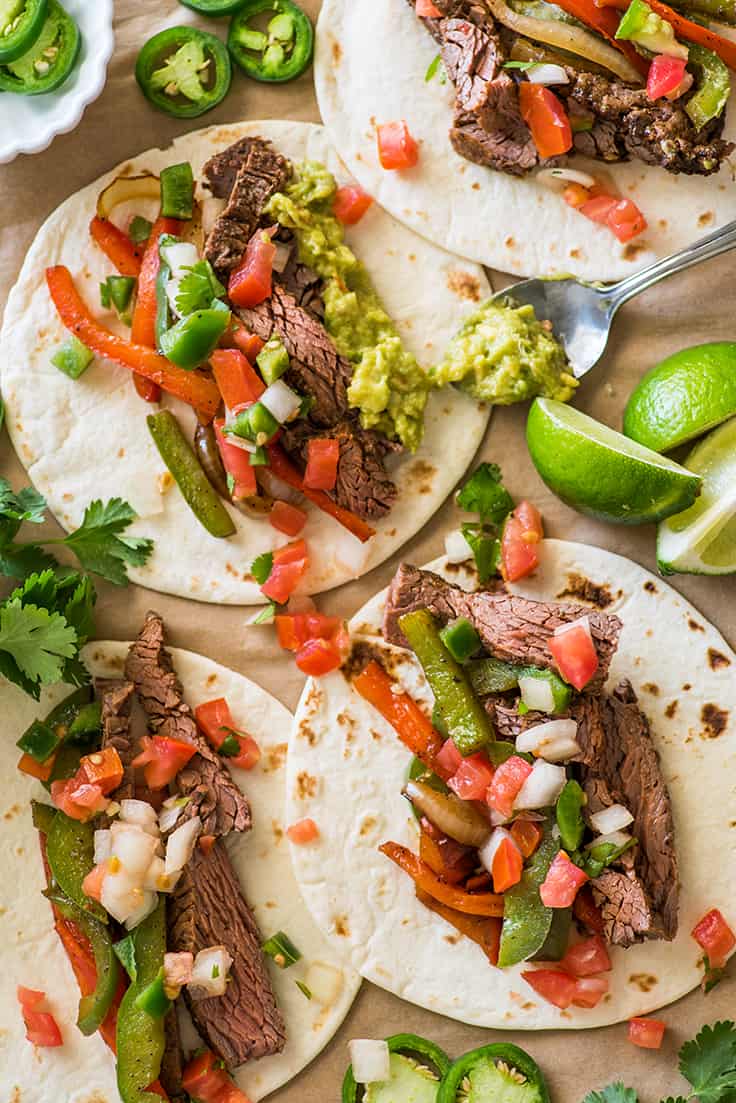
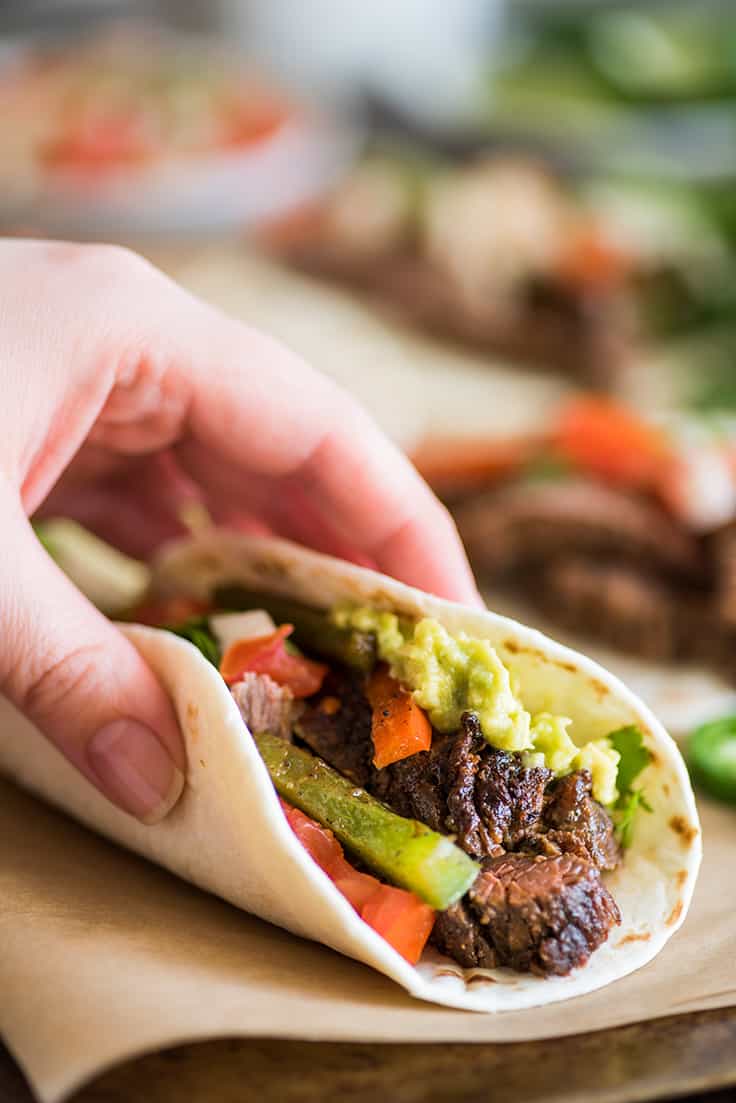
These are INCREDIBLY GOOD steak fajitas. Tender, tangy, and super flavorful beef paired with slightly charred veggies, warm tortillas, sour cream, and guacamole.
A while back, I shared my favorite Carne Asada marinade with you, and today, I’m sharing my very favorite way to use that marinade: to make steak fajitas.
Friend, these steak fajitas are SO GOOD. Plus, since this is a recipe that does best with a nice long marinade, if you start marinating your fajita steak the night before, your meat can go from marinade to plate in less than 20 minutes when dinner time comes around.

The Best Steak for Fajitas
The best steak for fajitas is skirt steak, flank steak, or flap meat. All three cuts of meat have a good, beefy flavor, take a marinade well, and cook up relatively tender under quick, high heat.
Given the choice, my personal favorite is flap meat, but all three are great options, and depending on their popularity in your area, you might not always be able to find all of these cuts at your local butcher. So just use whichever cut is available and most reasonably priced.
Fajita Marinade Recipe
The fajita marinade we’ll be using on the steak is citrus-based, so it not only produces tangy and delicious meat, but the acidity of the orange, lemon, and lime juice helps break down the steak for a more tender finished product.
If you’re short on time, you can marinate your steak for as little as four hours, but you’re going to get the best results with a 24-hour marinade.

How to Make Steak Fajitas
Start with a nice long marinade to tenderize the meat and make sure it really soaks up as much flavor as possible.
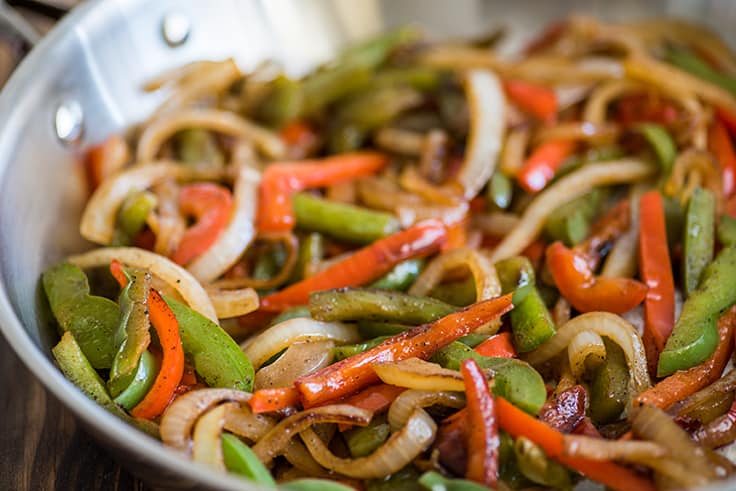
Prep your fajita veggies by slicing two bell peppers of any color and half of an onion into thin slices. This can be done the night before (store the veggies in an airtight container) when you start marinating your steak if you know you’re going to be short on time the following day.
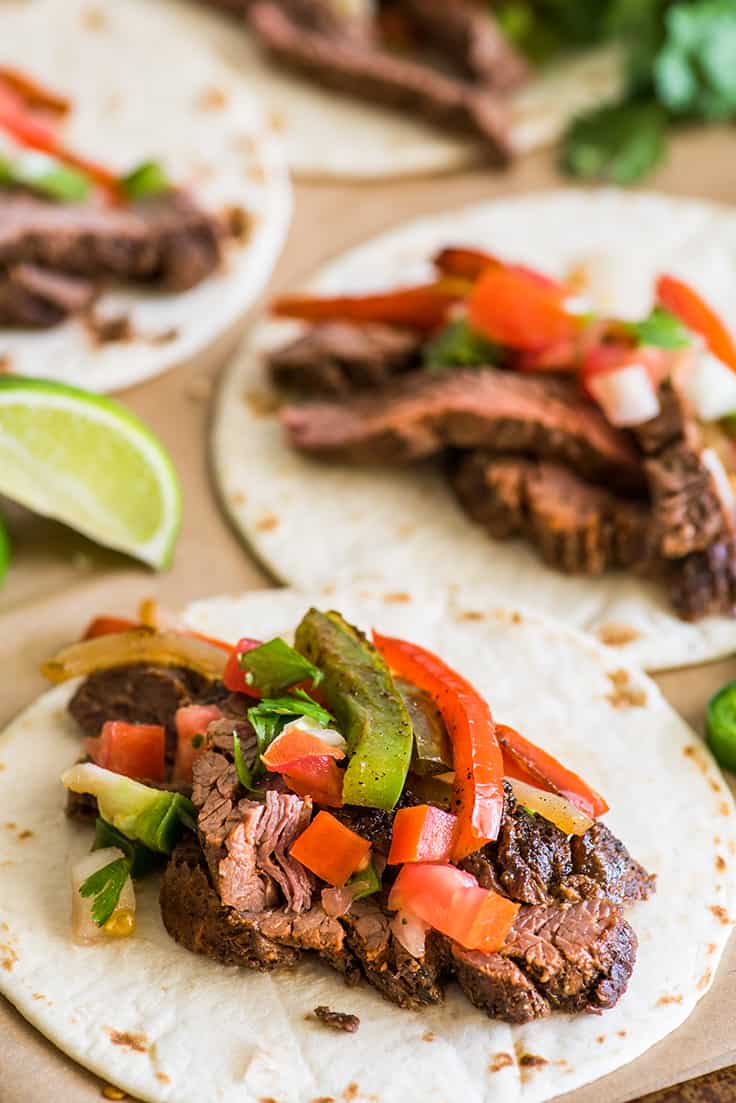
Cook the steak under a very hot broiler for about 4-6 minutes per side (less if your steak is very thin). Allow to rest for 5 to 10 minutes and then slice across the grain .
While your steak cooks, you’ll prepare the vegetables on the stove. The fajita veggies also get cooked quickly over high heat, so you get some charred edges while retaining the peppers’ color and texture.

- And that’s it. Serve over warm tortillas with guacamole, sour cream, maybe a little pico de gallo , and enjoy!
What goes with steak fajitas?
Classic fajita restaurant sides are rice and beans , but if you want something a little quicker for weeknights, you might also try:
- Oven-roasted Broccoli
- Tortilla Chips with Nacho Cheese
- Oven-baked Green Beans
Can the steak be cooked on a grill?
Absolutely! To cook on the grill, cook the meat over medium-high heat, 3-8 minutes per side, less if you’re working with really thin cuts of meat.
Can this recipe be made ahead of time?
Yes. Fajitas are a great make-ahead dinner. Simply cook the beef and veggies up to 2 days in advance. When you’re ready to eat them, reheat everything, and serve with warmed tortillas.

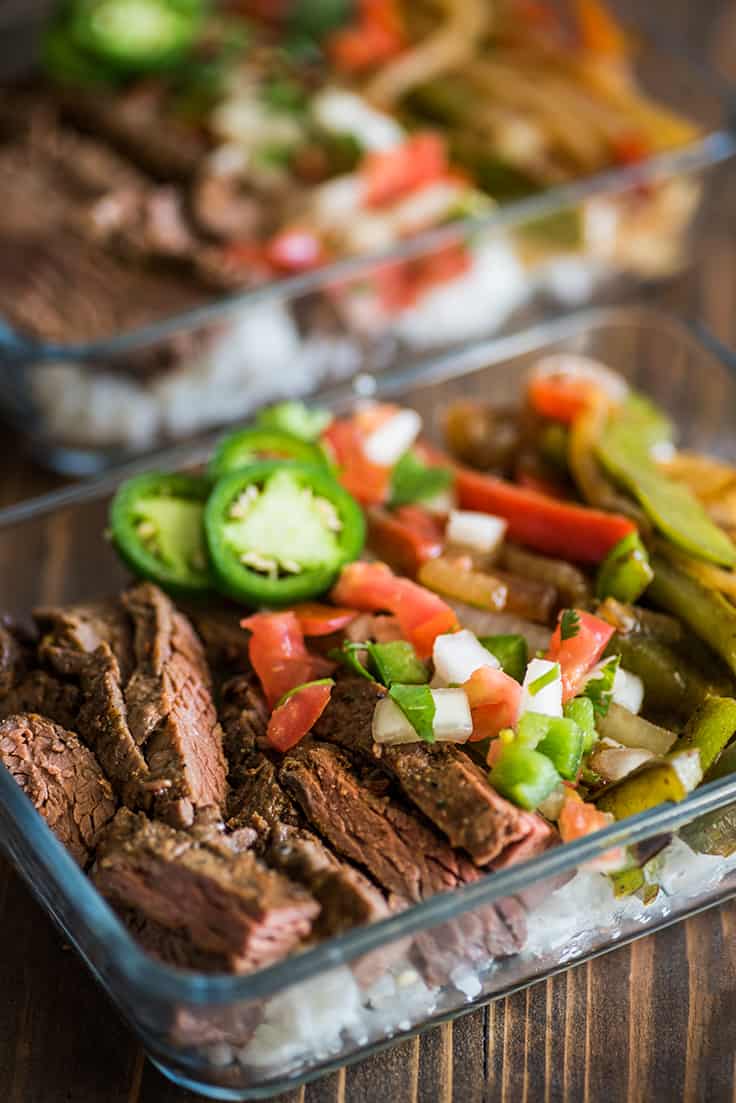
Meal Prep Steak Fajita Rice Bowls
And last thing before we go, this recipe makes about four servings. If you’re a household of one or two, I highly recommend turning the leftovers into meal prep steak fajita bowls.
Just layer cilantro rice (or cauliflower rice) in your meal prep containers and top with the steak and veggies. It turns your fajitas into super easy and portable lunches.

More Meaty Main Dishes
- Carnitas
- Country-style Pork Ribs
- Tri-tip
- Salsa Chicken
- Beef Short Ribs
- Quick and Easy Chicken Fajitas

Ingredients
Fajita Steak Marinade
- ▢ ½ cup orange juice bottled is fine
- ▢ ½ cup soy sauce low-sodium is fine
- ▢ ¼ cup lemon juice bottled is fine
- ▢ ¼ cup olive oil
- ▢ 2 tablespoons lime juice bottled is fine
- ▢ 2 cloves garlic pressed or diced
- ▢ 1 teaspoon chili powder
- ▢ 1 teaspoon ground cumin
- ▢ 1 teaspoon paprika
- ▢ 1 teaspoon dried oregano
- ▢ 1 teaspoon black pepper
- ▢ 1/4 teaspoon ground chipotle chili pepper OR 1 teaspoon finely chopped, canned chipotle pepper optional
- ▢ ½ bunch fresh cilantro chopped about ¾ to 1 cup very loosely packed
- ▢ 1 ½ to 2 pounds skirt, flank, or flap steak
Vegetables
- ▢ 1 tablespoon vegetable oil
- ▢ ½ large onion sliced
- ▢ 2 bell peppers any color, sliced ¼-inch
- ▢ Salt and pepper
- ▢ ¼ teaspoon ground cumin
- ▢ ¼ teaspoon chili powder
Fajita Toppings
- ▢ 8 tortillas warmed
- ▢ Sour cream optional
- ▢ Guacamole optional
- ▢ Pico de gallo optional
Instructions
Steak Fajita Marinade
- In a medium bowl, stir together all marinade ingredients. Place meat in a gallon-size plastic bag or glass container and pour marinade over the top. Marinate for at least 4 hours, preferably closer to 24, flipping the meat once halfway through.
Fajita Steak
- Arrange your top oven rack to about 4 inches below the broiler and heat broiler on high.
- Line a heavy-duty baking sheet or roasting pan with foil and broil steak for 4-6 minutes per side until the internal temperature reaches 135°F for medium-rare, 145°F for medium. Allow to rest for 5 to 10 minutes before slicing across the grain into strips.
Fajita Vegetables
- While your meat cooks, in a large skillet, heat oil over medium-high heat. Once oil is hot, add onion and bell pepper slices. Sprinkle spices over the top and generously salt and pepper. Cook, stirring occasionally, for 4 to 8 minutes, until edges are lightly charred and vegetables are tender crisp. For softer vegetables , turn heat down to medium once the vegetables get a nice char so they don’t burn, and continue to cook until vegetables reach your desired level of doneness.
- Serve with the sliced steak over warmed tortillas with sour cream, guacamole, and pico de gallo if desired. Enjoy!
Notes

Chicken and Broccoli Orzo
Ingredients
- 8 ounces (about 1 ⅓ cup) orzo
- 12 ounces broccoli florets chopped
- 2 tablespoons ( 28g ) butter
- 2 cloves garlic chopped or minced
- ¼ cup heavy cream, half and half, or milk
- ½ cup ( 2oz ) shredded Parmesan cheese plus more for topping
- 2 cups warm cooked chicken diced or shredded*
- Salt and pepper to taste
Instructions
- Bring a medium pot of lightly salted water to a boil and cook orzo according to package instructions. In the last 3 minutes of cooking time, add broccoli. When timer goes off, use a slotted spoon to remove broccoli and transfer to a plate. Drain the orzo and set aside.
- In a large skillet, melt butter. Add garlic and cook until golden, 30 seconds to 1 minute. Add drained pasta, cream, and Parmesan cheese. Add salt and pepper to taste. Stir in chicken and then gently fold in broccoli.
- Serve, top with more Parmesan cheese if desired, and enjoy!
