Brown Sugar Kettle Corn is kettle corn’s slightly more fun and mature sibling. Salty, sweet, and just a bit caramelly, it’s perfect for movie night or an afternoon snack.
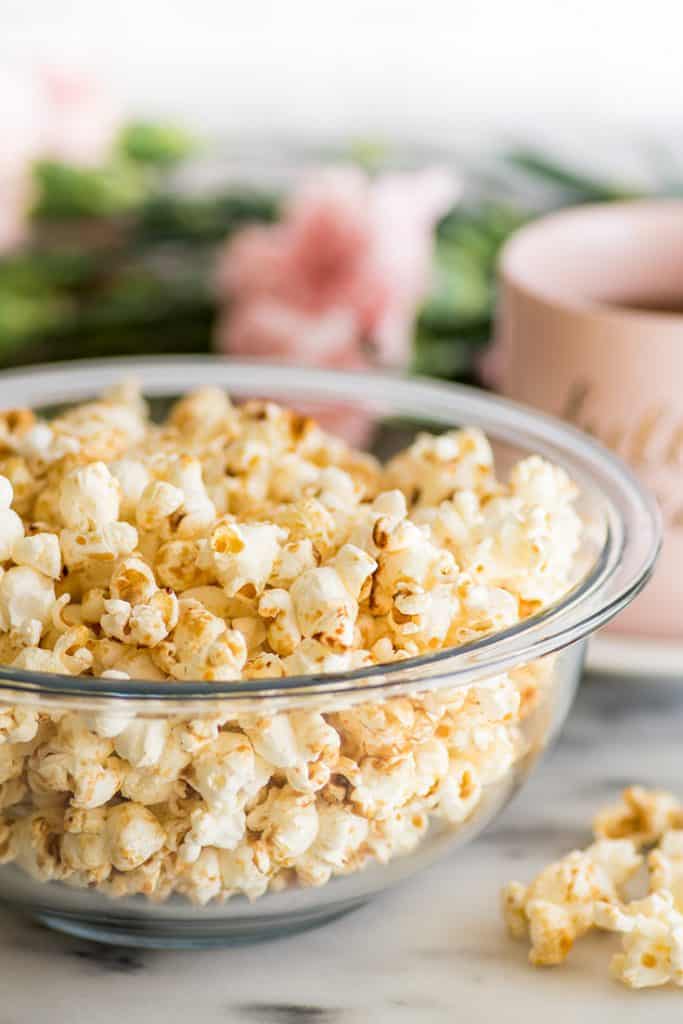

I shared my white sugar Kettle Corn Recipe with you last year, and I LOVE that recipe, but Brown Sugar Kettle Corn is like its slightly more mature sibling. When the brown sugar caramelizes and coats the popcorn kernels, the molasses in the sugar gives everything a deeper, richer flavor that you just can’t get with plain white sugar. It makes for killer kettle corn you definitely won’t want to share (seriously, this recipe is meant for one; don’t try to share unless you are an advanced Food Sharer 😉 ).


Homemade kettle corn is simple to make but a little tricky to get right because it’s so easy to burn the sugar before all your popcorn pops. And in my experience, brown sugar is even more prone to burning than white. So if you’ve never made kettle corn before, go read all the tips in my post, Easy Homemade Kettle Corn before starting here.
And just because I really want you to have a good experience making this, even if you have made kettle corn before, here’s a little reminder of what we’re going to do to keep the sugar from burning:
- Start with at leas t a 3-quart pot. We want the popcorn to have room to move once it starts popping because if it’s all jammed at the bottom of a small pot, it’s probably burning.
- Start with hot oil. Starting with hot oil means it’s going to take less time for your popcorn kernels to start popping which means less time for the sugar to start burning. You can make sure your oil is hot enough by placing three kernels of popcorn in with the heating oil. Once you hear all three pop, you know the oil’s ready.
- Crack the lid to let steam escape. Okay, not burning-related, but still important. If you’ve ever made homemade popcorn and it came at a little chewy rather than crunchy, it’s probably because there was too much steam trapped in the pot. To safely crack the lid on your pot, hold the handle of the pot in your left hand and with your right, use a small kitchen towel wrapped around the lid handle to protect your wrist and offset the lid (with the crack facing away from you) just enough to let steam escape but not stray popcorn kernels.


Looking for more easy snacks? Try my Cinnamon Bun Popcorn , Homemade Chocolate Milk , and One Banana Banana Muffins !

Ingredients
- ▢ 2 tablespoons vegetable oil or cooking oil of your choice
- ▢ 1/4 cup popcorn kernels
- ▢ 2 tablespoons ( 25g ) brown sugar not packed
- ▢ 1/4 teaspoon salt
Instructions
- Place a large bowl on the counter to pour your finished kettle corn into.
- To a large, heavy-bottomed pot, add oil and 3 kernels of popcorn. Cover and heat over medium-high heat (medium if your stove runs hot). When you hear all three kernels pop, add remaining popcorn and salt. Shake pan for a few seconds to coat the kernels in oil and then pour sugar and salt over the top. Return lid to the pot, leaving a small crack to allow steam to escape.
- Shake every few seconds until popcorn starts popping, and then shake continuously. Pull the pan from heat when there are between 1 and 2 seconds between pops. Immediately transfer popcorn to your prepared bowl, shaking the pan as you go.
- Pick out any unpopped or burnt kernels and enjoy!

Everything you need to know about meal planning including do’s and don’ts and step-by-step instructions for creating a system that works for you.

In my reader survey from a couple of weeks ago, I asked if there were any specific posts you’d like to see on the blog, and to my delight, one of the most popular requests was for a post on meal planning. Guys, this makes me so happy because I LOVE meal planning. I do it religiously, and if you know me in real life, you’ll know that it’s something I try to convince everyone to do for themselves because it will absolutely change your life for the better.
Why should you meal plan?
- It will save you money. Eating at home and shopping from a grocery list rather than throwing a bunch of things you think you might eat into your grocery cart will absolutely cut the amount you’re spending on food and probably eliminate a ton of food wastage.
- It will help you eat healthier. It’s far easier to make healthy decisions and plan nutritious meals once a week rather than at 5:30 every day when you’re starving and something hot and greasy and quick sounds like heaven.
- It’s one less thing to worry about every day. Happiness is never having to wonder what’s for dinner.
Meal planning is one of those things that becomes second nature after a little while, and once you get in the habit of it, you’ll never want to go back to wondering what to cook for dinner on a Monday afternoon. But it can be a little tricky to start because there are so many little things to figure out before you can begin, so I’m going to take you through setting up a meal planning system step-by-step from start to finish.
Before we start setting up a system, here are some general rules to keep in mind while meal planning. Obviously, rules are meant to be broken, but these do’s and don’ts will help keep things simple in the beginning.
The Do’s and Don’ts of Meal Planning
- Don’t be overly ambitious. Meal planning only works if you’ll actually adhere to your recipe schedule, and you’re more likely to do this if you keep most of your recipes simple and easy.
- Do keep breakfast and lunches simple and repetitive. One of the biggest mistakes people make when meal planning is getting too ambitious when planning these meals. Unless you’re already someone who cooks breakfast and lunch every day, beginning to cook three meals a day every day all at once is going to be overwhelming. Plan something nutritious and easy like instant oatmeal or pre-made smoothies that you can eat for breakfast all week and for lunch, alternate a couple simple lunches like hummus and pita, and homemade sandwiches.
- Do stick to simple sides during the work week. Plan things like Microwave-steamed Broccoli , Butter and Garlic Green Beans , or store-bought salad mix so you know you are getting your veggies in but aren’t adding a ton of work to your dinners.
- Do be flexible and forgiving. Meeting ran long? You can make Tuesday’s easy dinner on a Monday. Don’t be afraid to shift things around. And if you have to grab a burger on the way home, it’s not the end of the world. Just make sure to stick to your schedule the rest of the week.
- Do have a backup plan. We all have those days where we come home exhausted, and let’s be real, cooking a full dinner is not happening. Keep a few go-to emergency dinners in your back pocket for those nights. I always know that I have the ingredients for super easy Macaroni and Cheese in my cupboard, and when things are even worse, I keep a few frozen Naan Pizzas in my freezer or just make popcorn for dinner.
Alright, we’ve covered the why’s and the do’s and don’ts. Now we’re getting to my favorite part. Time to gather our tools and set up a meal planning system.
How to Create a Meal Planning System
Assemble your recipes: Gather all your favorite recipes in one place, be it a recipe binder or digital recipe notebook. I’ve been using Evernote for mine since checks earliest recipe date 2013, and I love it.
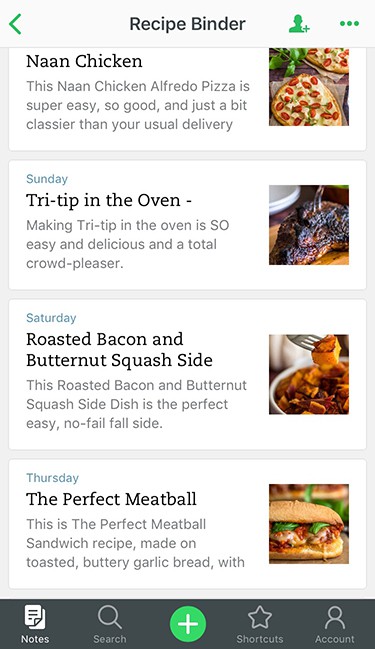

Not only does having all your recipes in one place make cooking during the week simpler, but when it’s time to plan your week, you can scan through them all and see what sounds good. For new recipes, I recommend keeping a bookmarks folder or a Pinterest board specifically for recipes you want to try.
Decide where you are going to keep your meal plan: You can scribble it on a whiteboard , print out a calendar and keep it on the fridge, record it in your planner, or keep it digital with Trello or an online calendar. Experiment and see what works best for you.
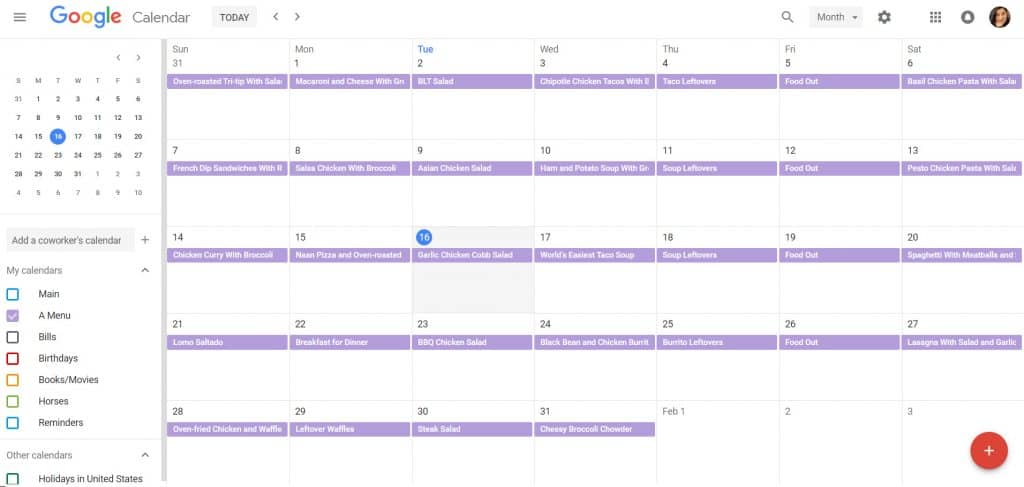

I use Google Calendar for my meal planning because you can drag and drop recipes around, share the calendar with family and roommates, and it’s always available on all your devices. If you want to see a deep dive on this topic, go check out How to Meal Plan Using Google Calendar .
Make a weekly template: Assigning loose categories to your days will make meal planning easier because it narrows down your choices for each day. Scheduling in things like one meal out a week and one meal of leftovers also builds flexibility into your schedule and gives you two fewer meals to figure out.
A sample template might look something like this:
Monday-Easy/Crockpot Tuesday-Salad or Vegetarian Wednesday-Soup or Mexican Thursday-Leftovers Friday-Food Out Saturday-Pasta Sunday-Try a New Recipe!
And translate into:
Monday- Salsa Chicken with Broccoli Tuesday- Asian Chicken Salad Wednesday- Ham and Potato Soup with Green Beans Thursday- Soup Leftovers Friday-Food out Saturday- Pesto Chicken Pasta with Salad Sunday- Healthy Caprese Skillet Lasagna with Salad


Make meal planning an enjoyable part of your weekly routine: Take a minute to look at your schedule and figure out when you’re going to meal plan and do your shopping. To make things less overwhelming, don’t do both on the same day. I like to schedule time on Thursdays to plan my meals and make my list and do my shopping on Fridays. Make an appointment with yourself to do both of these things and put them on your calendar every week.
In order to make this habit stick, at least in the beginning, schedule in a little reward for yourself when you do each. It could be something as simple as a cup of tea or turning on a rerun of your favorite show in the background while you meal plan and promising yourself a cup of coffee from the in-store cafe during your shopping trip.
I’ve given you my best meal planning tips, we have a system, templates, and made time for planning and shopping. Once you’ve done all those things, it’s time to actually plan a menu.
How to Meal Plan
- At your scheduled time, check your fridge, freezer, and pantry. What do you have? What needs to be used up? Make a note of this.
- Check your calendar. Are there any nights this week you can’t cook? Nights you’re feeding extra people? Nights you need something super easy?
- Check the weekly advertisements- If you get supermarket flyers, browse through them. Is there anything on sale? Anything looking good?
- Use your template to fill out your menu for the week, taking into account what foods you already have, your schedule, and any good sales.
- Pair main dishes with simple sides.
- Look at your meat dishes and add reminders to your calendar or plan to take meat out of the freezer a day or two before you need it.
- Make your shopping list.
- Go shopping and enjoy a week of stress-free eating!
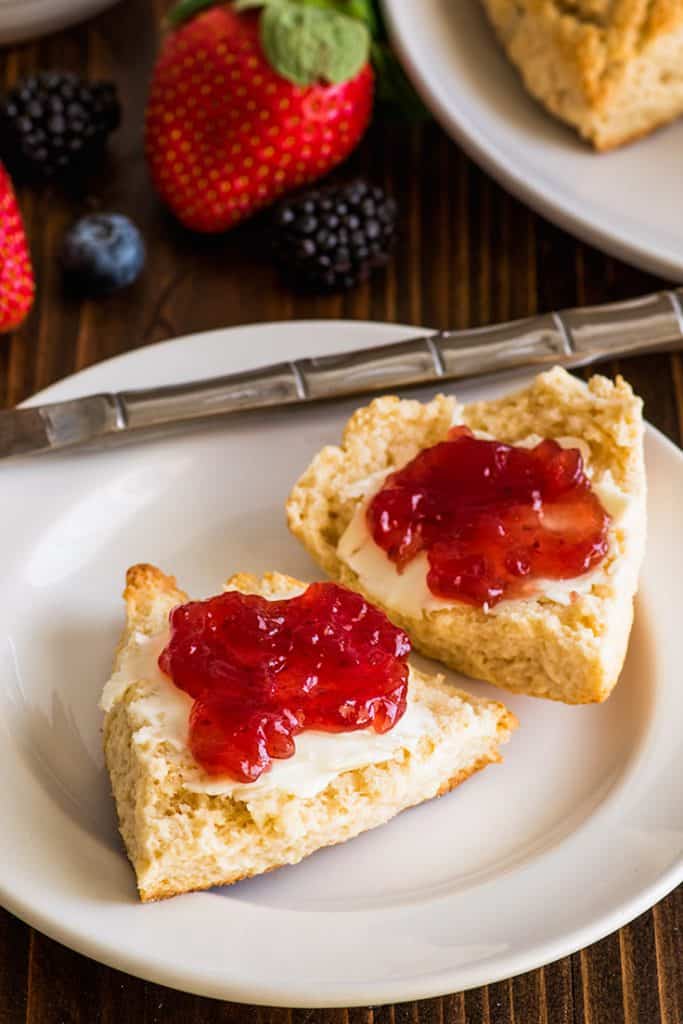
These melt-in-your-mouth cream scones are incredible and incredibly easy to make. They’re made with just six ingredients and can be on your breakfast table in under twenty minutes.

Let’s set the scene here: you, a lazy weekend morning, there’s coffee brewing on the counter and half a carton of heavy cream in the refrigerator from last night’s dinner that you need to use up. What are your going to do?
You’re going to make cream scones.
You’re going to take five minutes to throw together 5 ingredients and that leftover cream to make some dough, 14 minutes to have a kitchen dance party while it bakes, and then you’re going to spend the most charming morning sitting at the counter in your sun-drenched kitchen spreading butter and jam over freshly baked, warm-out-of-the-oven scones while you sip coffee and finish organizing your Pinterest boards .
At some point, you’ll smile to yourself and whisper yeah, we can have it all.


Okay, maybe not really. Maybe that scenario ends with you in yoga pants and a t-shirt from high school with a hole in the armpit, crying over a scone as you scroll through Twitter (even though you know nothing good ever comes starting your day with Twitter).
But you know what, a morning crying over Twitter with a freshly baked scone is still going to be better than a morning crying over Twitter without a scone.
Scones aren’t going to cure the world’s ills, but they’ll brighten your morning just a bit.
And fortunately, whenever your morning needs a bit of brightening, this small batch of cream scones is one of the easiest and quickest things to bake. It’ll go from bowl to 6 cute little scones in less than 20 minutes, and you can start eating them as soon as they’ve cooled enough that you’re not scalding off taste buds.
Pull one open, enjoy that little curl of steam that puffs out, and spread butter and jam over the inside or give it a drizzle of honey. The outside will be a little crunchy, the inside soft, and the whole thing kind of just melts in your mouth when you bite into it.
The entire process, from making to shaping to eating is utterly satisfying and really does make you feel like you accomplished something with your morning, even if that thing was just making some excellent baked goods.


Small-batch Cream Scones Recipe Tips
- Proper flour measurement is very important in this recipe. Too much flour and you might have trouble getting your dough to come together. Make sure to follow the measuring instructions in the recipe.
- If it feels like a maple morning, I made a version of these scones ( The Good Place themed!) with maple glaze, Small-batch Maple Scones .
- Have leftover heavy cream? Here are some ideas to use up the leftover cream .
Looking for more small-batch breakfasts? Try these Cinnamon Rolls for Two , Small-batch Chocolate Cinnamon Rolls , and Fluffy Buttermilk Pancakes for Two .

Ingredients
Cream Scones
- ▢ 1 1/2 cup ( 180g ) all-purpose flour measured by weight or using the spoon and sweep method*
- ▢ 3 tablespoons ( 37g ) granulated sugar
- ▢ 1 1/2 teaspoon baking powder
- ▢ 1/2 teaspoon salt
- ▢ 3/4 cup heavy cream plus more for brushing on scones*
- ▢ 1/2 teaspoon vanilla extract
Serve With
- ▢ Butter
- ▢ Jam
Instructions
- Preheat your oven to 425°F and line a baking sheet with parchment paper or a silicone baking mat.
- In a medium bowl, whisk together flour, sugar, baking powder, and salt.
- In a bowl or liquid measuring cup, combine heavy cream and vanilla. Drizzle cream over flour mixture and stir, using just enough cream so that a shaggy dough forms with no loose flour at the bottom of your bowl (you may not need all of the cream).*
- Use your hands to shape the dough into a ball and place on a lightly floured work surface. Press the dough into a disk about 5 1/2-inches across or 3/4-inch thick.
- Use a knife or your dough scraper to cut the circle into six wedges. Transfer scones to your prepared baking sheet, placing them in a circle, 1-inch apart.
- Brush scones with a little more cream to help with browning and bake for 14 to 16 minutes, until baked through and lightly golden.
- Allow to sit for 5 minutes and serve warm. Enjoy!
Notes
Recipe Adapted From King Arthur Flour

Brown Sugar Kettle Corn
Ingredients
- 2 tablespoons vegetable oil or cooking oil of your choice
- 1/4 cup popcorn kernels
- 2 tablespoons ( 25g ) brown sugar not packed
- 1/4 teaspoon salt
Instructions
- Place a large bowl on the counter to pour your finished kettle corn into.
- To a large, heavy-bottomed pot, add oil and 3 kernels of popcorn. Cover and heat over medium-high heat (medium if your stove runs hot). When you hear all three kernels pop, add remaining popcorn and salt. Shake pan for a few seconds to coat the kernels in oil and then pour sugar and salt over the top. Return lid to the pot, leaving a small crack to allow steam to escape.
- Shake every few seconds until popcorn starts popping, and then shake continuously. Pull the pan from heat when there are between 1 and 2 seconds between pops. Immediately transfer popcorn to your prepared bowl, shaking the pan as you go.
- Pick out any unpopped or burnt kernels and enjoy!
