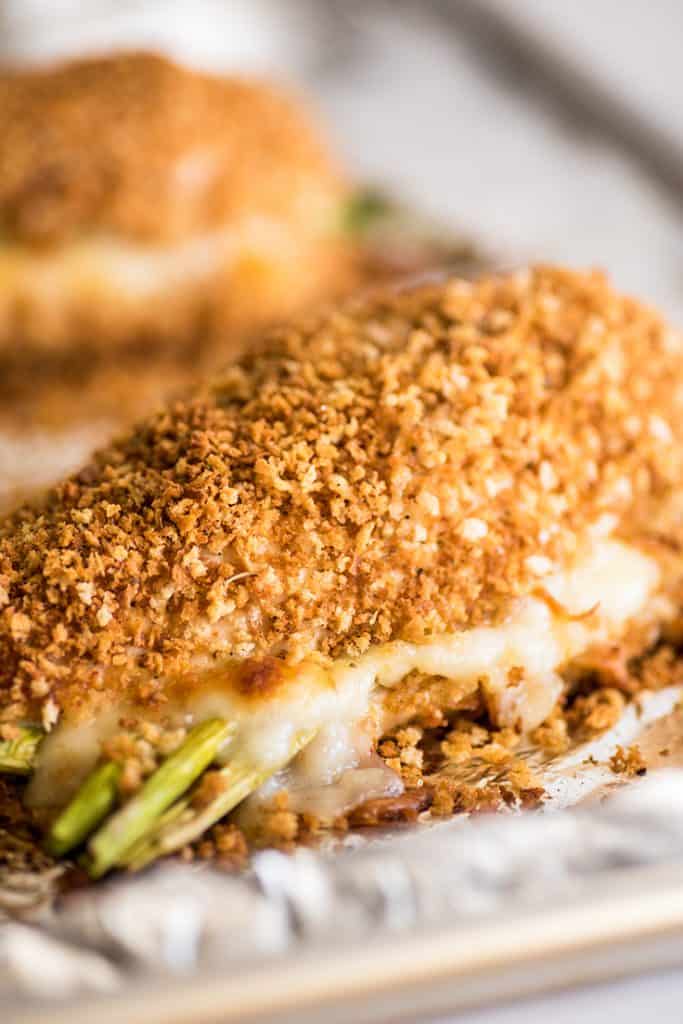
This Asparagus-stuffed Chicken is a great, simple dinner that’s easy enough for weeknights, but looks good enough to serve for company when you need something foolproof and delicious.
Hey, it’s asparagus season ! Here in California, asparagus season runs about February through June, and in celebration of this happy time, I’m sharing one of my favorite easy asparagus recipes: Asparagus-stuffed Chicken Breasts.
This is a great, simple dinner that’s easy enough for weeknights, but looks good enough to serve for company when you need something foolproof and delicious.
It’s also one of those dishes that you have to work really hard to mess up.
As long as you have an instant-read thermometer and remember to check on your chicken so you don’t burn or over-cook it, dinner’s going to be great.

Ingredient Notes
- Small-to-medium boneless skinless chicken breasts: Stick with smaller chicken breasts for this recipe, about 8 ounces. If using large chicken breasts, your asparagus will burn before the chicken cooks all the way through.
- Thin asparagus spears: This recipe calls for thin asparagus spears, as that’s my personal preference. You can use medium/average size spears if that’s what you can find, but stay away from the really thick spears. They make the chicken awkward to cut and eat and don’t have the best texture.
- Panko: If you don’t usually cook with panko, you can typically find it at the grocery store near the breadcrumbs. It has a fantastic crispy crunchy texture that is so good on chicken, but if you want to use regular bread crumbs, you can substitute them here.
How to Make Asparagus Stuffed Chicken
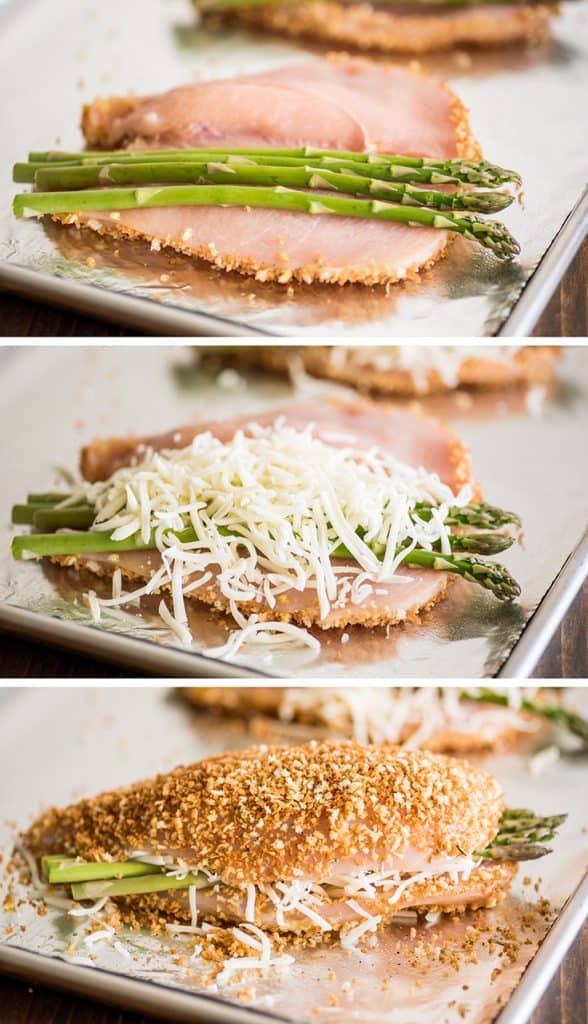

- This recipe starts with butterflied chicken breasts ( watch this video if you’ve never butterflied chicken breasts before) dipped in whisked egg to act as a binder and rolled in a combination of toasted panko, Italian seasoning, salt, and pepper. In the oven, it will crisp up and form a crispy, crunchy coating on the chicken.
- Place chicken on a baking sheet and stuff each breast with thin asparagus spears and mozzarella.
- Bake until cooked through, and enjoy! (Scroll down for the full, printable recipe.)
Asparagus-stuffed Chicken Recipe Notes
- Toasting the panko in this recipe is optional. It produces a nicer golden-colored crust, and the flavor is a little toastier, but the chicken still tastes great with untoasted panko. To be honest, I usually do this step for guests but skip it when I’m making it on a busy weeknight.
Can I make this recipe in advance and bake it later?
I don’t recommend it, as the panko will get soggy. Instead, you can prep all the ingredients in advance (toast the panko, shred the cheese, trim the asparagus, butterfly the chicken, etc.) and then assemble everything right before baking.
If all your ingredients are prepped, the chicken can be assembled and oven-ready in about 10 minutes.
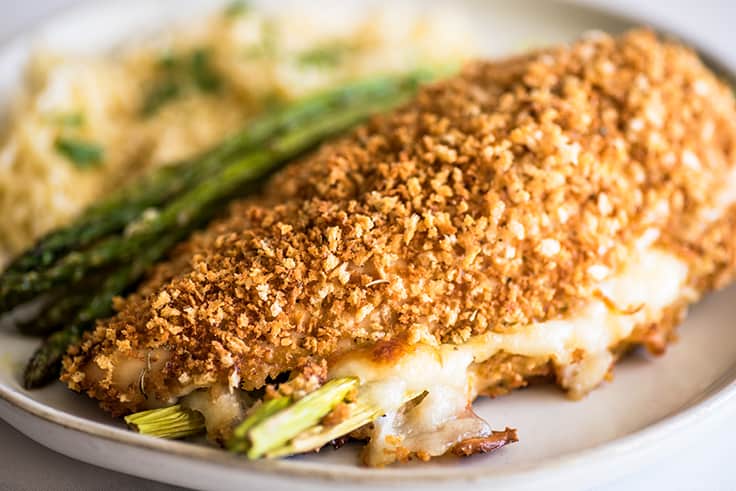
What to Serve with Asparagus-stuffed Chicken Breasts
Asparagus chicken goes very well with orzo (I always serve it with my fav Parmesan Orzo ) or rice. You can roast additional asparagus and serve alongside or pair with a different green veggie like Roasted Broccoli , Roasted Green Beans , or Butter and Garlic Green Beans .

My panko keeps burning when I try to toast it. Help!
Don’t worry, you’ve got this. There are a couple tricks to toasting panko without burning it. One, toast it over just medium heat (any higher, and it will burn fast), and once it starts to look like it’s toasting, watch it like a hawk and stir it to keep it moving. Two, cook it only until about 70% of the panko looks toasted and then remove it from heat and transfer it immediately to a bowl.
If you wait for every single piece to look perfectly toasted or leave it in a hot pan for too long before pouring it out, it will burn on you. The panko will continue to brown in the oven, so don’t worry too much about getting every single piece golden brown.
Can I halve/double this recipe?
Absolutely. To change the recipe yield, hover over the number of servings in the recipe card (or click if you are on mobile) and slide the slider.
More Easy Chicken Recipes
- Salsa Chicken
- The Perfect Roast Chicken
- Chicken Francaise
- BBQ Baked Chicken Thighs
- Pesto Chicken Pasta
- Creamy Asparagus Chicken Pasta
Ingredients
Special Equipment
- ▢ Instant-read thermometer
Asparagus-stuffed Chicken Breasts
- ▢ Cooking spray or cooking oil
- ▢ 1 cup panko *
- ▢ 4 small to medium (about 8-ounce) boneless, skinless chicken breasts
- ▢ 1 to 2 eggs *
- ▢ 1 teaspoon Italian seasoning
- ▢ ½ teaspoon salt
- ▢ ½ teaspoon pepper
- ▢ 16 thin asparagus spears washed and trimmed
- ▢ 1 cup ( 4oz ) shredded mozzarella cheese
Instructions
- Preheat your oven to 375°F and lightly grease a baking sheet.
Toast Panko (Optional)
- Heat a medium skillet over medium heat. Lightly grease with cooking spray or a couple teaspoons of cooking oil. Add panko and toast, stirring almost constantly once it begins to brown, until about 70% of the pieces are lightly golden in color, about 3 to 5 minutes. Transfer panko to a medium container large enough to dip a chicken breast into and set aside.
Prepare Chicken
- Butterfly each chicken breast by placing one hand flat on the top of the breast and slicing horizontally almost all the way through, so you have thin, even pieces on the top and bottom and you can open it like a book.
- In a medium container, large enough to dip a chicken breast, crack and whisk egg, set aside.
- Into the panko, stir Italian seasoning, salt, and pepper.
- Dip closed chicken breasts first in the egg then in the panko, coating the top and bottom, and place on prepared baking sheet. Don’t discard any extra panko.
- Open chicken breasts and place 4 spears of asparagus inside of each and top each with ¼ cup of cheese. Close chicken breasts and sprinkle any remaining panko over the top.
- Bake for 25 to 35 minutes, until an instant-read thermometer inserted into the thickest part of the breast reads 165°F. Allow chicken to rest for at least 5 minutes before serving. Enjoy!
Notes
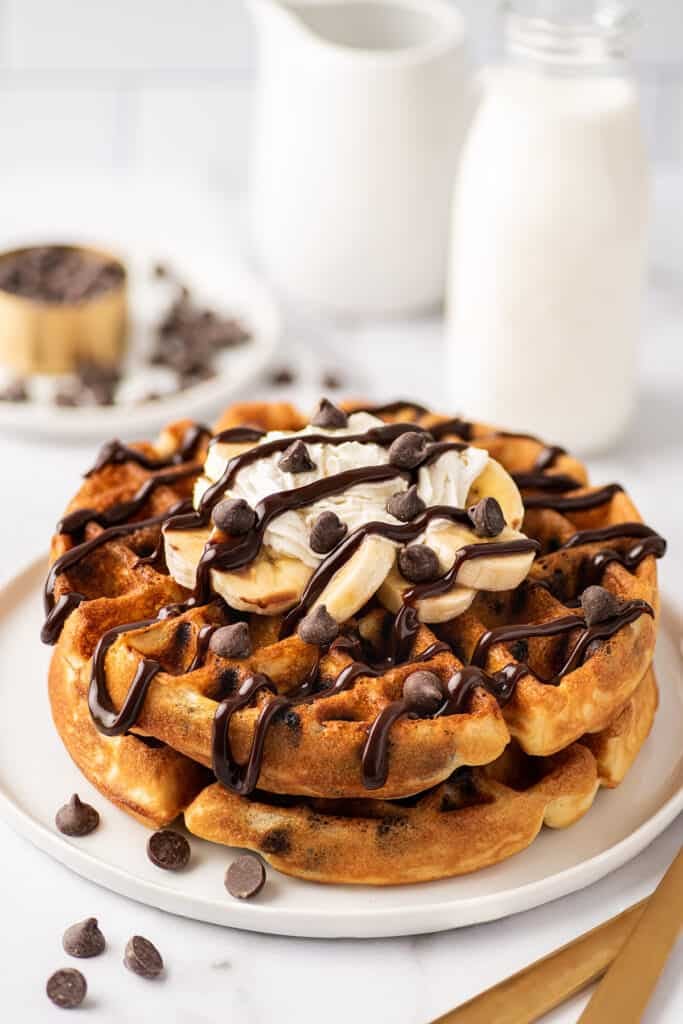
These are the BEST chocolate chip waffles. Crispy, fluffy waffles packed with gooey chocolate chips ready to be topped with your favorite waffle toppings.
When was the last time you had a bit of fun with your breakfast? If your answer is, Too long ago or I don’t remember , friend, let’s fix that.
You should have chocolate chip waffles for breakfast.
These waffles are gooey, crispy, SO decadent, and completely delicious. They’re just about the most fun you can have before 8 AM.

What’s Great About These Waffles
- Crispy exteriors, soft and fluffy insides: These waffles (based off my favorite waffle recipe in the entire world) are designed to be ultra-crispy on the outside but soft and fluffy inside.
- Gooey, melty chocolate chips: There are a lot of chocolate chips in these waffles, so with every bite you get plenty of gooey, melty chocolate.
- Easy to make: On top of being really good, these waffles are also ridiculously easy to throw together. They use oil so you don’t have to melt any butter, and they’re perfectly fluffy all on their own so you don’t have to worry about whipping egg whites or digging a package of yeast out of the back of your cupboard.
Tool & Ingredient Notes
Waffle Maker: Yes you have to have a waffle maker to make waffles. If you don’t own one, this is the waffle maker I use . It’s not fancy or expensive but makes wonderful waffles, and I love that it can be stored vertically so it takes up very little cupboard space. Corn starch: Corn starch is the secret to crispy waffles. I absolutely recommend using it, but if you don’t have any and really really want waffles NOW, you can replace it with the same amount of all-purpose flour. Buttermilk: No buttermilk? No problem. You can make a quick buttermilk substitute with milk and lemon juice or vinegar (there are more detailed instructions in the recipe card below). If you do have real buttermilk, check out my post What to Do With Leftover Buttermilk for freezing tips and ideas for using up the leftovers (I recommend a batch of Beef Pasties ).
How to Make Chocolate Chip Waffles From Scratch
This is a quick overview of the recipe process with extra tips and tricks. For the full printable recipe, scroll down to the recipe card below.
- Mix the dry ingredients in a medium-to-large bowl.
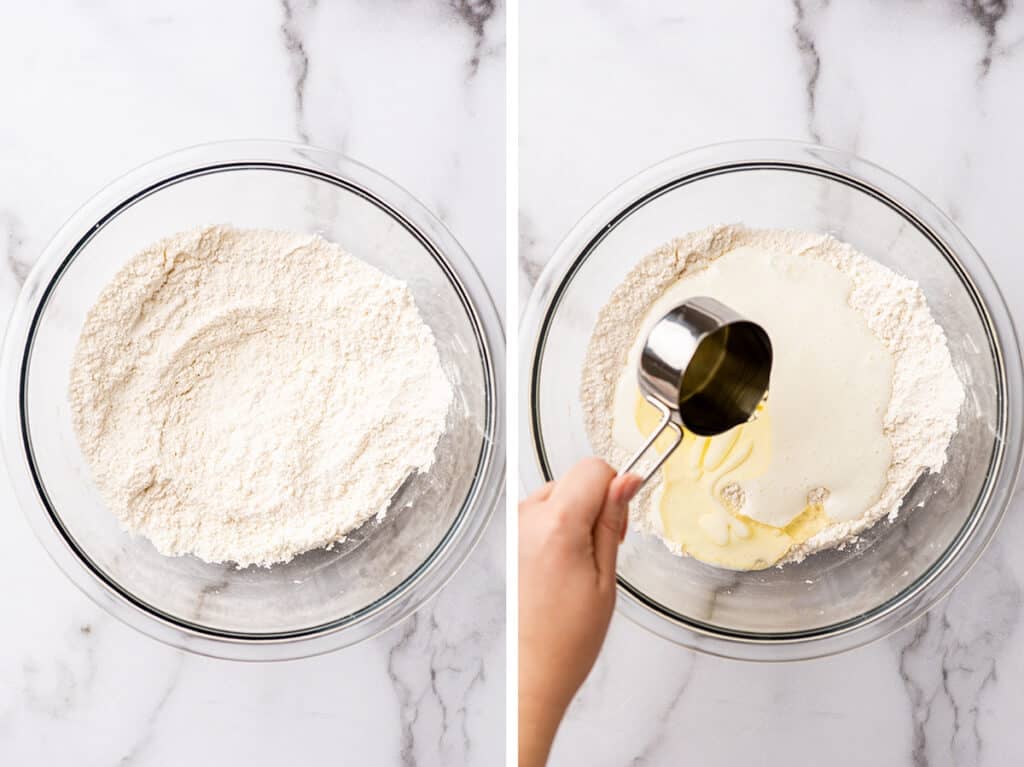

Make a well in the center and add your wet ingredients. It will seem like this is a LOT of liquid, but don’t worry, the recipe is correct. Mix until the batter is just combined. You shouldn’t see any dry flour in your bowl, but a few lumps are normal and expected.
Rest your batter. Why does the batter need to rest? Resting the batter allows the gluten to relax and for it to absorb some of the liquid and thicken slightly. Don’t skip this step. If you’re serving your waffles with fruit or a full breakfast spread, this is a perfect time to start prepping the rest of your breakfast.
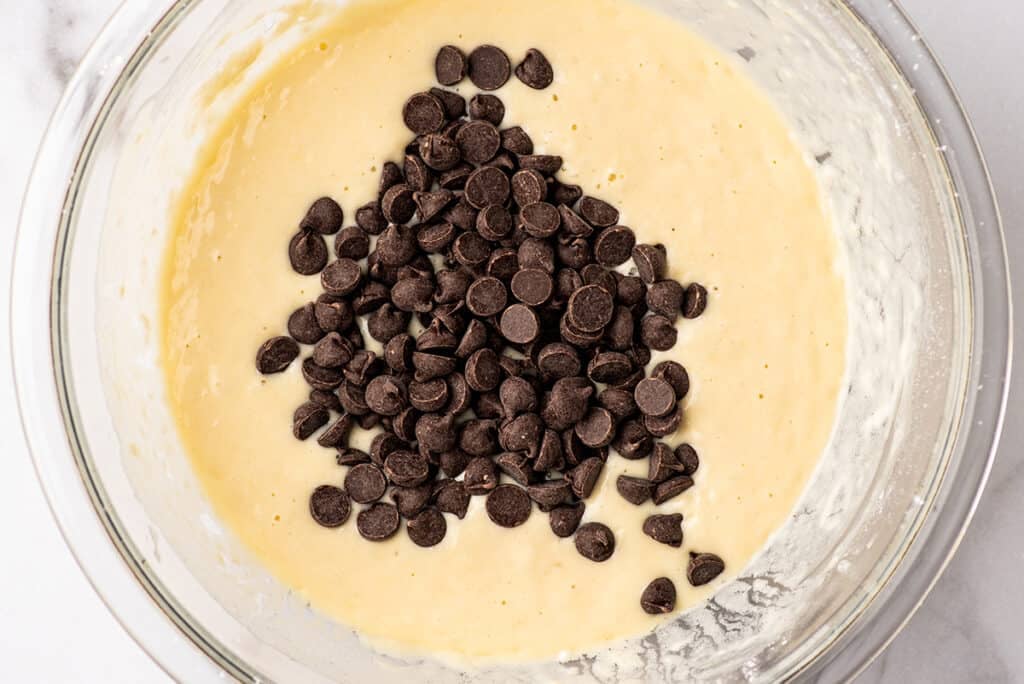
Add the chocolate chips and gently fold them into the batter.

- Cook the waffles in a preheated waffle iron according to iron instructions. All waffle irons are a little different, so follow the instructions for your particular machine. For mine, it takes 1 cup of batter and cooks in about 2½ to 3 minutes per side.
Filling Your Waffle Iron: For any waffle iron, make sure it’s properly preheated before adding the batter. Ladle the batter in slowly, filling holes where more batter is needed. Give the batter just a bit to set (about 10 seconds) before closing the lid. This will help prevent it from squeezing out the sides when you close the lid.
Transfer cooked waffles to an oven-safe cooling rack (if you have one) placed over a baking sheet in your warm oven while you cook all the batter. The cooling rack will allow air to circulate under the waffles keeping the bottoms crispy while they sit. The steam from just-cooked waffles sitting for too long directly on a surface can make the bottoms soggy.
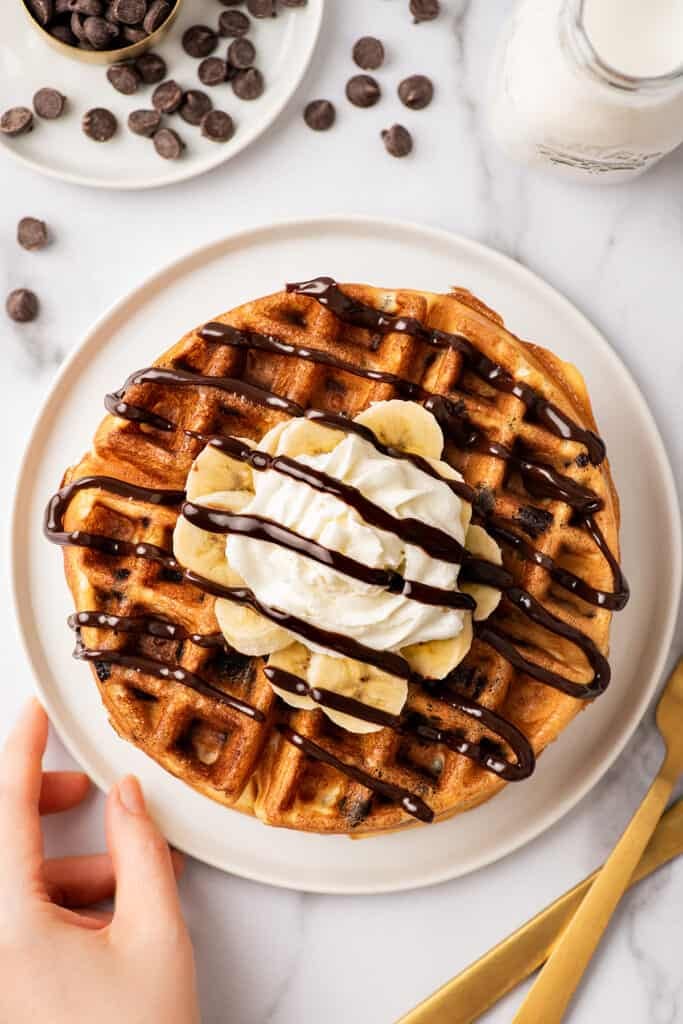
Plate up, top with toppings, and enjoy!!

What toppings go on chocolate chip waffles?
You can serve chocolate chip waffles with classic butter and syrup. They’re also incredibly good with sliced fruit, fudge sauce , whipped cream , and a bit of syrup.
For a truly indulgent treat, make a waffle sundae and add a scoop of ice cream, chocolate sauce or peanut butter sauce , and sprinkles.
Do I need to grease my waffle maker before cooking the waffles?
If you have a non-stick waffle maker, you shouldn’t need to grease the plates before cooking your waffles. BUT if you typically need to use cooking spray with your particular waffle maker, go ahead and do so.
How much batter does this make/ how many does it serve?
This recipe will make a bit over 2 cups of batter, which depending on your waffle maker translates into about 2 to 4 waffles. This generously serves 2 but can be stretched to serve 3 to 4 if you’re serving kids or serving the waffles with a full breakfast.


Can this waffle recipe be doubled?
Absolutely. You can double or triple the recipe with no preparation changes needed. To change the recipe yield, hover over the serving size in the recipe card below or click if you’re on mobile, and slide the slider.
Can I freeze chocolate chip waffles?
Yes! Chocolate chip waffles (and waffles in general) freeze really well.
To freeze your waffles, store them in an airtight container or freezer bag for up to 2 months. When you’re ready to reheat them, place frozen waffles on a baking sheet and bake in a 350°F oven for about 10 minutes or until heated through and crispy.
More Chocolate Chip Recipes
- Small-batch Chocolate Chip Cookies
- One Chocolate Chip Cookie
- Small-batch Chocolate Banana Muffins
More Breakfast Recipes
- White Chocolate Mocha
- Pancakes for One
- Small-batch Cinnamon Rolls
- Blueberry Waffles

Ingredients
- ▢ ¾ cup ( 90 g) all-purpose flour
- ▢ ¼ cup ( 30g ) corn starch
- ▢ 1 tablespoon ( 12g ) granulated sugar
- ▢ ½ teaspoon baking powder
- ▢ ¼ teaspoon baking soda
- ▢ ½ teaspoon salt
- ▢ 1 cup buttermilk *
- ▢ ⅓ cup vegetable oil
- ▢ 1 large egg
- ▢ ¾ teaspoon vanilla extract
- ▢ ½ cup chocolate chips
- ▢ Melted butter optional for serving
- ▢ Syrup optional for serving
Instructions
- In a large bowl, whisk together flour, corn starch, sugar, baking powder, baking soda, and salt.
- Make a shallow well in the dry ingredients and add buttermilk, vegetable oil, egg, and vanilla. Stir together until just combined.
- Allow batter to rest for 30 minutes.
- Preheat oven to 200°F or set it to the warm setting and set a baking sheet (with cooling rack if you have one) inside.*
- After the batter has rested, fold in the chocolate chips.
- Preheat waffle iron and cook batter according to your iron’s instructions*, typically 4 to 6 minutes per waffle, until waffle is nicely golden and has mostly stopped releasing steam.
- Transfer waffle to your warm oven while you cook the rest of the batter.*
- Top with melted butter and syrup if desired, and enjoy!
Notes
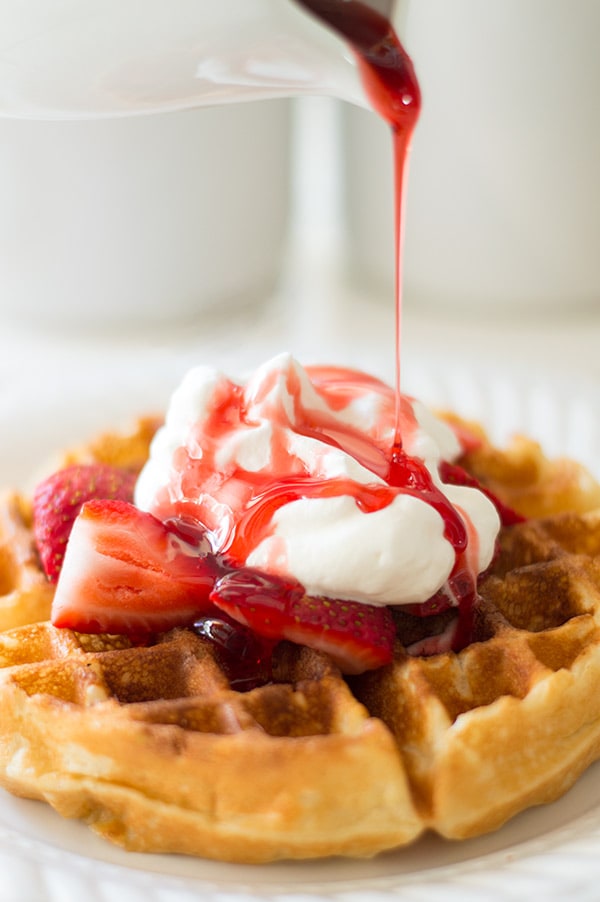
Quick and easy homemade strawberry syrup, perfect for serving over waffles, pancakes, or ice cream.
Here on the blog, I have a recipe for (the best) homemade waffles and whipped cream (made three ways), and today I’m adding the recipe for strawberry syrup so you have all the tools needed to make the breakfast waffle stack of your dreams.

If you’ve never made strawberry syrup at home before, you’ll be shocked at how easy and good it is. The cooking process is mostly hands-off–you just need to slice some strawberries, let them simmer, and give them a stir every once in a while.
The end result is a sweet and tangy bright red syrup that you’ll want to drizzle over pretty much everything.
Ingredient & Equipment Notes
- Fresh strawberries: It’s okay to use strawberries that are a little past their prime for the syrup, but this will affect the cooking time. The time it takes for the syrup to thicken will vary depending on how much liquid was in your strawberries (old strawberries will produce significantly less liquid and therefore cook much faster). Keep this in mind if it seems like your syrup is thickening more quickly than expected.
- Fine-mesh strainer: A fine-mesh strainer is essential for getting a perfectly smooth and clear syrup. However, if you don’t own one, you can simply remove the cooked strawberries with a slotted spoon. You’ll have some seeds and a bit of strawberry pulp in your syrup, but it will still taste great.
How to Make Homemade Strawberry Syrup
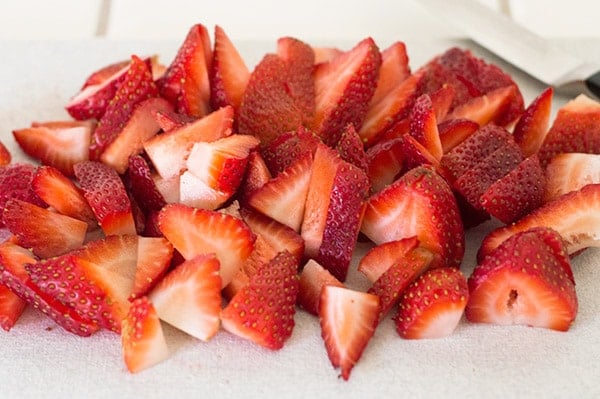
- Roughly chop your strawberries, cover with water, and simmer for 15 minutes.

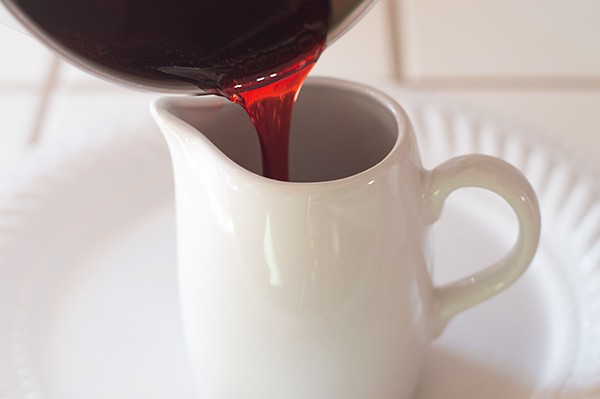
- Strain the juice from the strawberries.


- Wipe out the pot, return juice, and add your sugar.


- Stir and simmer for 12 to 15 minutes until mixture is thickened. Transfer from the pan and enjoy!

How easy was that!?
Where to Use Strawberry Syrup
- The Best Crispy Waffles
- Pancakes for One
- Buttermilk Pancakes for Two
- Blueberry Waffles
- Banana Pancakes
How much syrup will this make/how many will it serve?
This recipe will make between ½ to ⅔ cup of syrup. Depending on how much you use, that should serve 2 to 3 people.
Can I make a larger batch of this?
Yes. This recipe can be doubled or tripled without any preparation changes. You just might need to extend the second simmering time slightly.
To change the recipe yield, hover over the serving size in the recipe card below or click if you’re on mobile, and slide the slider.
Can I use this syrup in drinks?
This syrup is a little thick to stir into cold drinks. If you’d like a syrup for strawberry milk , milkshakes , or flavored sodas, go check out my strawberry milk recipe . The syrup in that recipe is cooked for less time so it’s thinner and better for stirring into cold liquids.
How do I store this syrup?
Store the syrup in an airtight container in your fridge for up to 2 weeks.
More Sauce & Syrup Recipes
- Strawberry Sauce
- Peanut Butter Sauce
- 30-second Chocolate Sauce
- Nutella Sauce
- Hot Fudge Sauce
Equipment
- Fine mesh strainer
Ingredients
- ▢ 1 cup hulled and chopped strawberries
- ▢ ½ cup water
- ▢ ¼ cup ( 50g ) granulated sugar
Instructions
- In a small pot, combine strawberries and the water and simmer for 10 to 15 minutes, until water is bright red and strawberries are dull.
- Strain the juice from the strawberries through a fine mesh strainer and discard the strawberries.
- Wipe out the pot, return juice, and add your sugar.
- Simmer, stirring occasionally, for 5 to 15 minutes*, until syrup is thickened and reduced to about ½ to ⅔ cup. Syrup will seem a bit runny at this point, but will thicken as it cools.
- Serve over waffles, pancakes, or ice cream, and enjoy!
Notes

Asparagus-stuffed Chicken Breasts
Ingredients
Special Equipment
- Instant-read thermometer
Asparagus-stuffed Chicken Breasts
- Cooking spray or cooking oil
- 1 cup panko *
- 4 small to medium (about 8-ounce) boneless, skinless chicken breasts
- 1 to 2 eggs *
- 1 teaspoon Italian seasoning
- ½ teaspoon salt
- ½ teaspoon pepper
- 16 thin asparagus spears washed and trimmed
- 1 cup ( 4oz ) shredded mozzarella cheese
Instructions
- Preheat your oven to 375°F and lightly grease a baking sheet.
Toast Panko (Optional)
- Heat a medium skillet over medium heat. Lightly grease with cooking spray or a couple teaspoons of cooking oil. Add panko and toast, stirring almost constantly once it begins to brown, until about 70% of the pieces are lightly golden in color, about 3 to 5 minutes. Transfer panko to a medium container large enough to dip a chicken breast into and set aside.
Prepare Chicken
- Butterfly each chicken breast by placing one hand flat on the top of the breast and slicing horizontally almost all the way through, so you have thin, even pieces on the top and bottom and you can open it like a book.
- In a medium container, large enough to dip a chicken breast, crack and whisk egg, set aside.
- Into the panko, stir Italian seasoning, salt, and pepper.
- Dip closed chicken breasts first in the egg then in the panko, coating the top and bottom, and place on prepared baking sheet. Don’t discard any extra panko.
- Open chicken breasts and place 4 spears of asparagus inside of each and top each with ¼ cup of cheese. Close chicken breasts and sprinkle any remaining panko over the top.
- Bake for 25 to 35 minutes, until an instant-read thermometer inserted into the thickest part of the breast reads 165°F. Allow chicken to rest for at least 5 minutes before serving. Enjoy!
